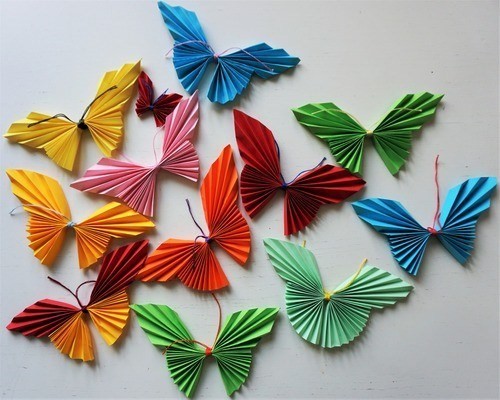
Butterflies are often used to decorate clothes, hairpins, accessories, and as interior decor. But it is not always possible to find figures of the right color and size. Knowing how to make a butterfly with your own hands, you can create a unique thing. Many techniques and a variety of materials do not limit the creative potential of the needlewoman.
Selection of material depending on the purpose of the decor
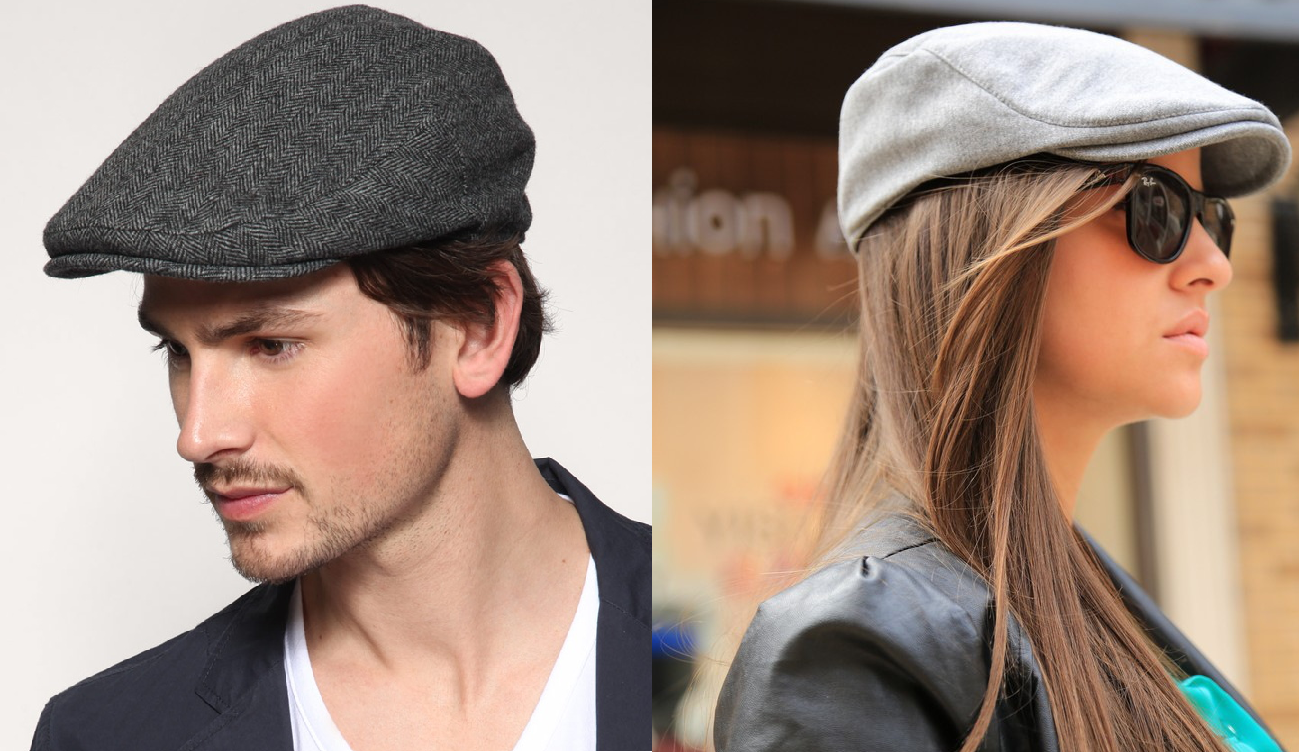
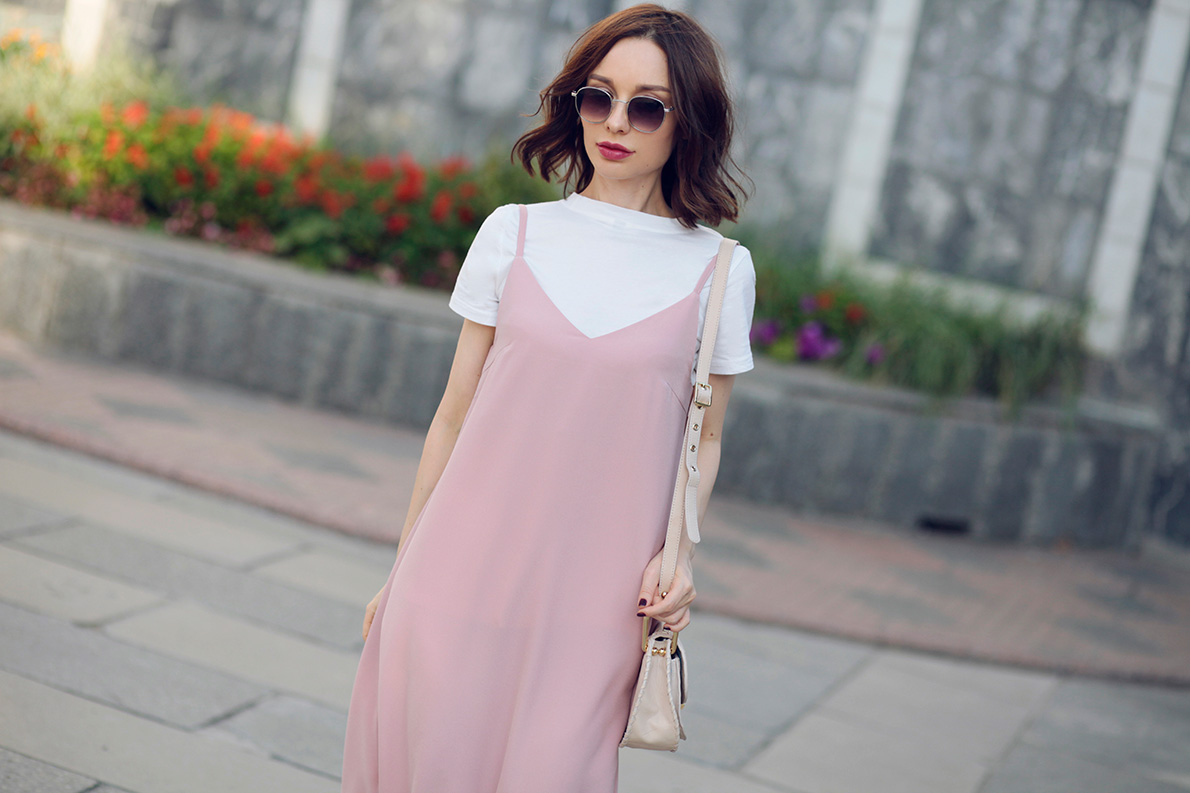
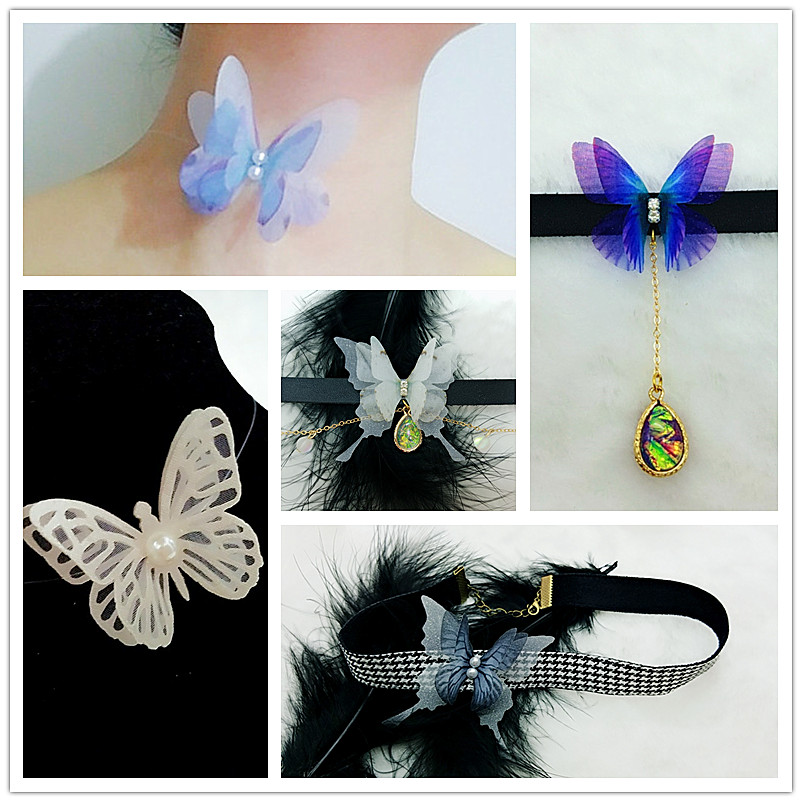
Wall panels made of butterflies are a great solution for those who want to update the design without spending a lot of effort, time and resources. Butterfly figures are most often used to decorate a child's room, living room, bedroom. Clothes are also decorated with elegant butterflies. These can be patches or brooches made of fabric of different thicknesses, which can be attached to blouses, dresses, bags, scarves or hats.
For decorating rooms, it is best to make voluminous butterflies from dense materials (paper, cardboard). They look especially impressive when the wings remain unattached – creating the effect of weightlessness. It is also recommended to combine contrasts in the decor: light walls – dark figures and vice versa.
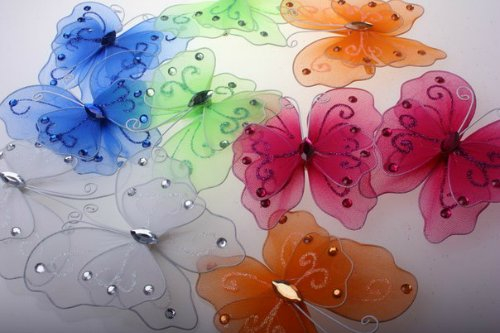
Vinyl film is suitable for interior decorations: it is easy to cut, holds its shape well, and retains an attractive appearance for a long time. It can be multi-colored, with glitter and mother-of-pearl. Some craftsmen use improvised materials: plastic, metal wire, tin from beer cans, records. But such crafts look impressive provided that they are made at a professional level.
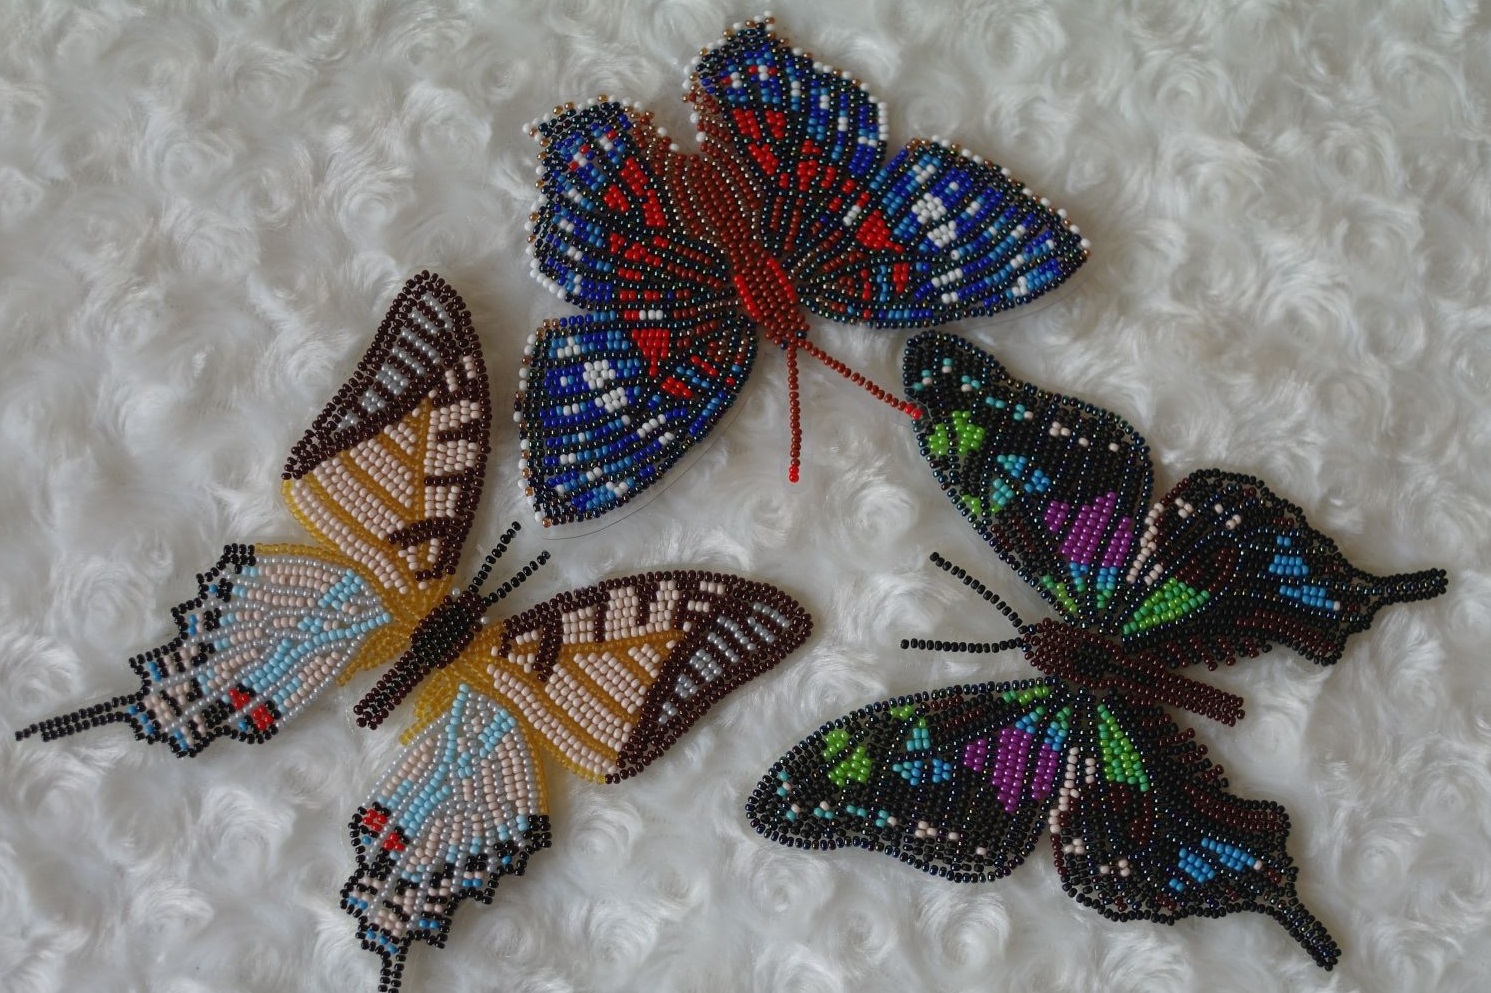
It is better to choose simple, safe materials for decorating a child's room. If the product has many small decorative elements, such as beads, it should be hung higher. Otherwise, the child will be able to tear off and swallow some part.
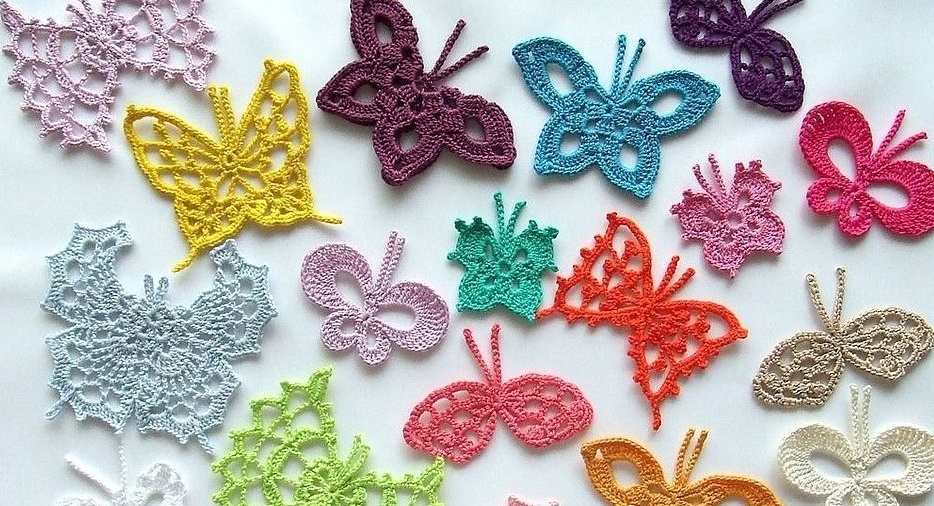
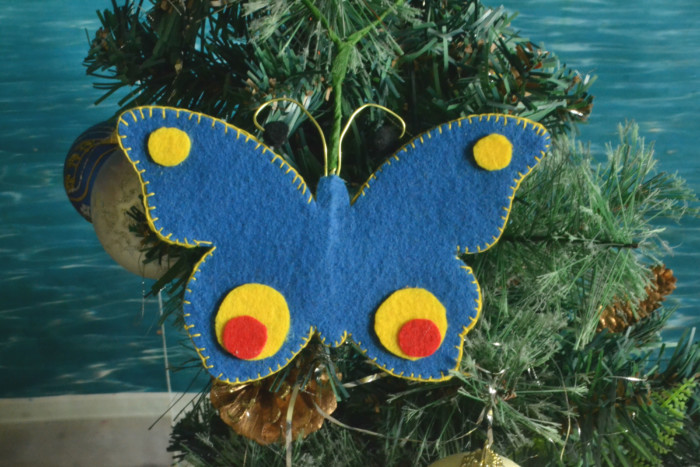
Butterflies for decorating clothes or accessories can be made of fabric. The most popular materials are velvet, silk, satin, satin, tulle. Felt is considered the best material for making brooches. It holds its shape well and does not require special care, which is important for decorating outerwear or bags. Thick velvet will look spectacular on blouses, dresses or suits. It also holds its shape well, but is more demanding in care.
Working with templates
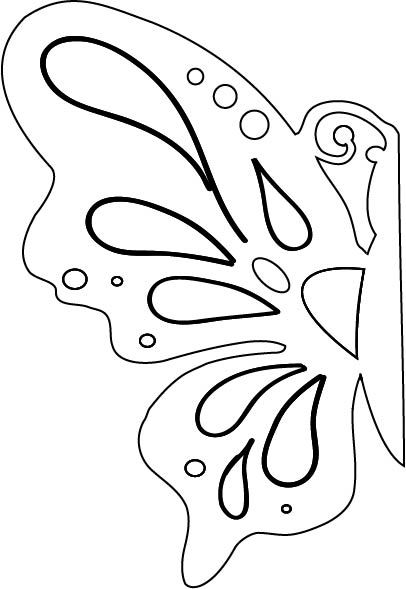
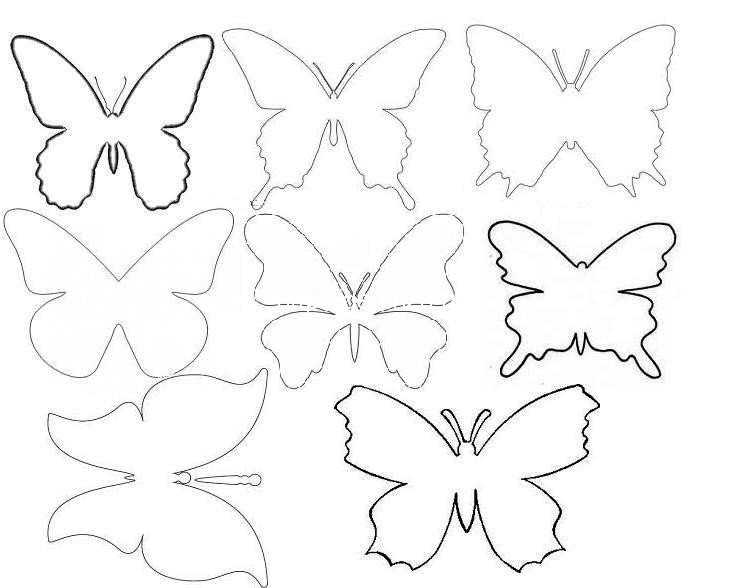
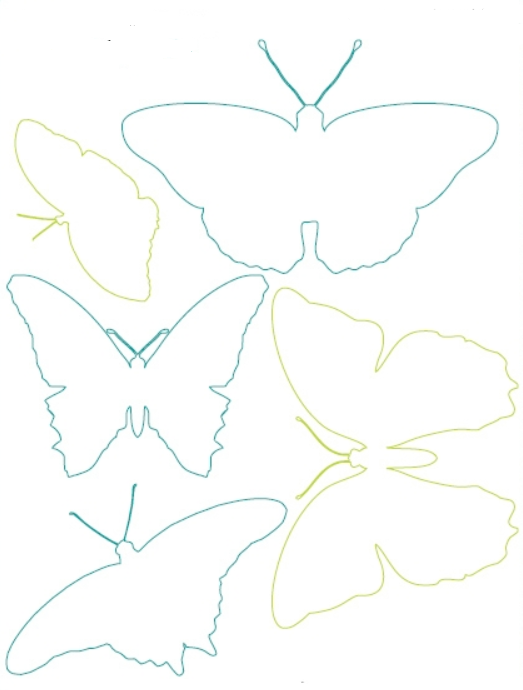
To make a butterfly with your own hands, it is recommended to make a stencil. You need to cut out a blank from thick paper, then outline the outline of the future product on the selected material.
To make the craft symmetrical, use only one part of the stencil. For convenience, you can cut off the unnecessary half. The image is applied to a sheet folded in half with the belly to the fold line.
If you want to make interesting and unusual butterflies, you should look for ready-made templates on the Internet. There are two options for using the picture you like:
- Print the sheet and cut out the template.
- Transfer the drawing from the screen. To do this, open the image on the monitor, attach a sheet of paper and trace it.
The advantage of these methods is that you can get identical blanks of different sizes by changing the image in any convenient editor. It is also recommended to preview the document before printing in order to estimate the actual size of the template relative to the A4 sheet.
Stages of making different models of butterflies
The decor in question is as elegant as it is easy to make. You can make a butterfly with your own hands using master classes from experienced needlewomen.
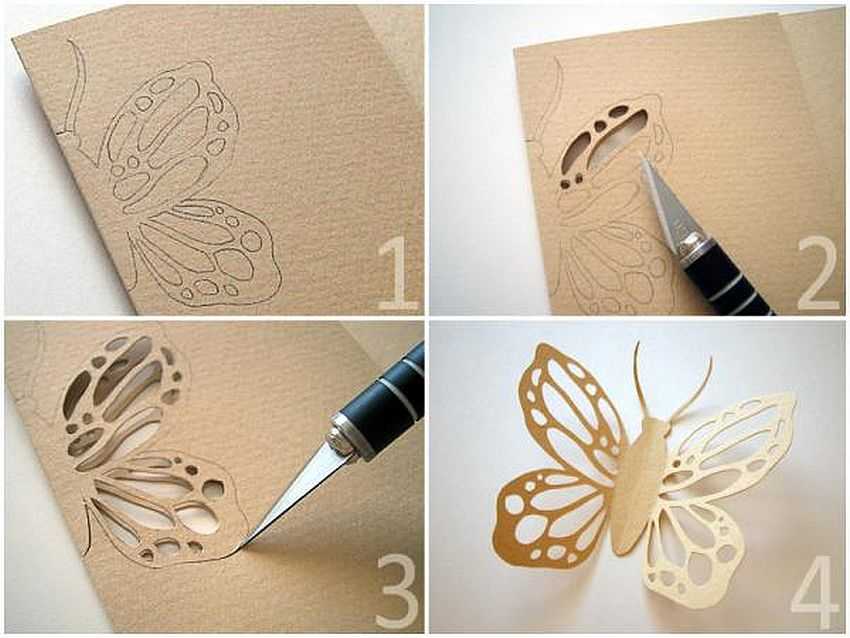
Simple made of cardboard
First, you need to decide what kind of cardboard butterfly you want to make. If the image is to be glued completely, a low-density material will do. For a three-dimensional composition, it is better to use thick cardboard so that the wings hold their shape.
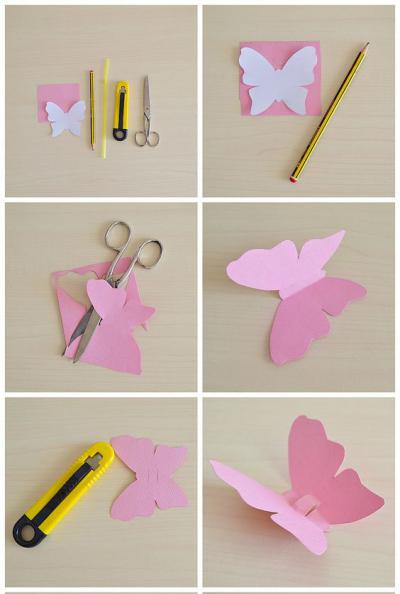
Procedure:
- Apply the image to the paper. For a three-dimensional craft, it is better to bend the sheet.
- Cut carefully. If the material is very dense, it is recommended to use a stationery knife or very sharp scissors.
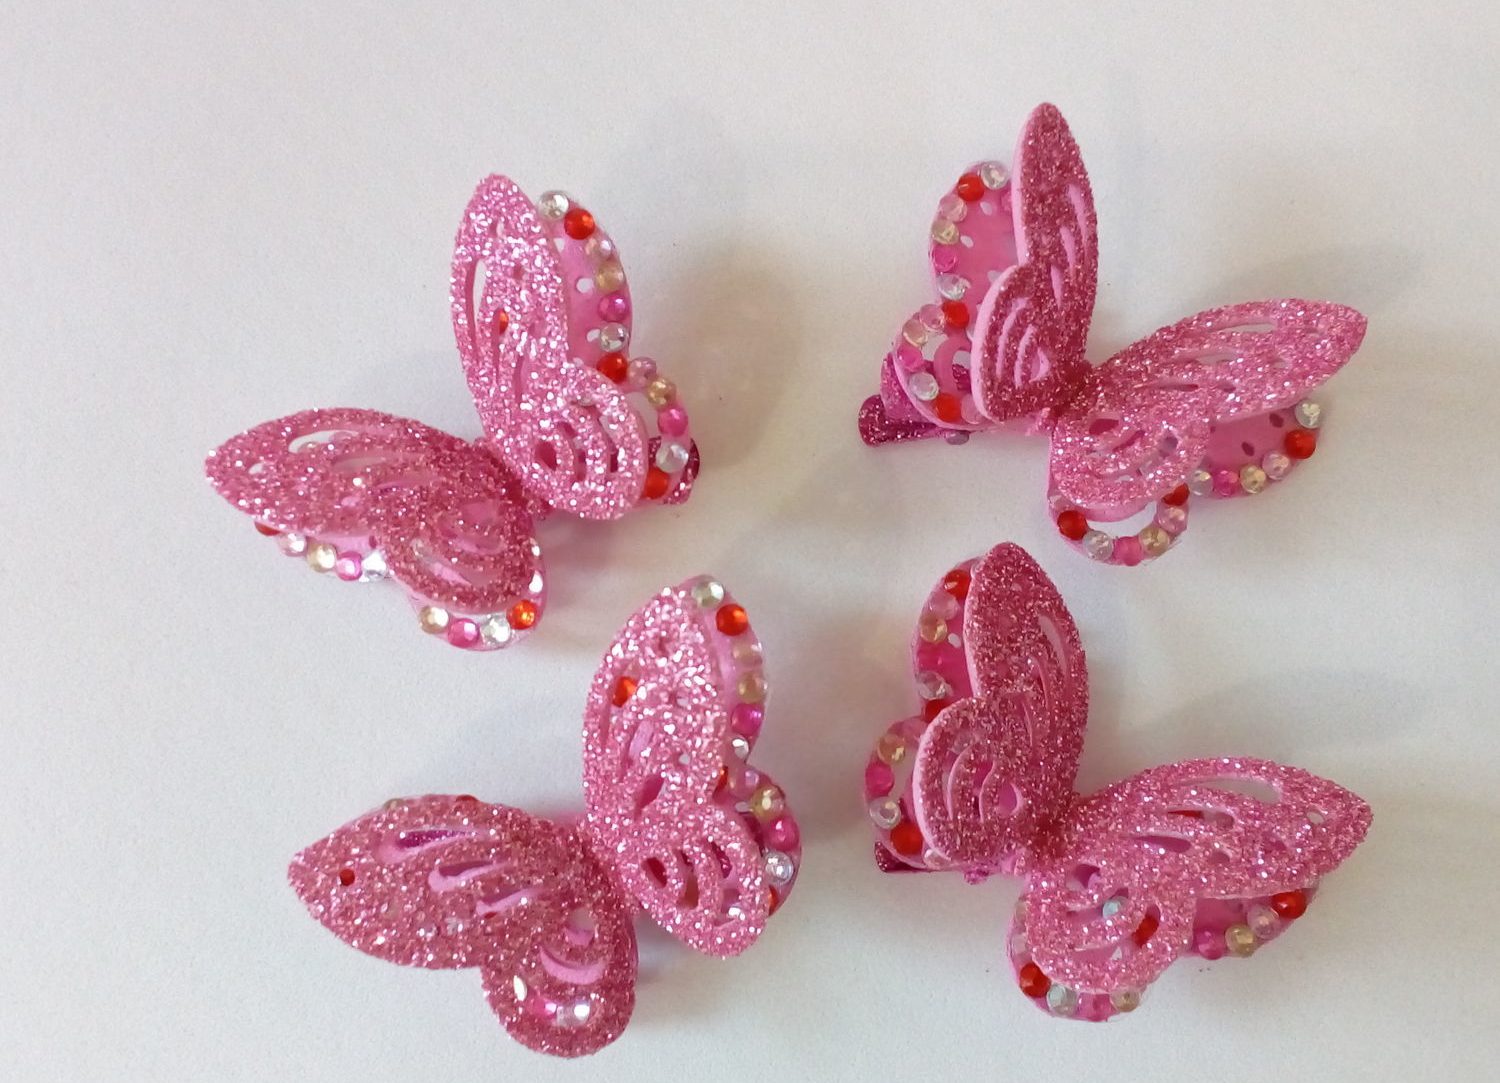
- Paint with acrylic paints or gouache. Additionally, the product can be decorated with beads, glitter, sequins, and seed beads.
The cardboard butterfly can be used on its own or as a base for voluminous fabric crafts.
Multilayer
Multilayer volumetric paper butterflies are made not much more difficult than usual ones. The work algorithm:
- Cut out the base of the craft from cardboard, you can choose any color.
- The top of the butterfly can be the same size as the base or slightly smaller in outline. The number of layers is optional. For openwork on the wings, use a stationery knife to cut out patterns.
- Connect the elements along the belly line (fold) with glue.
The finished product can be attached to any surface.

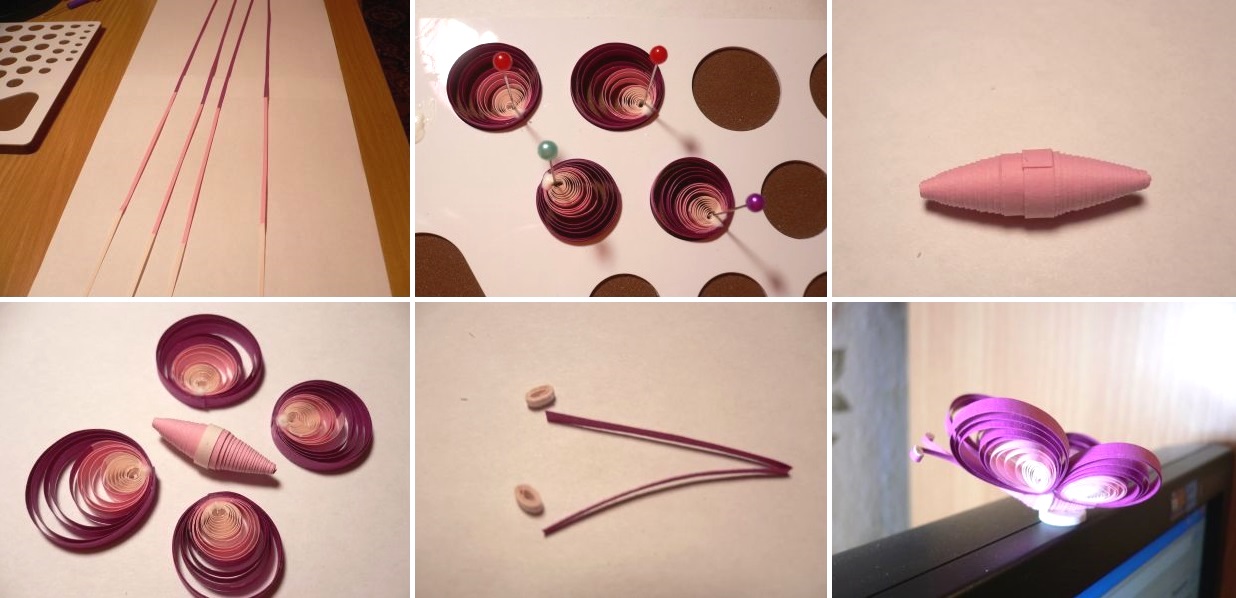
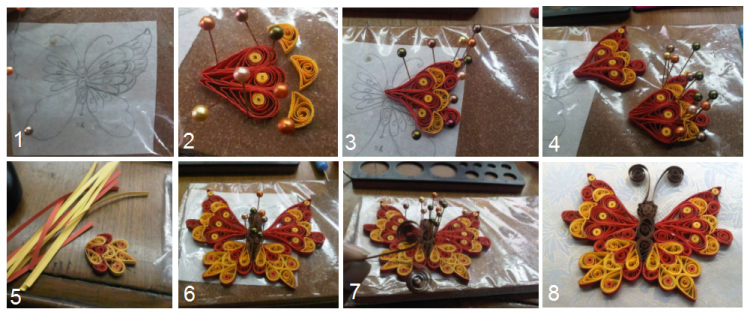
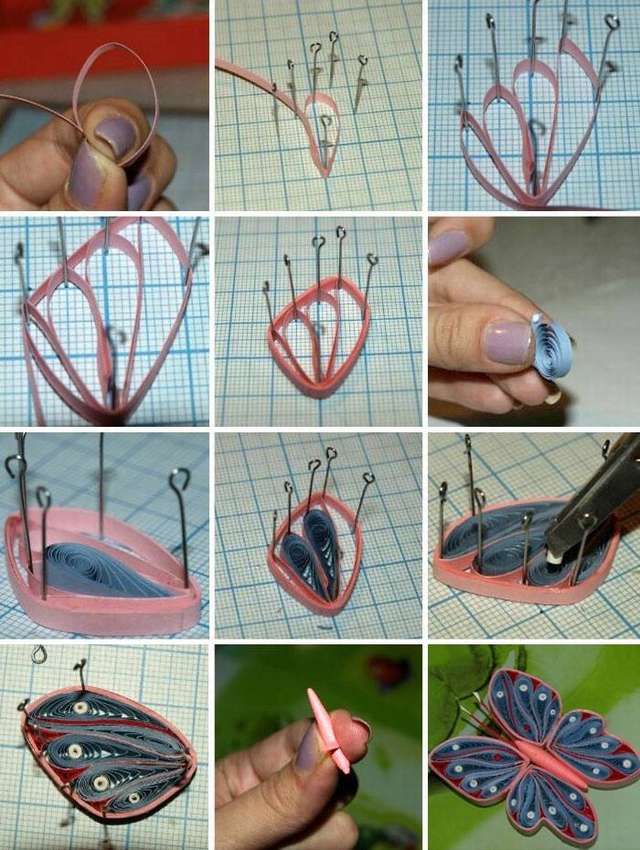
In the quilling technique
Beautiful decor can be created using the quilling technique. Figures made this way look beautiful and unusual. To make them, you need to adhere to the following algorithm:
- Cut strips from thin colored paper: 4 pieces 1.5 cm wide, 5 cm long; 6 pieces 1 cm wide, 10 cm long; 2 pieces 20 cm long, 2 cm wide.
- For edging, take strips of a denser material, possibly a contrasting color. The length and quantity are determined during the manufacturing process.
- Roll the colored strips into small rolls and place them in paper curling stencils. These are templates with holes of different diameters, which are sold in specialized stores; if desired, you can make them yourself.
- When the blanks begin to hold their shape, the free end should be fixed with glue, then given the shape of a drop.
- From the obtained elements, fold the butterfly wing, glue the parts together. You should get 4 assemblies: 2 wings from 3 large rolls and 2 wings from 3 small rolls.
- Glue strips to hold the shape around the resulting figures along the contour.
- Glue 4 wings together. You can add antennae, typical for a butterfly.
To prevent the product from coming apart over time, it is permissible to coat the craft with PVA glue, carefully treating each area.
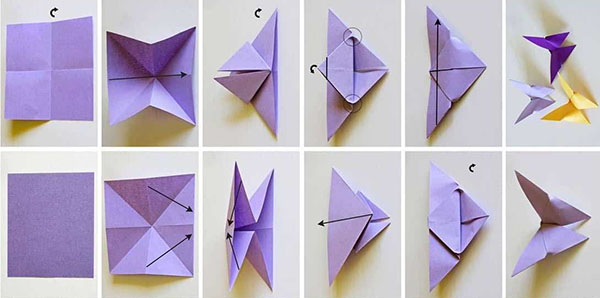
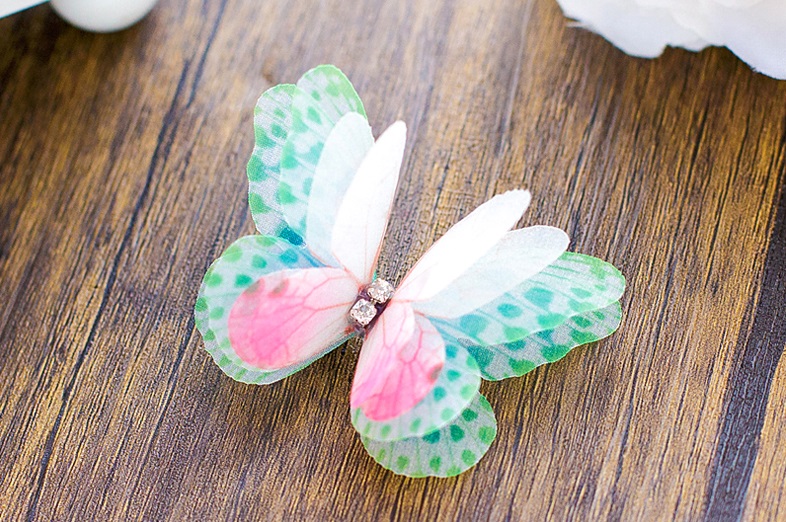
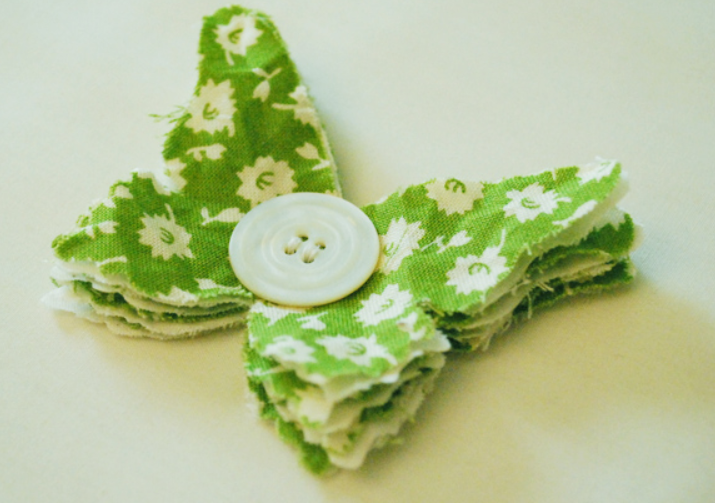
Volumetric from fabric
Sew from fabric hovering moths tIt's as easy as making a paper butterfly. The work is done in the following sequence:
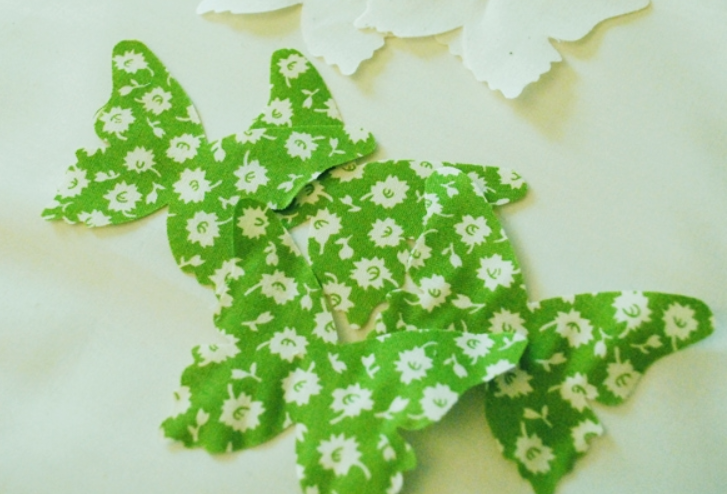
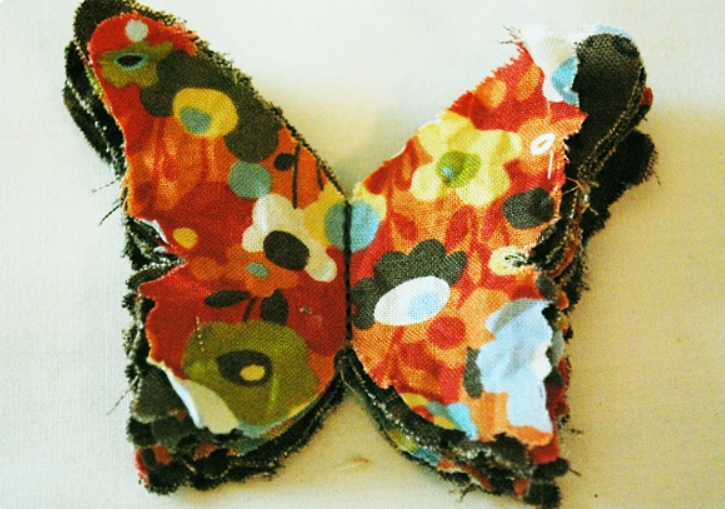
- Use soap or chalk to draw the outline of the future craft onto the fabric. If you cut out more details, you will get a three-dimensional butterfly.
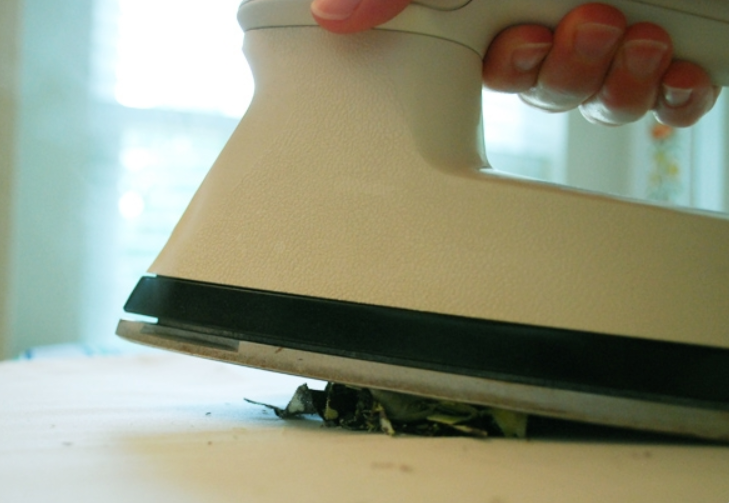
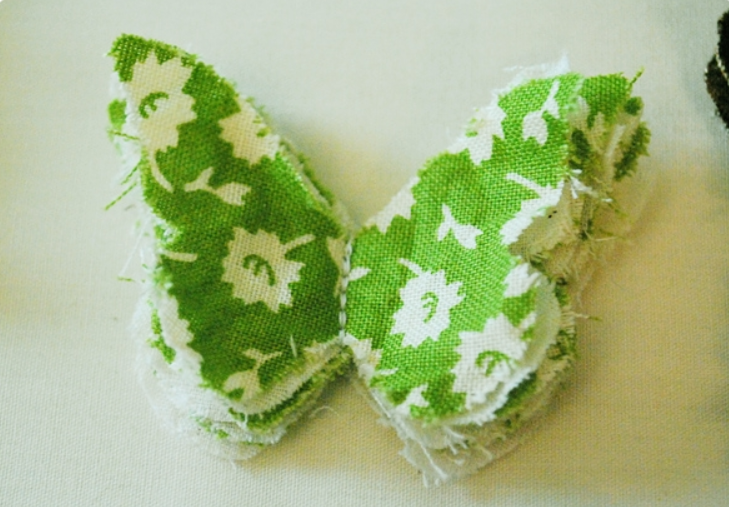
- Place all the pieces on top of each other. It is recommended to iron them for a tighter fit.
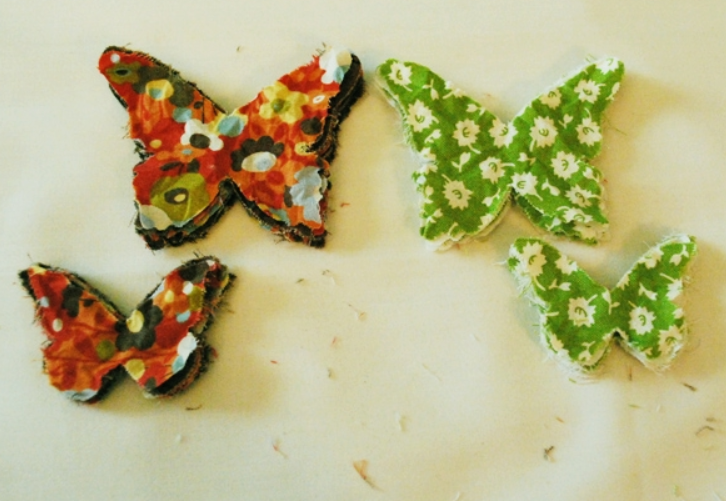
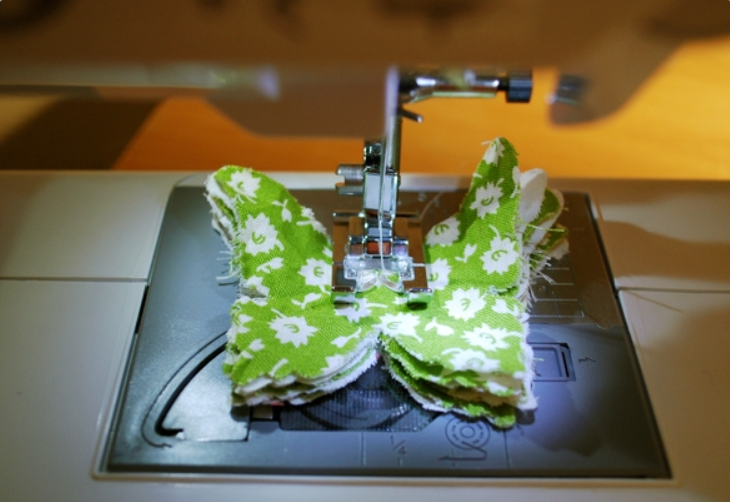
- Sew all the parts together in the middle (along the belly).
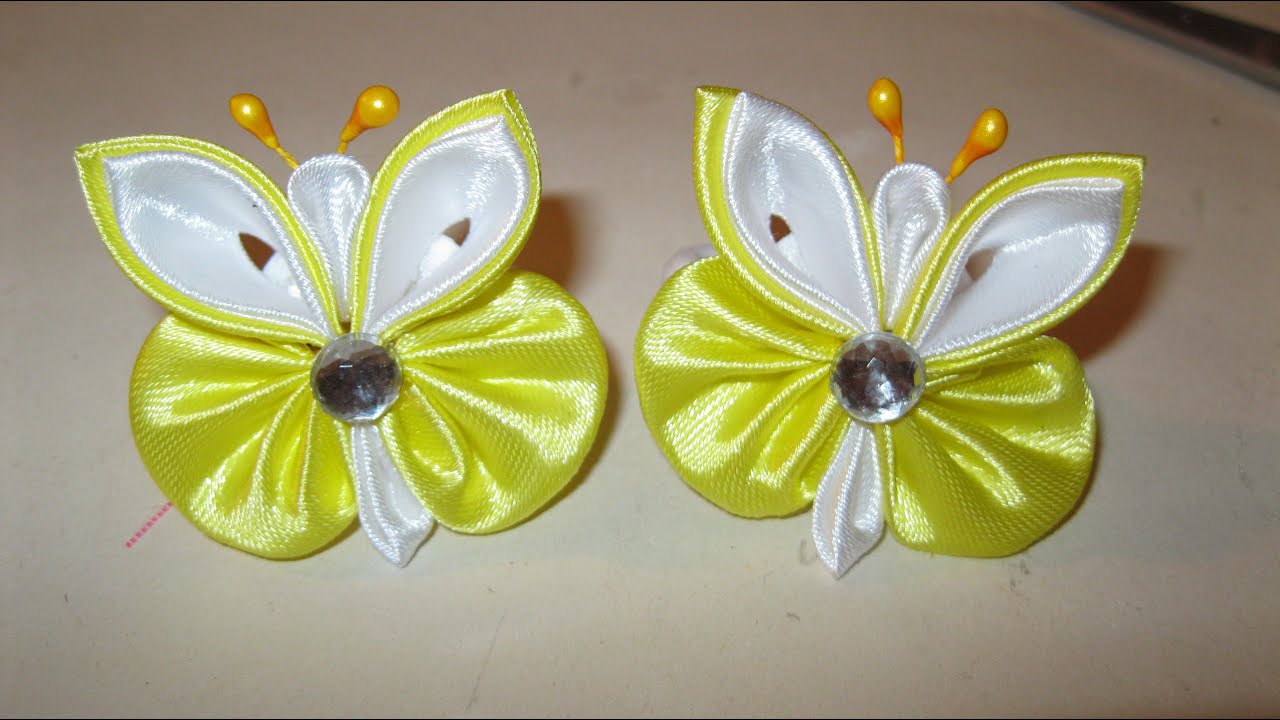
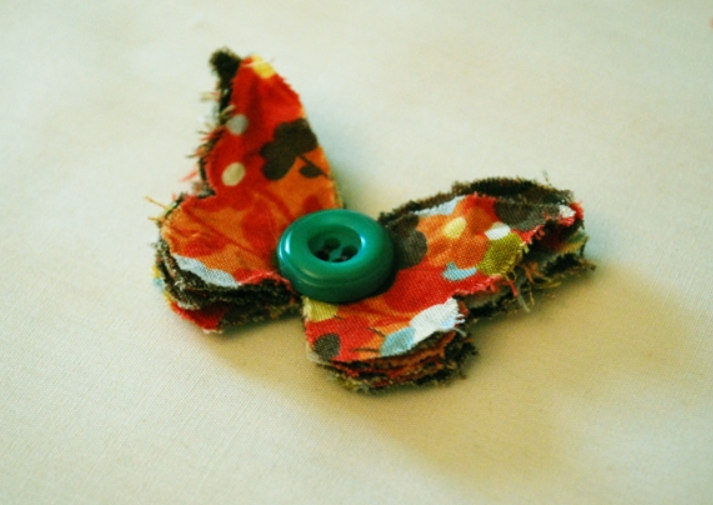
- You can hide the seam with beads, colored ribbons, or beads.
To make this craft hold its shape, it is better to use a dense material. Cotton fabrics and felt will do. It is more convenient to fasten multi-layer butterflies using a sewing machine. Thin and soft fabrics such as velvet, silk or satin look more attractive if the craft has many layers. A simple pin will do as a fastener.

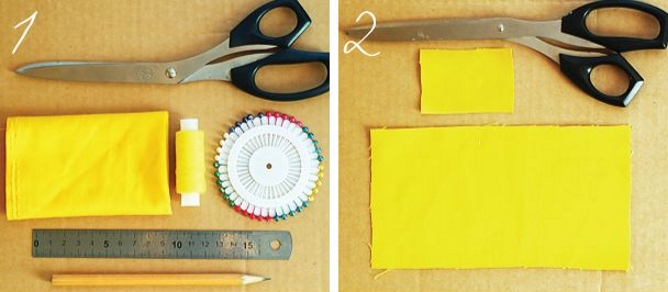
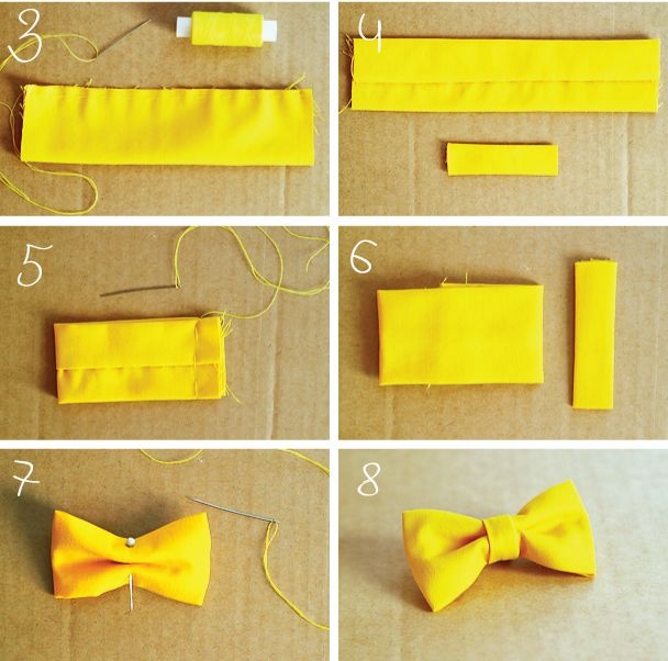
How to Make a Stylish Bow Tie for a Child
A stylish bow tie does not necessarily have to be expensive. It is easy to make yourself. Instructions on how to make a bow tie with your own hands for children:
- Cut a square out of A4 paper.
- Fold the resulting piece into an accordion shape, approximately 1-1.5 cm wide.
- Press in the middle and secure with an elastic band or ribbon. You should get a butterfly.
- Attach an invisible pin to the elastic band to make it easy to attach the tie to the shirt.
An original bow tie made with your own hands will make your child stand out among his peers.
Master classes from experienced craftswomen clearly demonstrate that it is not difficult to make a butterfly, be it a decorative element or an accessory. This is a great way to refresh your image, set the mood or breathe new life into boring things. All you need is imagination, desire and a minimum set of materials.
Video