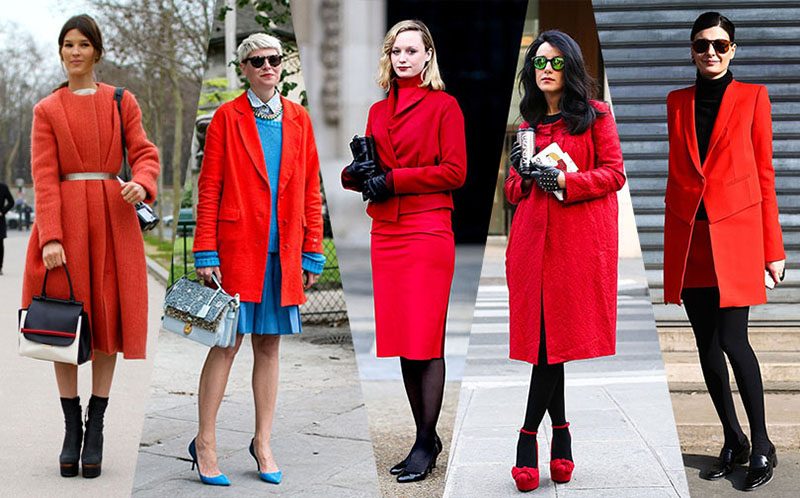
The current trend that has affected the latest designer shows is that high fashion should be for all body types. Finally, there are options not only for girls with model parameters, but also for women of normal build, and even for ladies with curvy shapes. A warm knitted coat is one of these new trends. If desired, you can make an original model of outerwear yourself.
Fashion models
The main coat models presented at fashion shows can be divided into the following types:
- short products;
- cape coat;
- cape;
- trapezoid;
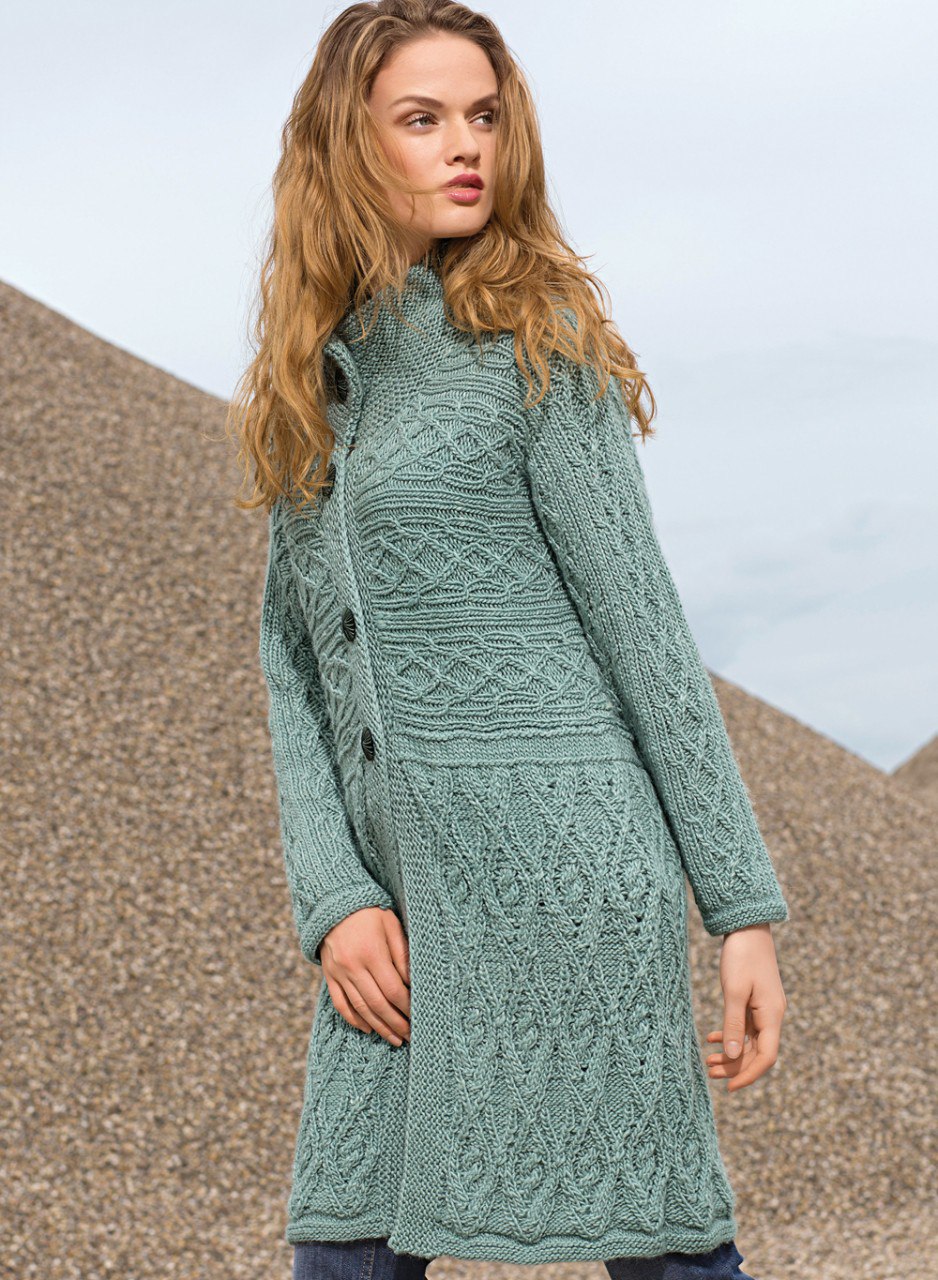
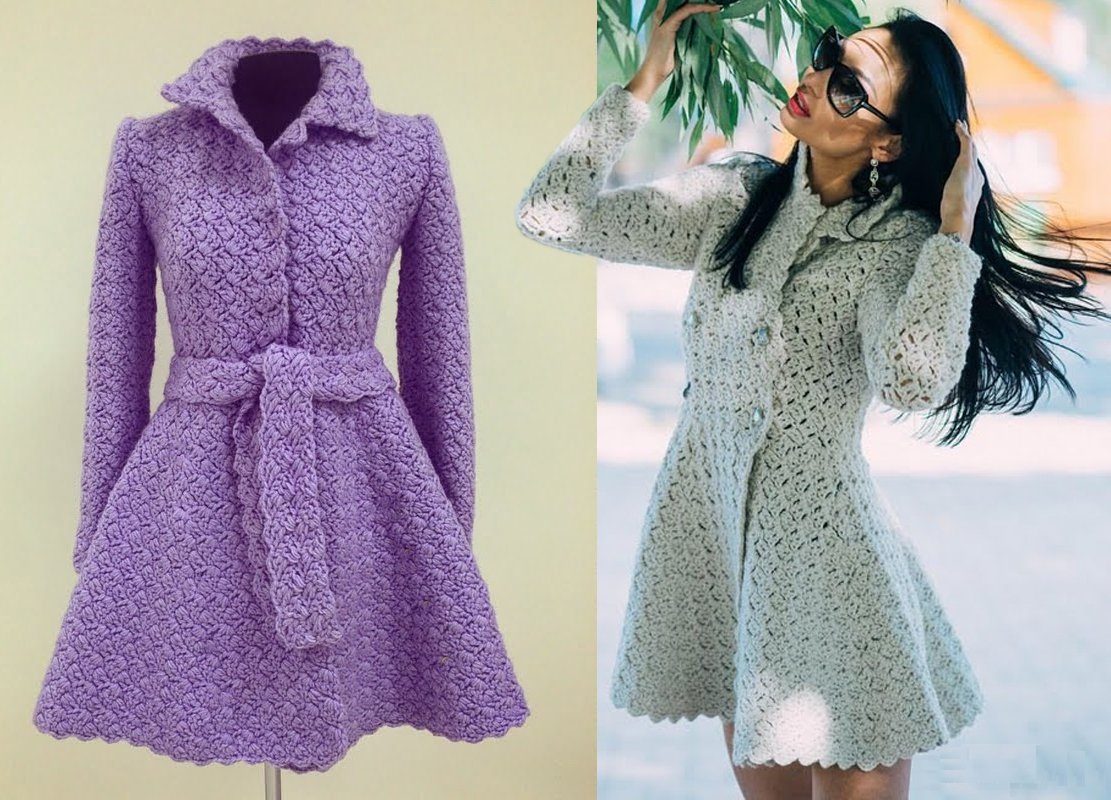
- fitted;
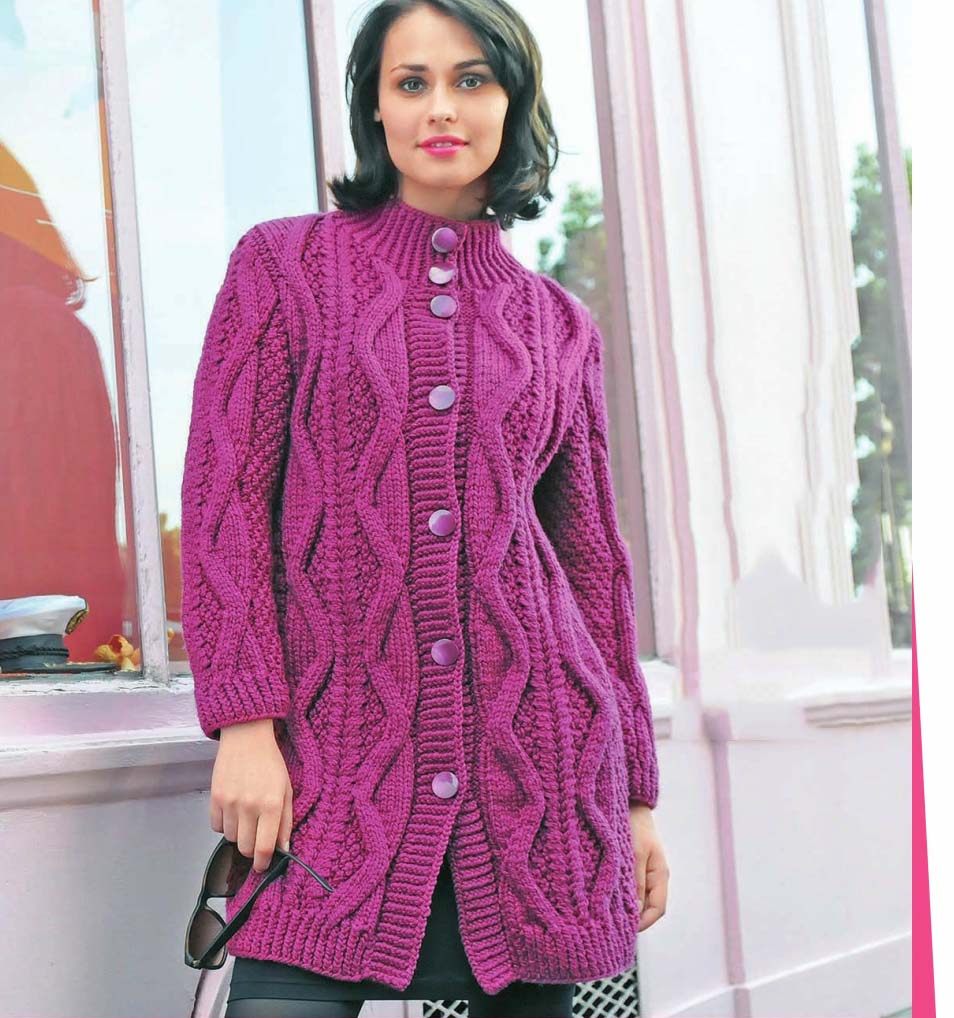
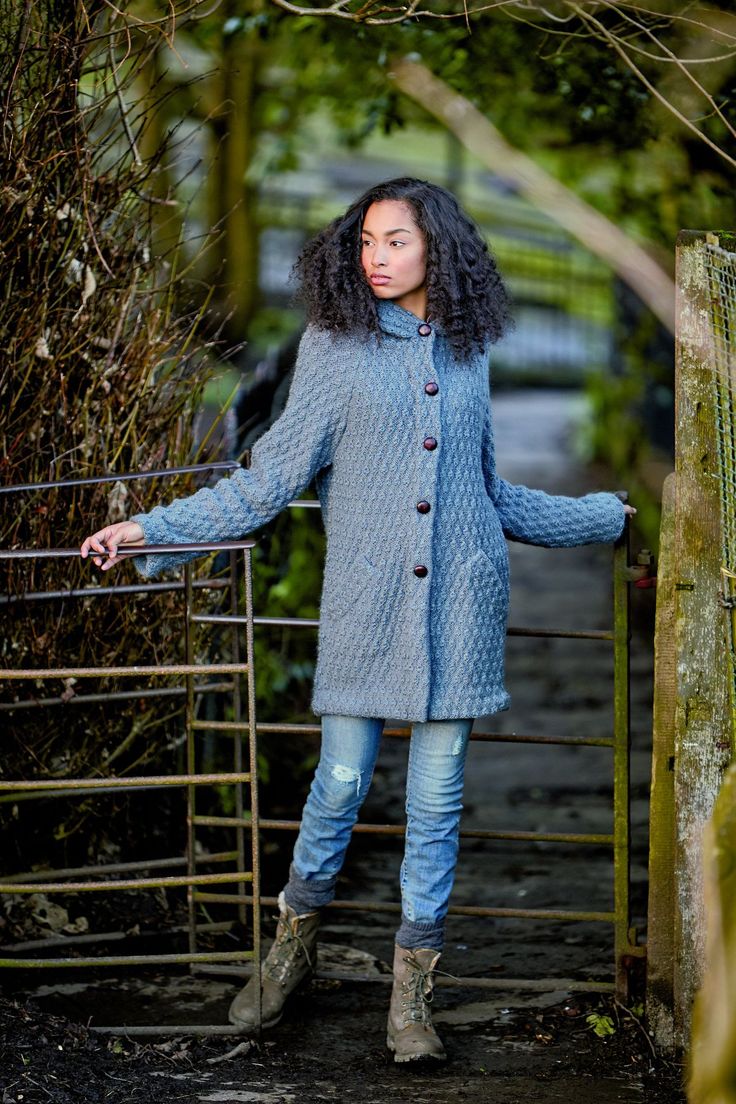
- on buttons;
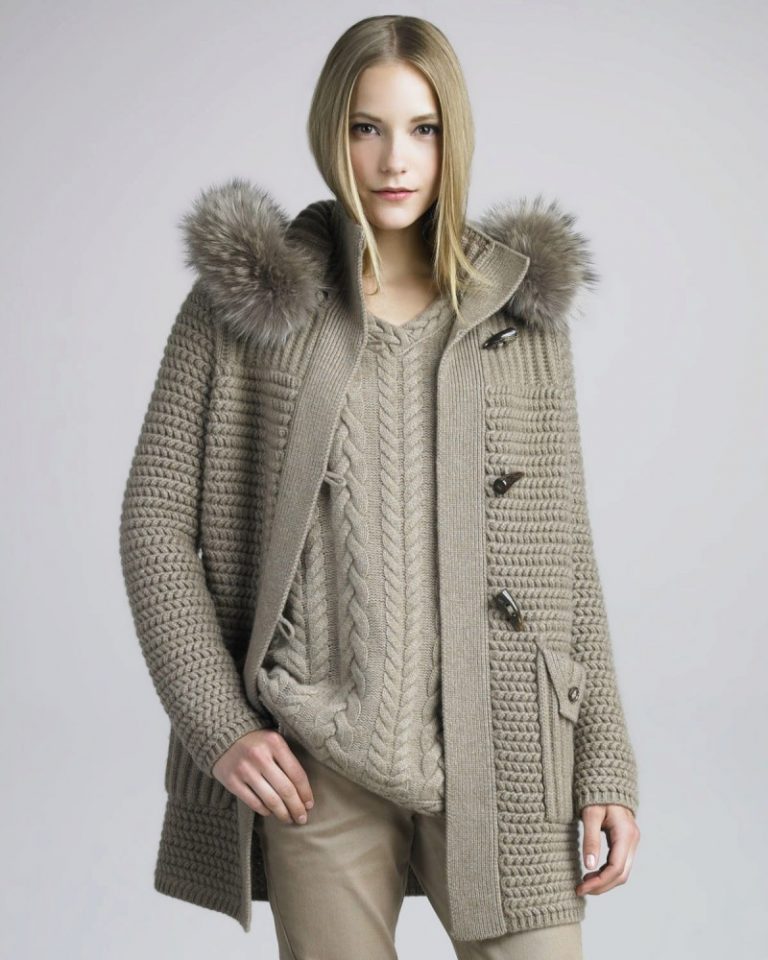
- duffle coat;
- asymmetrical;
- without collar;
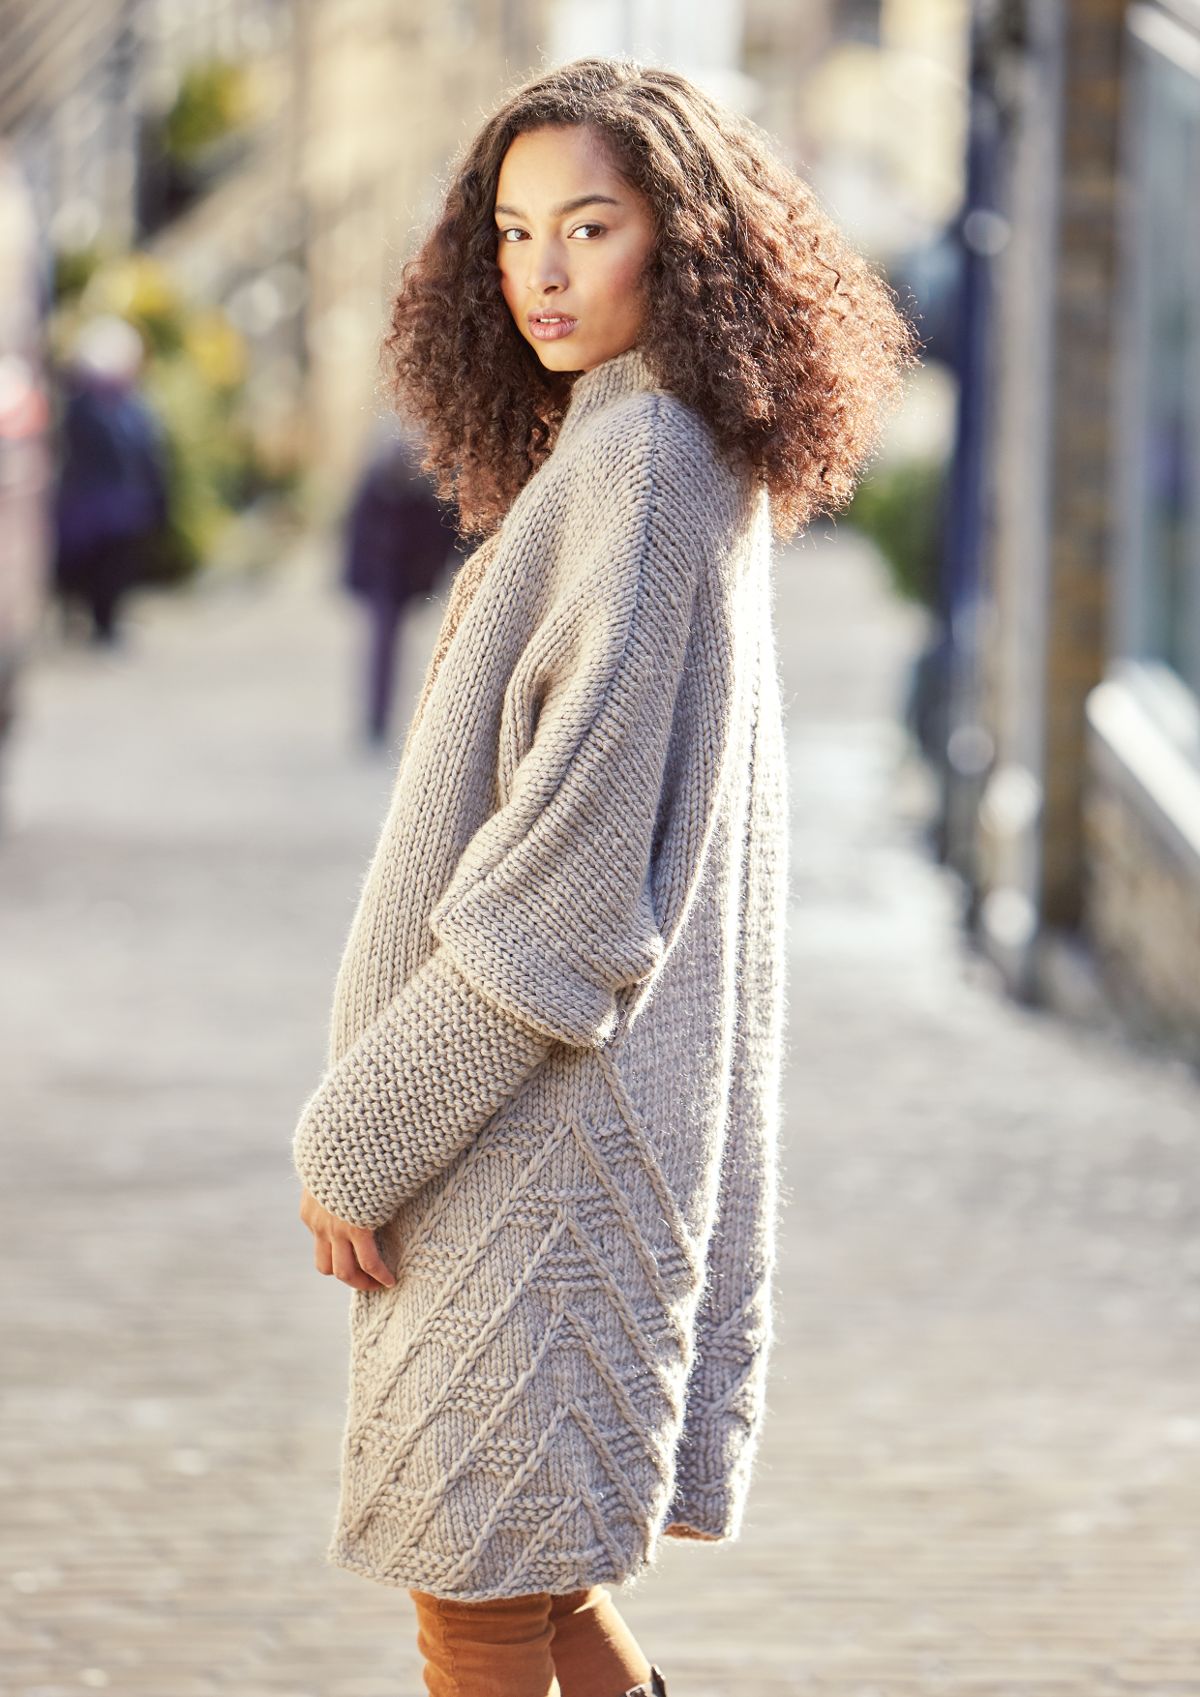
- oversized.
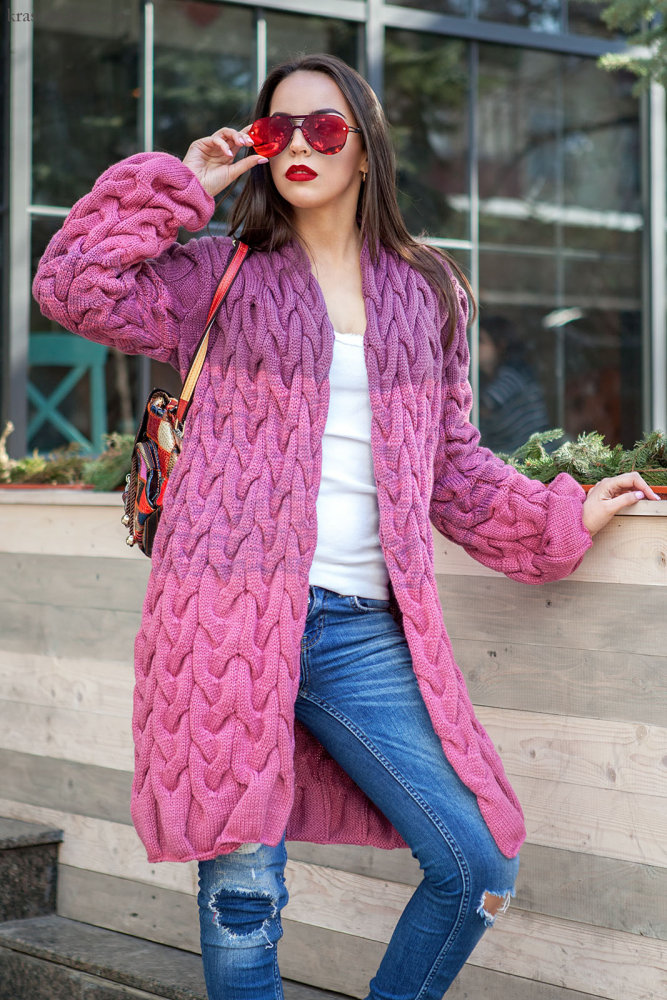
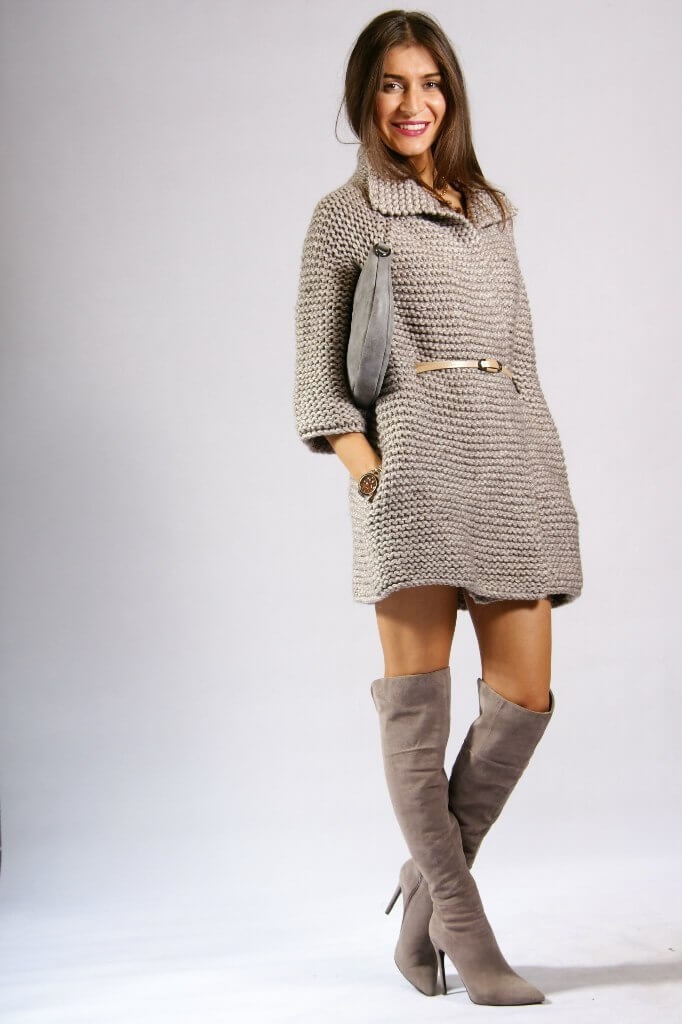
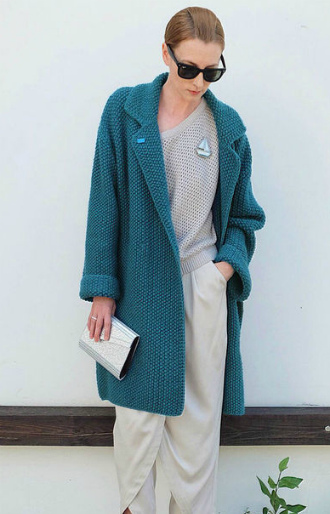
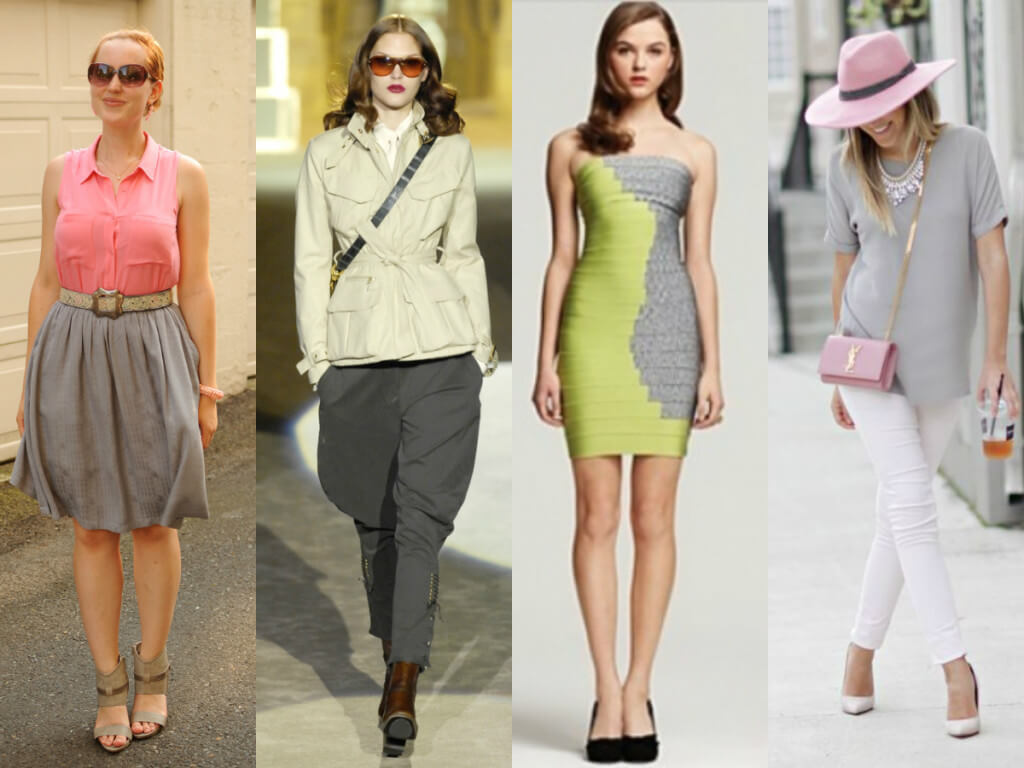
A short coat or cardigan is a greeting from the past, a revival of long-forgotten casual wear. A light, comfortable garment is easy to wear in the off-season, when it is not very clear what the weather will be like in the evening. The main accent in such models is a wide and long belt. Sleeves also deserve special attention - depending on their length, a knitted coat can be summer or demi-season. Large or, conversely, hidden pockets are another distinctive element of such cardigans.
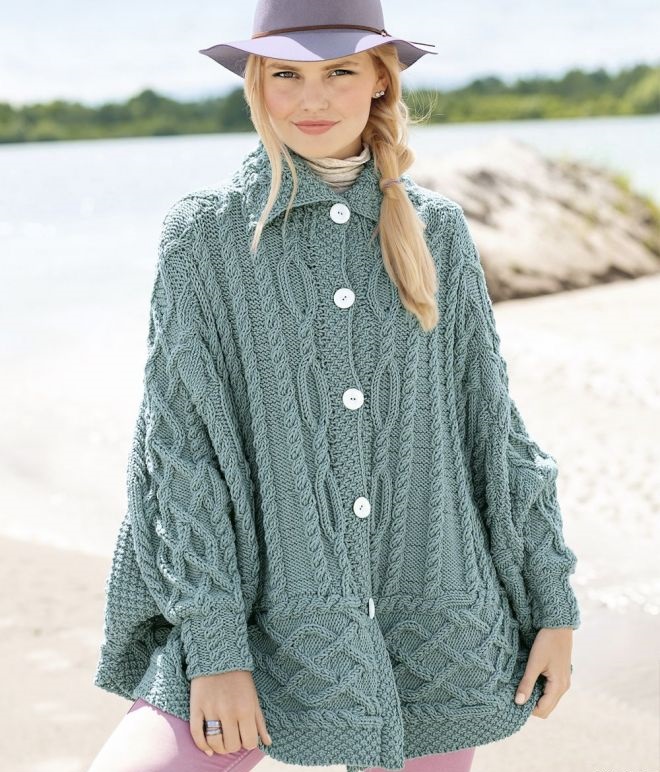
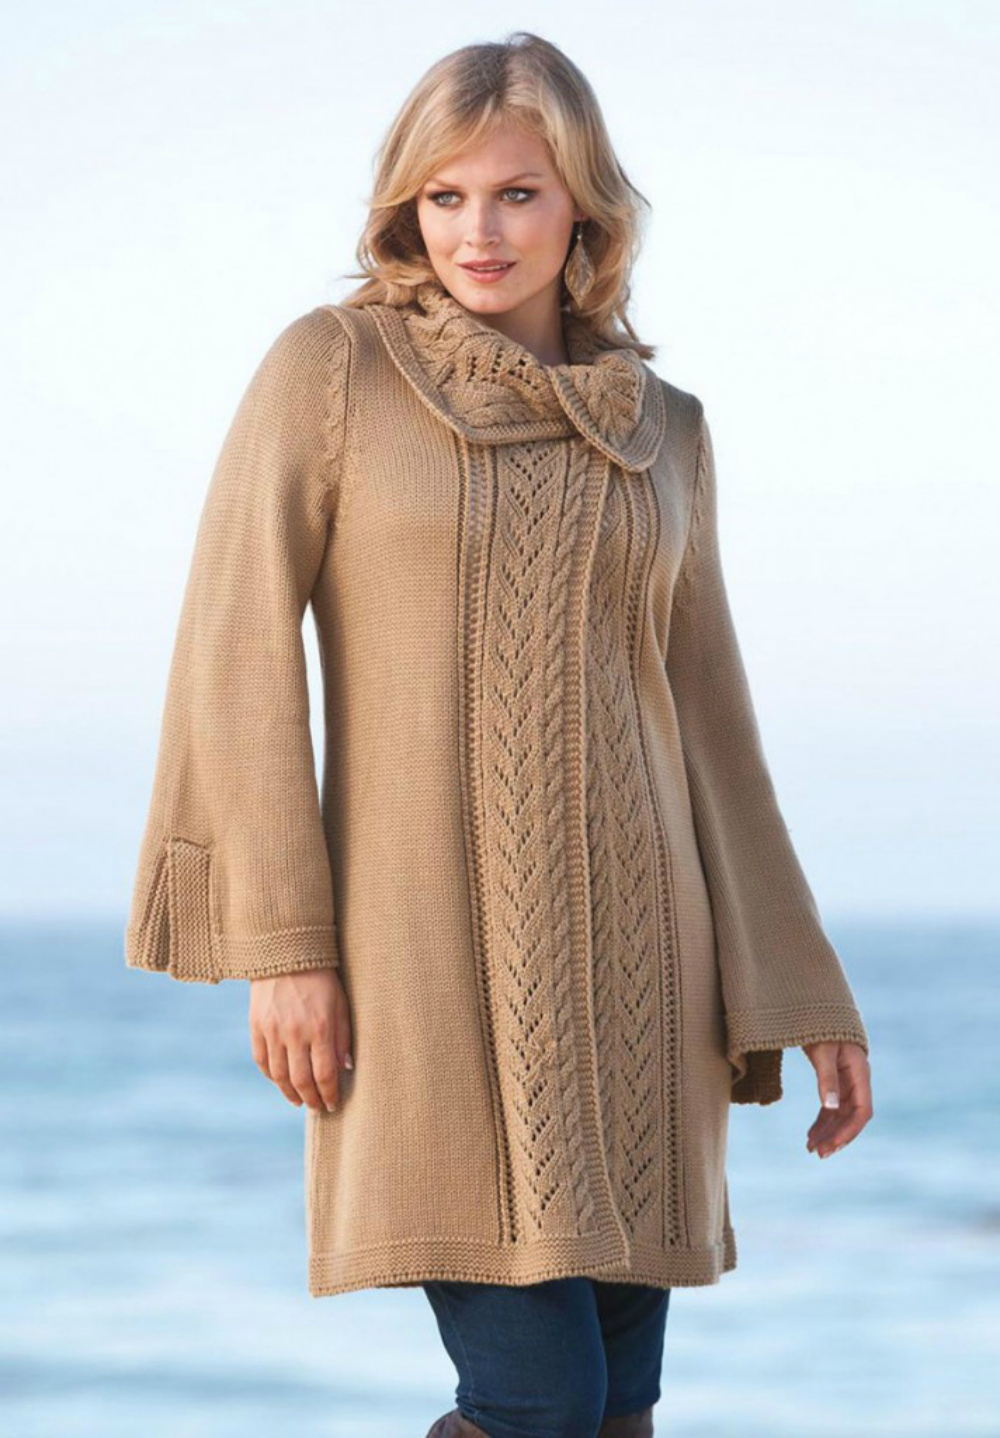
The popular cape model is a simple cape, somewhat similar to a poncho. The only difference is in the cut of the main fabric - the latter is made in the form of a square, and the cape resembles a trapezoid. This is a beautiful, bright coat that will suit both slender young girls and adult women, including full-figured ones.
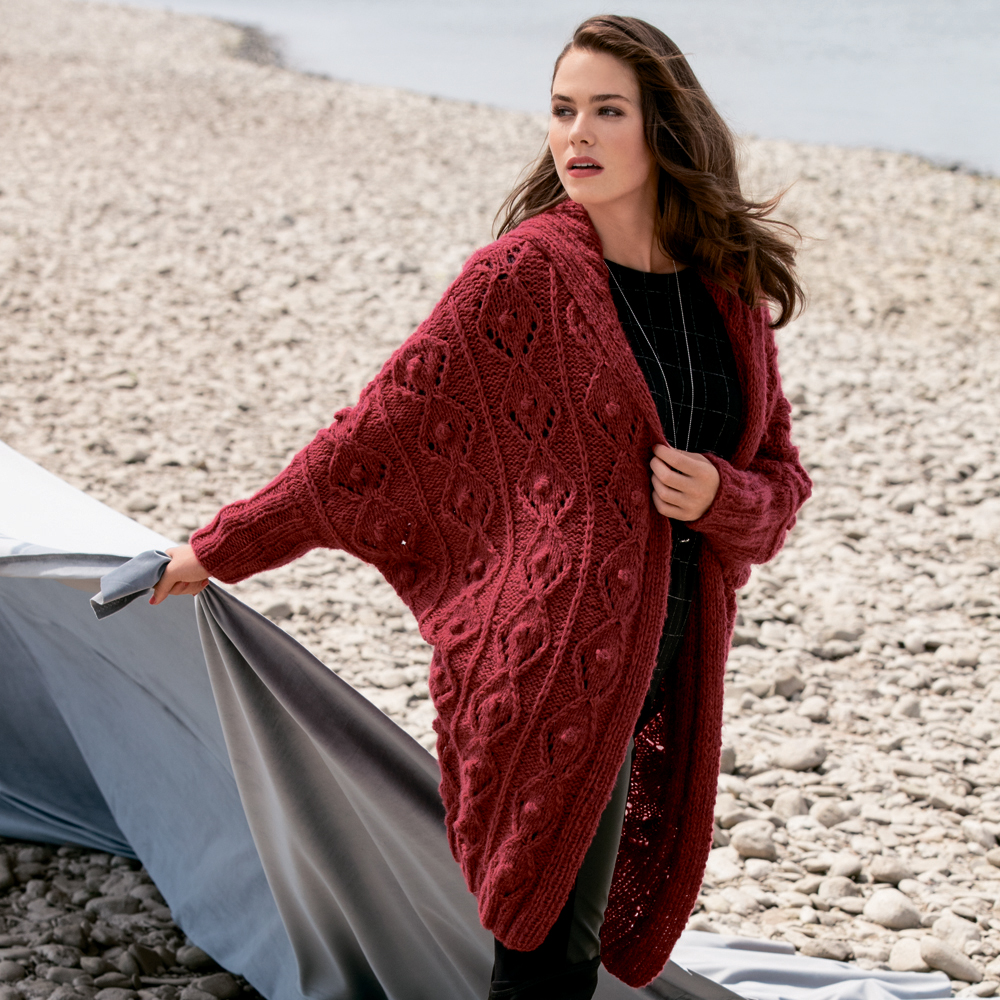
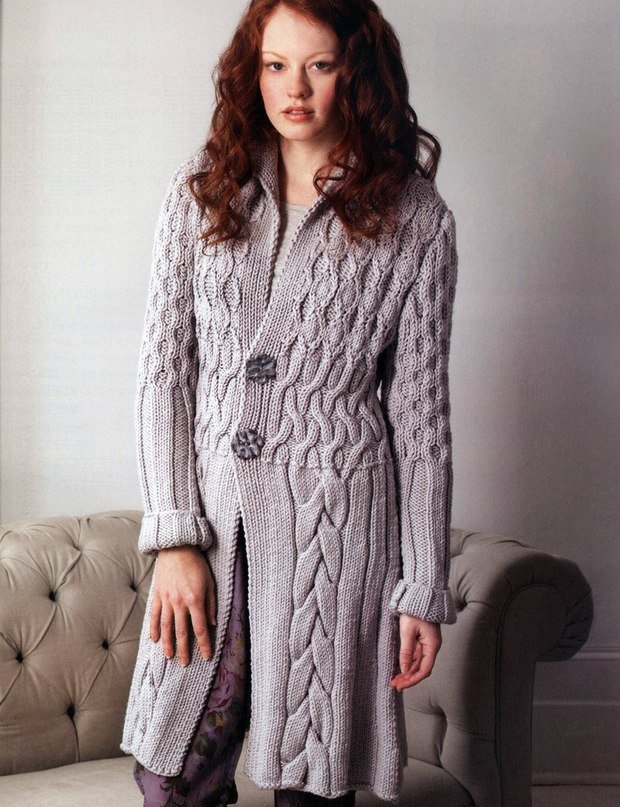
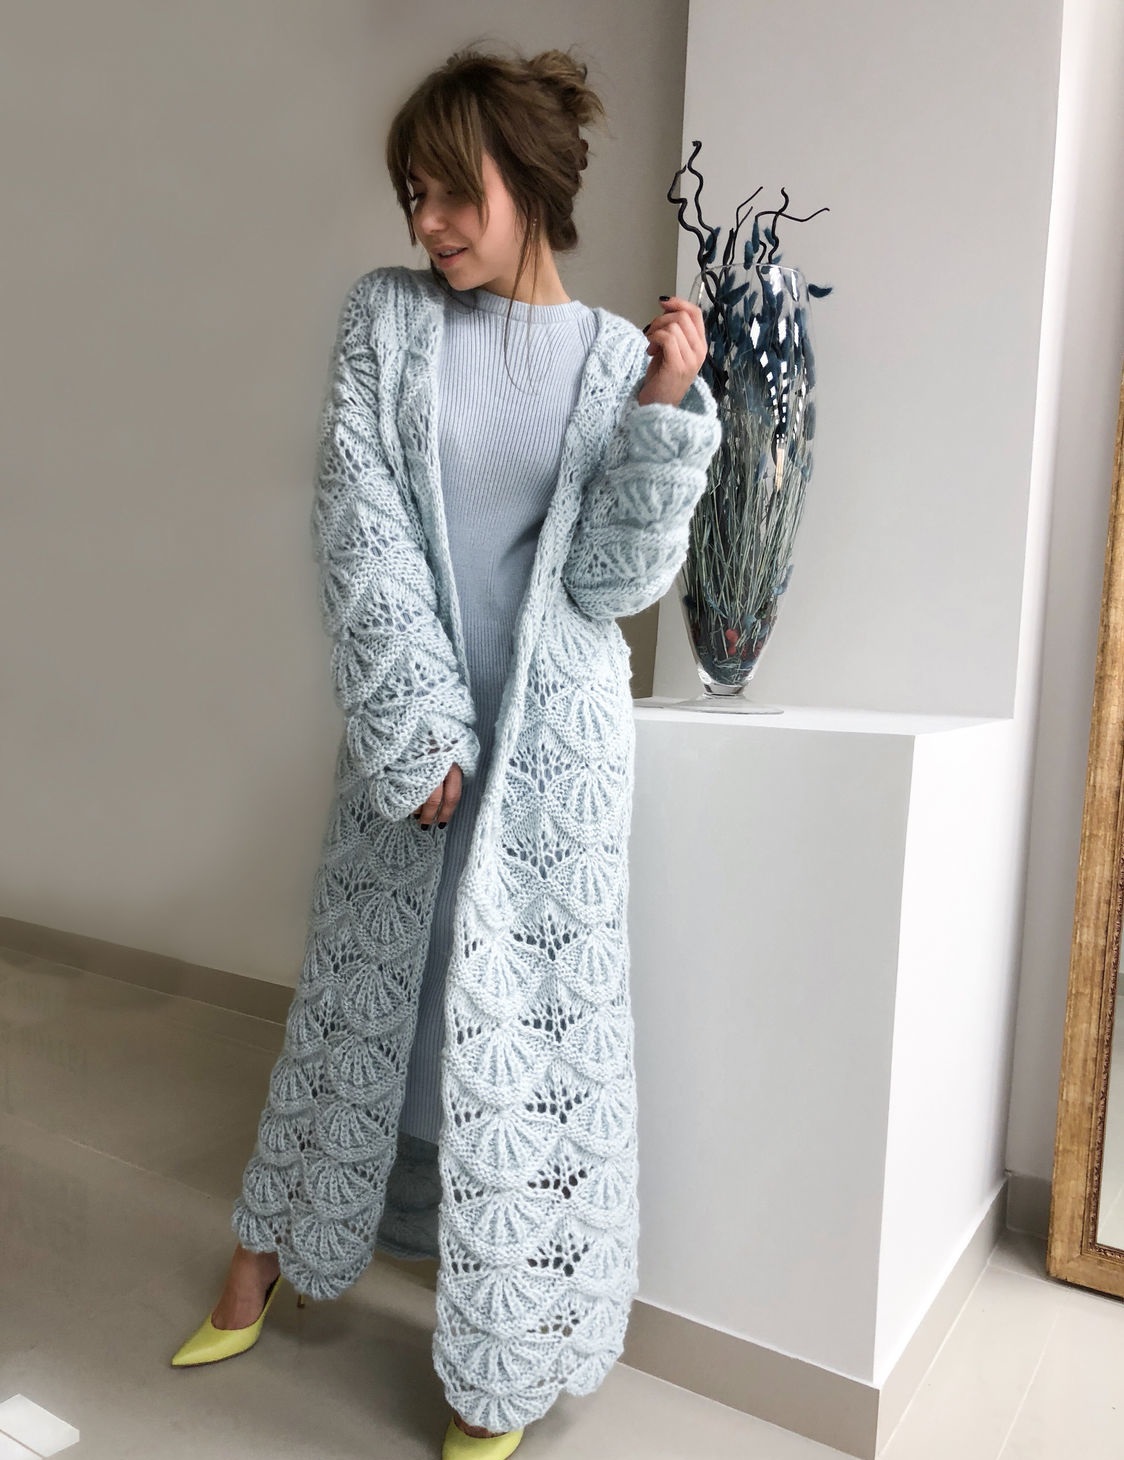
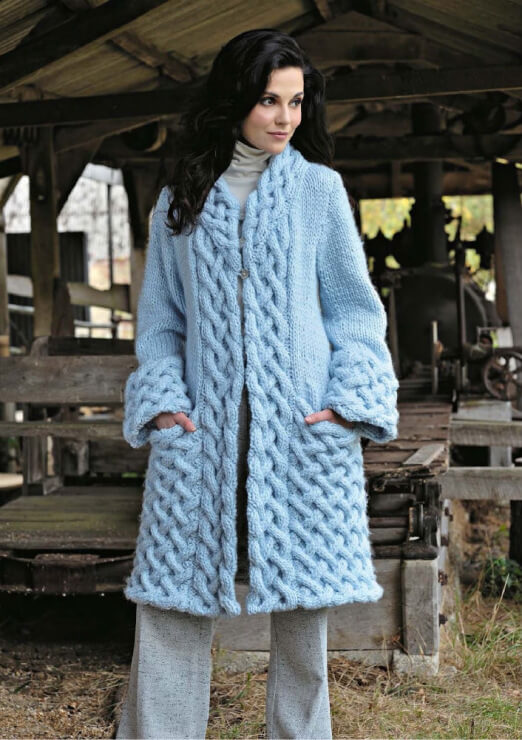
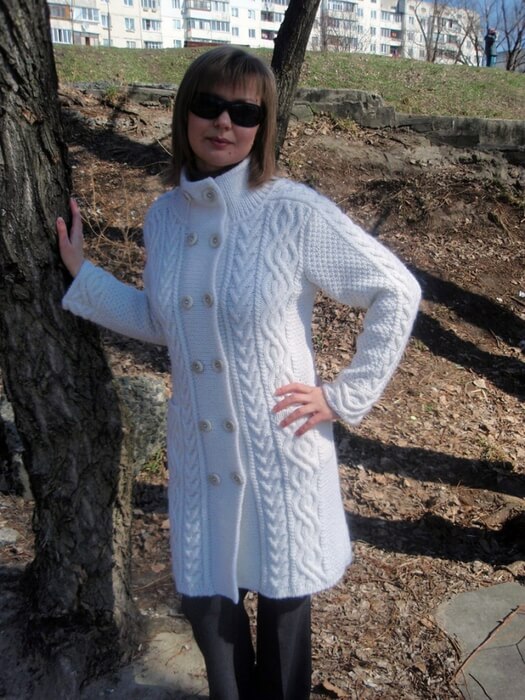
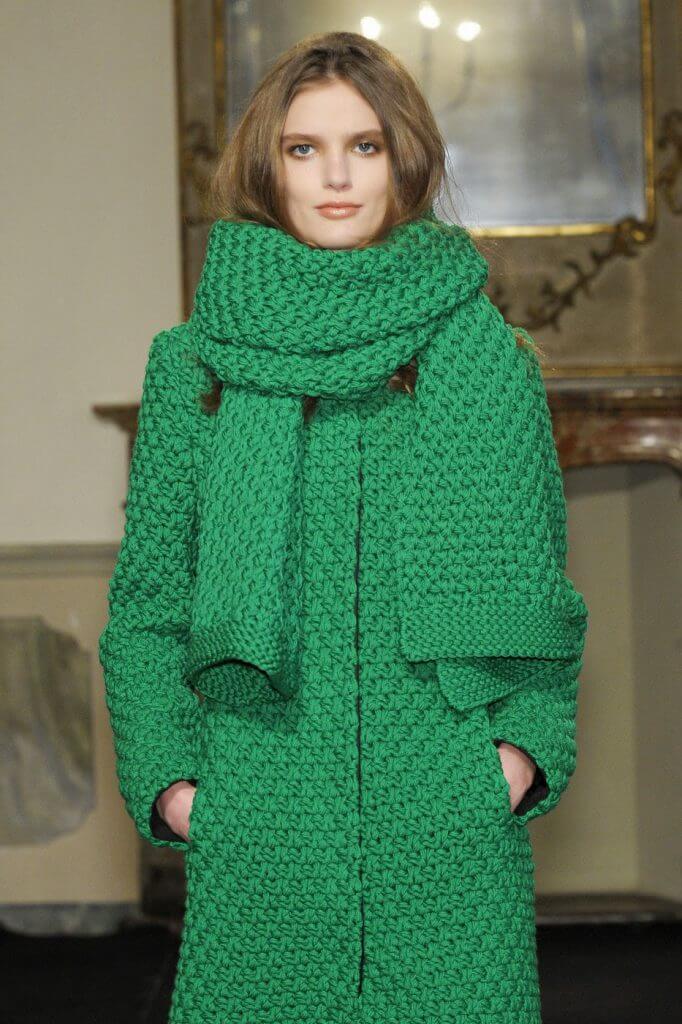
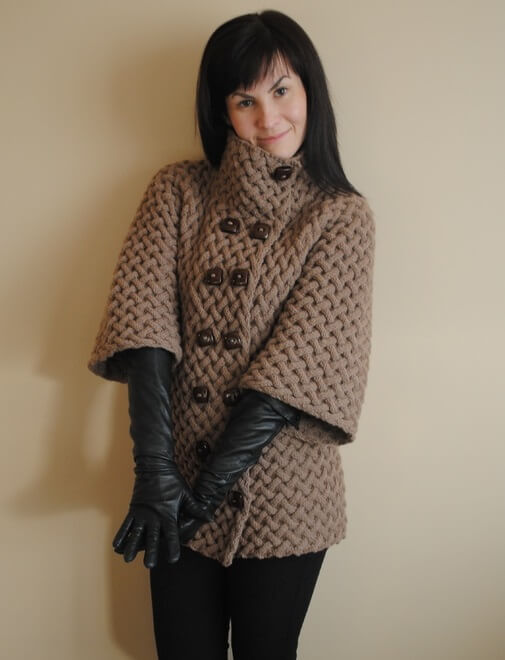
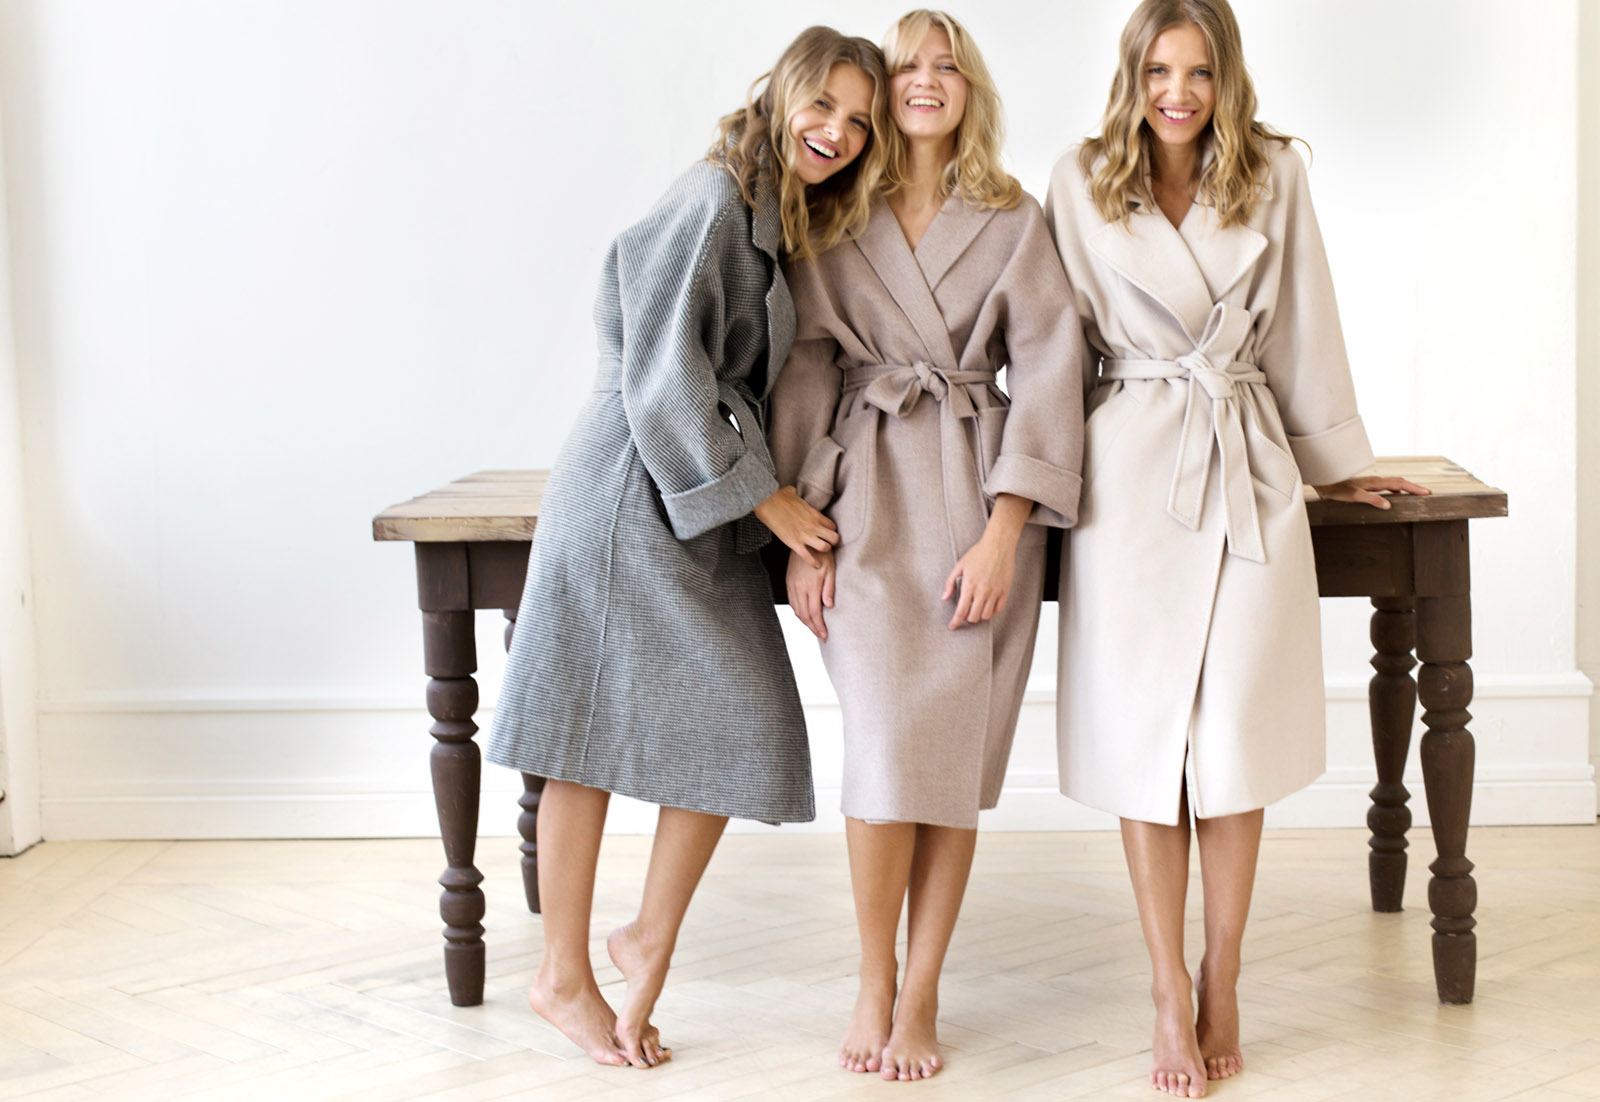
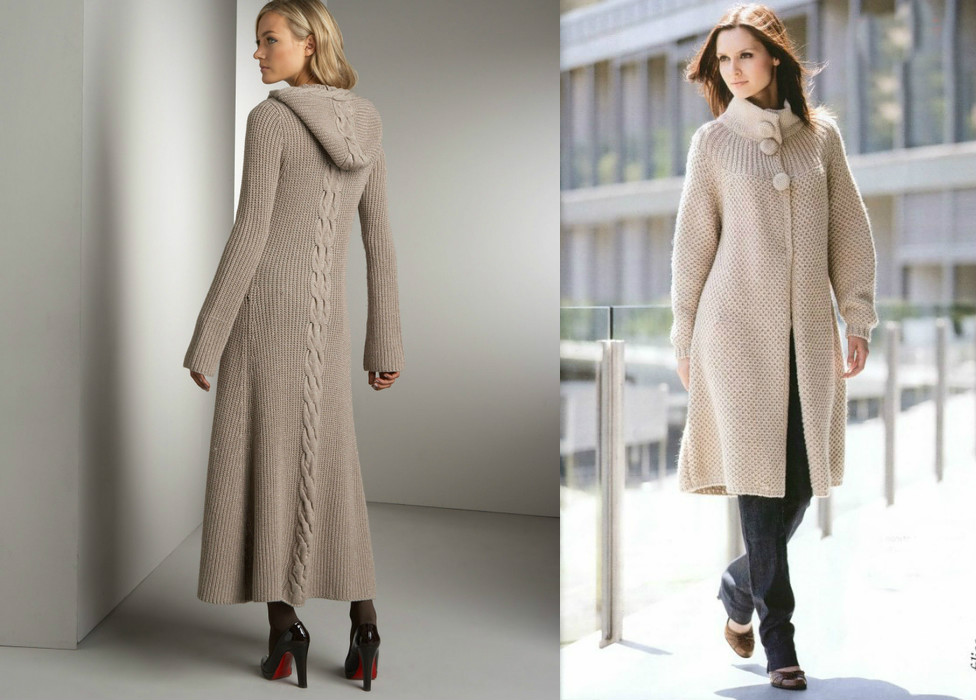
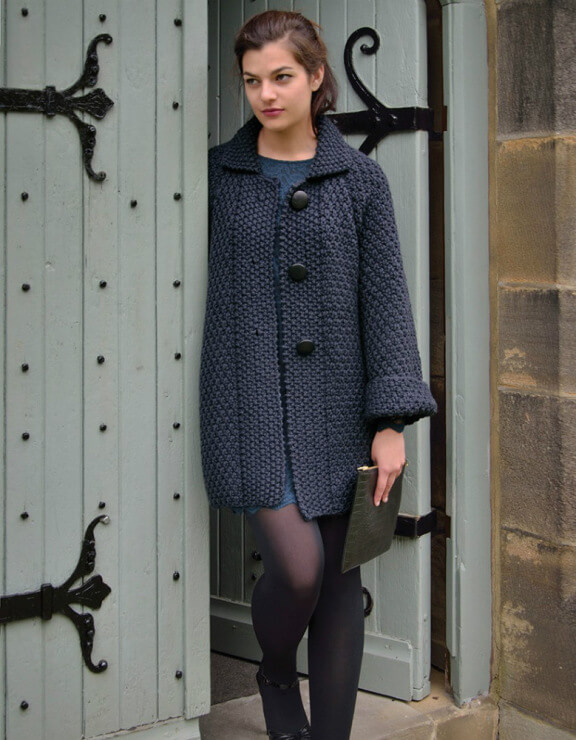
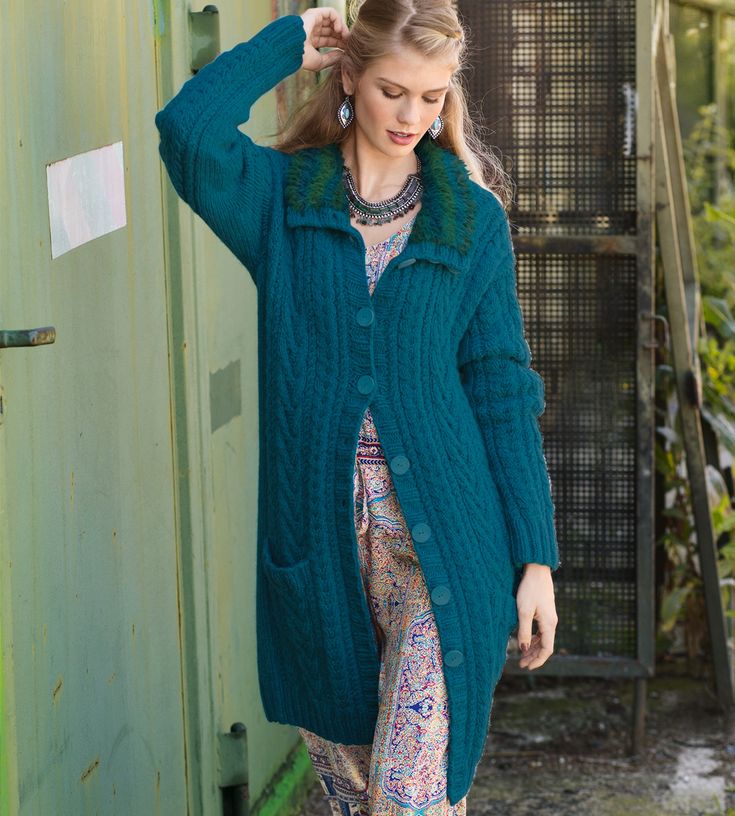
Fashionable knitted items of floor length or slightly shorter are not decorated with a large number of additional details. In such models, the main accent is often the collar or belt, which serves as a decorative element. Buttons can also become part of the design. Large round or square - they make knitted coats original and stylish.
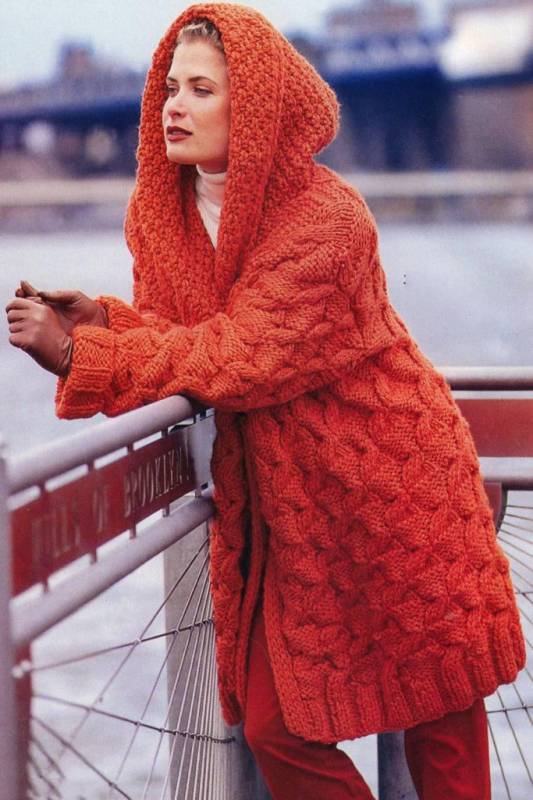
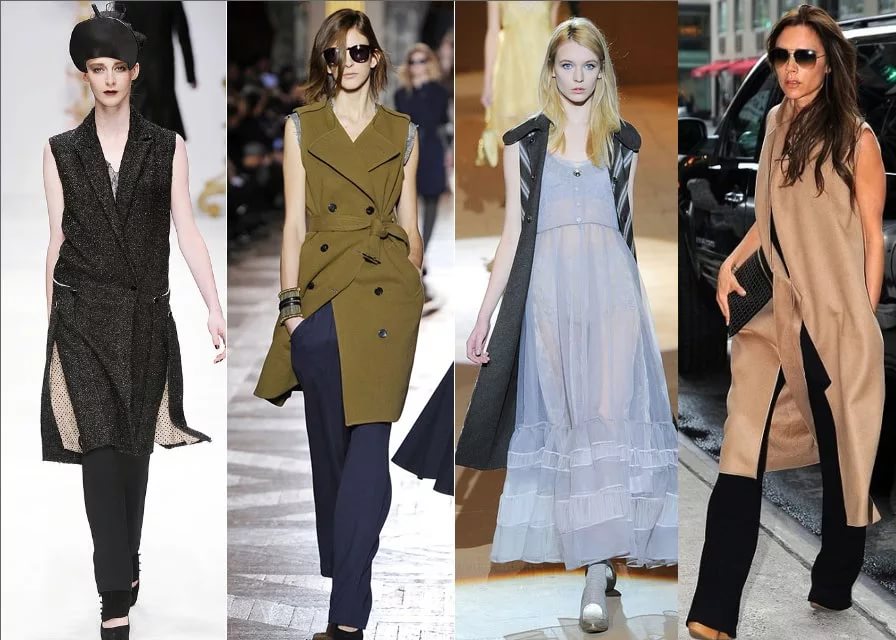
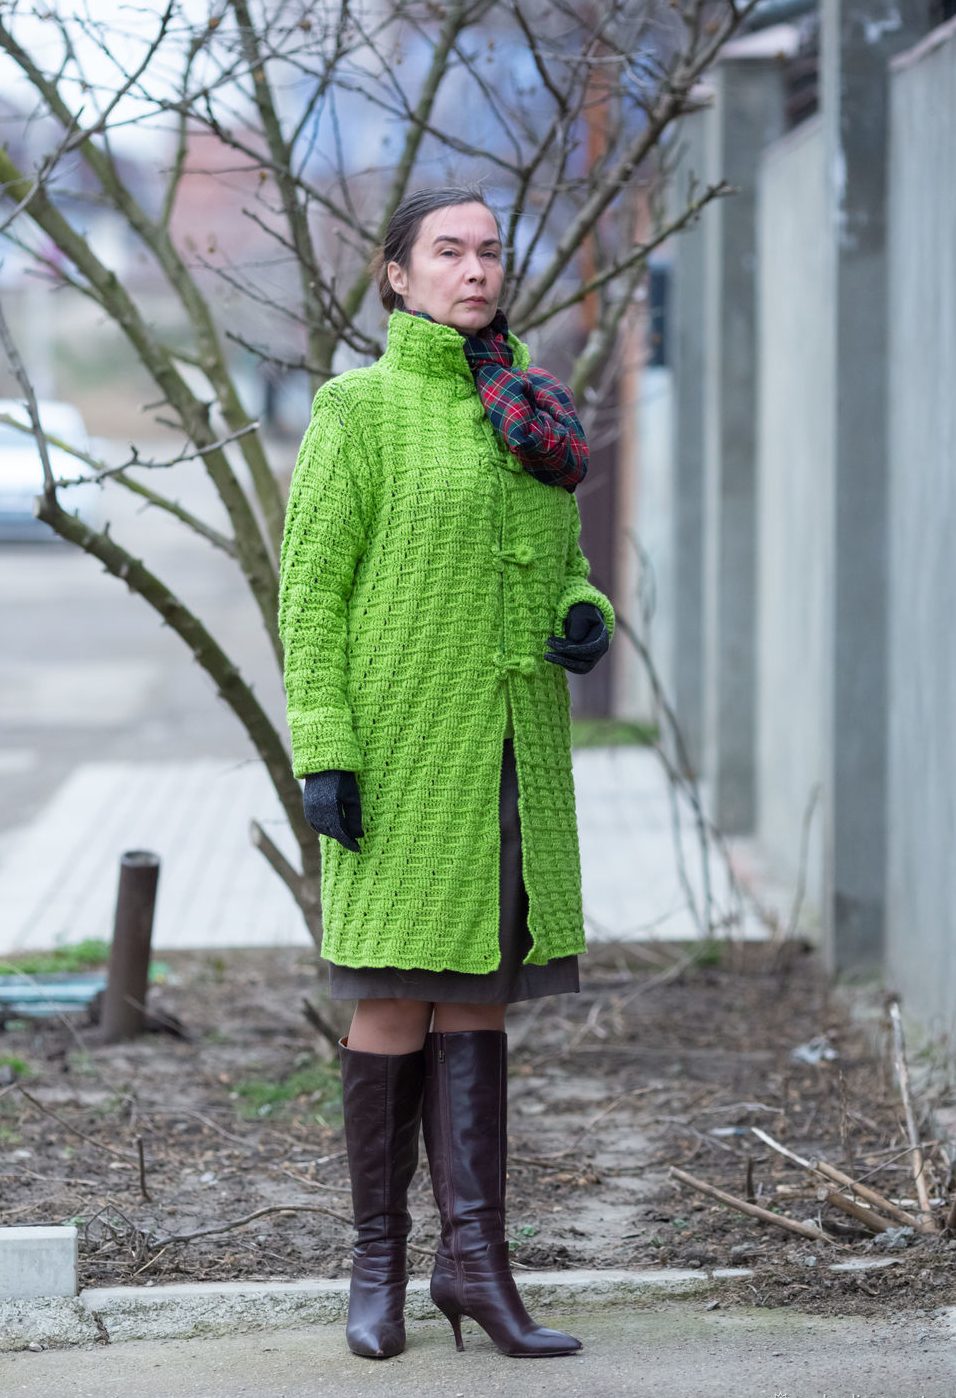
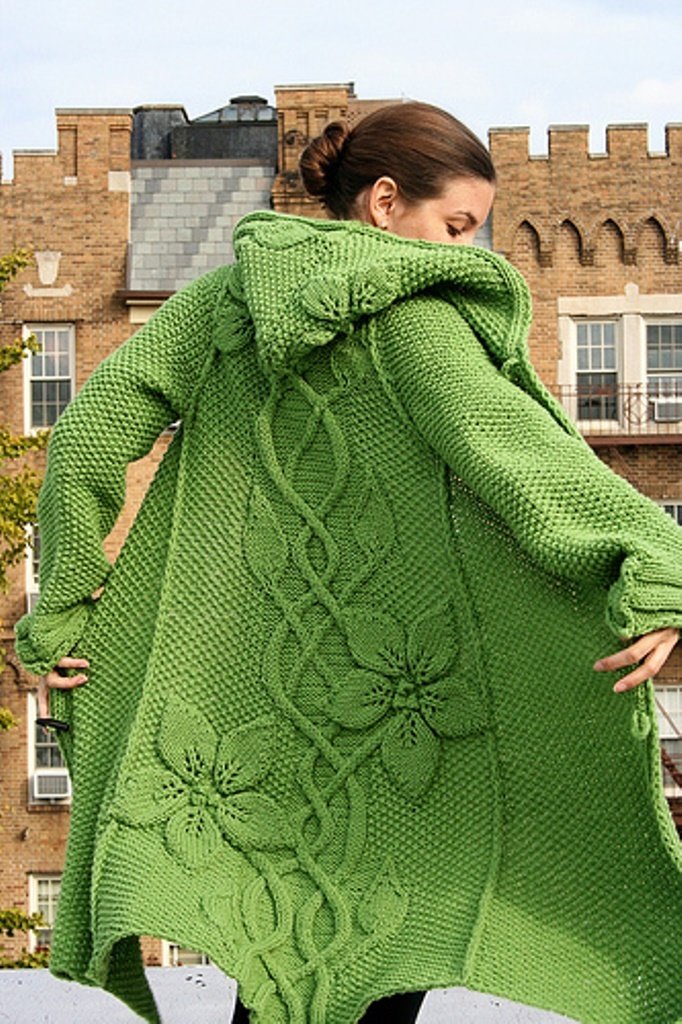
The modern tendency to stand out in the crowd, to be brighter has led to the emergence of various asymmetrical modifications. It is not always clear how they are cut, but it is the mystery that explains the popularity of such products. One of the varieties of knitted coats with a hood has become transformers, when the jacket turns into a vest or a cape. Comfortable oversized models are chosen for their volume, softness, ergonomics, versatility. Such products are suitable for girls with any type of figure, and this is also an ideal coat for plump women.
It is important not to overdo it with large knitting when making oversized models, otherwise you will end up with a shapeless blanket, not beautiful new clothes.
There is a certain difference when knitting a coat for women with knitting needles using different types of yarn. Thicker threads are used to make warm clothes, but they leave less room for choosing a knitting technique. Standard, familiar yarn allows you to realize any fantasy both in choosing a pattern (openwork, braids, and any other) and in terms of modeling. In addition to summer coats, you can also knit a product for cool evenings from regular yarn, but in this case you will need to provide an additional lining so that it is not blown by the wind.
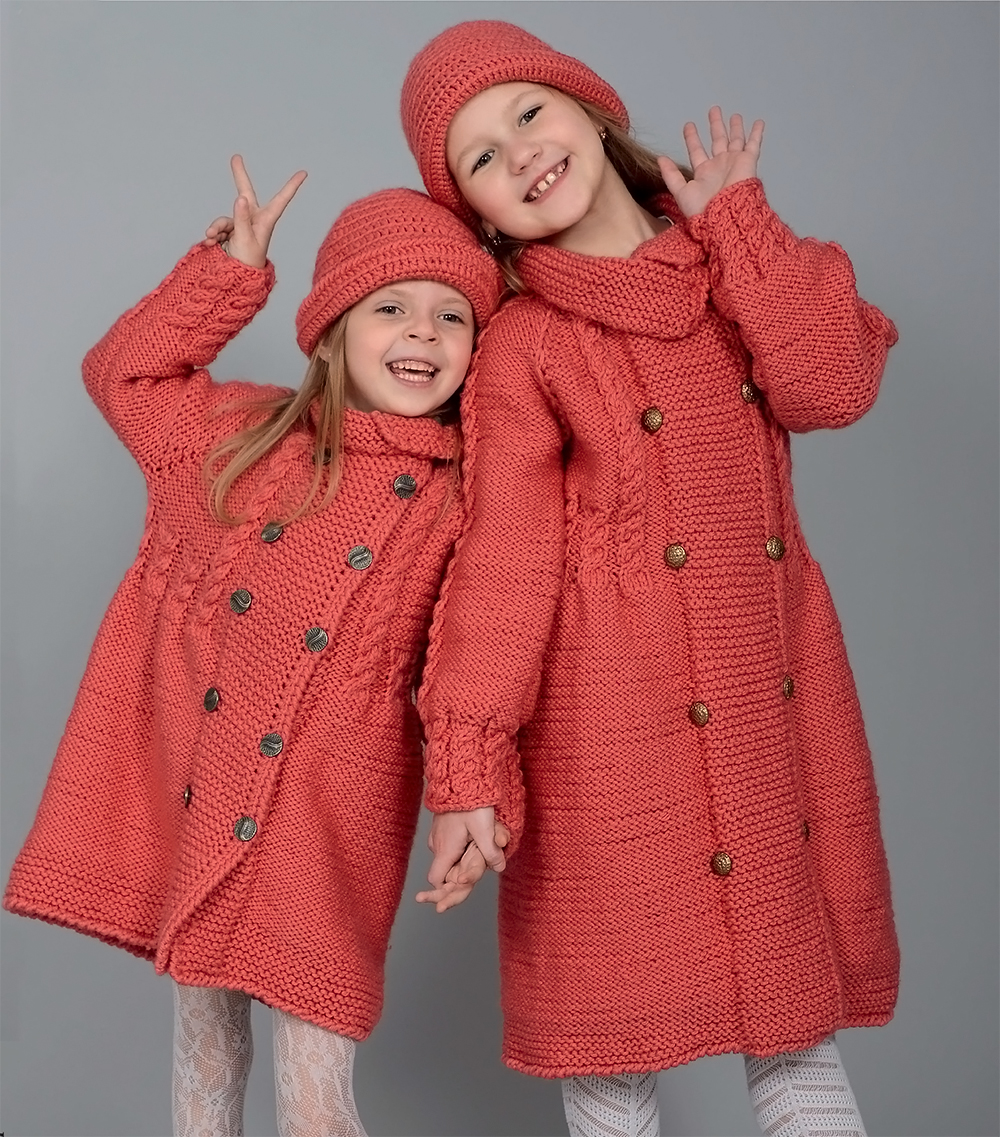
The famous couturiers also paid attention to models for little fashionistas. This season, young princesses prefer flared versions with a belt, such as a cape, trapeze, cape coat or simply fitted.

Materials and tools
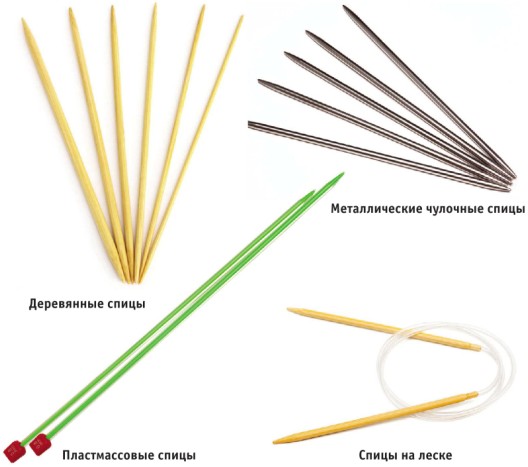
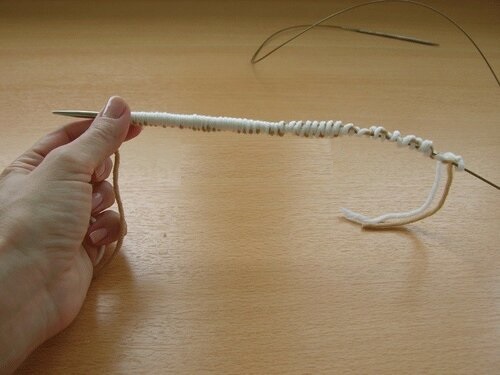
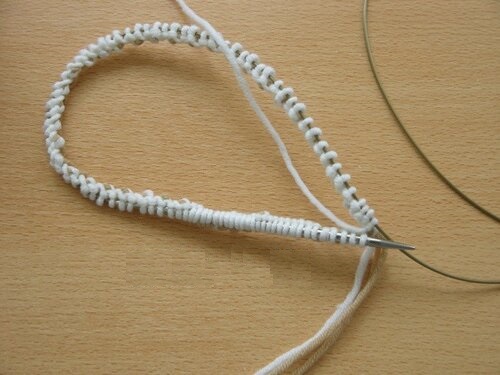
To knit a new beautiful coat yourself, the first thing you need to do is select yarn and knitting needles for work. Thick types of threads are mainly suitable for outerwear. Accordingly, the knitting needles will also be of a large diameter. Alternatively, you can use the finger knitting method, but on the condition that the threads are thicker than 4 mm.
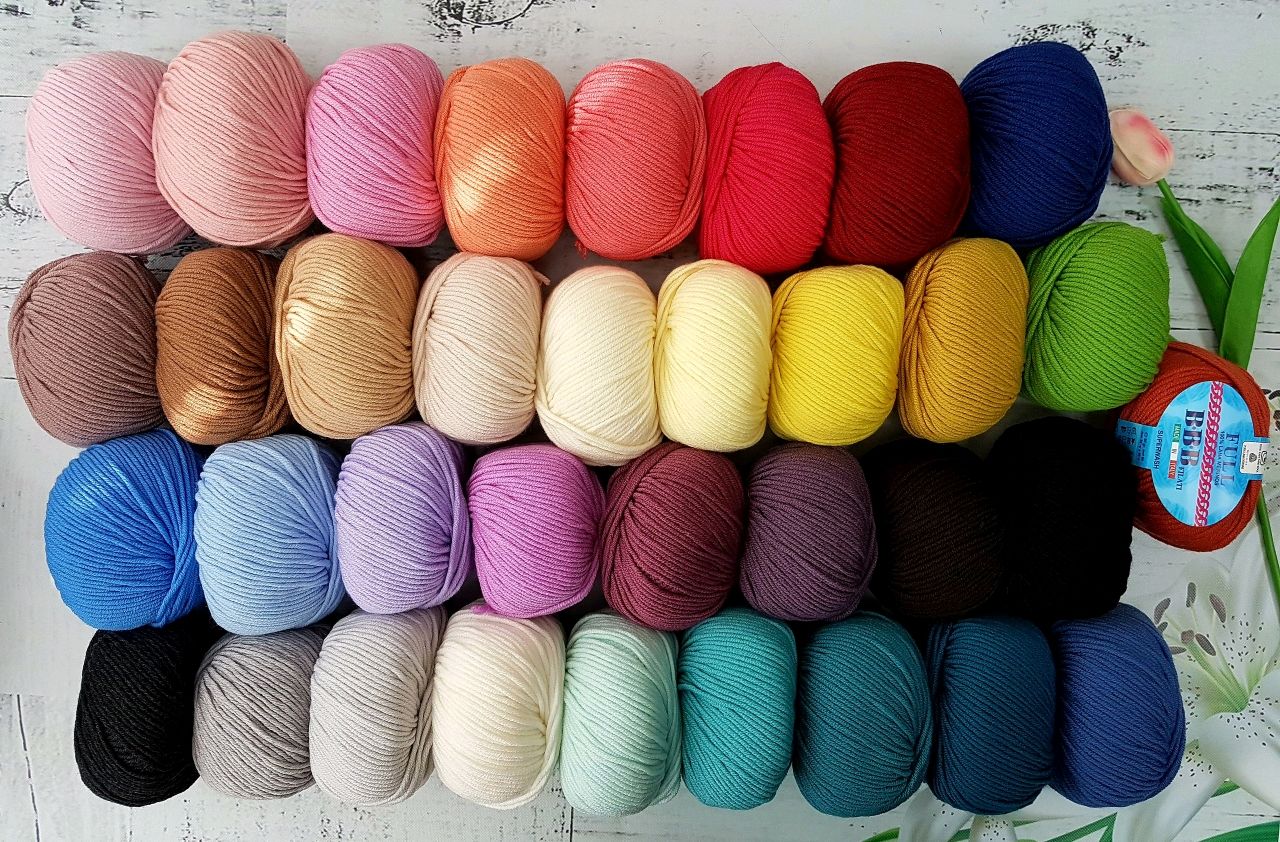
Usually, the pattern for making any product already includes an approximate calculation of the required amount of yarn. This is very helpful for beginners in the process of knitting a coat with knitting needles. Experienced knitters can easily determine how much yarn is needed to make a specific product. They mainly use wool with the addition of various artificial threads. The exception is a light openwork coat - it is knitted on knitting needles from cotton threads (melange).
The diameter of the knitting needles is selected in accordance with the markings on the balls. Usually it is 1 mm larger than the thread thickness. Additionally, markers for marking the fabric into component parts will come in handy for raglan, so as not to get confused when counting loops.
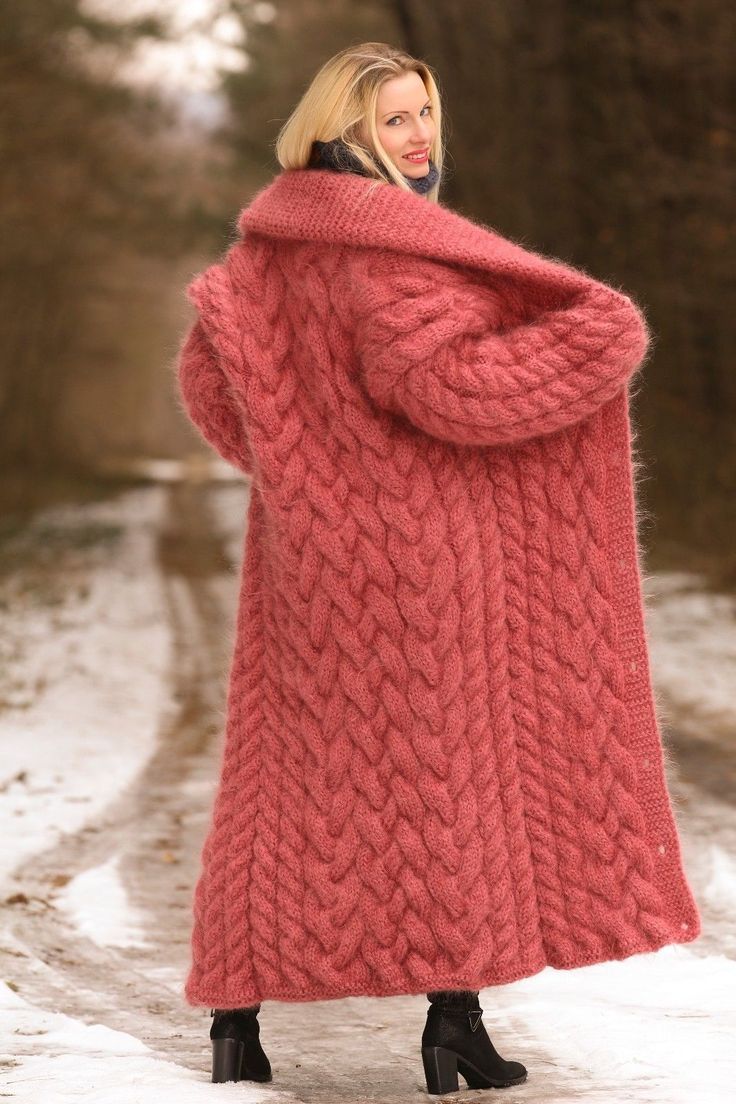
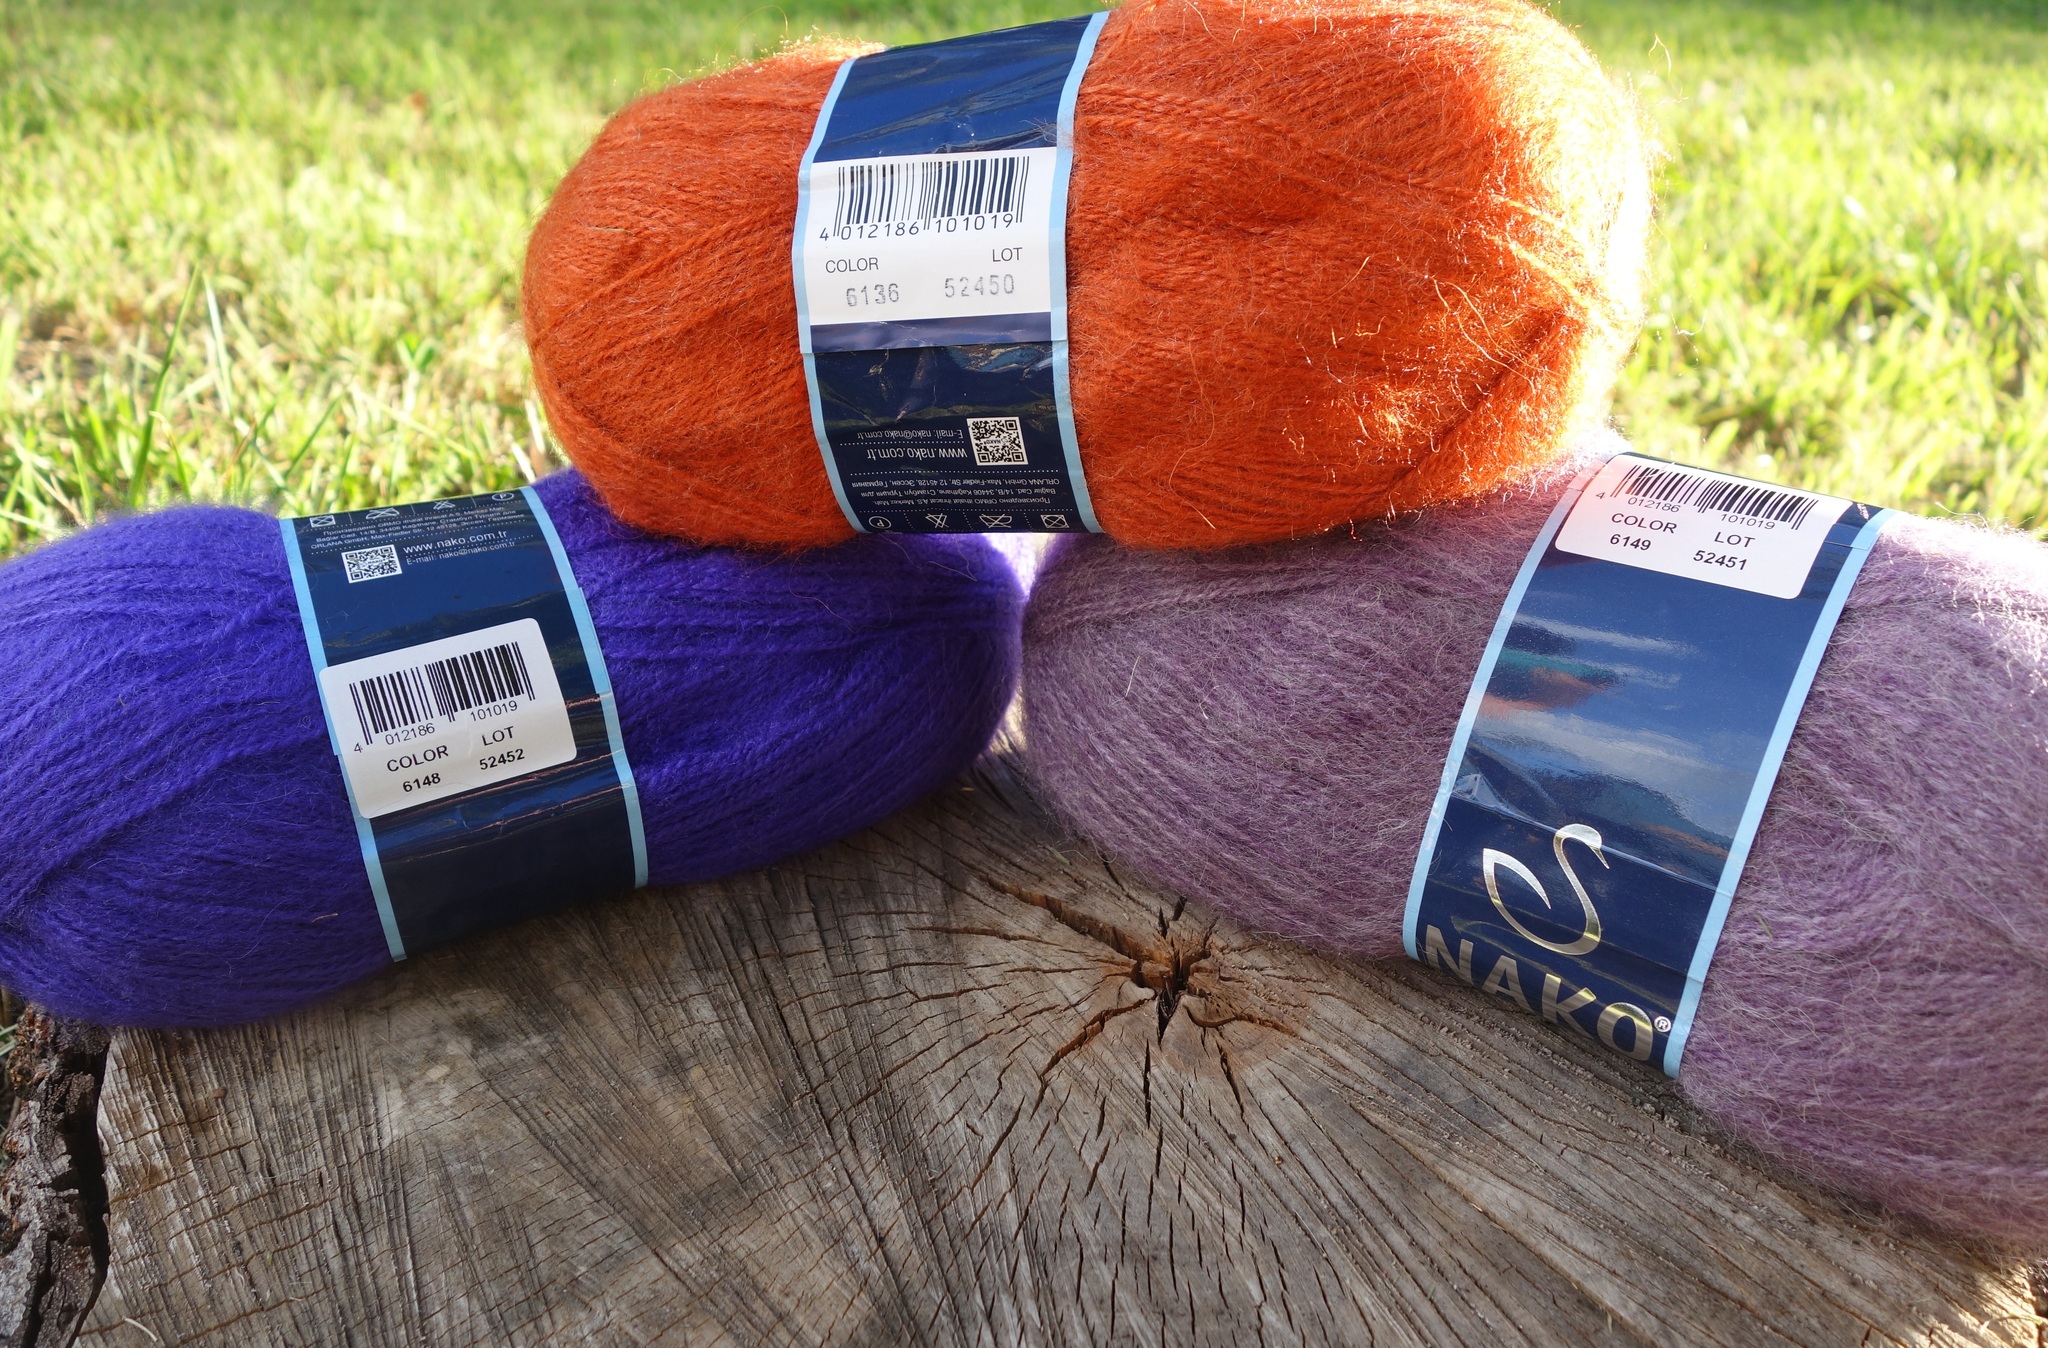
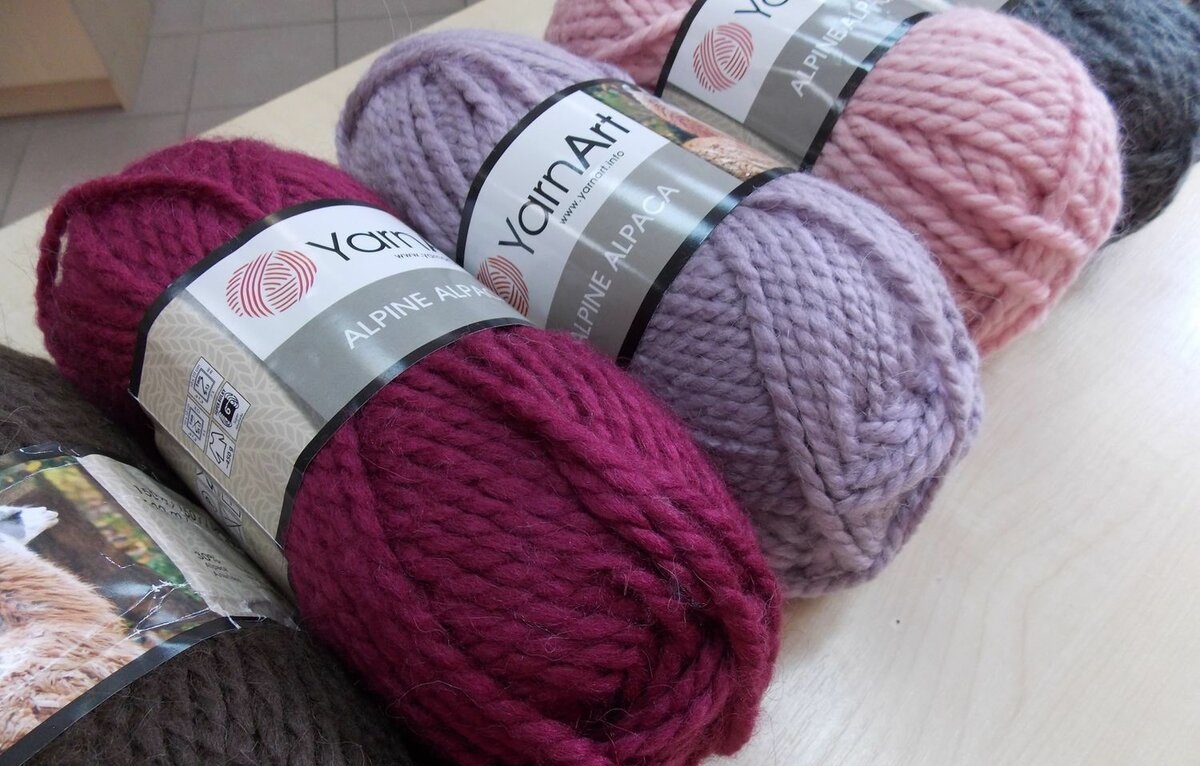
A long coat knitted with knitting needles from thick yarn turns out to be quite voluminous, respectively, the weight of the product will also be significant. To prevent it from being too heavy, you should also pay attention to the density and weight of the threads in advance. The ideal option for a warm budget product is a mohair coat. Other popular types of yarn are merino, alpaca, wool with acrylic. They hold patterns well and are characterized by low weight.
Since the coat is made using yarn with wool added, it is essential to knit a test pattern.
It is recommended to make several rapports, and then wash and dry the finished sample 2-3 times. Only on the basis of the fabric obtained as a result of all these manipulations can the knitting density for outerwear be measured. It is necessary to remember that knitted parts on large sizes stretch in length much more than the sample copy.
If the test fabric has stretched a lot or, on the contrary, has shrunk after washing, it is worth considering how important it is to use exactly these threads. After all, during use, after several washes, a long coat can completely lose its shape and change its size. If the product has shrunk, to correct the consequences of washing, you can try rinsing the item again in cold water and re-stretching or changing the size with an iron. It is best to put the wet product on a personal mannequin to give it the desired size. If the coat has stretched too much, you can try washing it at a higher temperature, but in this case it is difficult to predict how much the size will decrease. These tips are relevant only for wool and mixed fibers; a summer coat made of cotton or synthetic threads cannot be restored.
Techniques and patterns
It is important to decide on the pattern and knitting method in advance, as different techniques may require different amounts of yarn. It is worth considering that when making such a large item as a women's coat, the volume of thread may differ by several balls from what was originally planned.
| Knitting technique | Difficulty level to perform | Yarn consumption |
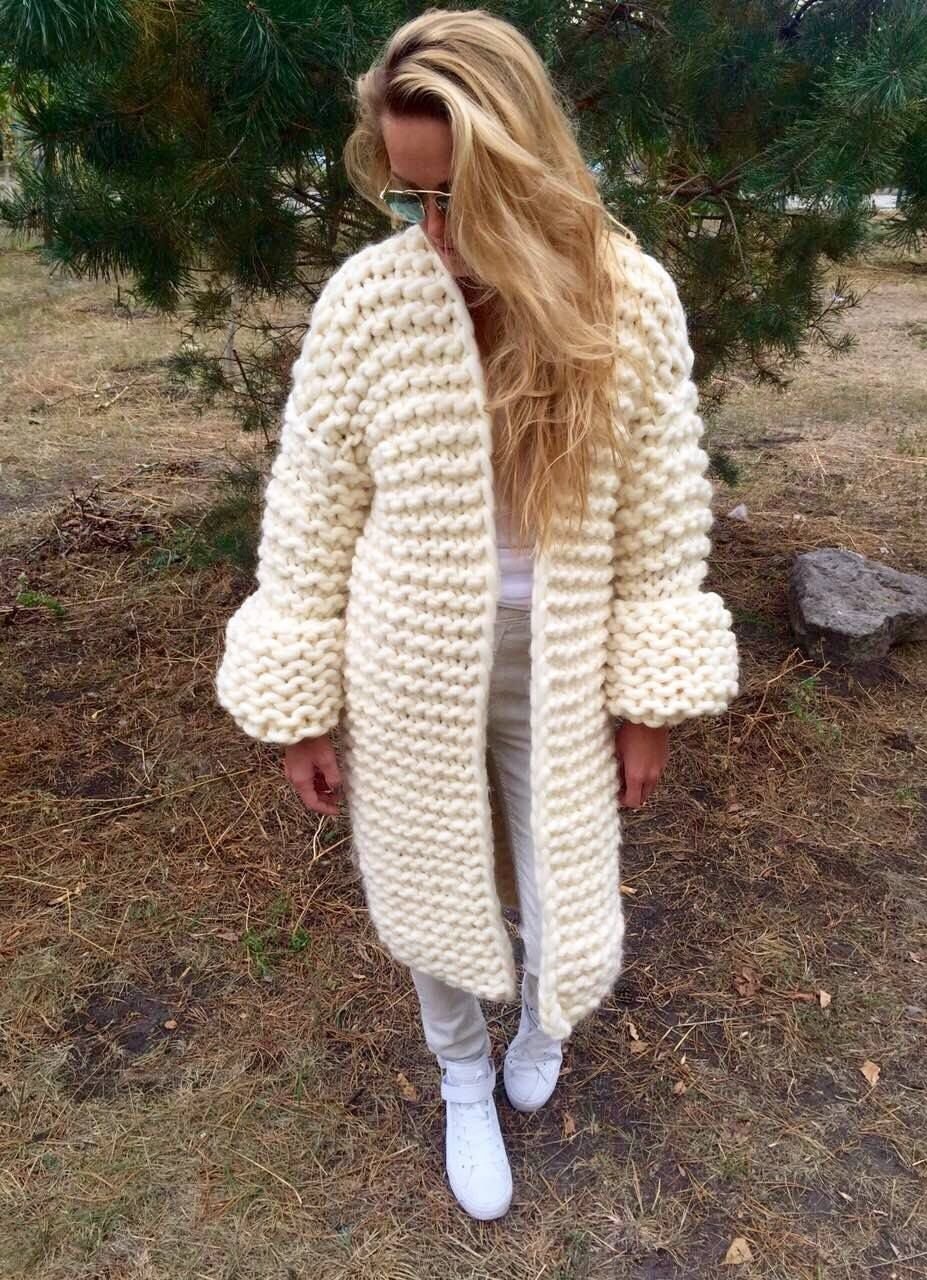
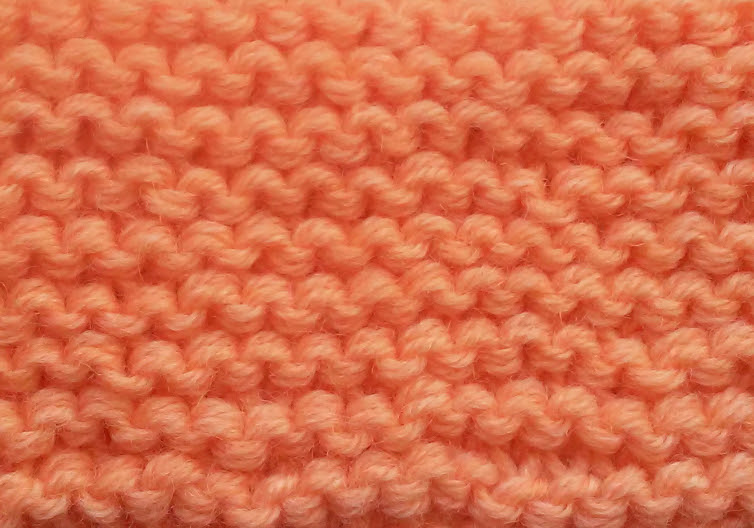
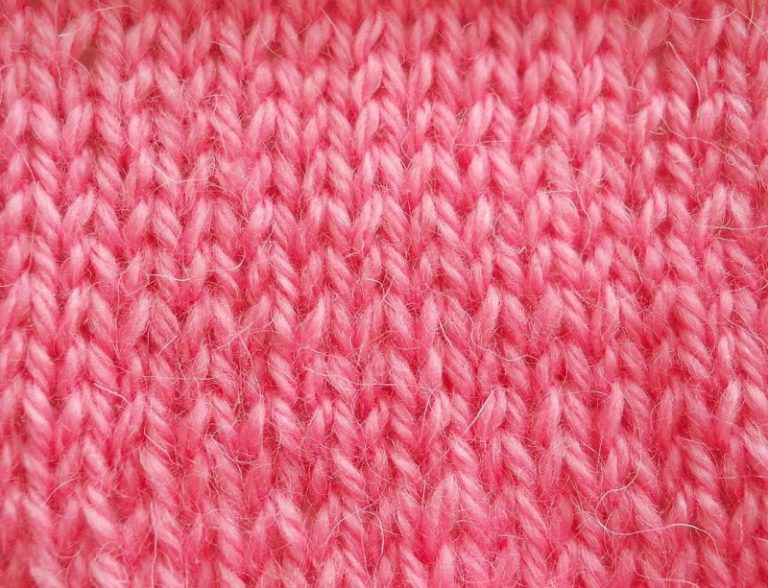
| Garter stitch and stockinette stitch | Easy to perform technique, suitable for beginners | The usual yarn consumption, which is given in the average tables |
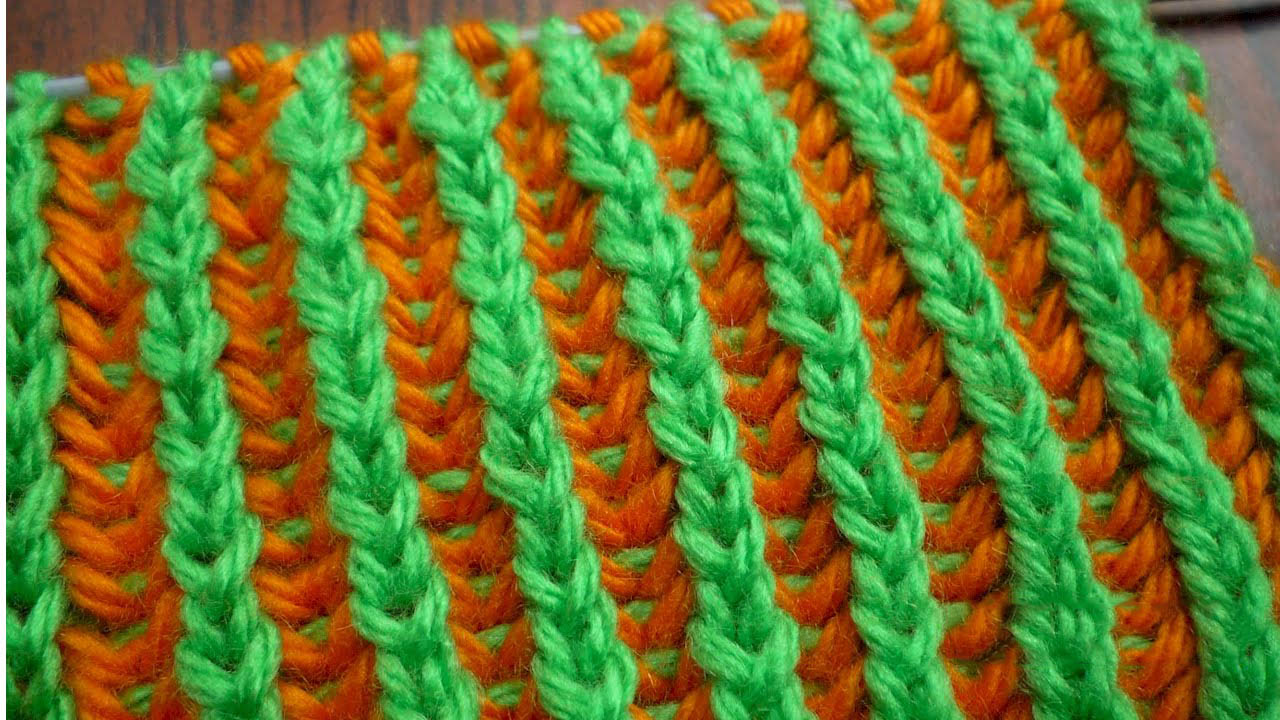
| Rubber | Simple technique, requires attention at first | The yarn consumption is slightly higher than when knitting with garter stitch |
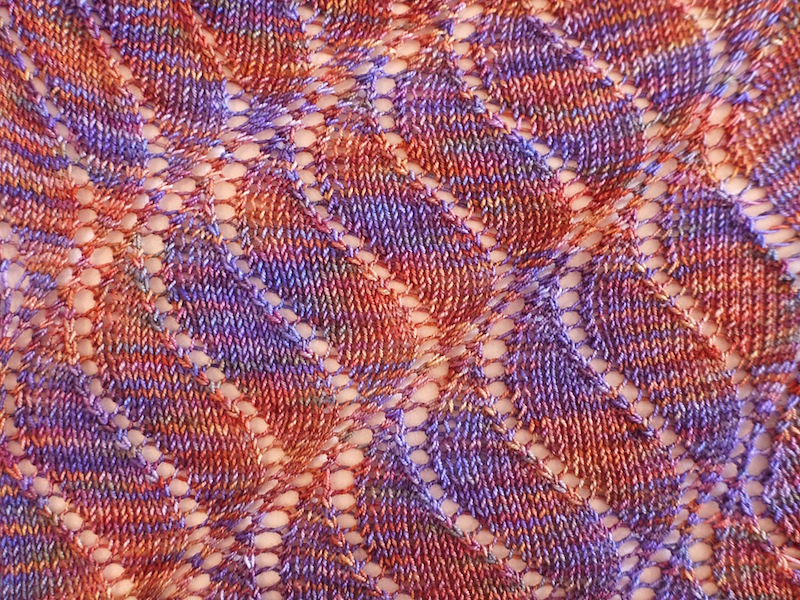
| Openwork | The technique is not complicated, you need to be able to read the diagrams and carefully follow the transition of the patterns | The yarn consumption is low, the volume is created by yarn overs |
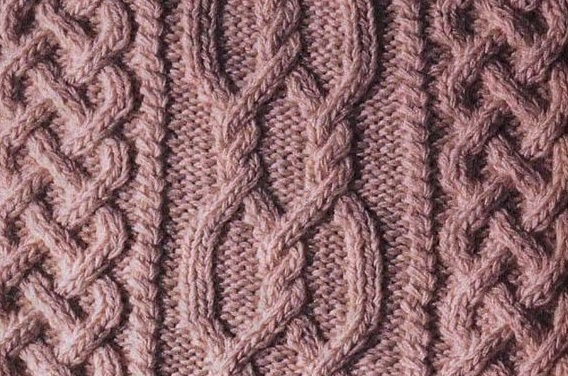
| Harnesses and braids | The technique of knitting braids requires skill and expertise. | High yarn consumption, very dense knitting |
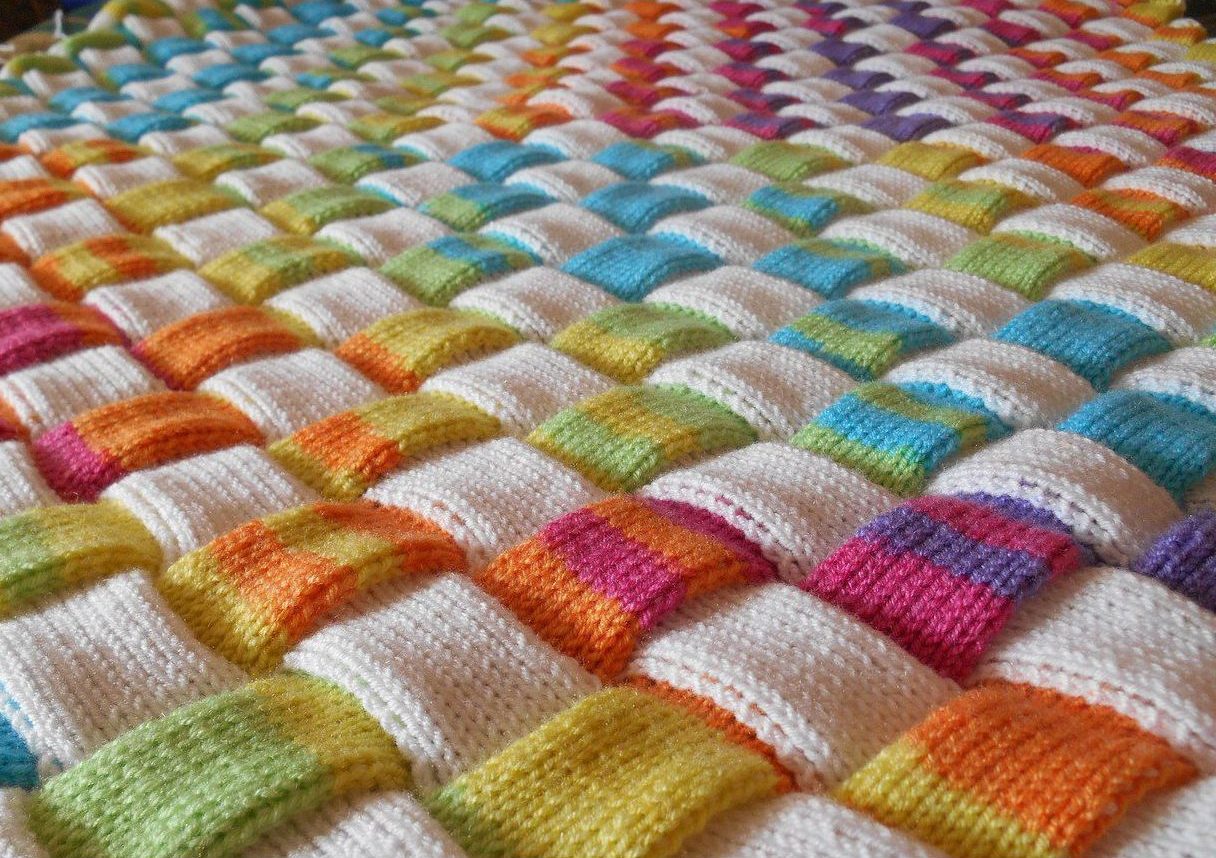
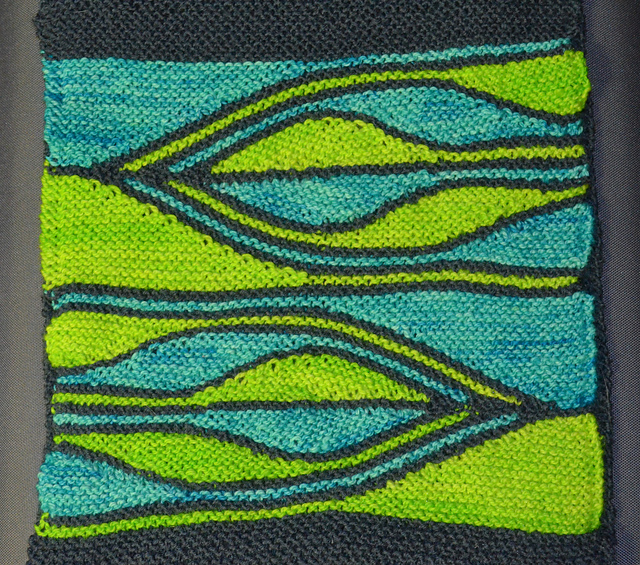
| Enterlac | At first glance, it is a complex, but in fact, quite feasible technique | Yarn consumption is the same as for regular knitting with the front surface |
| Rotary knitting | Knitting a coat with short rows requires attention and a little experience. | Normal consumption |
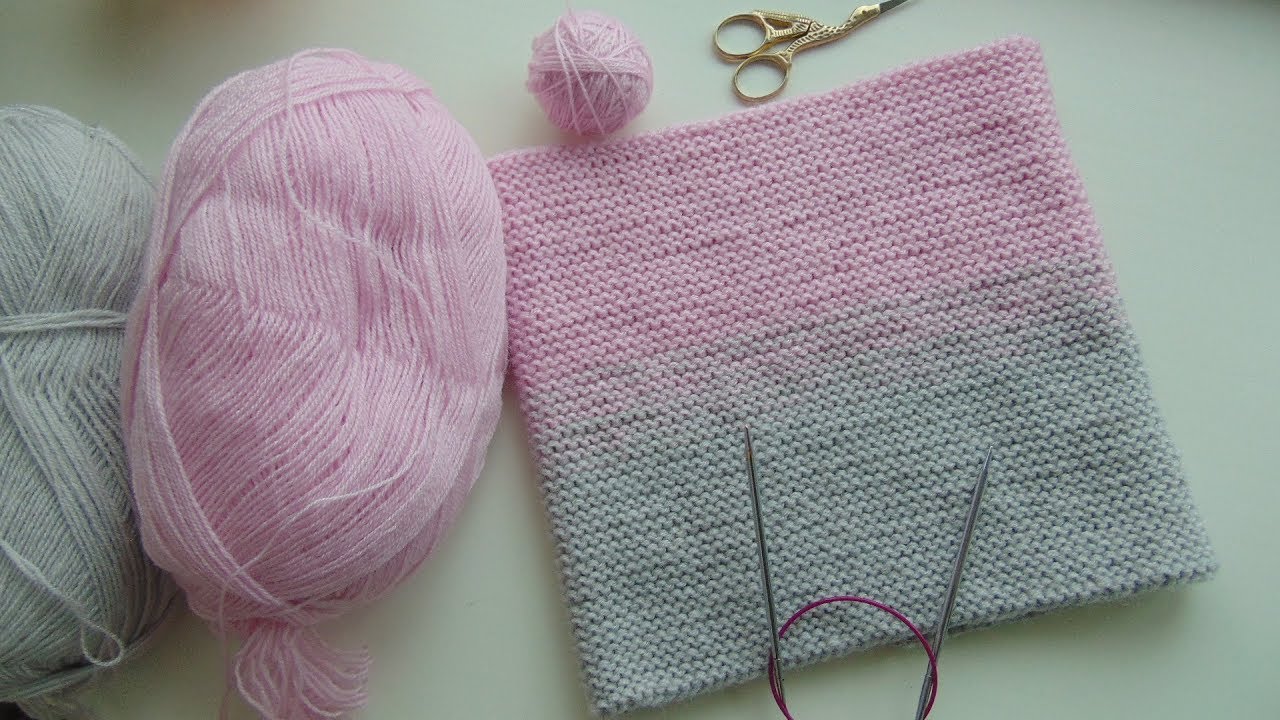
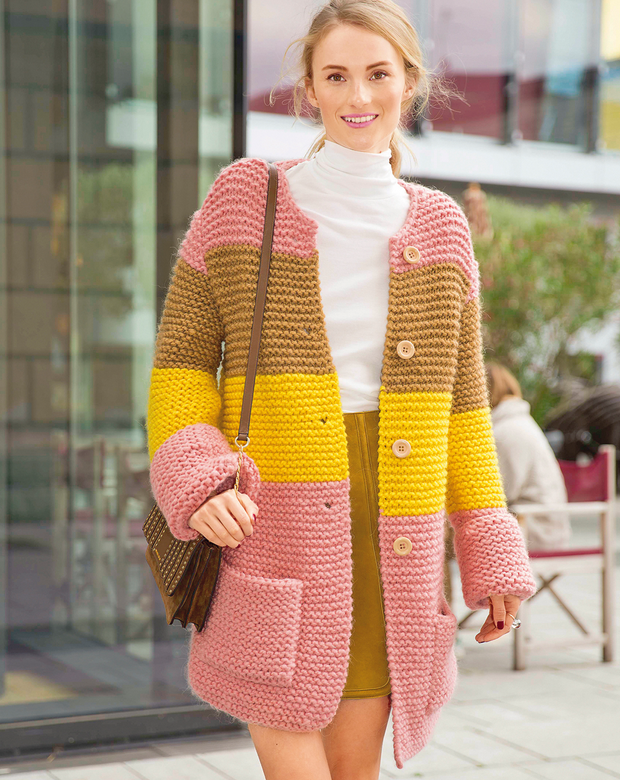
| Gradient | Knitting requires only a sense of taste and attention | Normal consumption |
Another factor that influences the appearance of the final product will be the knitting density. Each craftswoman has her own, special one. And often, according to one pattern or description, you can get a completely different coat size. That is why it is important to knit a sample in advance and make a calculation.
Measurements and pattern
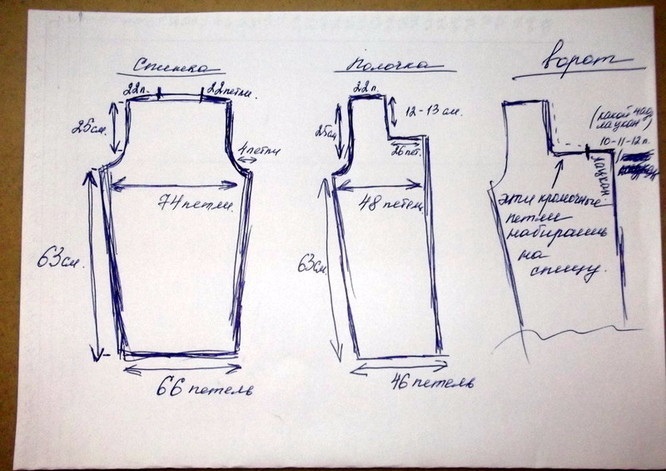
If you knit using ready-made patterns, you just need to strictly follow all the steps. If you want to create a custom product, you need to draw at least an approximate diagram. To create a pattern, you can take a ready-made one and adapt it to your size. Often, the templates indicate the approximate number of loops for several sizes, you just need to choose the right one.
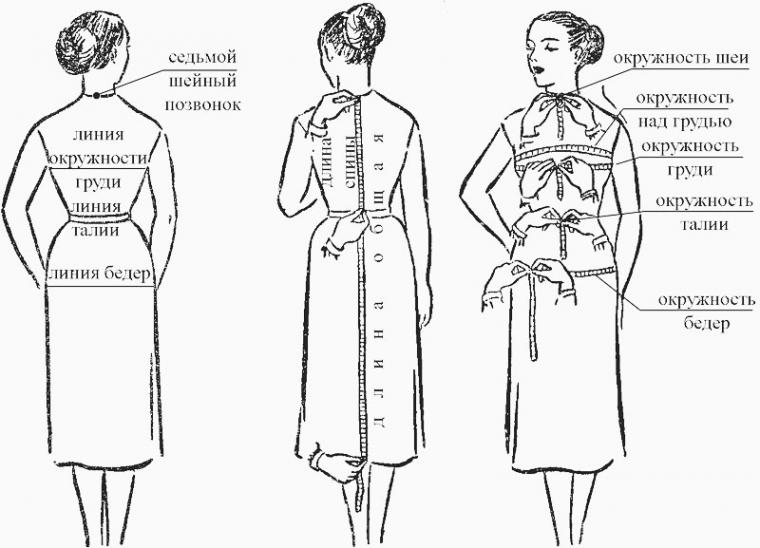
When creating your own pattern, you will need to take several measurements: neck circumference, chest half-girth, waist, hips, coat length (to the waist, along the back). Preparing patterns is not that difficult, however, it does require some experience and skill. Accuracy of measurements and vision of the final result - all this comes with experience.
When constructing patterns for a loose-fitting coat, it is essential to make allowances at the chest and waist, they vary from 3 to 10 cm depending on the model. This is done so that the finished product falls freely, and does not fit tightly along the contours of the figure.
Knitting stages taking into account the model
There are many patterns for knitting all kinds of coat models, intended for both beginners and experienced needlewomen. Simple options are recommended for beginners. Once you gain experience, you can take on more complex designs and experiment.
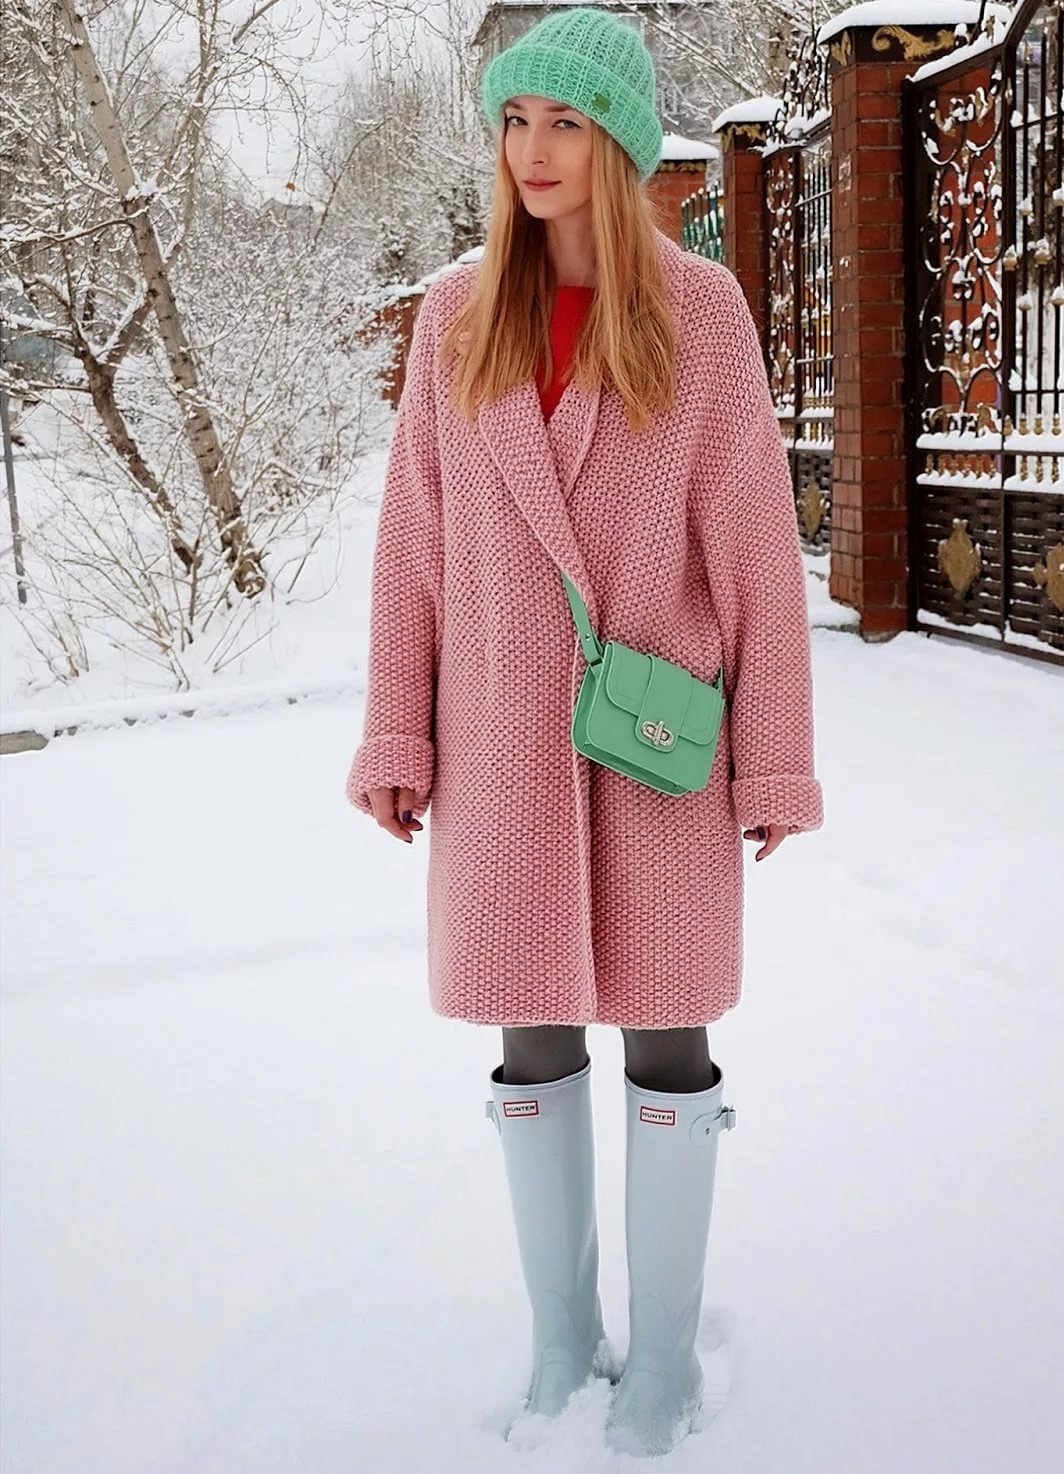
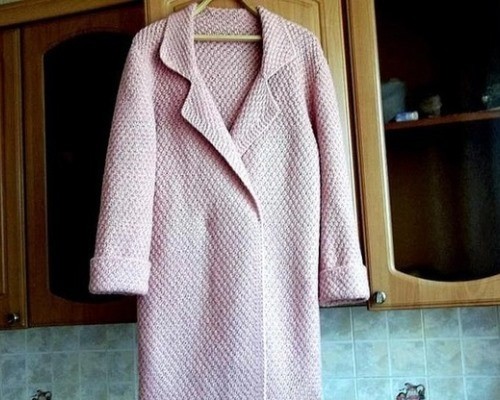
Oversized from thick yarn
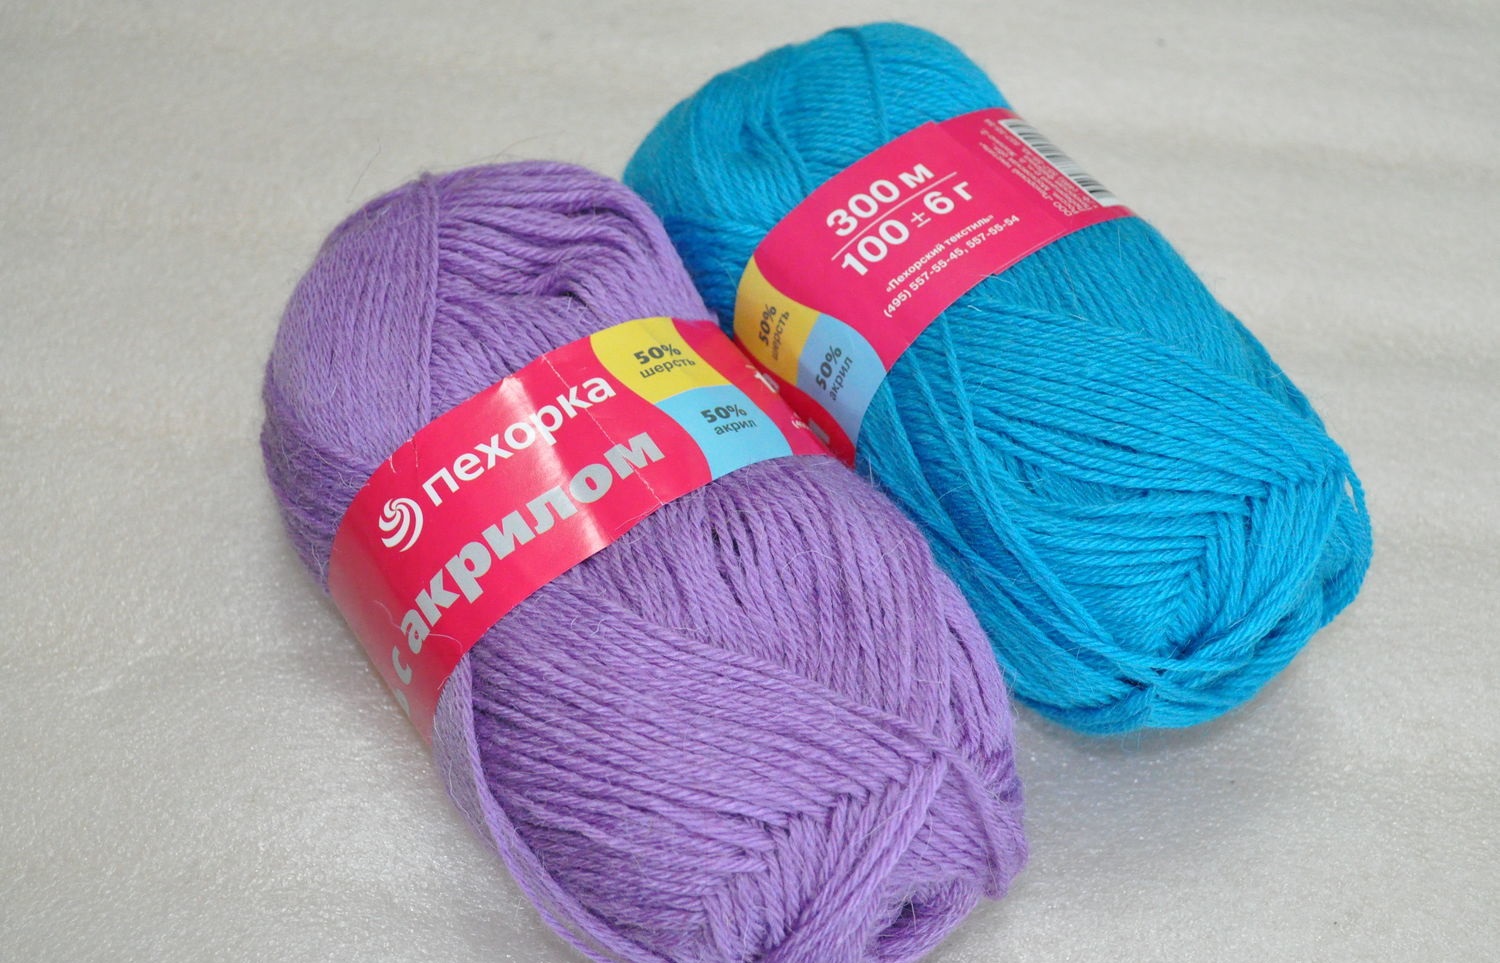
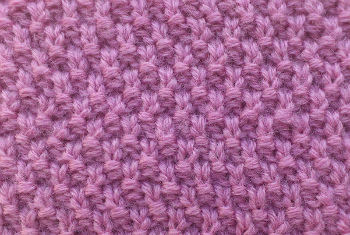
To knit an oversized coat, use threads with a density of 100 g per 100 m and 6 and 5 mm knitting needles. You will need about 12 skeins of yarn. The main motif is "tangle", but you can use other similar small, but fairly dense patterns.
The process of making a model consists of the following stages:
- Cast on about 70 stitches (for a coat size 46).
- Knit the back in the form of a rectangle with a slight expansion towards the waist line, adding 2 loops in each row. The expansion is done so that the coat is slightly narrowed at the bottom. From the waist to the armhole line, the fabric is knitted straight.
- Knit the armhole by decreasing 4 loops on both sides in one row. Then knit straight for about 25 cm.
- The loops are closed along the shoulder line, and another 2 cm are knitted to the neck line.
- Stop knitting, but leave the loops for the collar on the needles.
- Similarly, knit the front shelves (left and right separately). The size of the shelf is equal to half the back with an allowance for the chest circumference.
- Having knitted to the collar line, decrease the stitches to the entire width of the neckline and knit straight to the shoulder line.
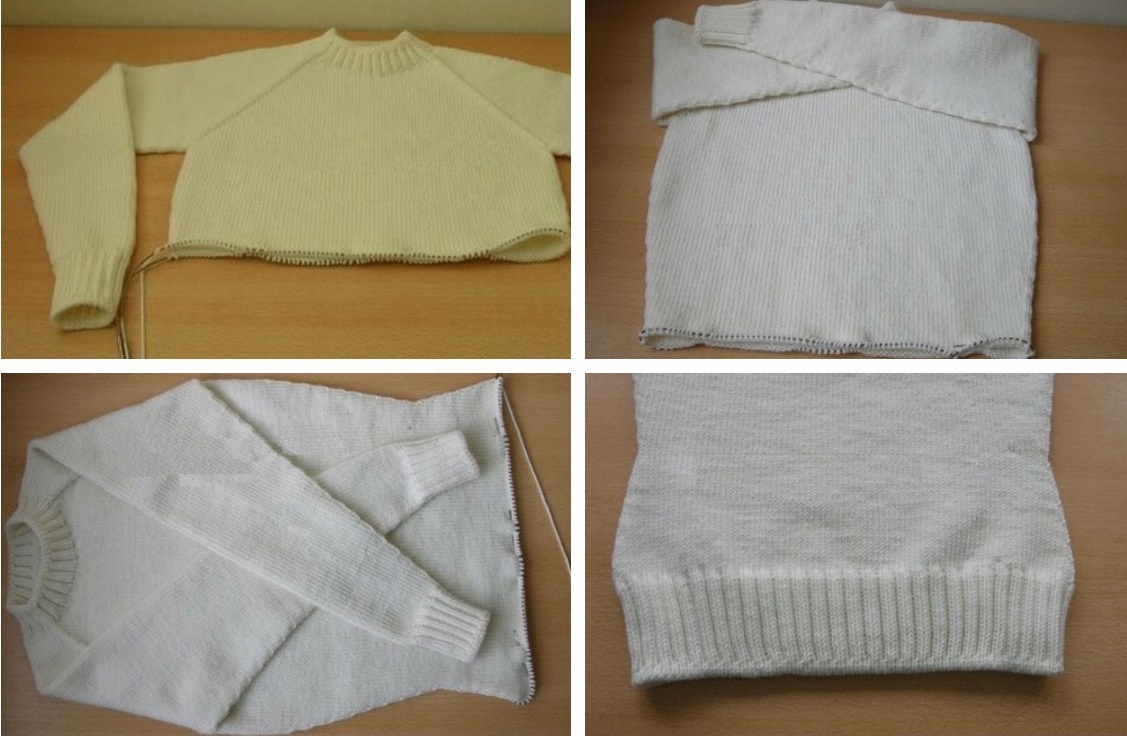
- Close the loops at the edge of the product, sew the shoulders of the back and front pieces together.
- The coat is made with knitted long sleeves. They are knitted from the shoulder to the cuffs, so it is easier to check the length of the finished piece.
- The sleeve is knitted from the armhole loops, 5 loops are cast on from one side of the shelf, a loop is caught from the shoulder seam and 5 more loops are knitted from the other side of the product. Then in each row it is necessary to add one loop at the edges until the entire armhole is on the knitting needles.
- Knitting continues until the desired sleeve length. It can be straight or narrowed by decreasing loops throughout the entire fabric during the knitting process.
- Without knitting 5-6 cm to the end, you need to change the knitting needles to a smaller diameter and knit the remaining length.
- Change the knitting needles back to the previous ones and make the sleeve cuff.
- The last thing to knit is a collar of any shape from the loops remaining on the knitting needles on the back and additional loops of the coat shelves. The loops are taken in accordance with the width of the collar lapel. It is more convenient to knit on circular knitting needles, as it produces a fairly wide fabric. The length of this element can be any.
- To fasten the wrap of the coat, you can provide hooks or 2 large buttons; in the latter case, you will need to knit the loops first or they can be sewn on top.
The finished product must be washed and dried, observing the temperature conditions recommended by the yarn manufacturer. The coat can be decorated with additional elements. Large bright decorations on the collar look beautiful, focusing attention on the upper part of the product.
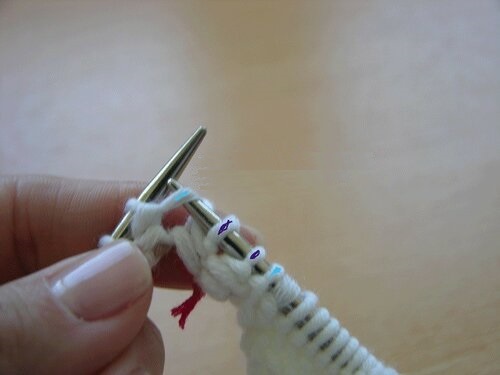
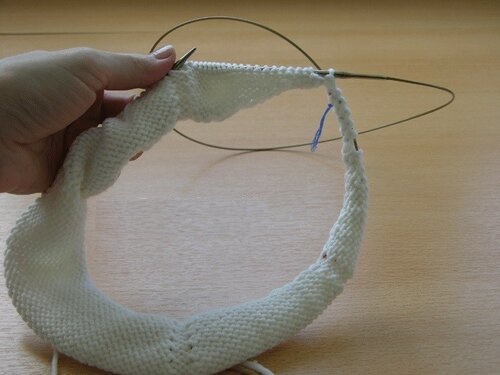
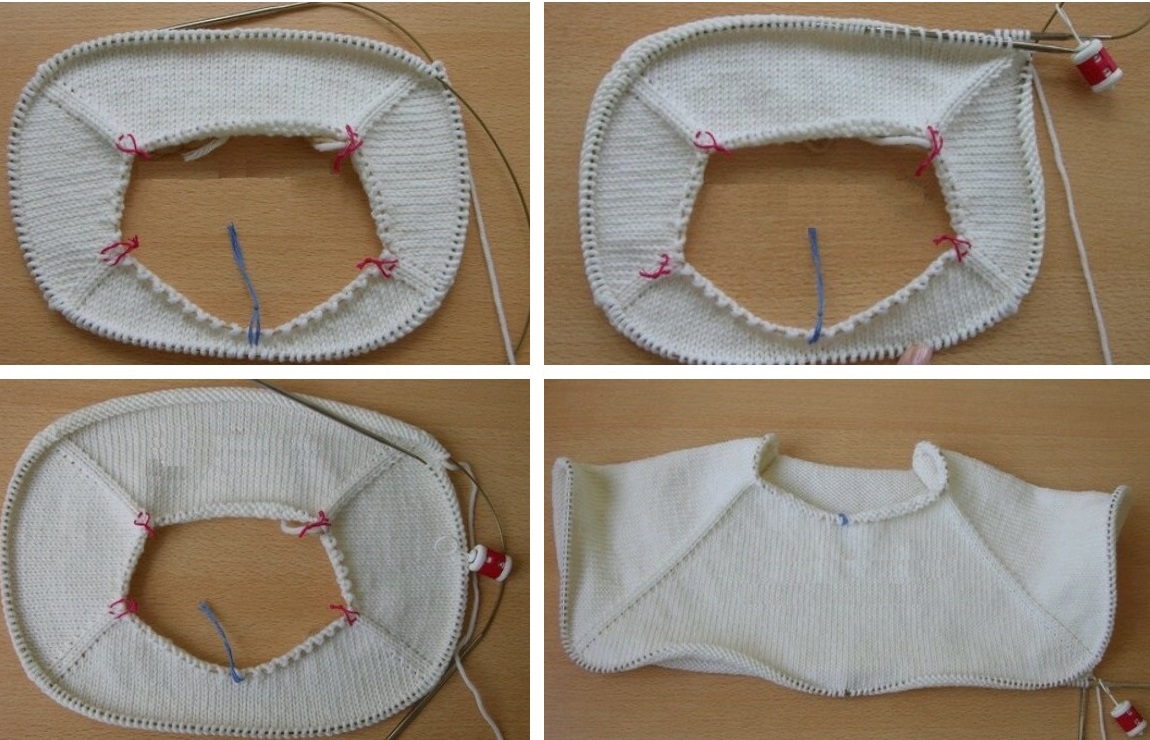
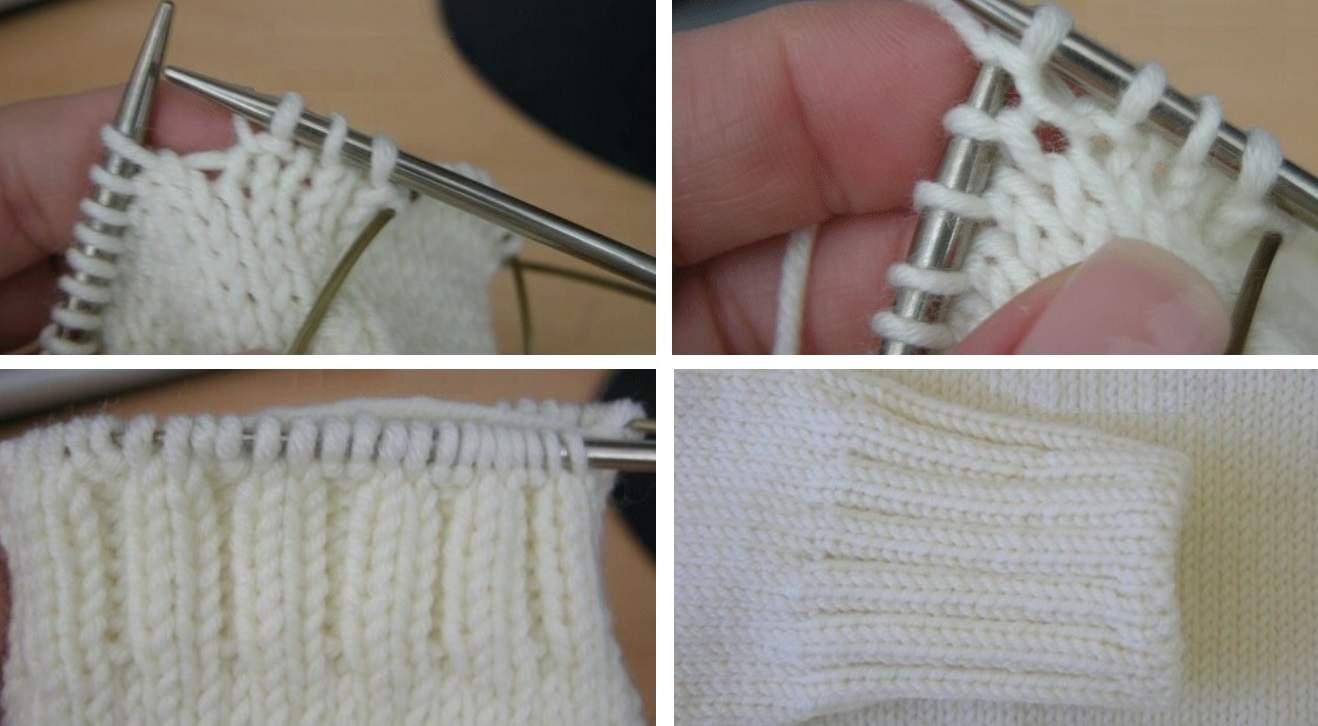
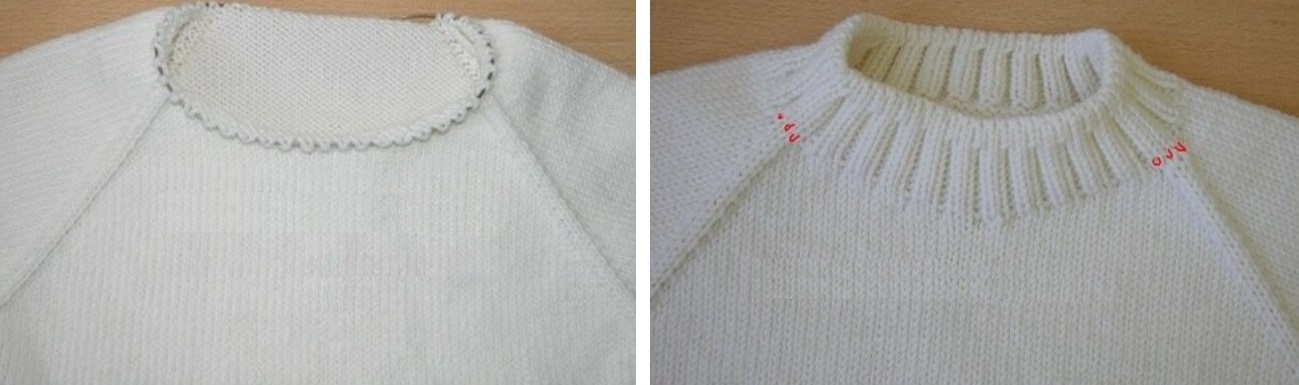
Raglan
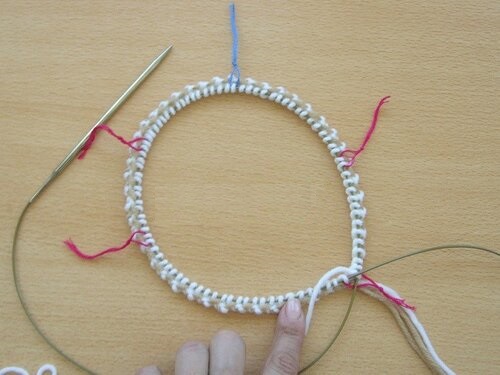
Knitting a raglan or seamless coat with large knitting will certainly appeal to those who like to create simple and beautiful products in a short time. This model is most often performed from top to bottom. The number of loops for an increase for each part of the product is pre-calculated. For work, you need circular knitting needles of different sizes: thin ones - for knitting the neck and collar, thick ones - for the main fabric.
To make individual parts of the raglan, you need to calculate the knitting density based on the number of loops per 1 cm of fabric.
A knitted coat is made with knitting needles as follows:
- The number of loops required for the neck is cast on. For size 46, this is approximately 108 loops.
- The circle is divided into 8 parts. One of them will go to the sleeves, and 3 - to the back and shelves. Markers are placed at the control points.
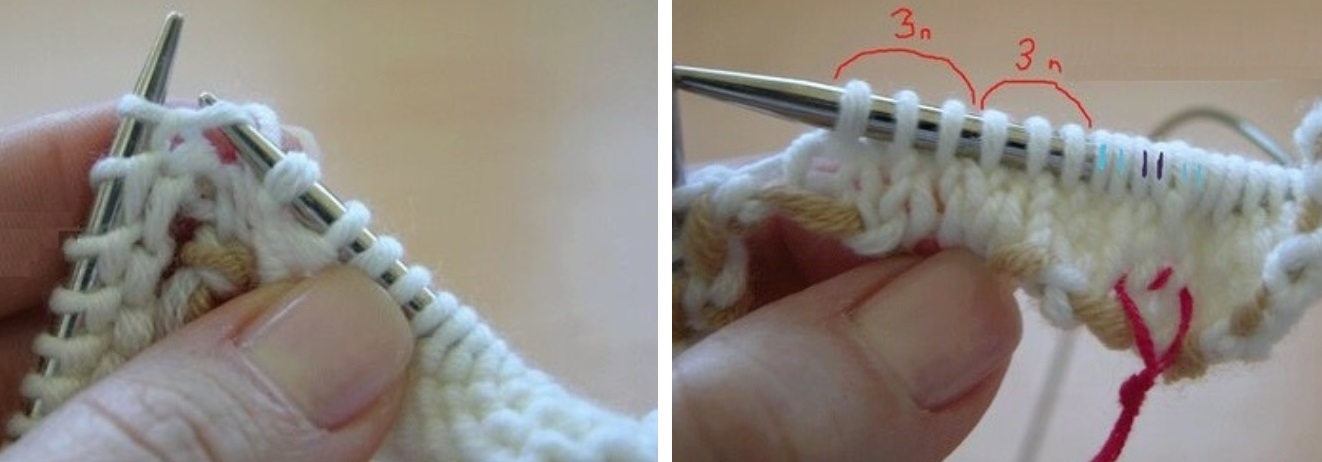
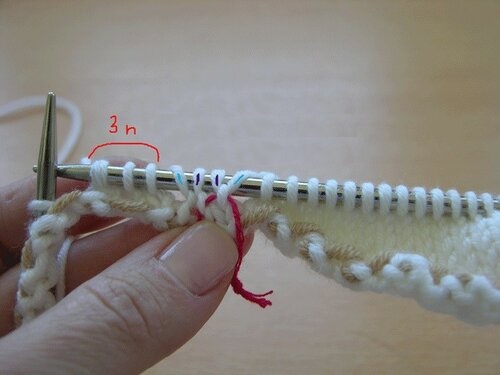
- Loops for raglan lines are subtracted from the total number of loops. In this case, 8 loops at the rate of 2 loops for 4 raglan lines.
- The remaining 100 loops are divided into the front, back and 2 sleeves (12 loops for each sleeve and 38 loops for each front and back of the coat). The division points are marked with knitting markers.
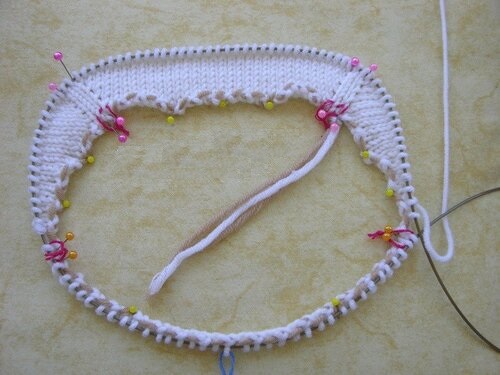
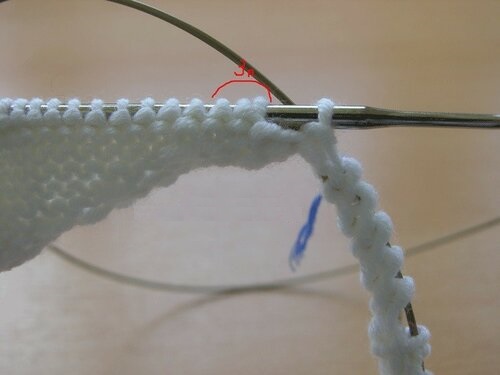
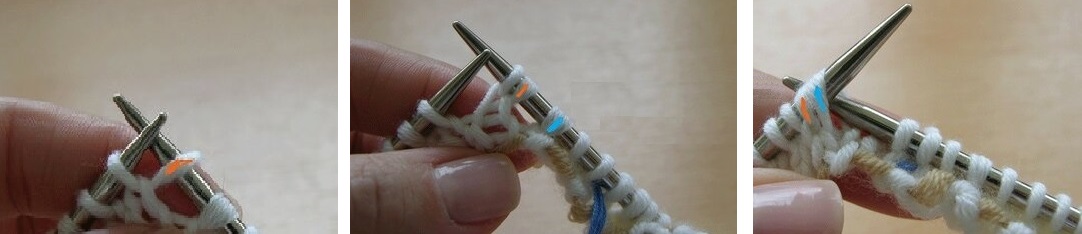
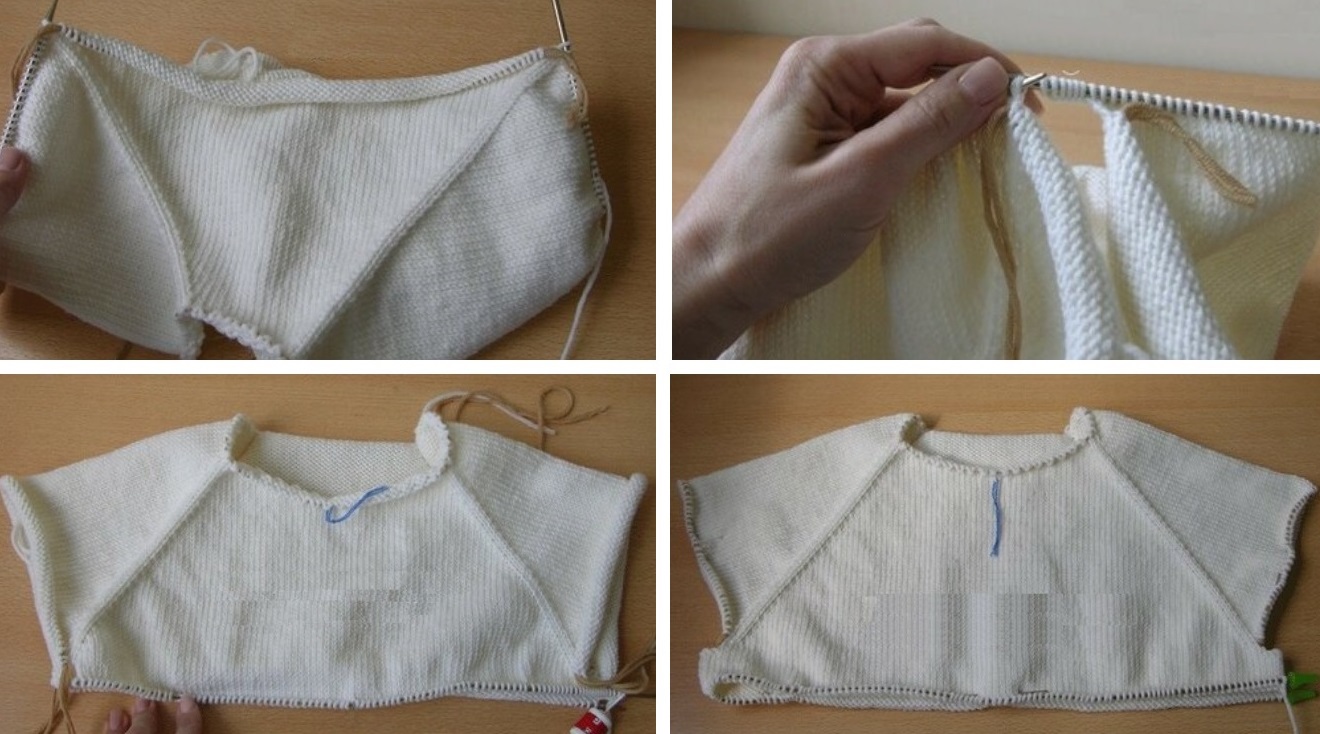
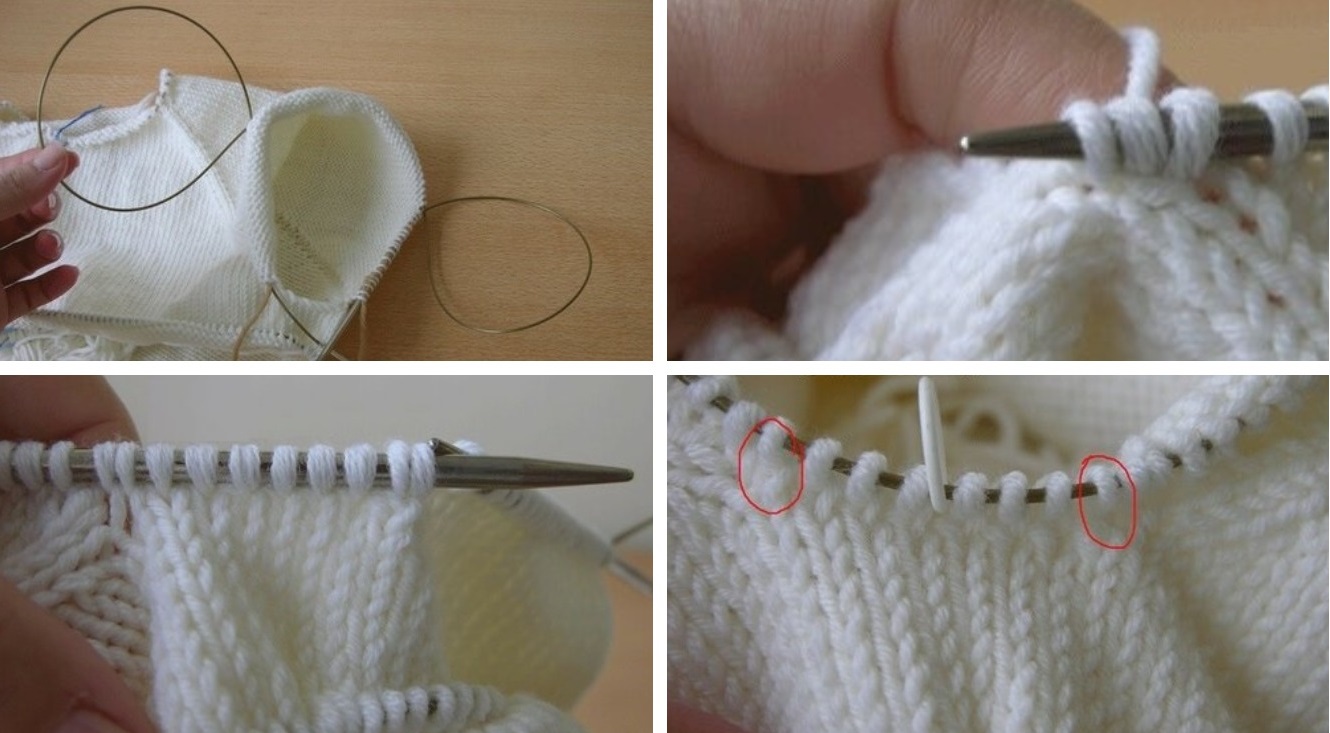
- The upper parts of the front and back shelves are first knitted as a single piece from the neck. Visual division into separate elements occurs along the line of raglan bevels, which are formed by adding loops to each part of the knitting along the dividing marks through a row. This results in 8 additional loops on every 2nd row.
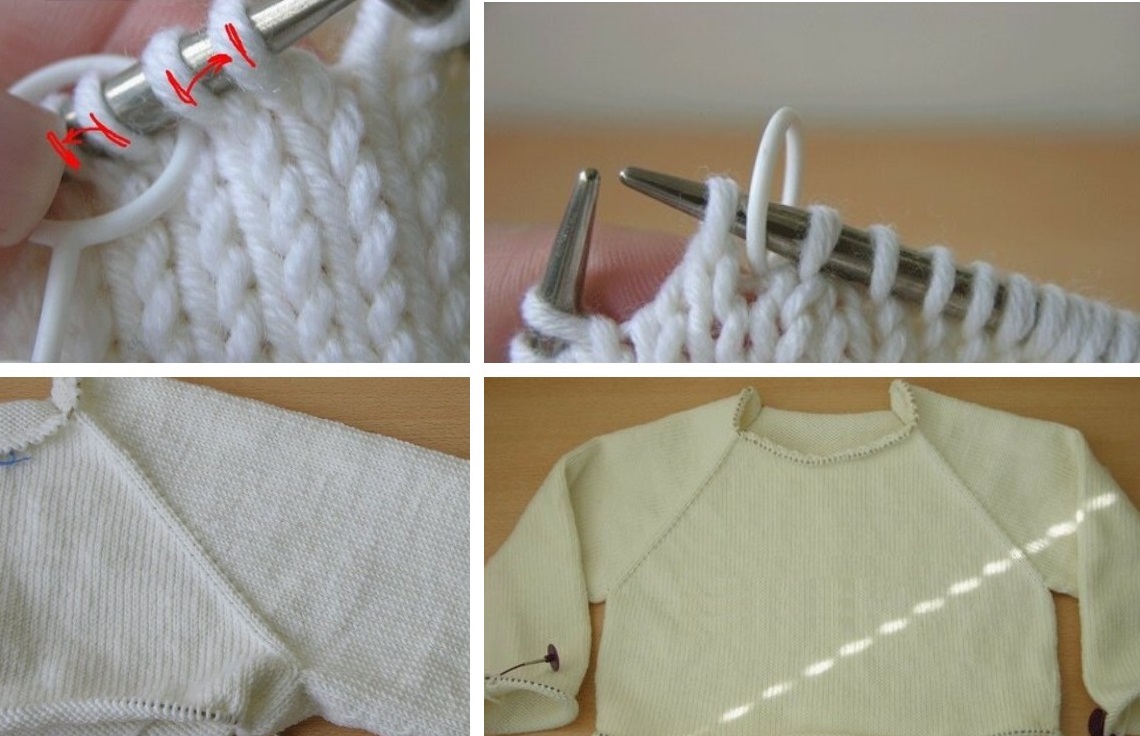
- After the armhole line, the sleeves are transferred to separate knitting needles, the side seams are highlighted. Then each part of the coat is knitted separately (back, front, sleeves). The shape and size of the part are formed by adding loops to the desired length and width. The sleeves can be finished with circular knitting needles, in which case they will be seamless, if done on regular knitting needles, then they will need to be sewn.
- After knitting is finished, the pieces are joined separately. The front and back parts of the garment are sewn along the side seams from the armhole line to the bottom.
The finished coat can be decorated along the neckline. It is tied with a closing seam or a large collar is knitted. The binding is created using knitting needles or a crochet hook, depending on the characteristics of the threads and the desired shape.
Decorating the product
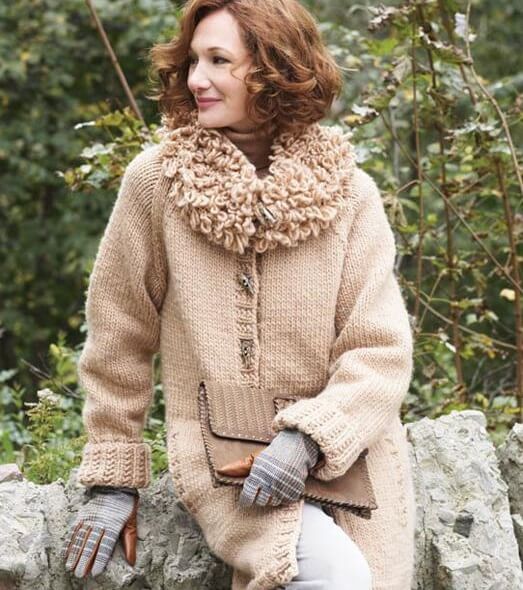
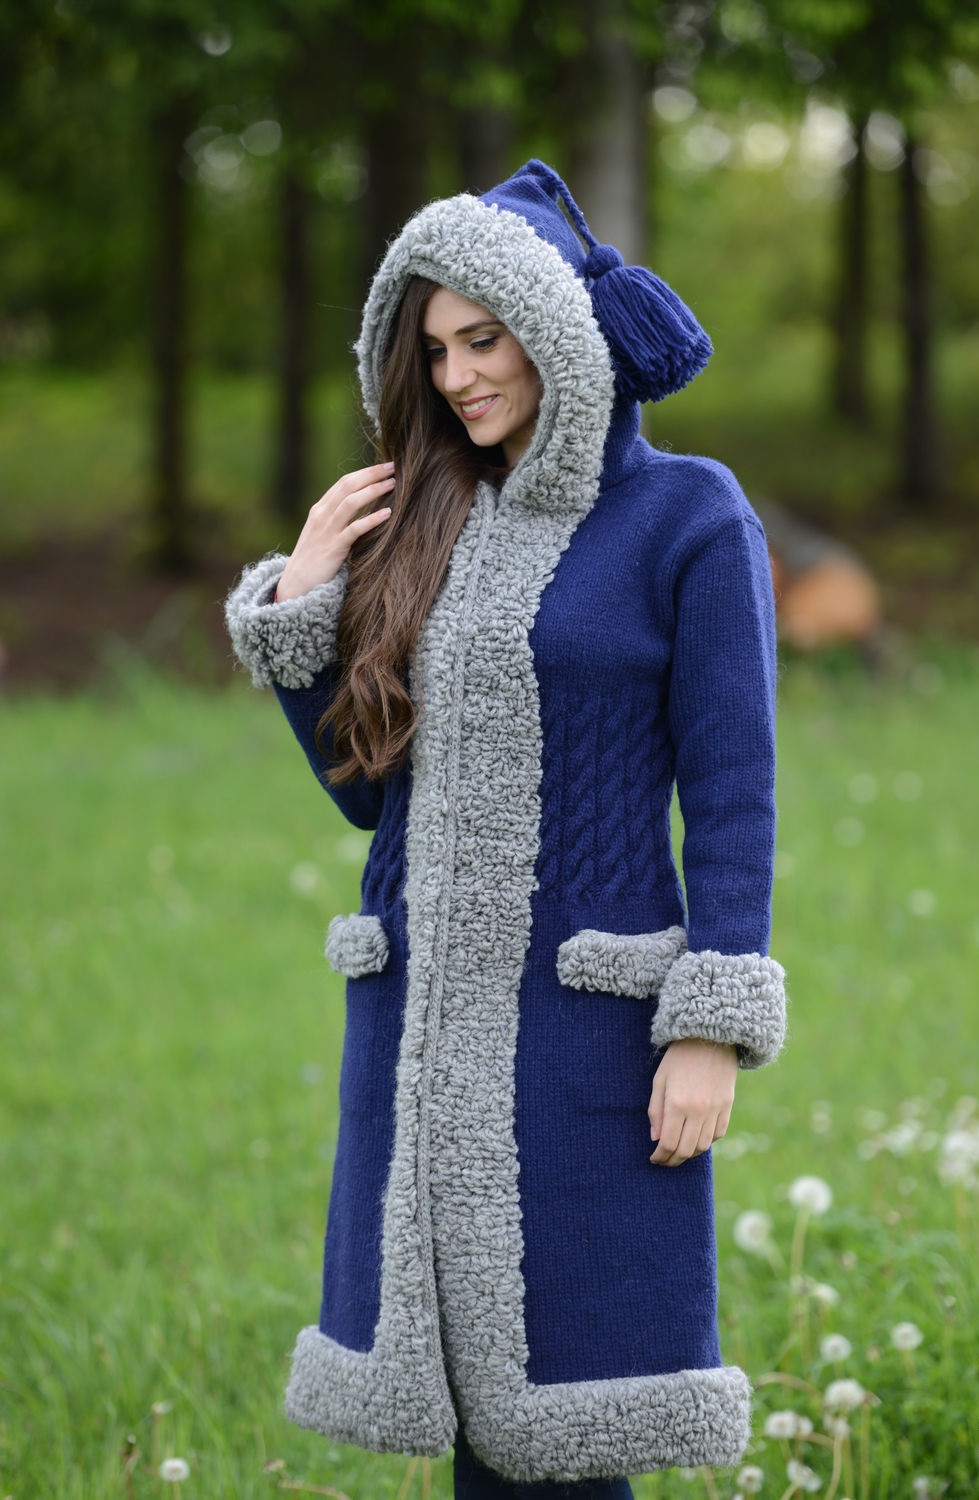
In addition to color and style, decoration plays a significant role. Coats with a fur collar are often seen at fashion shows. Also, down can decorate the bottom of the product or make cuffs on the sleeves. At home, you can create a collar for a knitted coat with fur yourself. It is enough to sew on a piece cut to shape.
With the help of modern textured yarn, you can knit various decorative elements and ornaments separately. Fantasy thread in openwork or stockinette stitch allows you to create completely unique products without using special techniques. The fabric is obtained in different colors and textures only due to the texture and coloring of the threads.
Button decoration is worth mentioning separately. On oversized models, they occupy a central place not only as a fastener, but also as the main element of decoration. The same can be said about pockets. Large and asymmetrical, they make the model brighter and more interesting.
Long or short, openwork or made with a garter stitch - an exclusive designer item always attracts attention. Regardless of whether the coat with a hood is knitted or crocheted, it will surely become a favorite piece of clothing for everyday wear. The best thing is that both novice craftswomen and advanced professionals will be able to create original women's models, guided by numerous patterns.
 Video
Video
Photo