Most people are used to wearing shoes as the manufacturer laced them, without changing anything. So it turns out that everyone uses mostly the simplest “crosses and bows”. Meanwhile, there are dozens of options for tying laces in a much more original and tasteful way. At the same time, shoes not only look beautiful, attracting the attention of others, but also sit surprisingly comfortably on the foot, without falling off or rubbing. And most importantly, each of these techniques is quite simple to perform: having spent a minimum of time, you will be able to successfully diversify both women's and men's looks.
Basic rules
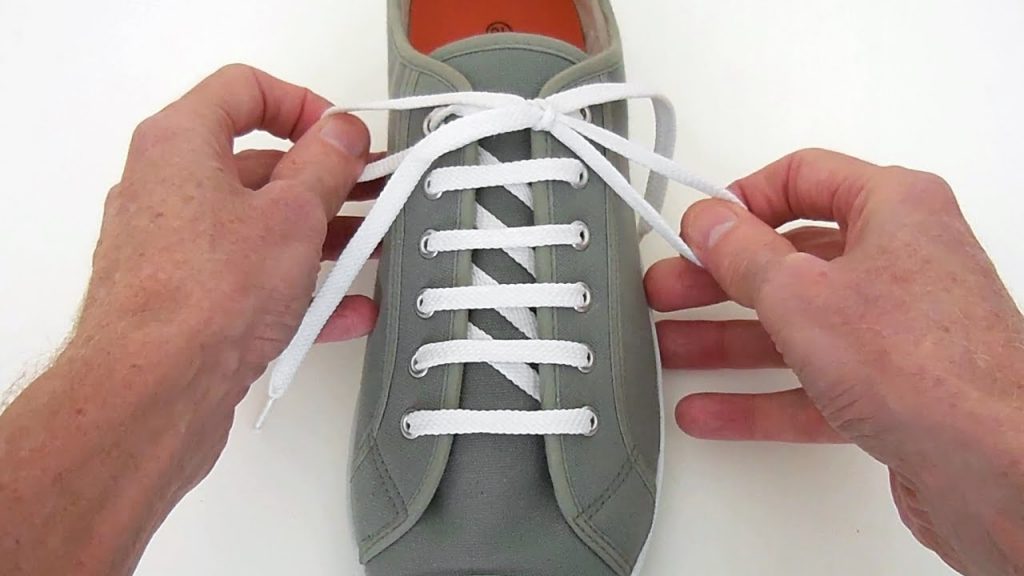
The most common method of lacing shoes is cross-lacing. If you wish, you can choose any other method, the basic rules will be identical:
- The process always starts from the toe area with gradual tightening of the lace from one pair of holes to the other.
- Lacing is done with even pressure, without rushing. You can't pull the ends, trying to finish faster. The step-by-step process, although it takes more time, but the finished product will sit on the foot perfectly.
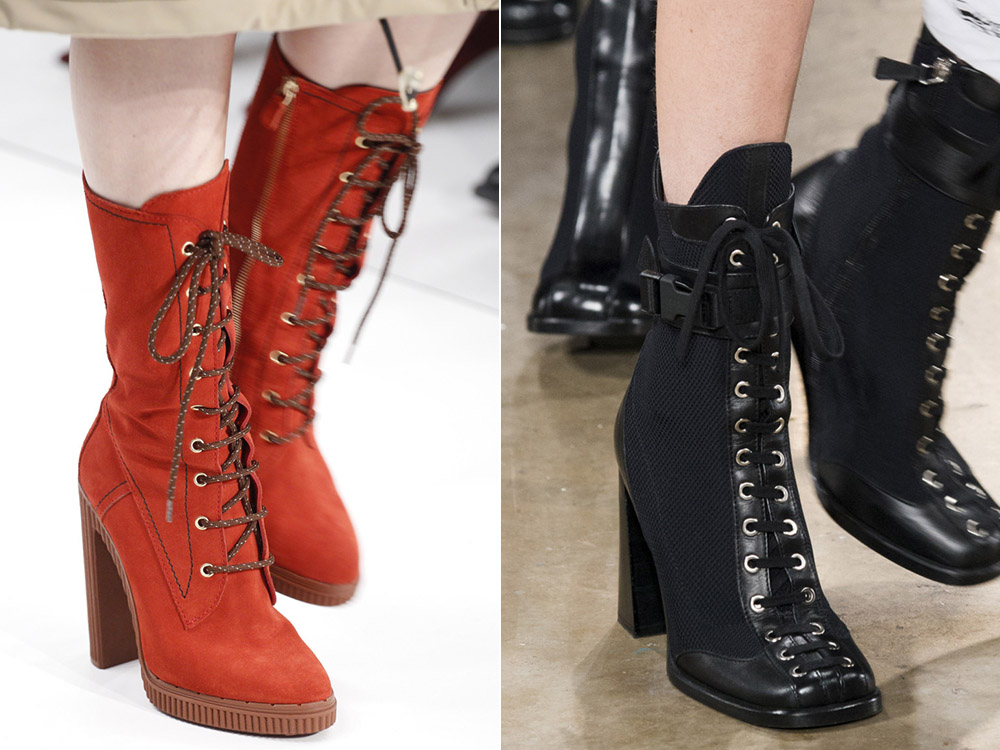
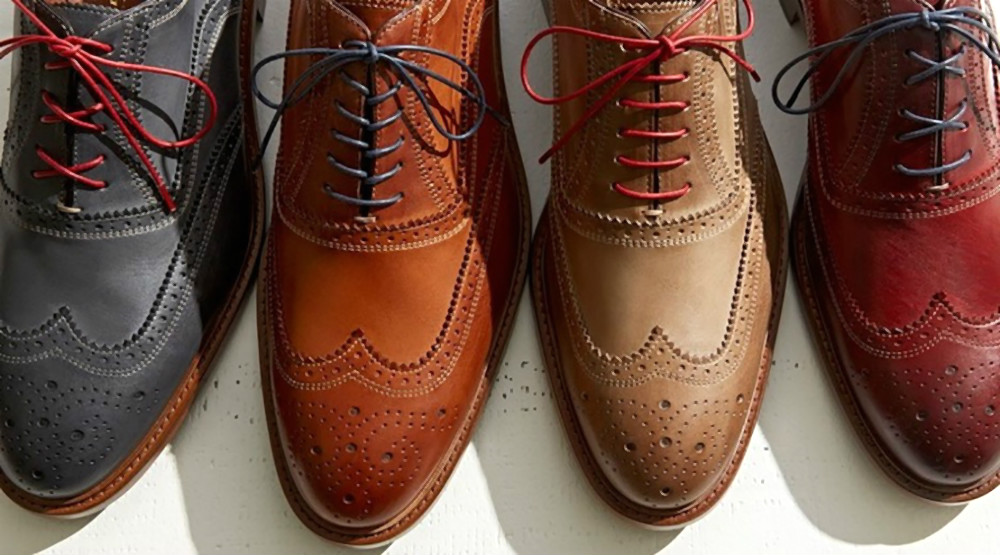
This season, it is fashionable to lace up everything: sandals, boots, ankle boots. Various techniques look chic in tandem with a high heel and a pointed toe. At the same time, the laces on the shoes can either match the color of the top or contrast with it. Stylists recommend choosing models with many eyelets, which will allow you to use a variety of tying patterns and beautifully lace up any style of shoes, including those decorated with fringe or straps.
Before putting on shoes, the laces are loosened - this makes it much easier to insert your feet into the boots, the eyelets do not stretch, and the shoes last longer.
Lacing patterns
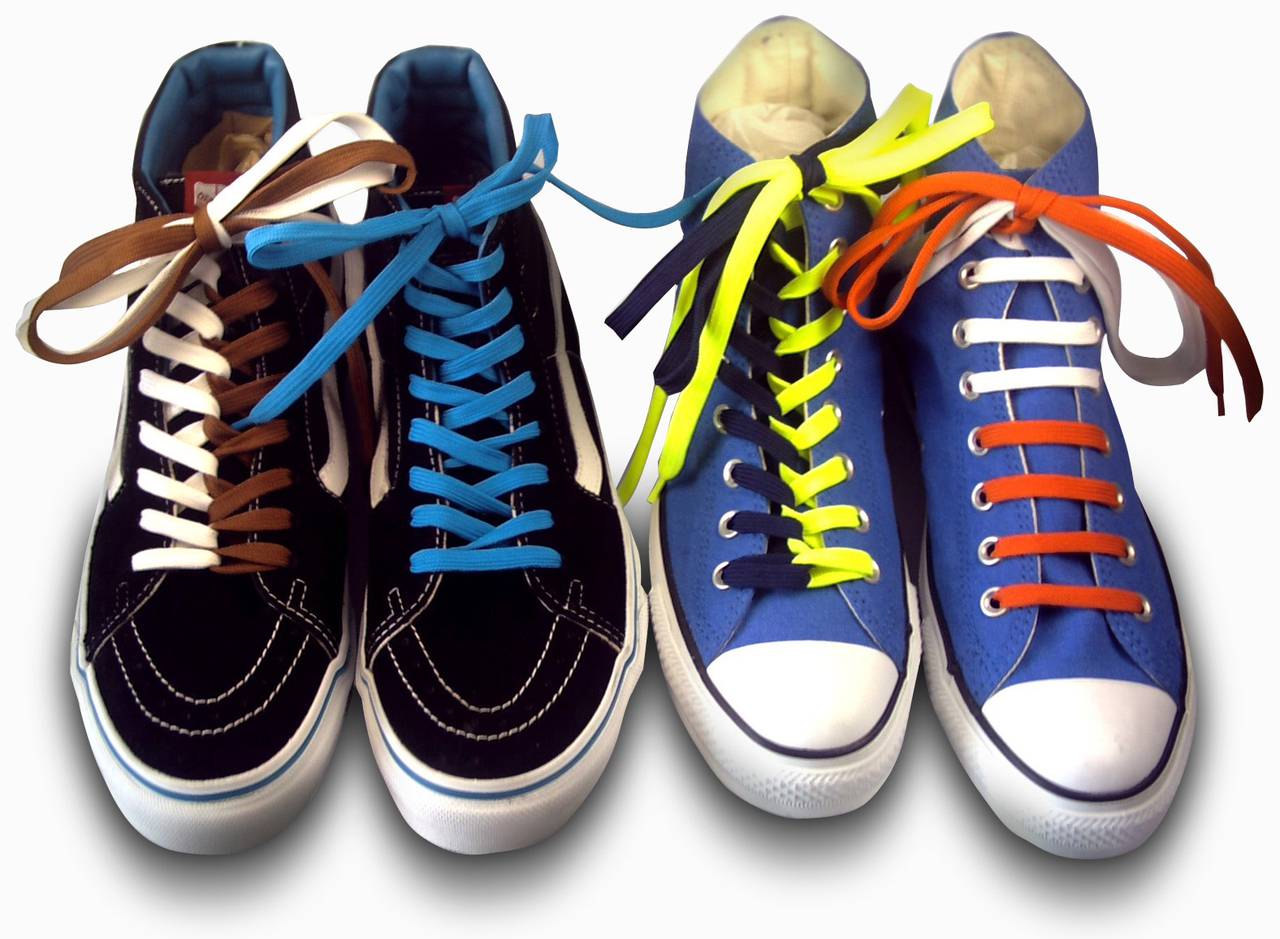
There are several fashionable options for tying shoelaces. Universal methods are easy to perform, original ones are more difficult, but they look more attractive. The combination of two colors is popular among young people. This unusual solution emphasizes the features of the pattern, gives a special look to the shoes. Step-by-step tips will help you cope with the most difficult methods.
Universal
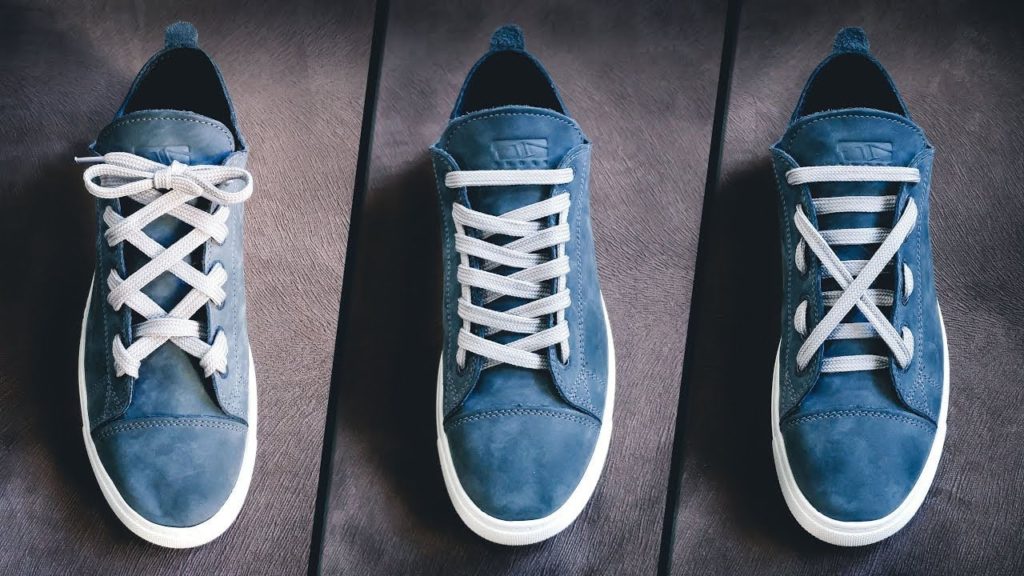
This group includes the most popular lacing options. They are easy to perform and convenient:
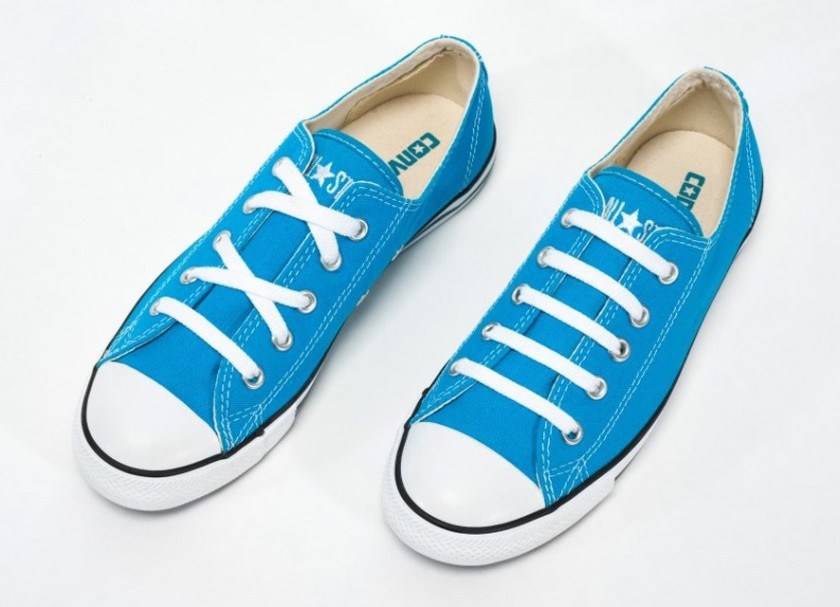
- The classic method is a suitable technique for sports models. The ties go through the eyelets, are brought out on the sides, crossed, and then come out from the inside. The method is relevant for execution if there are 5 holes. The actions are repeated up to the upper holes, the ends of the lace are tied in a bow. Advantages: ease of execution, convenience, due to the external location, the skin of the legs does not rub.
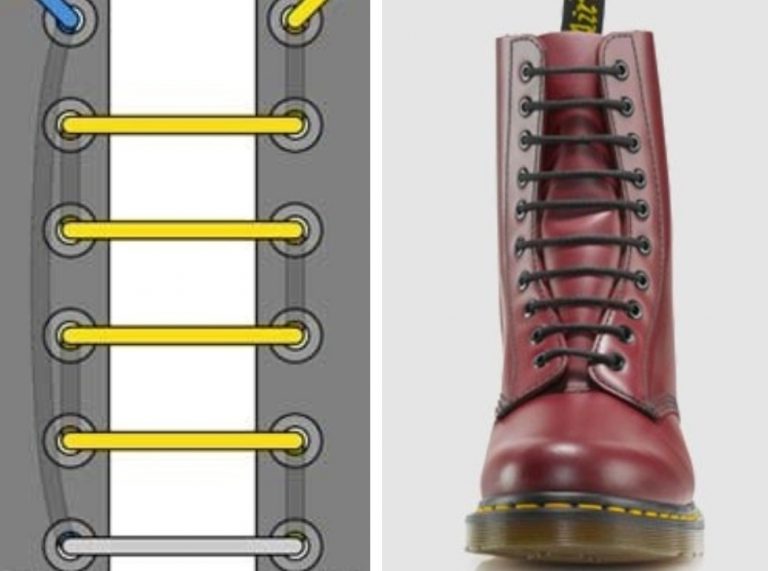
- The straight pattern requires threading through the first eyelets. The end comes out of the top right hole, goes through the left, then both are lifted and pulled out from the outside. The ends are tied in a bow. Advantages: neat, tidy appearance, ease of use.
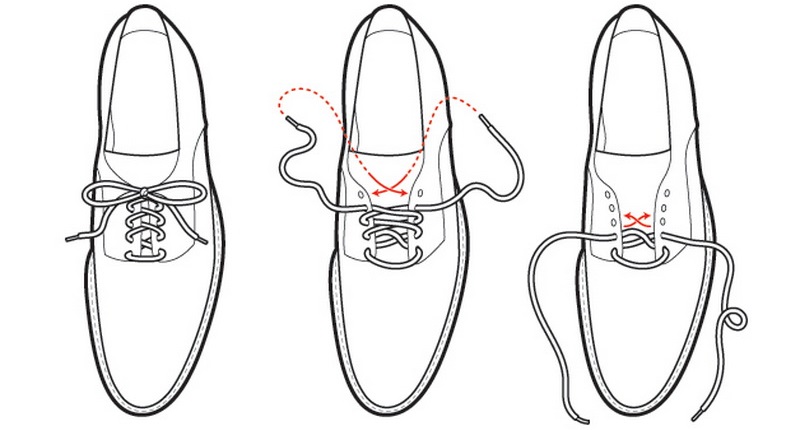
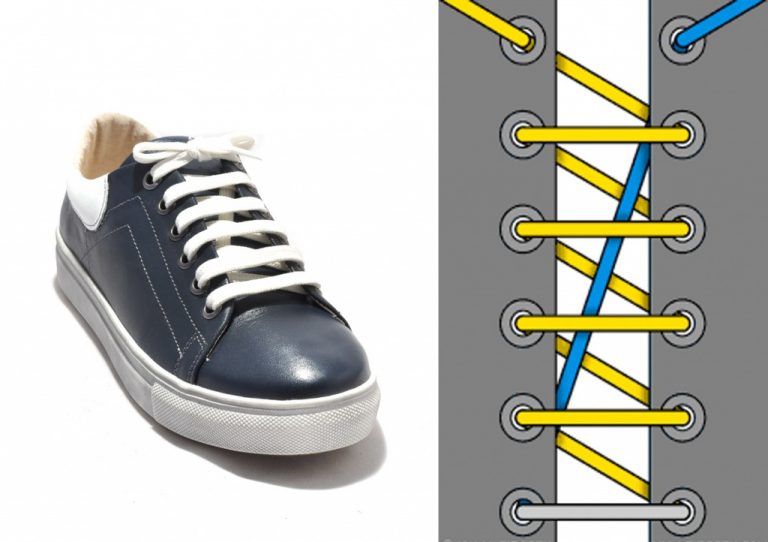
- Diagonal method - is used to create an original pattern, with which men's boots or shoes look especially beautiful. One end of the lace is pulled out from the outside, the second - from the inside. The right one is threaded through the hole on the opposite side, the other is pulled from the inside. The manipulations are repeated to the very top, the visible and invisible sides alternate. A bow is tied from the remains of the laces. Advantages: originality, strong fixation of shoes.
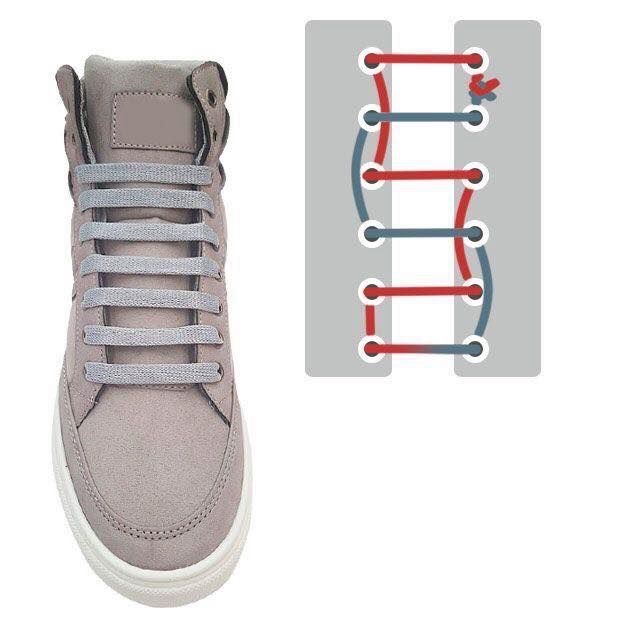
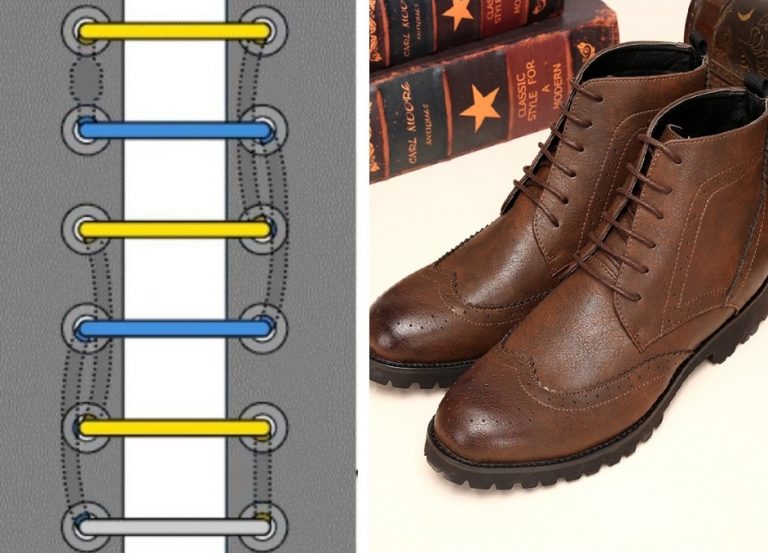
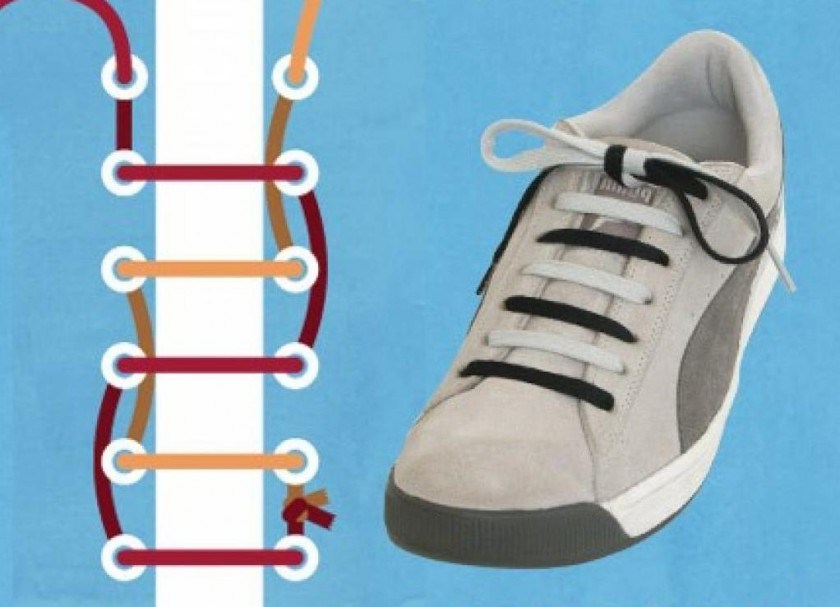
- Hidden straight lacing, in which the inner component of the ties will be hidden. The right lace is passed through the first holes, the left one is brought out to the top eyelet from the inside out. It is not used further, so the tip should be shorter than the right one. The latter is taken out above the hole through which it passes, and is launched into the opposite one. Exactly the same actions are repeated to the top. The ends can be tied in a knot. Advantages: easy to perform, looks neat.
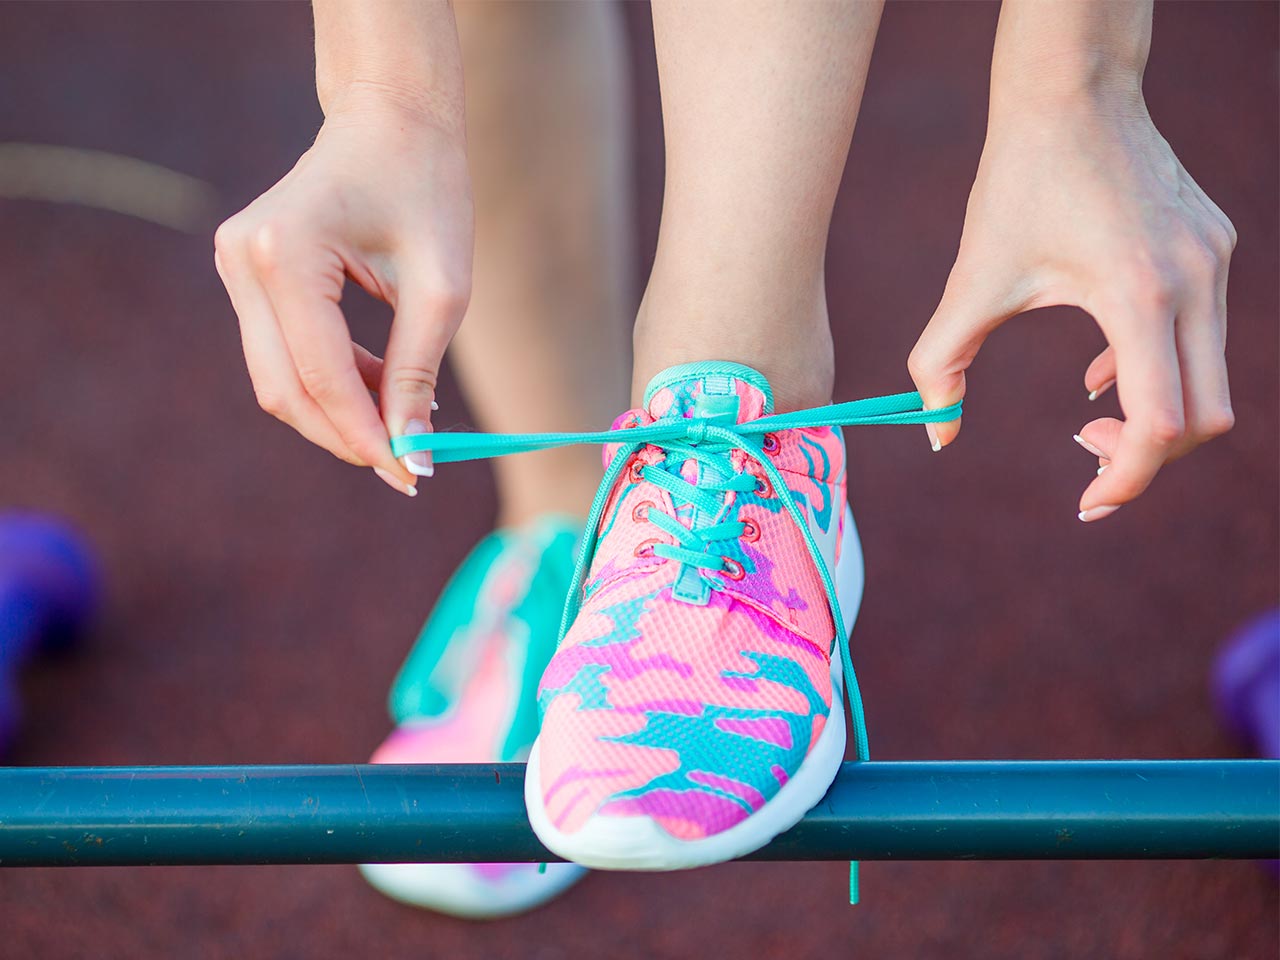
- Quick lacing is done in a short time, without much effort. The ties are inserted into the first eyelets, inside. The left end is pulled through the top hole, diagonally. The right one is brought out above the hole where the opposite one was pulled, in a straight line. The ends are tied in a bow. Advantages: ease of execution, attractiveness.
- "Cross over-under" is a pattern that looks interesting on classic shoe models. The laces are pushed through so that the ends are placed inside from the outside. The ties are crossed and passed through opposite holes to form a cross. The same is done in the next step. The ends are tied into a bow. Advantages: originality, stylish look.
- "Shop" lacing involves tying in a reverse cross-over manner. The ribbons are threaded through the first holes, pulled inside, the ends are crossed, inserted into the next eyelets, the process continues to the top. The rest of the lace is hidden in the boot. Advantages: looks impressive, easy to loosen.
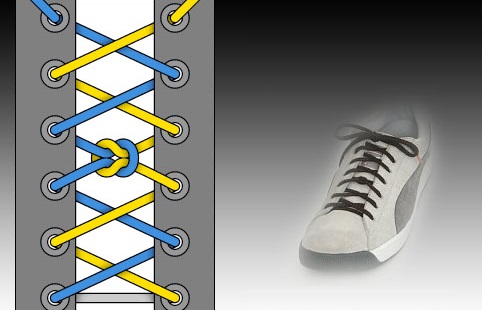
- The segmental knot method is one of the best options for tying laces on sneakers. The main distinguishing feature is a knot in the central part. If necessary, the halves are tightened more or less, the ends are tied. Advantages: non-standard look.
- The "hidden knot" is suitable for lacing sneakers and any other sports shoes. The ties are passed through the lower eyelets, one edge comes out at the next step on the right, the other is brought out from the corresponding side after one step. Then the crossing is made, the ends are secured with a knot. Advantages: ease of execution, neat appearance.
For shoes with loops, it is recommended to use round laces. This reduces friction and extends the life of the product. The safest lacing method in this case is the usual cross-lacing method.
Original
If you want to tie your shoelaces creatively, you should pay attention to unusual patterns. Among the most popular techniques:
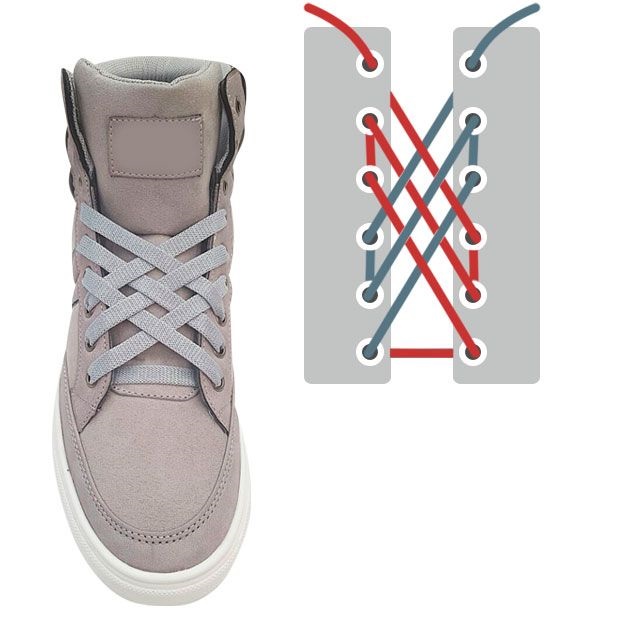
- "Web". This method is optimal if the shoe has a wide tongue, and looks perfect on sneakers with six pairs of holes. The lace is passed through the first holes, comes out on the sides, crosses and is threaded into the fourth pair. The ends are raised by two eyelets, come out, cross and are inserted into the second pair, forming a web. The ends are taken out through the upper holes, tied in a bow or hidden in the shoe. Advantages: spectacular appearance, suitable for short ties.
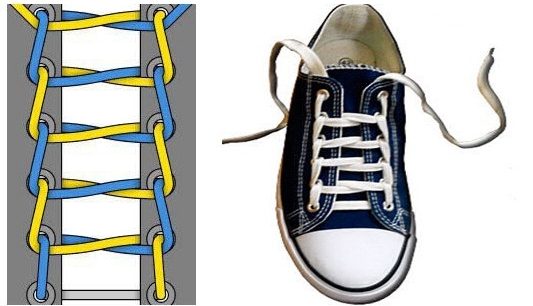
- With knots. Numerous tightenings increase the strength of the lacing and improve the appearance of the shoe. The tie is threaded through the lower eyelets, the ends are crossed and fixed, spread apart. Then the actions are repeated. Advantages: excellent tightening, safety.
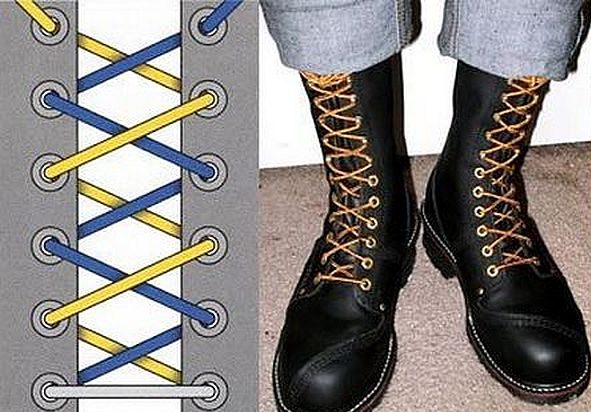
- "Ladder". The finished pattern resembles the rungs of a stepladder. The method looks most impressive on boots with a high top. The laces are threaded from the inside through the lower holes, then inserted into those located next to each other in the second pair. The ends are crossed, the left one is threaded under the neighboring one, passes through the hole in the third pair. Similar actions are done with the right one. The ends are hidden in the shoe. Advantages: good fixation, strong tightening, conciseness.
- "Cross ladder". It becomes more pronounced on high boots or sneakers with many holes. The lace is passed through the lower holes, then into the adjacent holes, crossed and brought out under the vertical tie to return to the upper eyelets. The rest of the lace is placed in the shoe. Advantages: spectacular, reliable fixation.
- "Lightning". A complex technique for tying laces, ideal for roller skates and skates. The ends are taken out of the lower holes, tucked under the stitch of the same level, then passed from the inside into the next pair. Crossing and further threading occurs at each stage. The ends are tied in a bow. Advantages: looks stylish, holds securely.
- Reverse loop. The main feature of the method is that all parts of the lace intersect with the end in the middle, moving away from the central zone. The ribbons are threaded through the lower holes in a spiral, and are brought out on the sides. The left one is raised up from under the eyelet with ties, and the same manipulations are performed with the right one. The edges are tightened. Advantages: aesthetics, good fixation.
- Double reverse loop. Used to shorten long ties. The lace is passed through the second pair of holes and inserted into the inside of the shoe, crossed and threaded from the outside to the inside of the 4th pair of eyelets. The ends are tied in a bow. Advantages: originality, reliability.
- "Butterfly". The ties pass through the lower holes, are taken to the inner area on both sides. The ends are tightened vertically from the next pair of eyelets, leaving a gap, then crossed. The edges are tightened with a knot. Advantages: lengthening of ties, comfortable use.
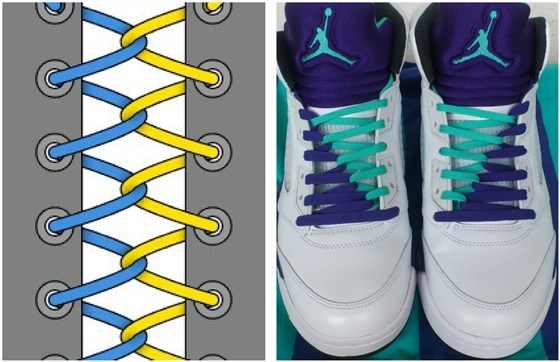
- Double spiral with one tie. The technique helps to tie laces beautifully and quickly. Both ends are brought out from the bottom, the left one is put through the next hole, the right one is taken out of the left one above. The process continues in a spiral to the top. The ends are tightened with a bow. Advantages: aesthetics, simplicity, slow wear.
- Roman lacing. The pattern is represented by alternating numbers. The left end is passed through the corresponding hole, the right end is raised vertically to the next pair. The laces are crossed, threaded through the eyelets on the right side, raised a couple of holes up. The remainders are connected with a knot. Advantages: attractive appearance, simplicity.
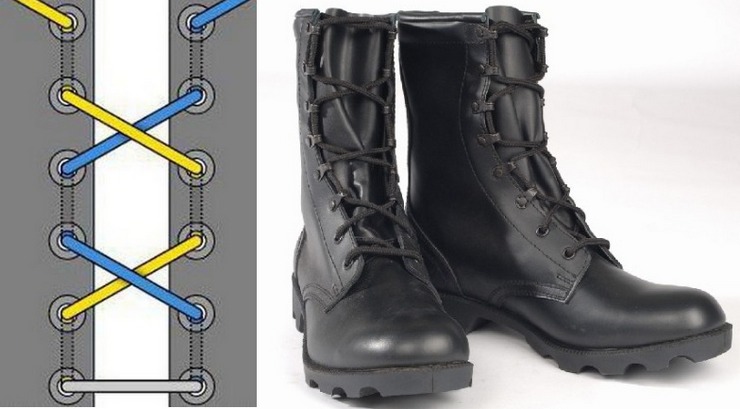
- Military technique. Suitable for connoisseurs of minimalism. The lace is threaded from the outside inwards. The ends are crossed and pushed through the next eyelets, the left one is placed in the corresponding hole, and the same manipulations are done with the right one. The rest of the lace is inserted into the boot or tied. Advantages: ease of use, reliable fastening, practicality.
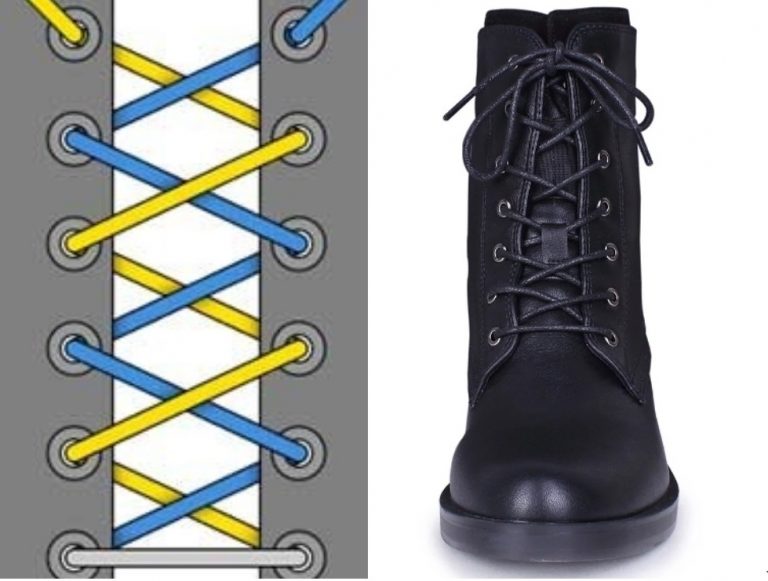
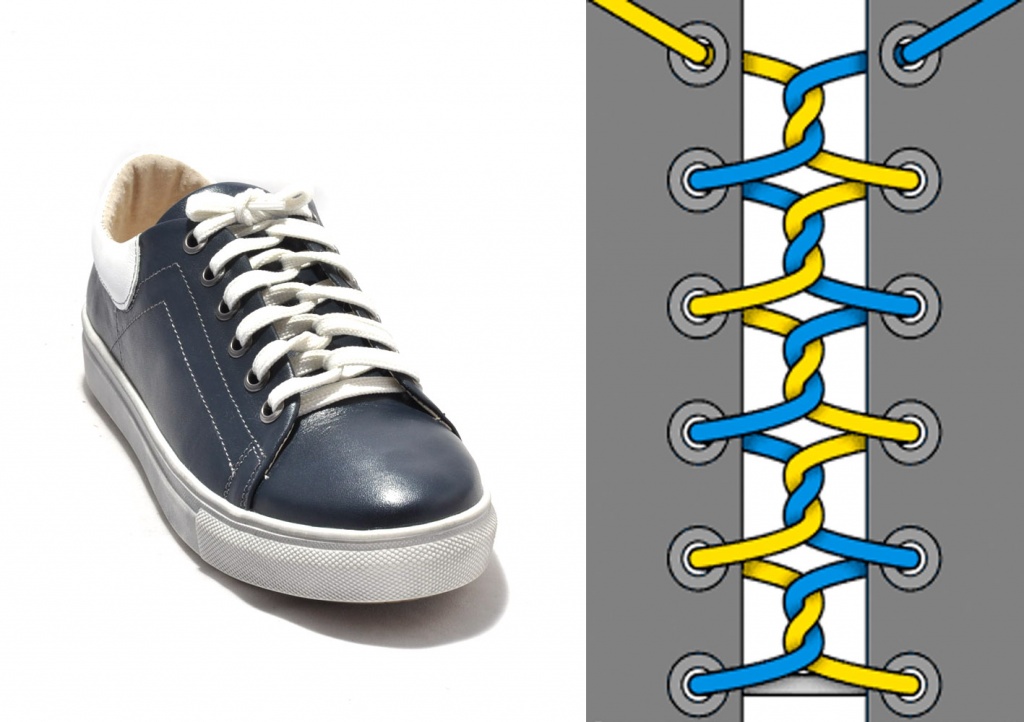
- Twisted lacing. It is a combination of a reverse loop and a knotted pattern. It looks best on round ties, the color of which contrasts with the background. The lace is threaded through the lower holes, and is brought out on the sides. The left end is raised in a spiral, pushed out from under the tie, the right one is moved in the same way, but with a double threading through the loops of the left one. The ends are tied in a bow. Advantages: reliability, attractive appearance.
Original shoe lacing techniques are popular among men and women, they improve the appearance of shoes, making them unique and attractive.
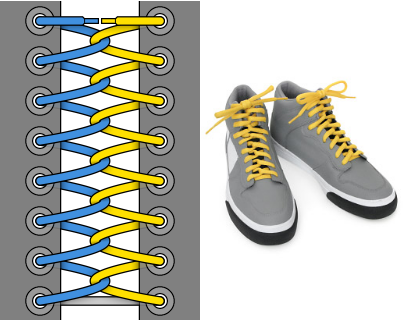


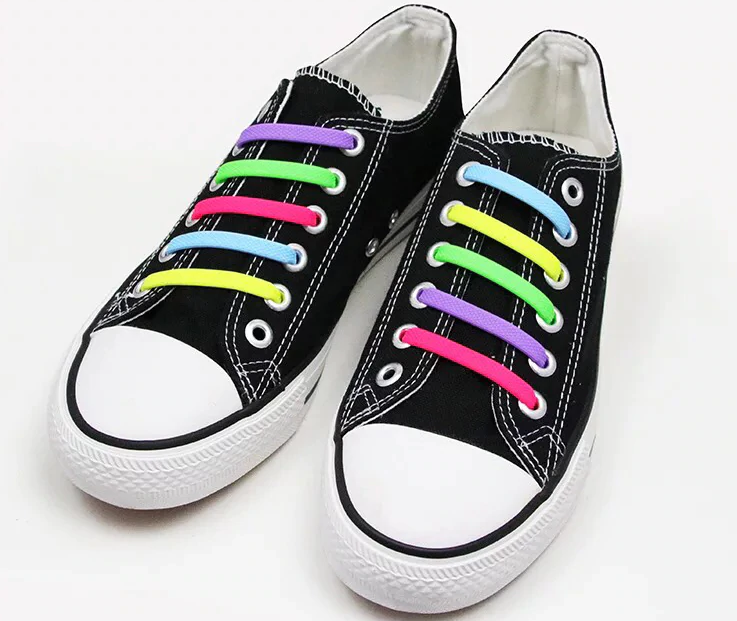
With multi-colored laces
The lacing created with the help of multi-colored ties looks modern and unusual. The most common schemes include:
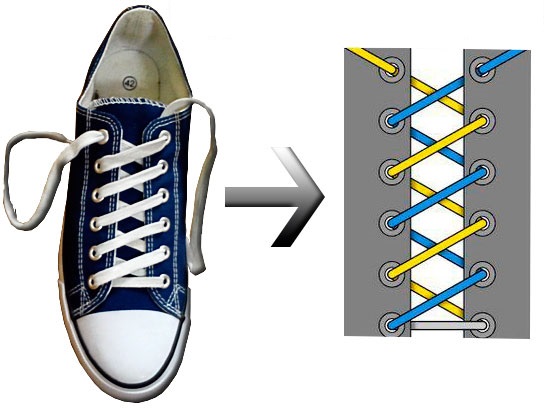
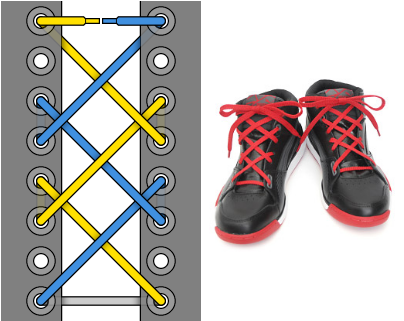
- Double cross. Quite a complex option. The lace is pulled through the lower eyelets. Two pairs of holes are skipped, the ends are crossed, inserted into the 4th pair of holes, crossed again, inserted into the 3rd pair. The ends are tied with a bow. Advantage: attractive appearance.
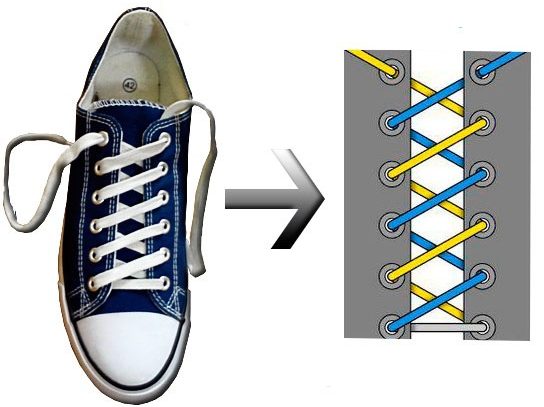
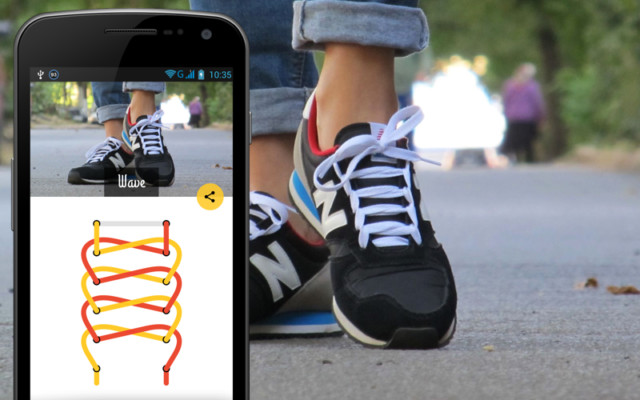
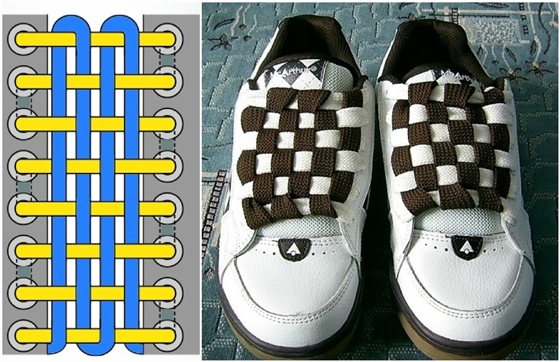
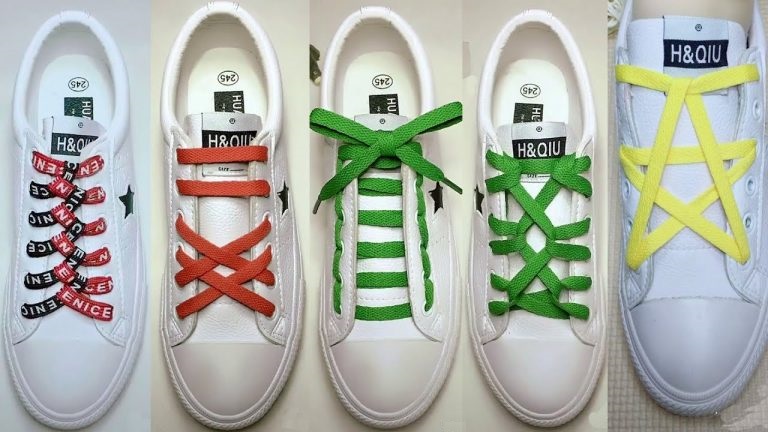
- Checkered. Reminiscent of a two-color chessboard, one of the most current ways to lace up sneakers and trainers. A tie of one color creates straight drawstrings. Another shade rises to the top in a wave-like pattern. The ends are tied on the inside. Advantages: no loosening, non-standard look.
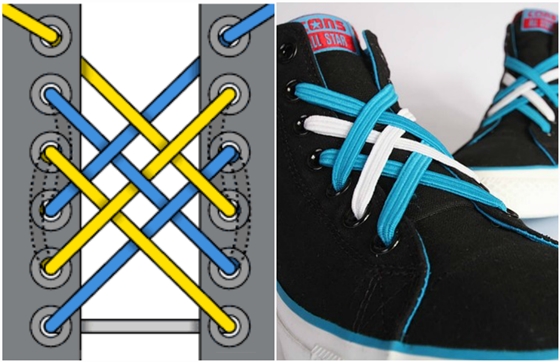
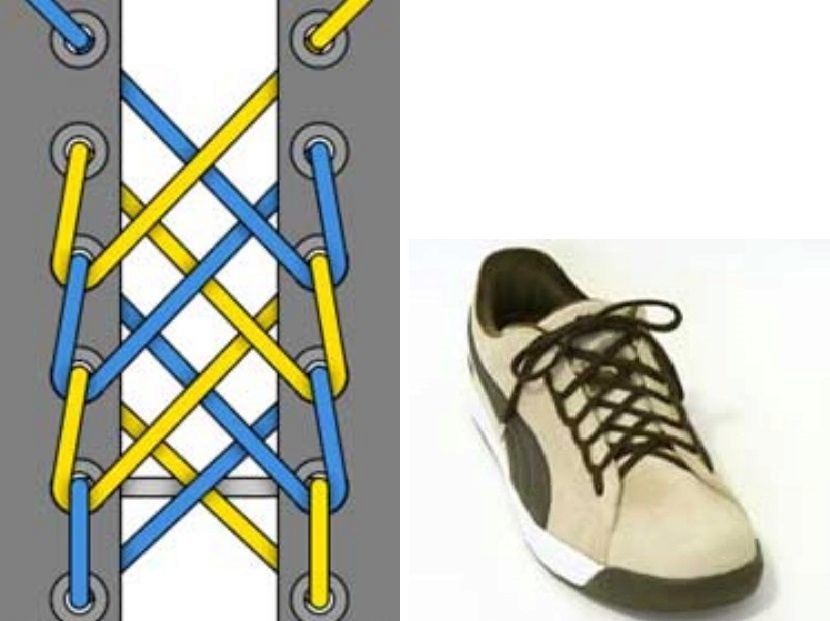
- Lattice. A complicated method, but it allows you to create an interesting pattern. It will look best on models with 6 eyelets. When performing the process, you need to make sure that the ends are intertwined in the form of a grid: once on top, once on the bottom. The rest of the lace is tied in a bow. Advantage: originality.
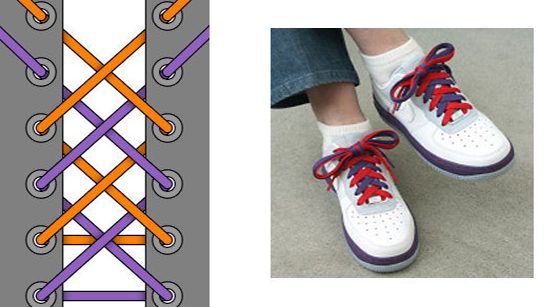
- Double. This beautiful lacing is done with two ties at the same time. It is done in the same way as the classic technique, but with the holes omitted for another color. The ends are tied with a bow. Advantage: an unusual look.
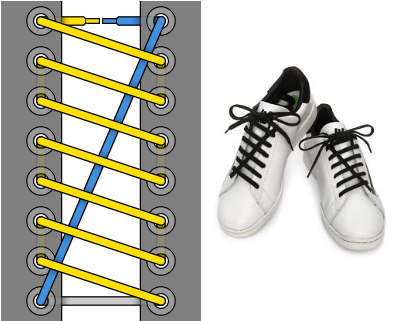
- Straight two-color lacing. A labor-intensive method, the ties form a hidden knot, which causes slight discomfort when walking. To perform, you need to tie two multi-colored laces, trim the edges and perform a straight technique. Advantage: aesthetic appeal.
The question of how to tie shoelaces most often worries teenagers, young guys and girls. Creative two-color schemes that attract the attention of others are suitable for them.
Step-by-step algorithm for complex methods
The most original and beautiful methods of tying shoelaces are the most labor-intensive. Step-by-step algorithms will help you cope with the task. For example, the "World Wide Web" technique is performed as follows:
- The lace is threaded through the penultimate pair of holes from the bottom. The ends should be on the inside.
- The left end is pulled diagonally through the eyelet on the right side.
- The lace is again threaded diagonally, skipping the nearest division.
- The end is inserted into the next hole vertically.
- Similar actions are repeated with the right lace.
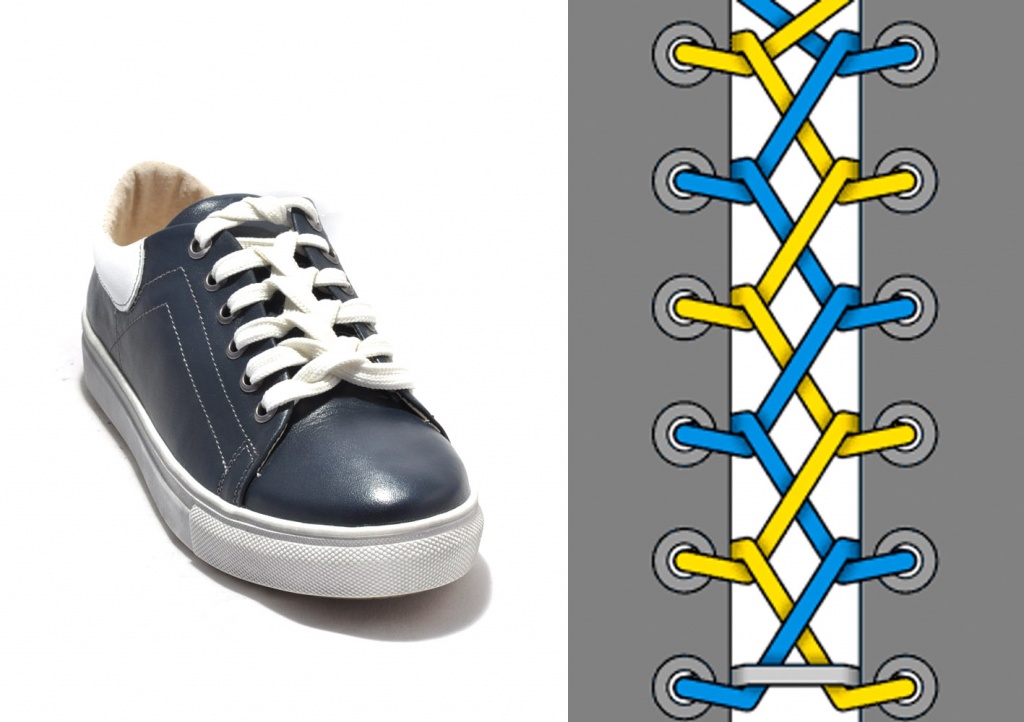
The "Railroad Lattice" technique resembles rails and sleepers. Due to frequent intersections, a fairly rigid fixation of the feet is achieved. It is performed in stages:
- The laces are inserted into the lower eyelets from the inside.
- Without changing sides, the ends are passed from the outside through the second pair of holes.
- The ties are crossed and inserted from the inside into the same holes.
- Similar actions continue up to the top of the shoe.
- The ends of the laces are tied into a knot.
"Zip" or "Zipper" is a complex but strong lacing system, ideal for roller skates and skates. It is done as follows:
- The lace is passed through the lower eyelets and brought out on the sides.
- The ends are tucked under the tie of the same step and directed into the next pair of holes from the inside.
- The ties cross, are pulled under the tie of their level, and are raised higher.
- Similar actions are repeated until the last holes. The ends are tied into a bow.
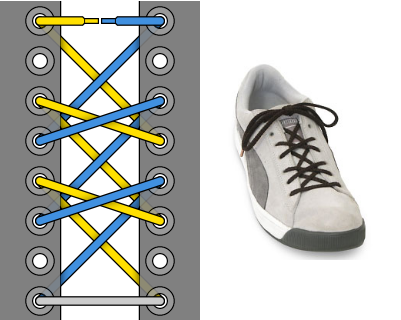
The method called "Wide Crosses" is difficult to tighten or loosen, so it is not suitable for shoes that are often taken off and put on. However, this technique looks original. It is performed in stages:
- The lace is inserted into the first holes from the outside.
- The ends are crossed and threaded through the 4th pair of holes.
- The ties are crossed again and passed through the 3rd pair of eyelets.
- The ends are brought under all the ties, crossed and placed in the 6th pair of holes. The remaining part of the lace is tied in a knot.
"Hexagram" is a loose lacing that cannot be tightened too much. It looks unusual. It is made according to the scheme:
- The laces are threaded through the lower eyelets from the outside.
- The ends are crossed and placed into the 4th pair of holes, then into the 3rd on the same sides from the inside.
- The first tie is passed over one edge of the resulting cross, then over the second and is inserted into the 3rd hole from the outside.
- The first end is passed through the 4th eyelet from the inside, then into the opposite 4th hole from the outside and into the 3rd from the inside, on the same side.
- The laces are crossed, the first one is brought under the cross and above the horizontal line, inserted into the 6th hole.
- The second end is pushed over the first cross horizontally and over the second end, placed in the 6th hole on the opposite side. The ends are hidden in the boot.
To originally lace sneakers using the listed methods, you will need to put in some effort. The advantages of each of them are originality and unusual appearance.

Selecting a pattern for different types of footwear
When choosing the right types of lacing, you need to take into account the style and height of the shoe. For sports shoes, techniques that harmonize with the design, provide sufficient fit and uniform tension of the laces are suitable. Optimal schemes for footbag and other sports:
- straight;
- with knots;
- classic zigzag;
- "railway";
- with side knot (for cycling).
"Chessboard" is suitable for tall models with a large number of eyelets. A more accessible, but no less interesting method is "lattice".
The ideal option for winter boots is the "ladder", it is optimal for a high shaft. Medium-height products are decorated with double spiral lacing, low ones - with a "railway".
For women's boots in a sporty or urban style, a diagonal pattern is suitable. The pattern can be the same or mirrored. Each of the options is created quickly and looks interesting. To decorate the boots, a "web" made of multi-colored laces is used. The technique is quite complex, but it copes well with the decorative function.
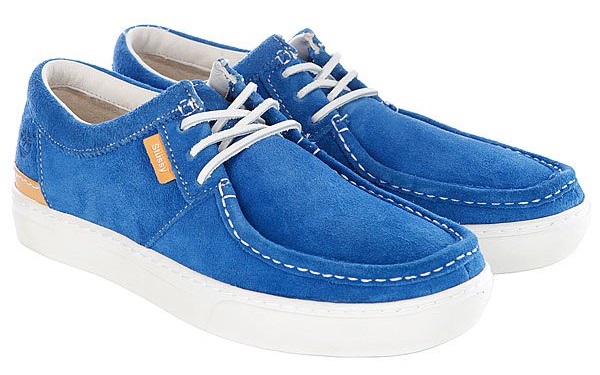
For formal men's shoes, various patterns are used, straight and parallel. They do not require much effort and time, and are suitable for all occasions. More complex methods include techniques with hidden knots. They are not very comfortable to wear, but they are attractive. For an informal setting, you can choose more interesting methods: "wide crosses" or "ladder".
Fashion Techniques for Street Sneakers
This season, the range of fashionable sneakers is full of a variety of design ideas. Despite the sporty focus of the shoes, they are an integral part of images in many styles. Popular manufacturers of models use their own methods of tying laces:
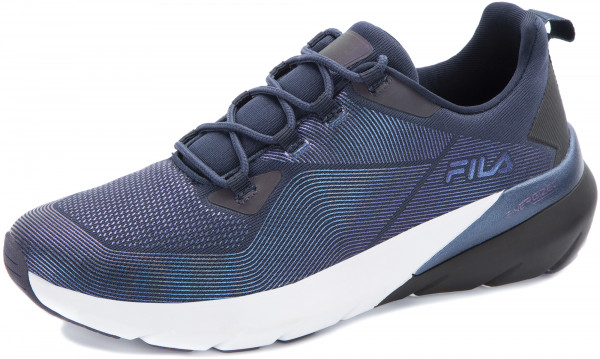
- Fila. Shoes of this brand are equipped with a quick lacing system.
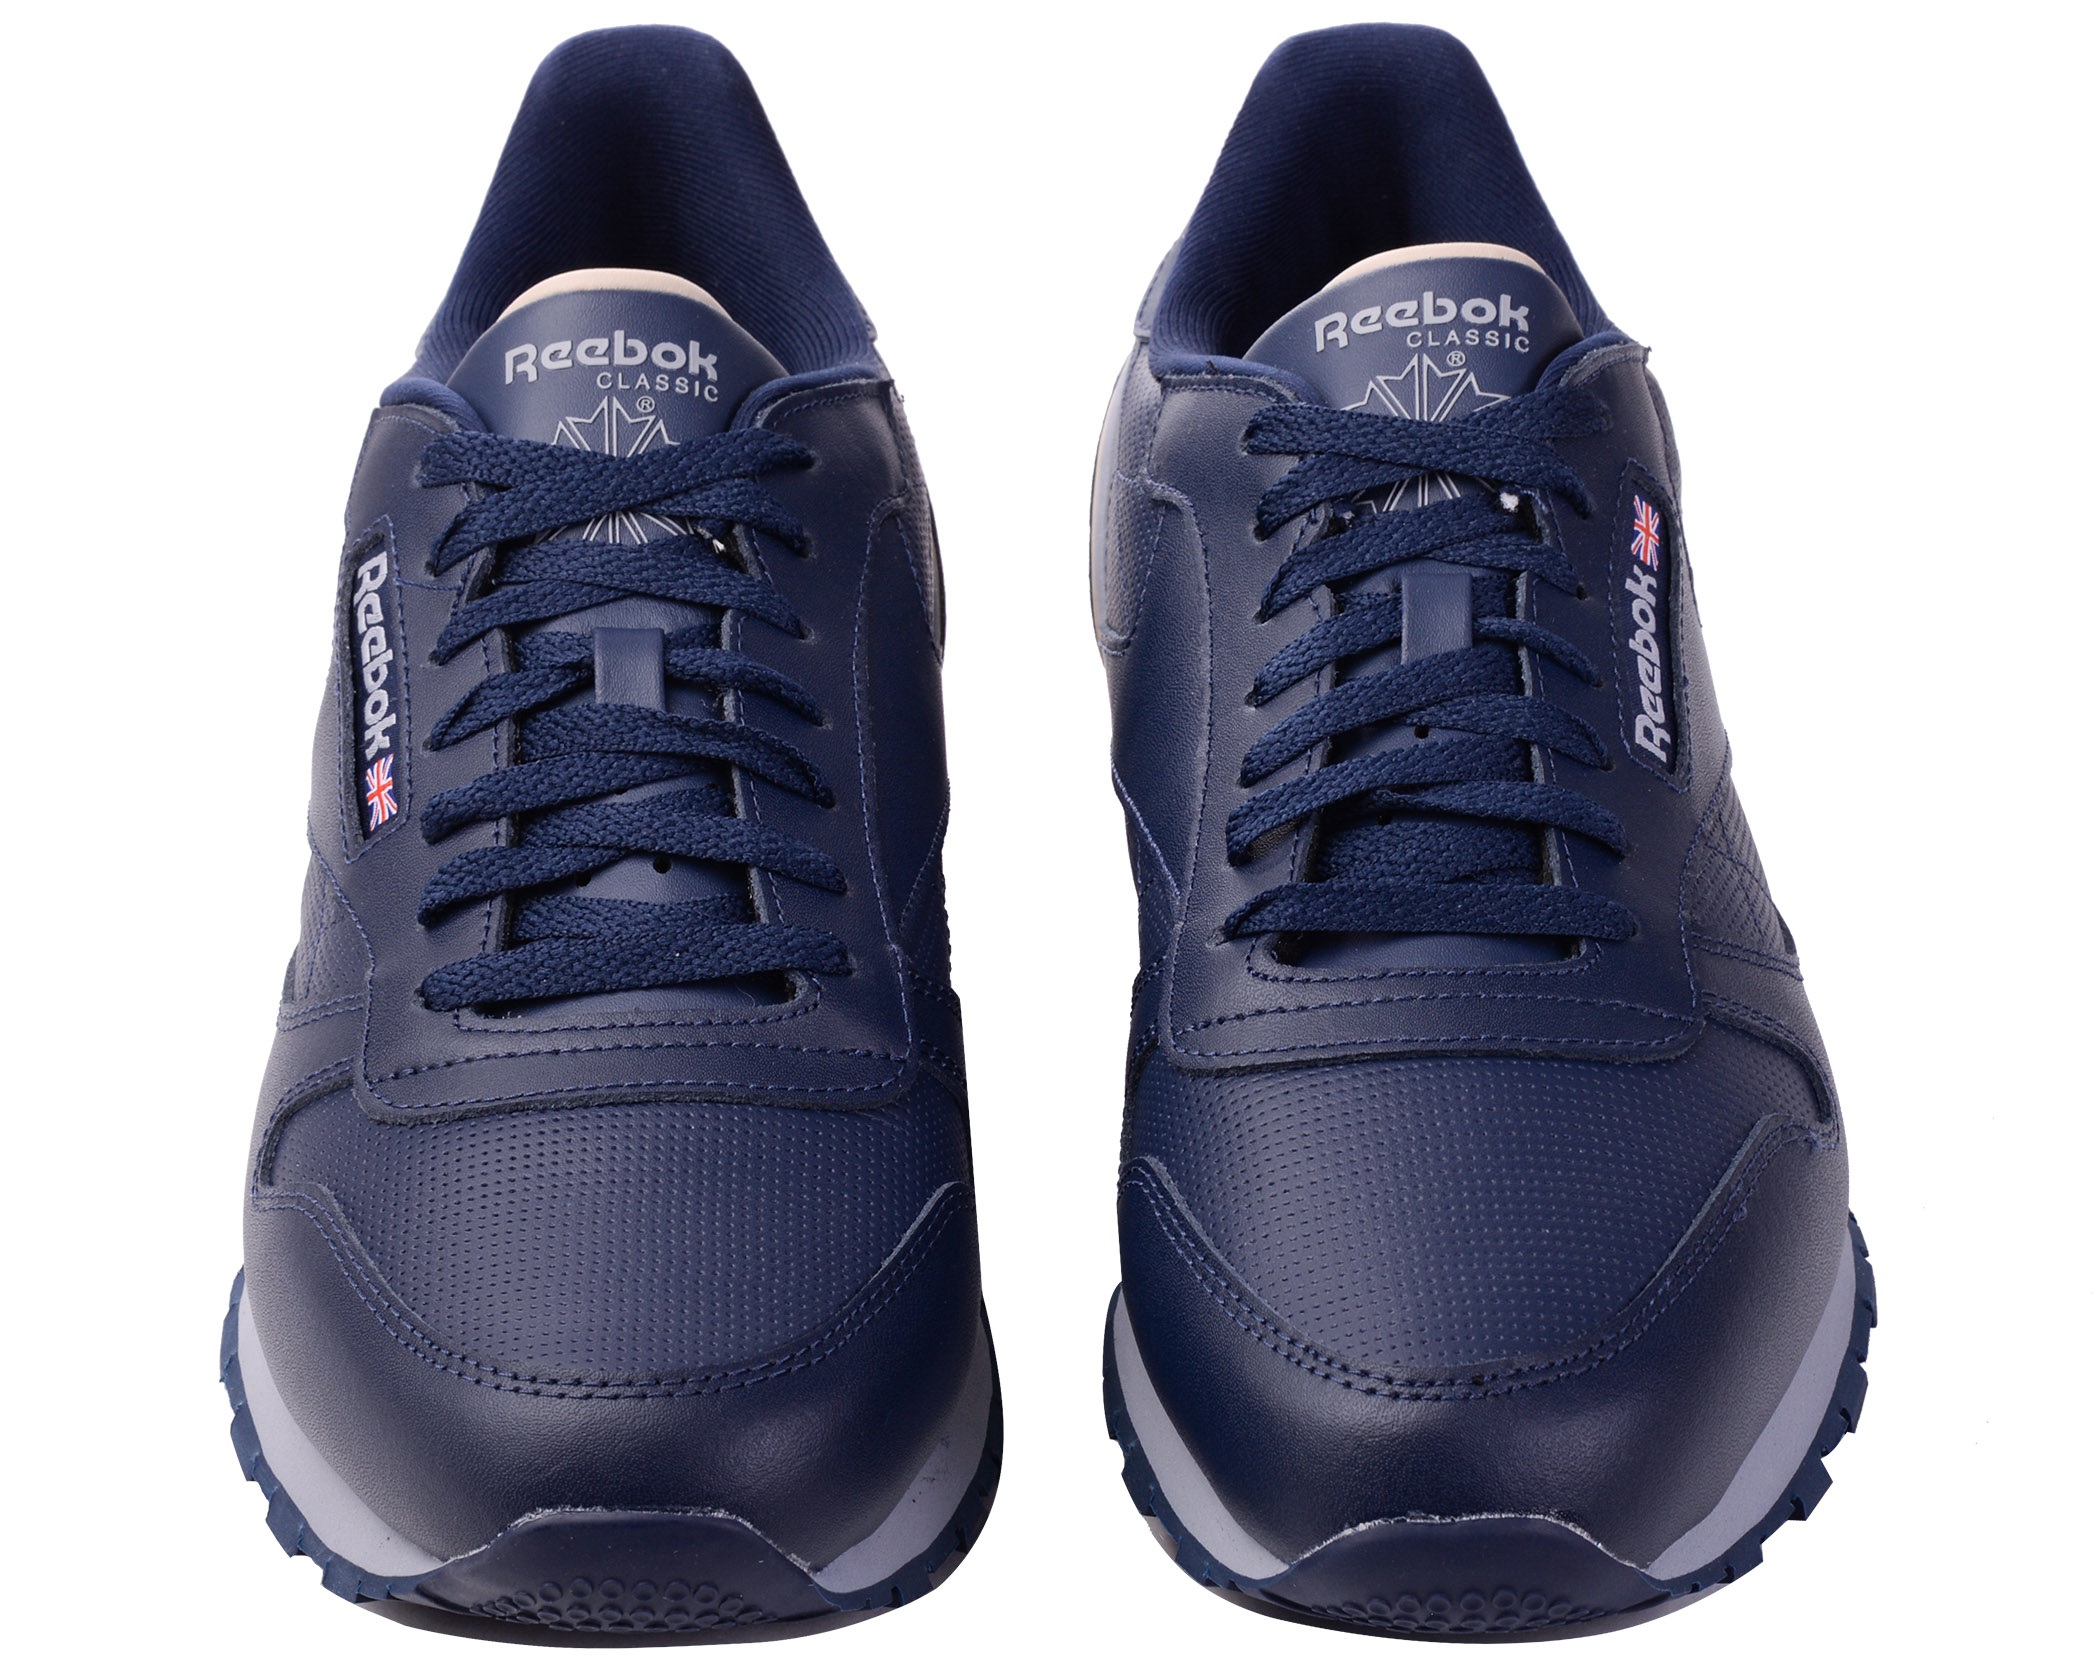
- Reebok. Uses an original scheme with a hidden knot.
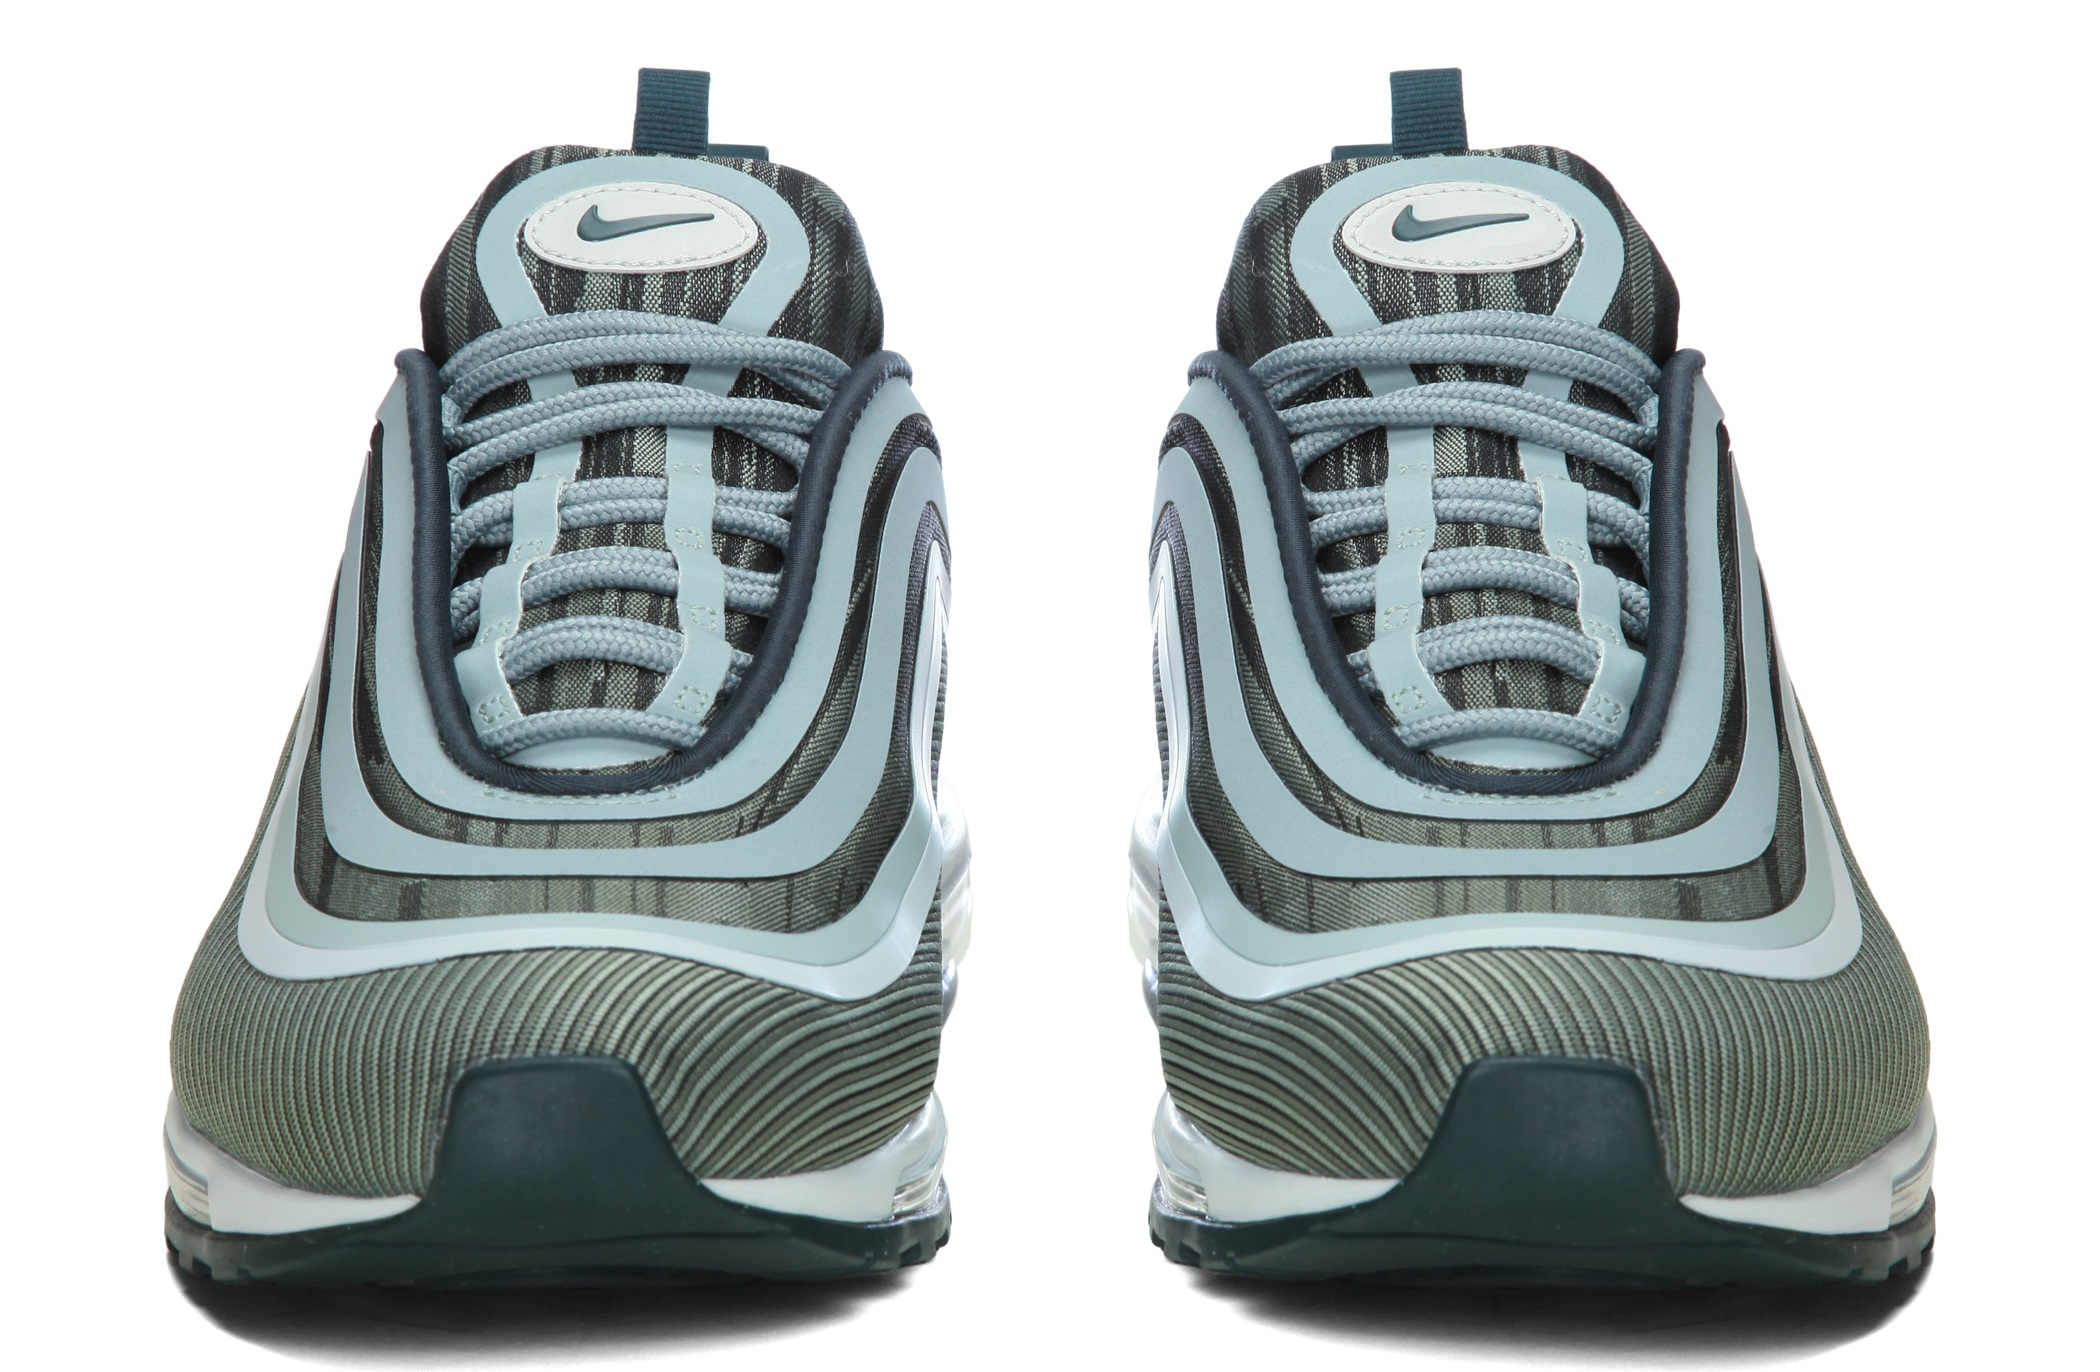
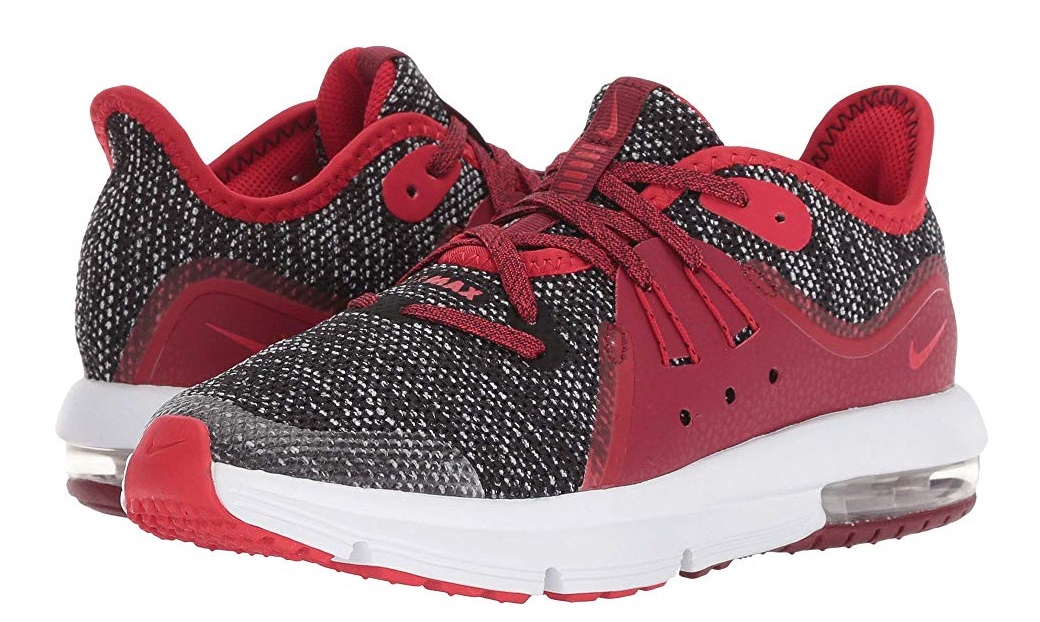
- Nike. The shoes are complemented by wide laces, which are tightened using several methods: "Saw", "Reverse loop", "Lightning", European lacing.
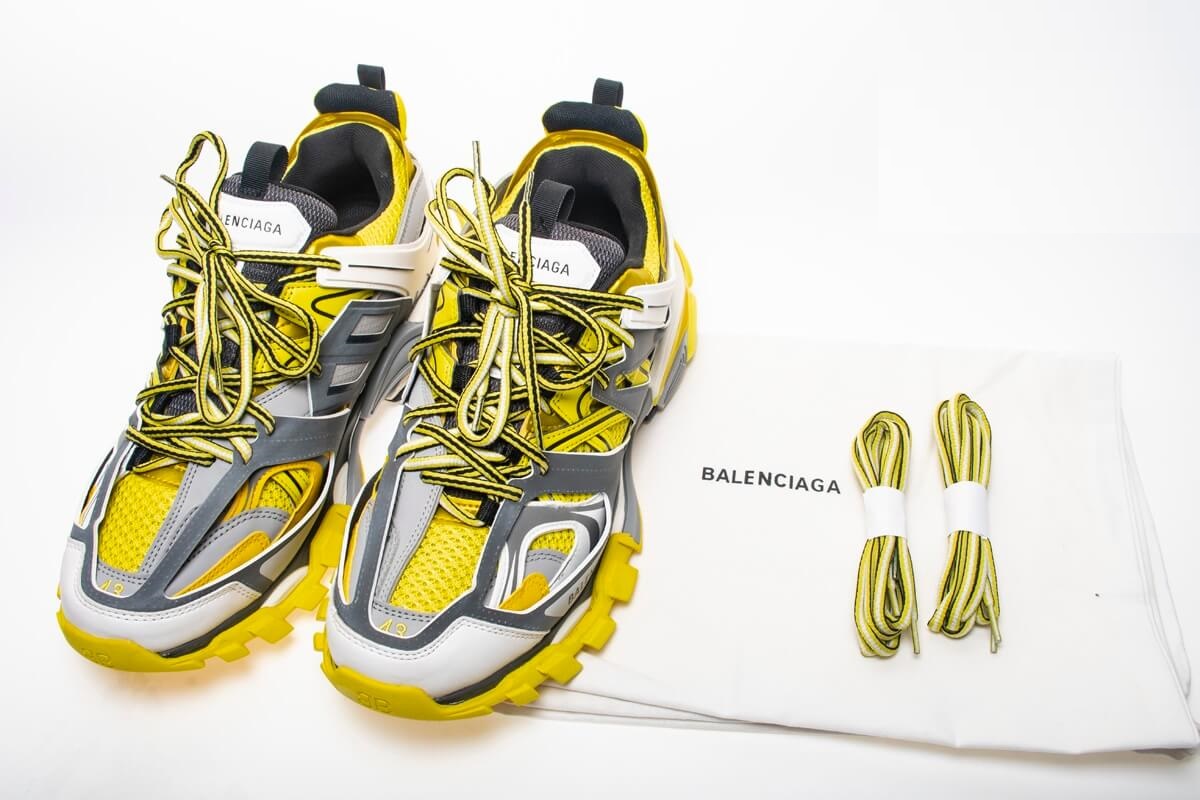
- Balenciaga. The brand's products have 12 holes, an athletic lacing system.
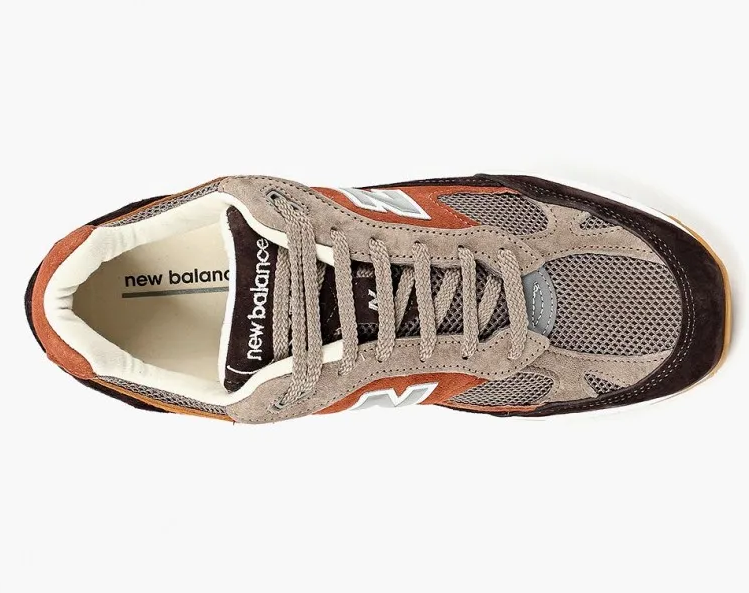
- New Balance, Adidas. Manufacturers use zigzag. To add originality, European, straight parallel loop is used. Romantic natures can decorate products with "Butterfly" lacing.

When choosing suitable patterns, you need to be guided by the style of the shoes and the number of eyelets. As for the color, the same tones are selected for black and brown models. Casual style shoes are complemented with laces according to the following principle:
- Burgundy is a light cherry color.
- Blue - light blue.
- Gray - white.
- Brown - beige.
Fans of experiments will be able to use bright ties, or those that match the color of the sole. Let's say you can match the shade to gloves, scarves, bags, socks. To create sports lacing for white sneakers, use the same snow-white ties or rich, cheerful colors. In the first case, the image will be classic, in the second - original.
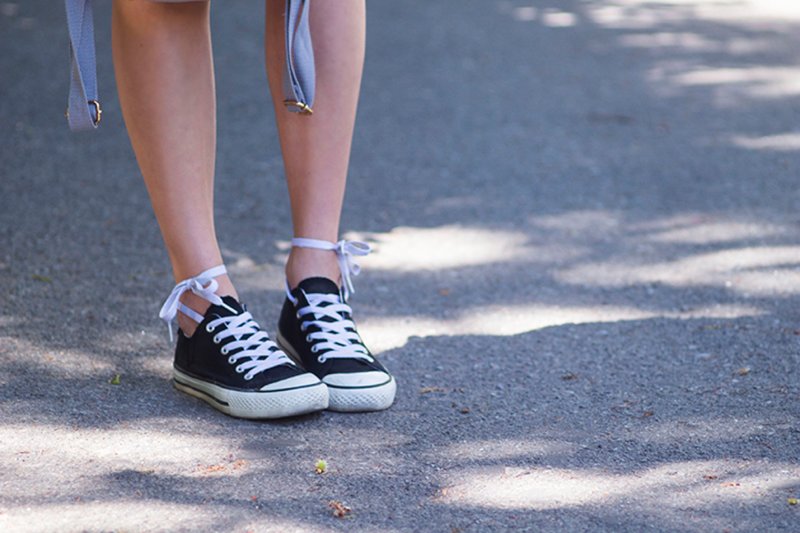
Today, non-standard solutions are in trend. One of them is tying laces around the leg, at the ankle level. The idea is simple and unusual, attracts attention and looks interesting. The optimal scheme will be straight lacing.
If there is a loop on the tongue, the laces are threaded through it after using the desired pattern, which ensures fixation, preventing deviations to the side. To hide the laces without tying, it is necessary to use the upper eyelets with threading inside and tuck the ends between the tongue and the boot.
The side holes on sneakers and trainers are used for ventilation, but can also be used to securely fix the feet. When using a cross pattern or zigzag, these eyelets are also used. The method is used in hiking conditions, and is suitable for adjusting shoes to a narrow foot.

Nuances depending on the number of holes
The fewer eyelets there are, the simpler the lacing method should be. To use voluminous, complex patterns, you will need a lot of space, because only in this case will they look attractive. So, for shoes with 3 holes, the straight or parallel technique is optimal. For tying models with 4 holes, the traditional cross-cross method and the original one - diagonal are suitable.
To create lacing for sneakers with 5 holes, you can take any beautiful patterns, despite the odd number of holes. The optimal method is the cross method with the ties coming out from the front or inside. Another suitable method is the straight one.
Shoes with 6 holes are the most common, so most patterns are designed for this number. The checkerboard method using multi-colored laces looks interesting. The combination of red and blue colors looks organic.
Models with 7 holes look attractive with a cross pattern. For lacing shoes with more than 8 holes, various patterns are used. Thus, women's boots look interesting with the Roman technique or "Butterfly". For men, "Lightning" and military equipment are suitable.
Any lacing scheme is suitable for an even number of holes. For models with an odd number, it is necessary to use some "tricks": skipping holes, one diagonal tie at the beginning, cross and double stitches.
Useful tips
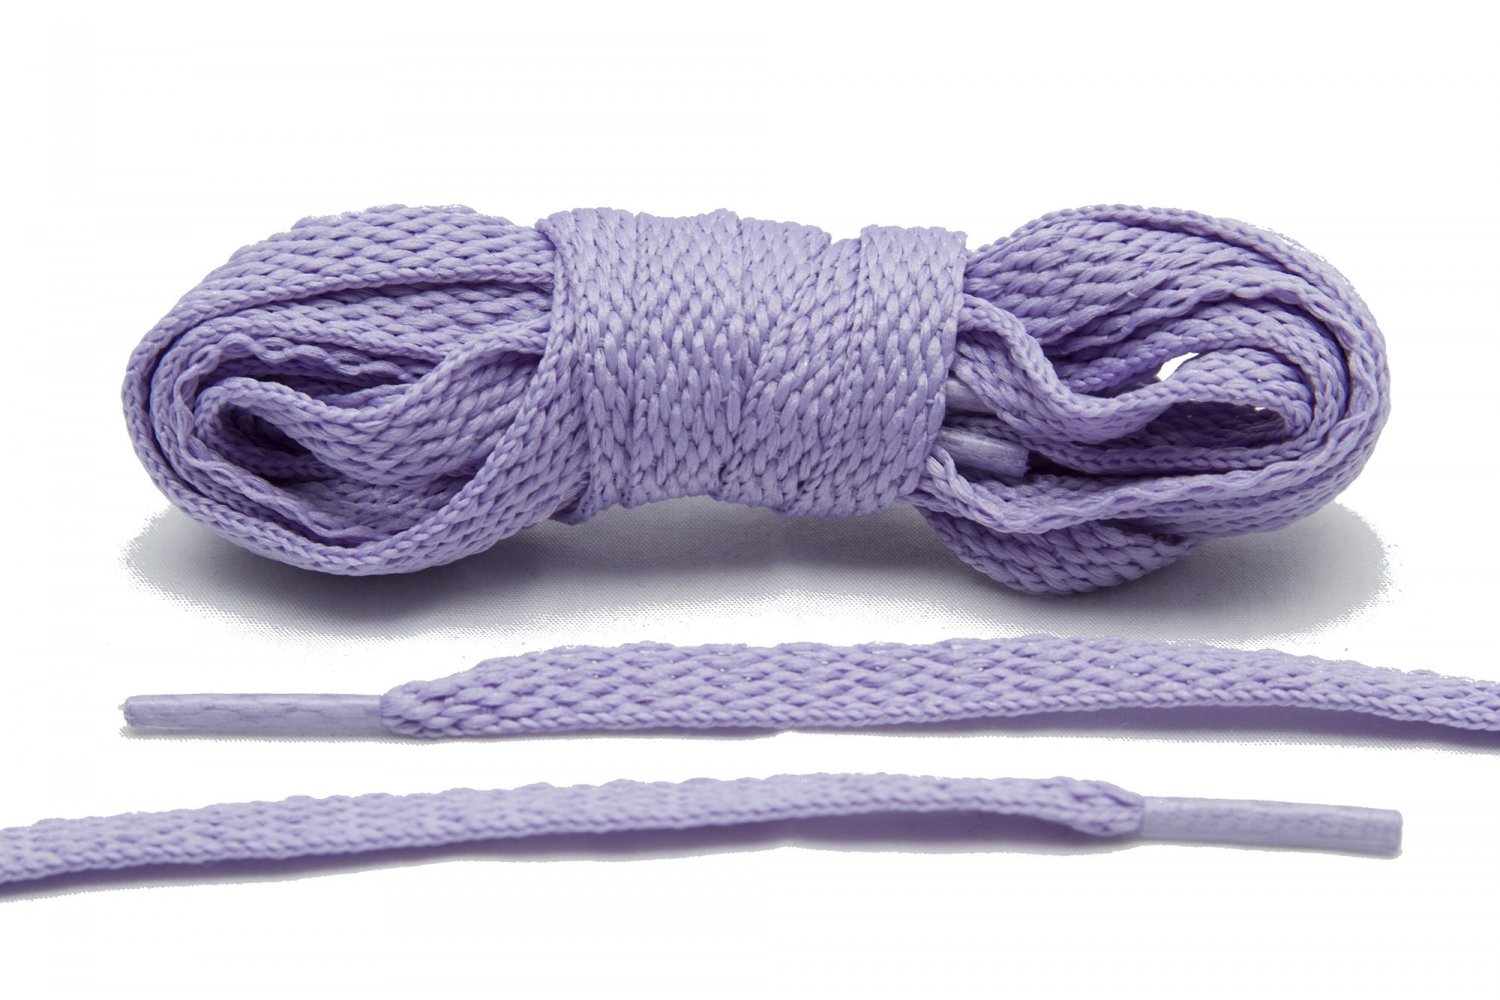
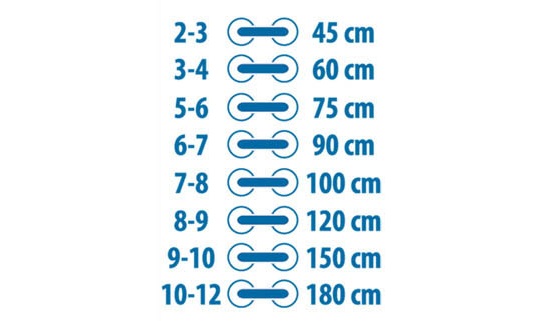
Problems often arise when choosing the correct length of laces. It is necessary to follow the accepted standards based on the number of eyelets:
- 2-3 pairs - 45 cm;
- 3-4 pairs - 60 cm;
- 5–6 — 75 cm;
- 6–7 — 90 cm;
- 7–8 — 100 cm;
- 8–9 — 120 cm;
- 9–10 — 140 cm;
- 10–12 — 180 cm;
- 16–19 — 250 cm.
It is not enough to know how to tie long shoelaces beautifully, it is also important to learn how to make a reliable knot. Lan is a loop with the ends passing through each other. A safe method is to create a pair of loops that are pushed through a hole in the middle.
Not everyone likes the standard fixation of the ends, so the question arises of how to tie laces on sneakers without bows. The surgical method is optimal. First, the knot is tied in the classic way, and then one end of the lace is additionally wrapped around the knot.
You can tie your laces so that they are not visible. To do this, pass the ends through the upper eyelets and tuck them under the tongue or into the inside of the shoe. It is not necessary to make knots.
There is a quickest way to tie your shoelaces. Just follow these steps:
- The laces are tied as usual. The little fingers on both sides are threaded under the ends.
- The right index finger and thumb are placed under the corresponding lace, and similar manipulations are performed with the left hand.
- The middle finger moves the free edge of the right tie back, the left hand simply rotates.
- The two loops are crossed. The left thumb pushes the free end towards the right, and the right middle finger pushes it between the left index finger and thumb.
- The left index finger and thumb grasp the free right lace and the right fingers hold the left end.
- The free edges of the opposite loops are threaded through each other.
There are a huge number of shoe lacing patterns. Universal ones are simple and quick, original ones are unusual but not so easy to do, with multi-colored ties - interesting and eye-catching. The appropriate technique is selected in accordance with the type of footwear, style, and number of eyelets.
Video