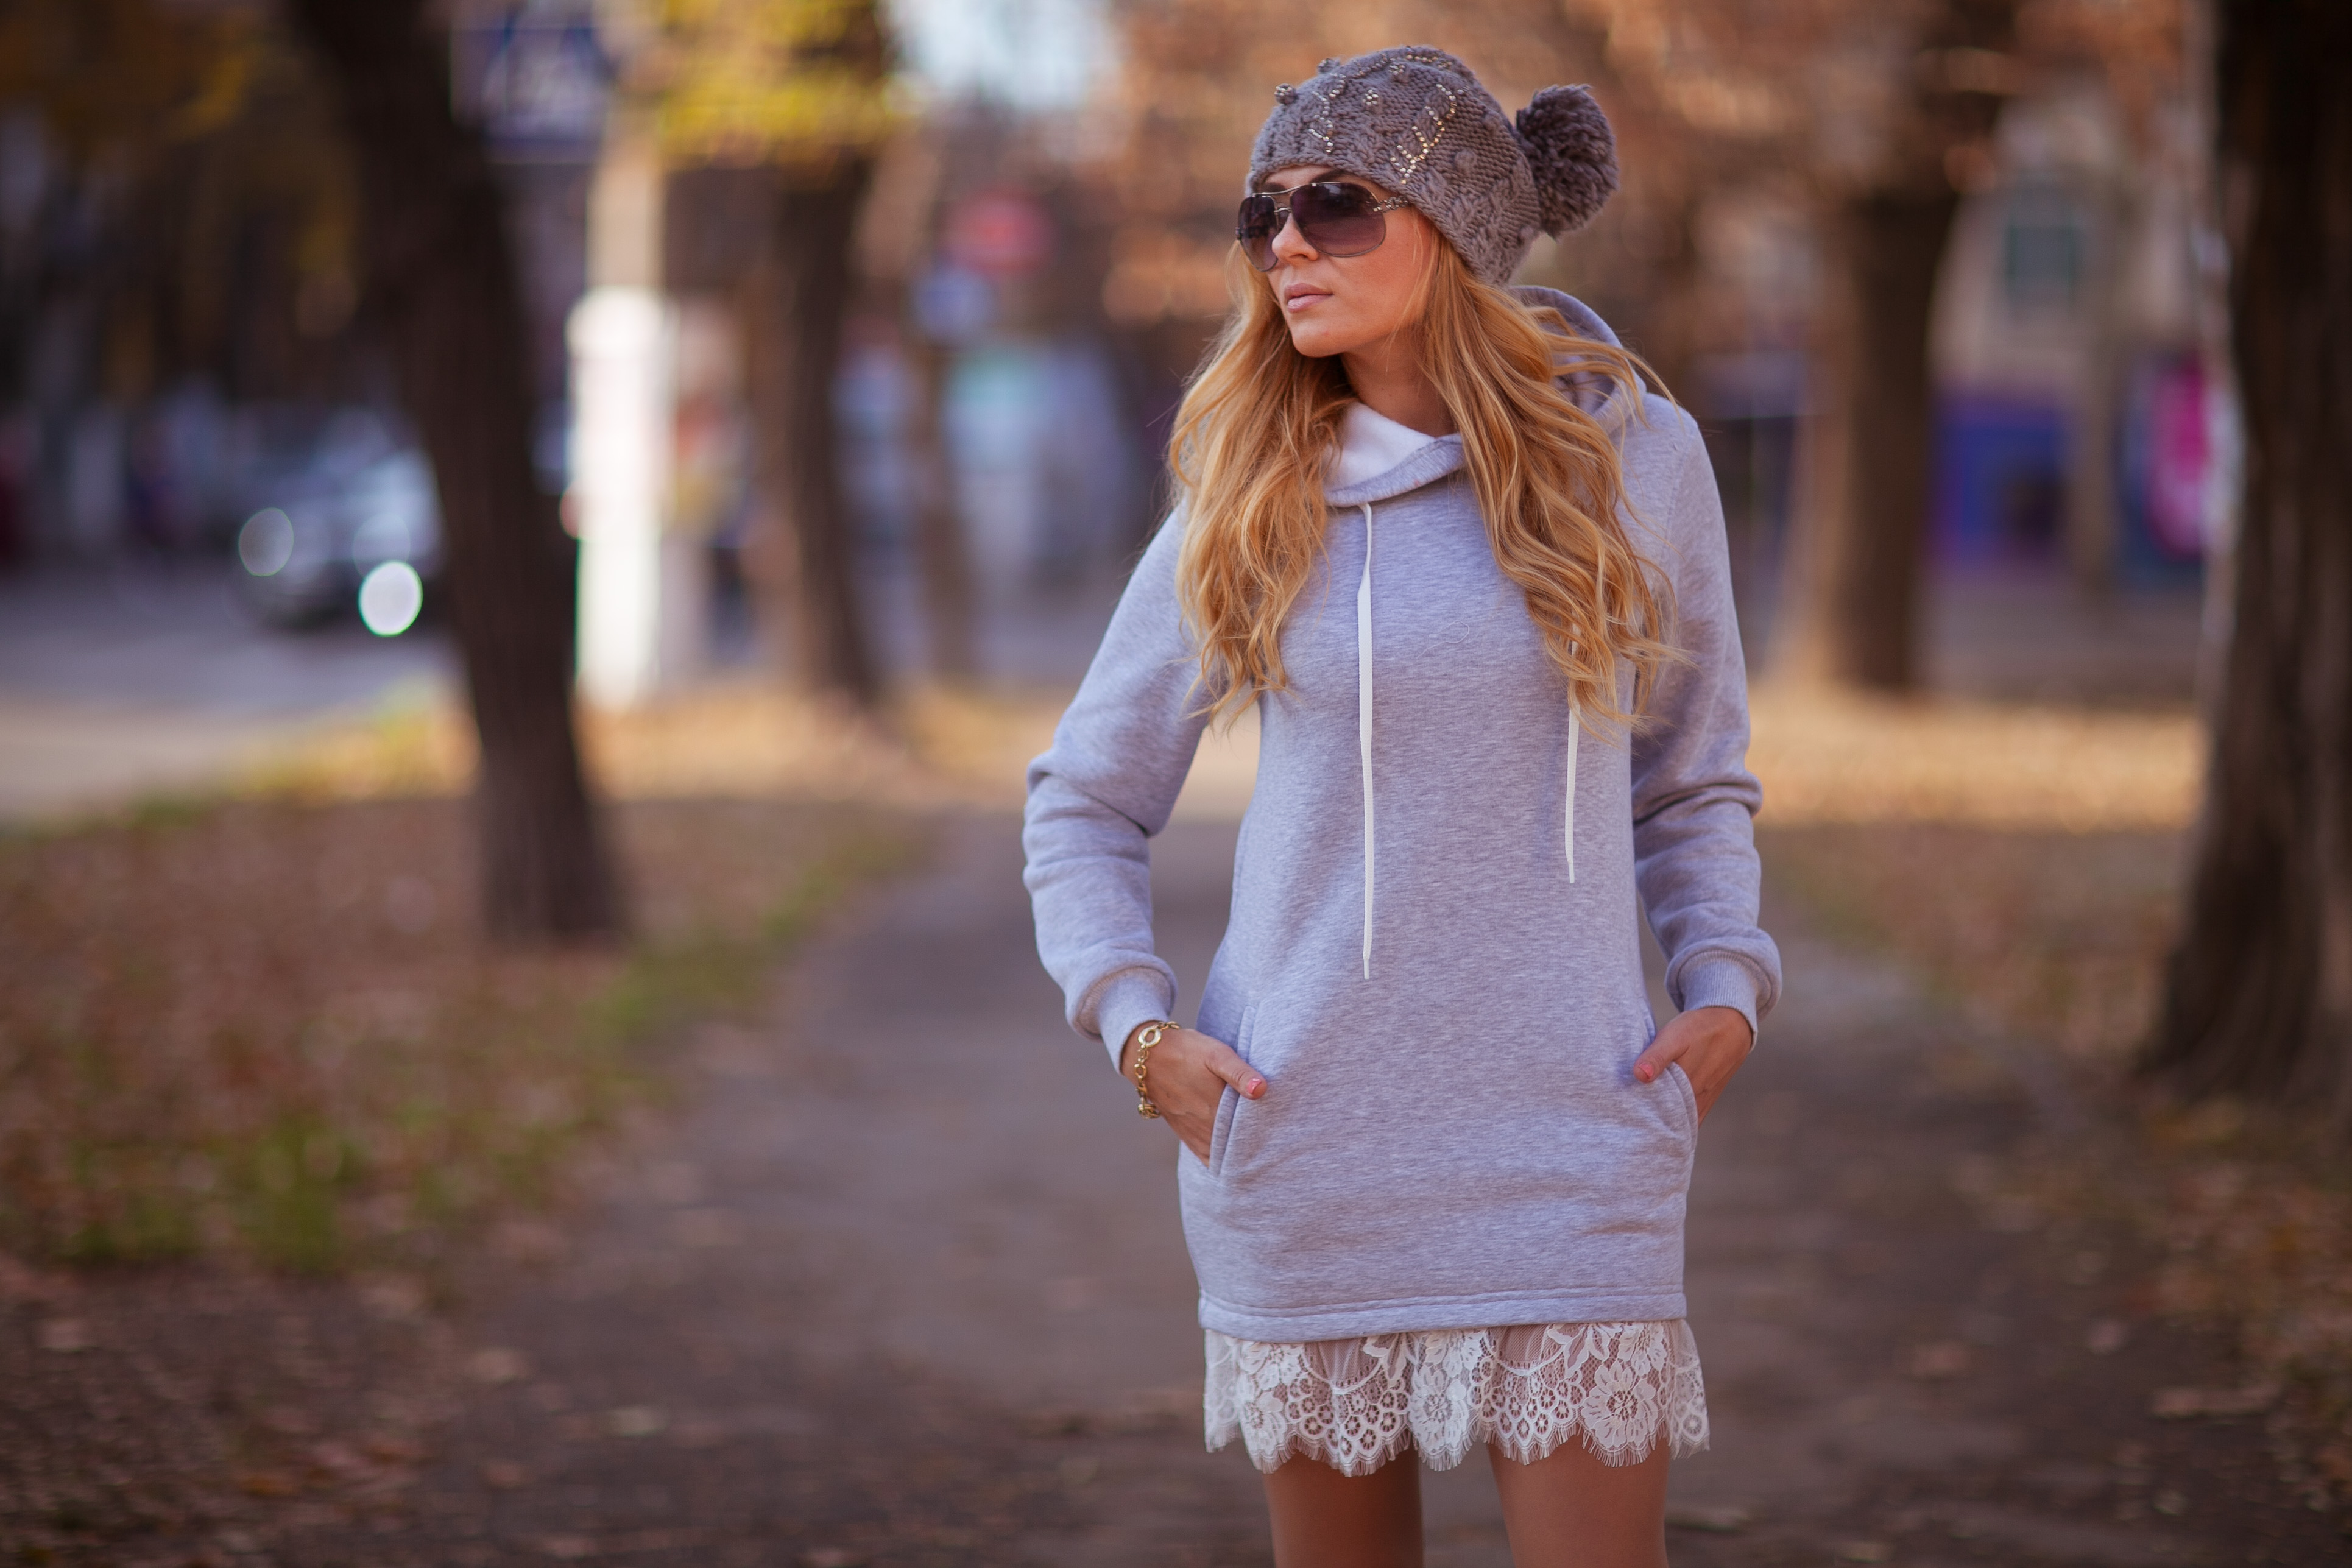
A hood often replaces a hat in the cold season, so it should be knitted from warm threads. It happens that things with it are worn in the summer, then it is better to use mohair or cotton. Many craftswomen do not know how to knit a hood with knitting needles from the neck, so they turn to master classes. Such instructions usually contain a detailed description of how to choose yarn, which knitting needles to choose and how to take measurements.
Measurements and calculations
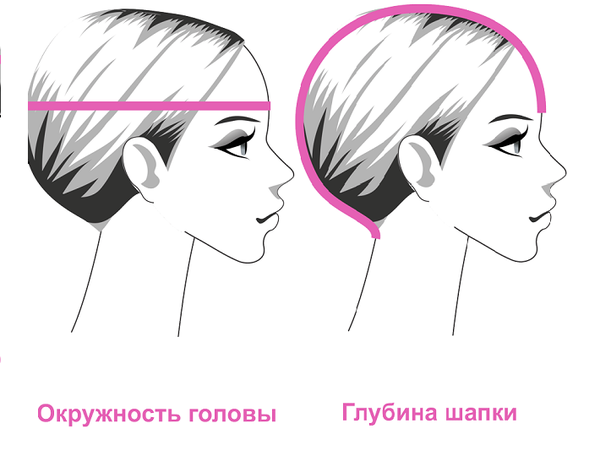
To prevent the hood from falling over the forehead or hanging back, it should be knitted to fit the head. To do this, you need to take measurements:
- head circumference;
- head height (distance from the neck to the crown).
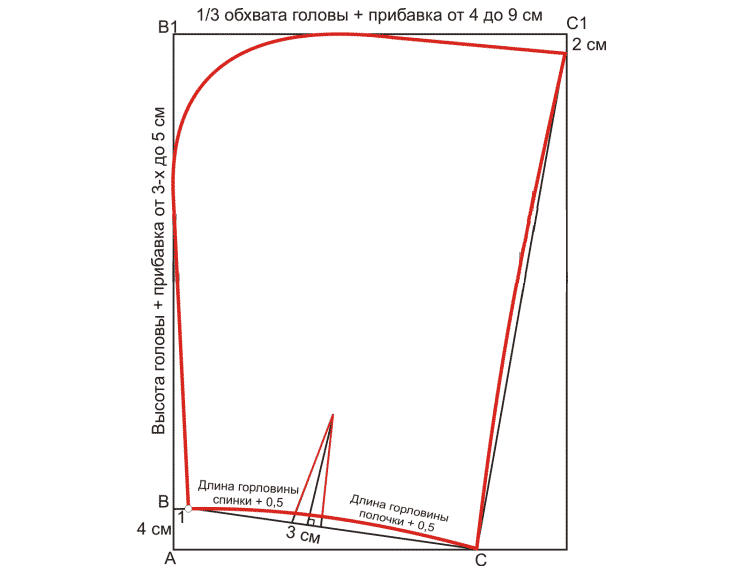
The construction of the pattern starts from the lower left corner, this data is relevant for all sizes:
- From point A, two segments are laid out at right angles, upwards and to the right.
- A vertical segment AB is drawn upward by 4 cm.
- From point B, you need to measure 1 cm (hereinafter point 1).
- Next, the length of the back neck and front is measured using the pattern.
- From point 1, the obtained measurements are plotted in a straight line, adding 3 cm for the dart - this will be value C.
- For the dart, from the same point comes segment 1C (from 1 to C): the length of the back neckline plus 1.5 cm.
- From the obtained point, the length of the dart is measured at a right angle of 8-10 cm.
- Segment 1C must be smoothly curved upward to obtain a concave line.
- From point B, measure up along the straight line B1 (from B to 1) – this will be the height of the head according to the measurement and add 3-6 cm.
- From point B1 to the right, add a third of the head circumference and add 4-7 cm.
- The upper edge of the hood needs to be drawn according to the pattern.
- From point C1, measure down about 2 cm and connect it with the concave line.
It is recommended to add at least 2 cm for a loose fit, as the hood should not completely encircle the head.
Popular knitting techniques
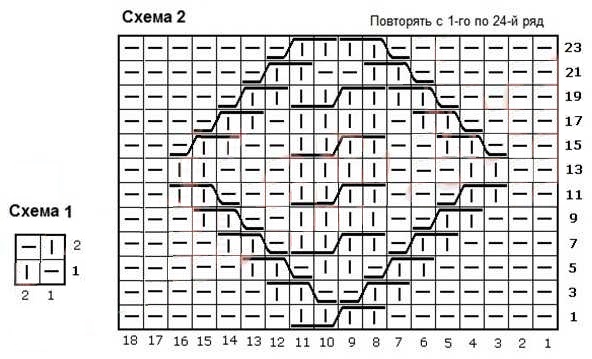
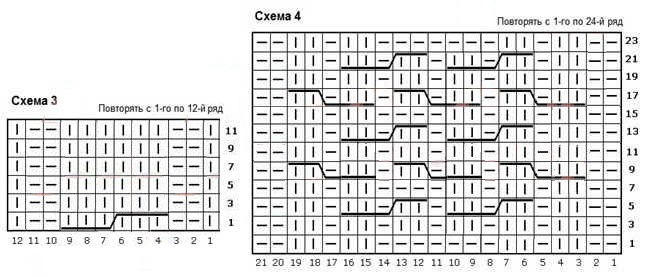
For knitting hoods, you can use both simple dense patterns and various openwork or voluminous patterns:
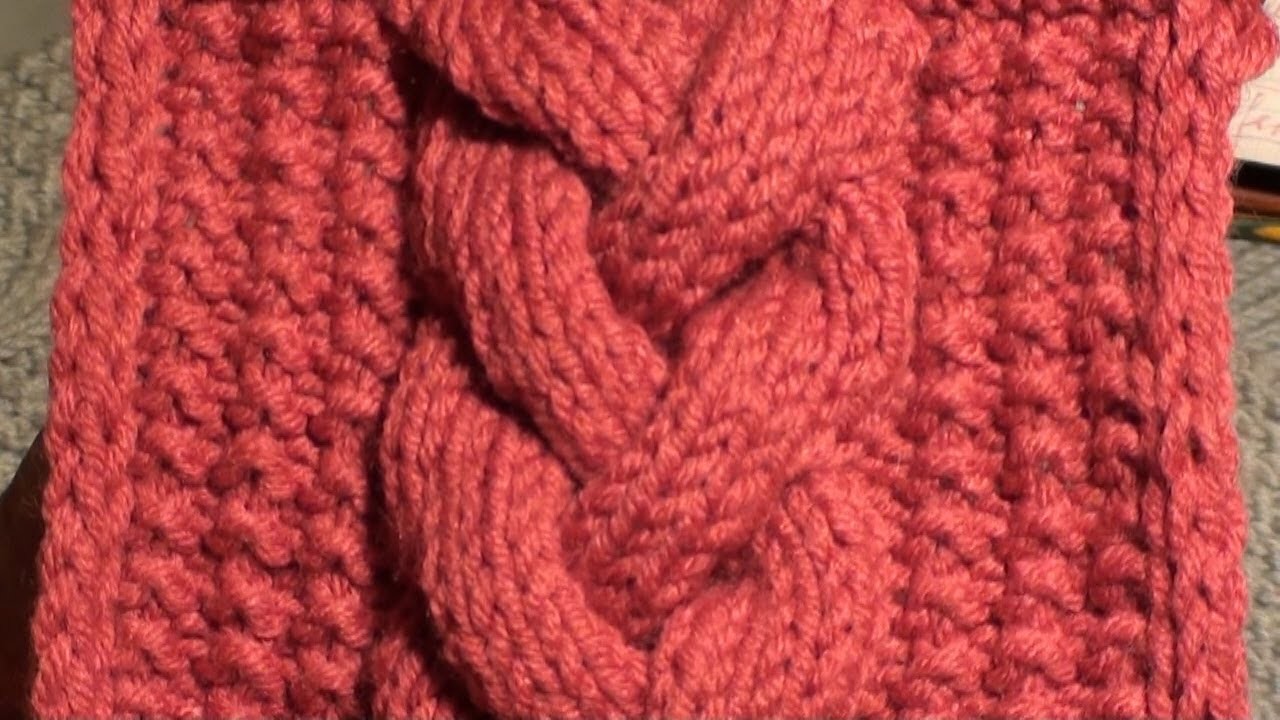
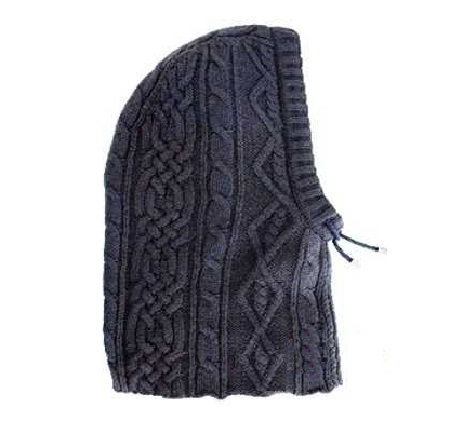
- Braids. Suitable for hoods that are sewn onto a jacket, coat or thick cardigan. This technique looks voluminous and is suitable for cold seasons.
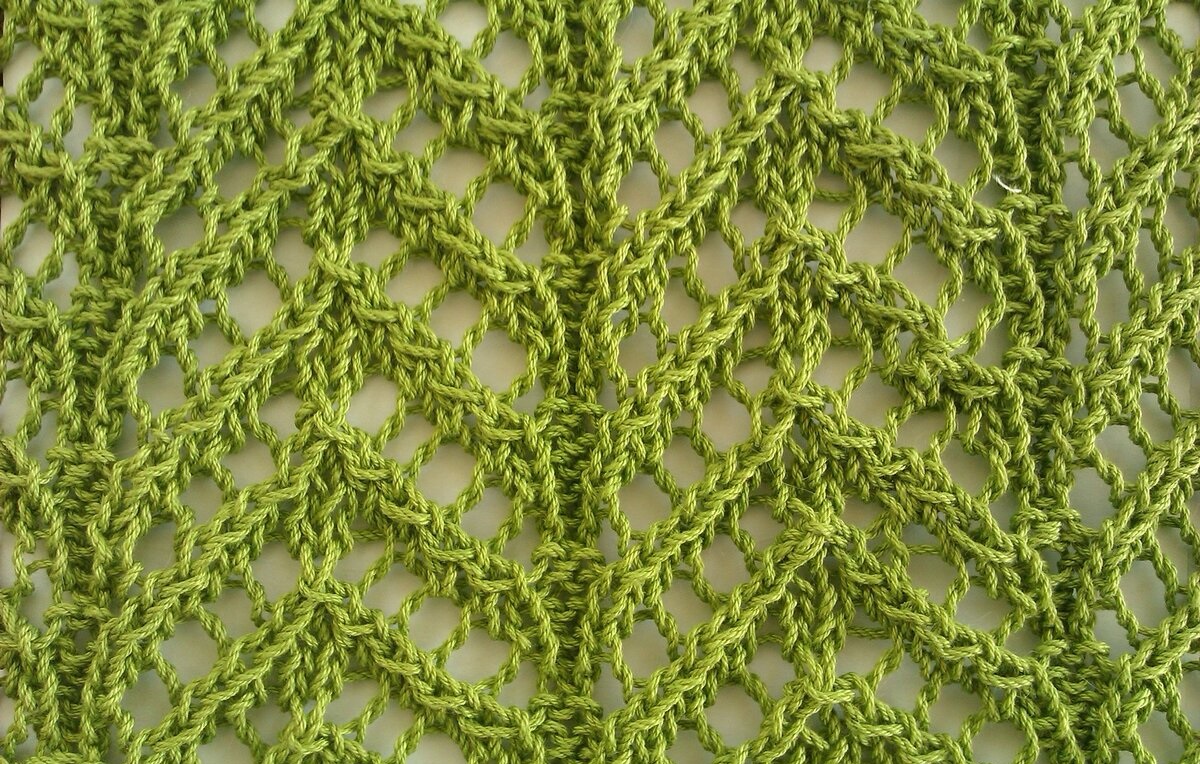
- Openwork options. Suitable for thin sweaters and pullovers. This technique is best used by a craftswoman who is skilled with knitting needles, because the patterns and execution can be difficult for beginners.
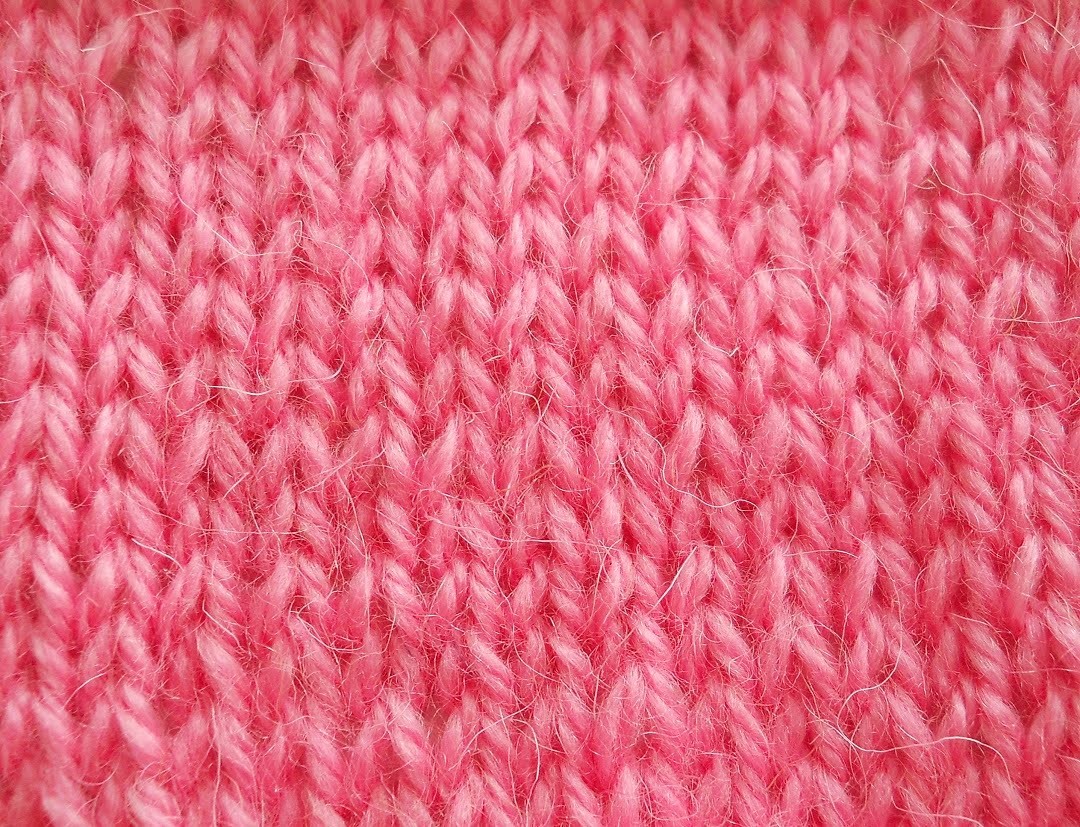
- A simple fabric. Knitted with a stocking stitch. It is better to start with this technique if the girl has been holding knitting needles in her hands for only a couple of weeks. The pattern is created by alternating front and back rows.
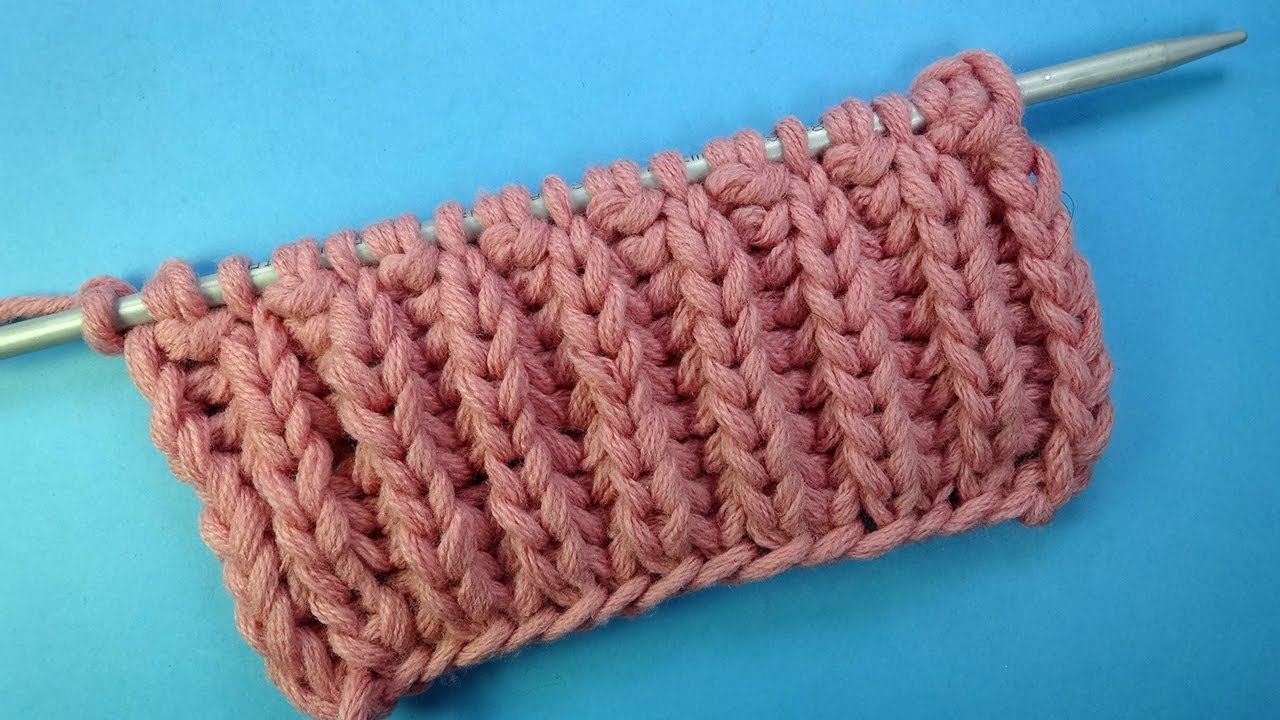
- Elastic band 1 by 1. It is made by alternating front and back loops in a row. Suitable for both beginners and experienced needlewomen.
The patterns are arranged from top to bottom and are knitted across the width of the product. For example, on a snood-shaped hood, braids or elastic bands are best knitted along the length of the fabric. In products with diamonds, there is no particular preference in placement, since this pattern is knitted over the entire area.
Step-by-step master class on creating basic hood models
A knitted hood can be made by a beginner needlewoman if she follows the instructions and counts the stitches. You can also create a product according to your own idea, combining known patterns and techniques.
Many people try to knit according to the pattern with knitting needles, the description allows you to do this without mistakes. Beginner needlewomen usually find it difficult to correctly imagine how to knit a hood. It is recommended to find a master class with a description and create your first product according to it. It's best to start with something simple like ribbing or stockinette stitch, and then move on to more complex patterns.
All measurements must be taken taking into account the desired pattern.
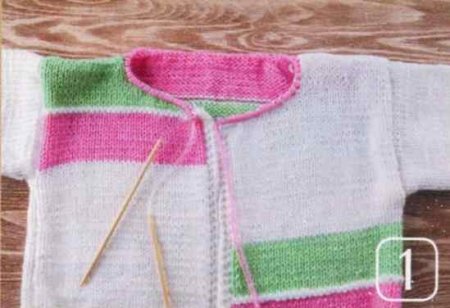
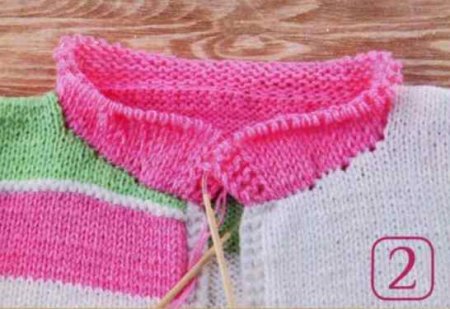
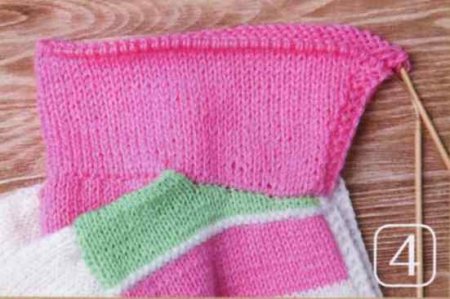
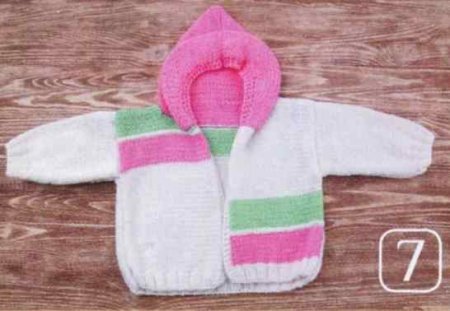
Classic on the sweater (from the neck)
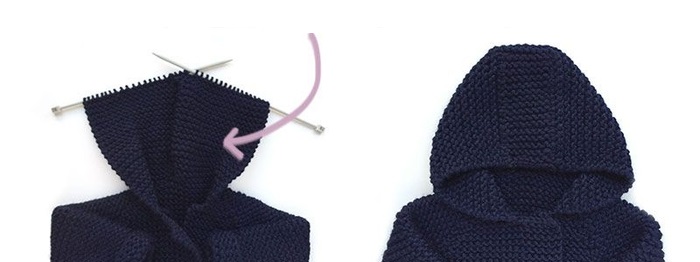
Even a beginner needlewoman can knit a classic hood with knitting needles from the neck. It is better to make the product with the same pattern as the cardigan or sweater. To ensure that the front neck is not deeper than the back, it is advisable to even out its depth. This can be done using shortened rows. You can learn how to knit a hood from the instructions:
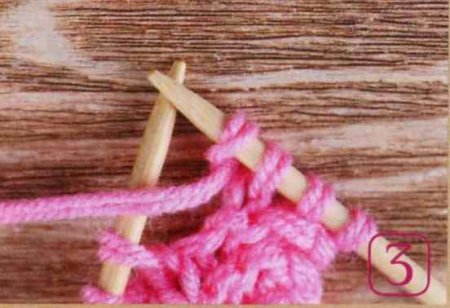
- First, you need to cast on stitches around the neck of the sweater.
- The first row is knitted with purl stitches. The second is done like this: 6 face stitches after the strip, turn the knitting to start the next row. The third is knitted with purl stitches. The first two and last stitches are the hood strip, they need to be done with garter stitch. The fourth row is knitted. Repeat this 2-3 more times.
- Next comes the strip and 12 front loops after it. Knit like this 5-7 times.
- After this, the shortened rows are finished. The strip and 16 front ones are knitted. This is repeated two more times.
- To widen the hood, you need to make increases after the strip and before it, knit in two loops. In every sixth row, add one crossed yarn over.
- To the required height, the hood is knitted with a garter stitch or elastic, at the craftswoman’s discretion.
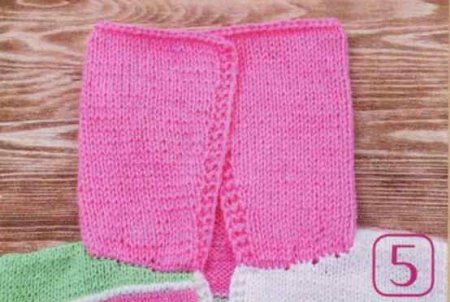
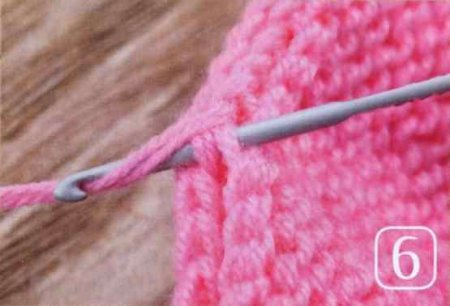
- When you reach the desired size, you need to close all the loops, fold the knitting in half and sew the top of the hood.
It is better to wash or steam a finished knitted hooded sweater. The smoother the seam, the neater the hood will look.
Bonnet
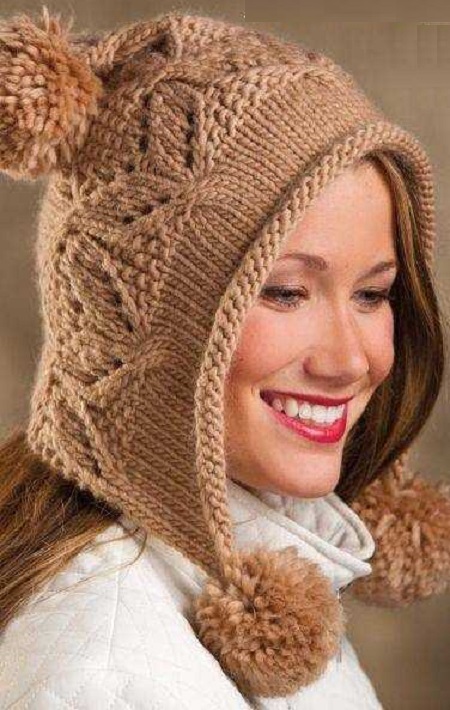
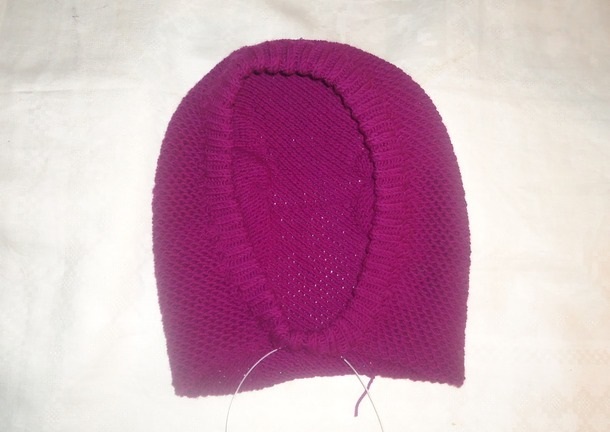
A bonnet is another interesting model of a hood with knitting needles. It is better to knit such a product with voluminous threads, so it will look more interesting. Knitting goes in the direction from the face to the back of the head in a single piece, and is sewn at the back. In order for the hood to turn out beautiful, you need to follow the instructions step by step:
- Cast on the required number of stitches.
- Knit with stocking stitch to a height of approximately 7-8 cm, depending on the desired size of the hood.
- Next, according to the pattern, an openwork fabric is knitted, about 35-40 cm.
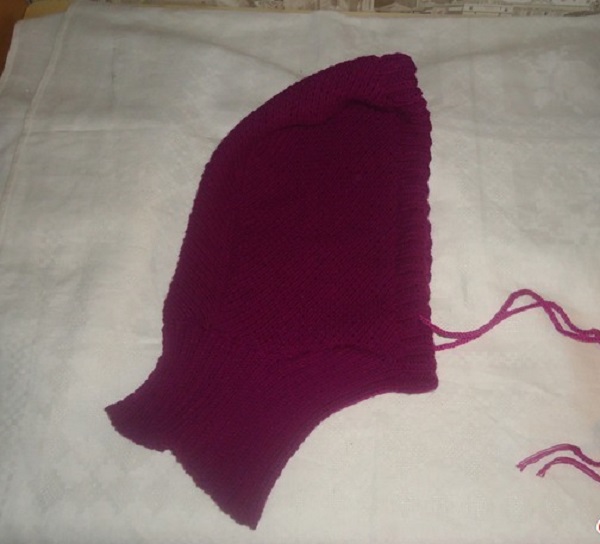
- Having reached the required length, you need to finish the row. You can’t do this in rows 1 and 15, otherwise the pattern will be messed up.
- Then, at the beginning of each row, 9 loops are closed, and 6 more rows are knitted in this way.
- The remaining loops are closed.
- The entire fabric is sewn together with thick thread using a vertical stitch.
It is better to start the satin stitch with thin threads and knit the pattern with more voluminous ones.
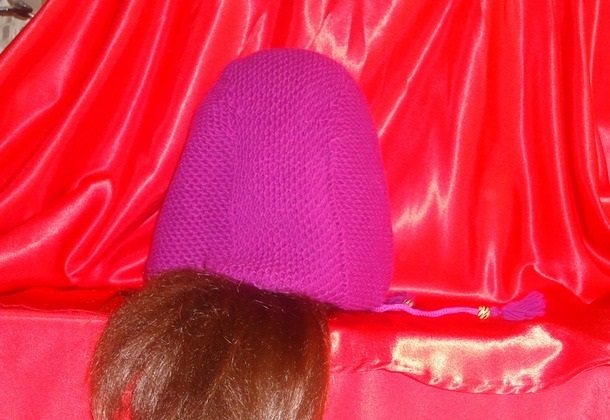
When the product is ready, it needs to be washed and steamed, and then sewn onto the jacket by the collar. If desired, the hood can be decorated with pompoms or cords.
According to the principle of knitting the heel
The hood knitted with knitting needles using the heel knitting principle turns out neat and seamless. This product can be sewn onto a sweater or jacket. The hood is knitted on two knitting needles. In order not to get confused, you need to count the number of loops and rows. The principle of how to knit a heel-shaped hood with knitting needles is simple:
- First, a rectangular piece of the desired height is created. This is the top and back of the product.
- Afterwards, edge loops are collected on the sides. The fabric is knitted according to the selected pattern. It is advisable to choose something symmetrical, for example, diamonds or zigzags, so the hood will look more beautiful.
- After all the rows have been cast on, you need to close the loops on the sides and stitch the hood from the top.
- You can also knit an elastic band at the end, then the product will not lose its shape after washing and long-term wear.
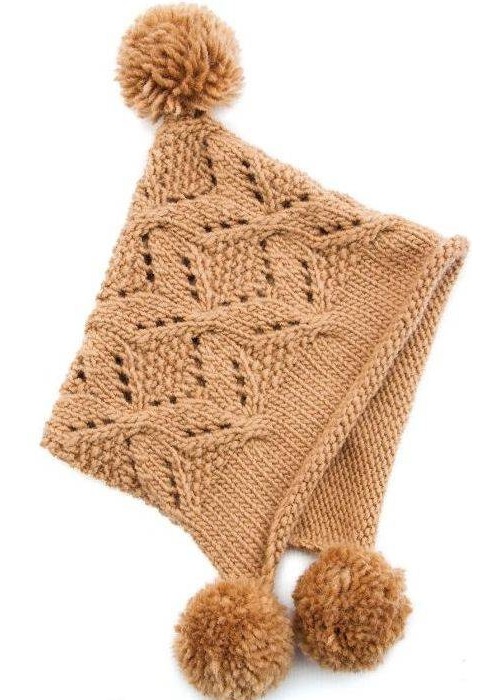
This style of hood is suitable for a sweater or jacket, it will also look good sewn to the neck of a knitted cardigan made of thin yarn. If necessary, add cords and decor in the form of sequins or rhinestones. In addition, the hood can be decorated with a pompom.
With a bib for a child
For a child, it is better to knit a hood with a bib. This model looks like a hat connected to a scarf. The product helps to keep warm in windy or frosty weather. The hood of this model, knitted from warm yarn, often replaces a hat.
For a hood with a bib, it is best to use children's acrylic with an admixture of wool, so that the thread is pleasant to the skin. To knit such a product with knitting needles for children, you must follow the instructions:
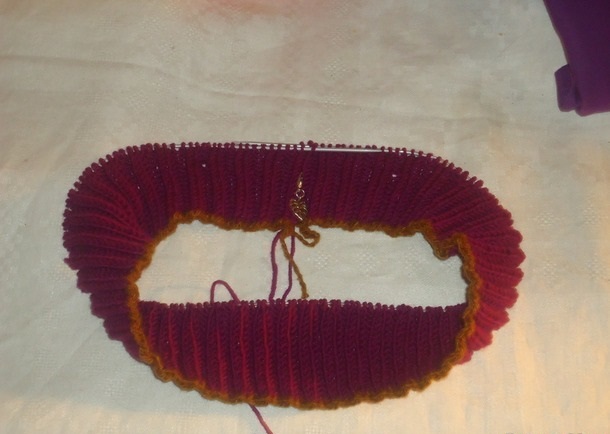
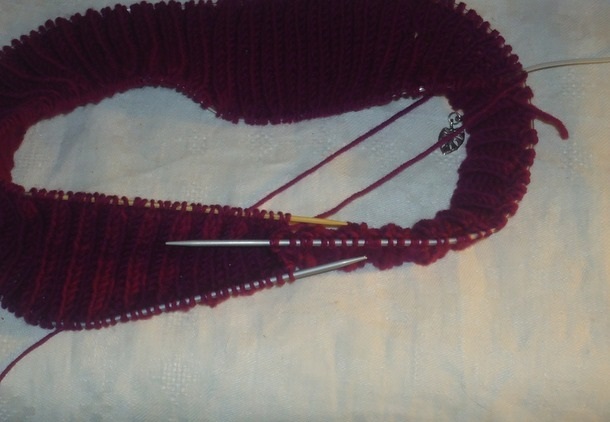
- Measure the height of the neck to make the collar.
- Cast on 150 stitches on circular knitting needles and knit a rib (1 knit stitch through 1 purl stitch), which is done on smaller tools than the rest of the product. At the beginning of the first row, you need to connect the two ends and knit in a circle up to 10 - 15 cm, depending on the desired length.
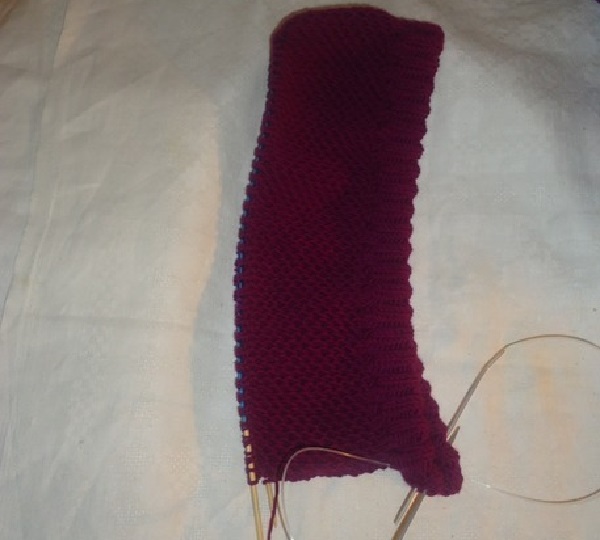
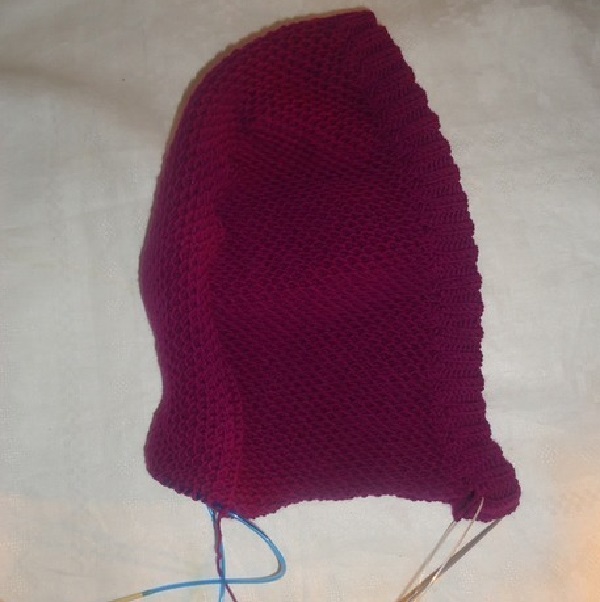
- Next, the crown is knitted as a separate element using the front surface. This hood is made in the shape of a heel so that it fits well to the head.
- After knitting the crown, the rows are closed (4 loops in every sixth row on both sides).
- Both parts are sewn together.
This knitted hood is decorated with felt appliques, flowers, beads, and rhinestones. If necessary, you can add cords and pompoms. The elastic can be made with a zipper so that you don’t have to pull the whole hat over your head.


Video