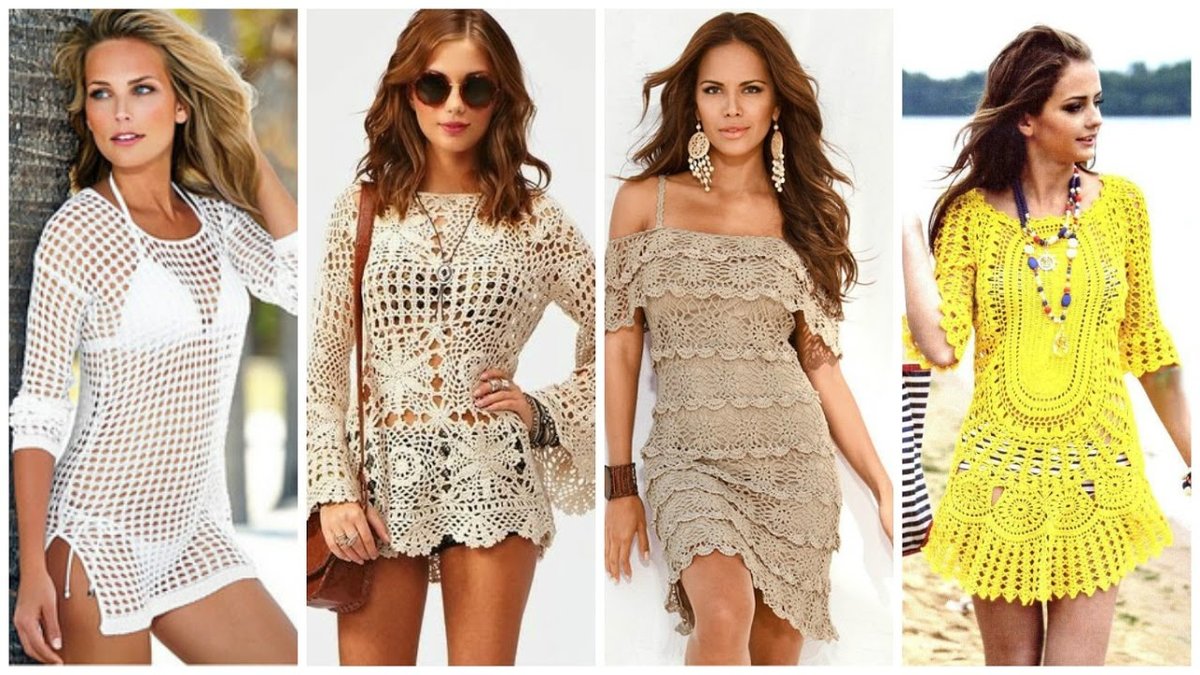
On the eve of the vacation planning season, you always want to treat yourself to a light, beautiful new thing for a beach holiday. A tunic is the most versatile clothing in this regard. It is light, protects from the sun and allows you to look elegant even on the beach. And an exclusive crochet tunic can even become a hit of the next season. It is not difficult to make it yourself if you follow the instructions correctly.
Materials and tools
To knit you will need a hook of the appropriate size and knitting thread. Since a tunic is more often summer clothing, it is recommended to choose threads that are pleasant to the body and light. Cotton-based threads are best:
- mercerized cotton;
- bamboo;
- cotton with lurex;
- with flax.
Synthetic and other mixed compositions can also be used for knitting:
- cotton mixed with polyacrylic;
- silk threads;
- viscose with cotton;
- acrylic threads.
For an everyday tunic, a composition of viscose and cotton is suitable, as it is the most wear-resistant. Clothes made from such threads will not require careful care. Products made from viscose are very pleasant to the touch, but it stretches over time. Therefore, when knitting, this must be taken into account and some reserve length must be left.
A summer tunic made of linen threads is perfect for hot weather. But you need to understand that linen is subject to strong deformation due to its structure - such products wrinkle quickly, so they require more careful wearing.
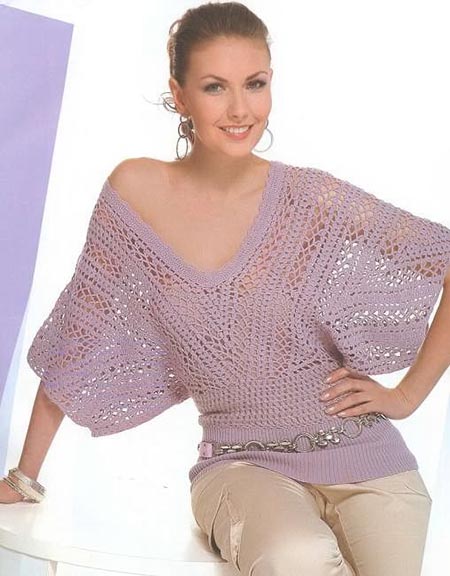
There are not only summer tunics. Some openwork models are worn over clothes, they are knitted from wool yarn with the addition of acrylic. Such threads come in brighter and more interesting colors than pure wool, so they are more often used for knitting. Acrylic products are very resistant to external influences, they retain a beautiful appearance even after 10 washes.
Once you have decided on the threads, you can choose a crochet hook. The recommended size is usually written on the balls of yarn, which makes the choice much easier. But if there are no such recommendations on the label, then you can determine by eye how tightly the hook will grab the thread during knitting.
The thickness of the thread should match the notch on the hook. In this case, the knitting will be dense and even.
It is often difficult for a beginner to decide on the amount of yarn. Usually, the descriptions of the selected models immediately indicate the approximate consumption of material for the product. But when starting to crochet, you need to take into account the characteristics of a particular thread and the density of the product. Quite often, the work may require more consumption due to the lush columns that are actively used in openwork knitting. If the needlewoman tightens the loops too much and knits quite tightly, she may also not have enough of the planned amount of material.

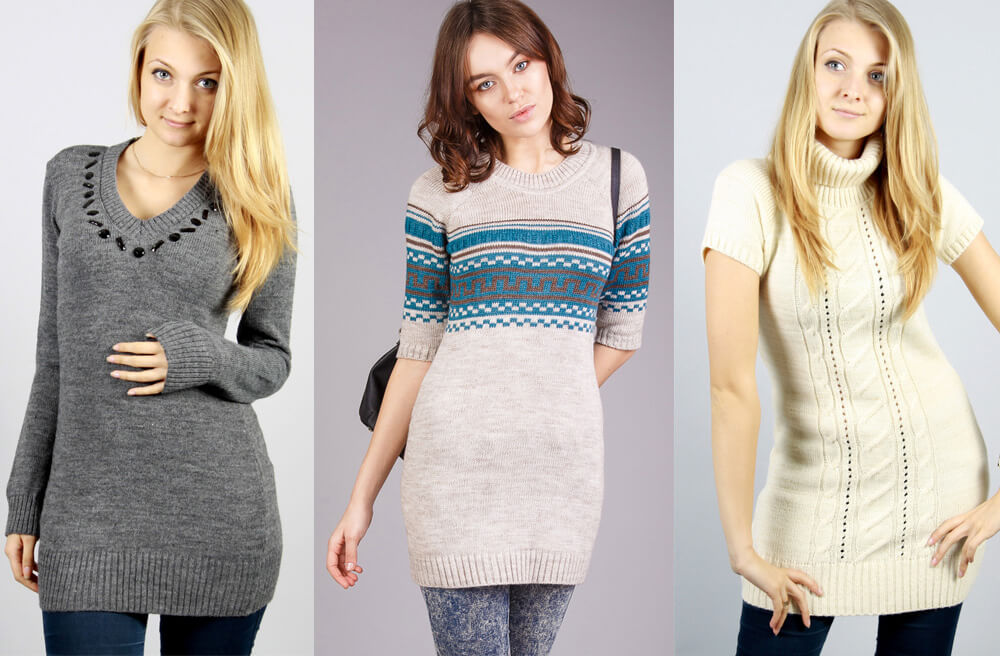
Model selection
It is very important to decide what style to knit before starting work. The simplest and most popular models:
- flared;
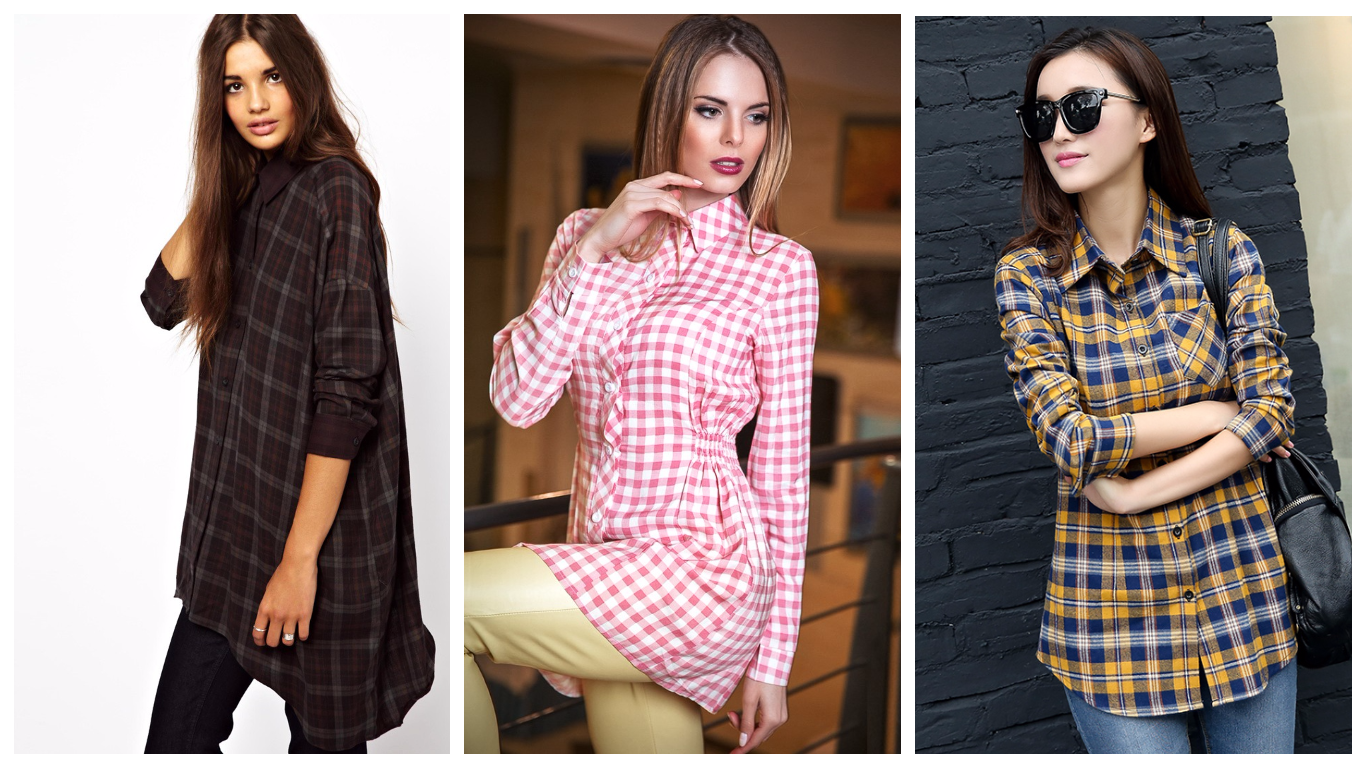
- oversized;
- bat;
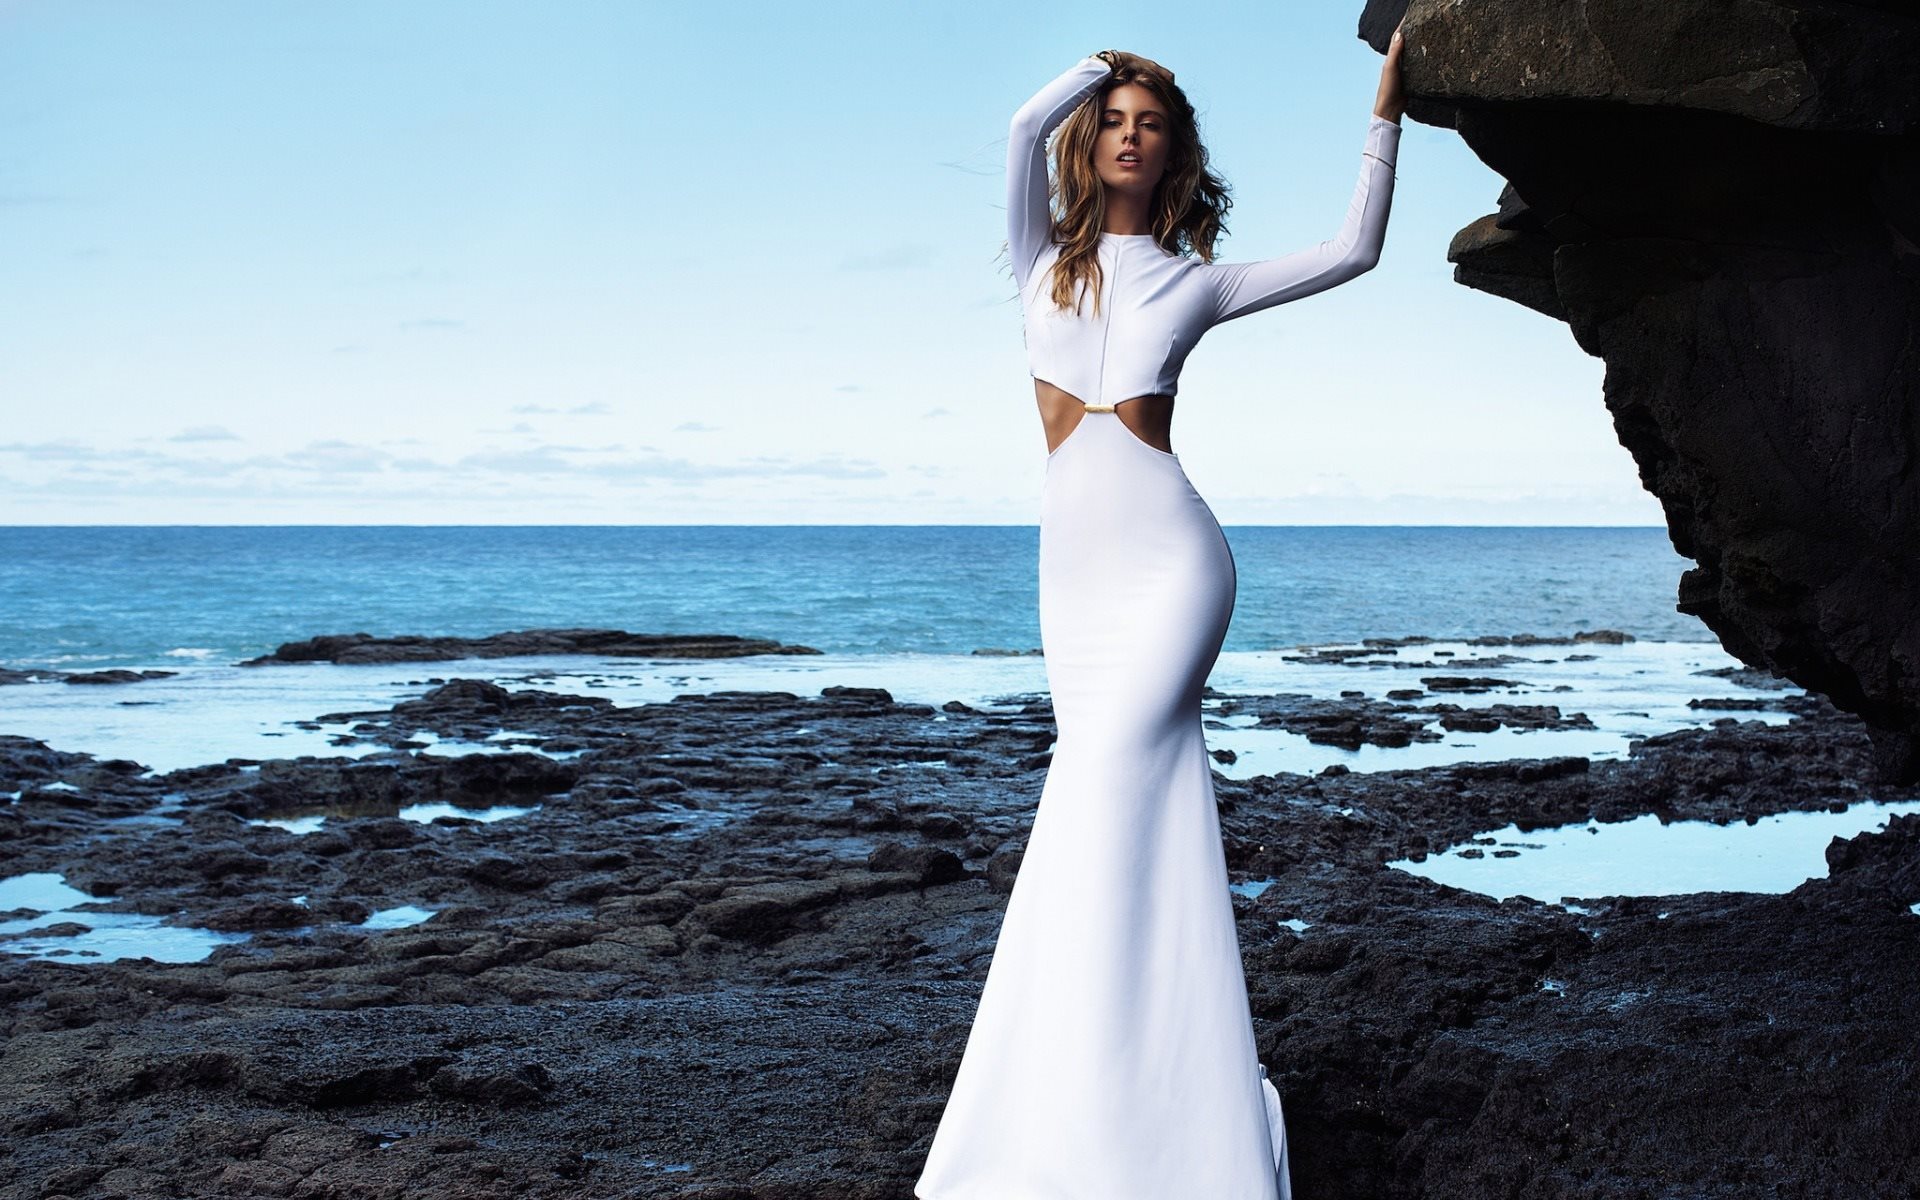
- straight;
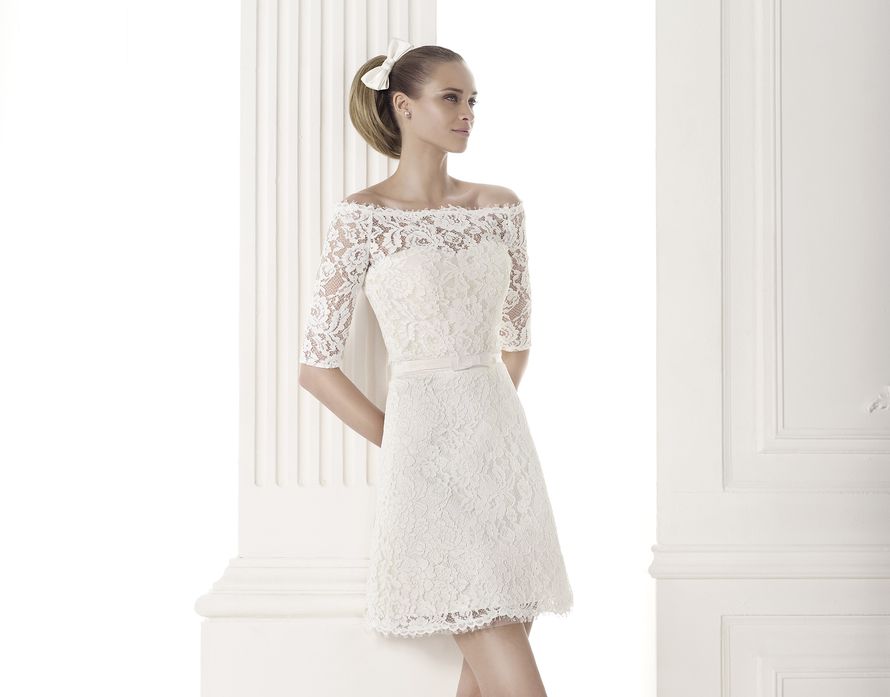
- with straps;
- with sleeves.
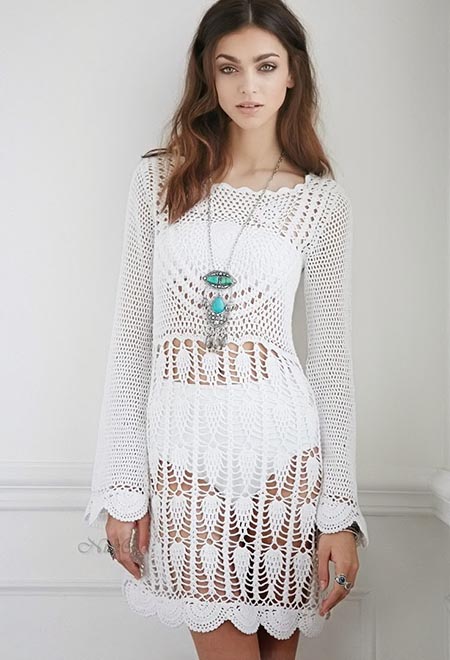
Almost all of these styles can be easily created even by a person without knitting experience. The best crochet tunic models for plus size women are flared and oversized. A straight knitted cape is suitable if the waist is not very pronounced, and the batwing version will cover full arms favorably. A model with straps or a straight white tunic will suit any figure, as an addition to a summer wardrobe.
A crochet tunic with sleeves made of motifs can be both a summer version and for cooler weather. It can be worn everyday or as an addition to a casual office look.
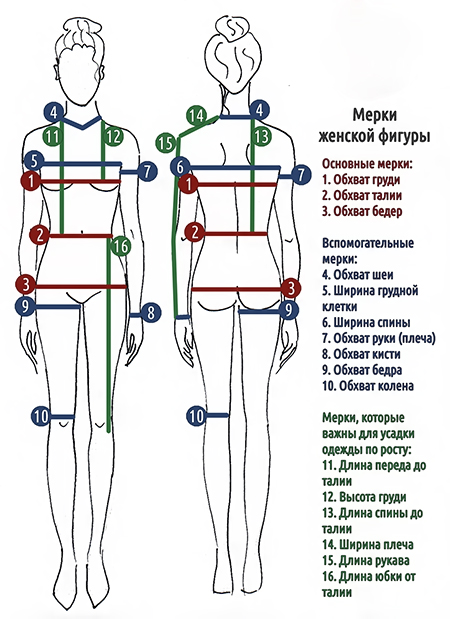
How to take measurements
Before knitting any model, it is necessary to take measurements to calculate the size of the finished product. Basic measurements for outerwear are taken with a soft measuring tape. It does not need to be stretched, but it should not sag either. There are certain parameters that are used for measurement.
|
Name of the measurement |
How to measure |
| Waist circumference | Around the waist line |
| Hip circumference | Around the hip line |
| Neck circumference | Around the base of the neck |
| Circumference in the "breeches" zone | Just below the hip line |
| Chest height | From the neck line to the bust line |
| Front waist length | From the neck line to the waist line |
| Length of product | From the waistline to the required length of the product |
| Shoulder length | From the neck line to the end of the shoulder |
| Sleeve length | From the end of the shoulder to the required sleeve length |
| Arm circumference | Upper arm circumference |
| Wrist circumference | Along the wrist line |
To knit a simple rectangular tunic, you don't even need a pattern. To do this, take the widest size and knit a rectangle half the width of the desired girth and the length of the entire tunic. In the same way, you can knit a simple cape with straps, adjusting the length of the product to the height of the straps. For more complex styles with a sleeve, you will need a small pattern for knitting the sleeve itself and the armhole for it.
In order for a women's crochet tunic to fit beautifully and emphasize the figure, and not its flaws, it is worth paying attention to the quality of measurements and using a proven pattern for the product.
Manufacturing stages
Even a beginner needlewoman without experience in knitting large items can make crochet tunics for women for the summer. All that is required is detailed diagrams and a description of the process. Below are crocheted tunics with diagrams and explanations.
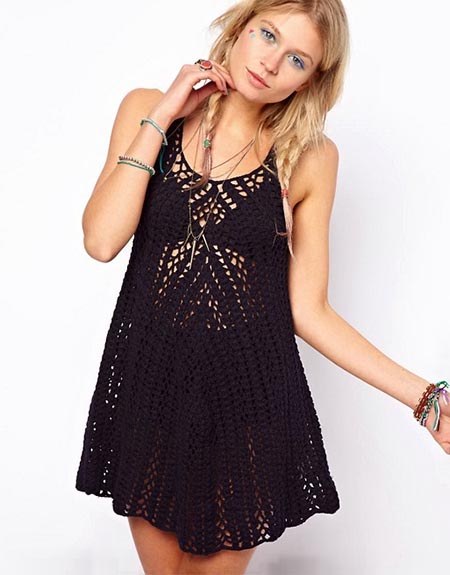
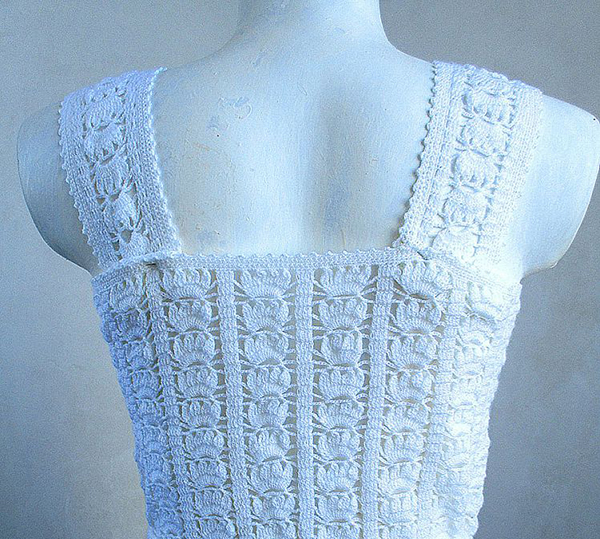
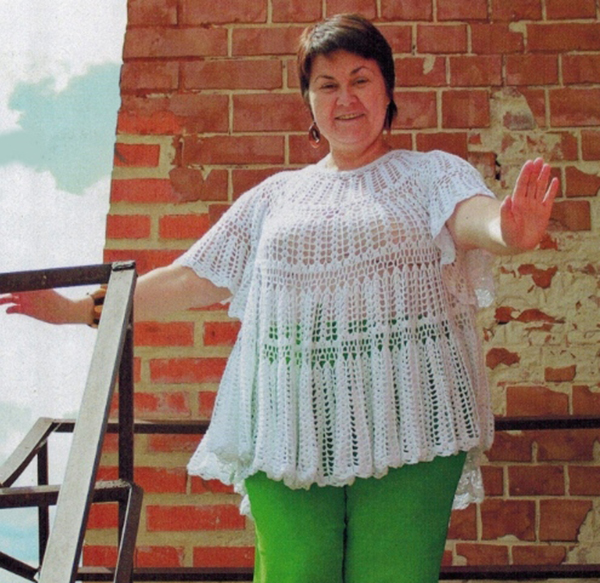
Openwork model with straps
The openwork tunic is knitted with acrylic and cotton threads using a 1.1 mm hook. For the lacy effect, a pattern of a lush flower and a simple row of 4 columns with 1 yarn over is used. Before starting knitting, you need to knit a sample to calculate the required number of pattern rapports.
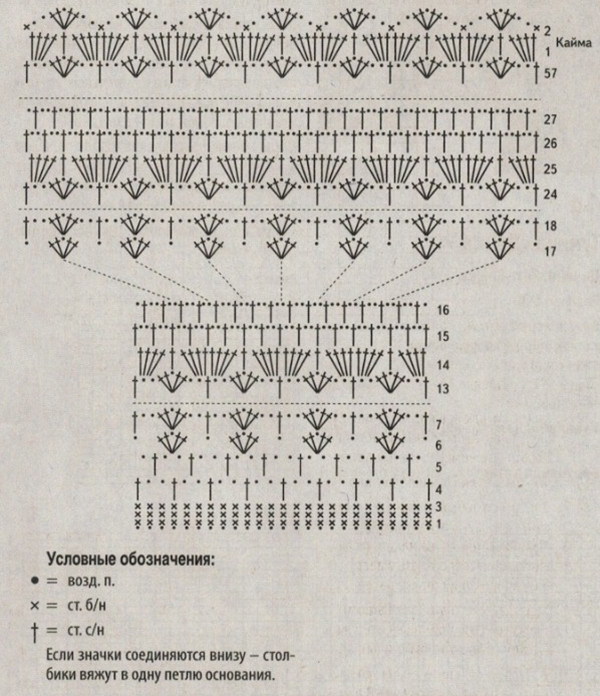
Knitting starts from the bottom in rows according to the description:
- First row – 4 sts, 3 ch, 1 st, 5 ch, 1 st, 3 ch. Then the pattern is repeated.
- Second row - over 4 STN, similarly knit 4 STN, then 2 VP, on the previous 5 VP make 12 STN, 2 VP, rapport is over.
- Third row – again 4 STN in the previous columns.
- Knit triple shortened stitches into the previous row with 3 VP between them, resulting in a flower shape, 2 VP, the pattern is repeated.
- Starting from the 4th row, the pattern is repeated from the 1st row again.
- Knit the pattern along the entire fabric from the bottom of the garment to the armhole.
- Determine the location of the straps in the front, knit them to the required length, and sew them to the back.
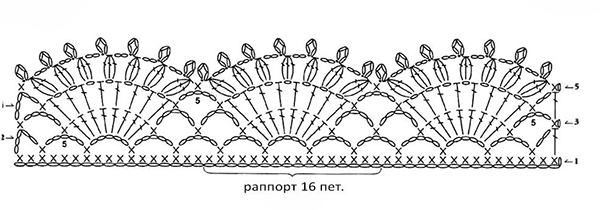
The lower edge of the tunic can be additionally decorated with a "shell" pattern. It is recommended to additionally tie the neck opening and the edges of the armholes.
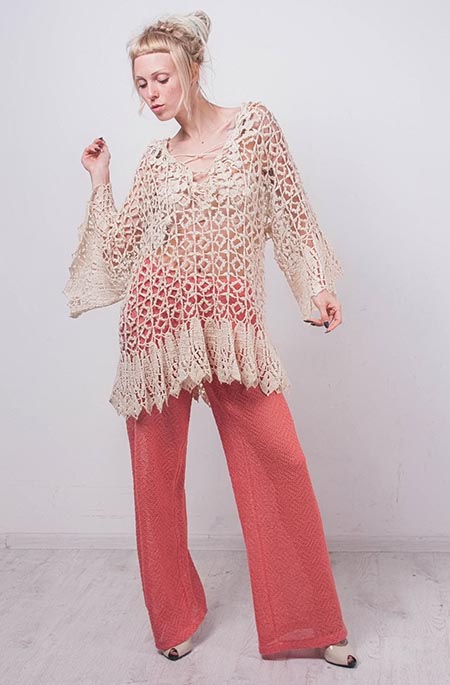
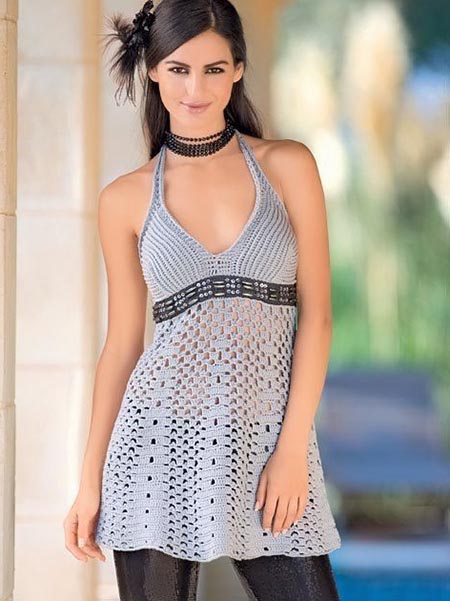
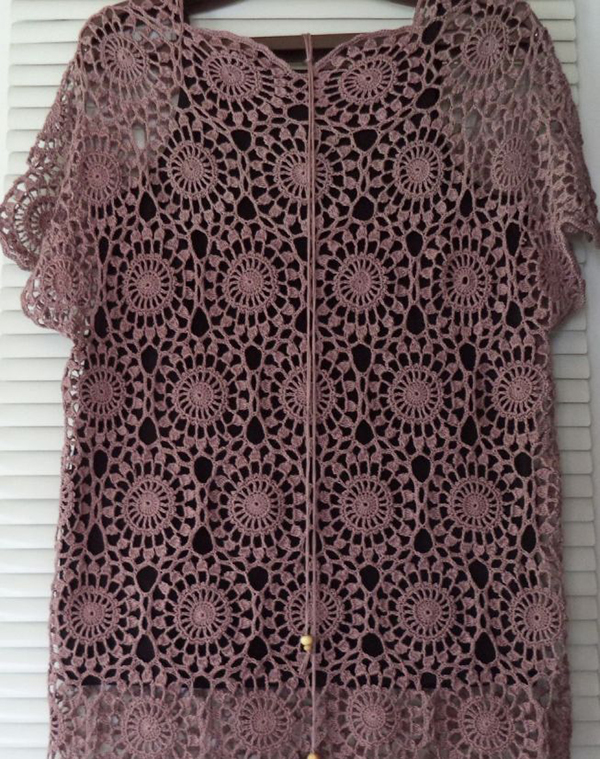
Summer flared tunic with motifs
To knit a tunic from crochet motifs, choose any beautiful pattern: a square, a snowflake or something to your taste. Step-by-step actions:
- A sample is knitted to calculate the knitting density.
- Individual motifs are knitted according to the pattern.
- The flared crochet tunic is assembled from top to bottom using a pattern of ready-made elements.
The motifs can be connected during the knitting process (for advanced craftsmen) or folded on the pattern, after which the finished patterns can be sewn or knitted together according to the size of the product. A tunic made of motifs is flared due to the size of the patterned elements or by increasing their number in one row. The final size of the product can be changed by replacing the hook with a more voluminous one.

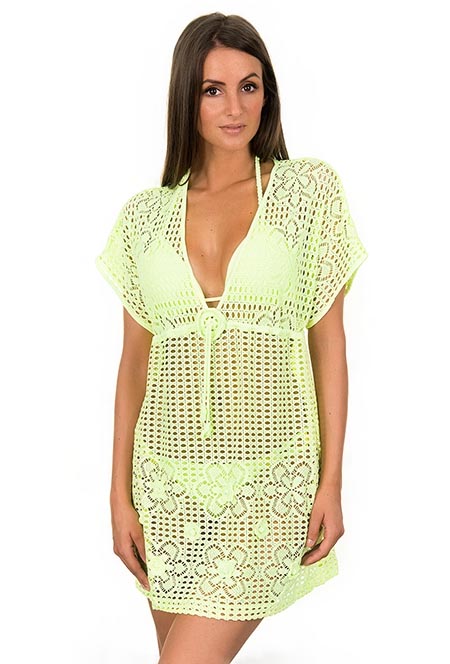
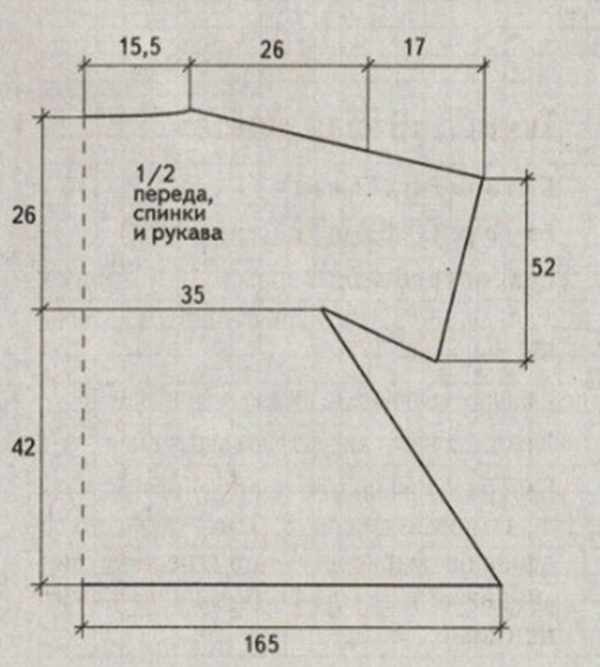
Stylish oversize for plus size girls
A loose, crocheted model of an oversized tunic dress is perfect for plump girls. A beautiful openwork pattern will make a simple yellow tunic, crocheted, incredibly stylish and trendy. It is not difficult to knit such a summer model, for this you will need:
- Choose any basic knitting pattern.
- Knit rectangles for the front and back with a small neck opening.
- In the same way, make sleeves in the shape of a trapezoid of the required length.
When assembling the product, you need to sew the tunic along the shoulder seams, sew in the sleeves and connect the side seams. In this case, you can not sew the sides to the very bottom, but leave 20-30 cm for cuts.
Decoding diagrams for beginners
Important rules for beginning craftswomen:
- Schematics are always read from below.
- The first row goes from right to left, and the even row goes the other way, from left to right.
- When knitting in a circle, the pattern is read from right to left.
- The rapport between special icons is repeated the required number of times.
- Each row begins with loops for lifting the pattern; in the rapport, these loops are usually replaced by a column.
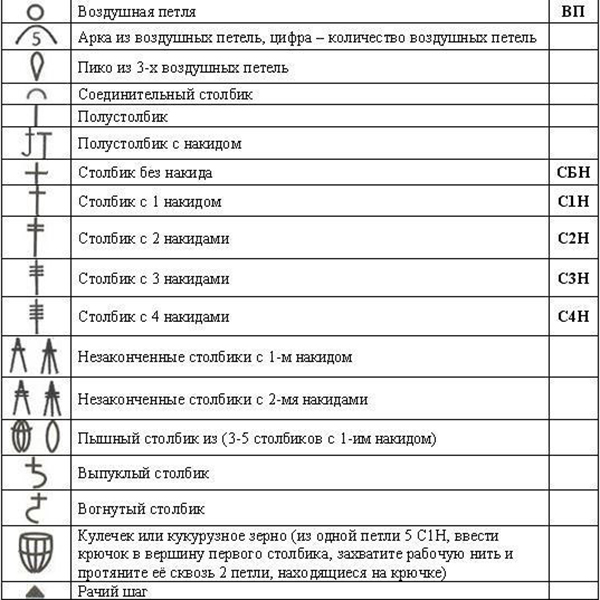
The following designations are found in the descriptions:
- air loop – VP;
- column – CT;
- double crochet – dc;
- single crochet – SC.
If the diagram is presented in the form of a drawing, a decoding of which icon denotes which loop is provided at the bottom.
Video