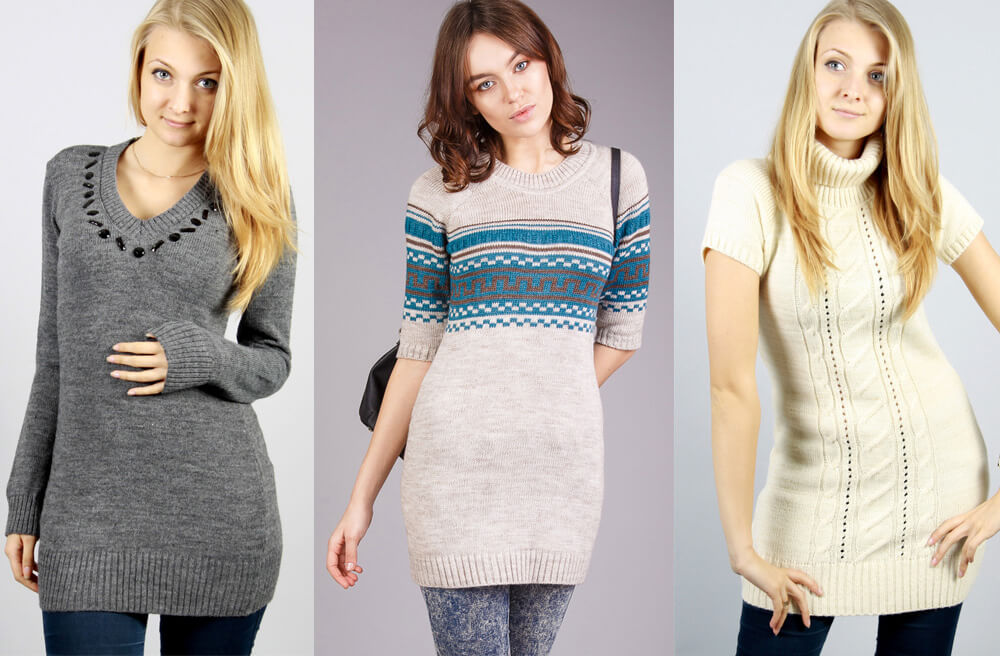
A tunic is one of the most common types of women's clothing. This item is made from different fabrics depending on its purpose: there are light models for summer and warm ones for cold weather. The most beautiful items are obtained if the tunic is knitted with knitting needles: craftswomen can make it airy and weightless, lacy or even rough in appearance. You should not be afraid of the complexity of the process. There are models that even a novice needlewoman can easily handle.
Selecting a model and pattern
Knitted tunics can be an alternative to a dress. They come in a variety of options:
- Summer tunics, distinguished by an abundance of patterns and designs. These are light, airy items that are comfortable to wear both during the day and in the evening. A summer tunic with knitting needles is often used as a cape for going to the beach. There are also models for everyday wear in a classic style.
- Products for spring and autumn - they can be combined with jeans, leggings, skinny pants. These are demi-season clothing options that are easy and comfortable to wear.
- Winter tunics are as if created to provide warmth and comfort in the harsh season. These can be models with both long and short sleeves. The first category includes items that are worn as separate items, the second includes turtlenecks or shirts.
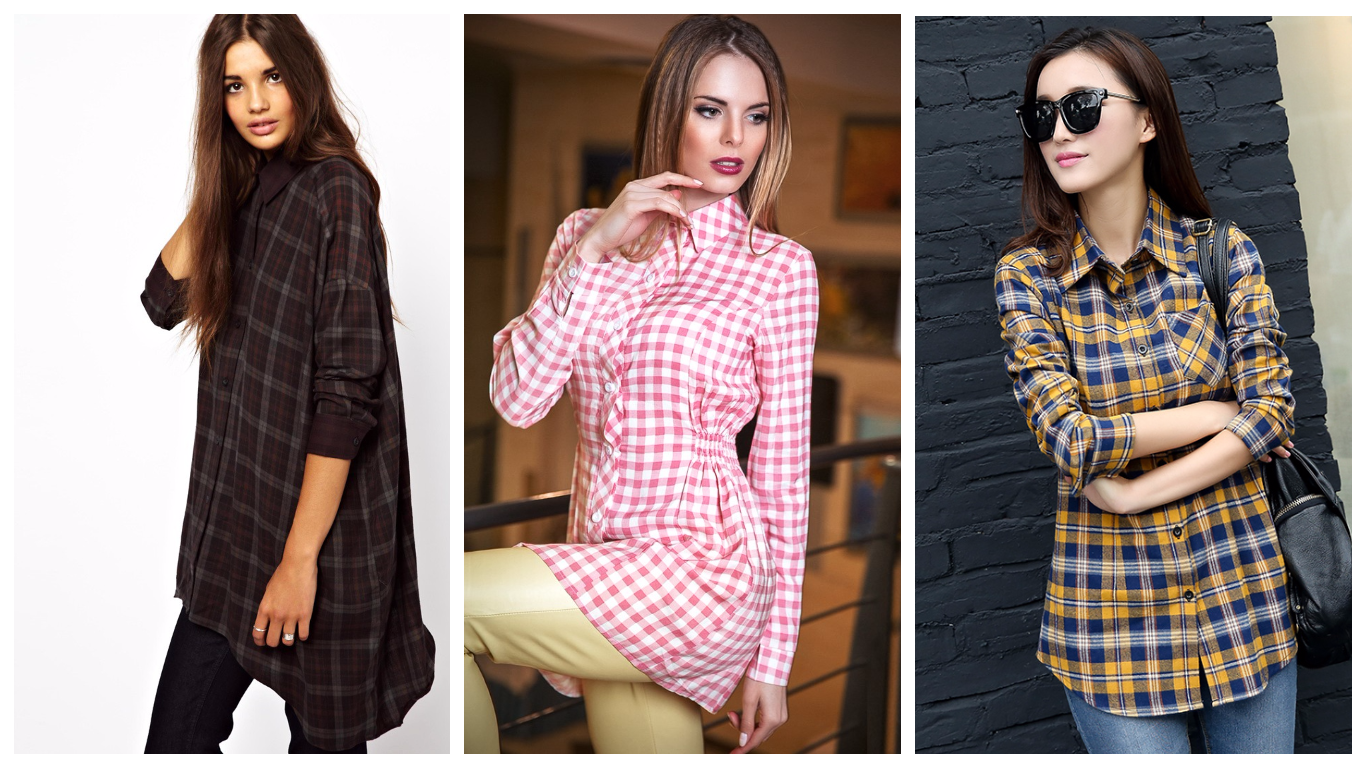
The most popular today are tunic-dresses and asymmetrical one-shoulder models. The first option attracts with its versatility, practicality, comfort. The second model adds fragility and femininity to the image.
If we are talking about tunics for the cool season, then such products are best made with regular garter stitch, stockinette stitch, "elastic", you can dilute it with relief patterns (braids and others). As a result, you will get a thing that will perform the main function - to warm the owner. If there is no need to create a very warm tunic, you can make a model using a jacquard pattern. This technique requires some skill, but if you practice, getting a unique, very beautiful wardrobe item will not be such a difficult task.
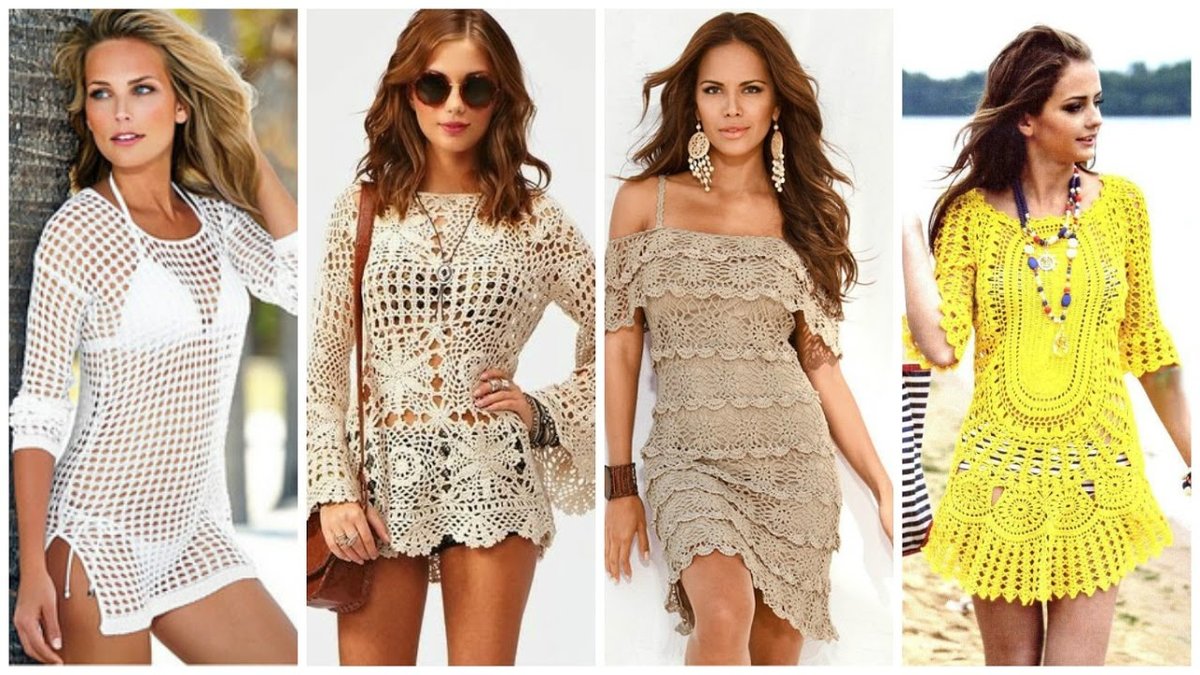
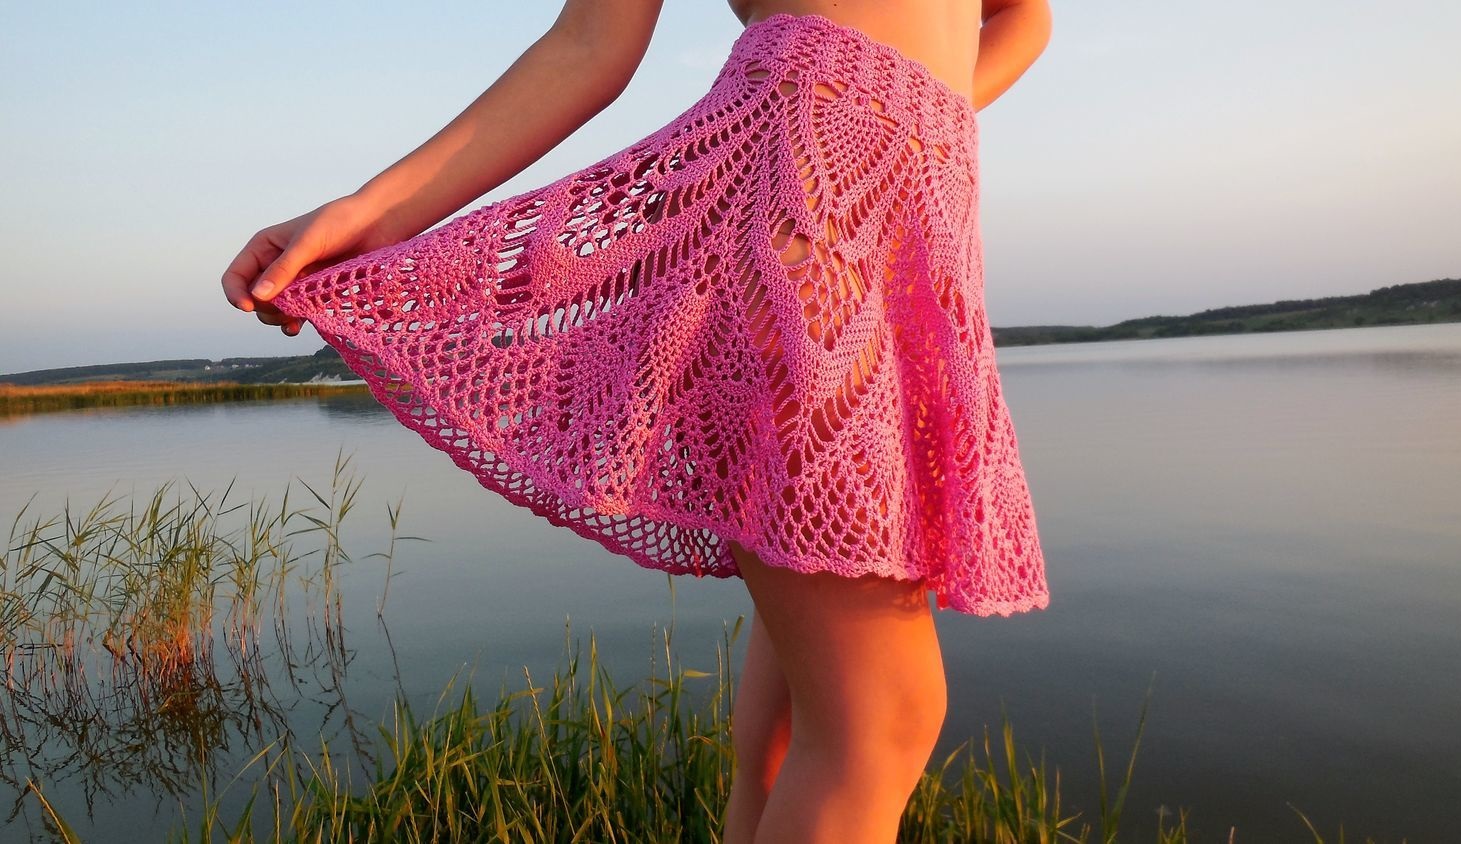
Openwork tunics are knitted from thin down threads, which are more suitable for the demi-season period or warm winter time. Such models are made from wool or cashmere yarn, synthetic fibers (acrylic or polyester) can be added to increase strength. Light summer items are preferably made with openwork knitting. Such products will decorate the owner, protect delicate skin from the sun and at the same time will allow air to pass through well, preventing the body from overheating. Tunics for the summer are best knitted from cotton or linen threads.
Knitting needles should be selected according to the yarn number: the skeins are necessarily marked with the tool number that will fit this thread. When choosing a product for a tunic, you should not forget about the pattern planned for the future product. Of course, the knitting needle has an effect on it. The best way to choose the right tool is to knit samples with products with different numbers. After the “test”, you will need to leave the one that is most suitable in density and appearance.
The thickness of the knitting needle should be 1 size larger than the thread size.
Preparing for work
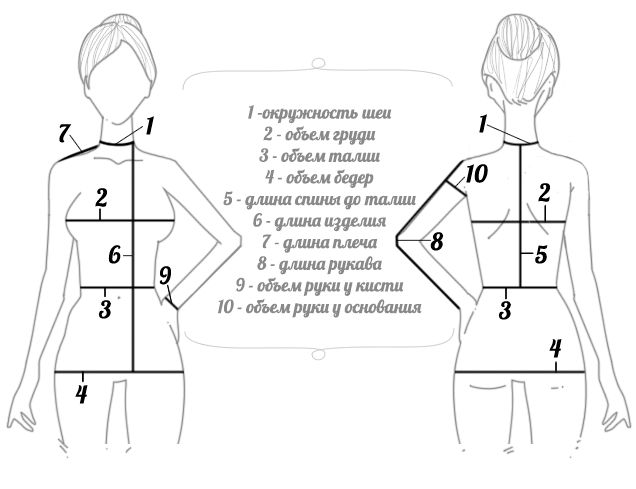
Before you get down to business, you will need to take measurements. The list of necessary measurements depends on the model. You will definitely need the chest circumference, shoulder length and product length. If the knitted tunic has sleeves, you will also need to measure the sleeve length and the arm circumference at the widest point.
To adapt the pattern, you need to recalculate the diagram for your size. Each of them indicates the knitting density, for example: 9 p x 10 p = 10 x 10 cm. Each needlewoman has her own work features, so to adapt the pattern, you will first need to make a control sample. First, you should cast on an arbitrary number of loops, for example, 30, and knit the intended pattern of the product - you should get a fabric measuring at least 10 cm².
After this, you need to find out the knitting density, that is, count the number of loops and rows in 1 cm of the finished sample. For example, you may get 30 sts in a width of 15 cm. The knitted fabric is 10 cm high and has only 24 rows. Thus, the density is 30/15 = 2 loops per centimeter of fabric, 24/10 = 2.4 rows per knitted centimeter. In the diagram, this would be marked as 20 sts x 24 rows = 10 x 10 cm or 2 sts x 2.4 rows = 1 x 1 cm².
This way, it is easy to calculate your pattern. For example, if the hip volume is 100 cm, then you should take ½, that is, 50 cm. The knitting density has already been calculated - 20 sts x 24 rows = 10 x 10 cm. Next, 50 cm should be multiplied by 2 sts (you will get 100 loops), add 2 edge loops. Total: 102 loops must be cast on to make the front or back of the models.
If the pattern for making a thing, for example, requires casting on 82 loops, then the difference should be calculated: 102 – 82 = 20. This is the number that should be taken into account when knitting armholes, neckline, shoulder slopes. When in other parts of the product there is a similar pattern or fabric made with the same yarn and the same tool, then, when casting on loops, the width, for example, of the sleeves, should be multiplied by the density.
In this way, you can adapt any patterns. The pattern, yarn, and knitting needles matter. If it so happens that the pattern does not specify the number of loops, a control sample will also come in handy. In such a situation, you need to make a 10 x 10 cm piece of fabric with the selected pattern. Then you should wash it and dry it to determine how much the yarn will shrink. After that, you should measure the area of the product and calculate the number of loops needed to make the tunic.
The amount of yarn also needs to be calculated using a control sample, since its weight depends on the chosen pattern and the density of the item.
Stages of knitting popular models
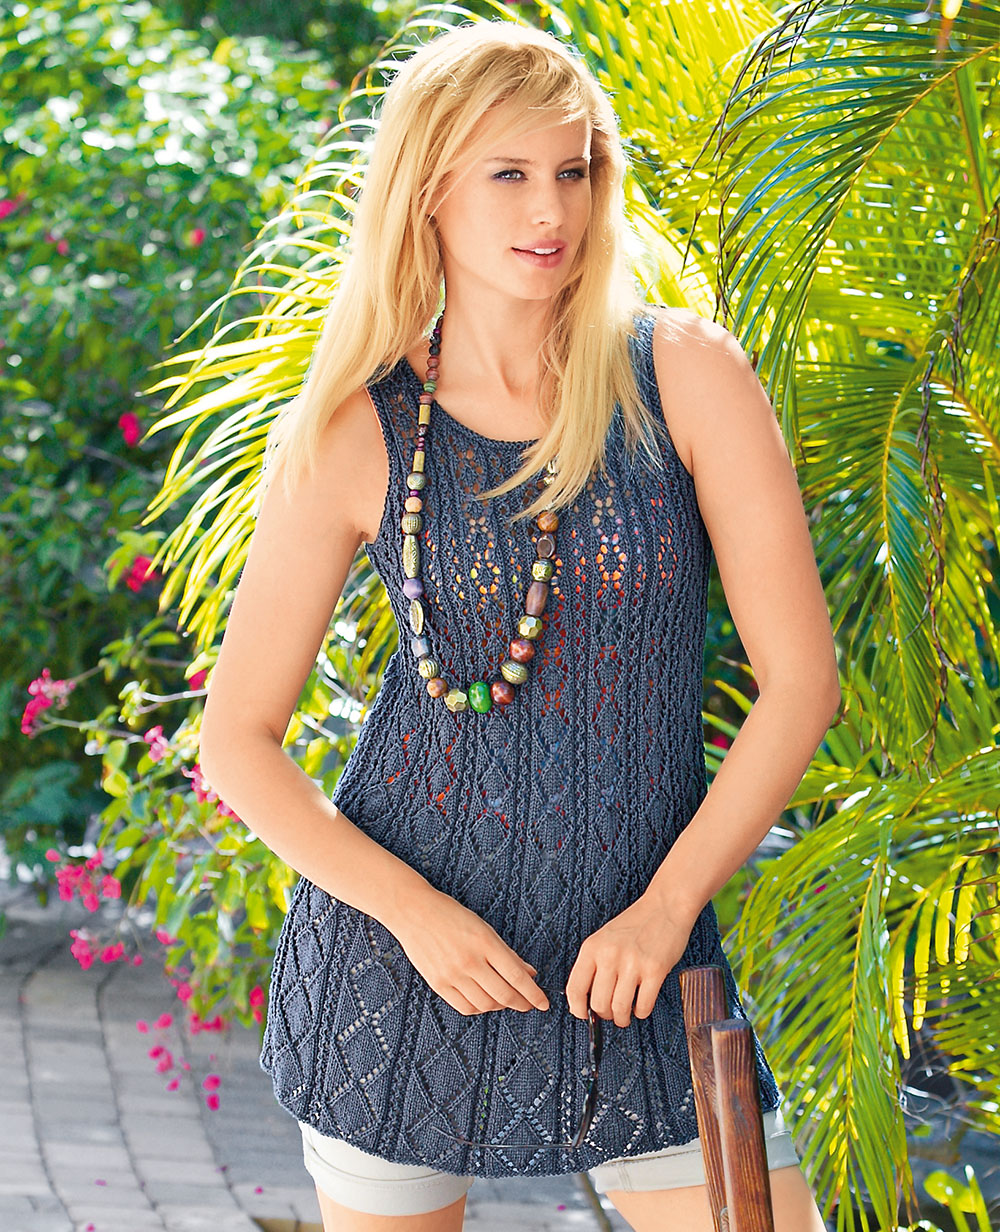
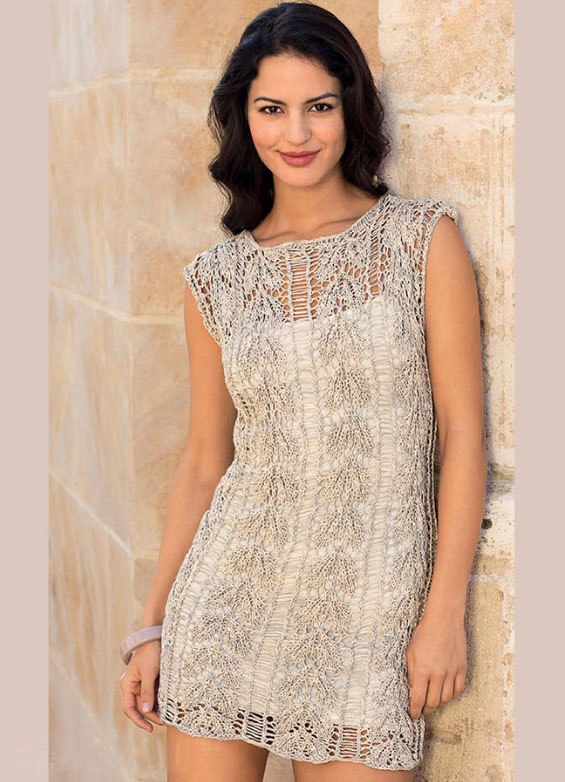
Even a novice craftswoman can make a tunic this way. Knitting requires following an algorithm. In the process of creating a thing, you need to focus on the pattern. An openwork tunic for the summer, for example, is most often knitted with a diamond pattern. It is better to use cotton yarn for its manufacture. This product is perfect for the beach or a walk along the embankment.
Summer openwork cotton
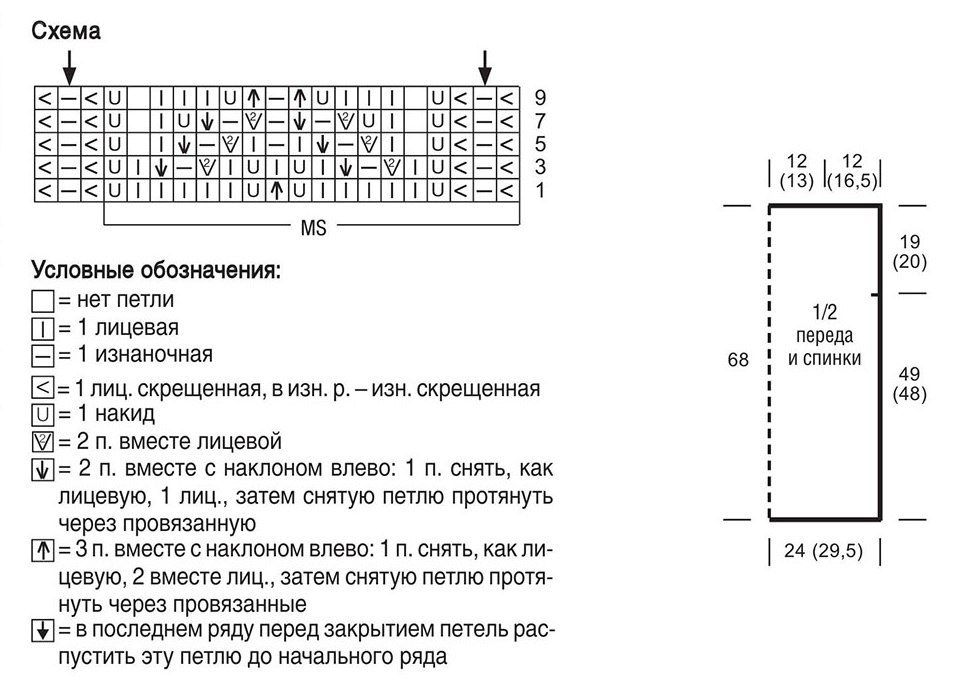
The tunic pattern should be made according to the diagram with the description. The purl rows are knitted with purl loops and yarns. Start with an edge loop, then a rapport and finish with a loop after the rapport, then an edge loop. Repeat the diagram from rows 1 to 10. Density: 14.5 sts by 19.5 rows = 10 x 10 cm.
An openwork tunic is made with knitting needles from two similar parts, which are knitted according to the following algorithm:
- Cast on the required number of loops. Knit the first row with purl stitches. It is not taken into account in the calculations. Next comes the lace. After 132 rows from the bottom, the loops need to be closed. Then, according to the pattern, unravel them and cast on 4 new sts instead. Then they should be closed so that the edge does not stretch. The second part is made using the same principle.
- Then comes the assembly. To do this, you need to sew the shoulders on both sides, then do the same with the sides, leaving armholes.
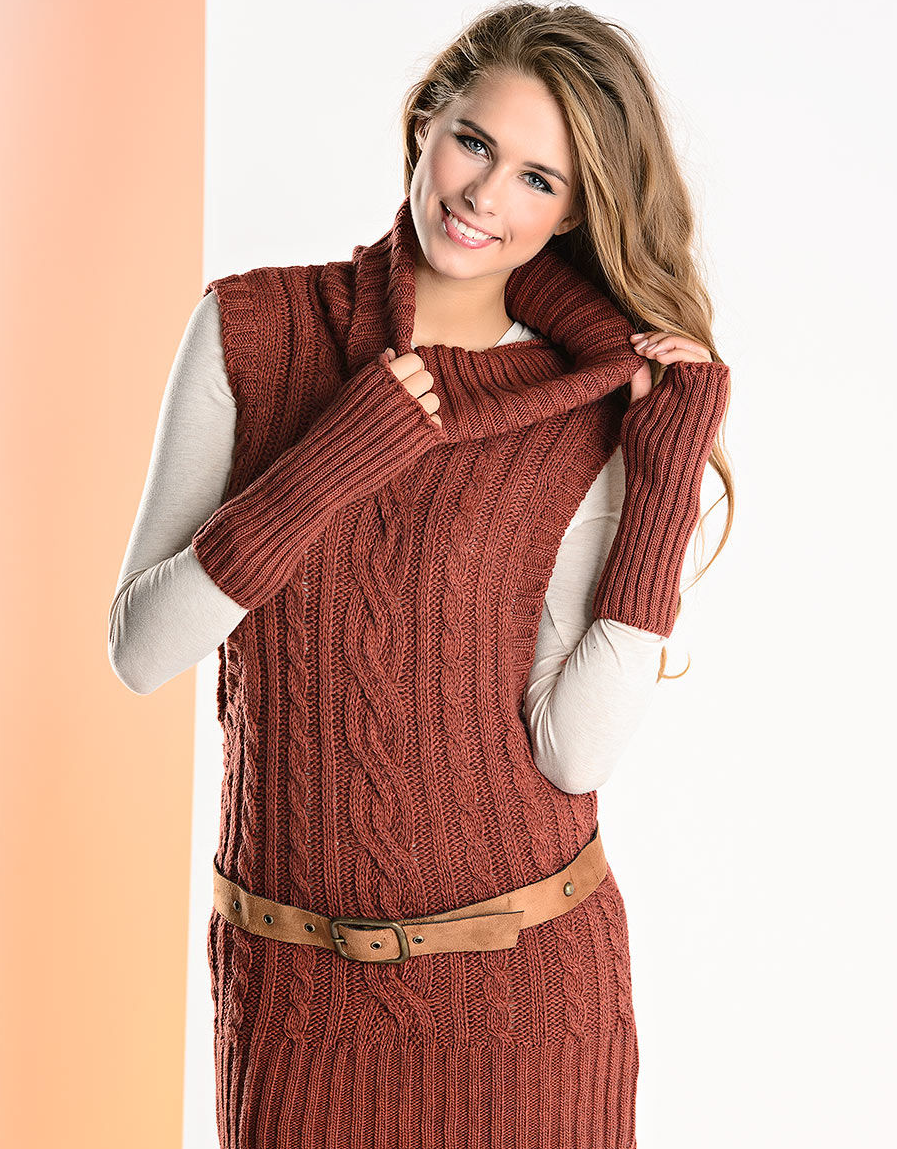
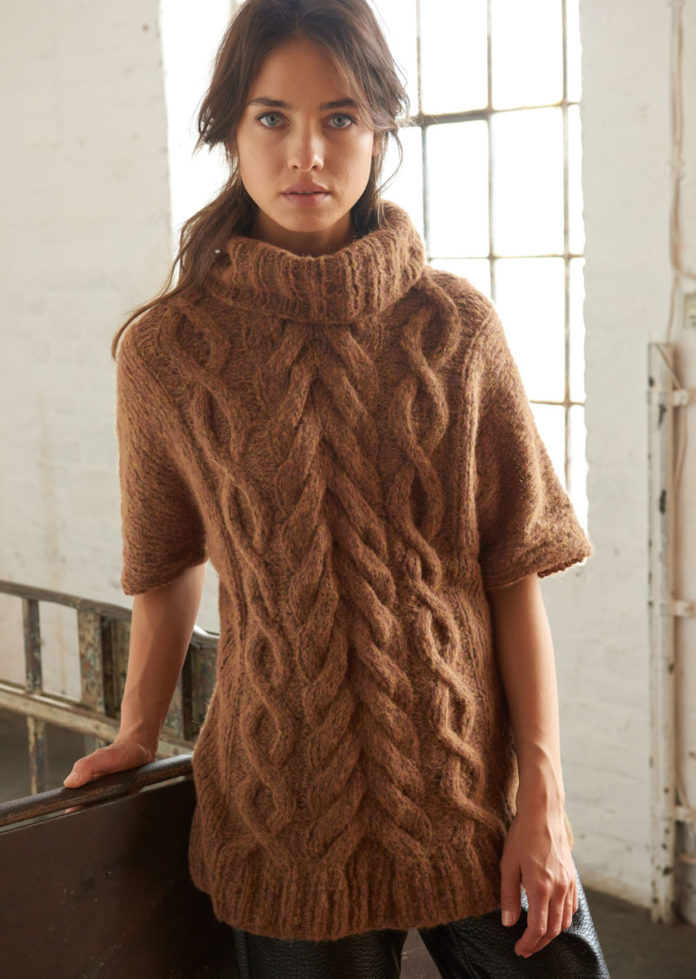
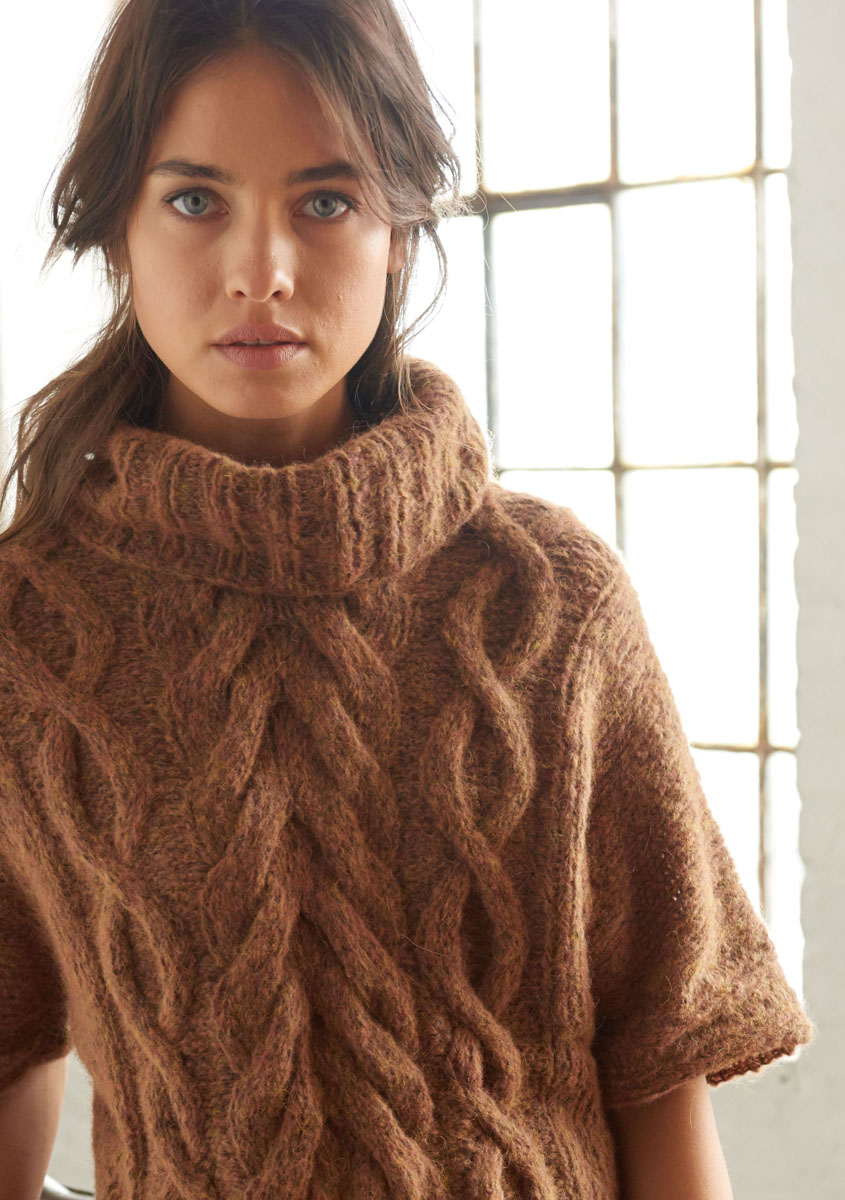
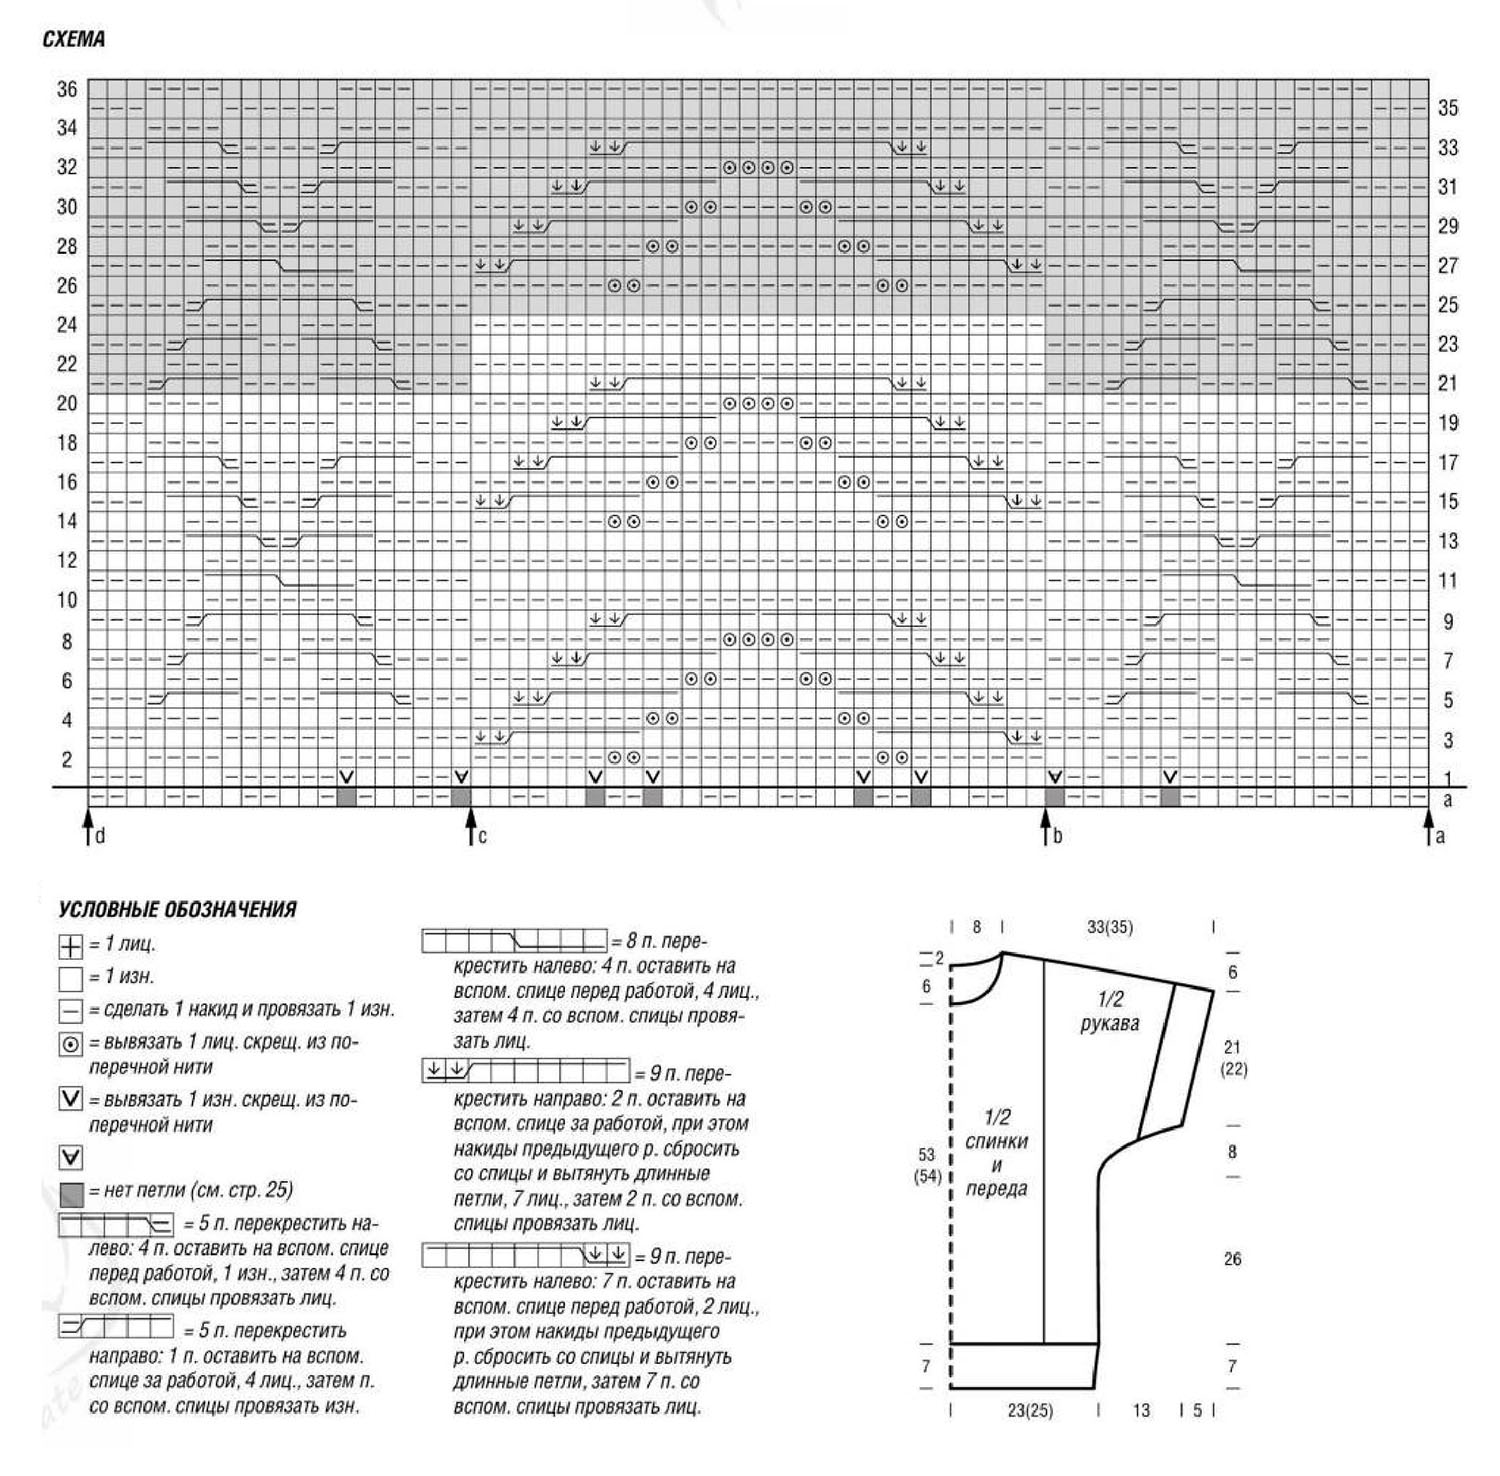
Warm flared with braids
A thick flared model with braids will warm you even on the coldest days of winter. To knit a warm tunic with knitting needles, you should consider the following recommendations:
- When knitting the edge with knots in each row, the first loop should be removed as a front loop. The last loop should be made as a front loop. Knit the edges of all parts according to this principle.
- The “elastic band” should be knitted according to the pattern – 2 front loops, then 2 back loops.
- The pattern needs to be knitted on 62 loops. In it, row a is the penultimate row of the "elastic". Knit from arrow a to arrow b. Continuing to work according to this pattern, in the first row you should add 8 loops, up to 70. After that, knit according to the pattern from row 1 to 36. Then, patterns with diamonds need to be repeated from rows 21 to 36 (they are located between a and b). In the pattern with braids, you should repeat rows 25 to 36, which are between arrows b and c (they are highlighted in gray).
- In the front surface - front loops, in the back surface - back loops.
- The front rows should be knitted with the front surface. In the back row, it is necessary to remove the loop as if it were a purl stitch (the thread must be held in front of the knitting needle).
- The knitting density of the tunic is 23.5 sts x 22 rows = 10 x 10 cm for the cable pattern and 16 sts x 22 rows = 10 x 10 cm for the front surface.
To create a tunic, you need to follow this algorithm:
- To make the back with half sleeves, you need to cast on 98 loops and knit the strip. This should be done with an elastic band: 2 knit stitches, 2 ip. Knit 21 rows like this. In the first purl row, start with the edge stitch, then 2 ip, finish with 2 ip and the edge stitch.
- After that, the following knitting pattern is used: edge, 14 loops knit stitch, 62 loops with a pattern of braids and diamonds. In this case, you should add 8 loops, then 14 loops with the front surface, edge again. In total, there should be 100 loops.
- At 26 centimeters, that is 58 rows from the strip, you should add 1 loop on each side. This is necessary for rounding. Next, in the 4th row, perform 1 loop in every second row. Then you should dial for the sleeves 2 times 2 loops and 1 time 11 loops. As a result, 140 loops remain.
- The loops that were added must be knitted as follows: the first 10 on each side - with the front surface, after 8 - with the "elastic". You need to start with 2 purl and finish with front loops, then you should knit 1 slipped and 1 edge.
- For bevels, add a loop in the fifth row. Similar increases should be repeated three times in each 6th row and four times in each 4th row. After 46 rows, close 16 sts on each side, then in every second row three times 8 sts and three times 7 sts. After 46 rows from the beginning of the sleeve, close 16 sts on each side. After that, in every second row, close 8 sts three times and 7 sts three times. Do the same with the 22 sts in the middle.
- To make the front part with sleeves, knit in the same way as the back with half sleeves. However, to knit the neck, close the middle 14 loops after 42 rows from the sleeves. Then knit separately, closing at the edges in every 2 rows 1 time by 3 loops, twice by 2 loops and three times 1 loop. Make the bevels for the shoulders in the same way as the back.
Designations:
- LP – front loop.
- ip – purl stitch.
Next comes the assembly. To do this, knit the neckline with a rib pattern on 76 loops on circular knitting needles. Close the loops after 19 cm. The parts need to be connected with a seam through the edge from the wrong side.
A knitted tunic is a versatile piece of clothing that can be perfectly combined with various wardrobe items. The abundance of models allows you to choose the right product for any situation. Working with knitting needles is not difficult, especially if you choose an easy-to-make item, even a beginner needlewoman can handle it.
Video