Lingerie is an important wardrobe item for every woman. But sometimes it is so difficult to choose the right size and style. In this regard, the fair sex often wonder how to sew lingerie with their own hands. Sometimes this is the only way to fully satisfy your desire to look amazing, feel comfortable and confident. There are a number of subtleties and nuances, having familiarized yourself with which you can create not just a wardrobe item, but a real work of art.
Selecting a model and material
Sewing underwear with your own hands does not present any particular difficulties, especially for professional craftswomen. However, you should first decide on the style. Experts recommend trying on several options in the store beforehand. The most liked and comfortable model will serve as an example for creating your own masterpiece.
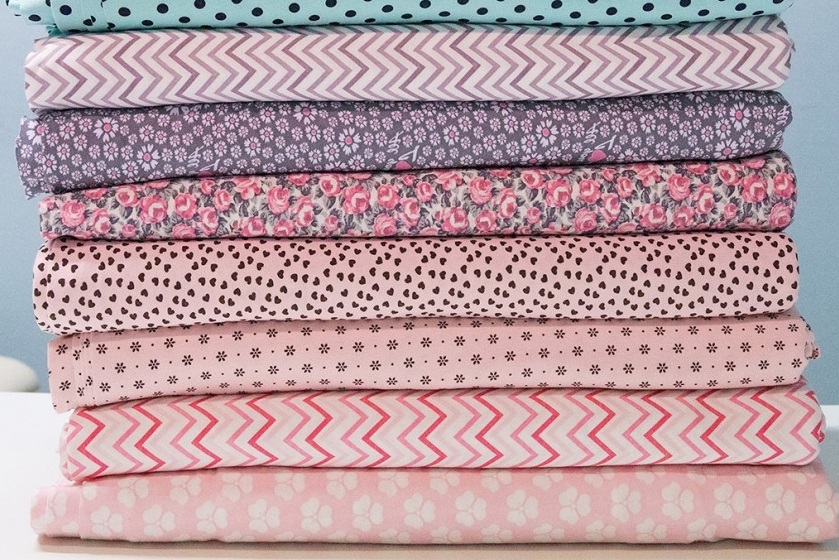
The next step is choosing the material. It is advisable to choose high-quality fabrics that are pleasant to the touch. This is an important condition, since such a delicate item of clothing comes into contact with the body. There are several popular materials for sewing underwear:
- Cotton.
- Silk.
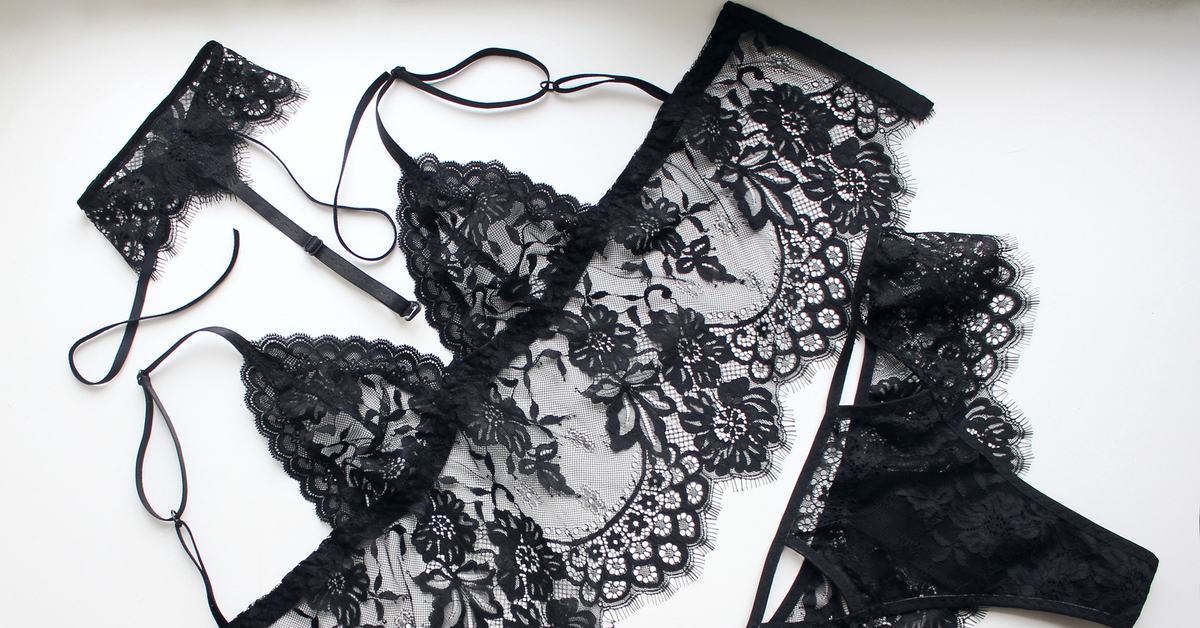
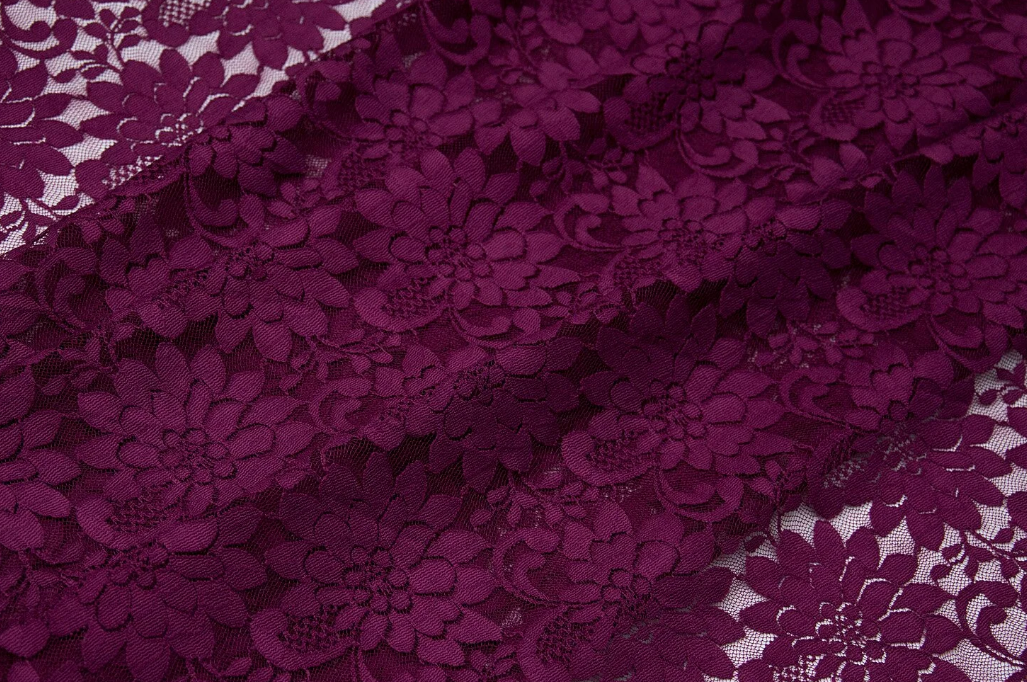
- Lace.
- Guipure.
- Polyamide.
Each fabric can be used separately or in excellent combinations. Everything depends on personal preferences and tastes. Guipure deserves special attention. Lace underwear is distinguished by its special sophistication, refinement, and is suitable for any occasion. Such fabric should be chosen depending on the style of underwear:
- Stretchable. Suitable for creating a complete product.
- Non-stretchy. This option is used for sewing individual elements.
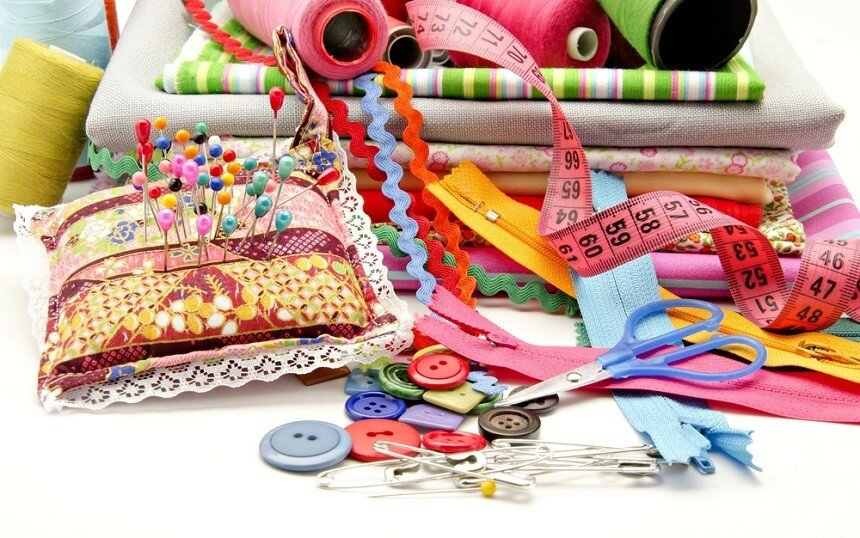
Correctly selected fabric is the basis for creating high-quality underwear with your own hands. However, in addition to the material, you should take care of additional elements. These include consumables and tools.


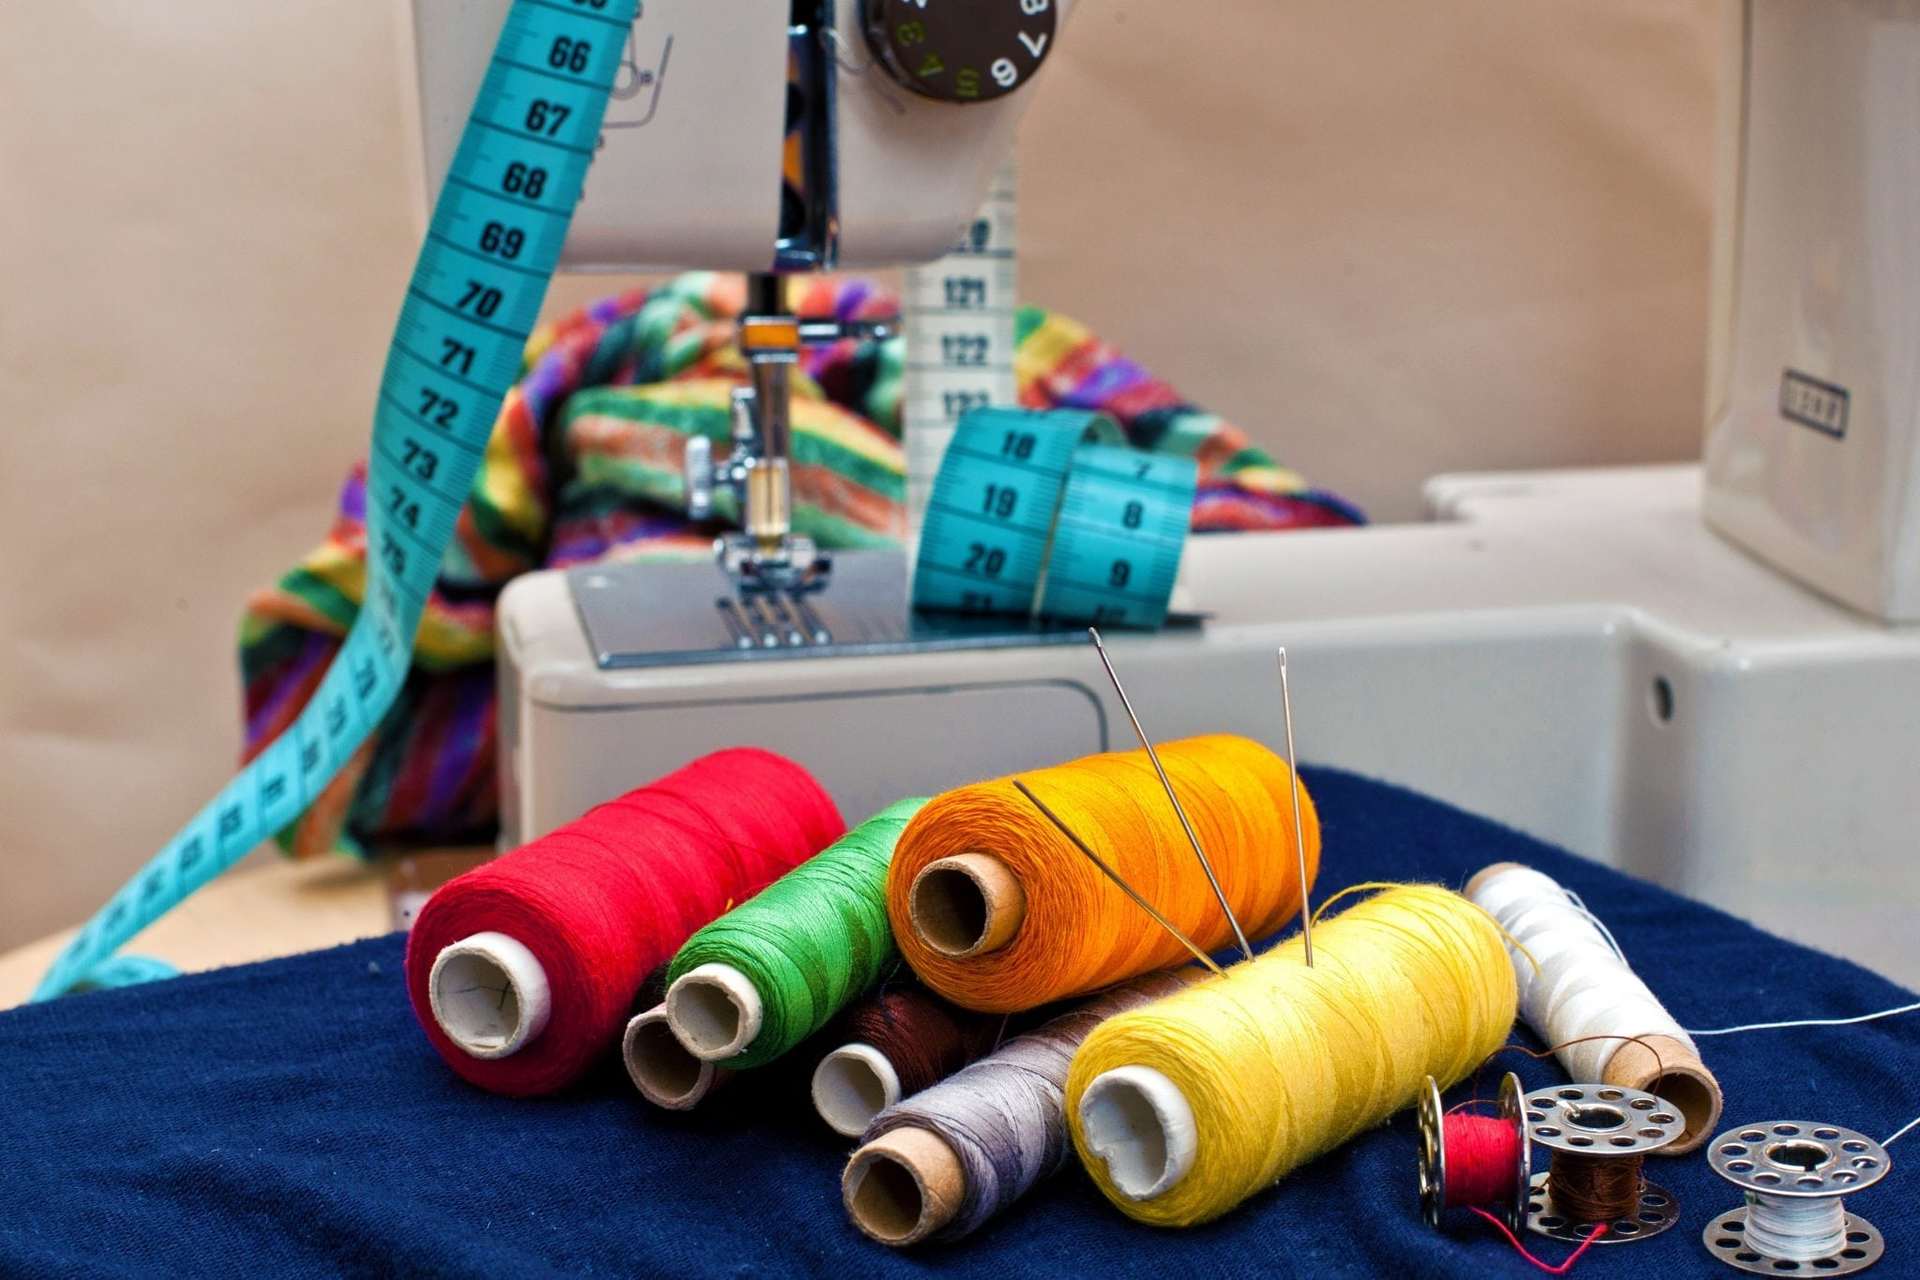
Tools and consumables
In order for the process of sewing women's underwear not to drag on for a long time, you should take care of all the necessary additional means. Without them, it is not possible to create a full-fledged product. The following tools will be needed for the work:
- Scissors. Should be sharp and comfortable enough to ensure a high-quality cut of the fabric.
- Measuring tape. You should choose one with clearly printed numbers so as not to make a mistake in measurements.
- Needles. Thin ones are recommended, as you will be working with delicate fabrics.
- Sewing machine. You should use a familiar model that is easy to use.
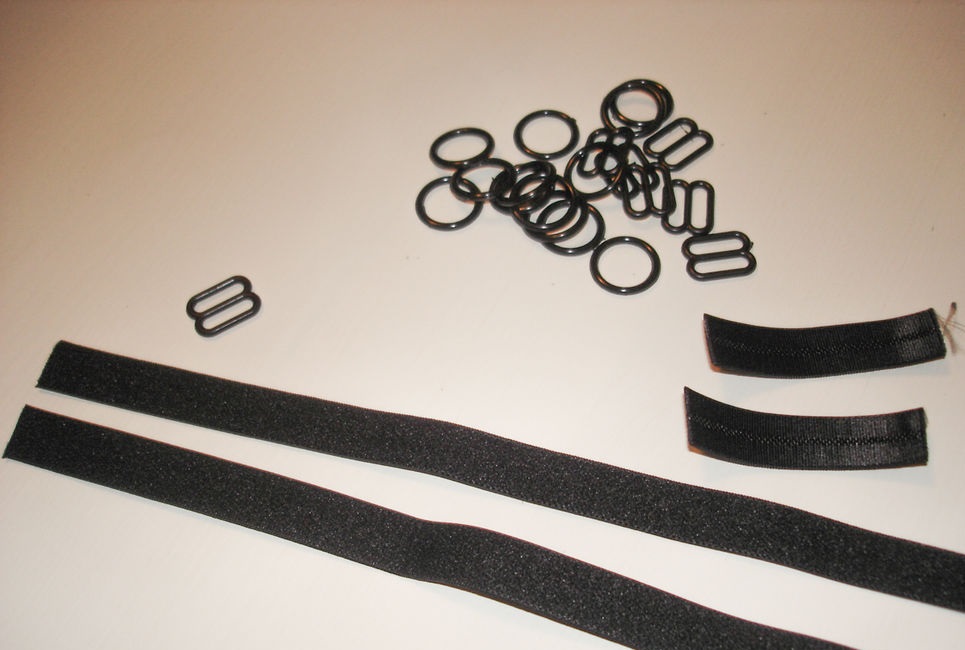
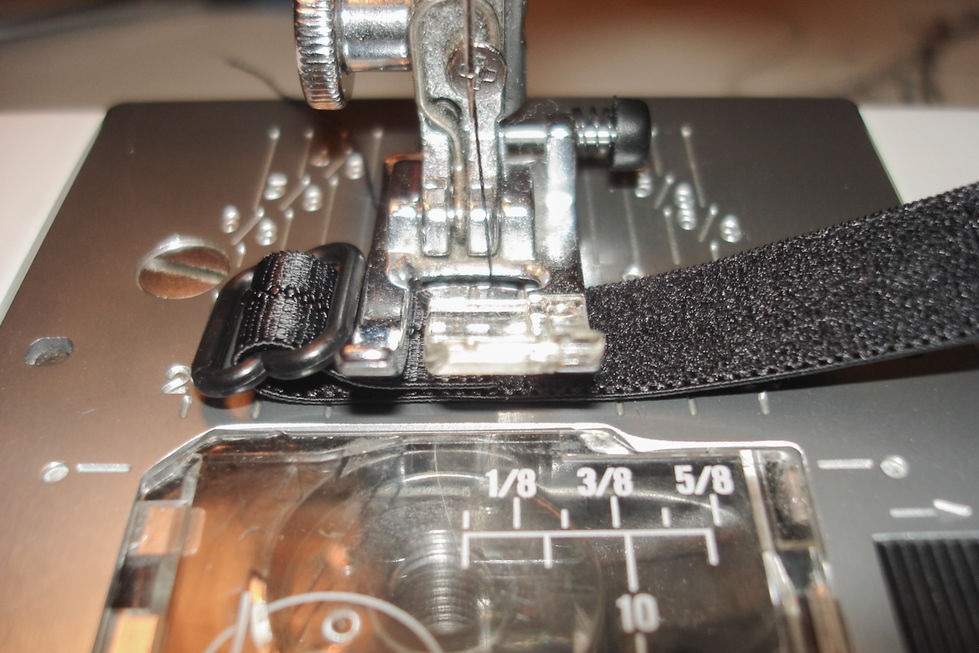
In addition to tools, it is necessary to select consumables. These include elastic bands, fittings, adhesive raw materials, threads. Elastic bands are required to create straps, process cuts. Fittings are represented by bones, hooks, rings, regulators. What exactly is needed for sewing depends on the model.
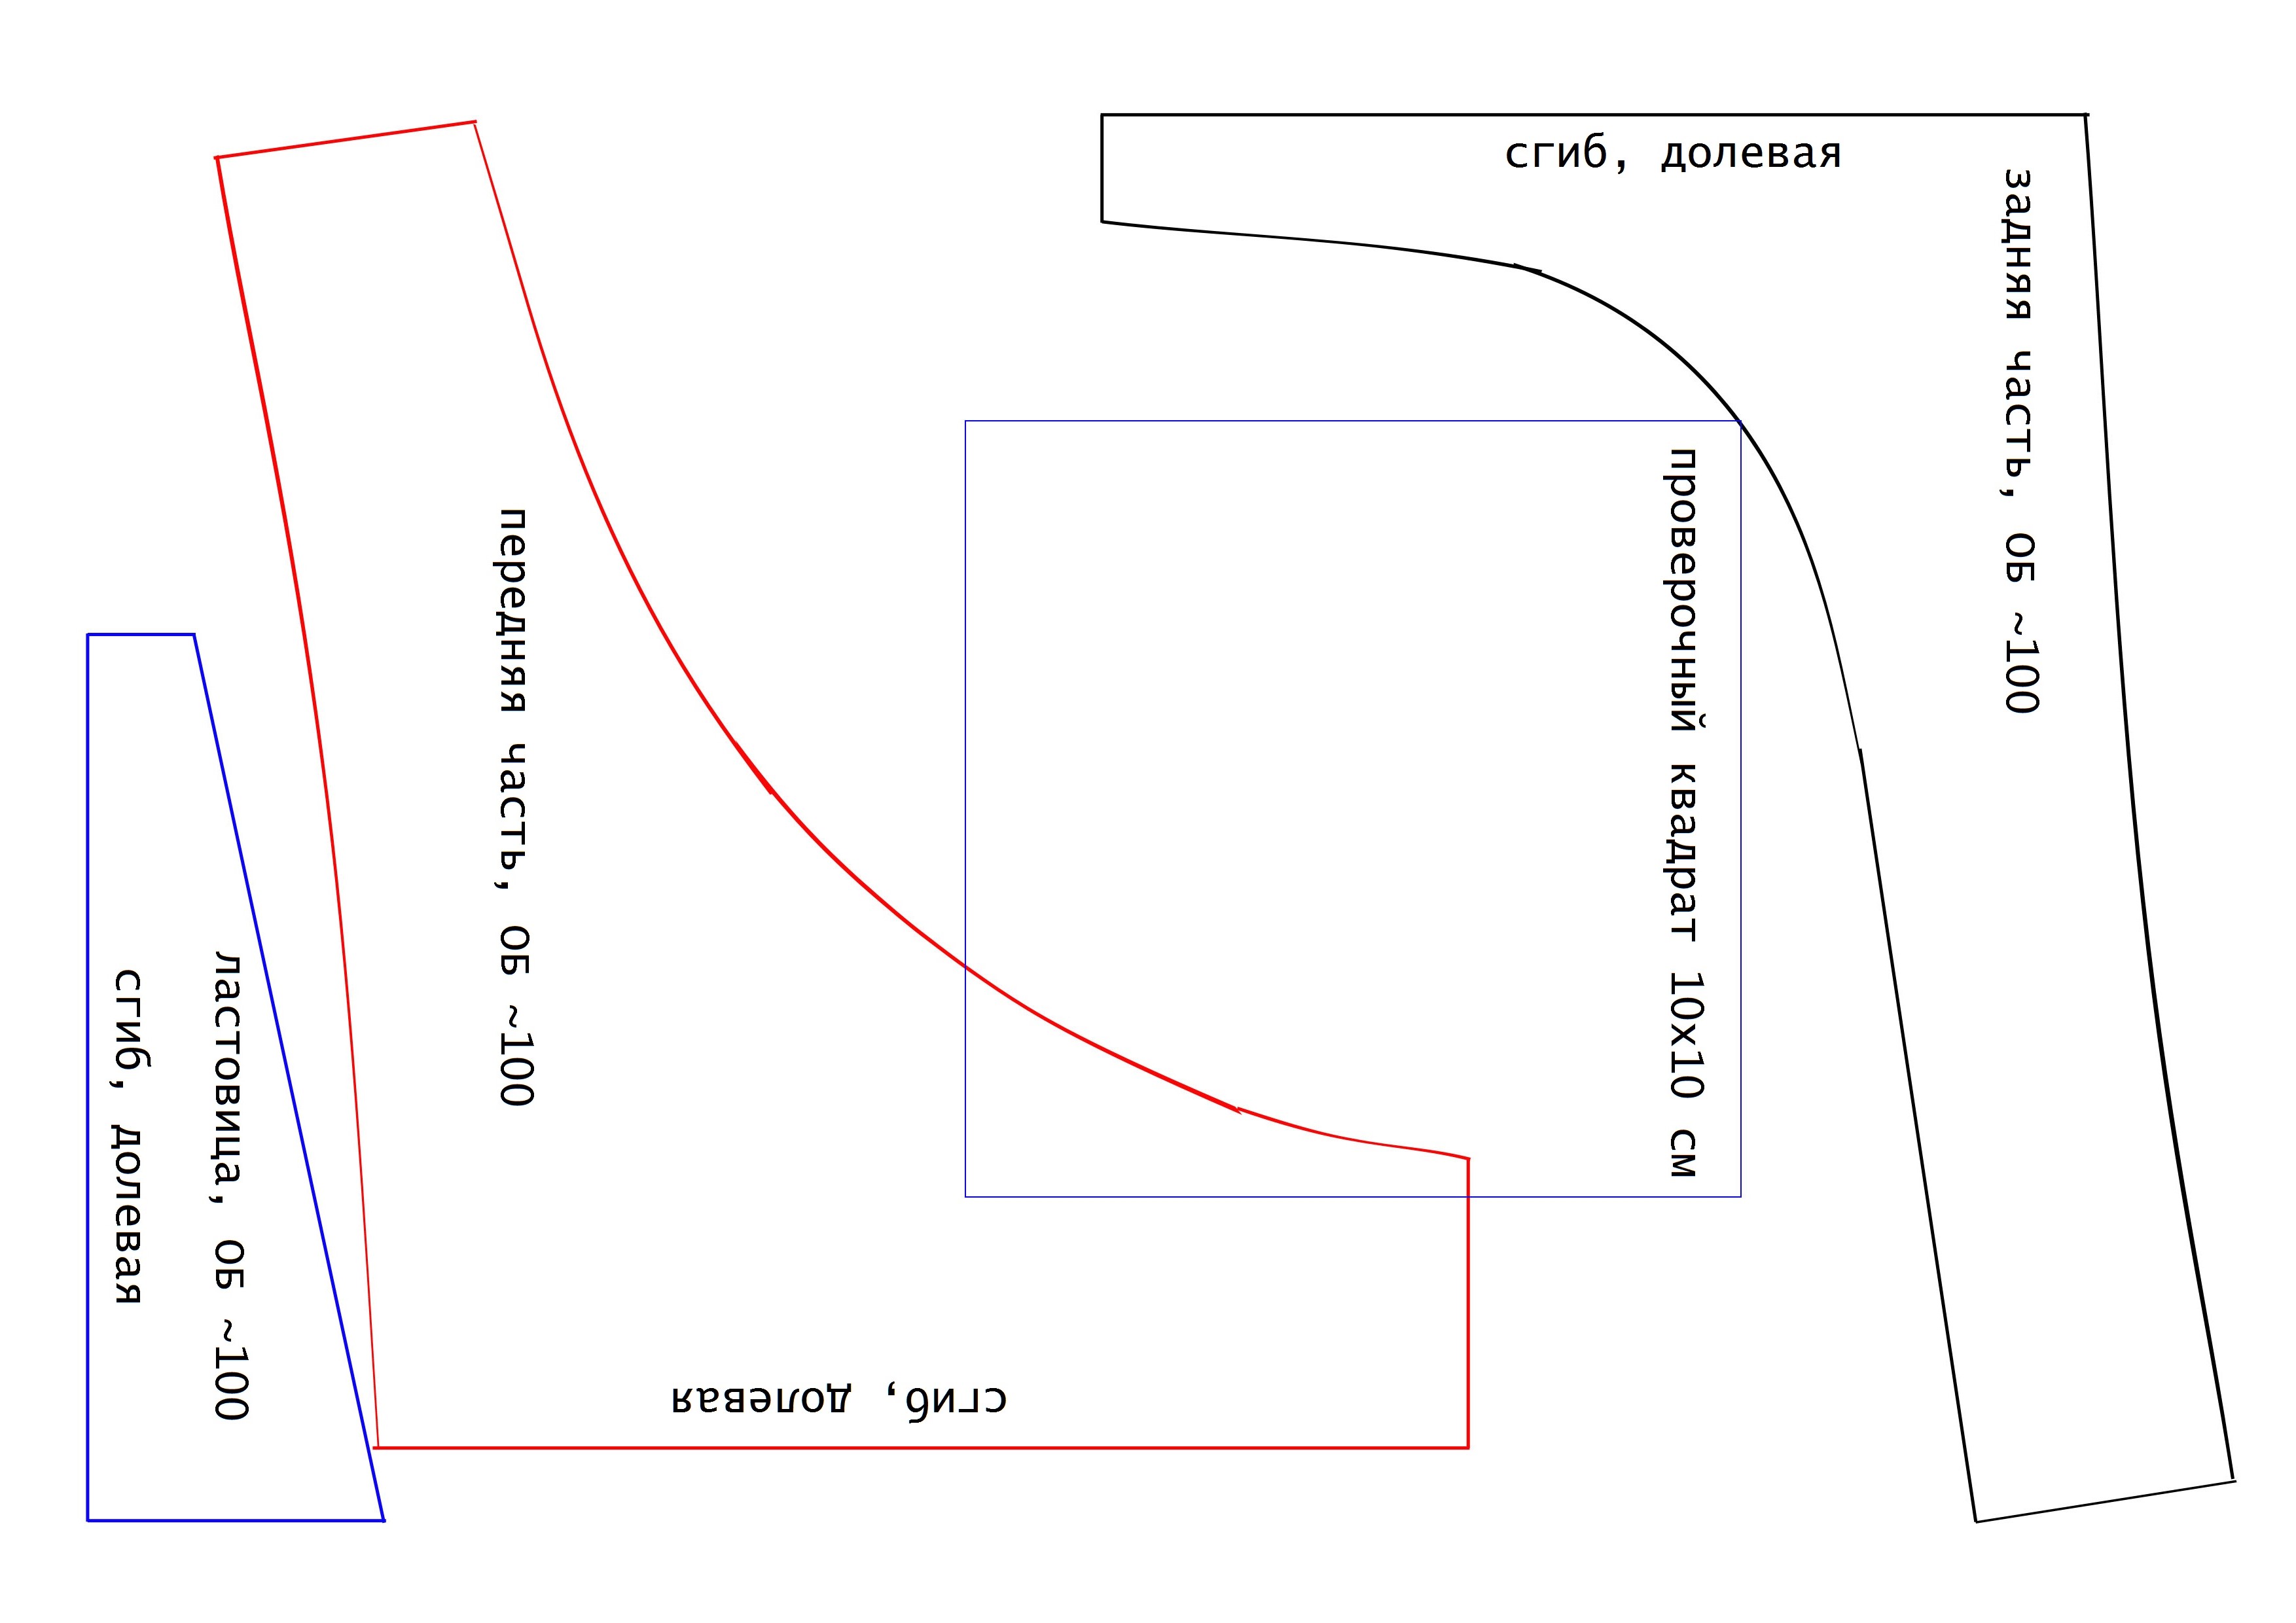
Creating a pattern
After all the necessary materials and tools have been prepared, a lingerie pattern should be created. It requires careful measurements and precise calculations. Only in this case will the product highlight the shape. However, the features of the selected material should be taken into account. Lingerie sewn according to the same pattern, but from different fabrics, may ultimately differ. Beginners are advised to practice on cheap fabrics to learn how to sew.
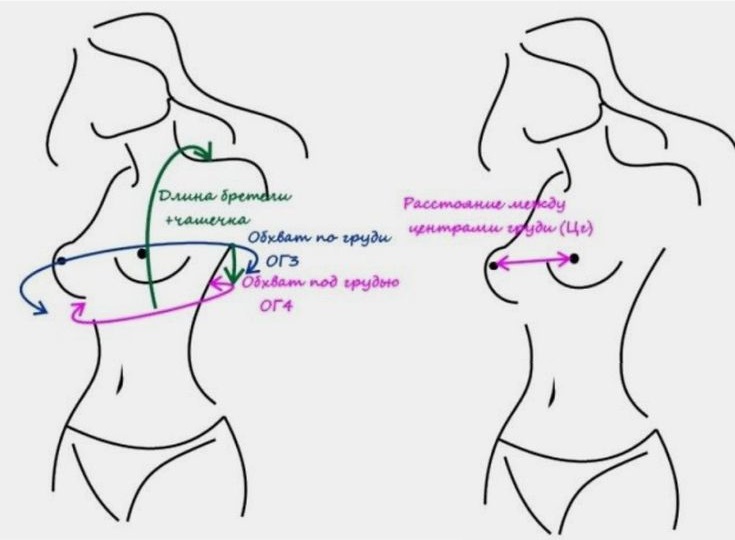
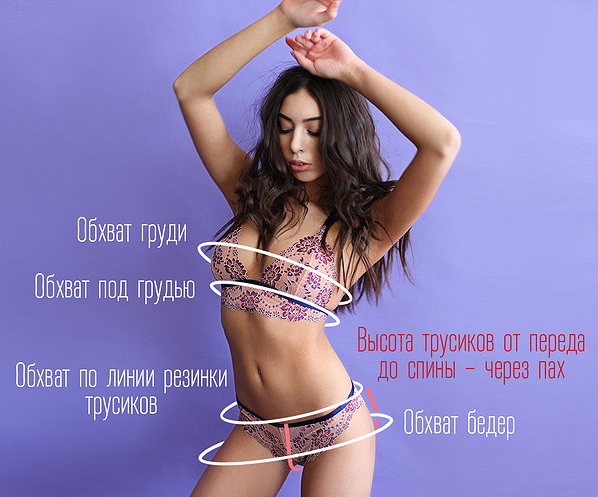
To create a pattern, you need to take the following measurements:
- Chest circumference (measured at the widest points) and under it.
- Width of cups at the bottom edge.
- Distance between chest centers.
- Length of straps.
- Waist size. You should tighten the belt moderately tightly and then take measurements based on it.
- Hip volume. In the buttocks area, you need to determine the most protruding points.
- Seat height. This measurement is necessary to determine the fit of the panties. You should draw a tape measure from the top of the back of the product through the gusset to the front.
Measurements should be taken in comfortable underwear. You must not raise your arms during the process. The measuring tape should be strictly parallel to the floor. It is advisable to round the measurements up.
Bodice
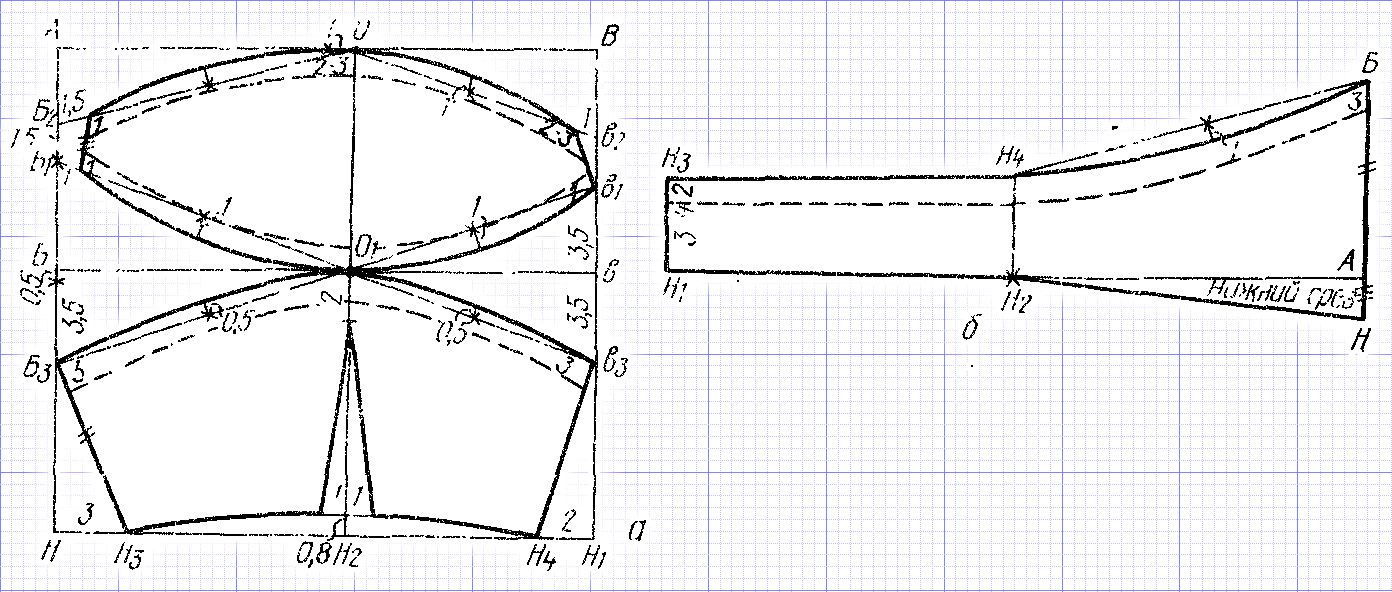
Before creating the basic bodice pattern, you need to prepare paper, a pencil, and a measuring ruler. All drawings are built strictly according to the measurements taken beforehand. In addition, you should calculate the size of the dart solution. To do this, subtract the measurement under the chest from the chest circumference. The resulting figure is divided by two. The final figure is written down.
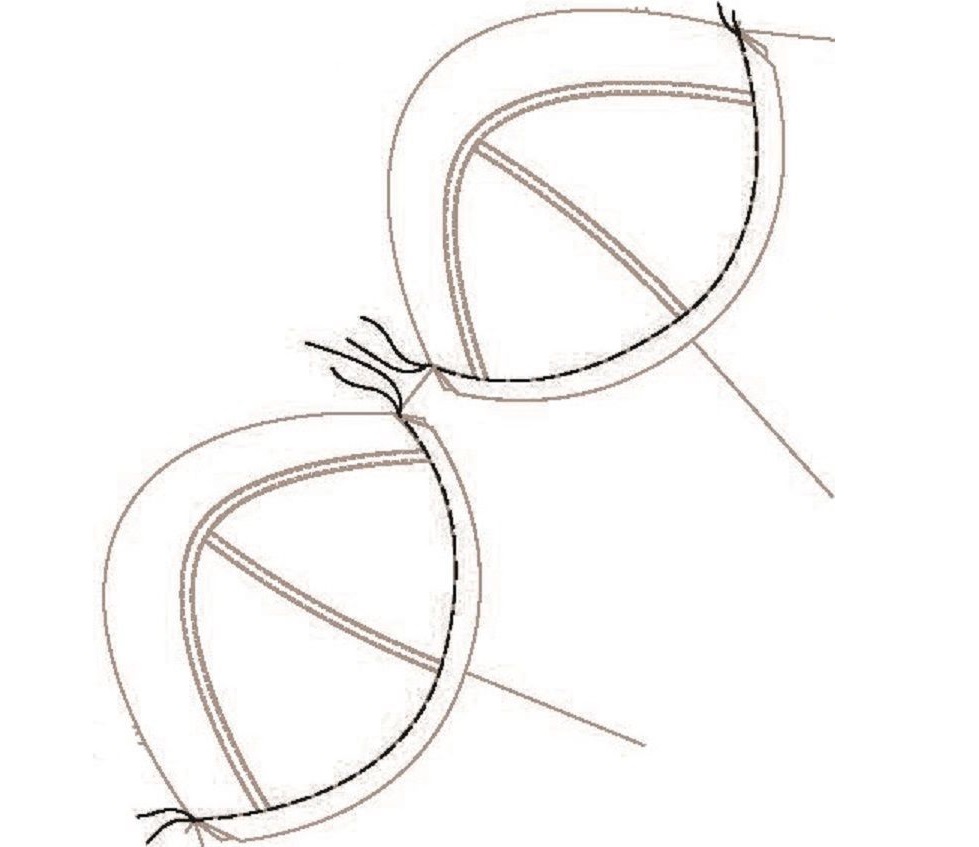
After this, the pattern is constructed. A horizontal segment AB is drawn. It is equal to the sum of half the cup width and the dart solution. Next, the center should be marked on the resulting segment - CG. A perpendicular line is drawn from it upwards, equal to the sum of the height and depth of the cup. Conventional designation CG - B.
After this, point C should be marked on the perpendicular line, which is equal to the distance of the straight line from the point of the girth under the chest to the nipple. This is how the point of the top of the chest is drawn. Then, from the center of gravity in both directions, a distance equal to the dart solution is marked. The designation will be P1 and P2. In order for the straps to fix and support the chest, point B, which will subsequently serve as the attachment point, should be shifted 3-4 cm to the left. Then the dart P1CP2 is formed. The basic pattern is ready.
The next stage is modeling. In this matter, fantasy plays a decisive role. Here, it is also recommended to start from the properties of the material. The use of lace and other decorative fabrics and elements will help to significantly improve the appearance of the product.
Using a basic pattern, you can easily adapt the model you like to your size, resulting in beautiful women's underwear.
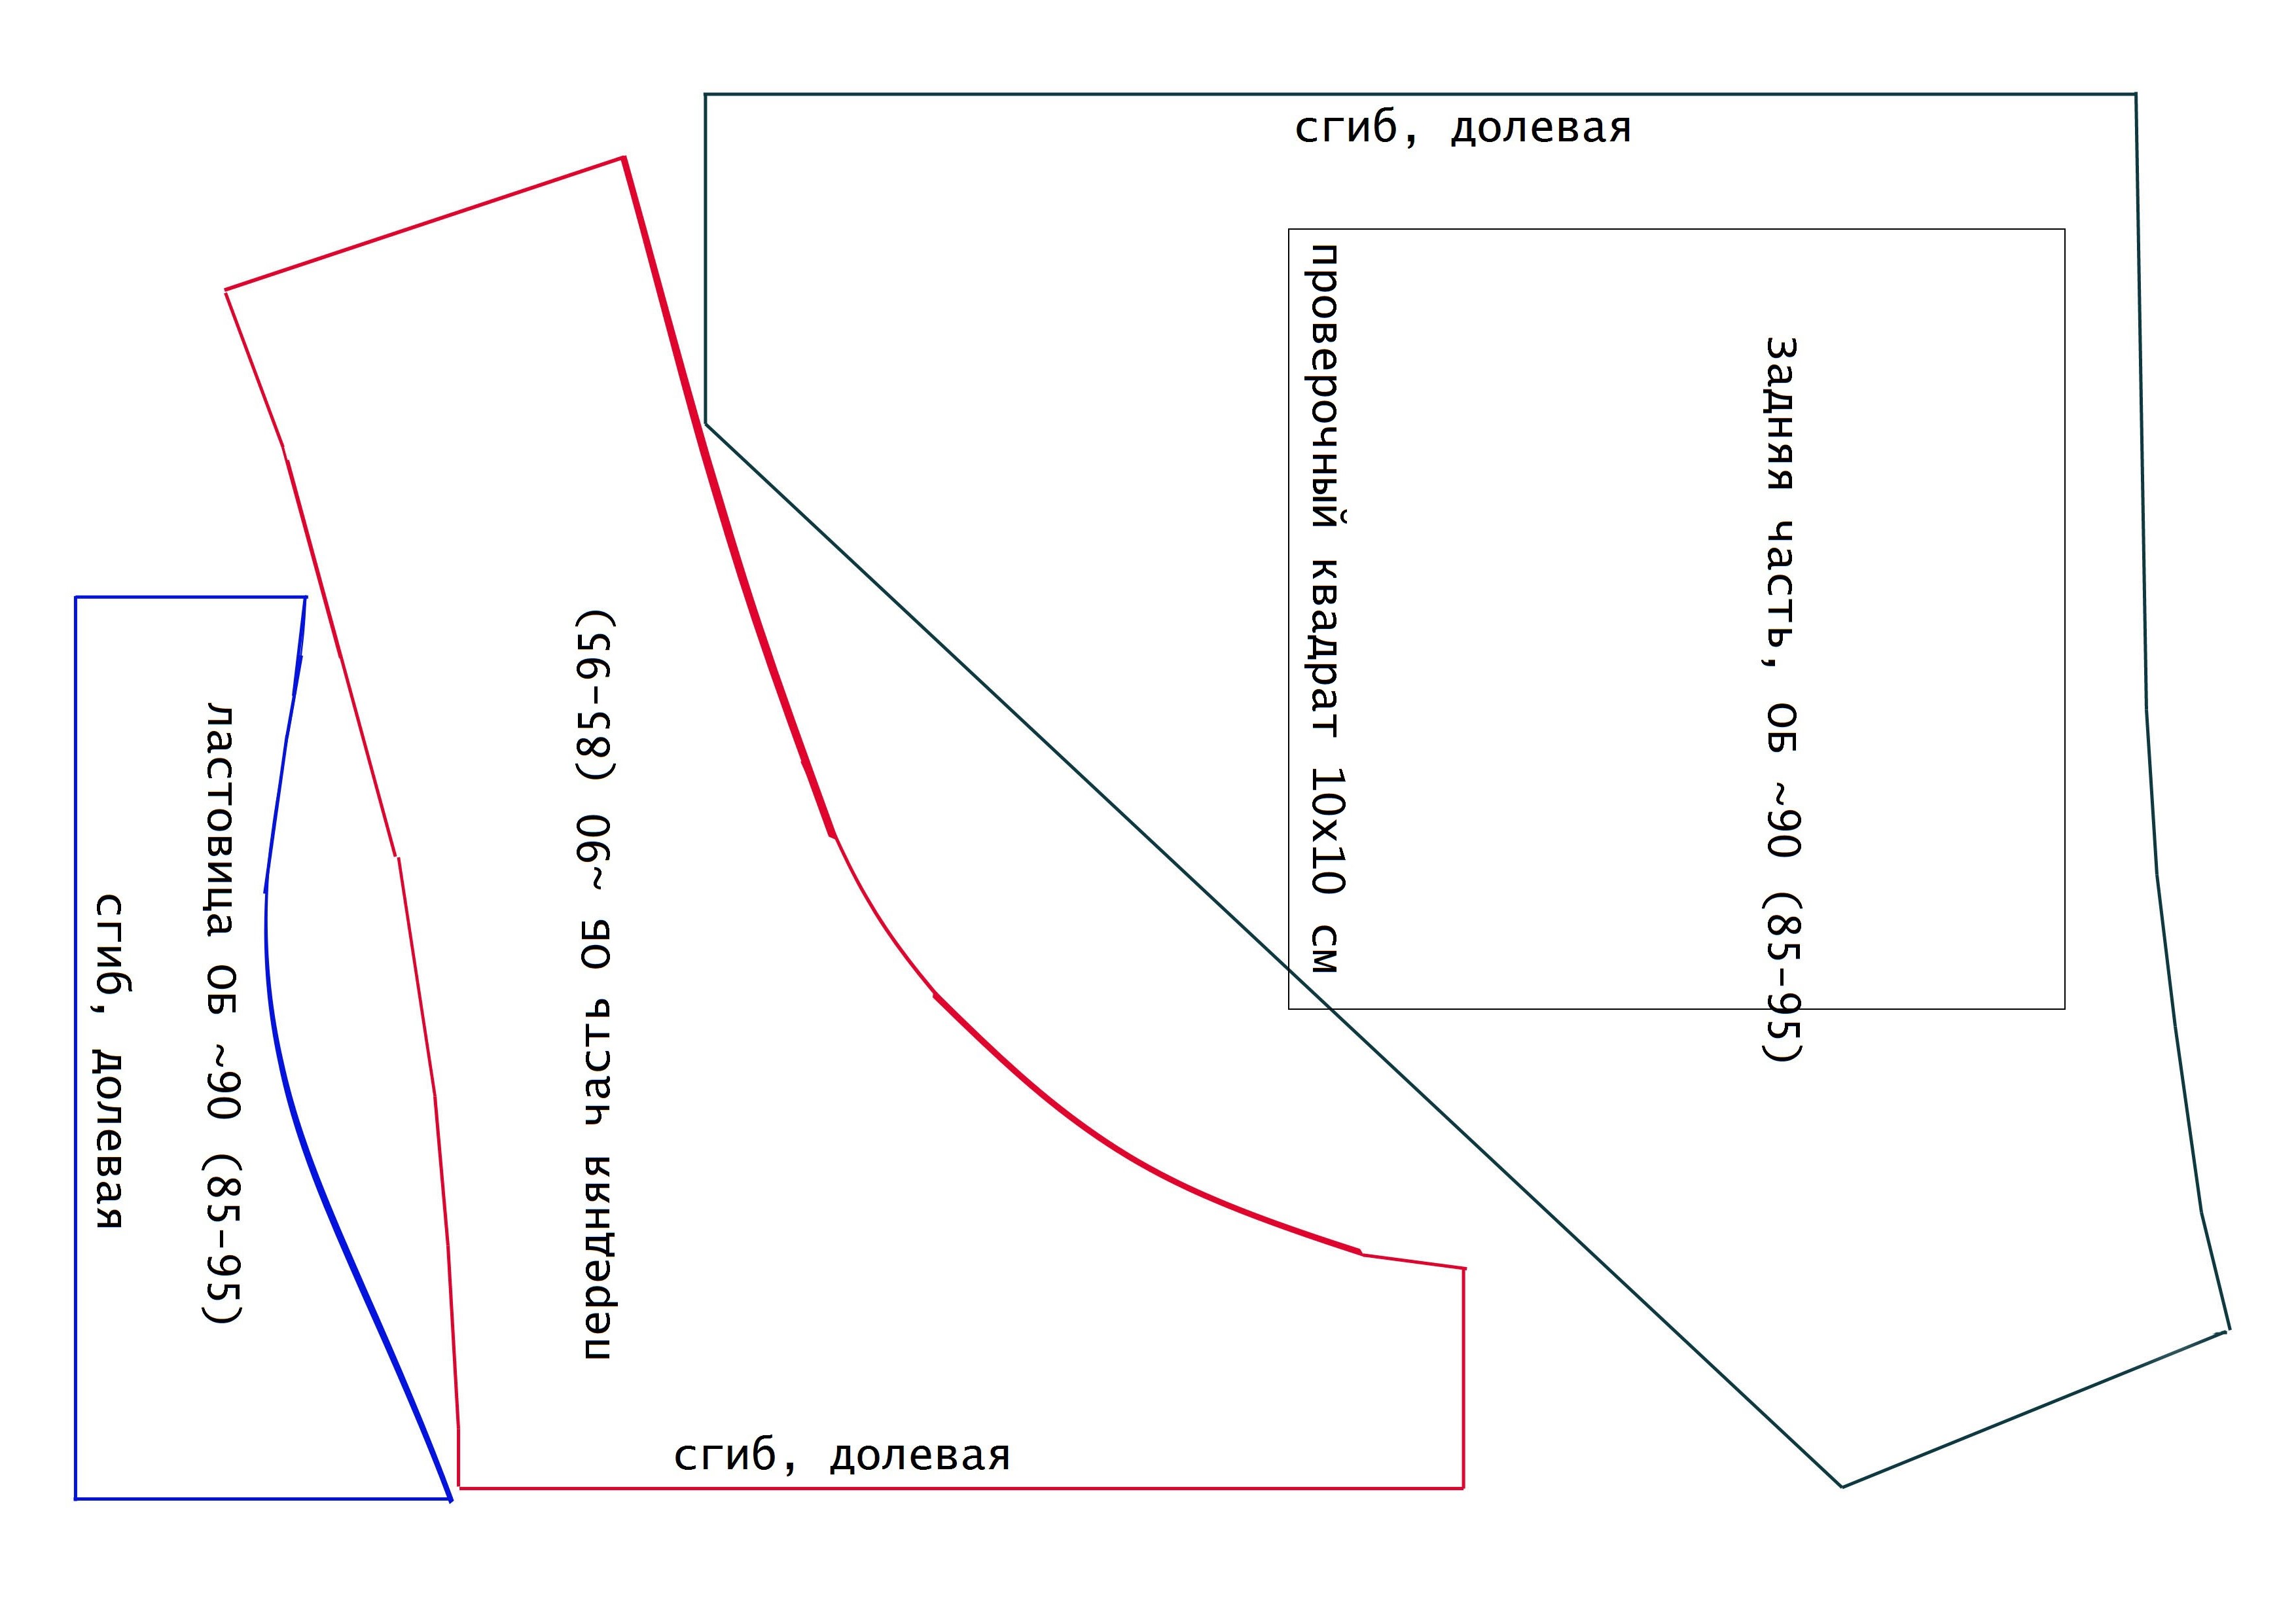
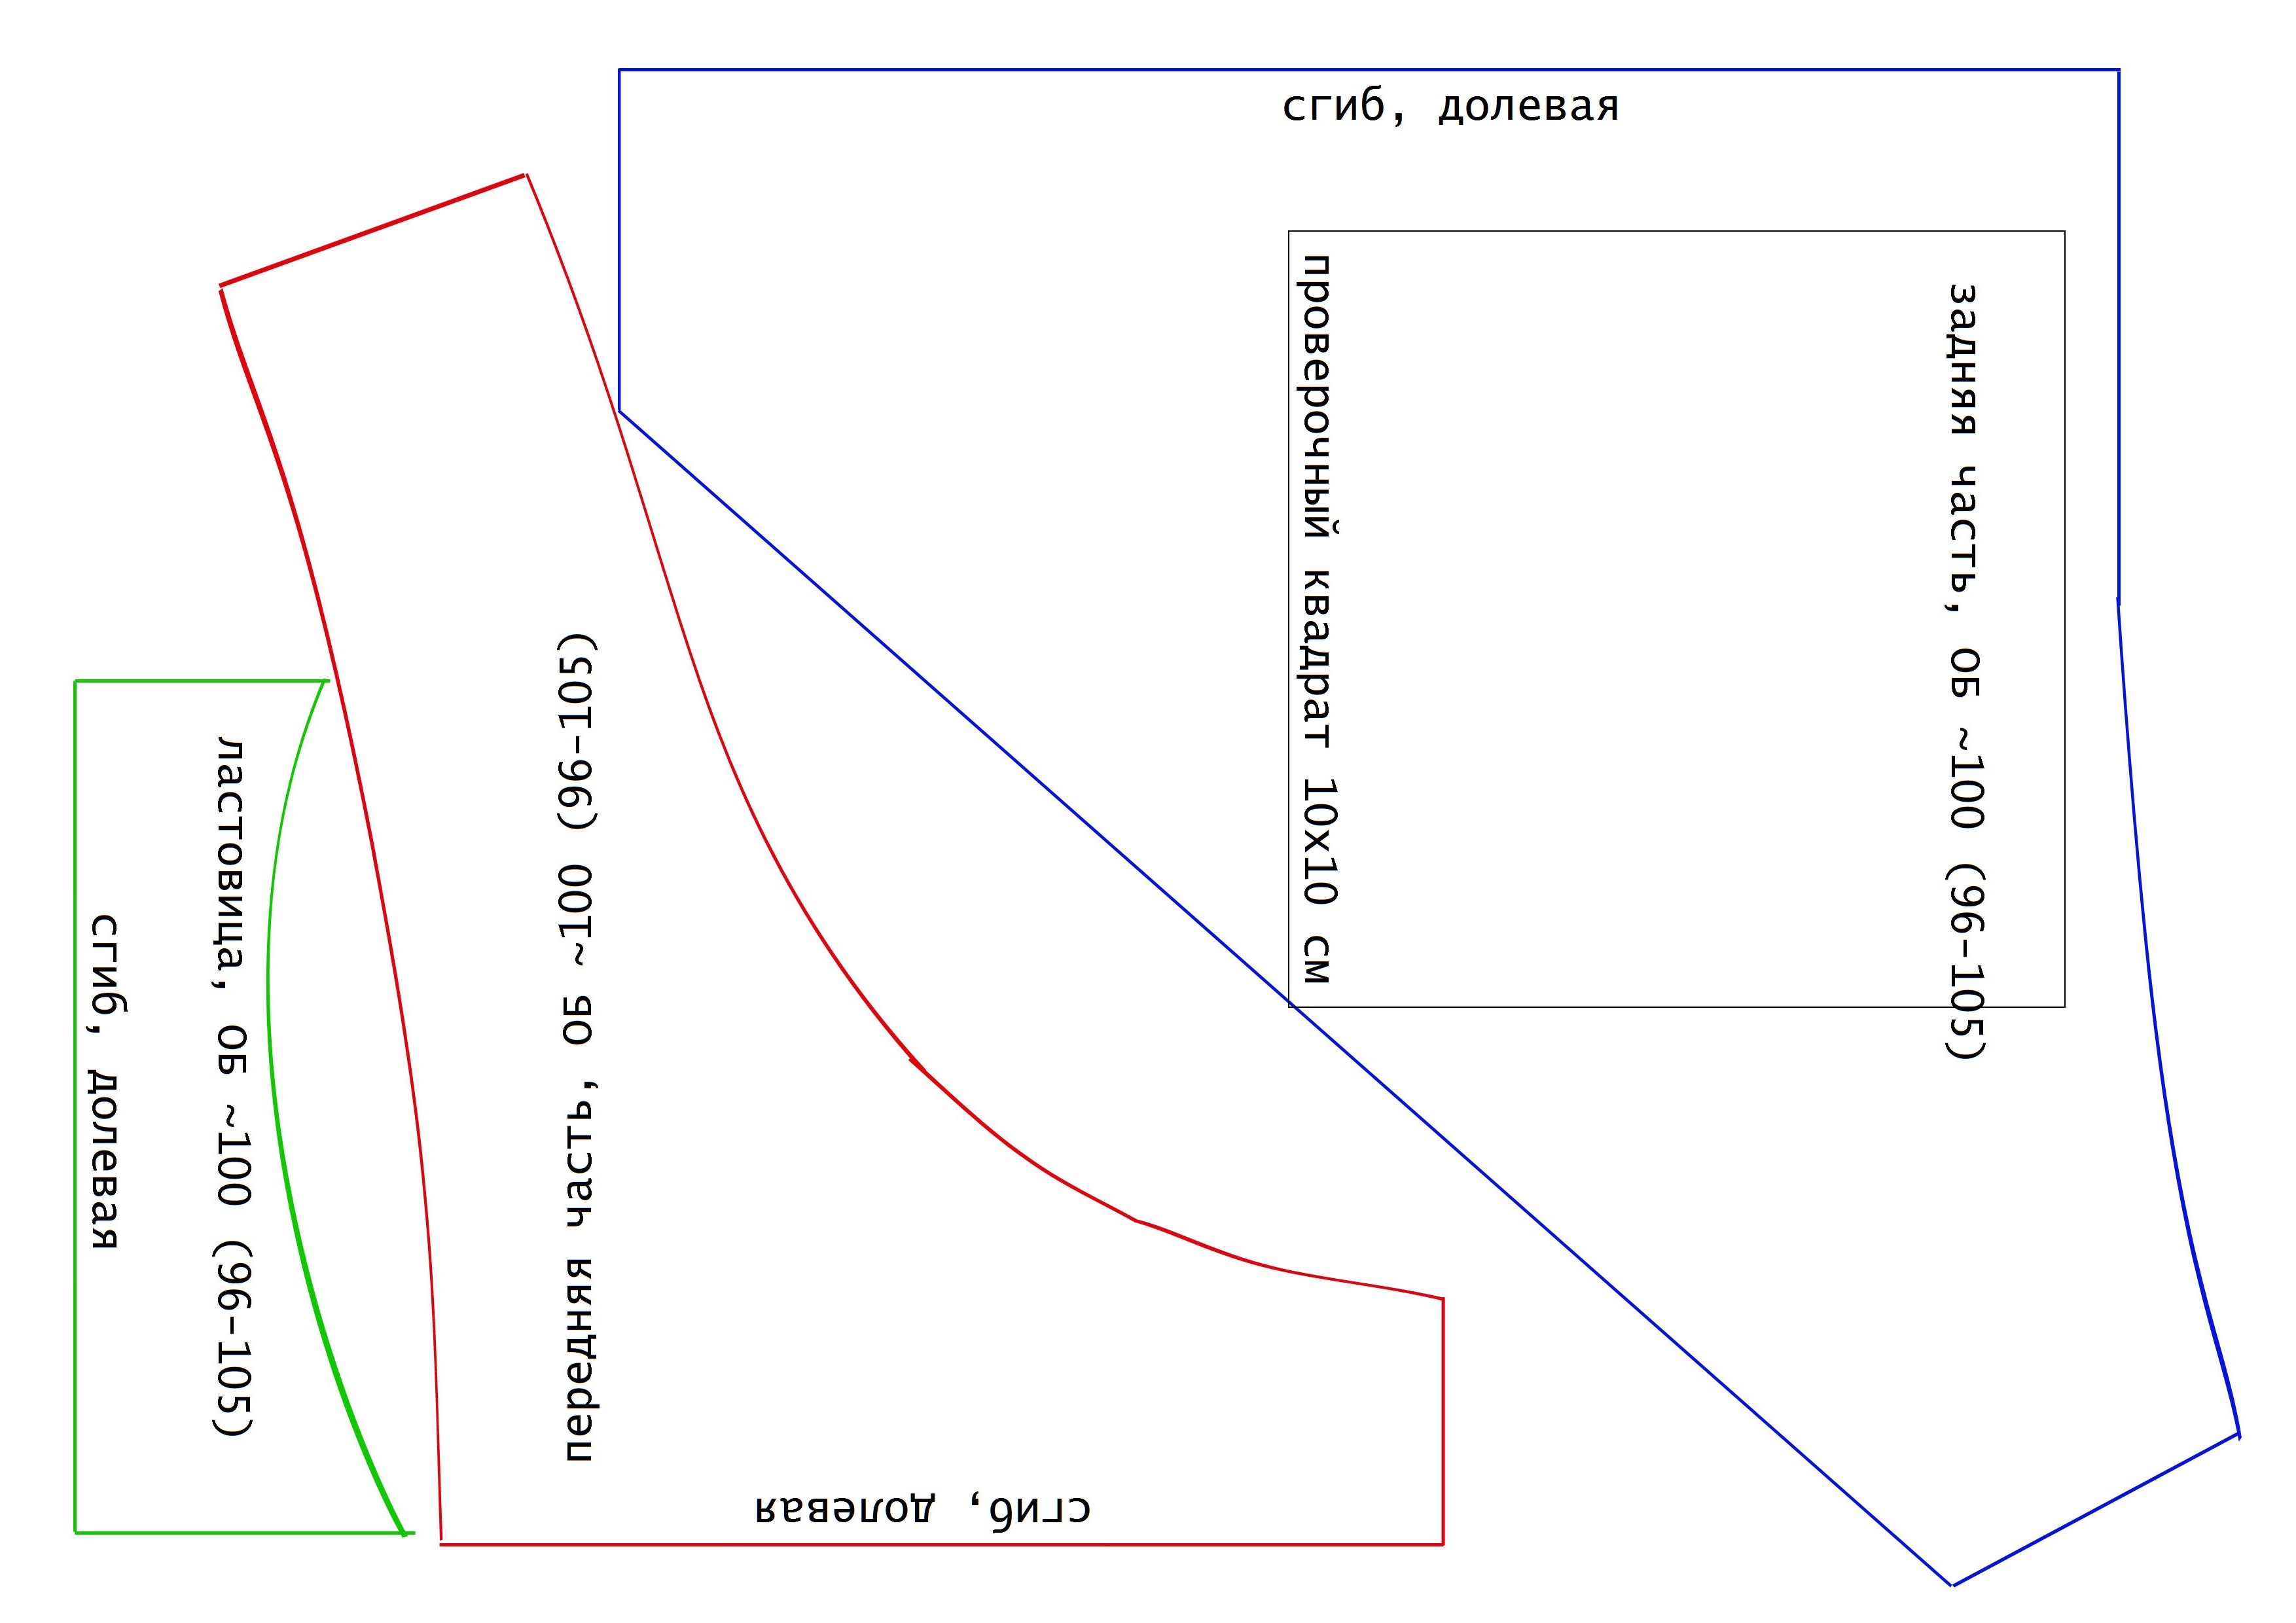
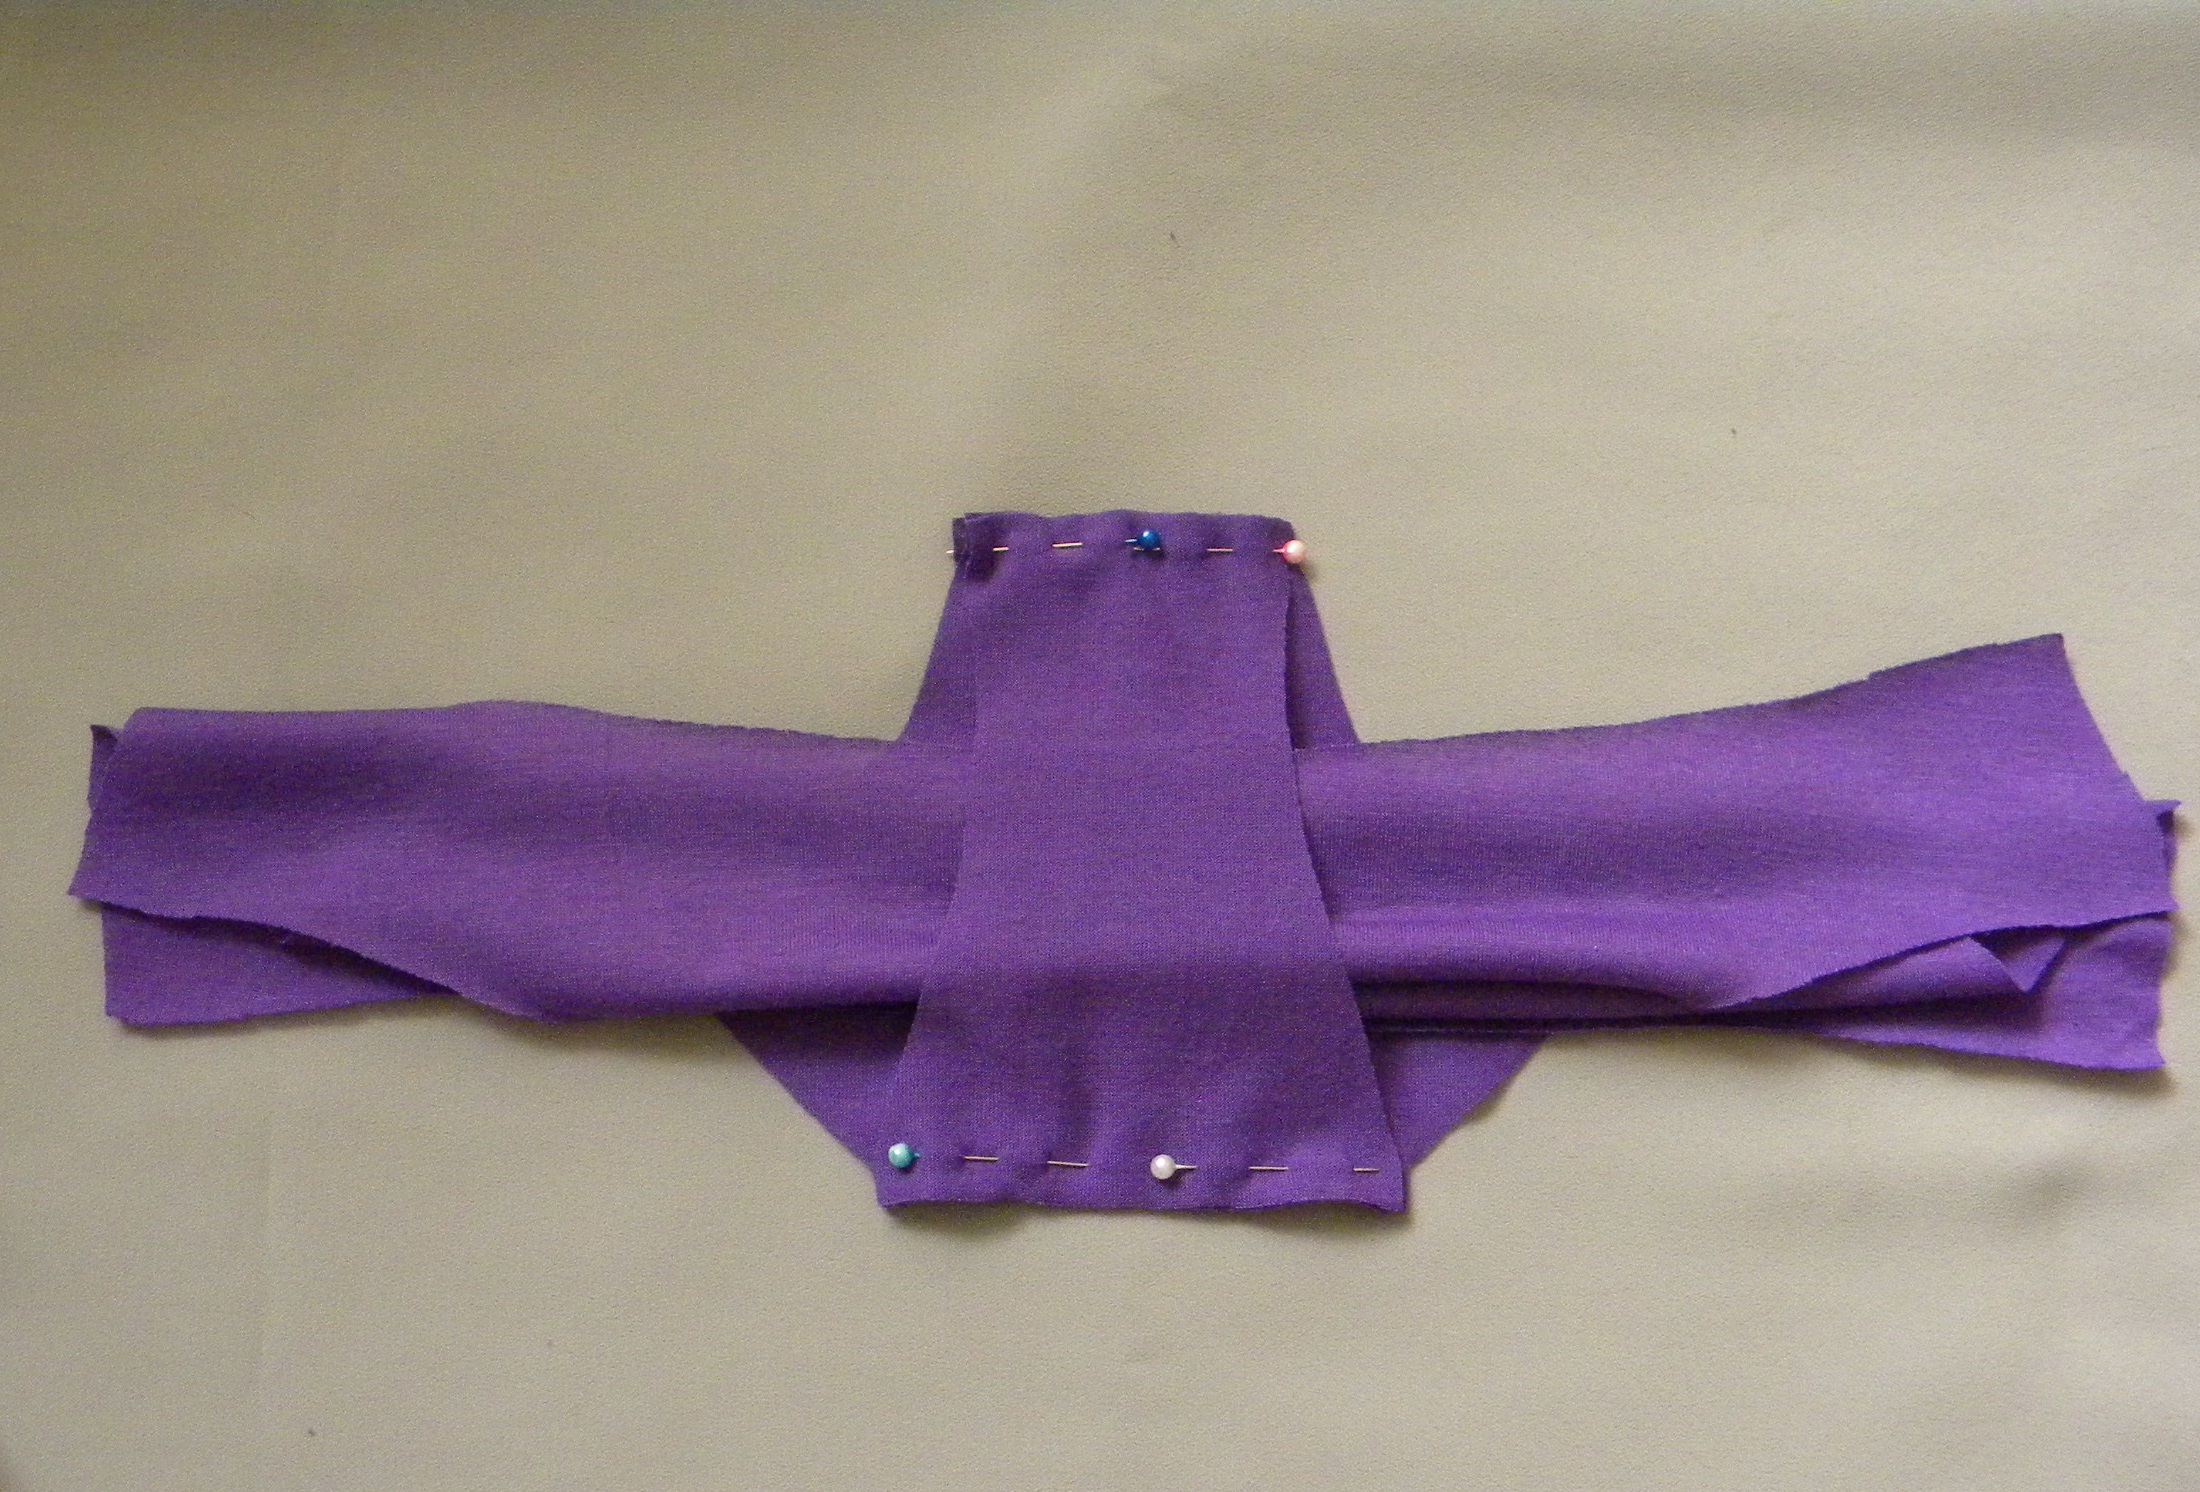
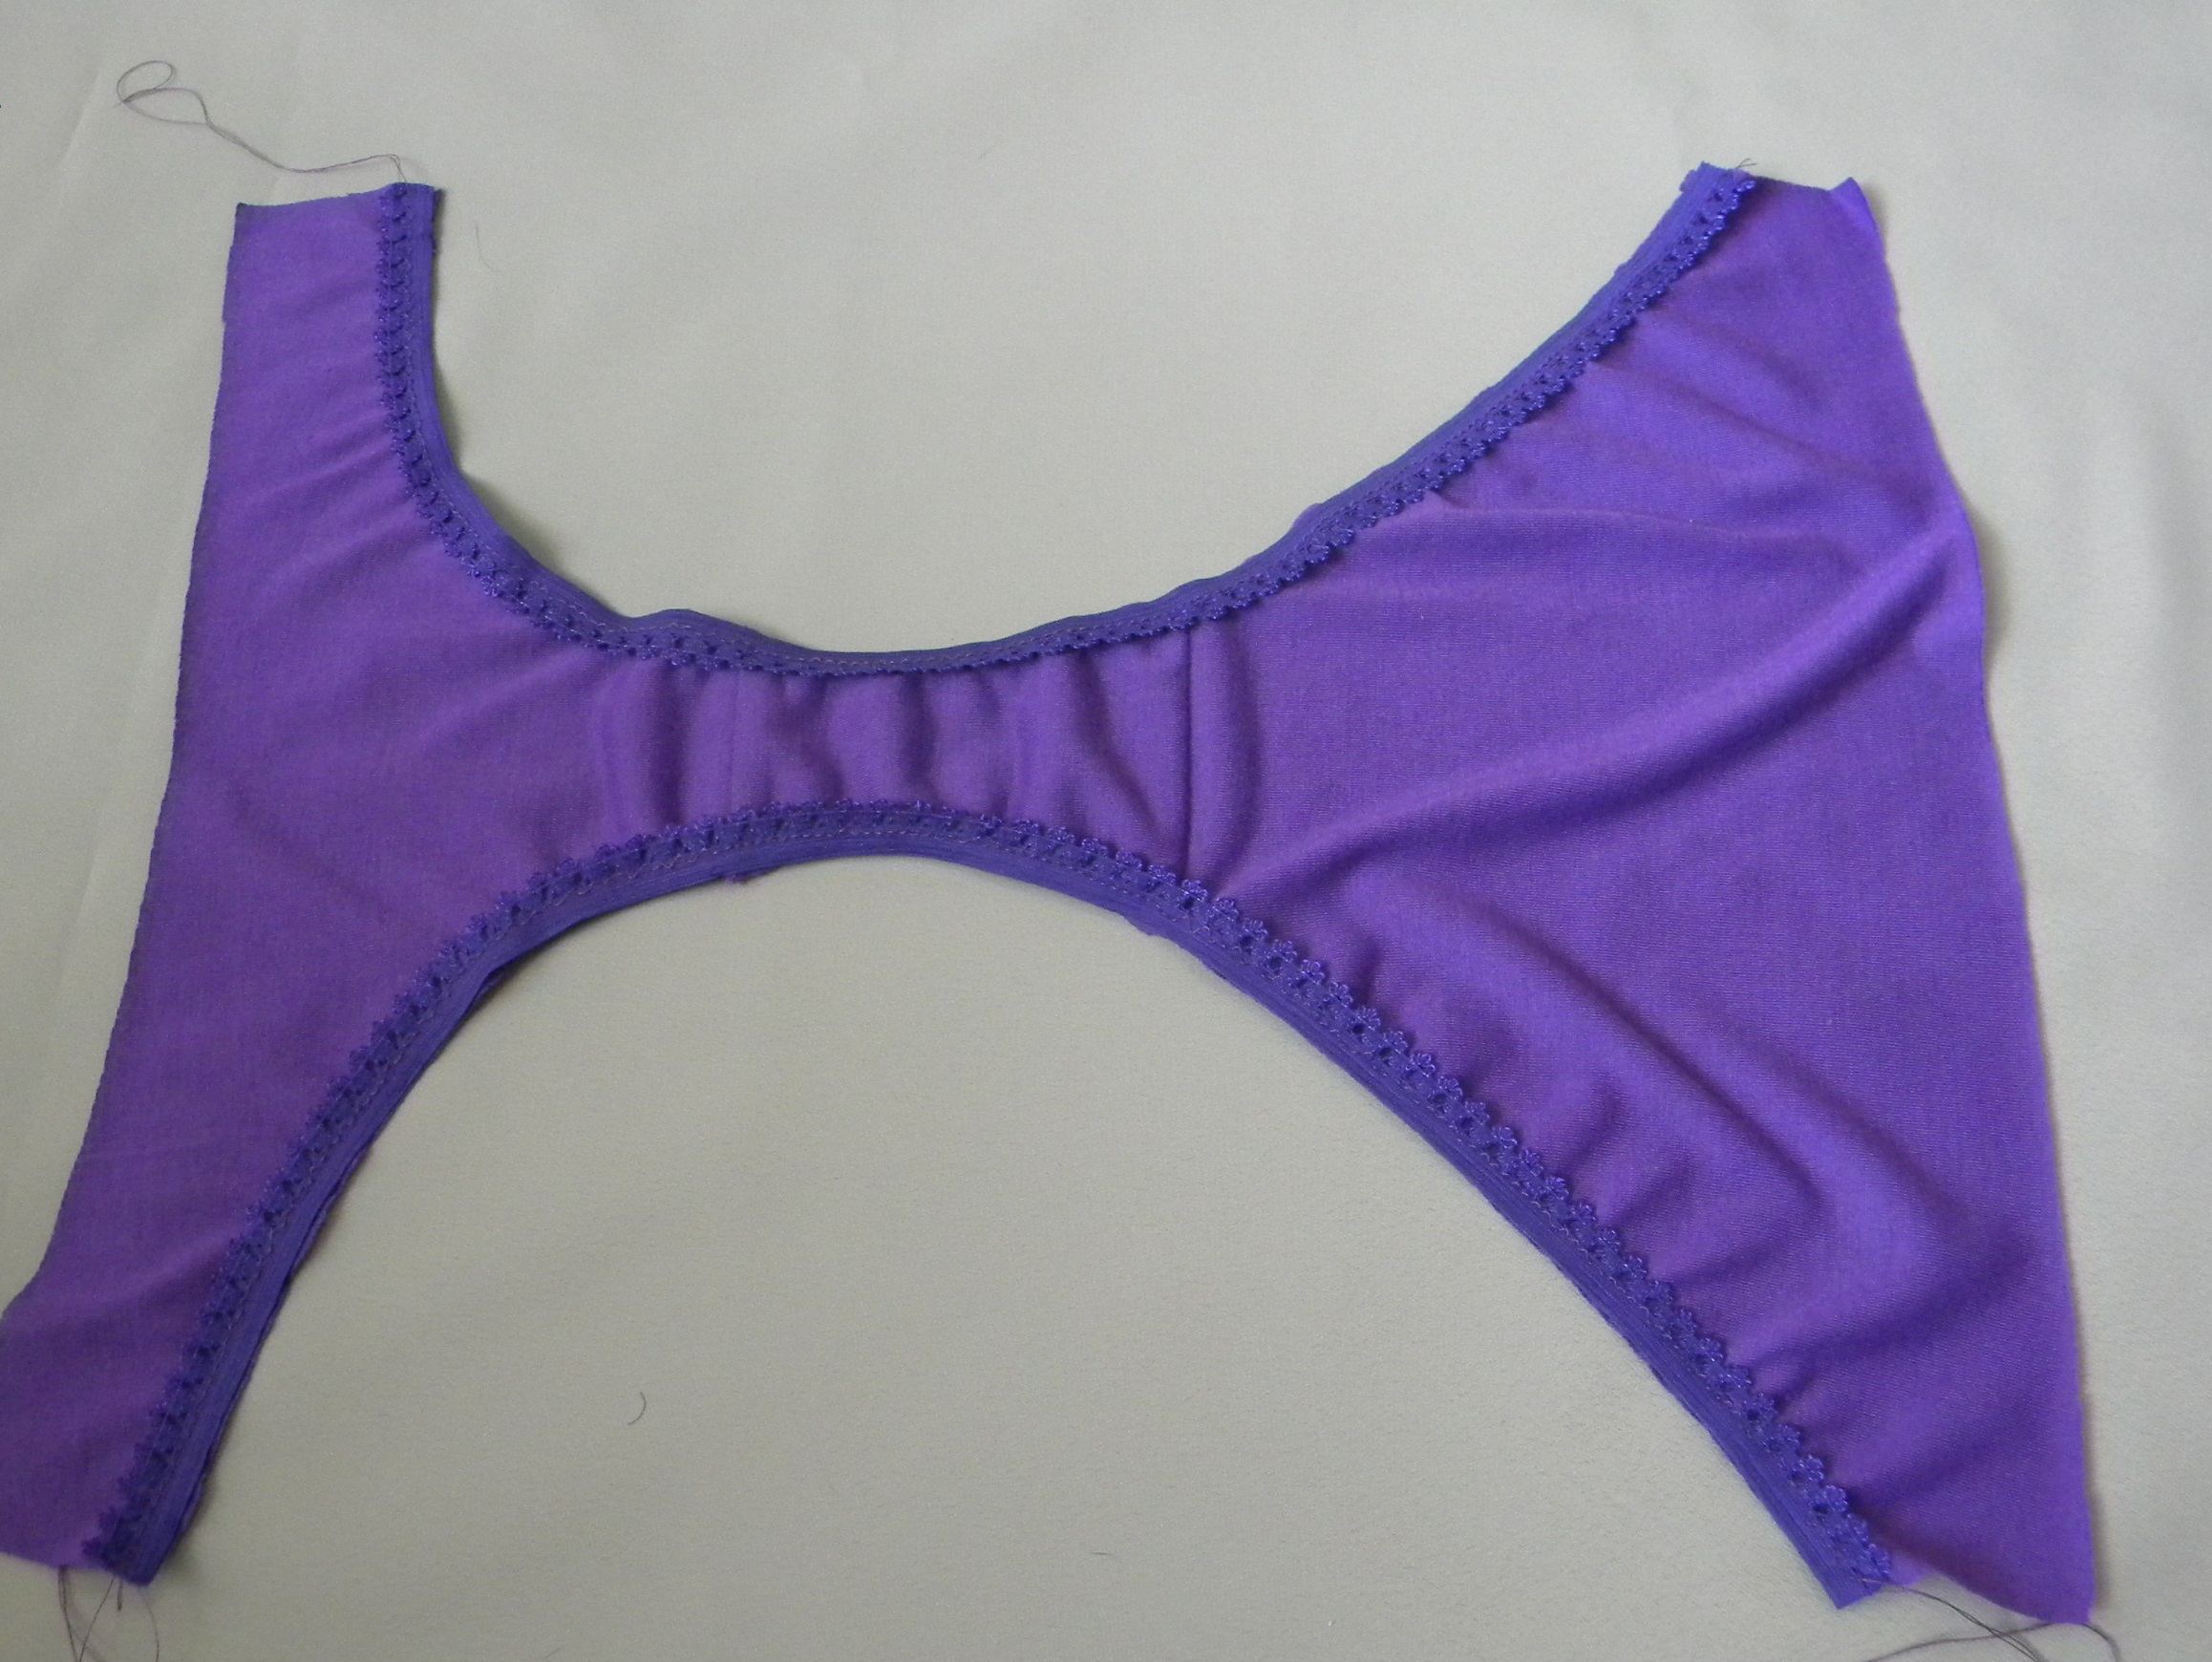
Panties
The creation of the panties pattern should start from the upper left corner, which is designated by point T. The height of the seat is measured down from it, point B is placed, the line is extended by a tenth of the hip volume minus one centimeter, point B1 is placed. The result is a vertical line T-B-B1.
Then, from B1, a horizontal line is drawn equal to a quarter of the hip volume minus 1.5 cm. Point B is put, from which a vertical is drawn with the final B1, located on the same horizontal line as T. The result is a rectangle T-B1-B-B1. From B1, the height of the hips is measured down, point B2 is put.
To draw the waist line, step back a quarter of the waist size to the right from T and mark it with point T1, connect it with B2. Then draw the top line of the product. From T down, put aside about 7 cm (T3), from T1 towards B2 – about 6 cm (T4). A red line is drawn between them.
Then the side seam is marked. From T2, a distance of 4 cm is measured along the T1-B2 line. Point T4 is put. To design the gusset, about 2.2 cm should be measured from B1. The resulting point is connected to T4. The pattern is ready.
To model the lower component of women's underwear, the top line should be lowered in the front and raised by 1 cm in the back. The side seam on the front part is shifted by 1.5 cm to the left, and on the back - by the same distance to the right. If the model you like differs significantly from the basic one, you can make the appropriate adjustments.

Cutting and assembly
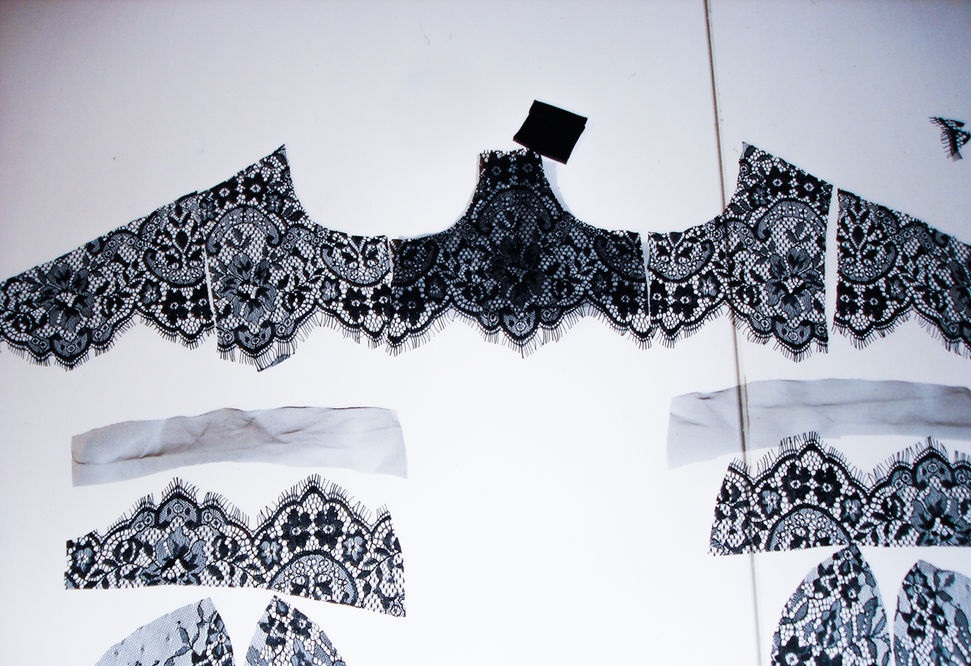
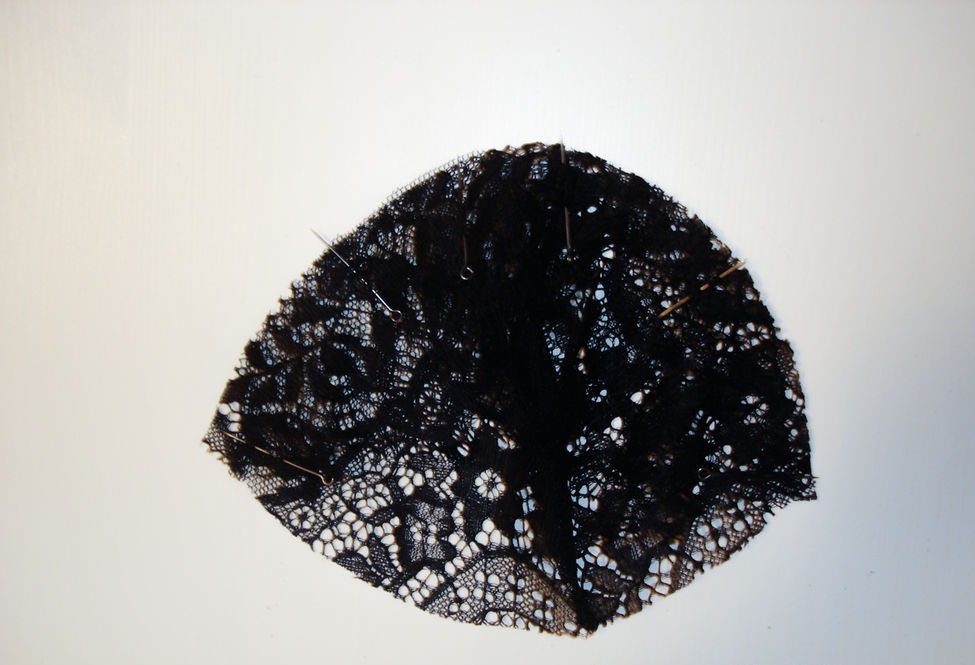
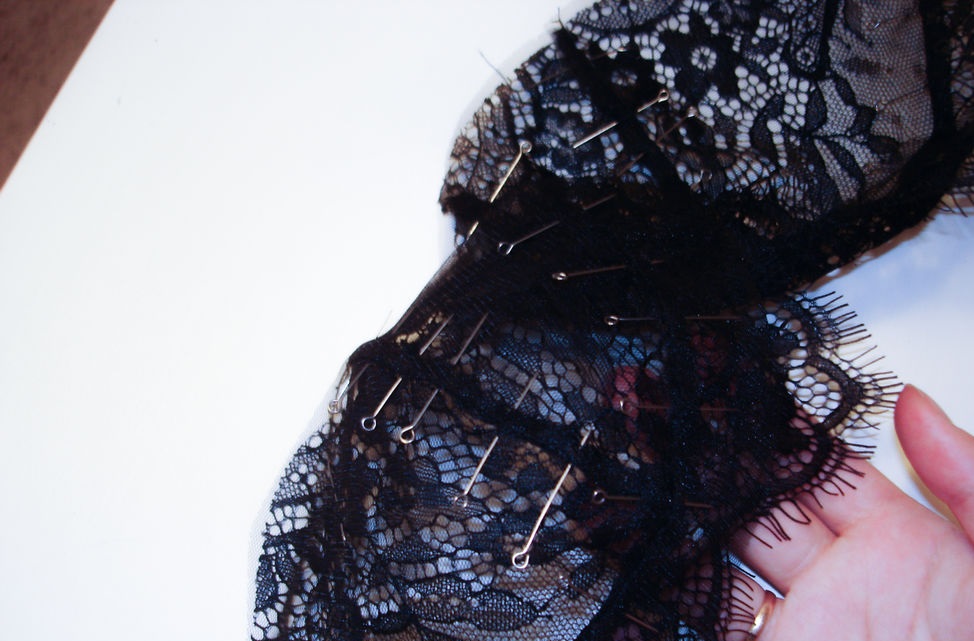
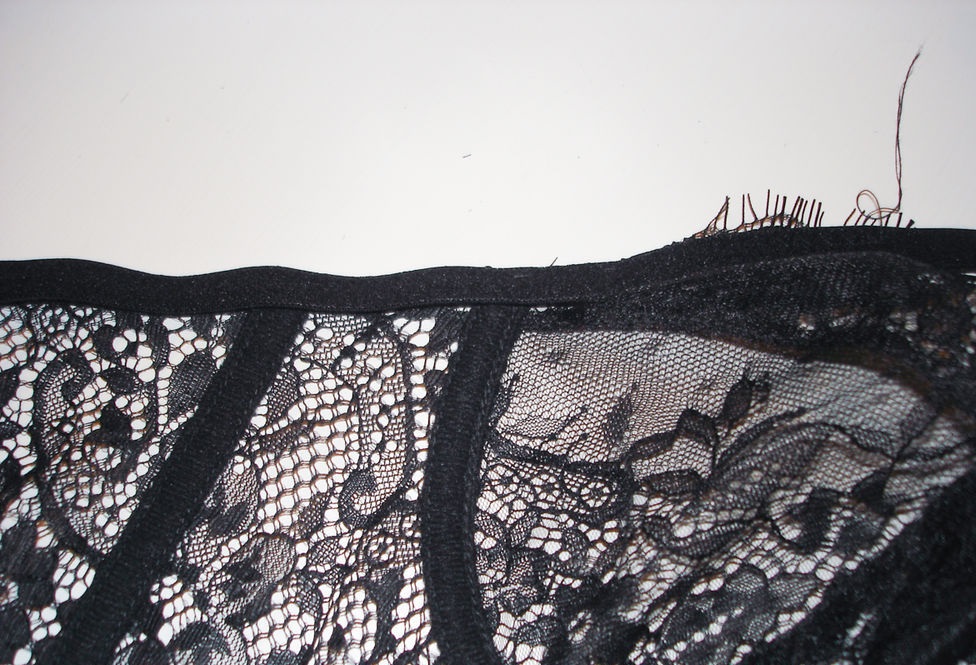
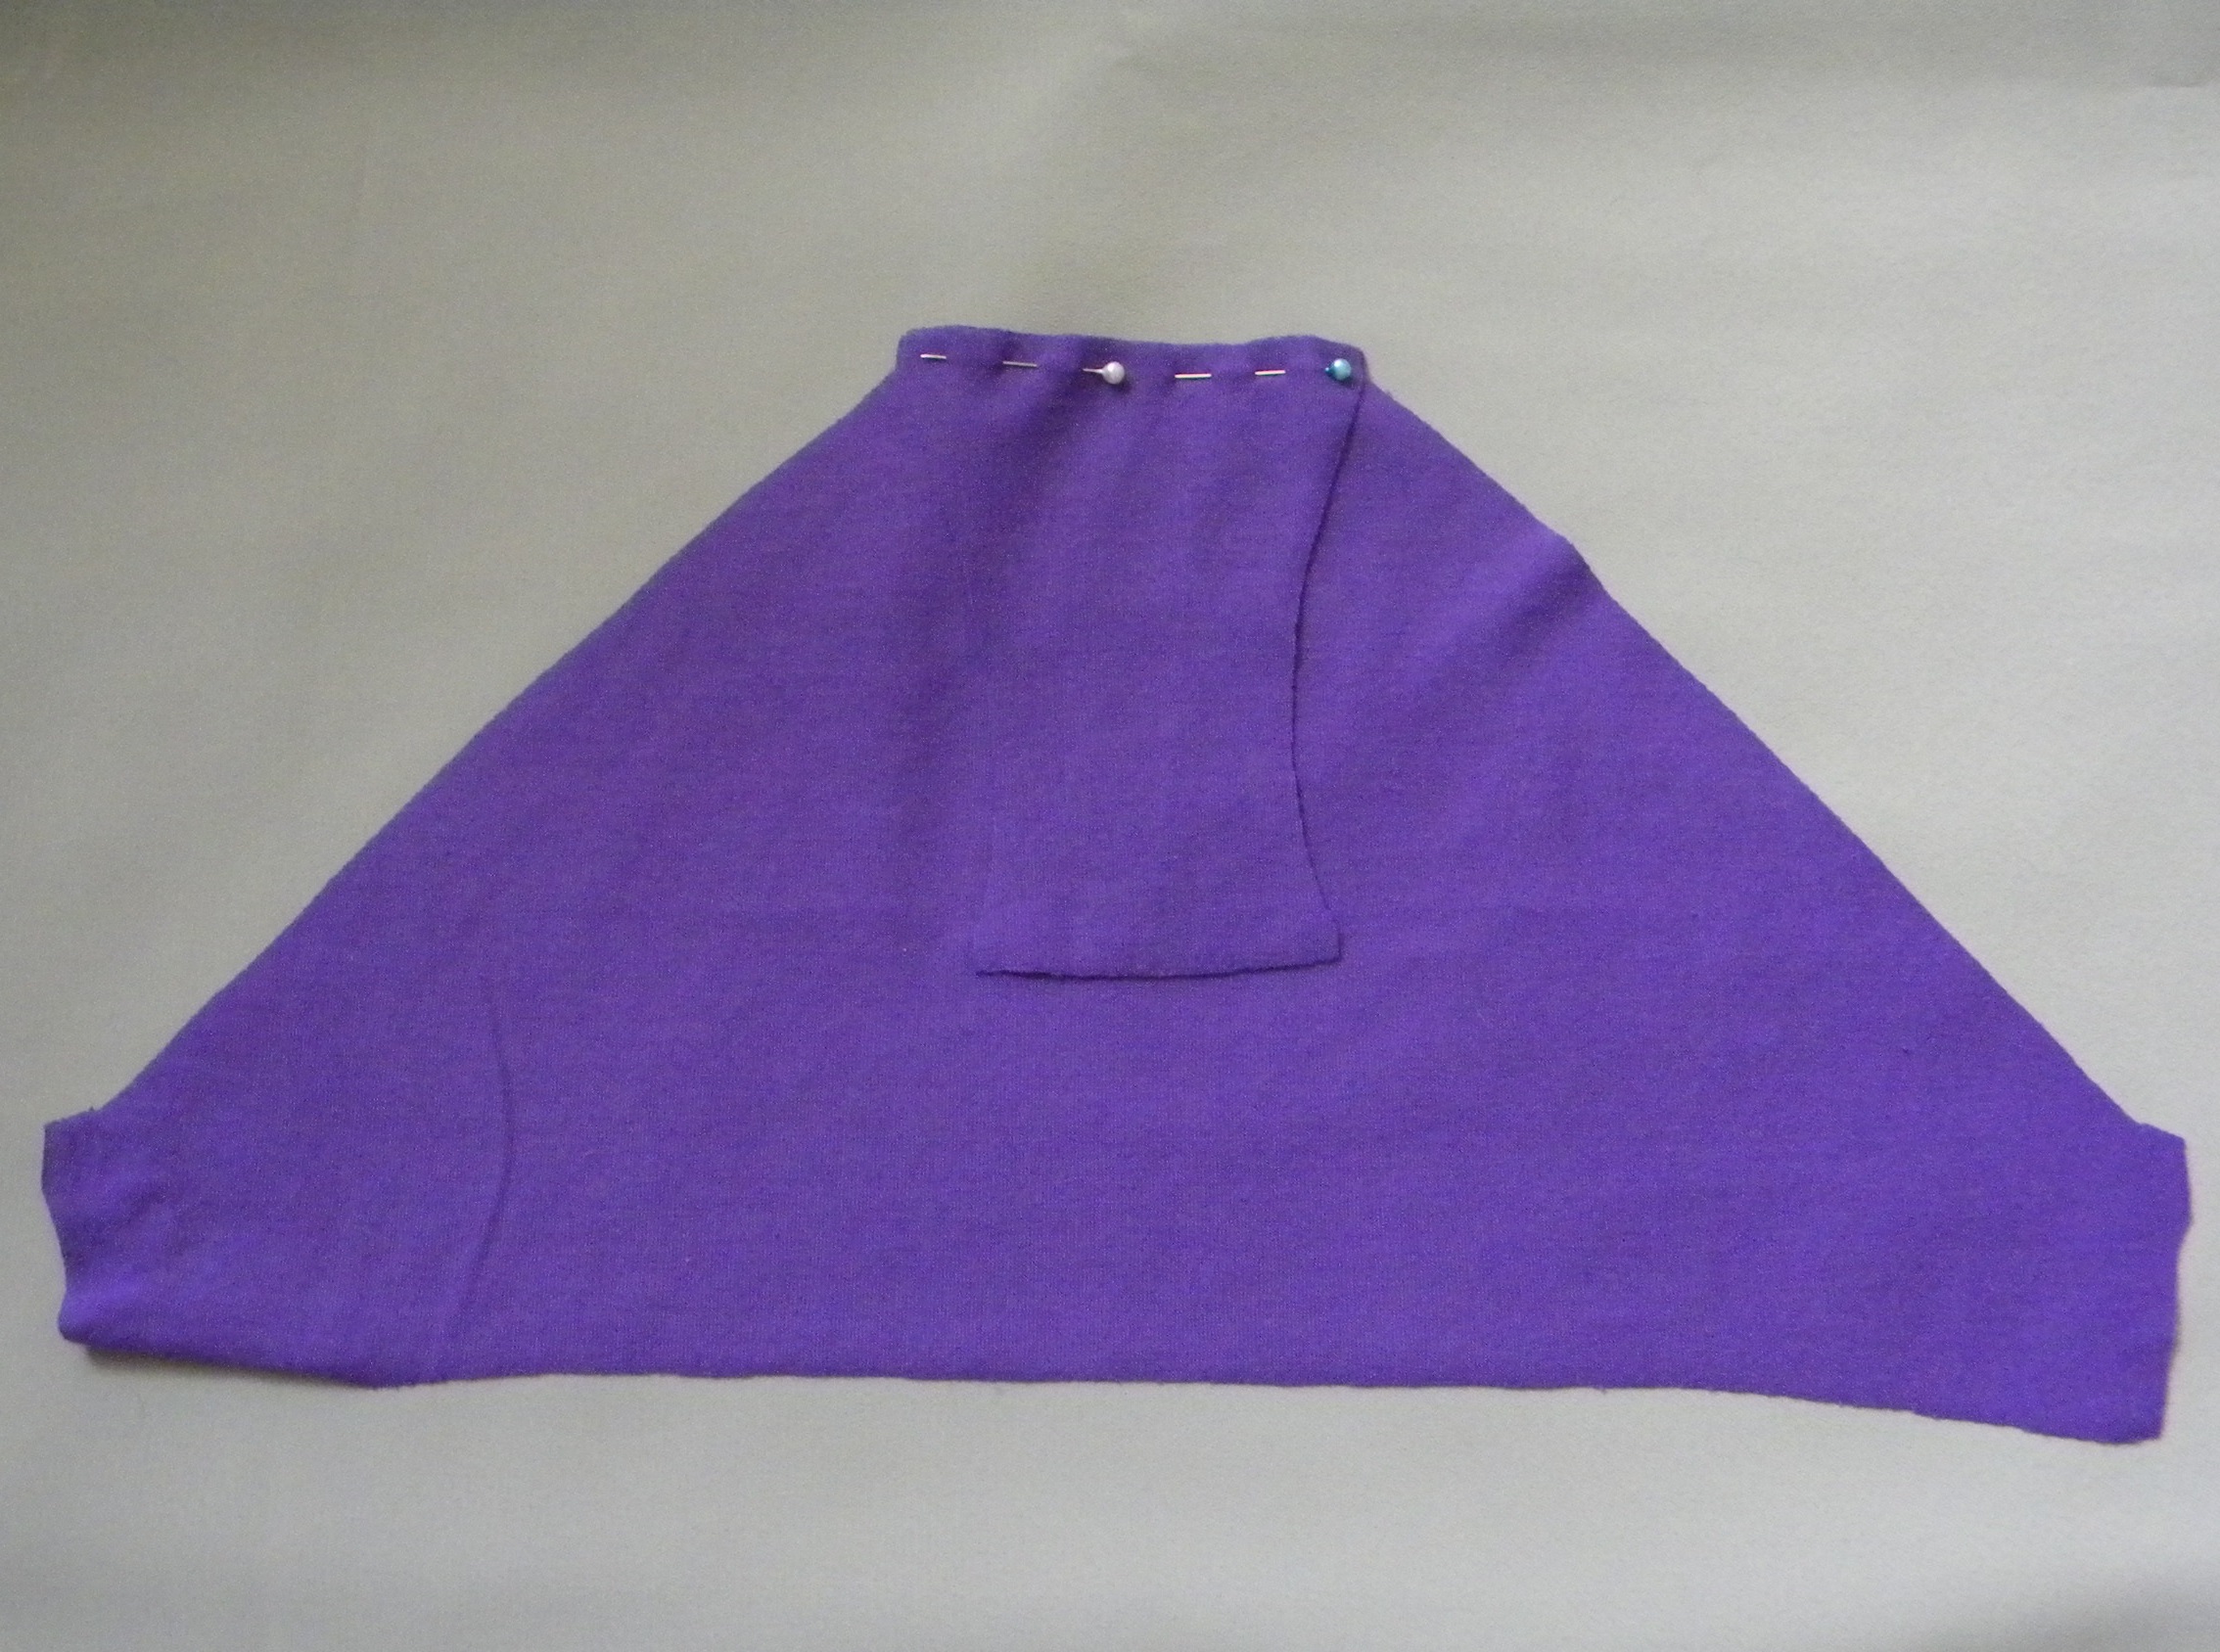
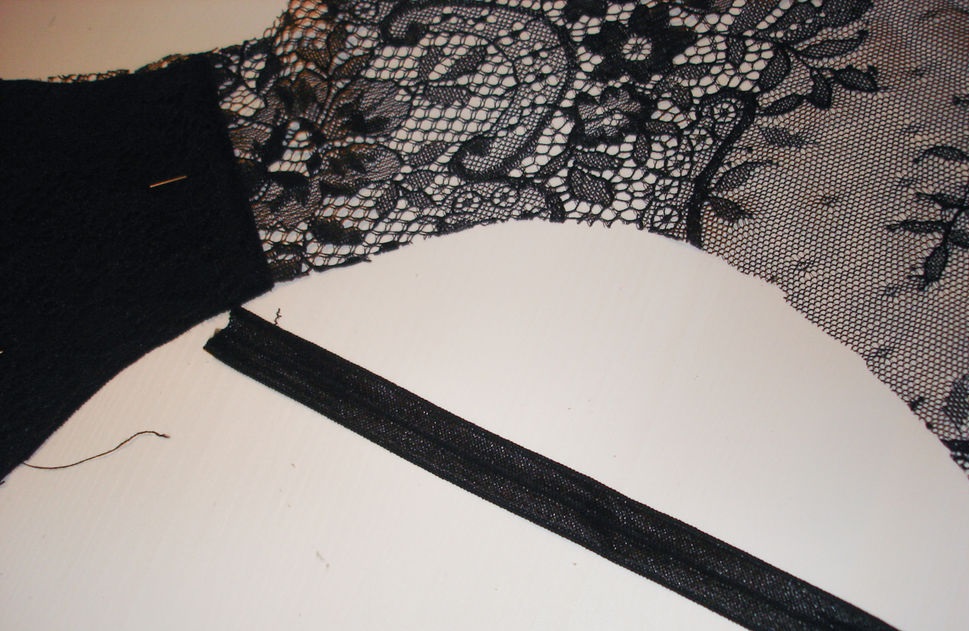
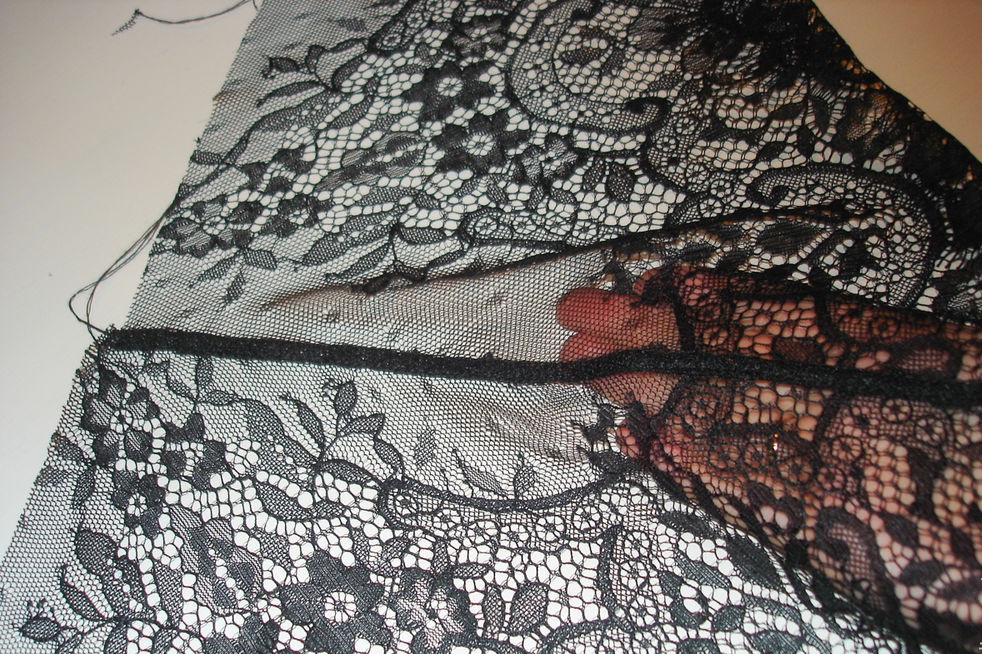
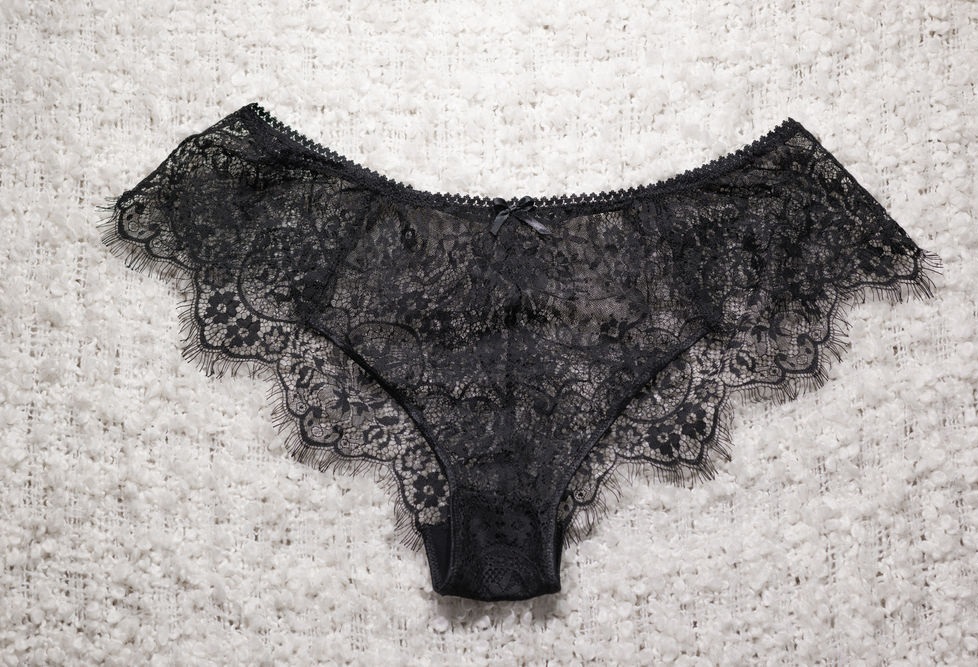
The most popular material for making underwear is lace. Therefore, it is worth paying special attention to. Lace is distinguished by the presence of a large or small pattern. It is necessary to cut it, starting from the pattern. Its main fragments should be located symmetrically relative to the center. It is advisable to combine the pattern in the connecting seams. Then the product, sewn independently, will look neat and dignified.
The process of cutting and assembling the bodice is as follows:
- The lace is folded in half.
- The pattern is placed on top and fixed.
- Two identical pieces are cut out to serve as cups.
- Then the straps and the back with the fastener are cut out.
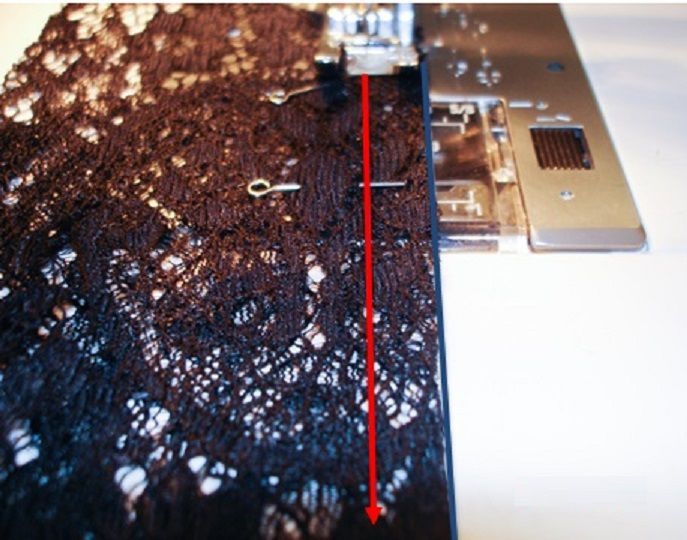
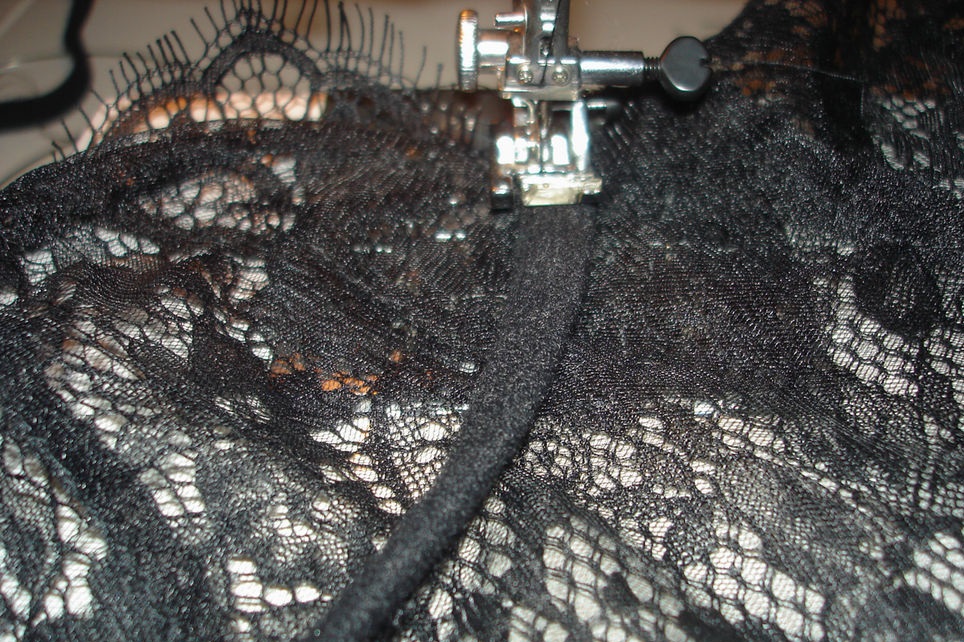
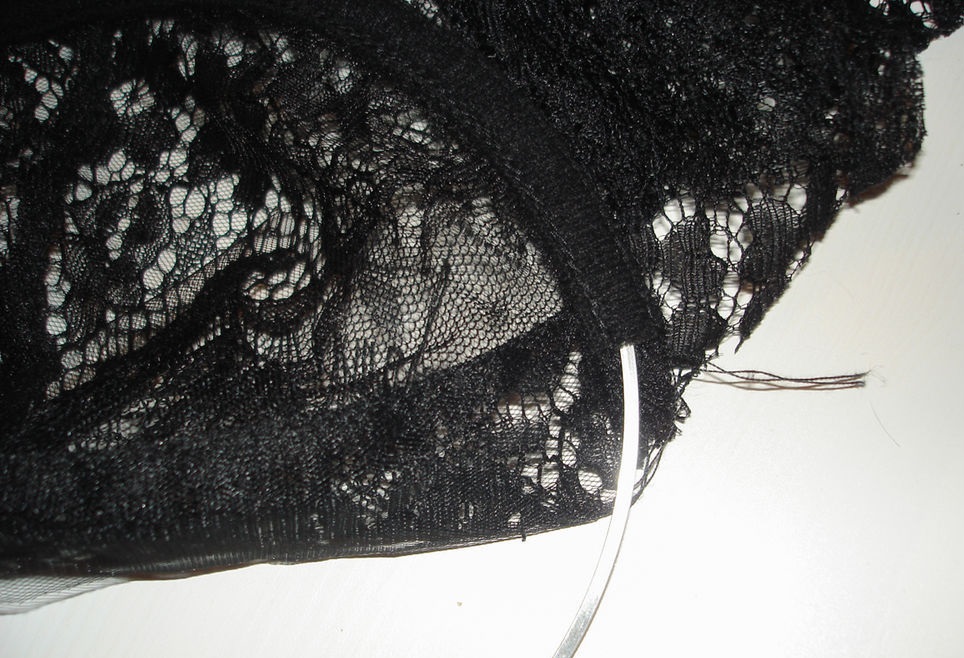
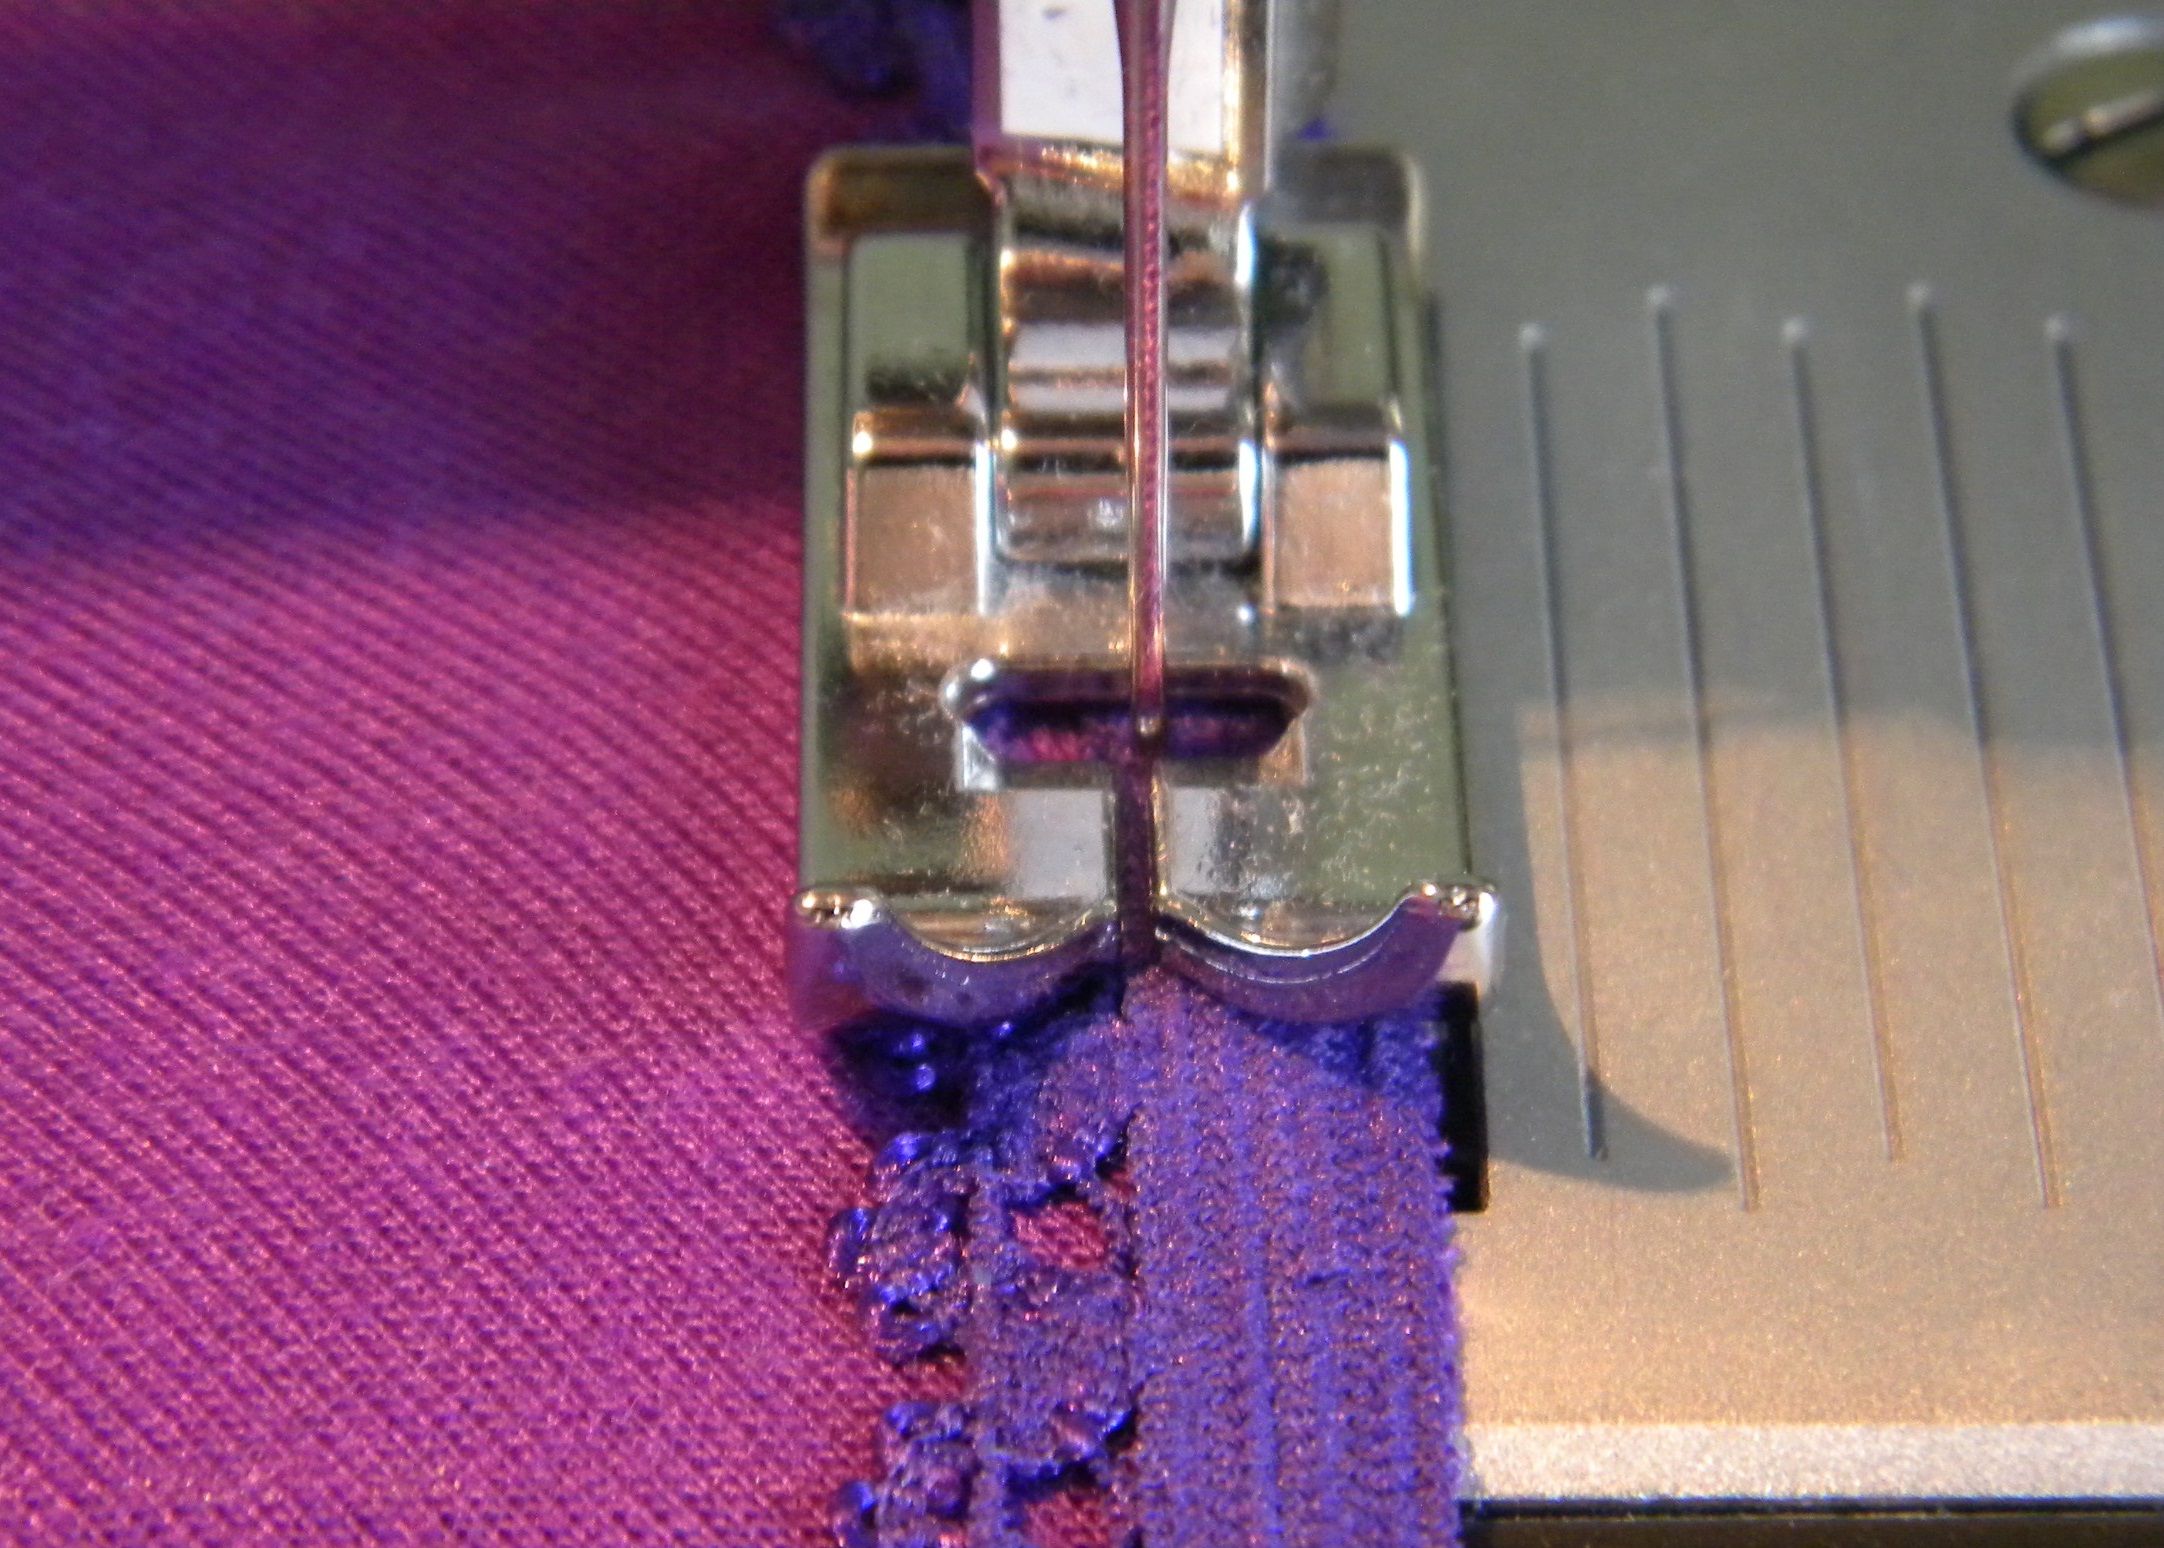
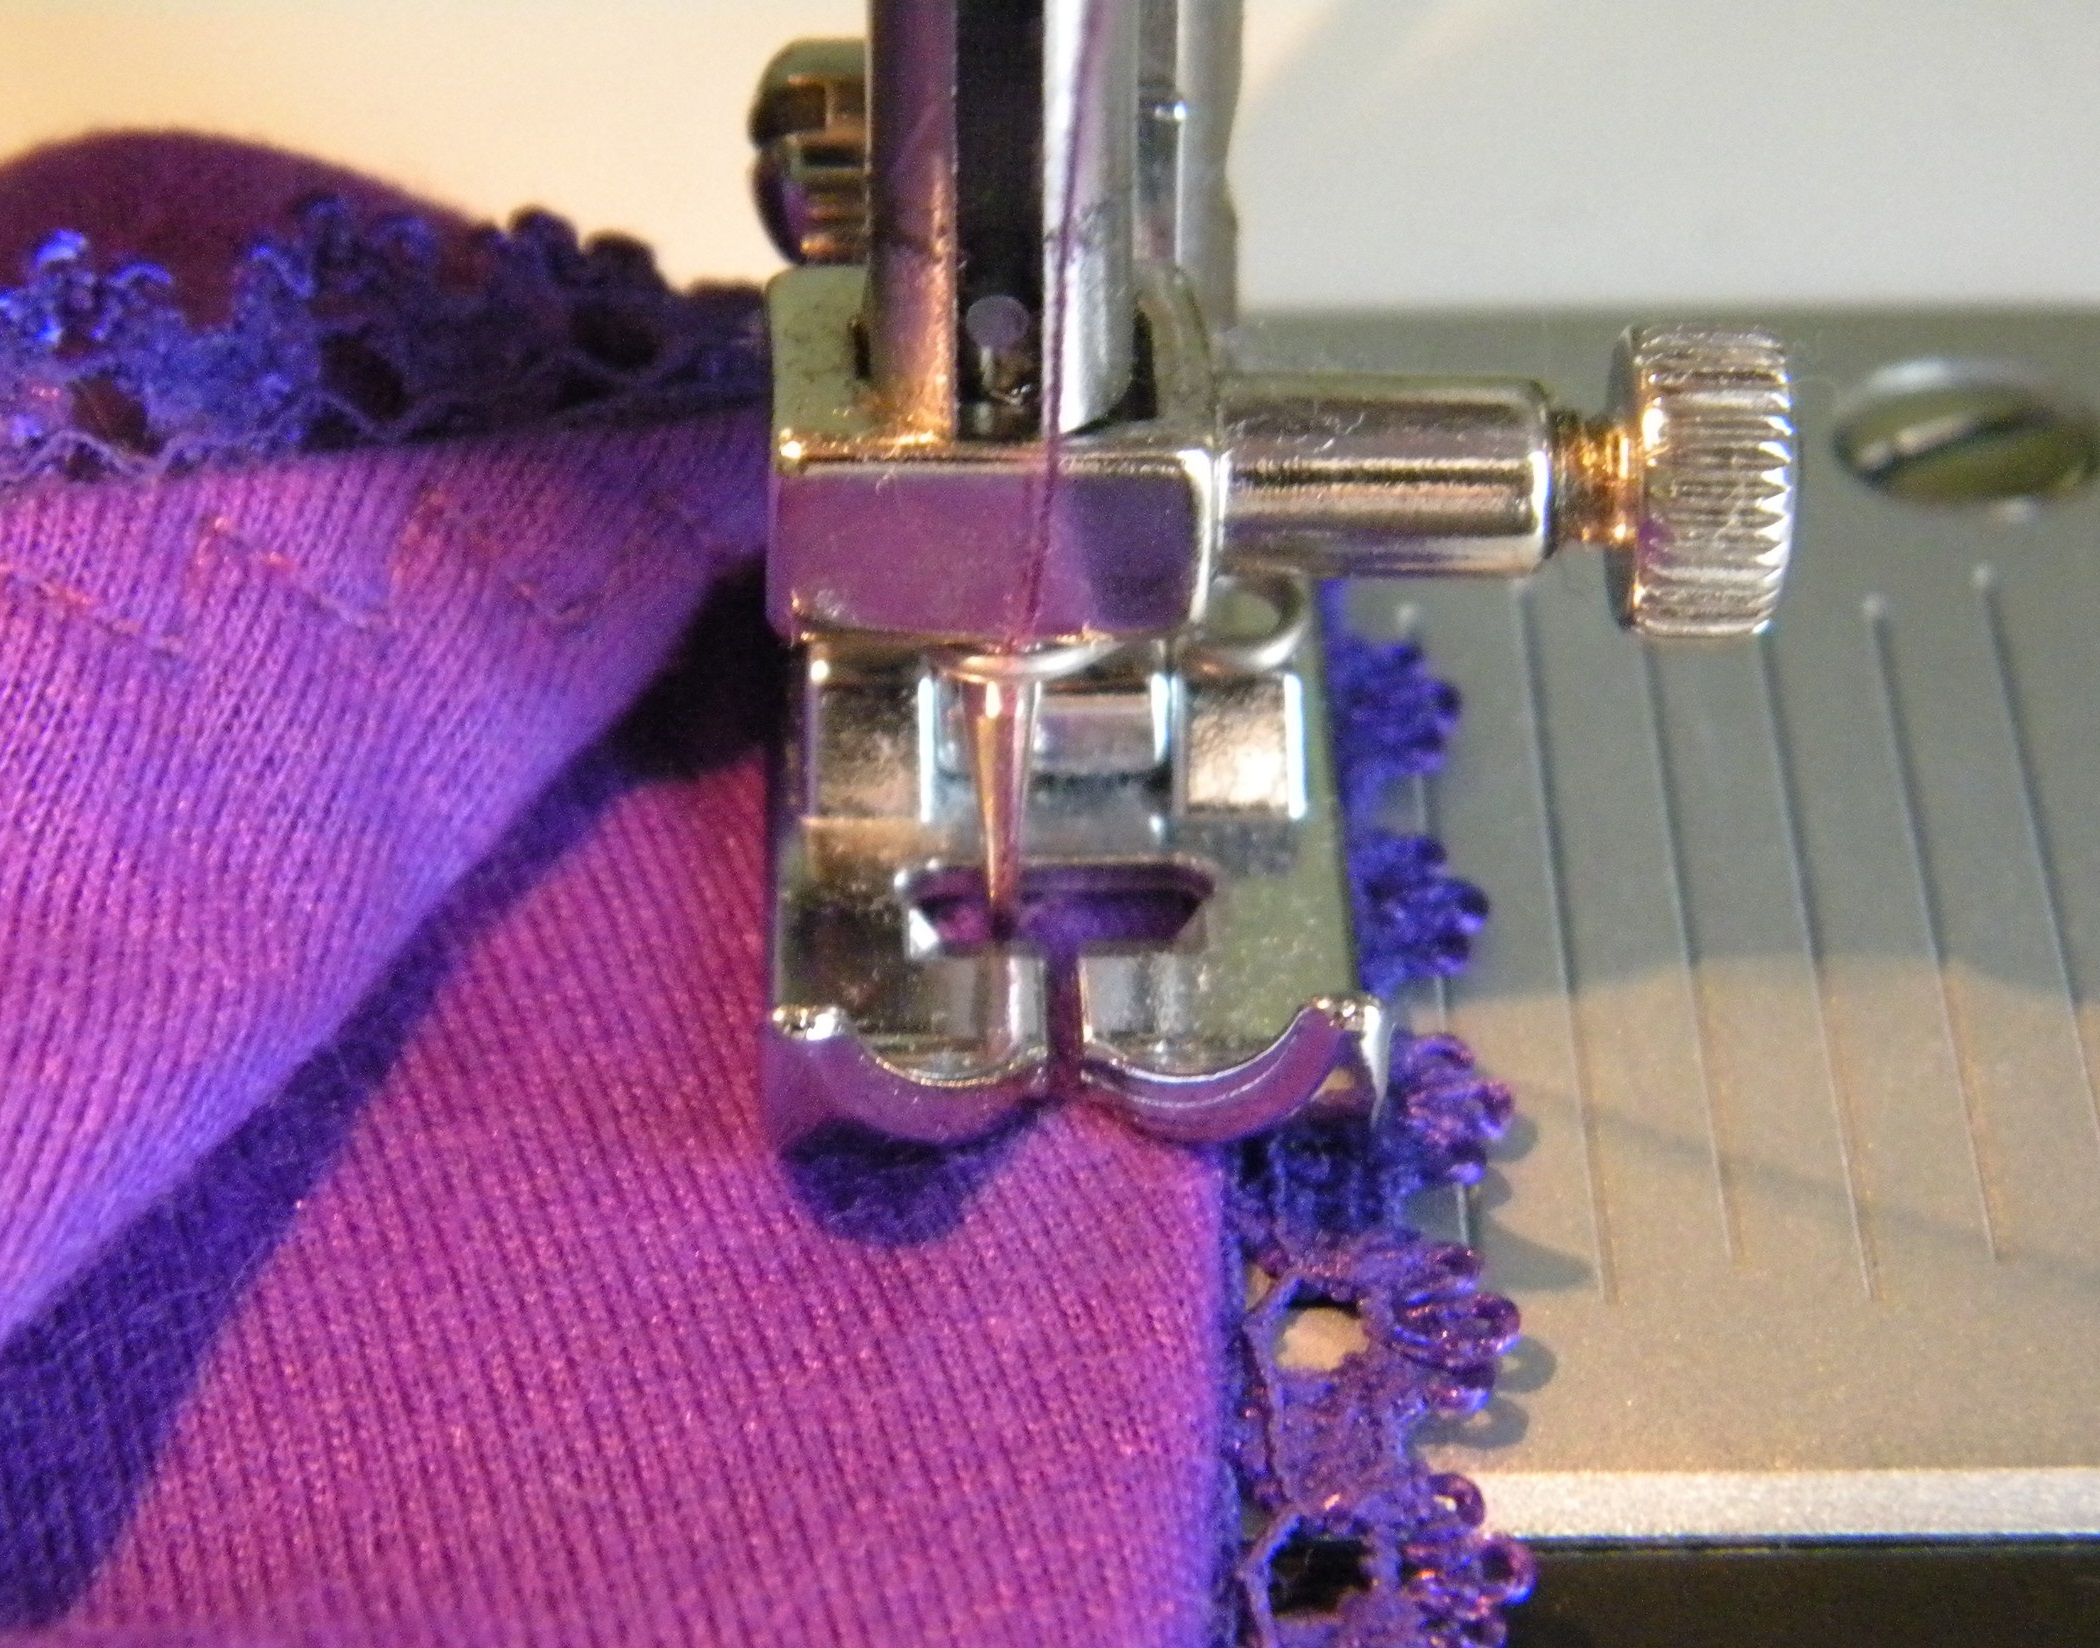
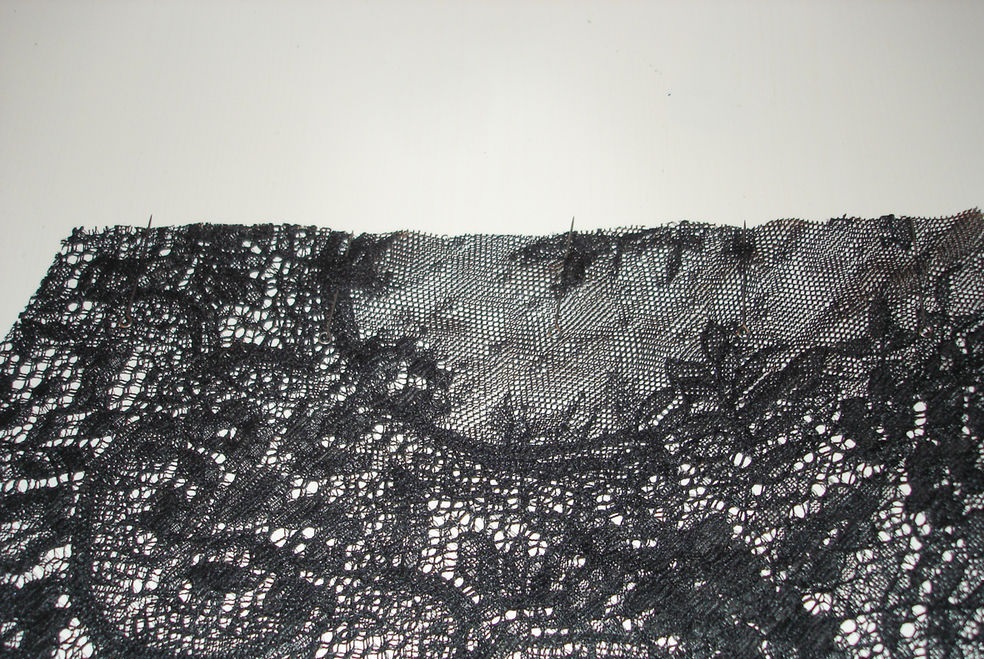
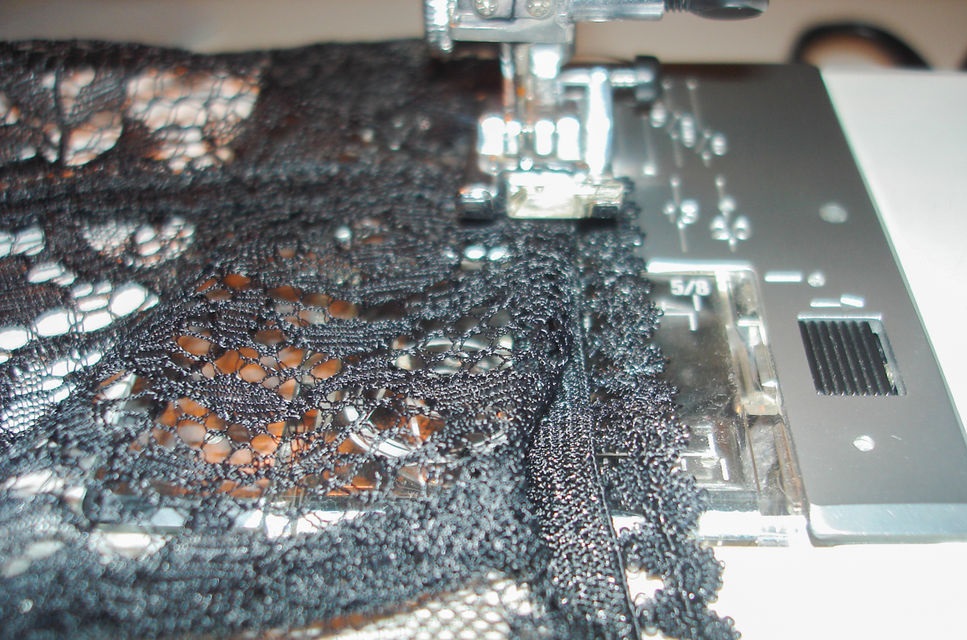
- Before sewing lace underwear, all cut areas are processed using an overlock or zigzag stitch.
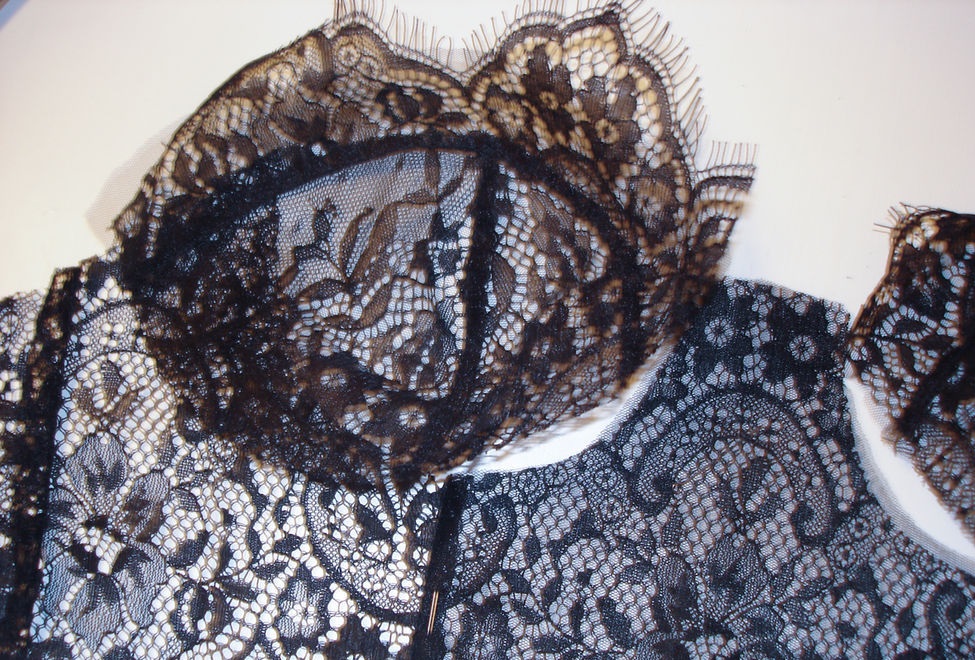
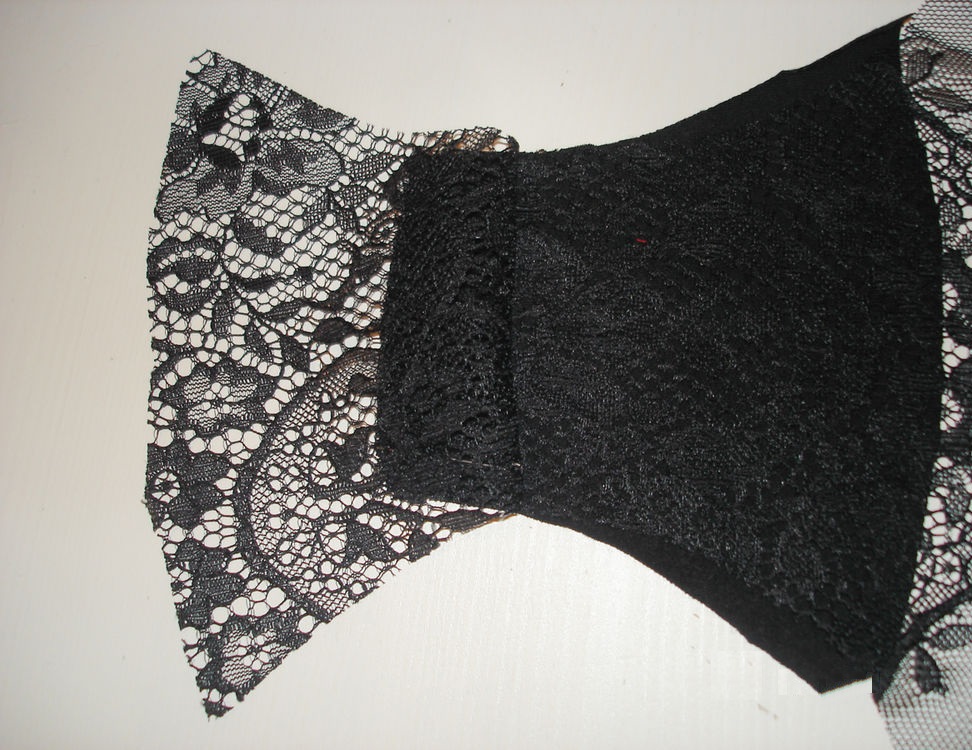
- Upon completion of the work, all parts are connected into a single product and sewn together.
- After trying on, all joints are sewn together.
- The product is ready.


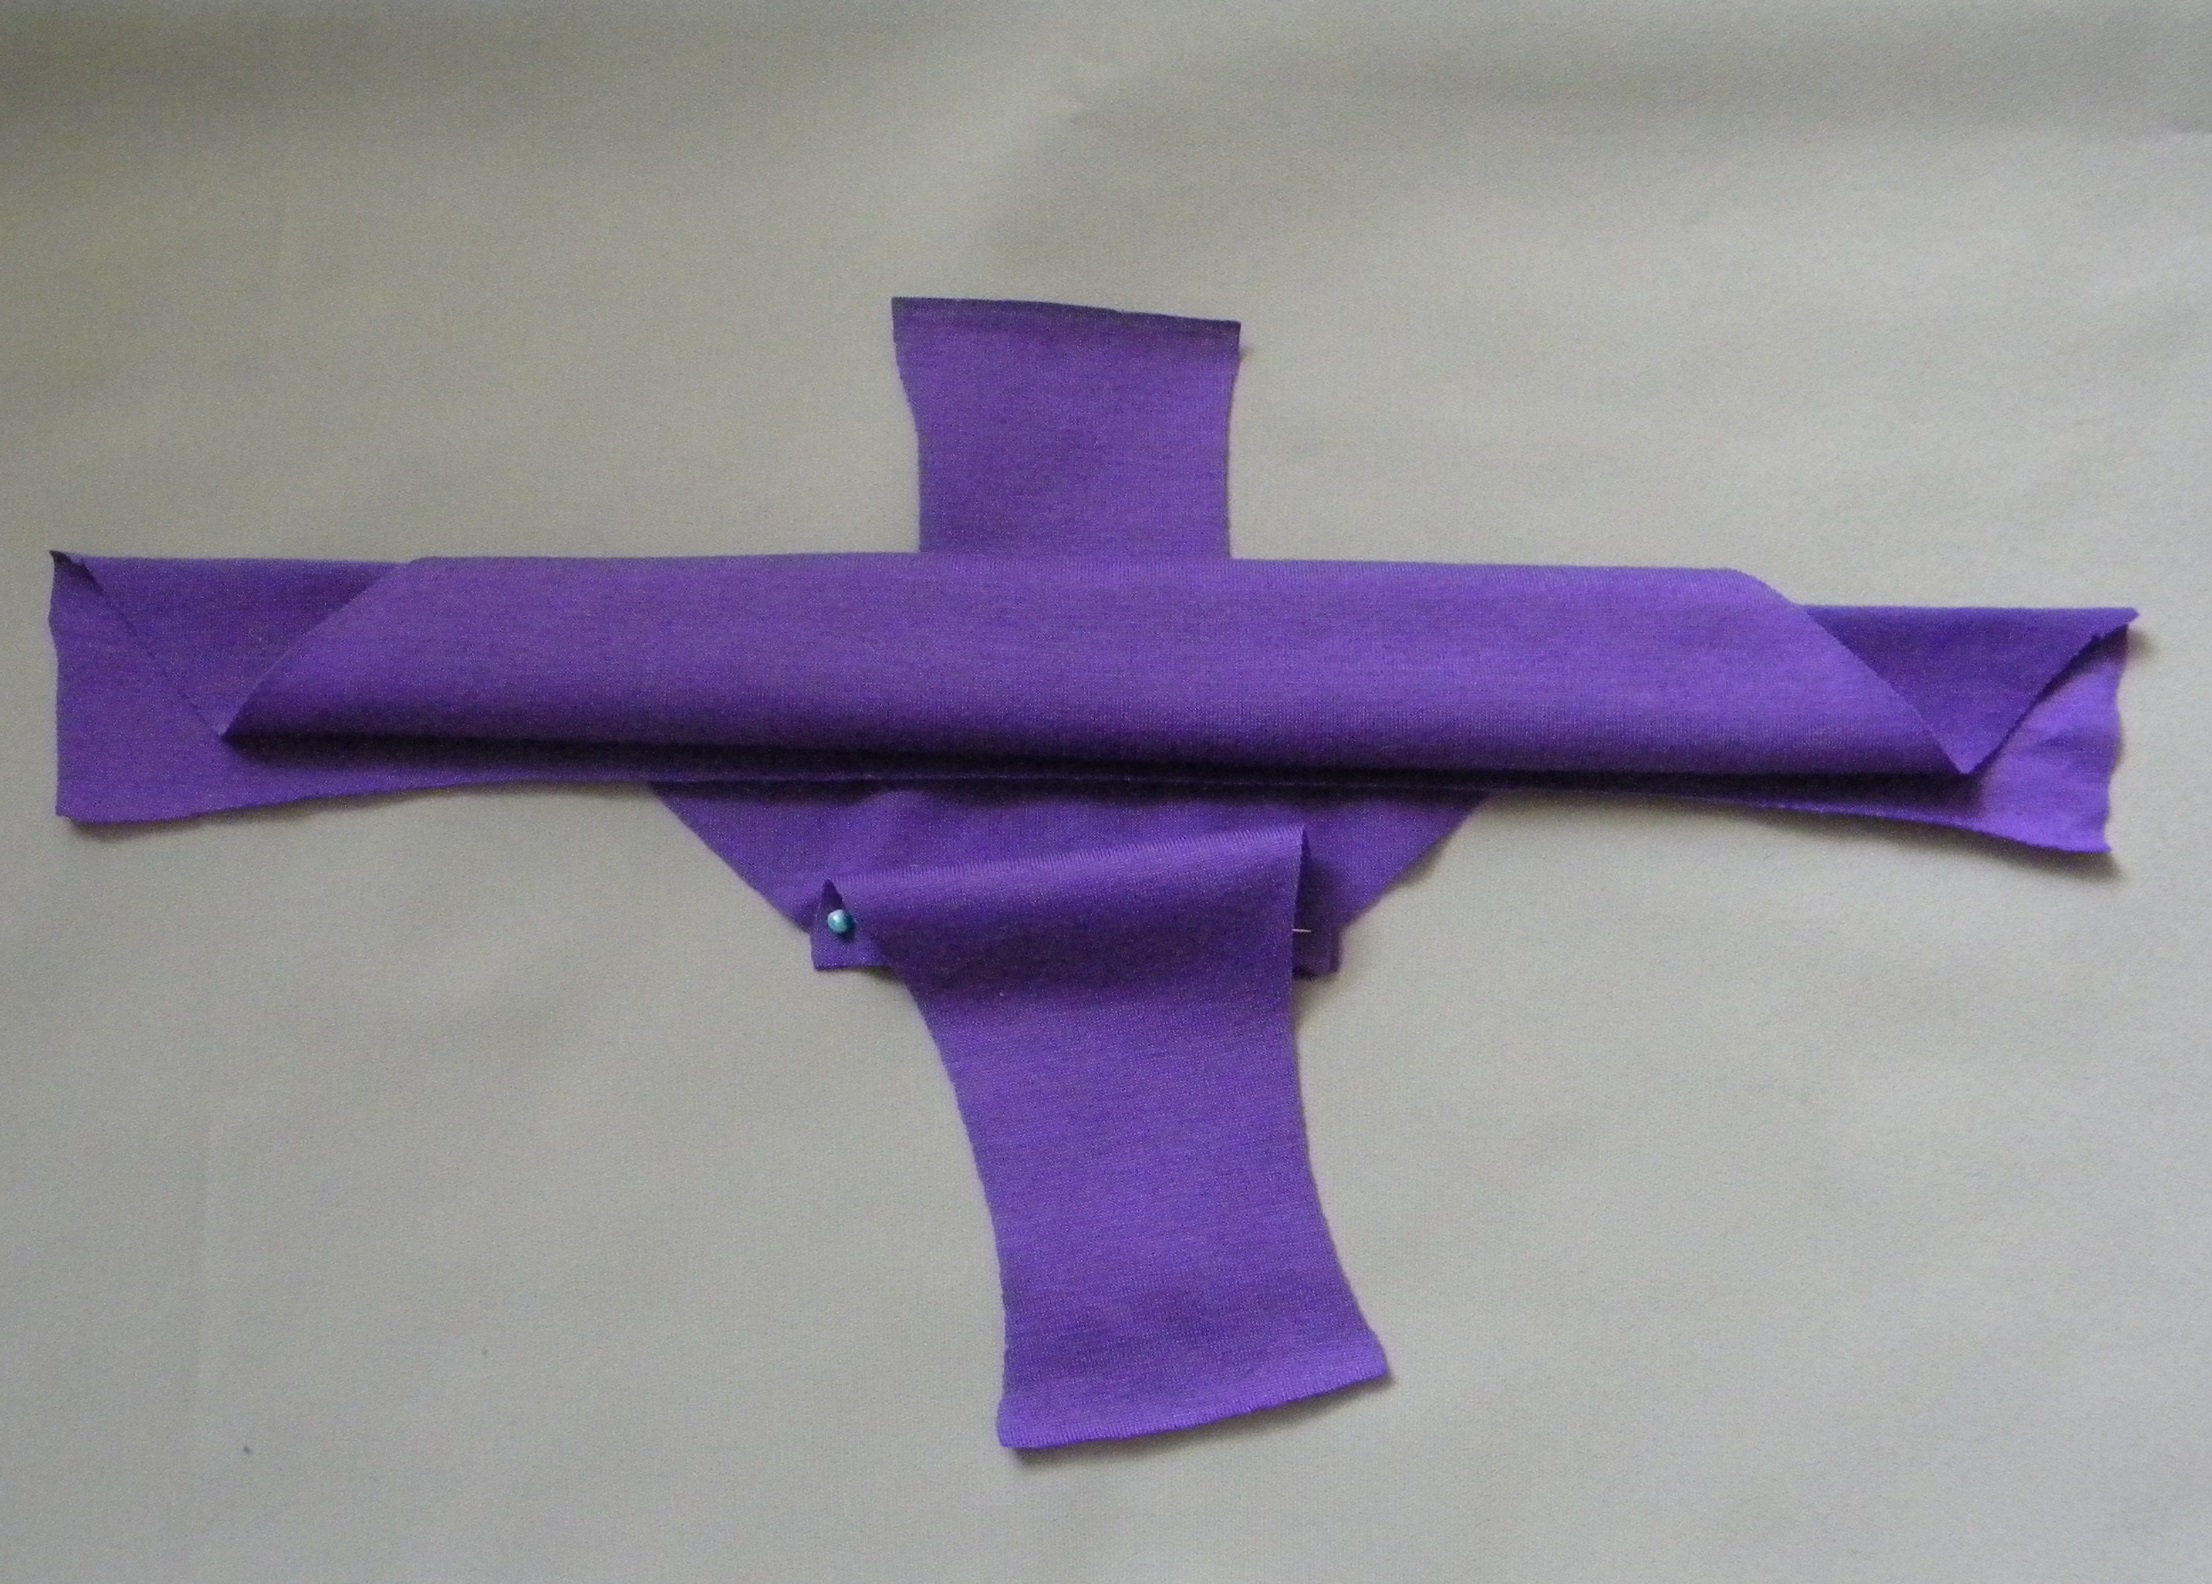
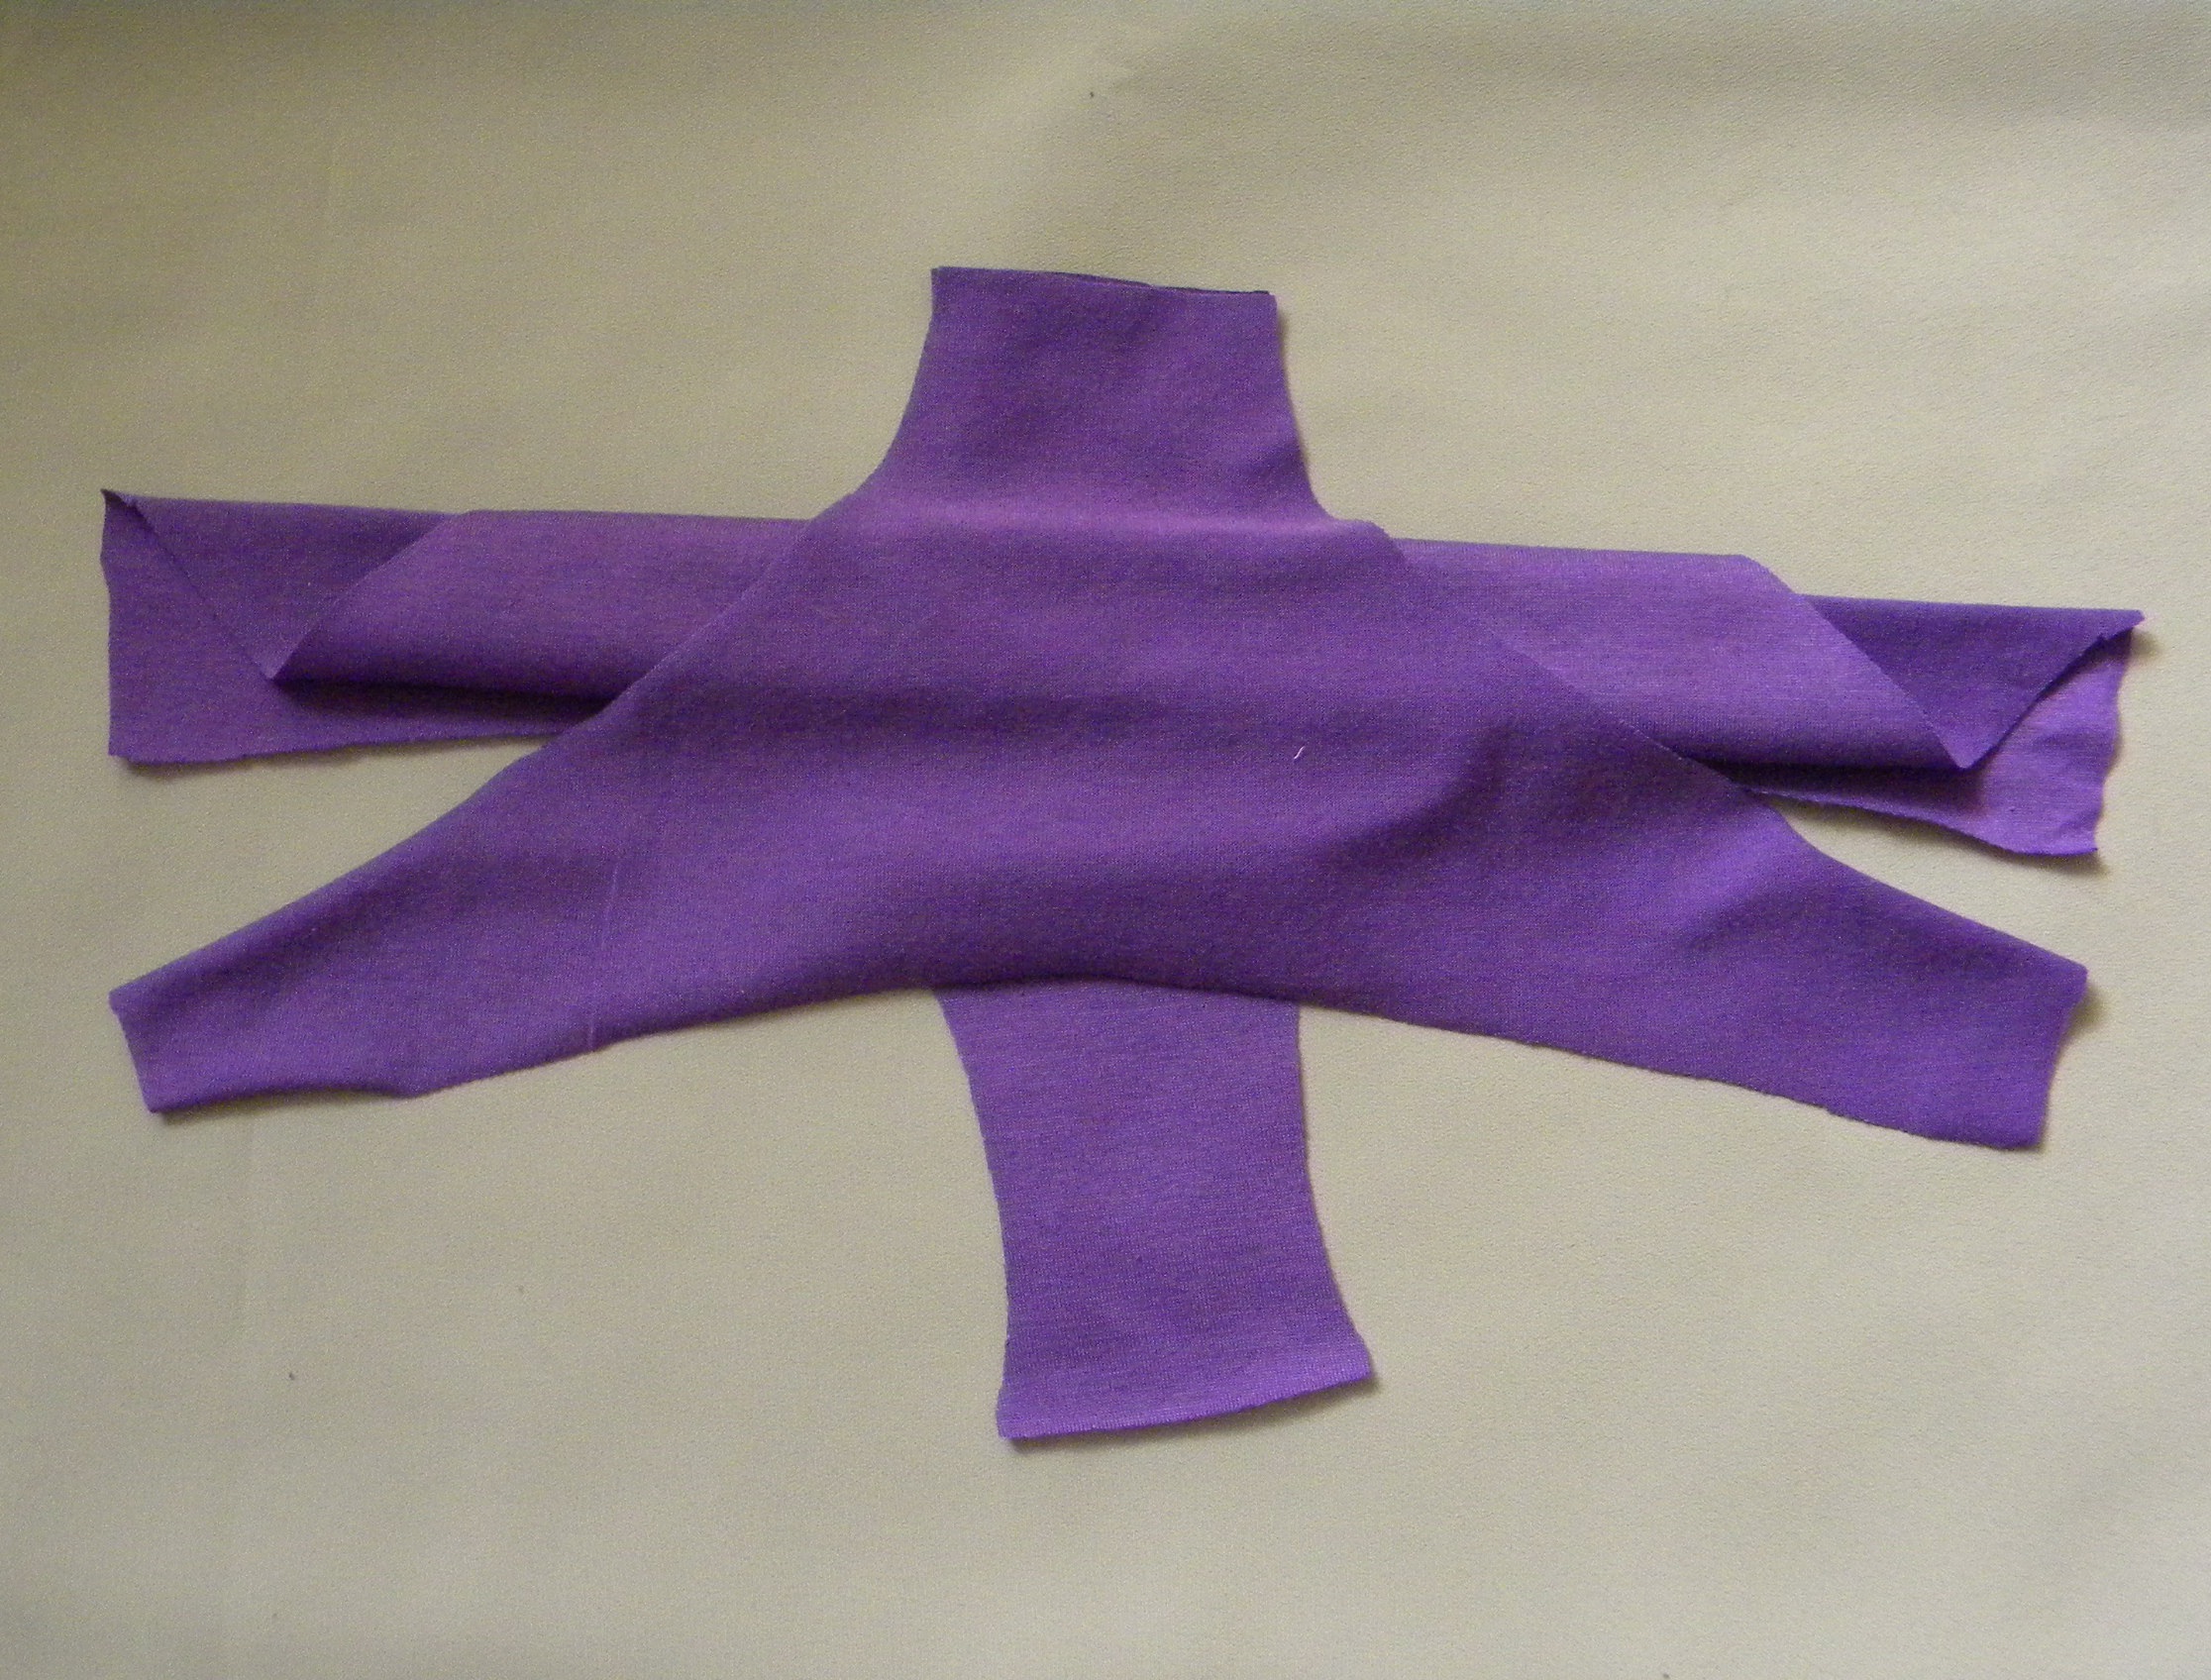
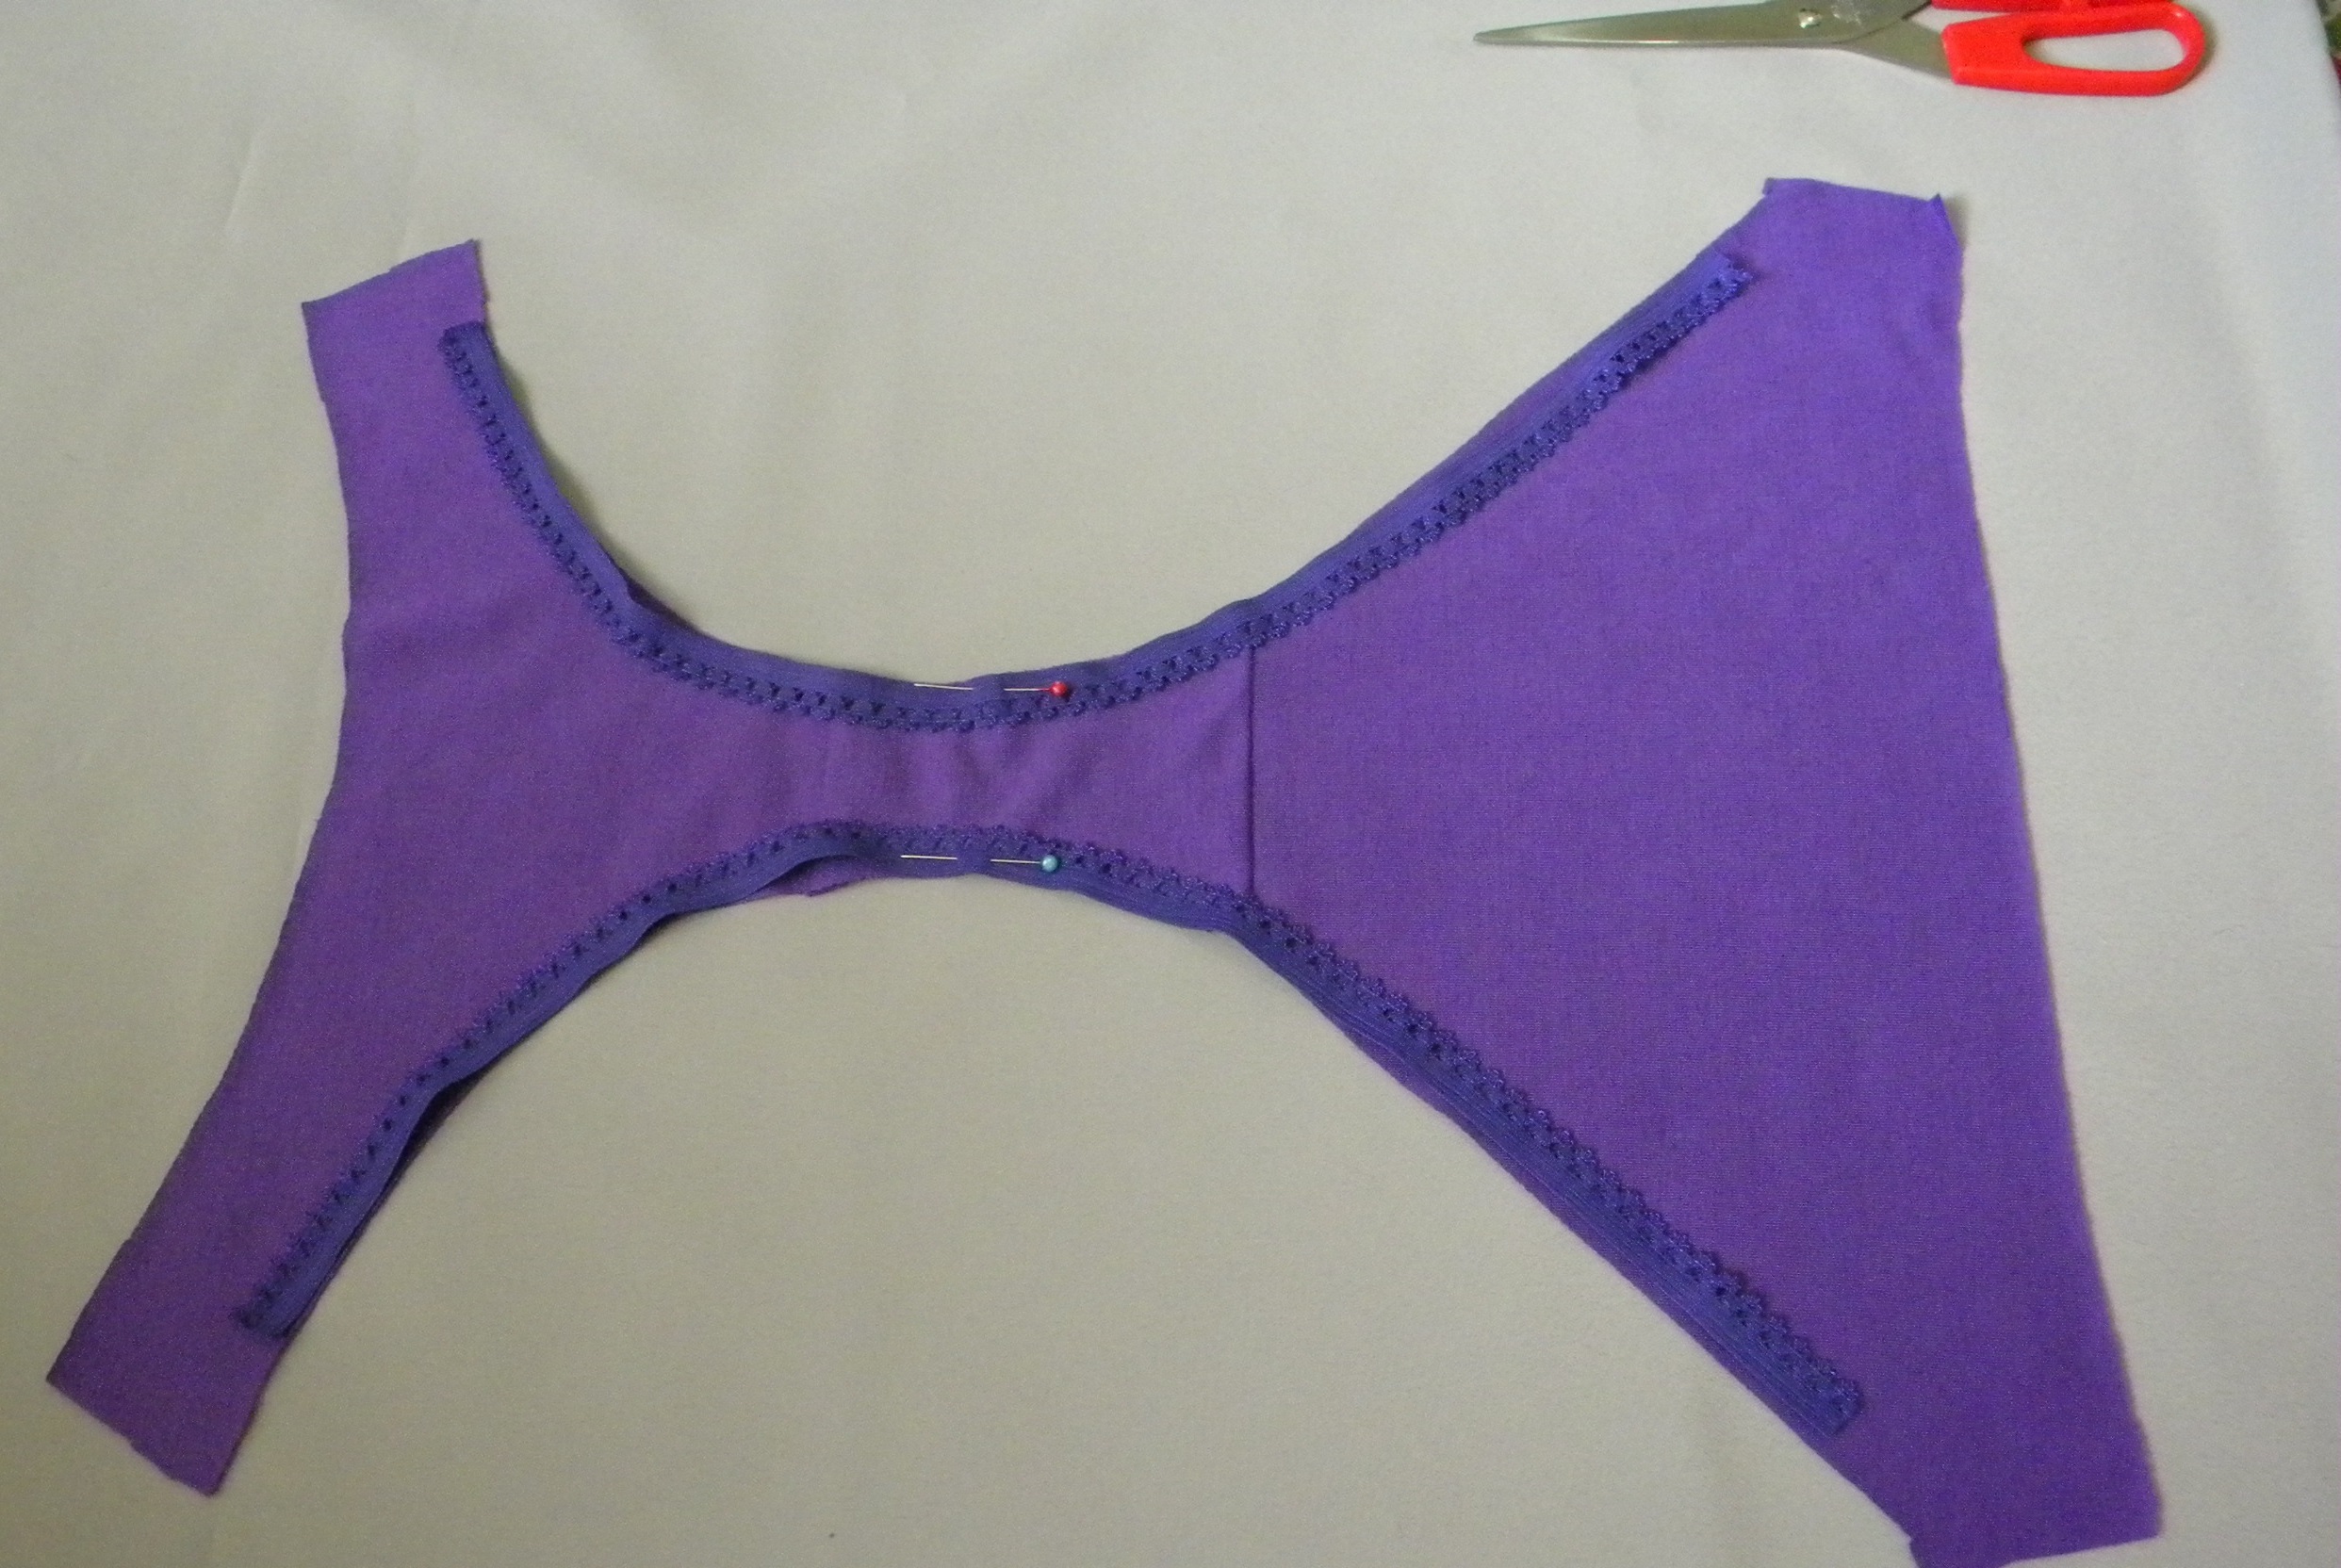
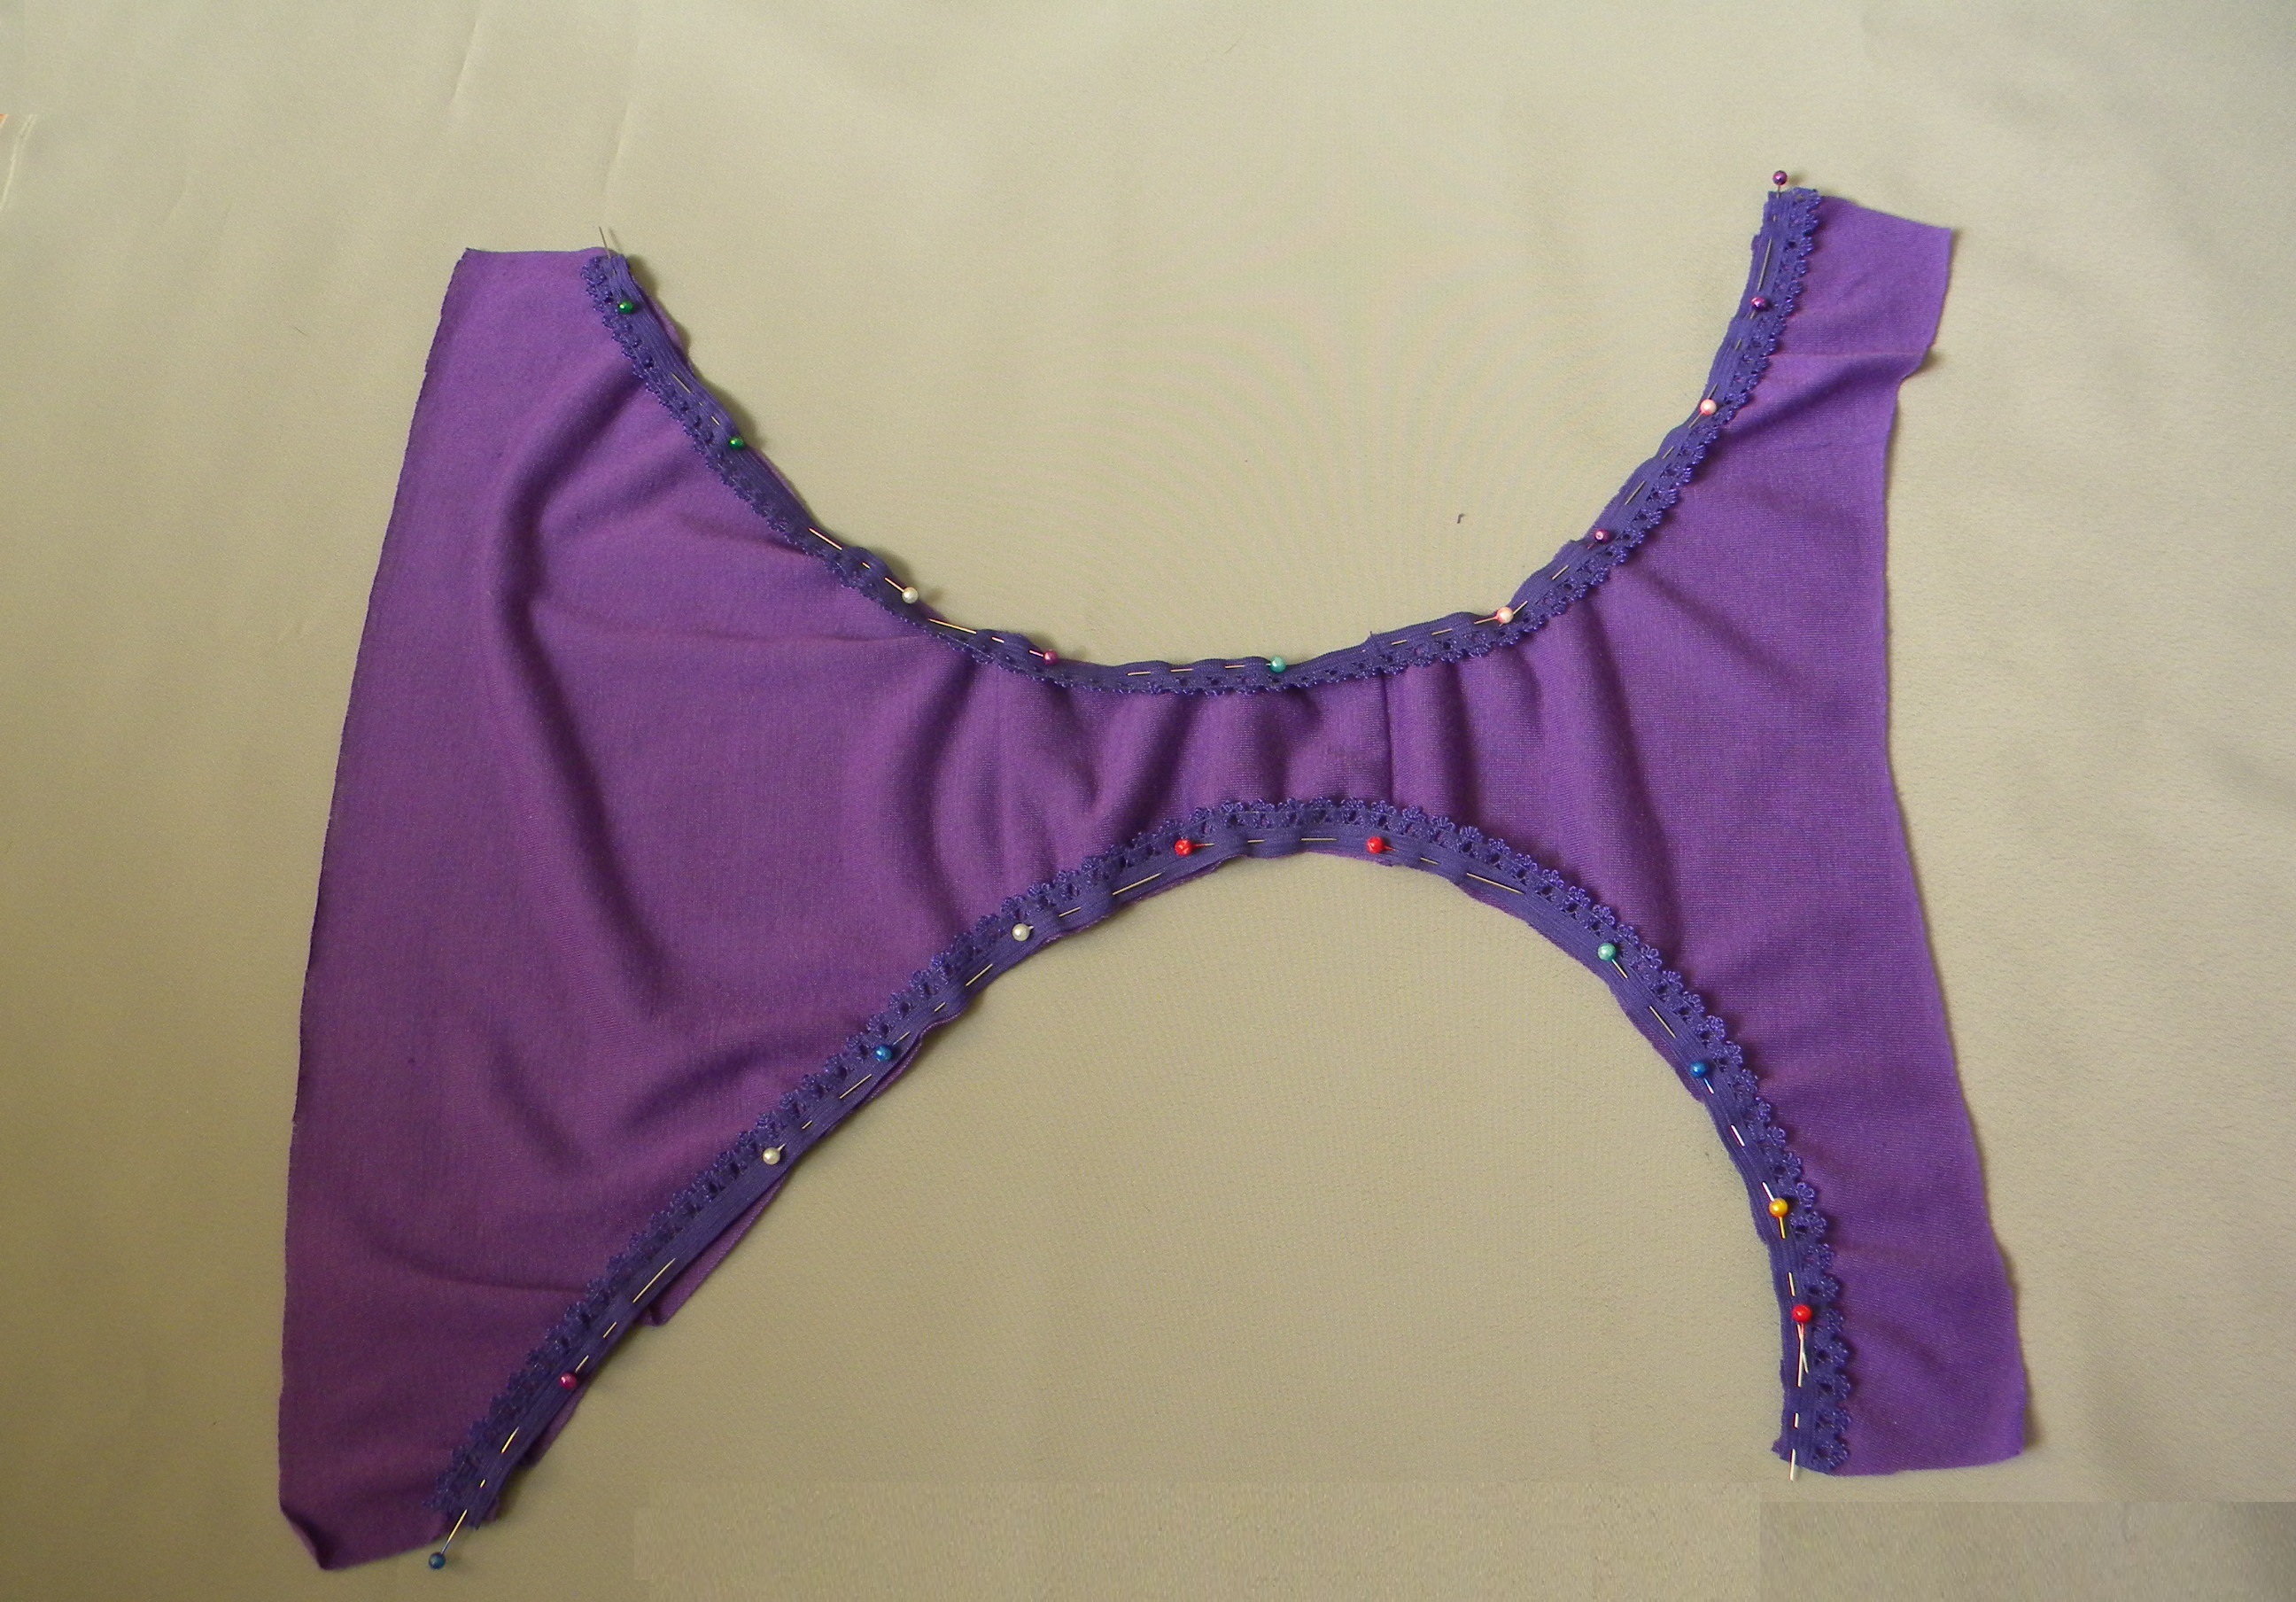
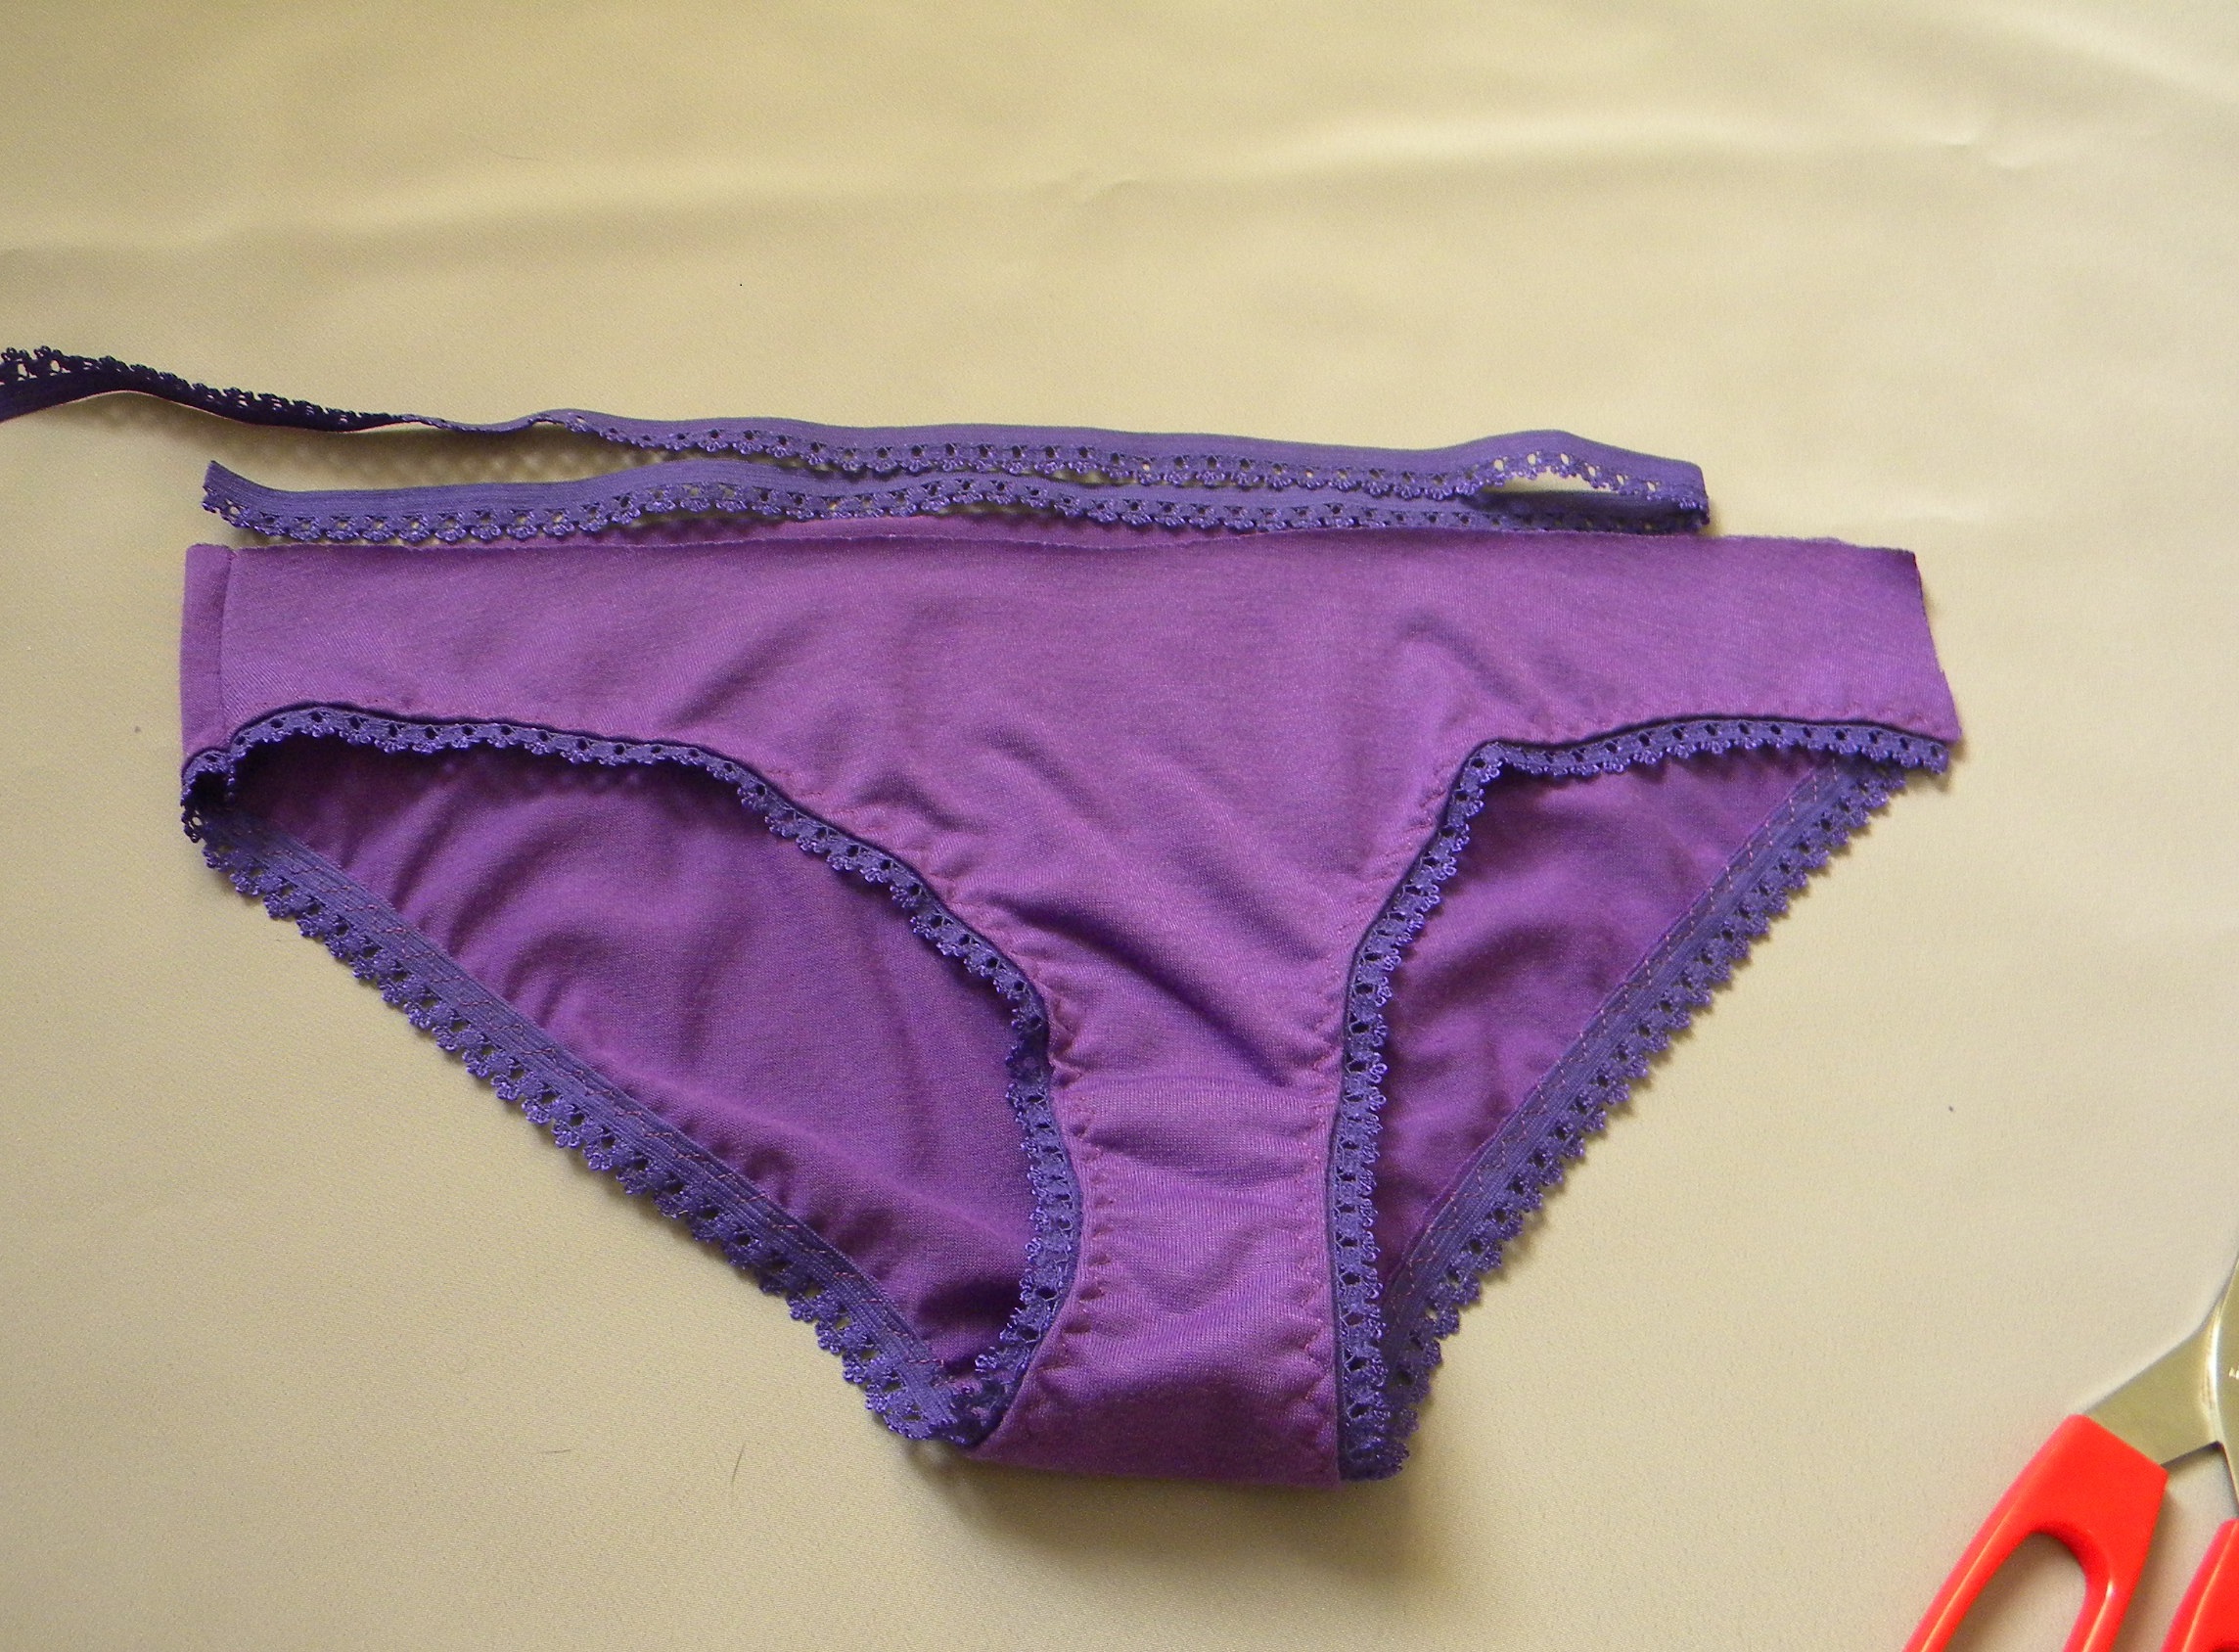
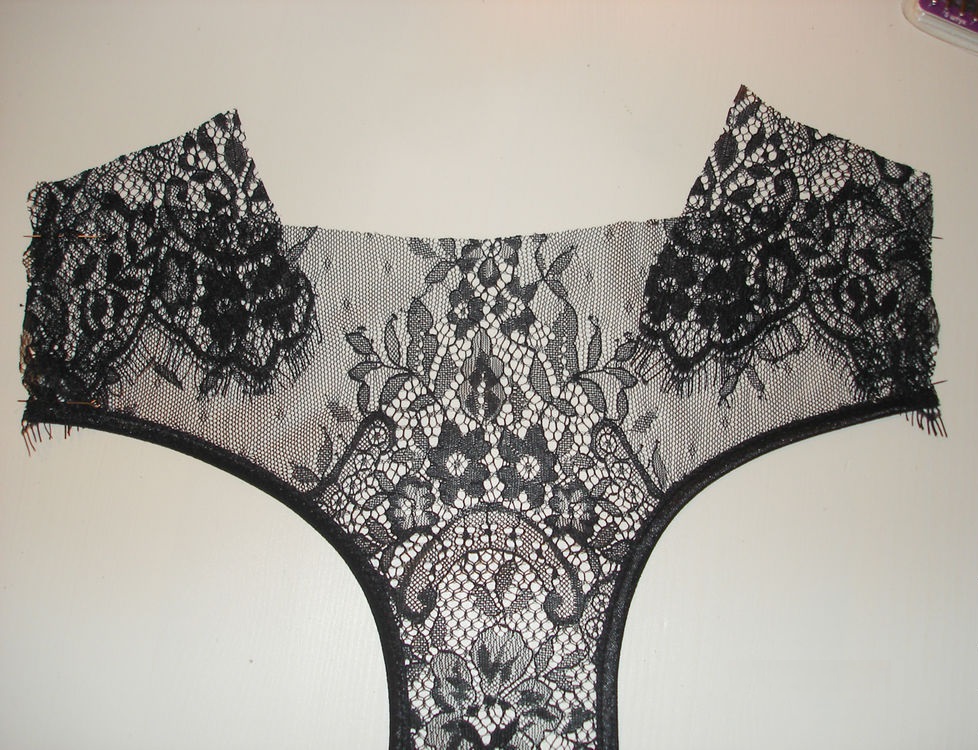
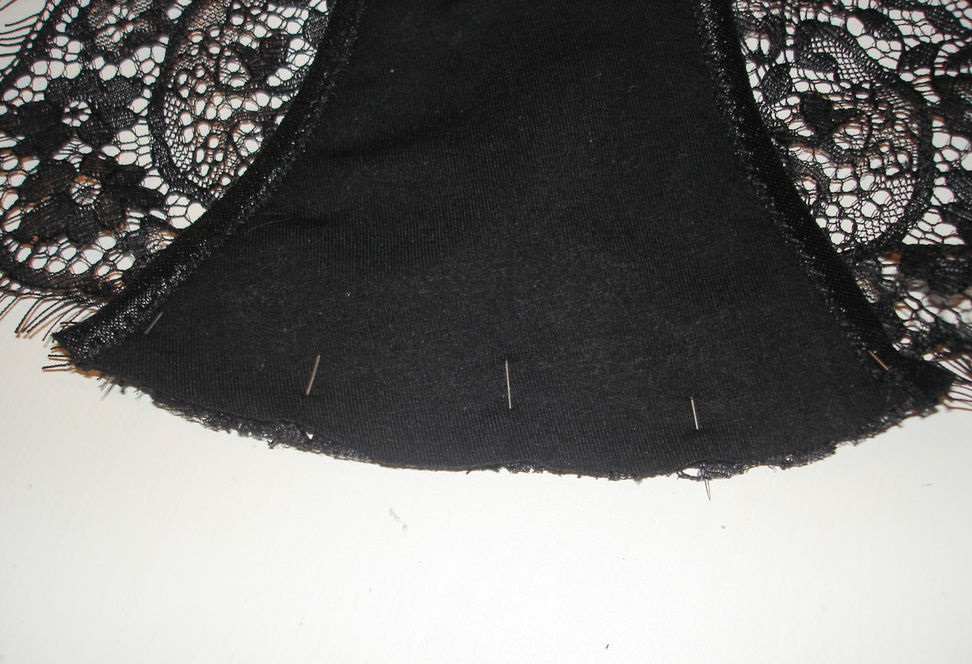
The cutting and assembly of panties is done as follows:
- The lace should be folded in half. The pattern of the front part is placed on top and fixed. The detail is cut out. The same procedure is carried out with the back part of the future product.
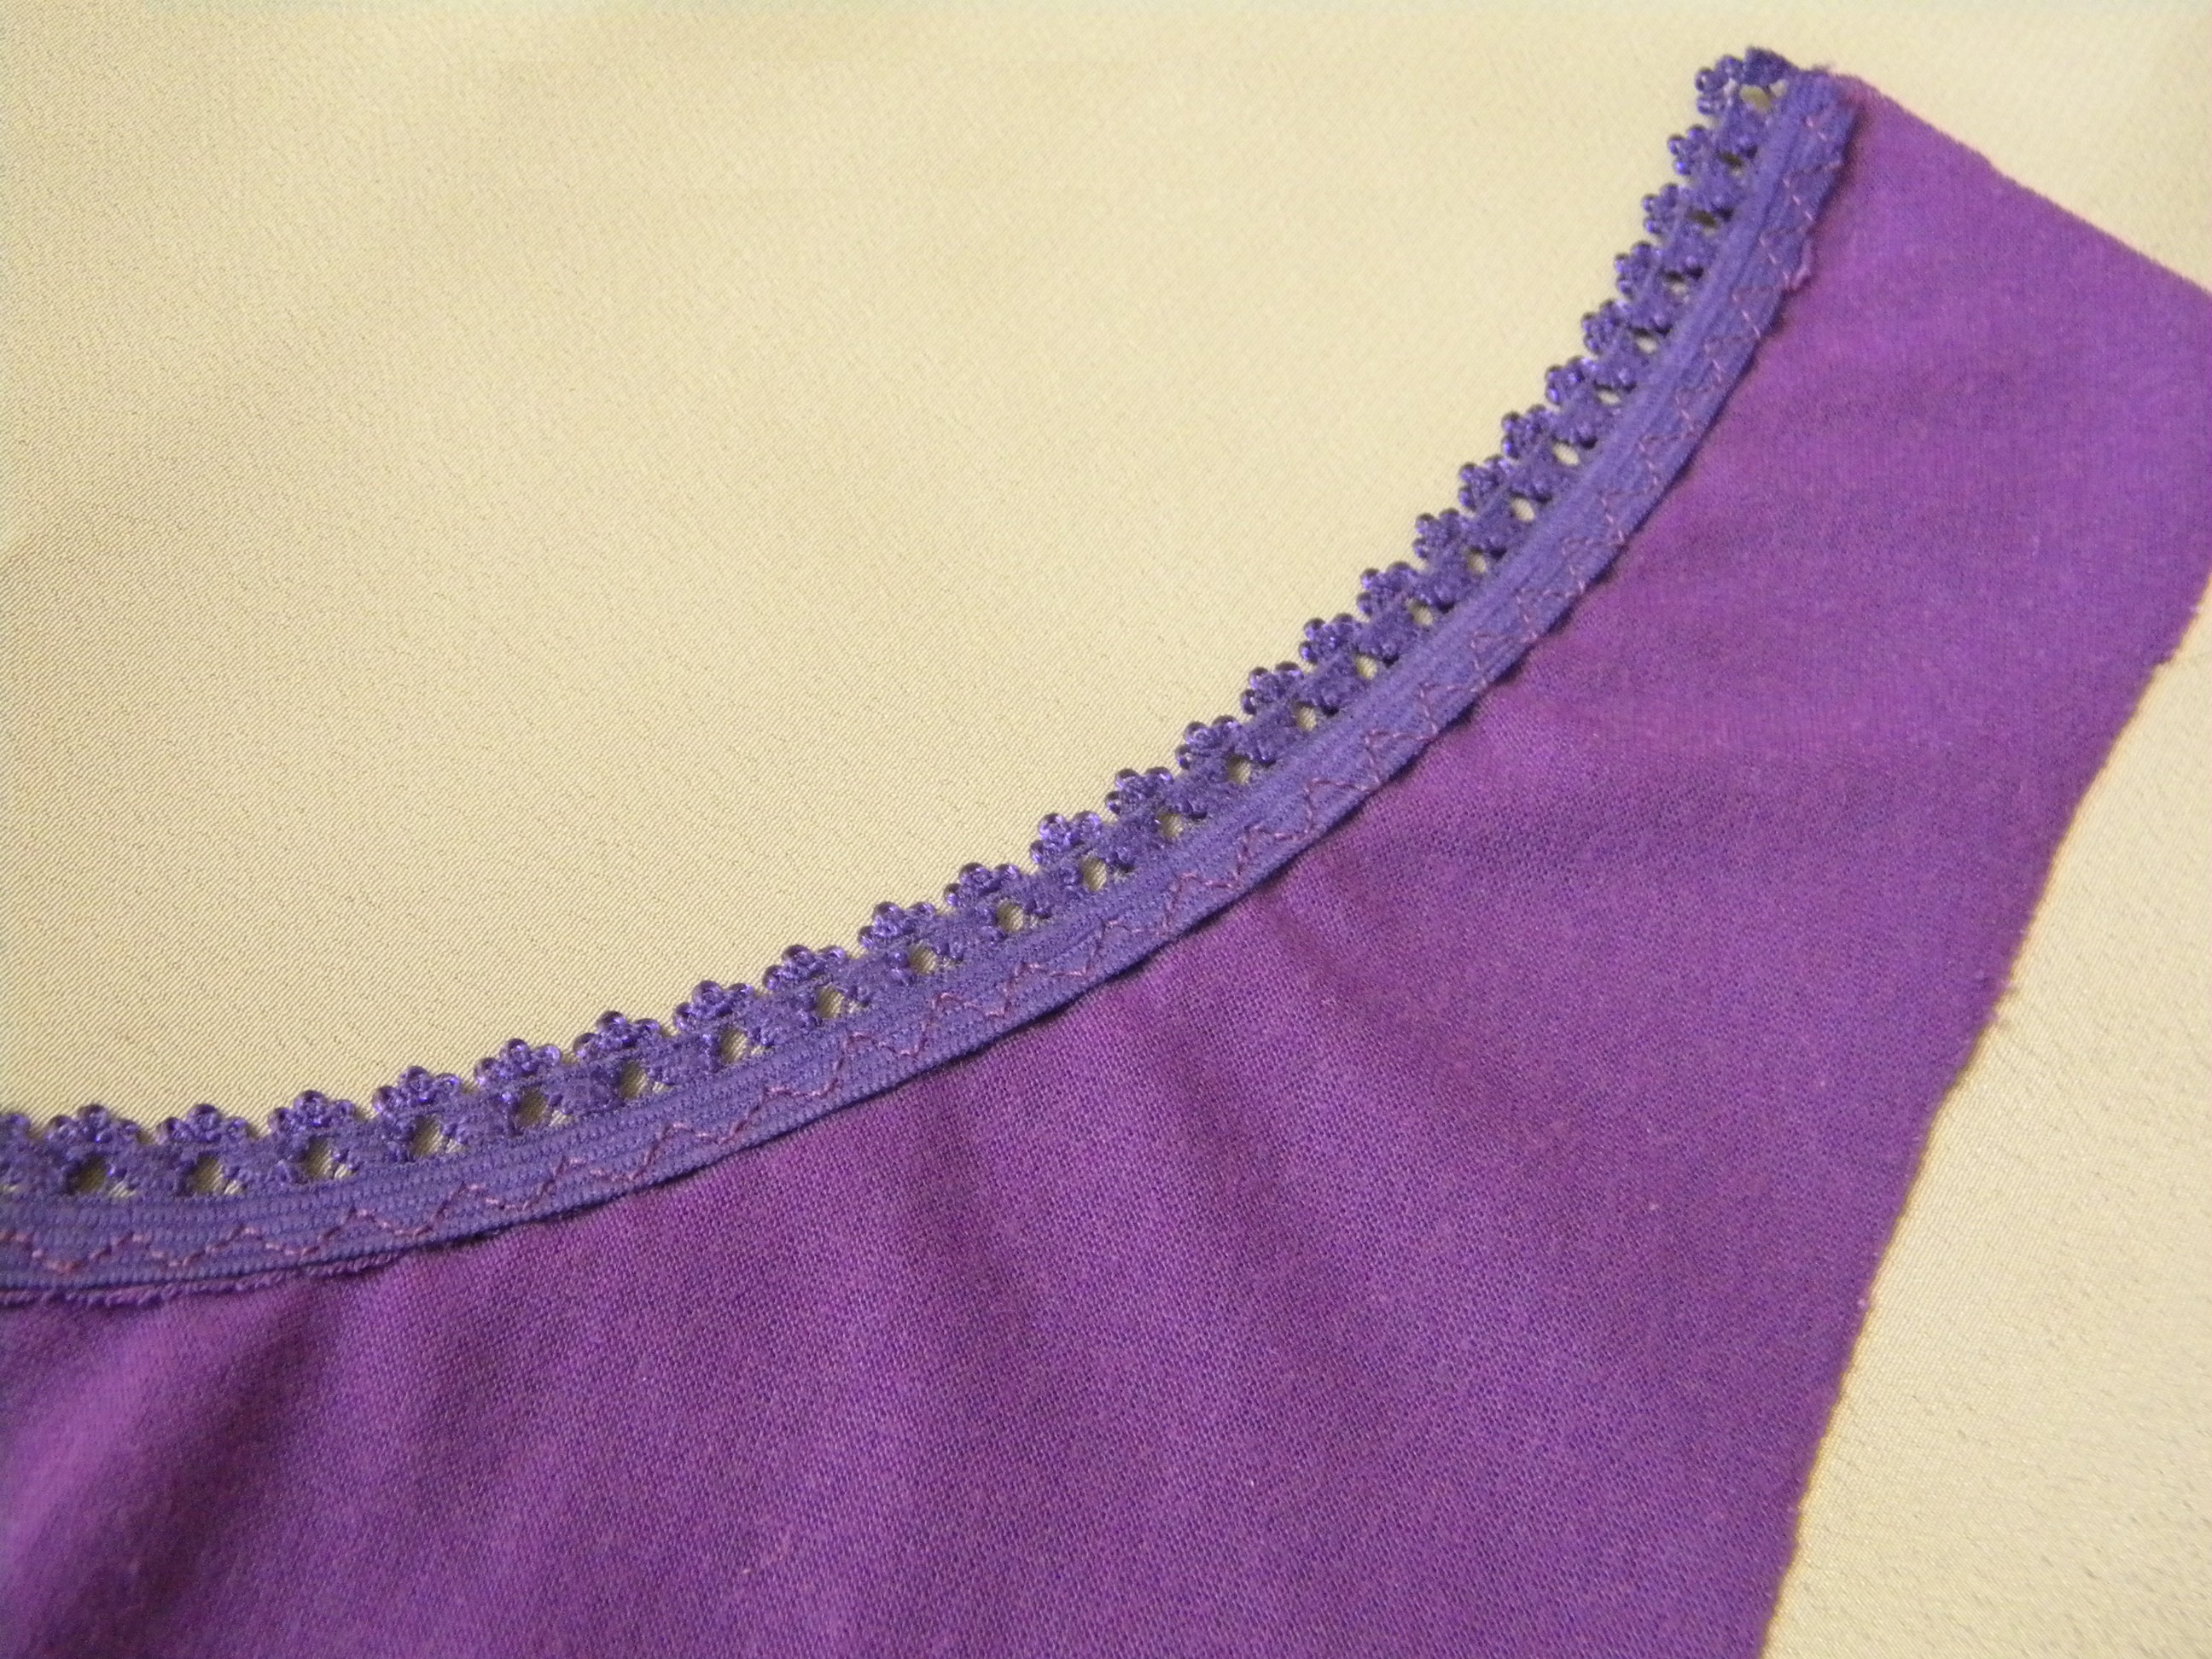
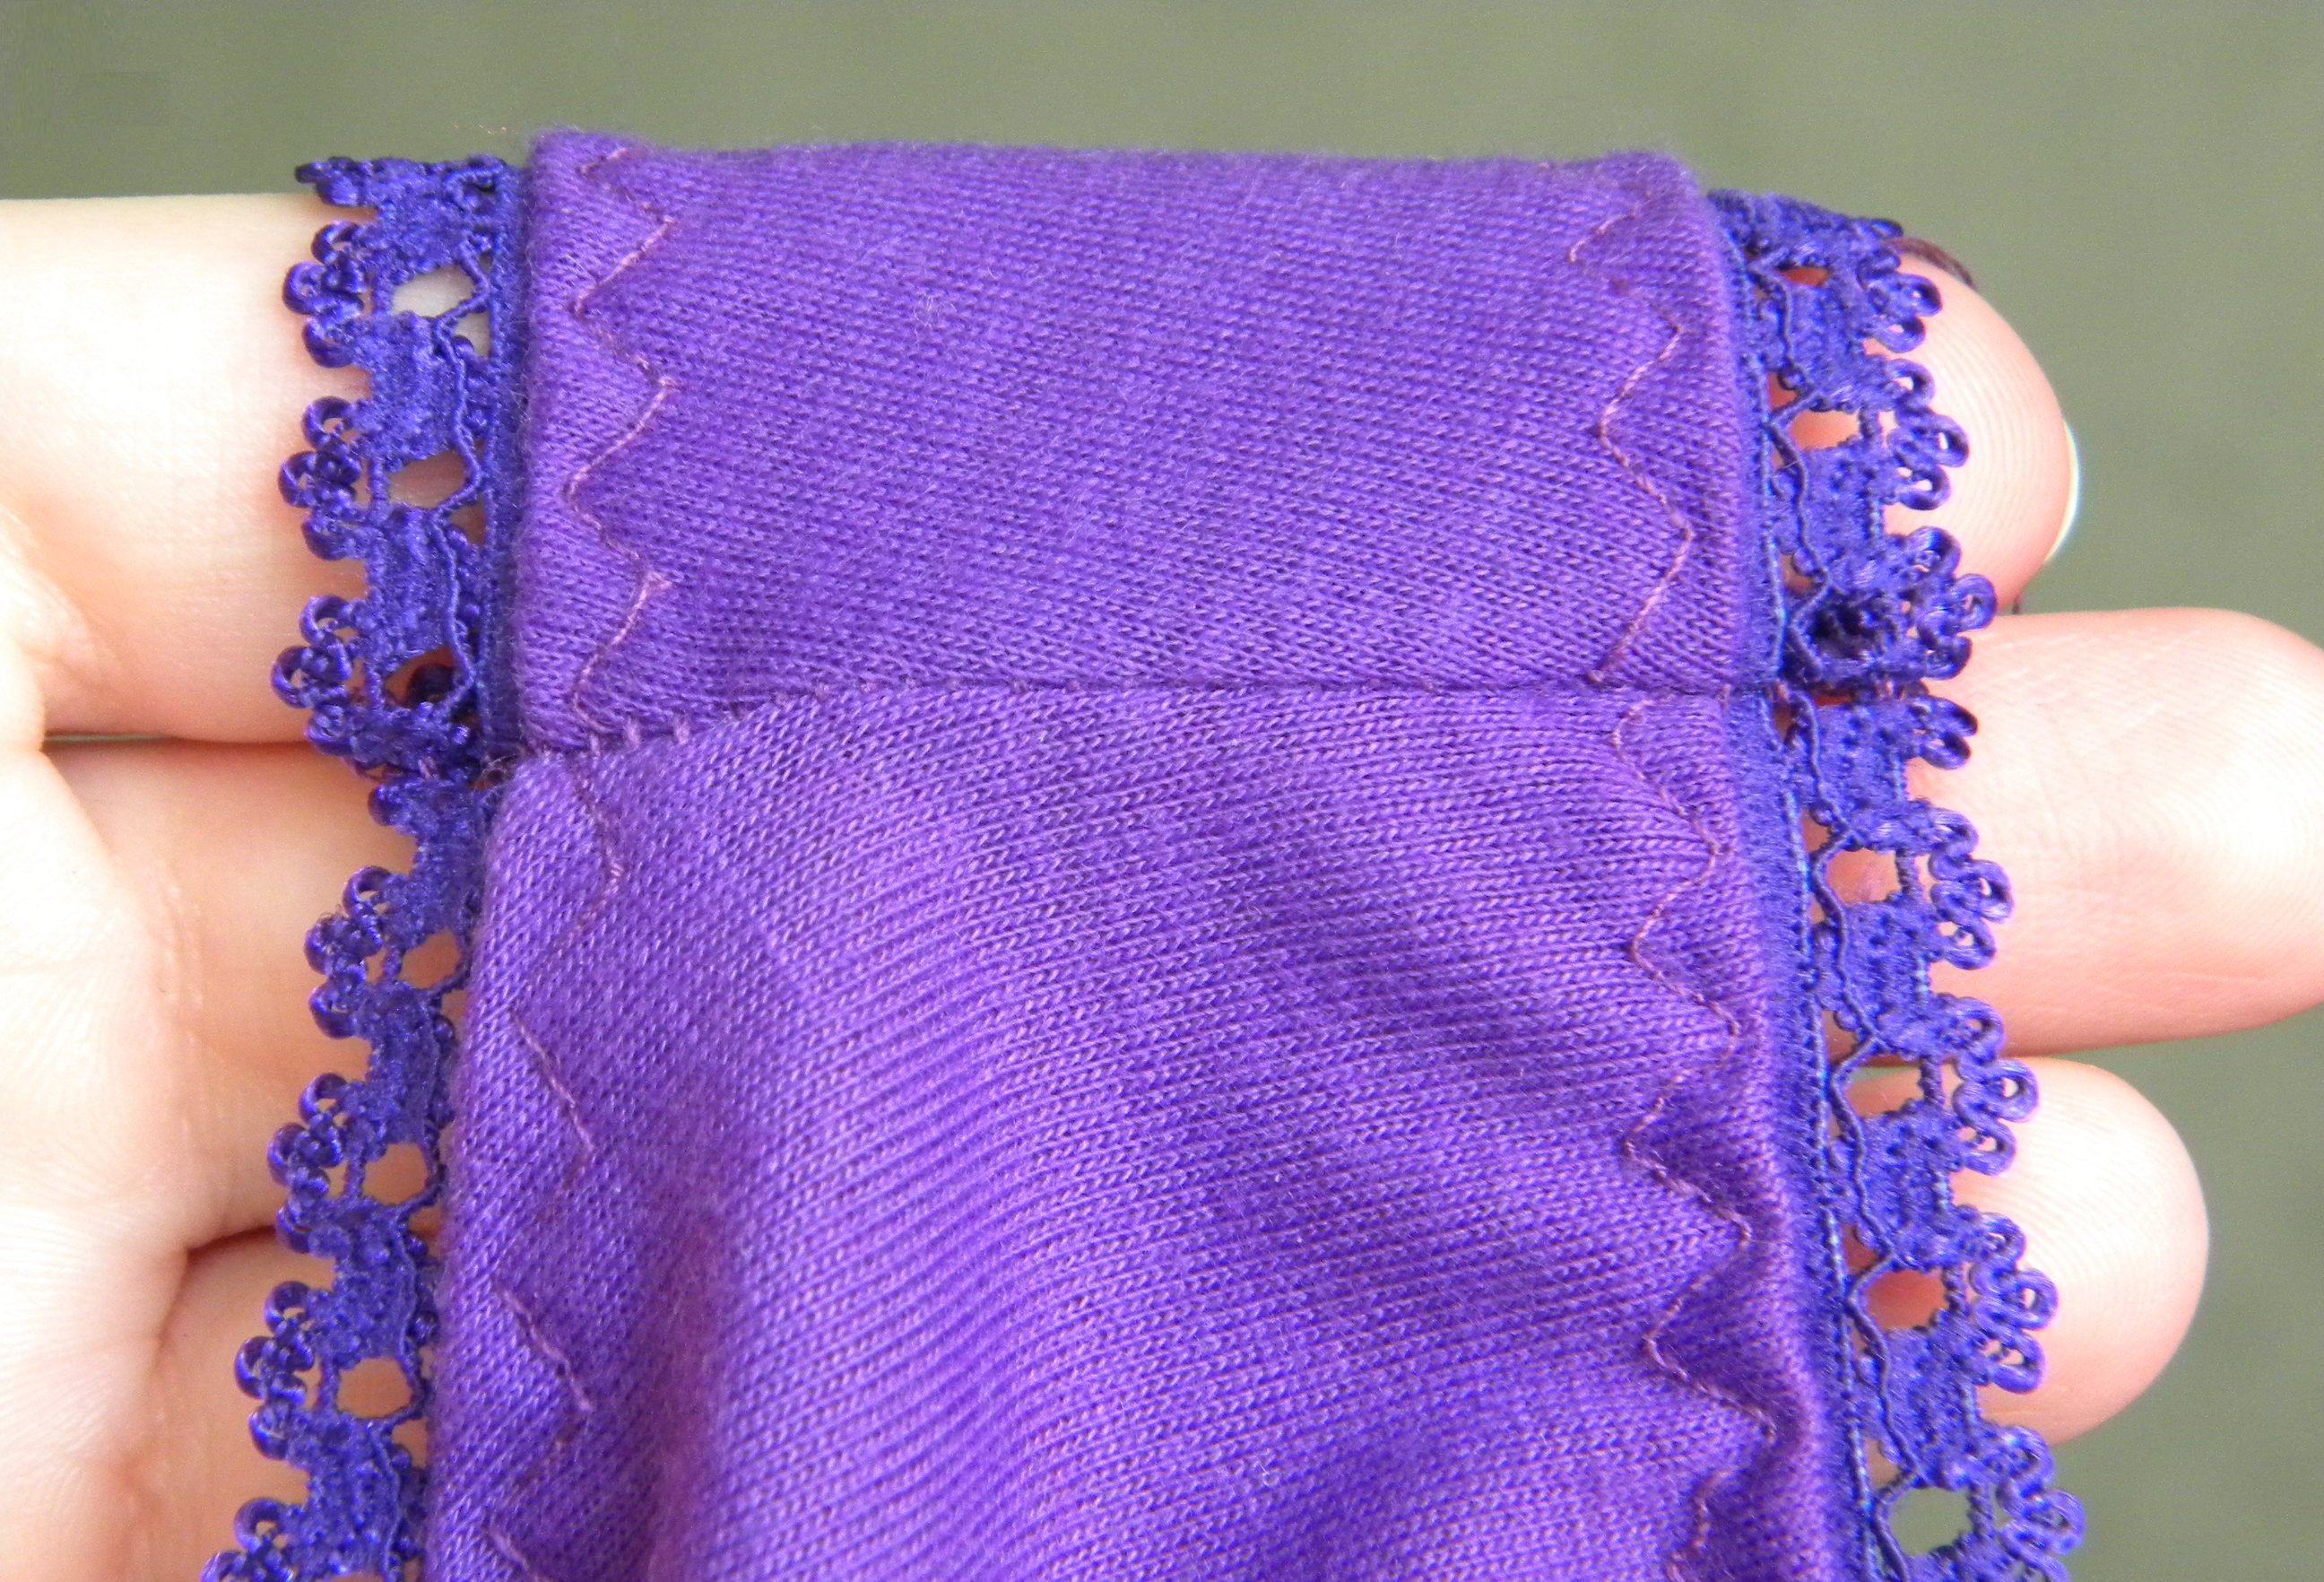
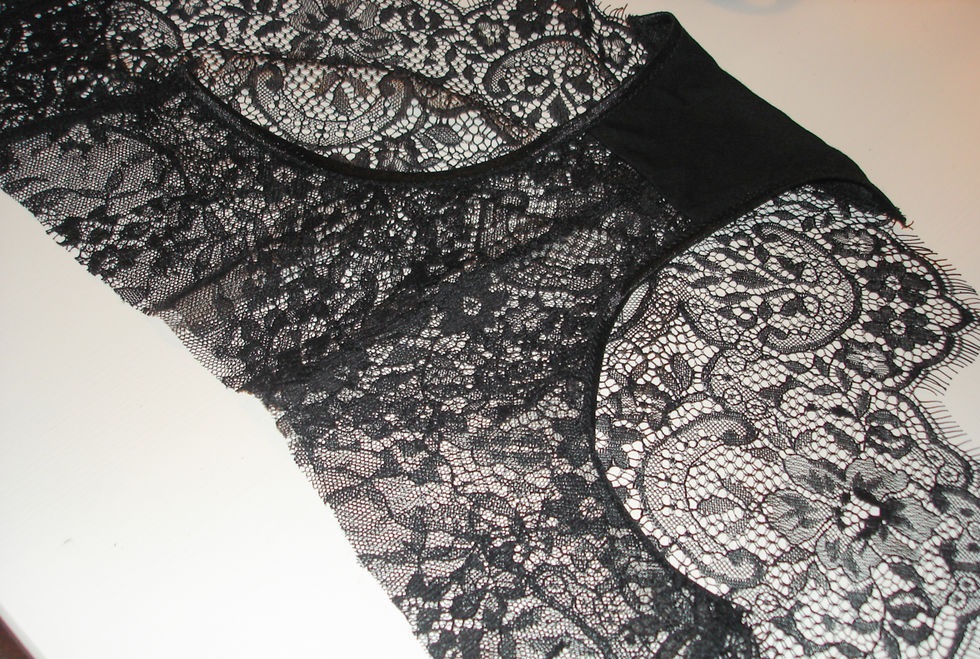
- Then the front and back seams are formed. The edges should be processed using an overlock or a zigzag stitch on a regular sewing machine. The front and back parts are connected using a seam.
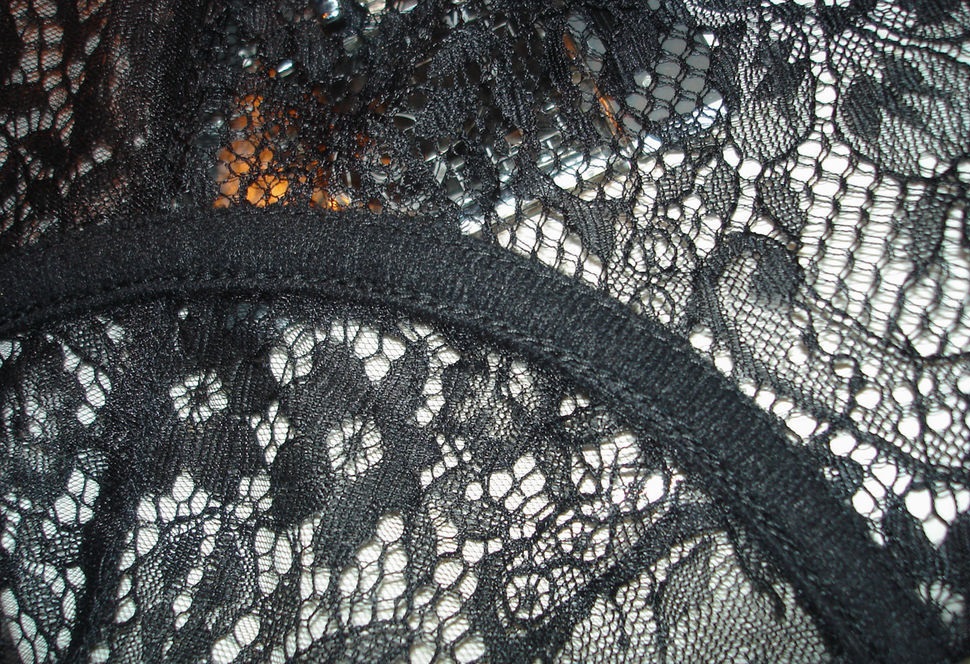
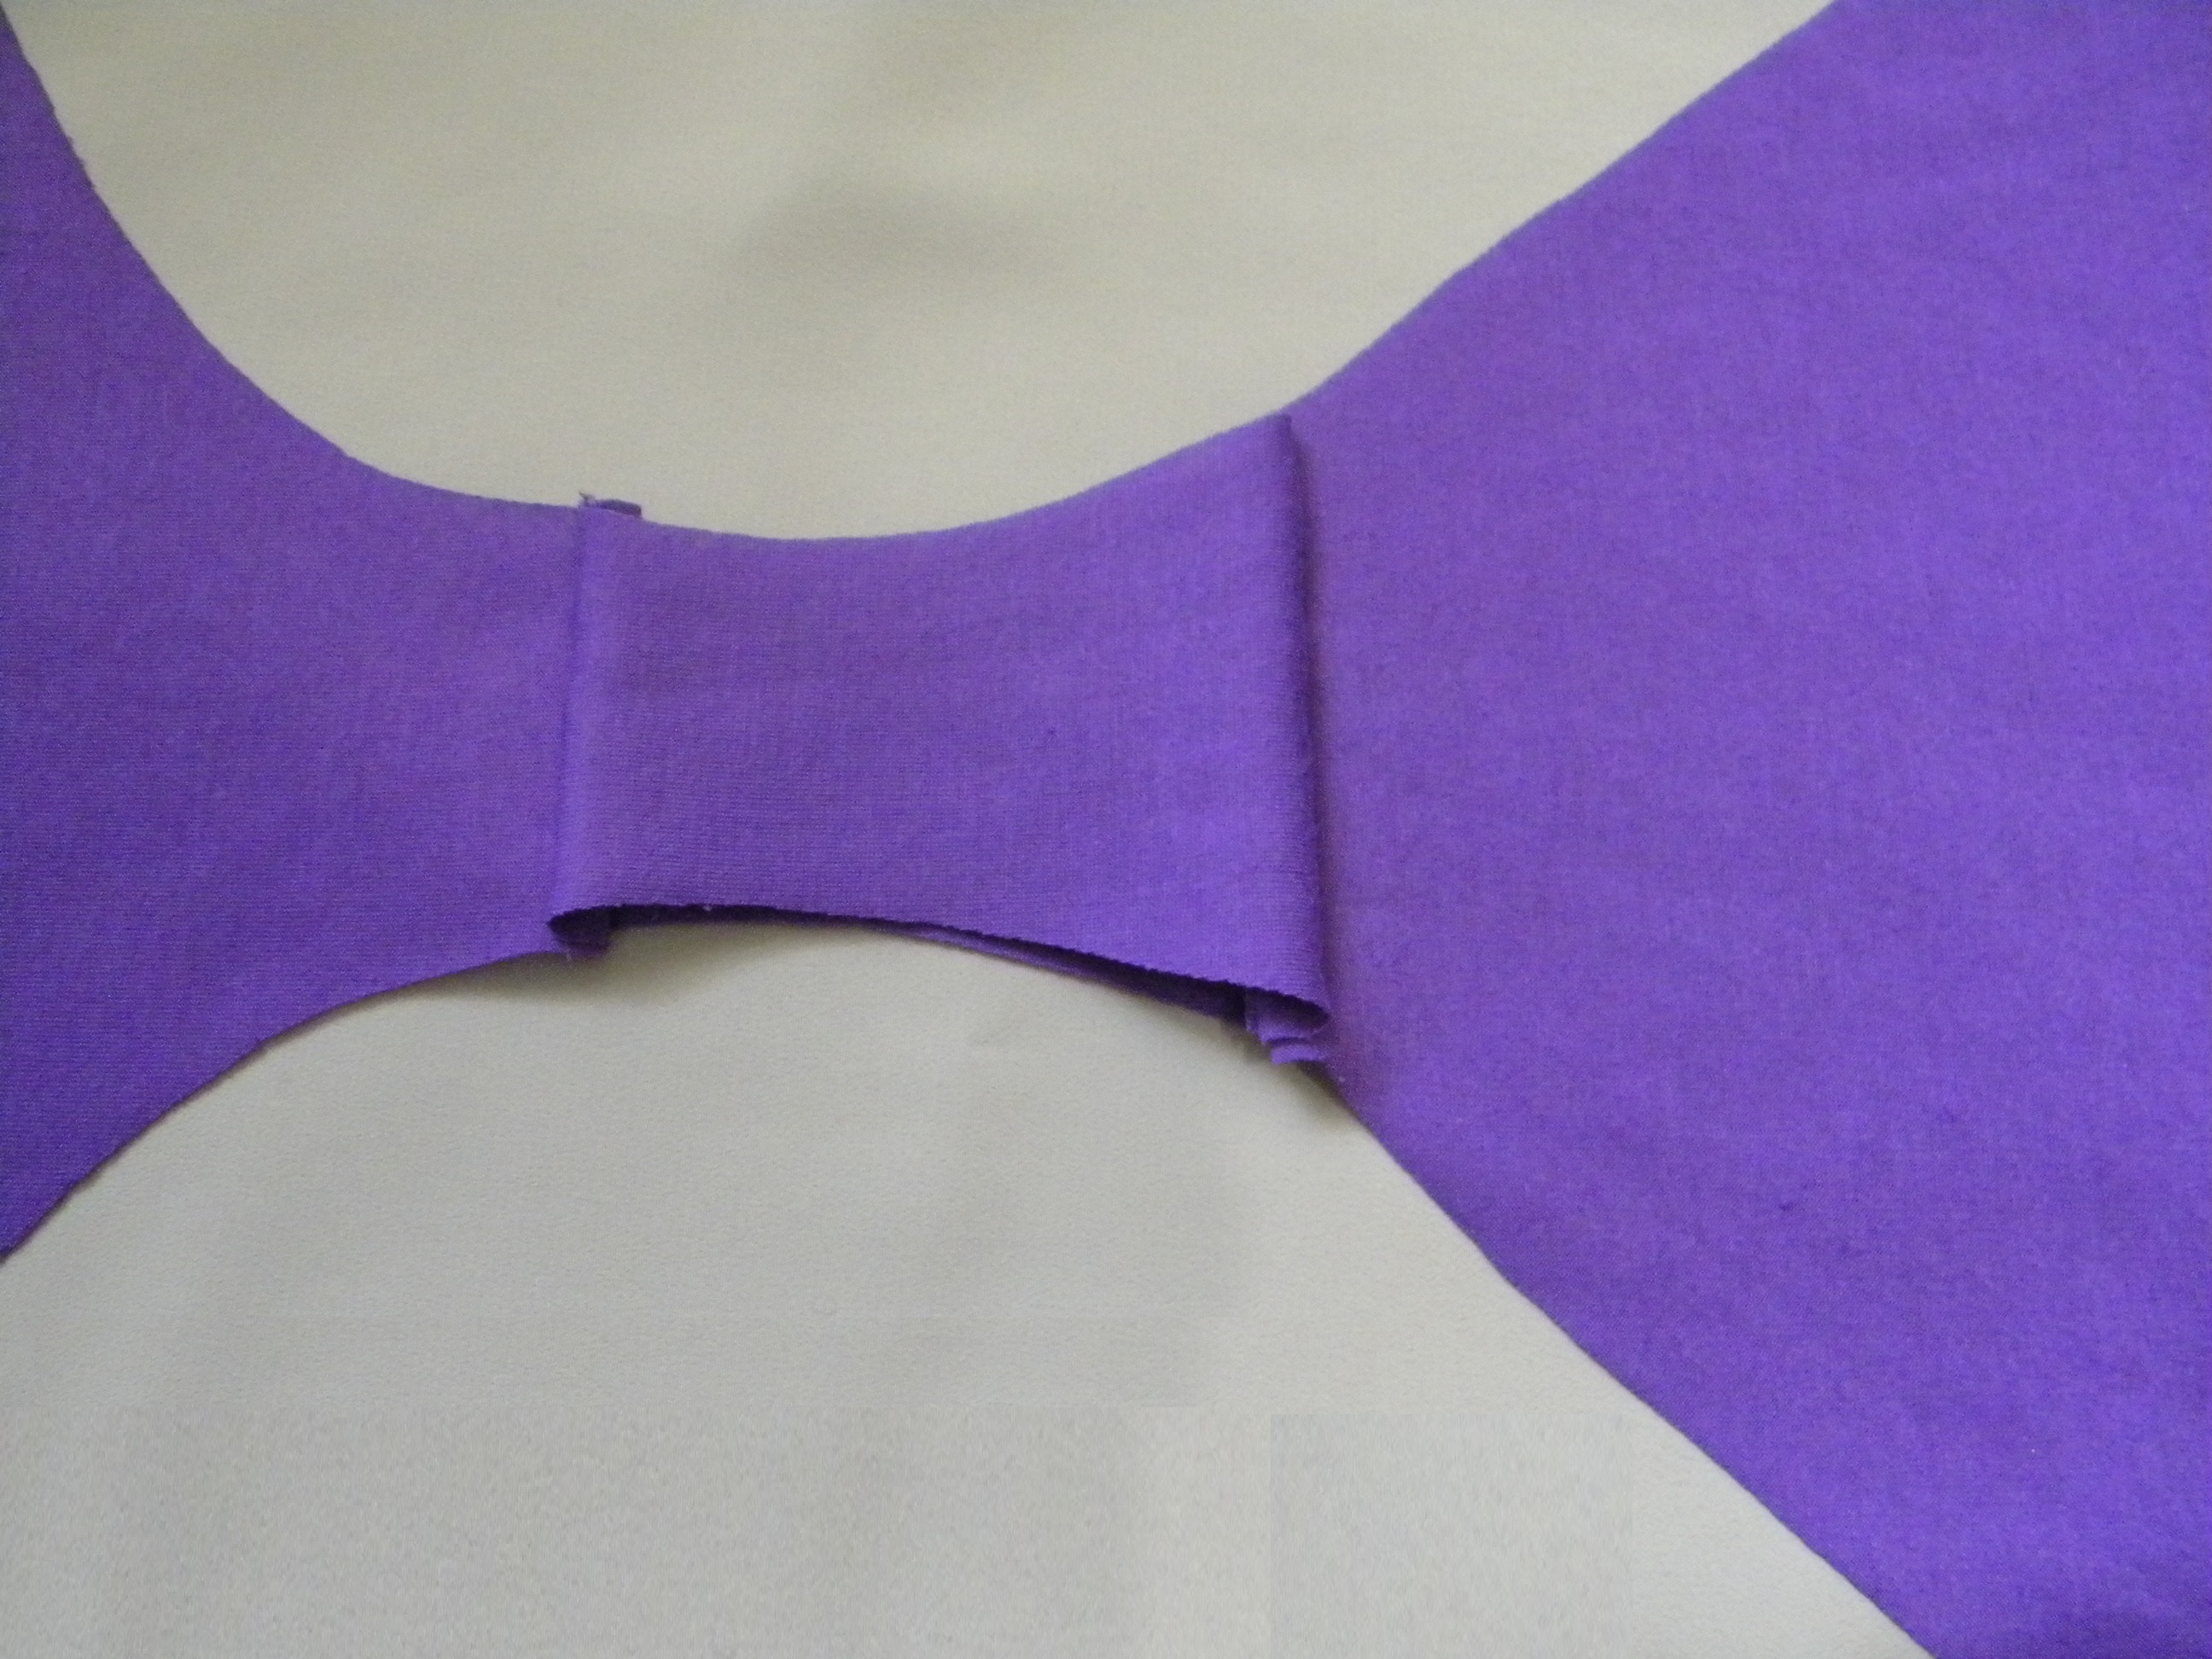
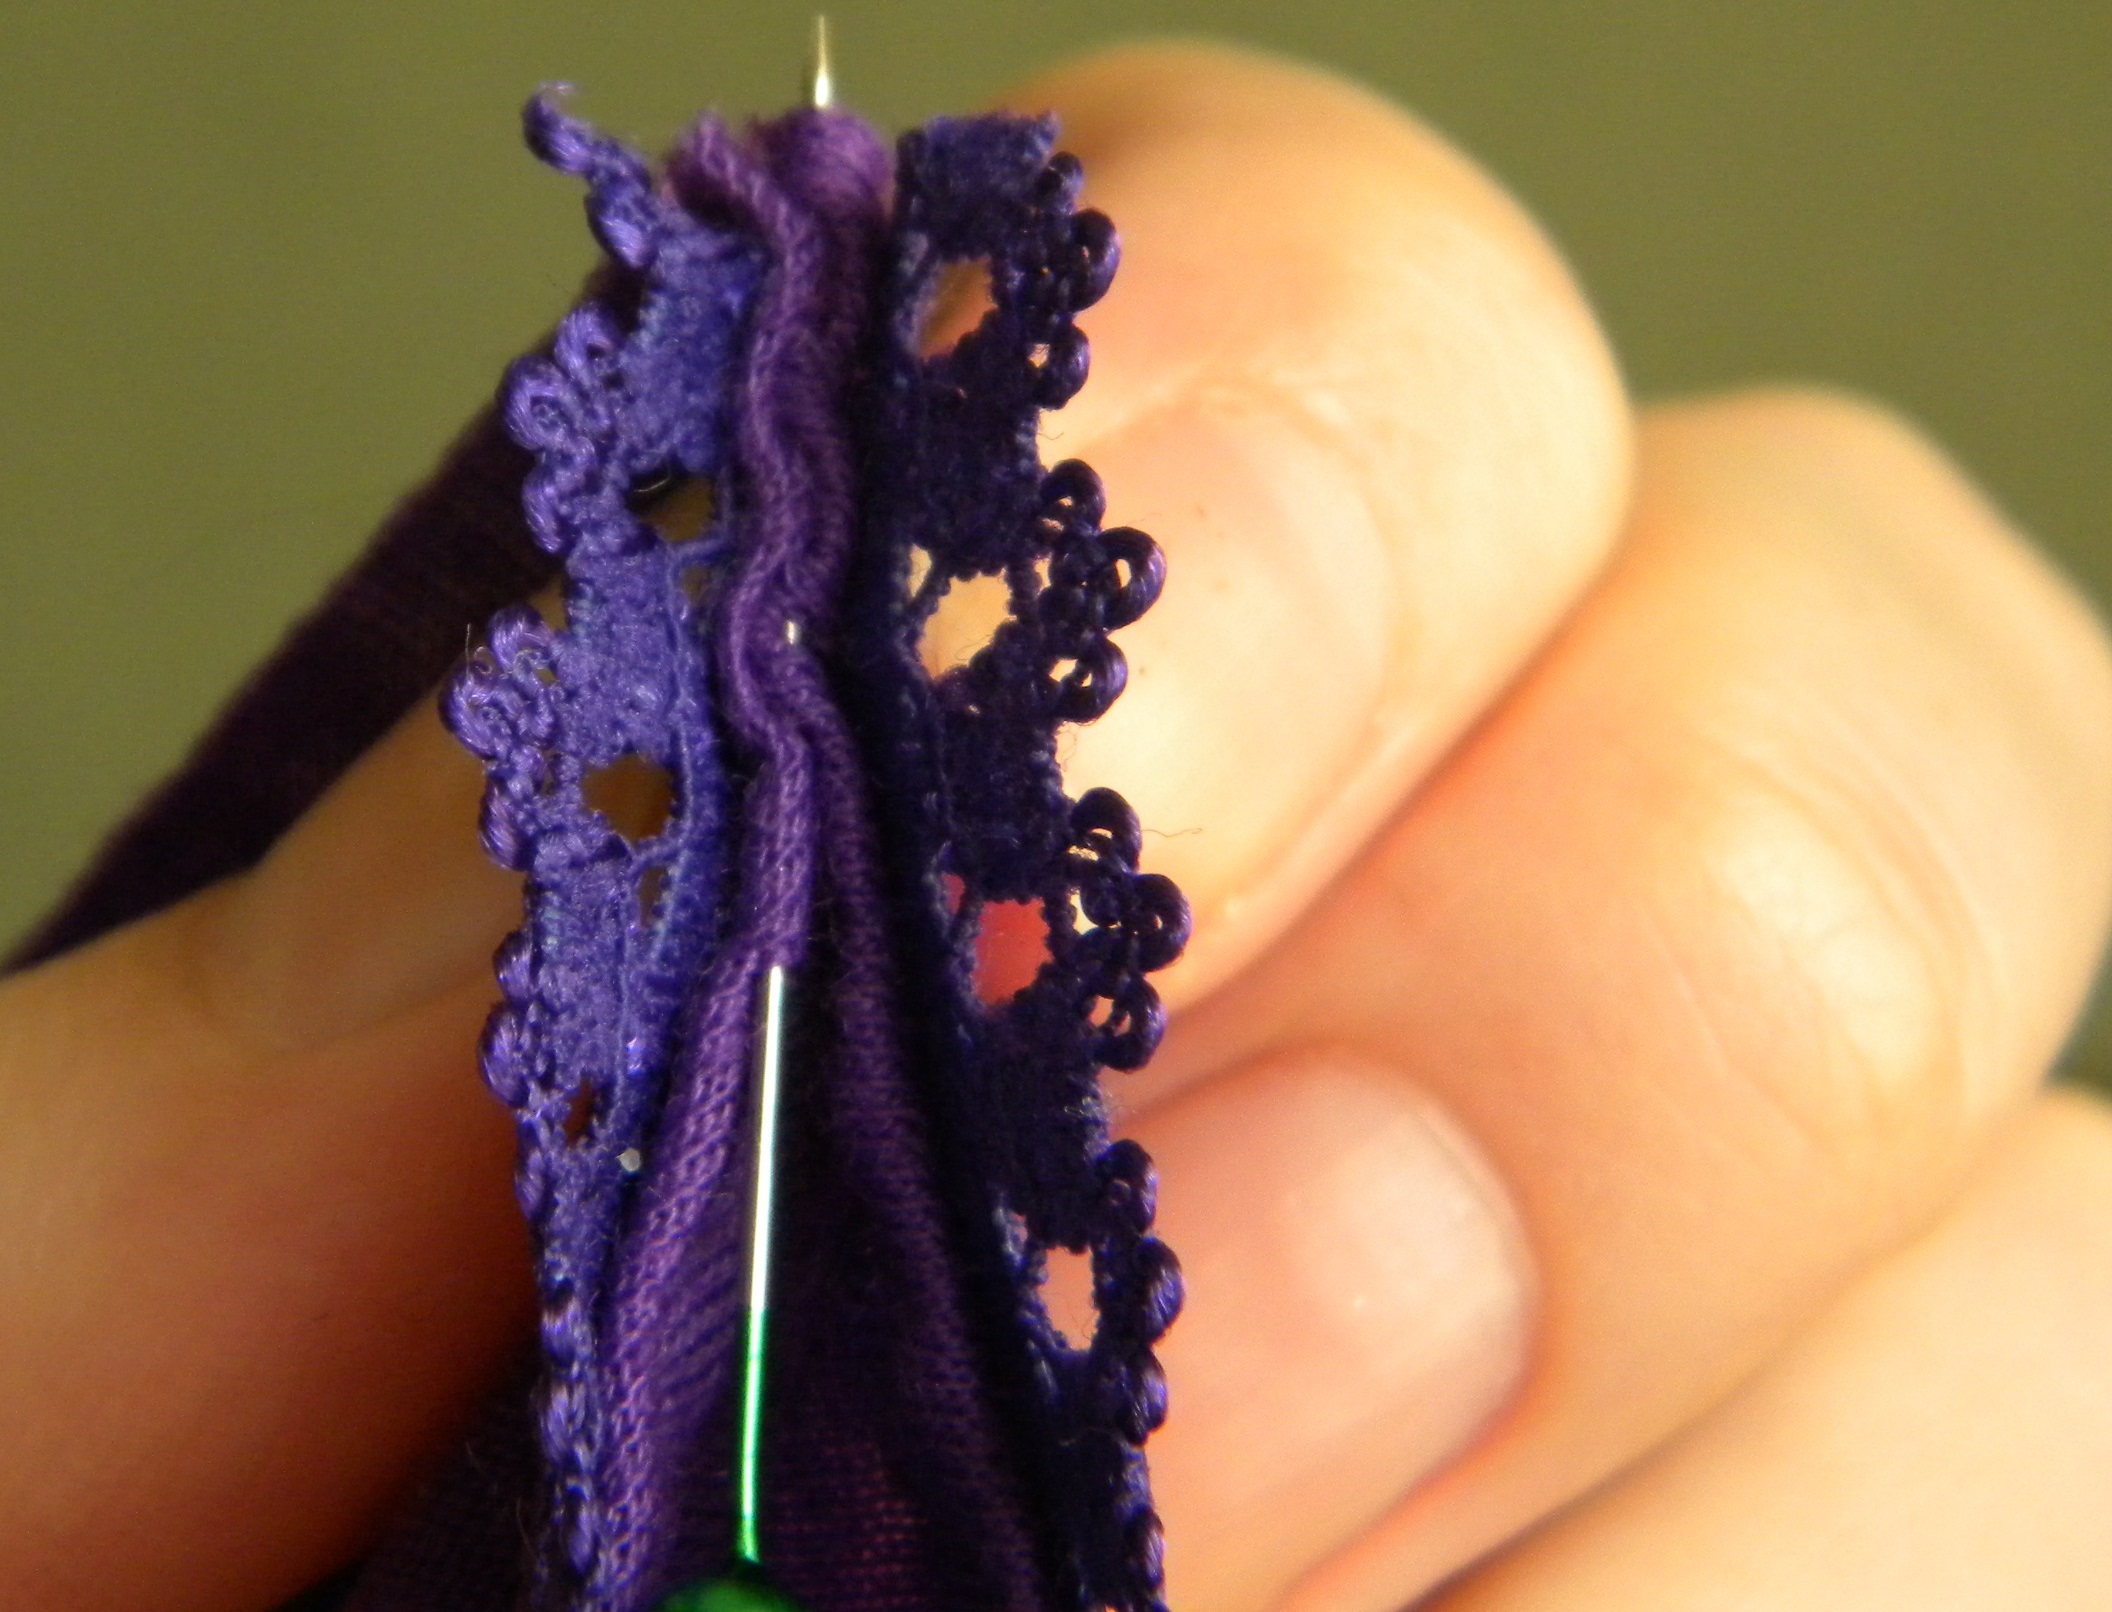
- For comfort, a gusset made of natural, breathable material should be sewn onto the area where it touches the most delicate part of the female body. An elastic band is sewn to the top with a zigzag stitch. The product is ready.


Master class on sewing simple models
When creating individual models that differ from the basic ones, you should use a step-by-step algorithm. This is especially relevant for beginner needlewomen. You can find a suitable master class on how to sew underwear yourself on thematic pages.
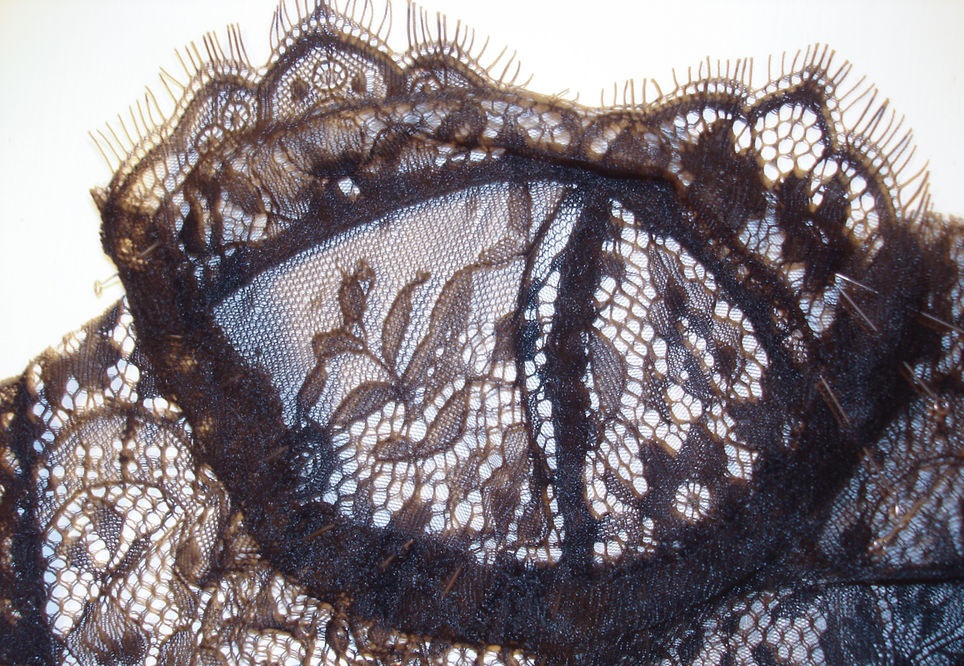
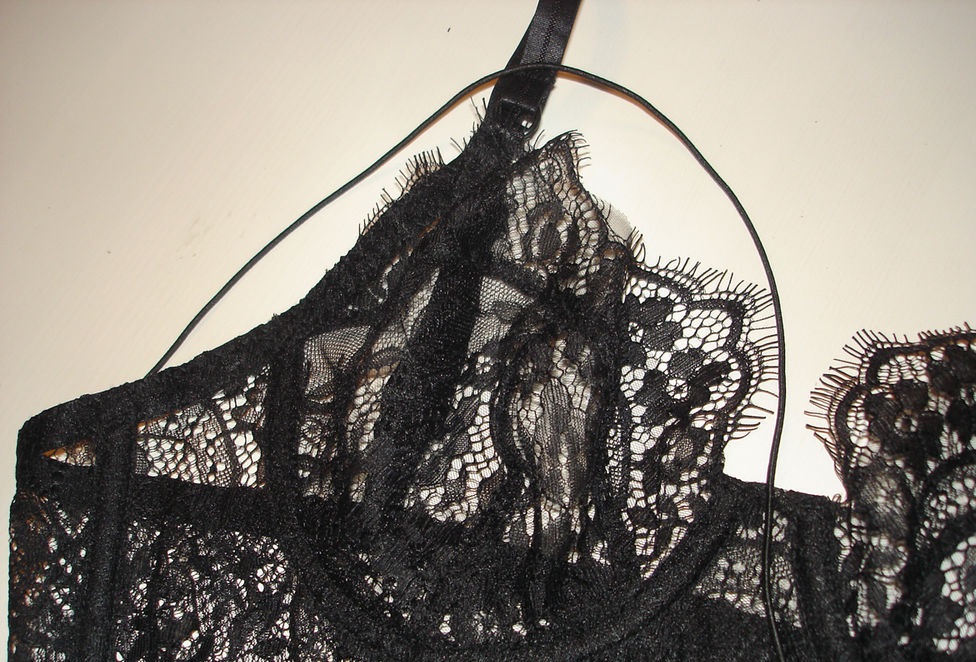
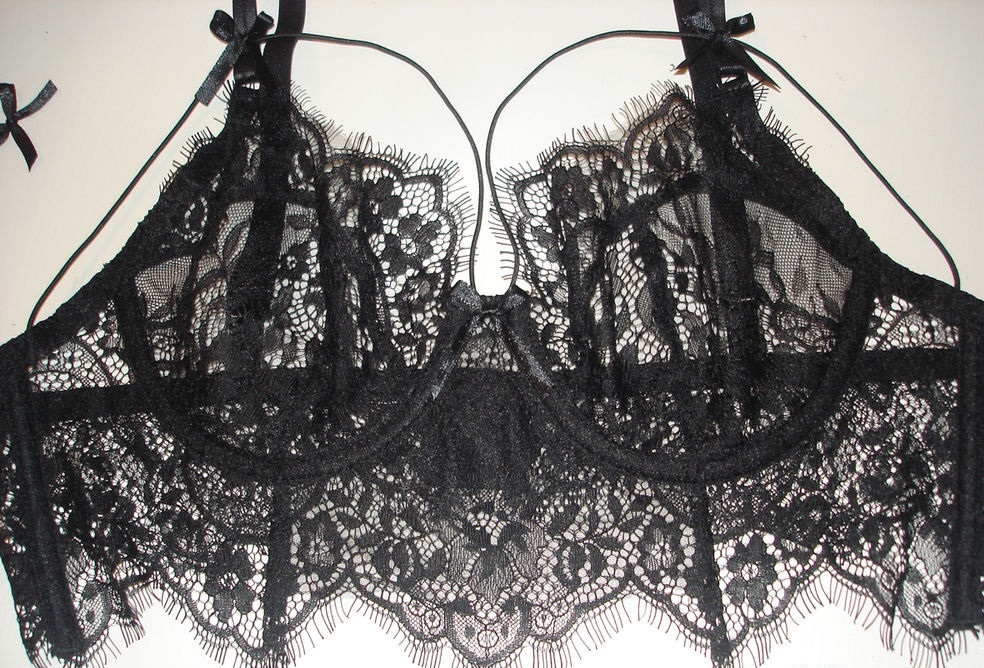
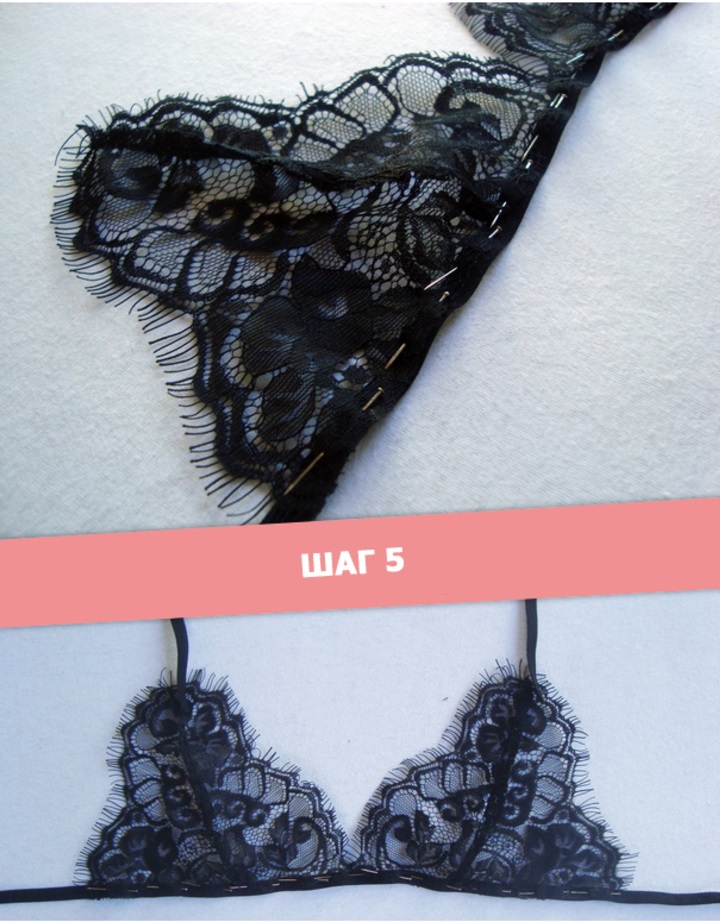
Lace bra
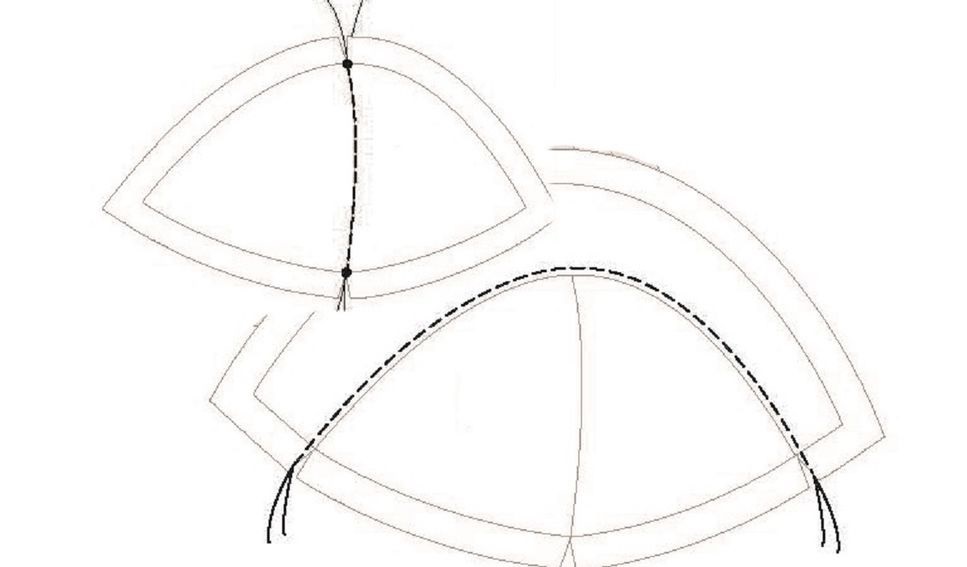
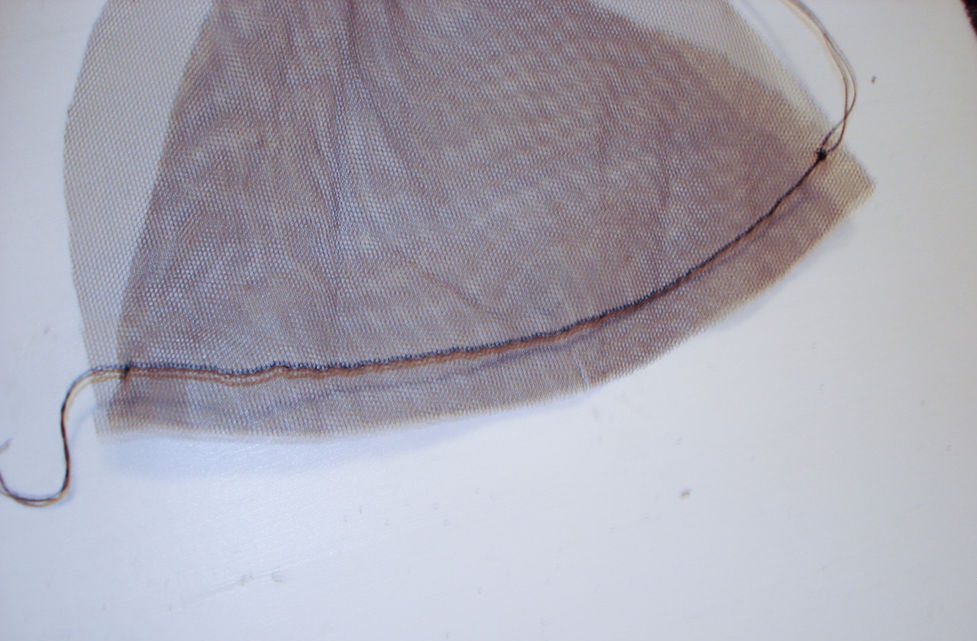
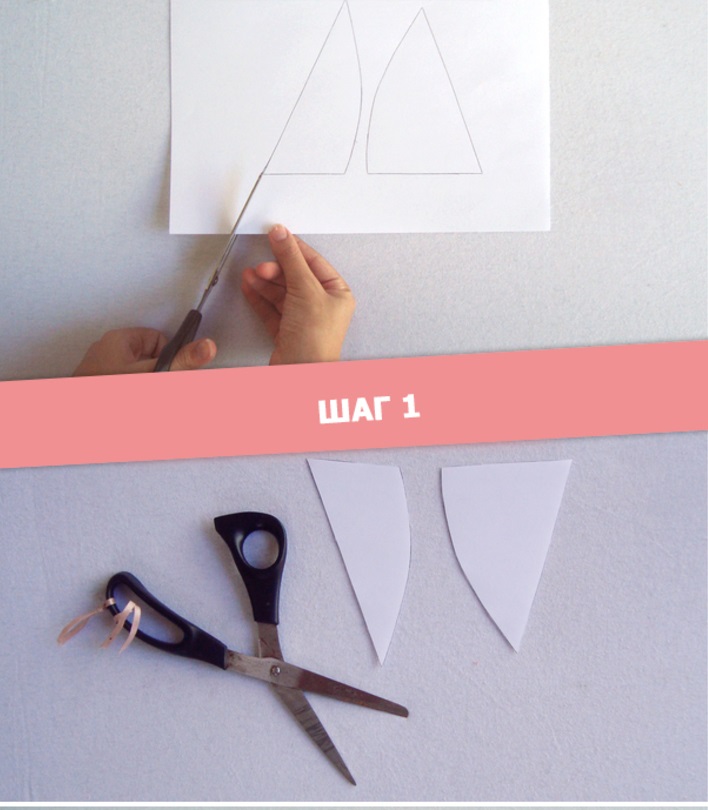
A lace bra is distinguished by the absence of special breast support. Sewing technology is focused on the aesthetics of appearance. After measurements are taken, a pattern should be created and cut out of paper. Seam allowances are necessarily taken into account. Therefore, 5 mm is added to each edge.
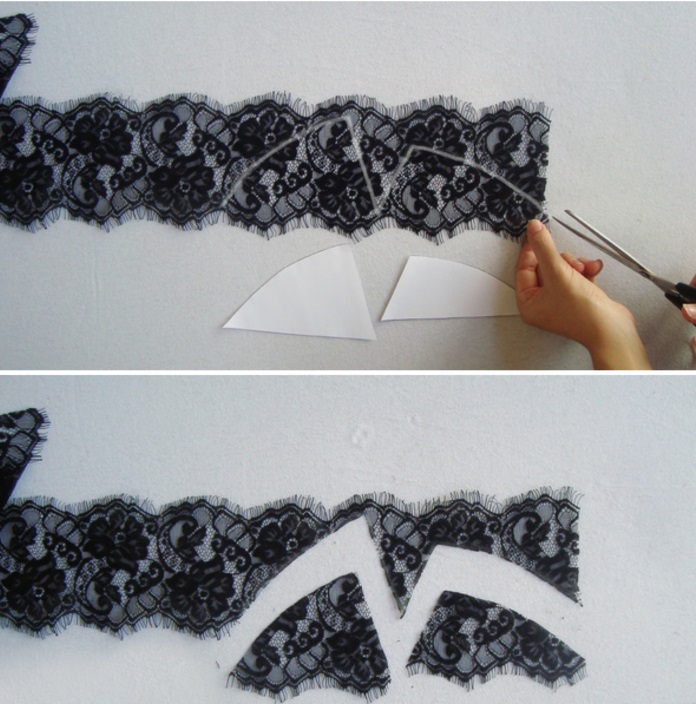
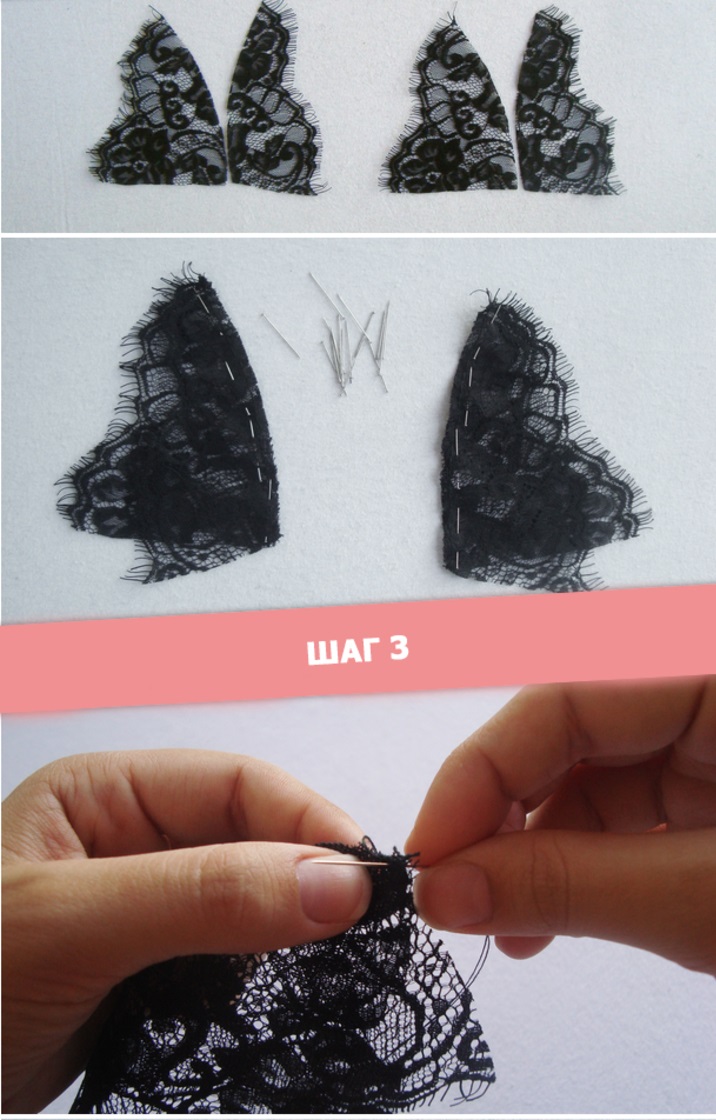
Then the lace is laid out on a hard, flat surface. The pattern is placed on top. In order for the handmade lingerie to look neat, the straight lines of the pattern should match the edges of the pattern. The pattern is outlined along the edge with chalk of a contrasting color. Then two pieces of symmetrical future cups are cut out and sewn together so that the wavy part is on the side. It is better to do this manually using the smallest and most frequent stitches.
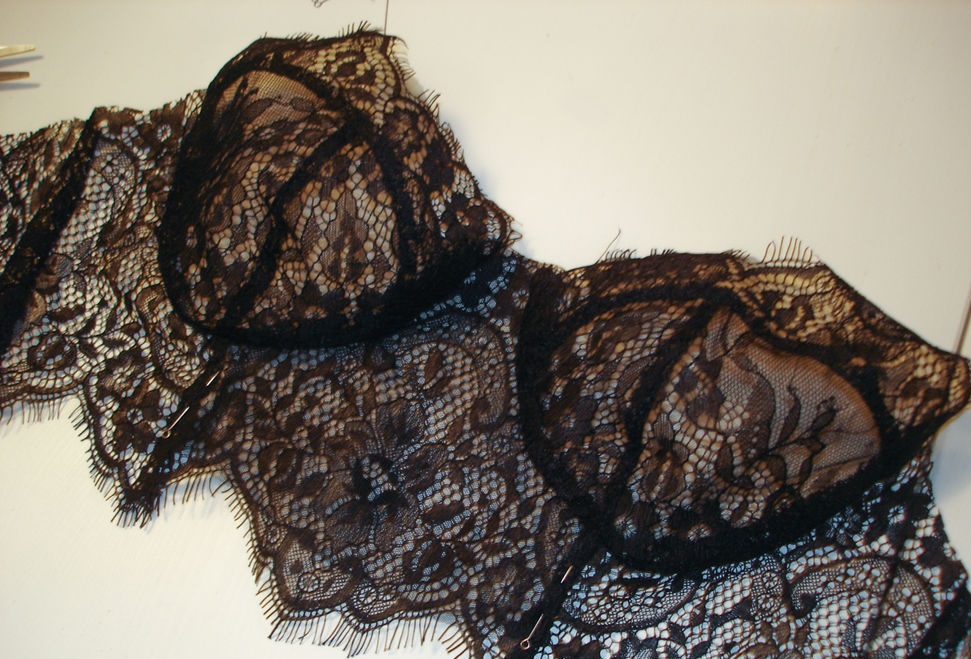
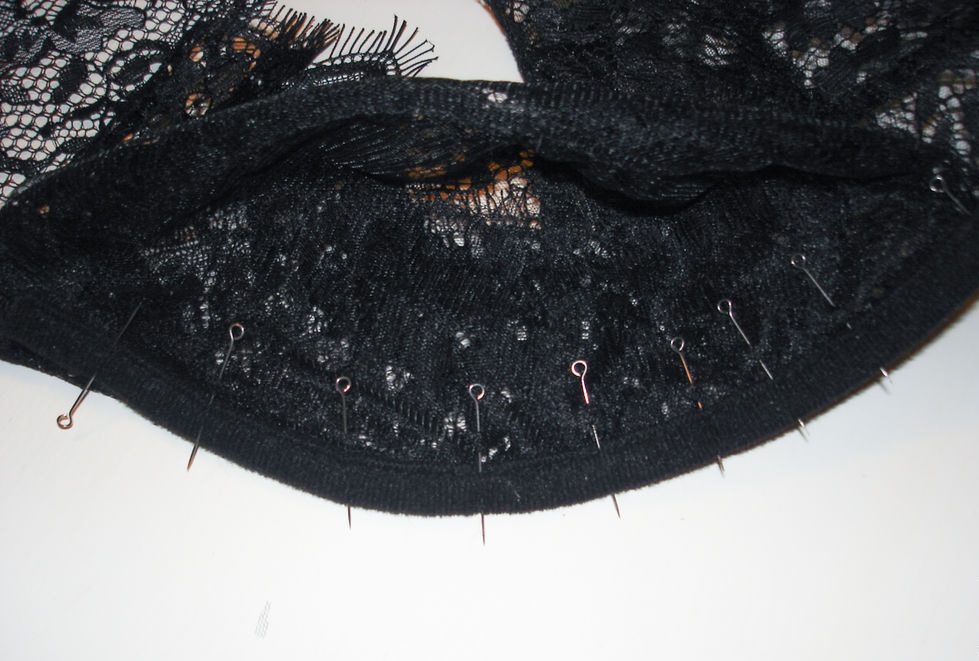
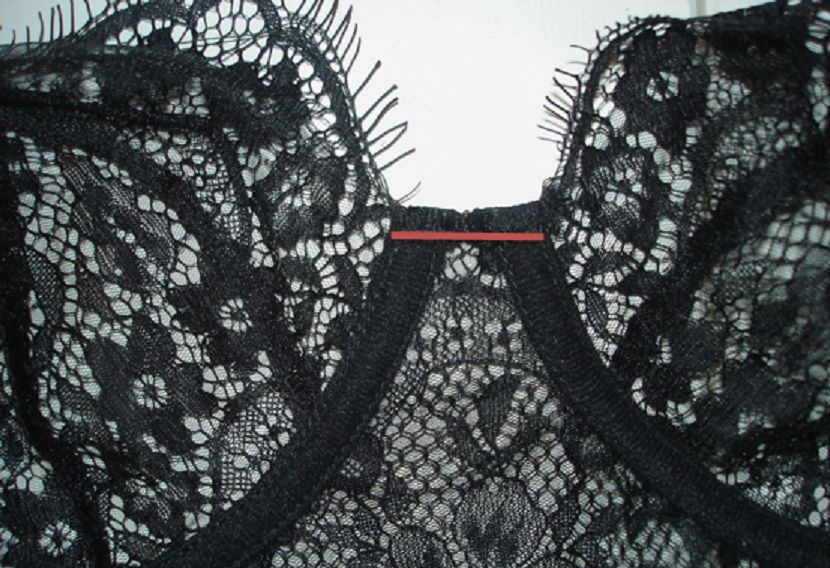
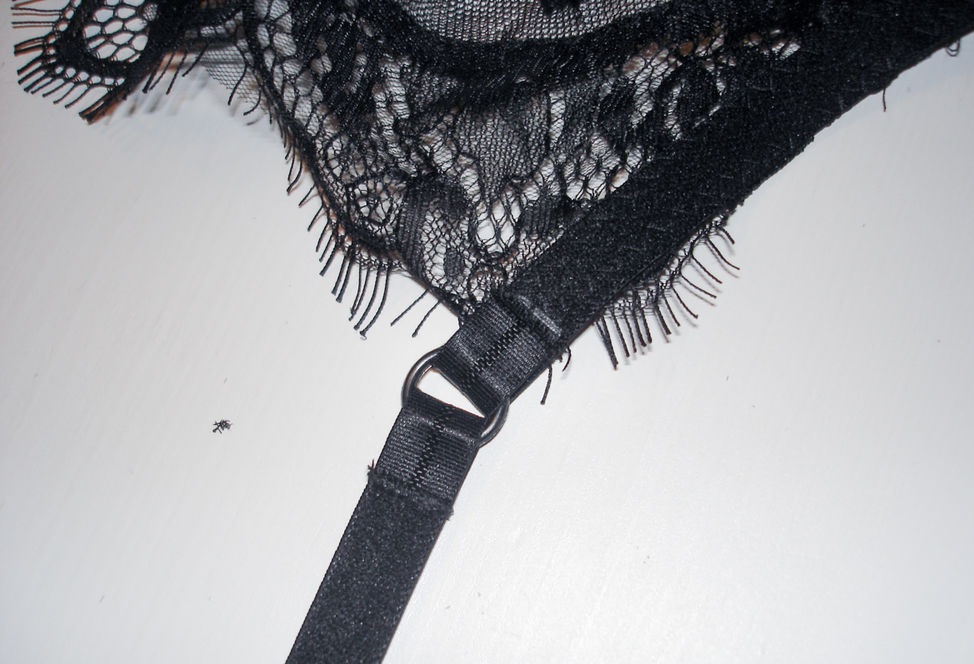
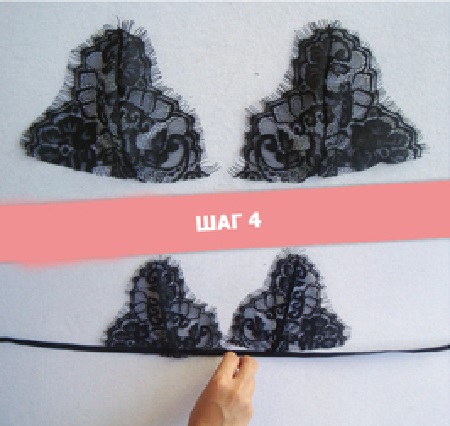
The next stage of bra sewing is creating a base from elastic. Its length is equal to the circumference under the chest. The elastic is laid out on a flat surface. Finished cups are applied to it, the distance between them is determined individually. The structure is secured with pins, tried on, and stitched on a machine.
After that, straps of the required length are sewn on, which can be determined using a comfortable bra that you have. The straps connect the elastic band in the front and back symmetrically, passing through the middle of the cup. At the back, the ends of the main elastic band are complemented with a clasp. All elements are sewn together with small stitches on a machine. The lace bra is ready.
Stylish slips
Stylish briefs are made mainly from lace. First, all the pattern pieces are cut out. Then they are laid on top of the lace, outlined with chalk, and cut out. It is important to take the pattern into account. There are 6 pieces: the front, middle, two side, two back, and a gusset. It is better to use knitted cotton to create the last piece.
The next stage of creating lace underwear is sewing together the elements of the middle front part and the gusset. The seam is 1 cm, up to 5 mm is allocated for the allowance. Then it is necessary to connect the two back halves using a lingerie seam. The gusset is applied to the back part end-to-end with the lace.
After this, the middle front part and the gusset are edged with a knitted piping. Subsequently, the two side front parts are sewn to the middle part using a linen seam. The resulting structure is stitched to the back part. The seam is laid at a distance of 1 cm, then overcast with a small, zigzag stitch, 5 mm is allocated for the allowance. The side sections are connected with a linen seam.
Bias binding for finishing the edge of the product can be the same shade as the main fabric, or it can be contrasting. Combinations of black and red, brown and beige, white and pink look interesting.
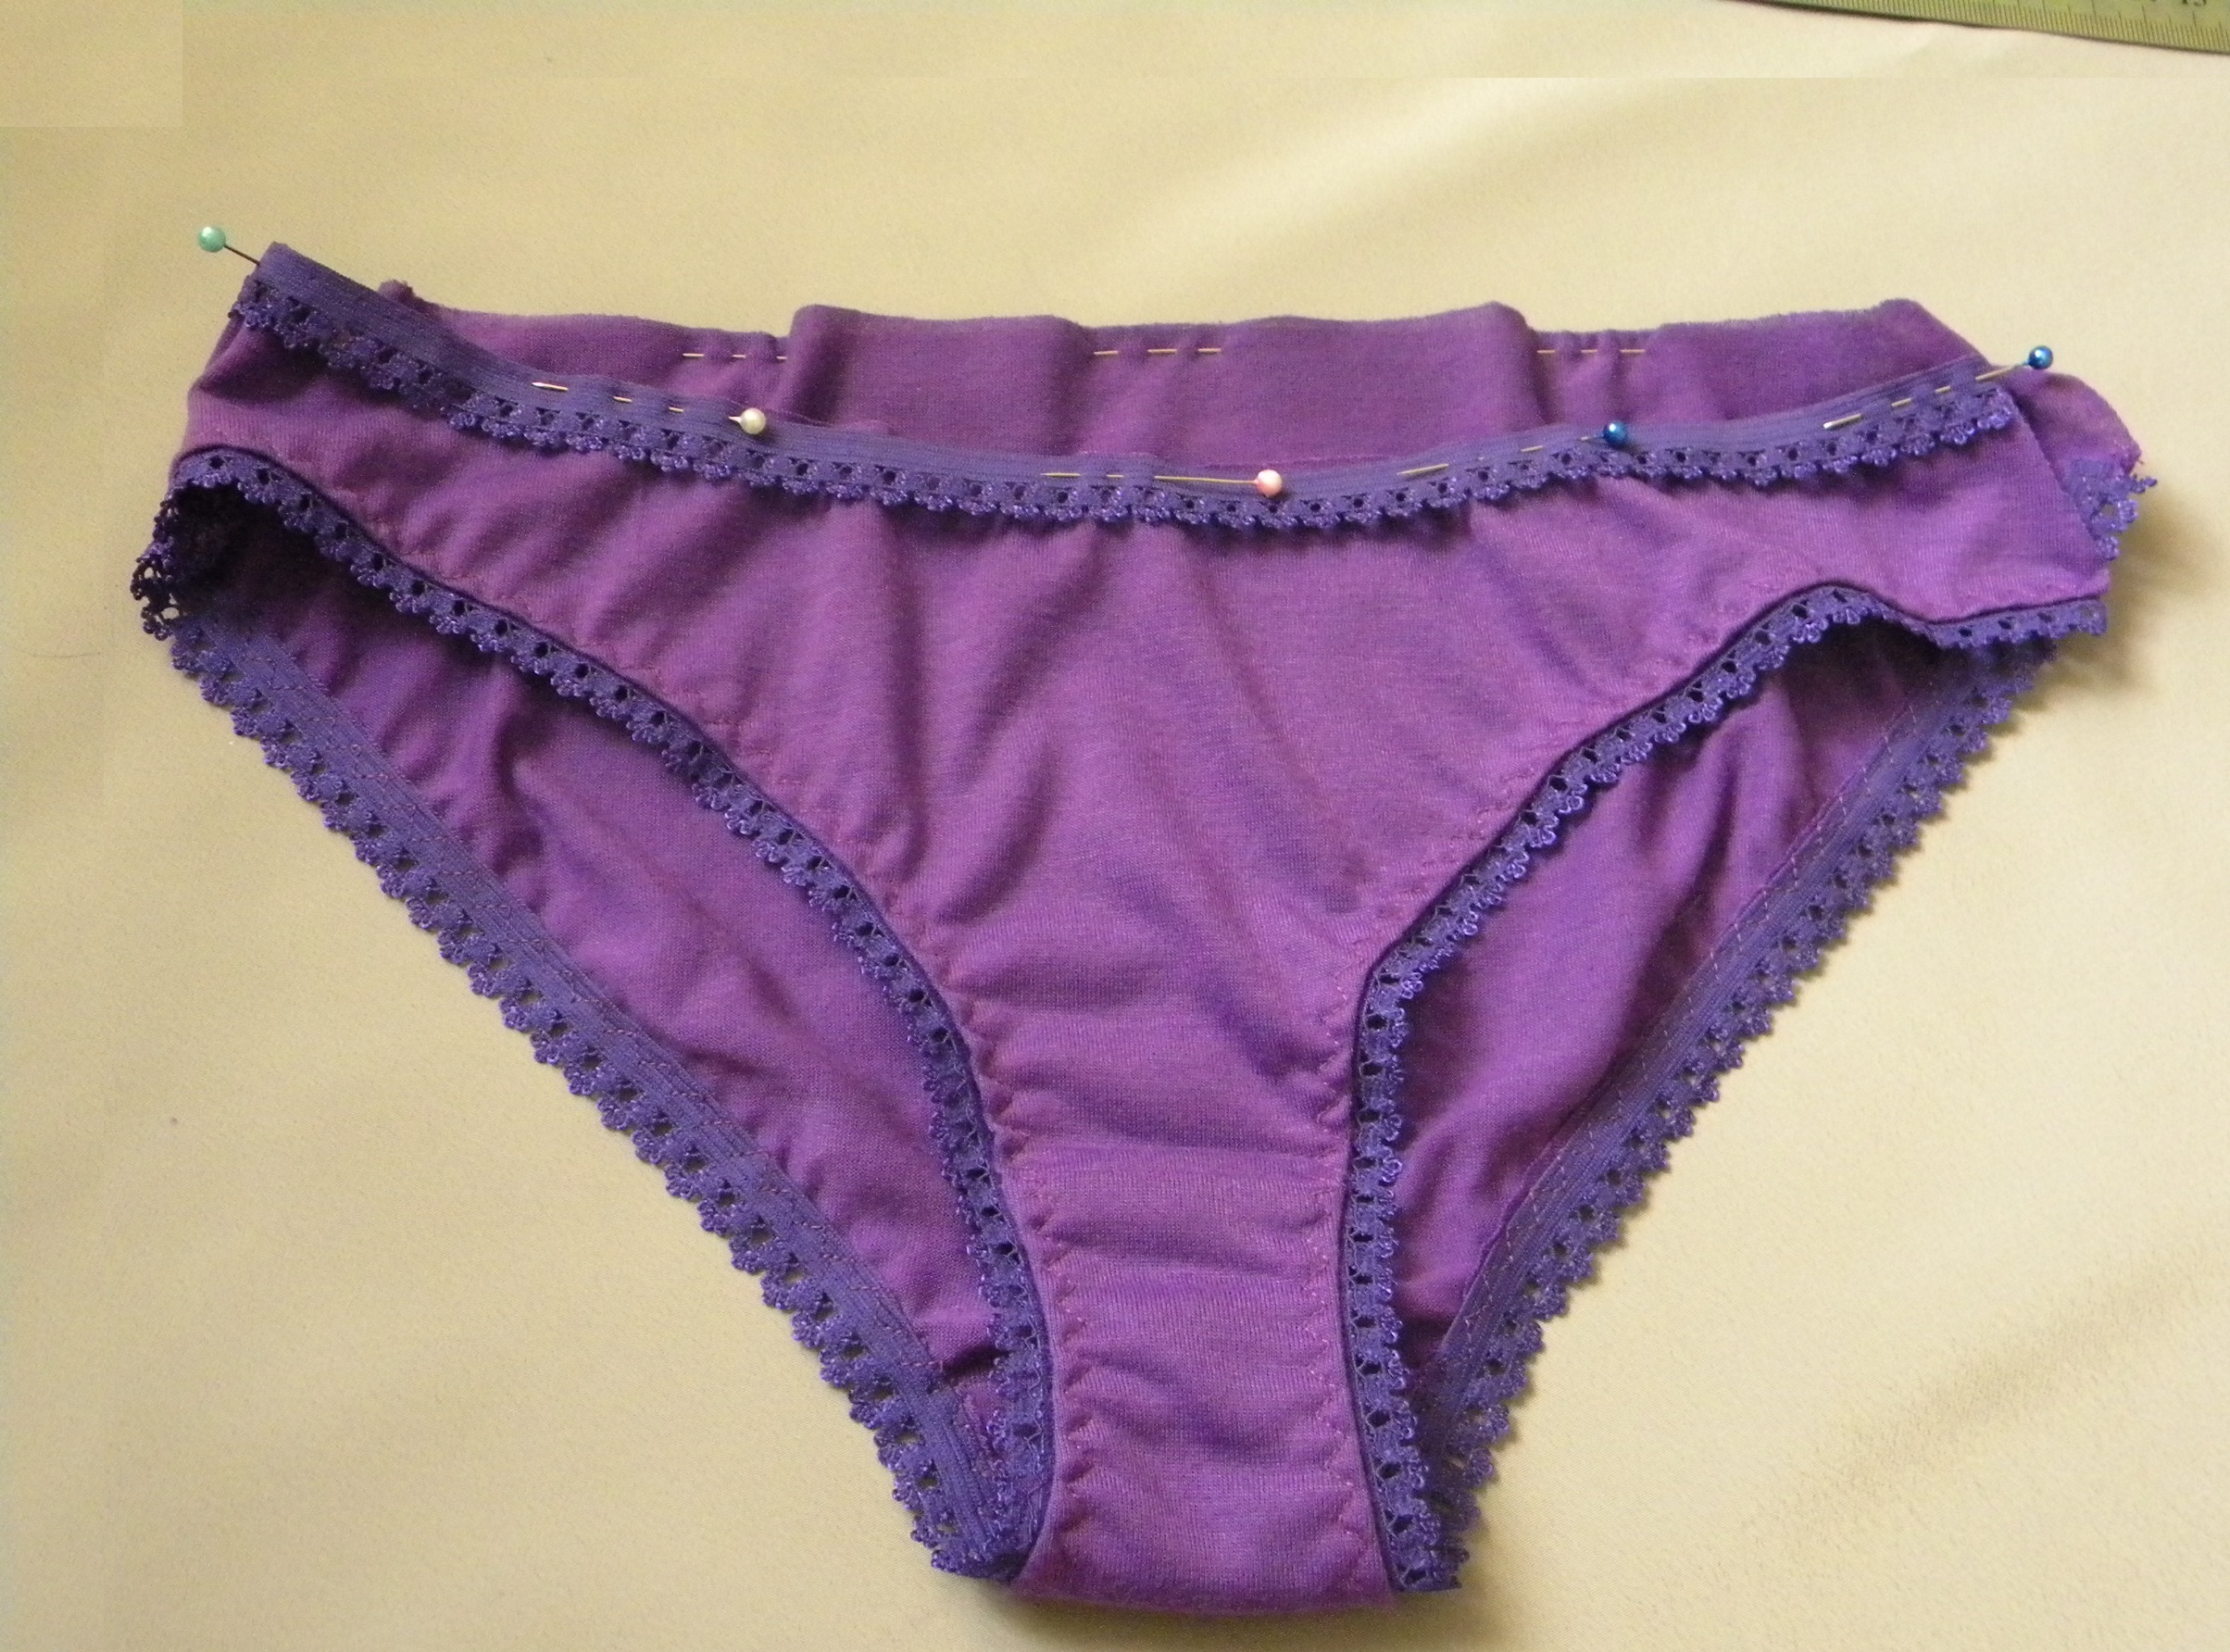
The final stage is attaching the elastic. It is laid along the fold of the allowance. The lace is held, the elastic is pulled by 3-4 cm and fixed with a zigzag around the entire circumference. At the end, a fastening is made, the remainder of the elastic is cut off. Stylish briefs are ready.
Video