The colorful image of the indigenous North American tribes excites many children's souls. Boys dream of trying on the type of a courageous and noble warrior, and girls dream of transforming into a wise and brave squaw. That is why the national Indian costume is so popular among children. Fortunately, such an item of traditional culture is easy to make at home. It does not require much time, financial costs, and is within the power of even those mothers who do not know how to sew.
What does it consist of?
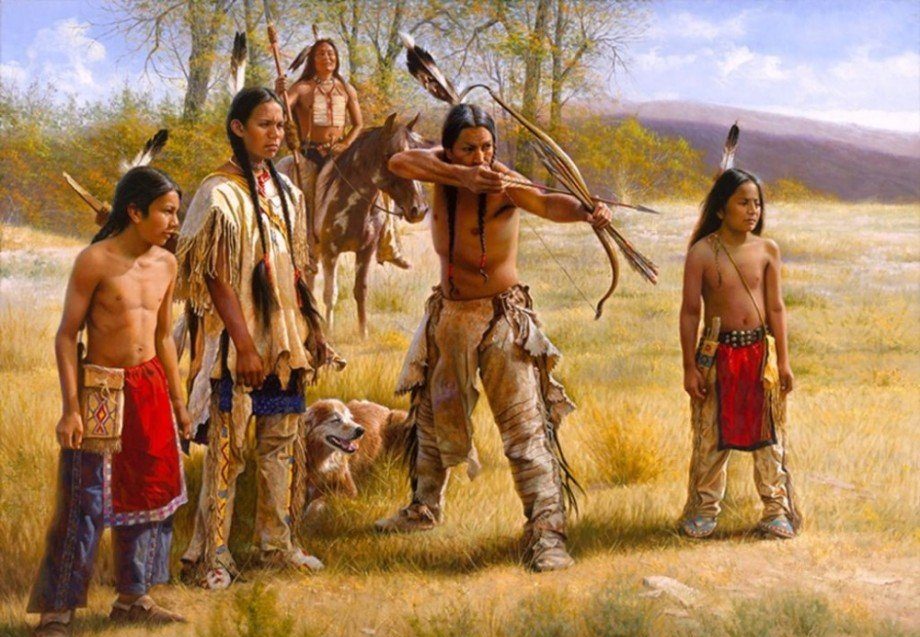
The term Indian is used to refer to all the indigenous populations that lived in America. But in terms of clothing, the tribes that lived in the north and east of the country are the most interesting. Men in these regions wore pants (leggings) made from two pieces of leather and a shirt. In the cold season, they would put a poncho on top.
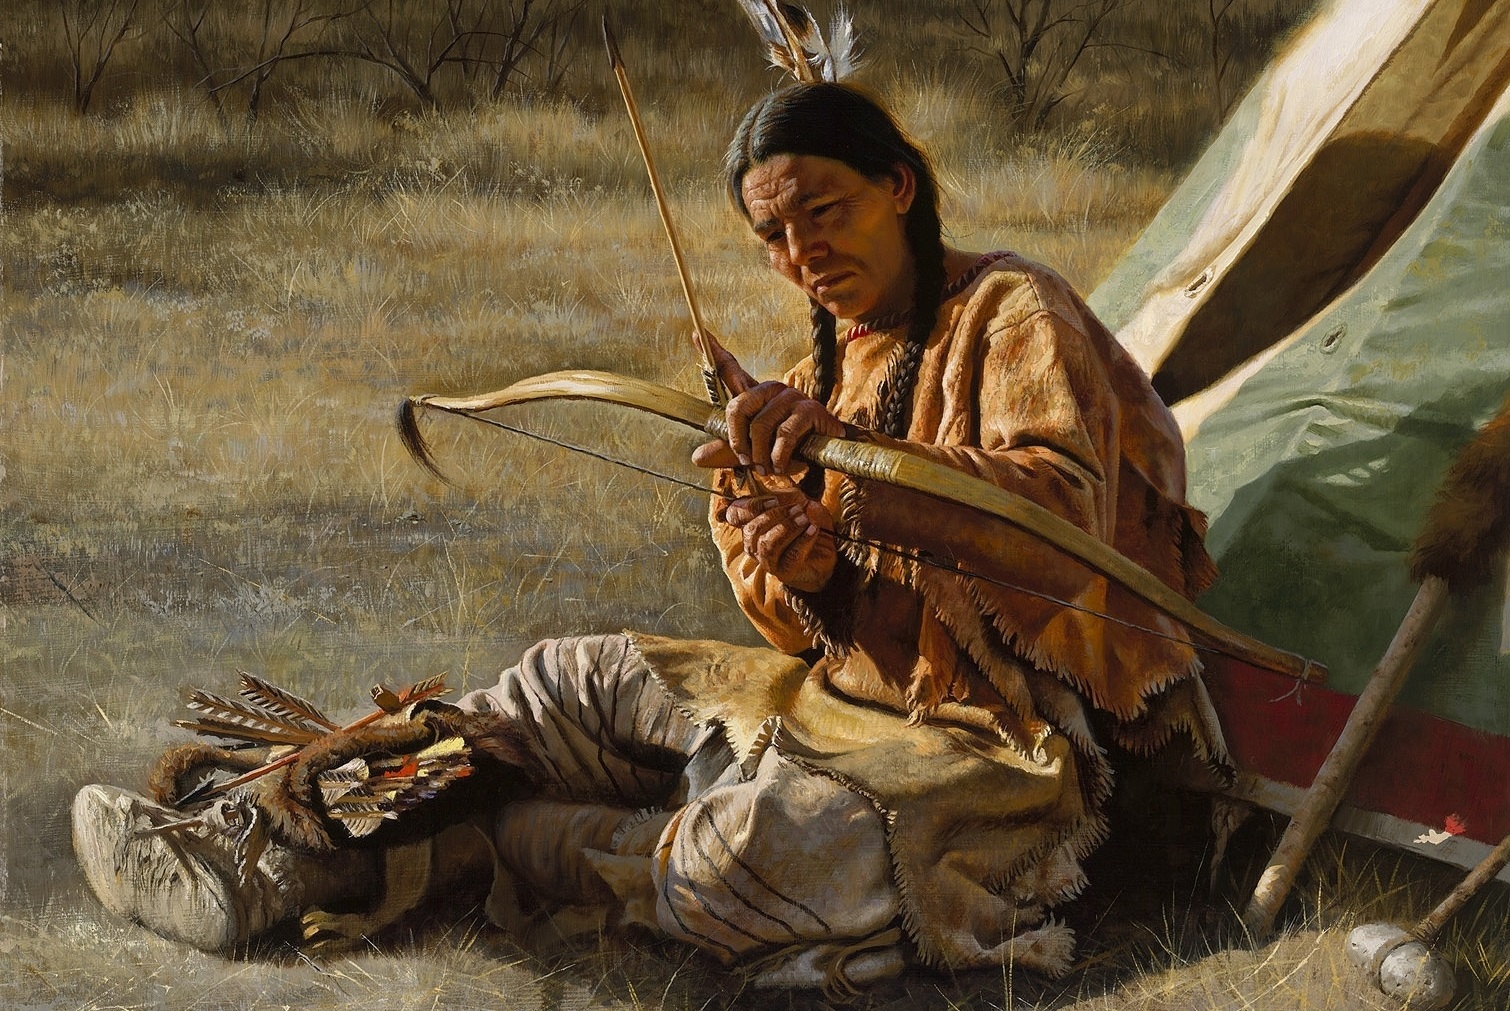
The Indian men's suit was distinguished by its simplicity of cut, since it was not supposed to restrict the movements of the hunter and warrior. The nation's love of freedom was reflected in the straight, spacious lines of the style.
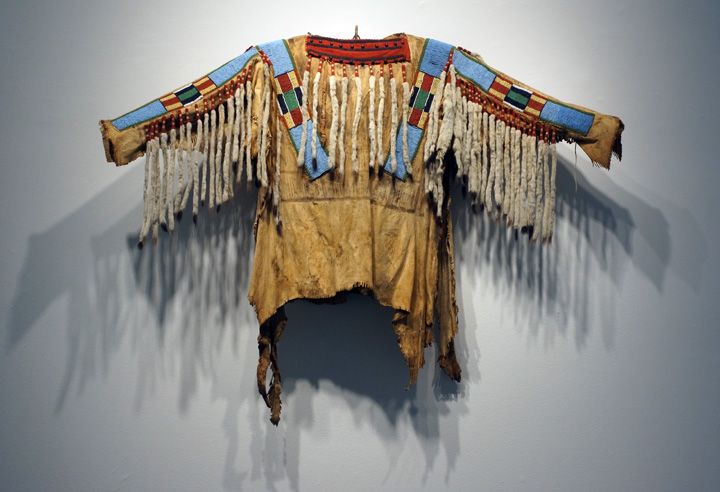
The Indian shirt was comfortable, long enough and warm. Thanks to the rounded neck, it was easy to put on over the head. The oval armholes did not interfere with raising the arms, throwing a spear or drawing a bow. Trousers were no less comfortable. For Indian men, they began at the waist, and thanks to a special cut, they allowed them to quickly jump on a horse and ride without a saddle.
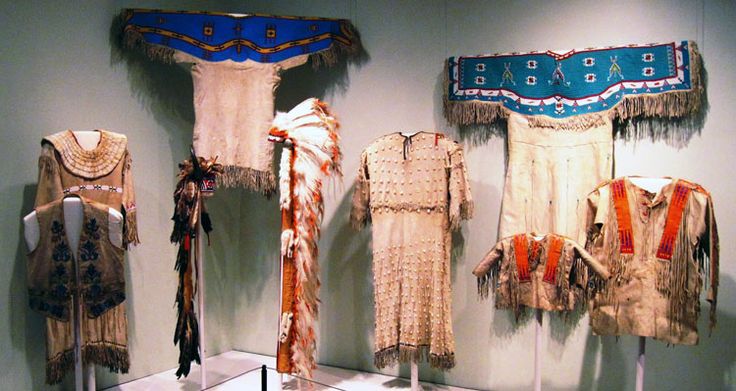
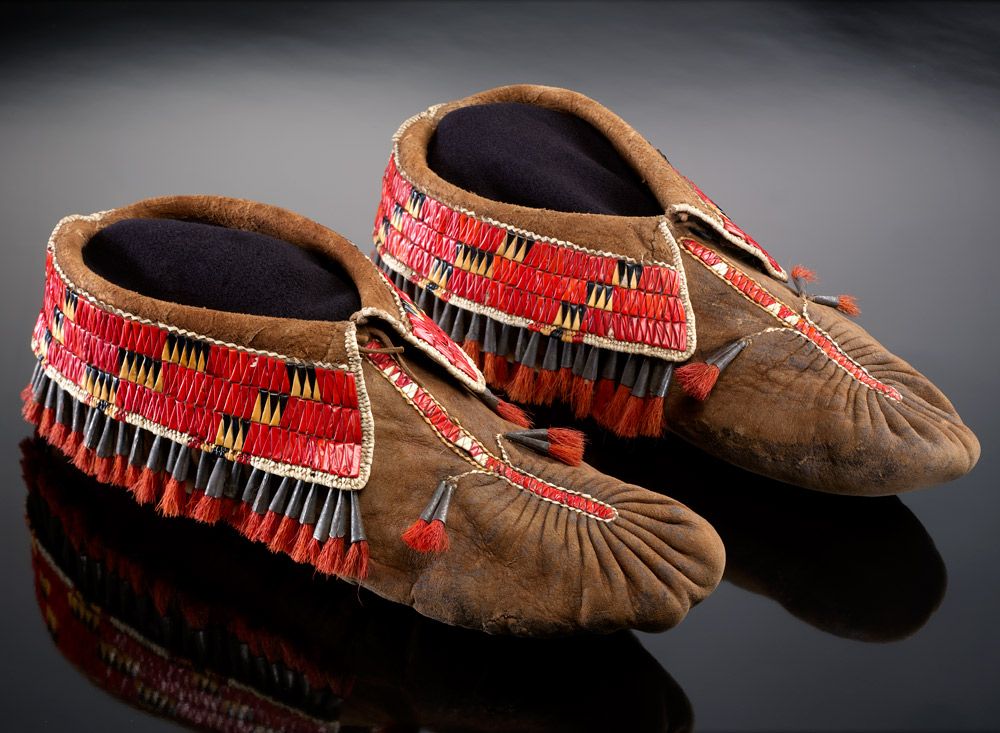
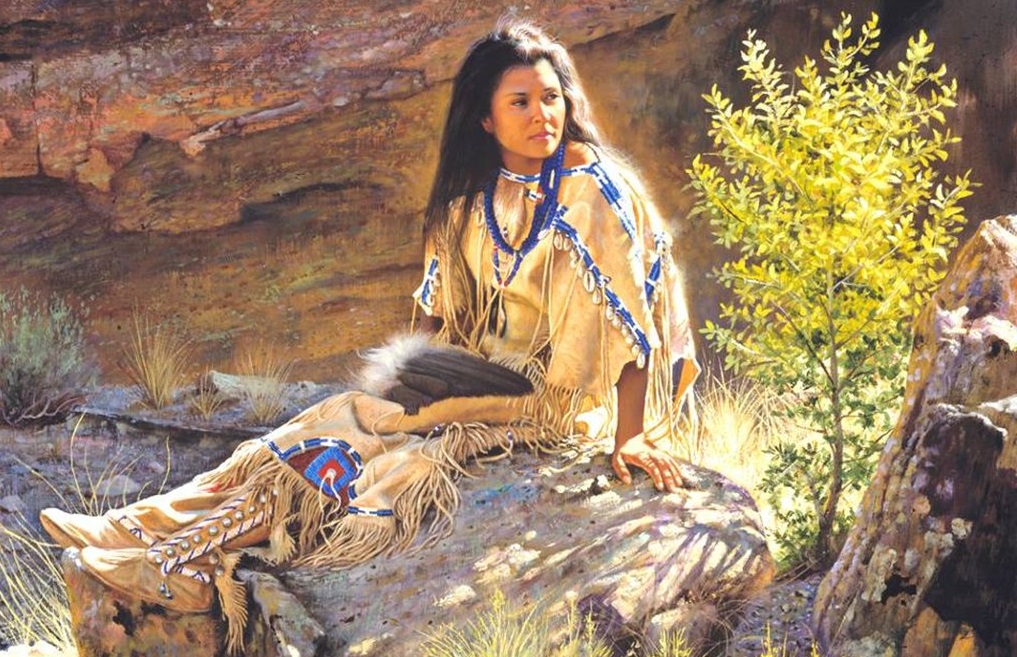
Women's clothing was richer, although it was based on a simple cube dress. In different tribes, it was transformed into a tunic or a long shirt. In some areas, the national costume consisted of a skirt and a straight blouse. Women more often than men wore suede clothing, while the stronger sex preferred leather. They wore moccasins on their feet. Sometimes they smoothly turned into leggings decorated with fringe and resembled high boots.
Distinctive design and color scheme
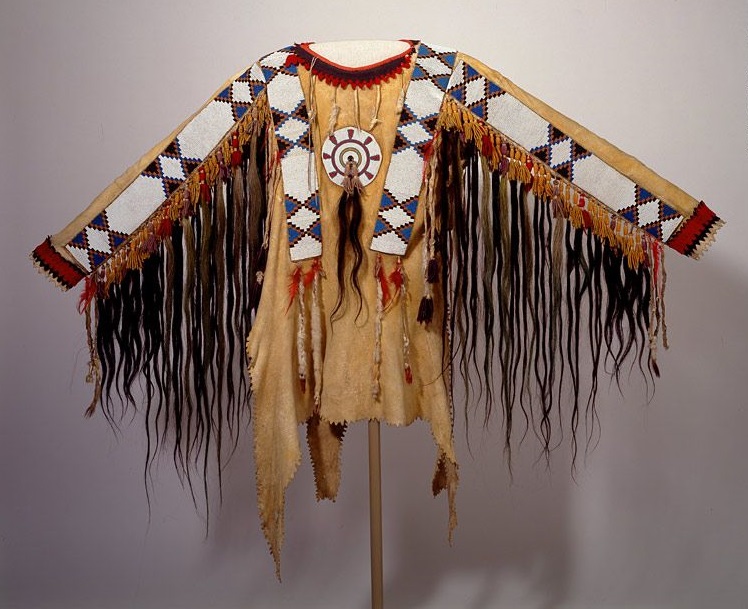
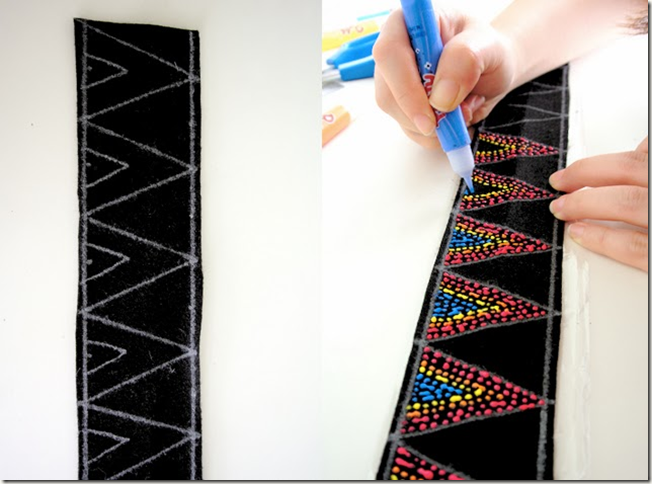
The Indian costume is characterized by multi-layeredness and color, a natural color scheme reminiscent of the colors of the steppes. Basically, it is beige, ocher, terracotta, and other shades of brown. Thanks to the rich decoration with beads, deer incisors or porcupine quills, the national costume of the Indians looked very original. Women made extensive use of embroidery, decorating their clothes with geometric patterns and lines.
Until the 19th century, warriors' costumes were generously trimmed with beads on the chest and back, which served not only as a circular ornament, but also performed protective functions.
All elements of the Indian national costume were abundantly trimmed with leather fringe. Sometimes the shirt was painted: the top was covered in blue and green (sky), and the bottom - red or brown (earth). Some particularly outstanding warriors and hunters applied special signs-pictures to the costume, showing the number of enemies killed or captured, the number of horses killed in battle, scalps taken.

Traditional accessories
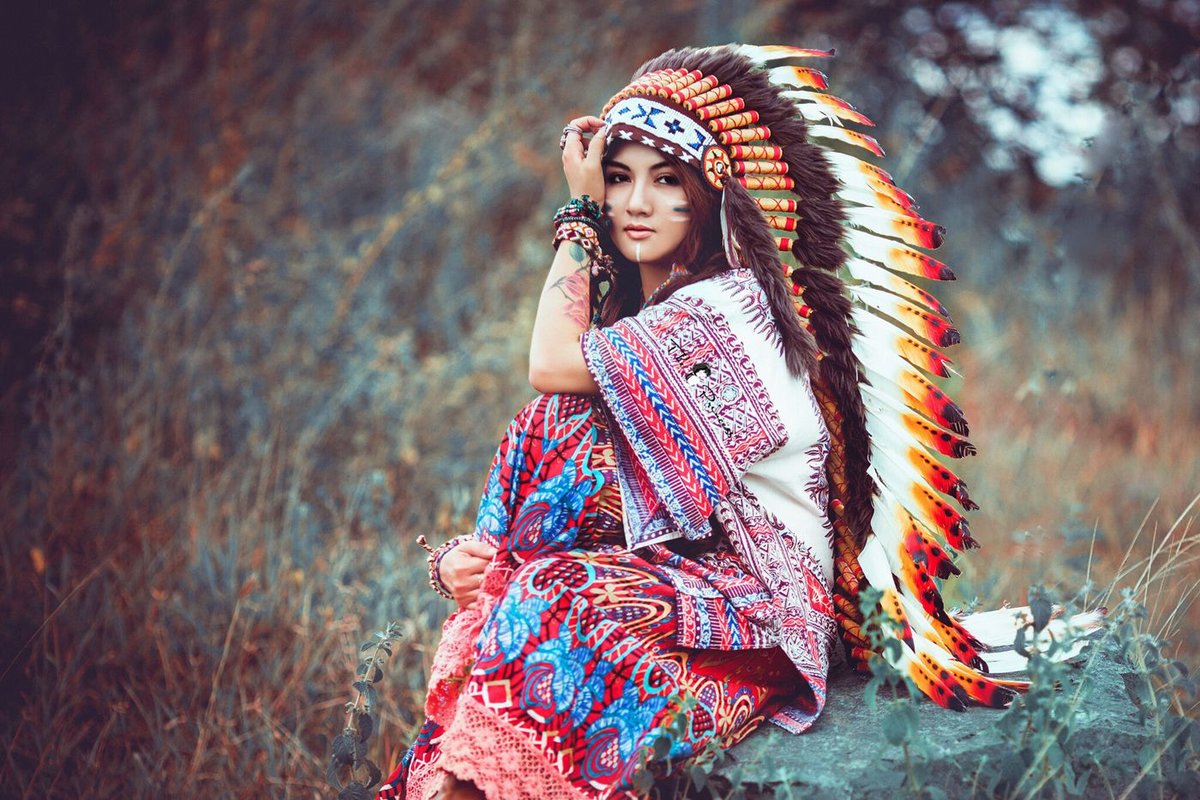
Almost all members of the tribe wore long hair. To prevent it from interfering with work, the forehead was intercepted with a thin red strap. Men had a simple leather one, women's headbands were richly decorated with beads and totem drawings.
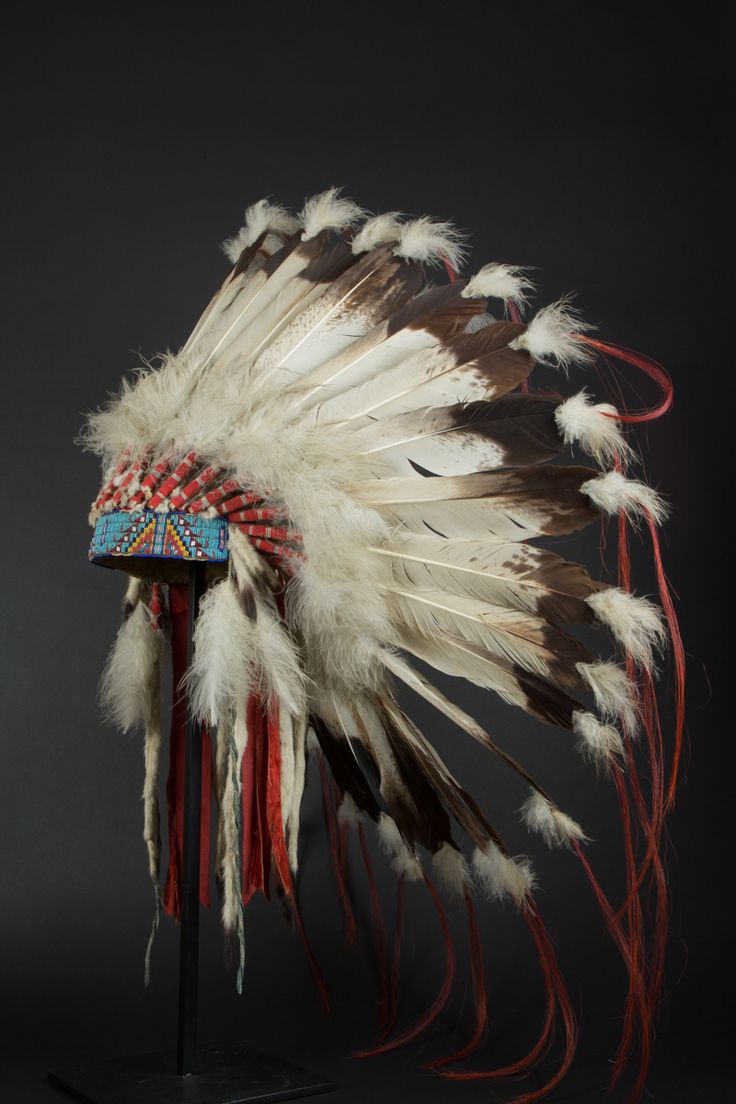
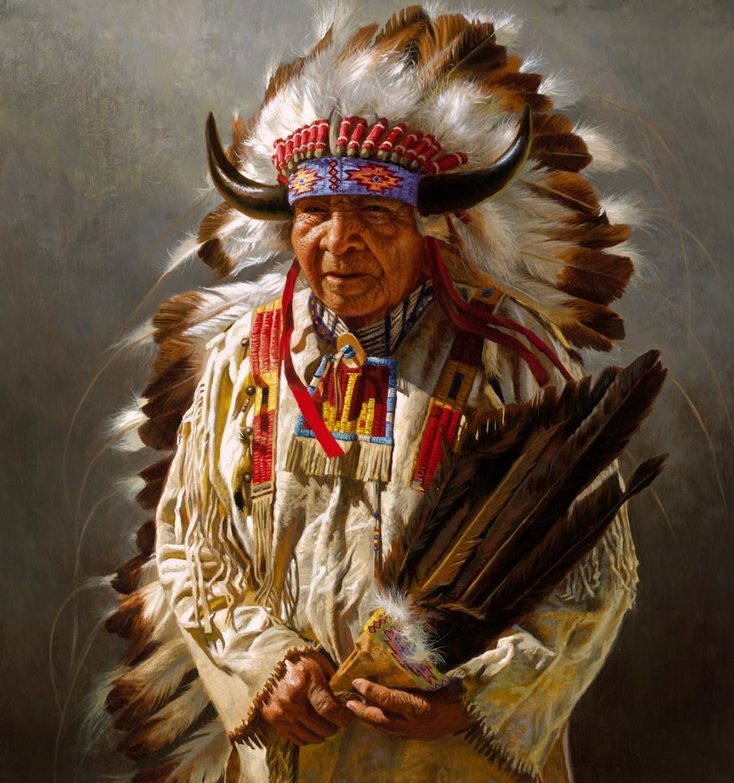
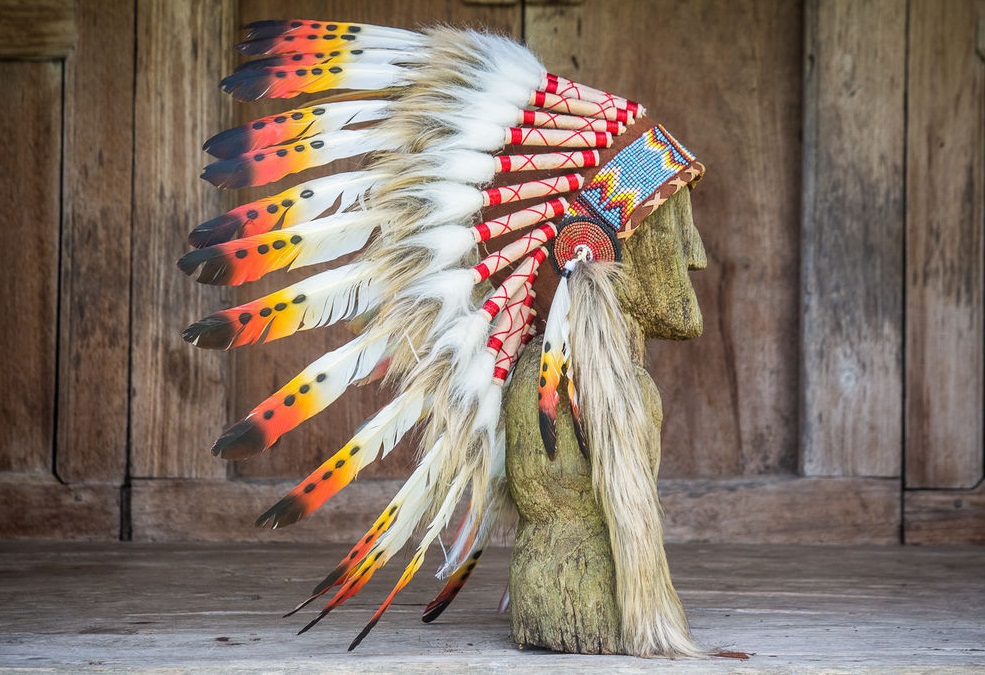
The national headdress of the Indians is a crown of feathers, which is a cap or a bandage. Only chiefs could wear it. Eagle feathers taken from the bird's tail were used to make the attribute of power. Common Indians preferred a headdress called a roach. It was made from horse mane, feathers of common birds, and porcupine quills.
In addition to the costume, additional accessories, serving as a symbol of honor and dignity, were of great importance to the representatives of the tribe. Warriors never parted with the tomahawk, the name of which comes from the English transliteration of a war club. The standard weapons of the Indians were a bow with arrows, a knife, and a flexible spear with a stone or bone tip.
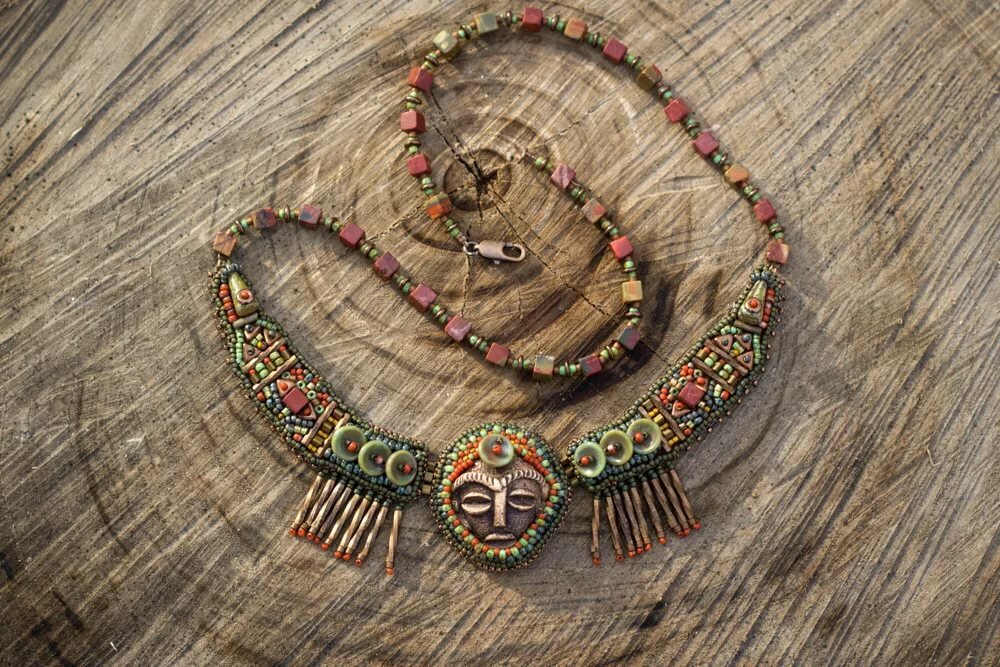
The Indians loved all kinds of jewelry, giving them a sacred meaning, considering them a talisman against evil spirits. Bracelets and pectoral necklaces were characterized by an unusual combination of colors and structures. They were made from animal bones, beads, shells, metal tubes. Deer fangs, bird claws, coins or remains of military weapons were strung on bracelets made of leather straps.
How to make it yourself
An Indian costume is easy to make with your own hands. First, sew a tunic for girls, and if you shorten it, you get an ethnic shirt for a boy. Step-by-step algorithm:
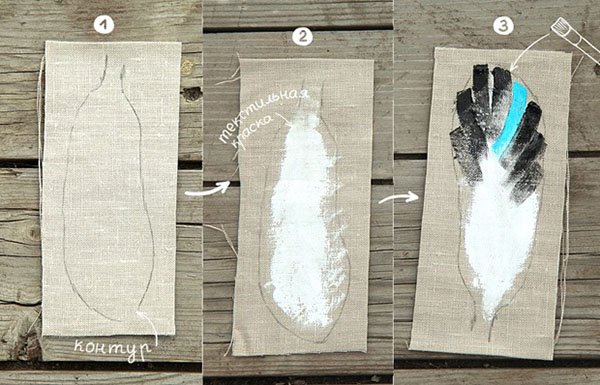
- Take a rectangular piece of fabric the size of the child, mark the middle. Stepping back 8 cm on each side, draw a neckline with chalk, 6–8 cm deep.
- For the armhole, we mark straight lines measuring 20 x 80 mm on the sides of the fabric. They should be located 3 cm below the shoulder level.
- To decorate the armhole, we make a fringe. We cut the fabric around the entire circumference of the neckline to a depth of 4–5 cm. You can sew ready-made fringe to the Indian tunic.
- Before sewing the side seams, we try the suit on the child and adjust the length and height of the armhole.
- To decorate the hem, cut the fabric to a depth of 8–10 cm every 2 cm. Sew the side seams.
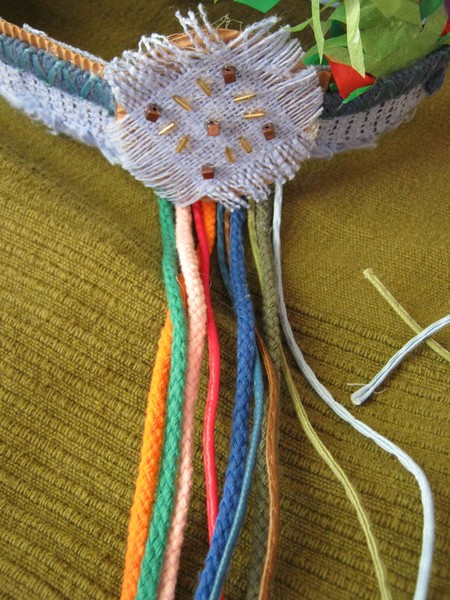
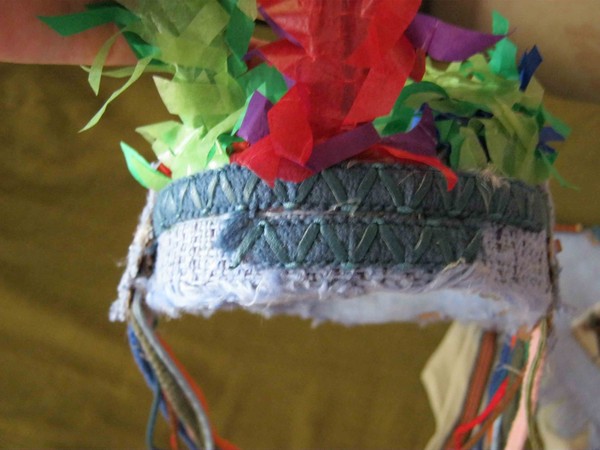
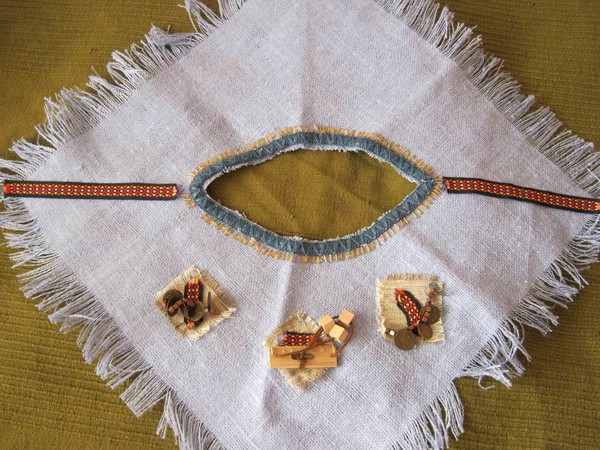
The fringe for the neck is made separately. To do this, take a piece of fabric of the desired color, cut out a round ribbon 6-10 cm wide. Then make cuts on it, sew it to the collar. To decorate the Indian costume, sew colored patches onto a tunic or shirt or apply special paint for clothes.
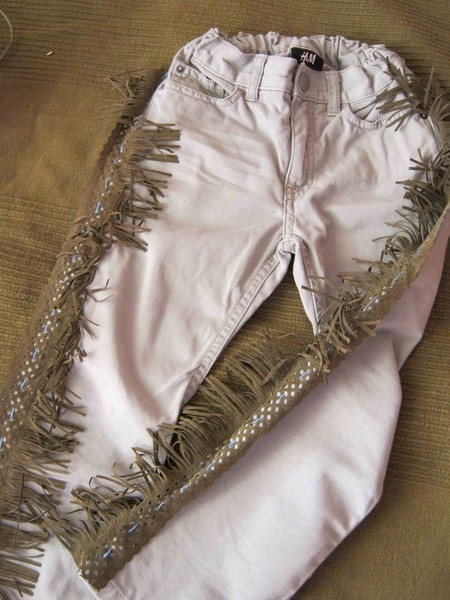
It is better to make Indian trousers from a ready-made item. They can be a slightly different shade, but in the same color range as the shirt.
You need to sew fringe stripes to the trousers, made of a material 5-10 cm wide. Choose the length yourself - to the knee or to the bottom of the leg. Before attaching the fringe and adjusting the length, the Indian costume for the boy needs to be tried on.
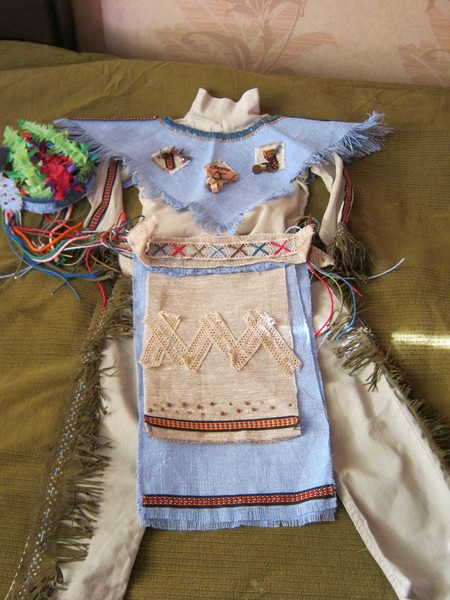
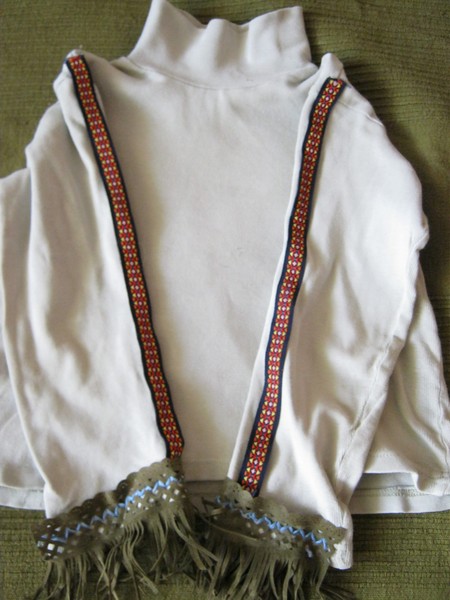
It is much easier to make a set of clothes from a color-matched plain T-shirt and trousers. You need to sew fringe on them, decorate them with an ethnic pattern or colored embroidery. You can put a fringed vest or cape on top of the suit, liven it up with a bright bib made of beads, pieces of fur, small feathers, shells.
Roach from scrap materials
Making an Indian feather headdress is not difficult. You can use real feathers, fabric or paper to create a roach.
From feathers
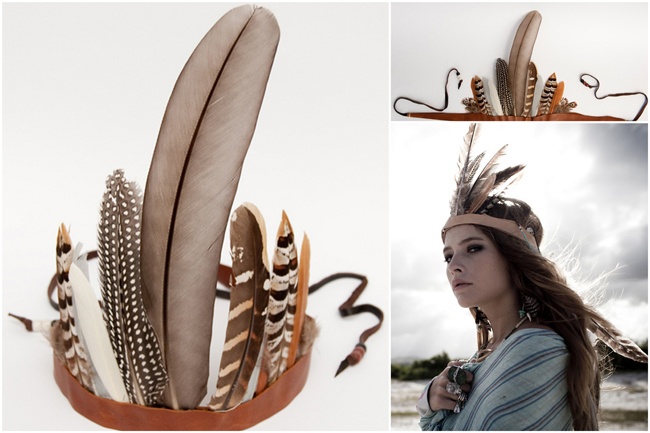
The most realistic would be an Indian roach made of feathers. The headdress can be assembled on a strip sewn from thick fabric, a rigid ribbon with a geometric pattern or a headband made of corrugated cardboard. The feathers should be real, at least 10 cm long. It would be a good idea to paint them in different colors. Manufacturing algorithm:
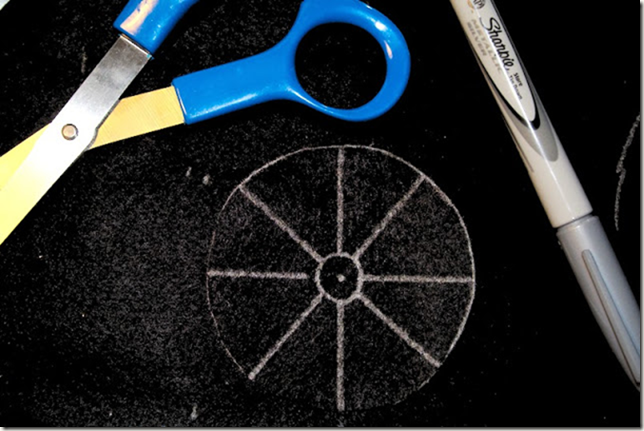
- We measure the circumference of the child's head.
- We choose a material to match the suit or paint the cardboard.
- We place the feathers on the strip and glue or sew them on.
- We hide the attachment point with beads, patterned ribbon, or colored paper.
- We make ties on the woven strip or insert an elastic band so that the roach stays on the head.
Before making an Indian headdress with your own hands, it is worth looking at photos of finished options.


Made of fabric
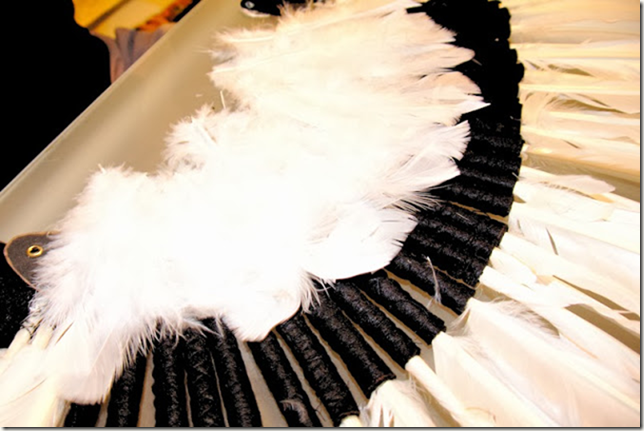
For another, more complex version of the Indian headdress in the War Bonnet style, you will need a tight-fitting Indian hat made of felt or other dense material. You can sew it yourself. To do this, take a strip of fabric 18-20 cm wide, slightly longer than the circumference of the head, matching the color of the costume. Sew the edges. Gather the top of the base on a thick thread and pull it together. You will get a hat. Step-by-step algorithm for making a roach from fabric:
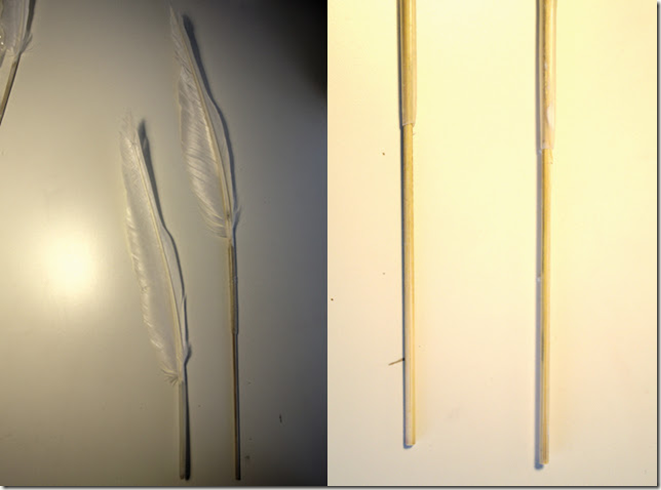
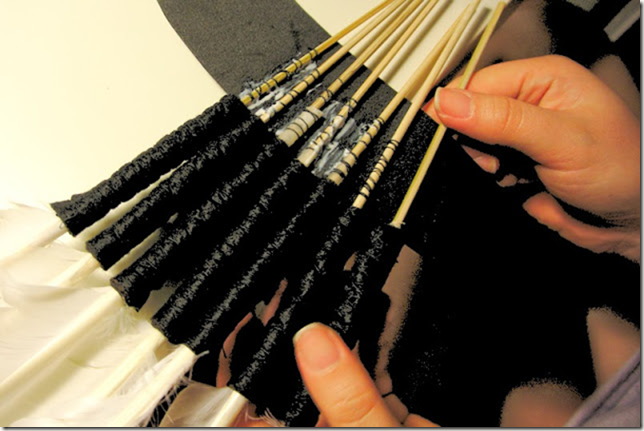
- We take long, stiff feathers of a bird (preferably tail feathers), straighten them over steam from a kettle, and smooth them out.
- We trim the tips and stems, aligning the feathers along the length.
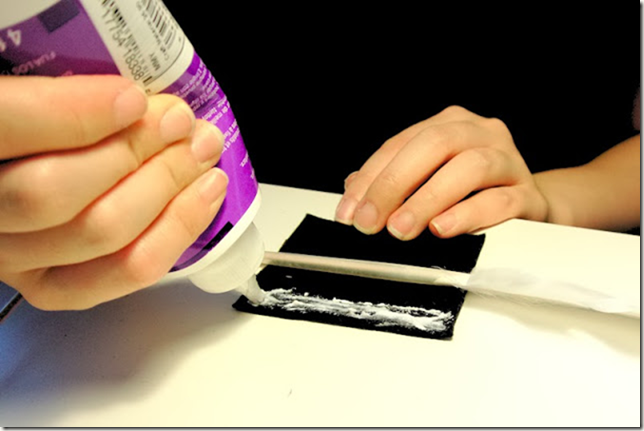
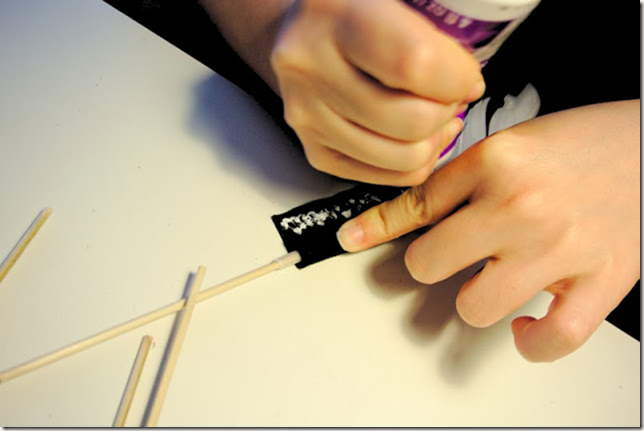
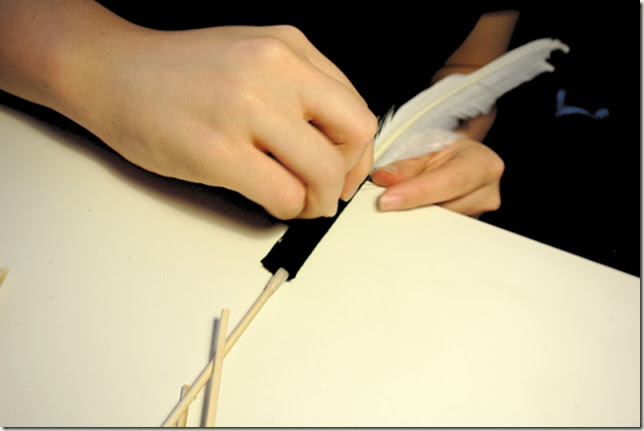
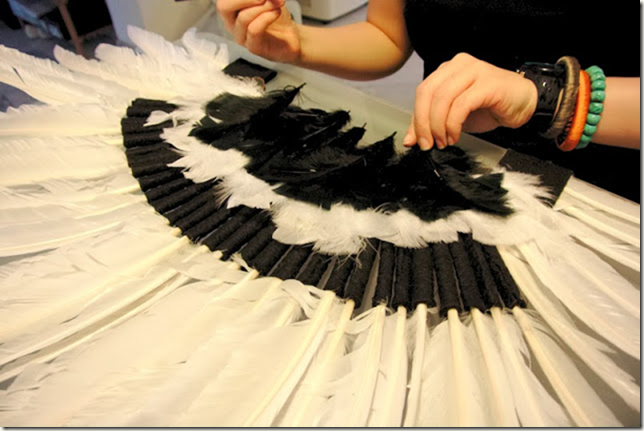
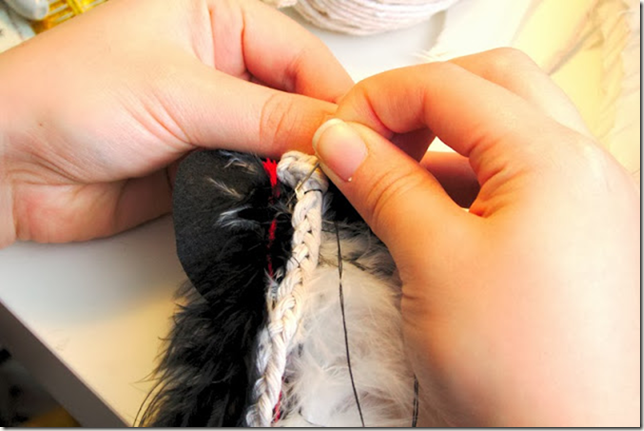
- We tie a thin cord 10 cm long on the stem of each feather and secure it with glue.
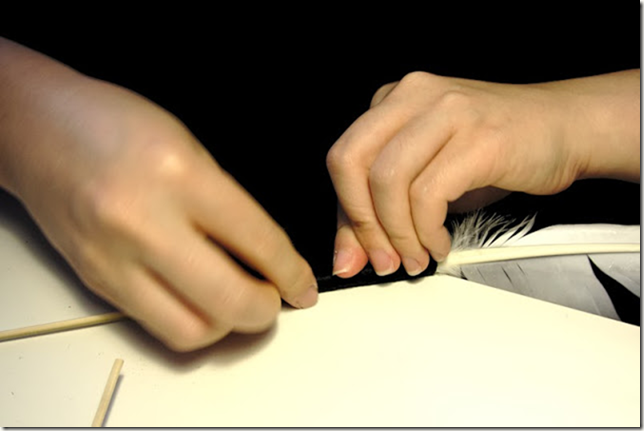
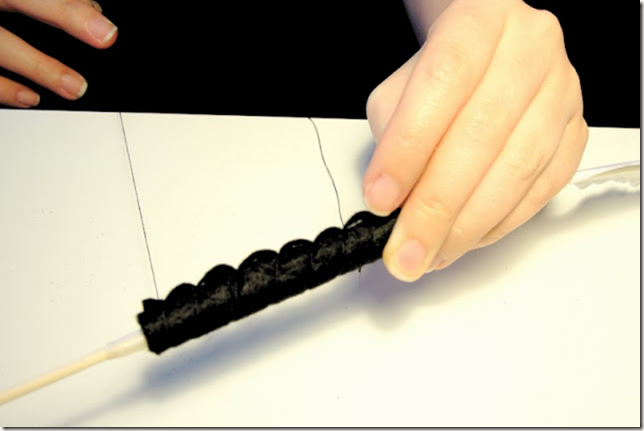
- We cut patches of bright fabric that matches the color of the suit, wrap the rods, leaving a loop. For strength, you can use glue.
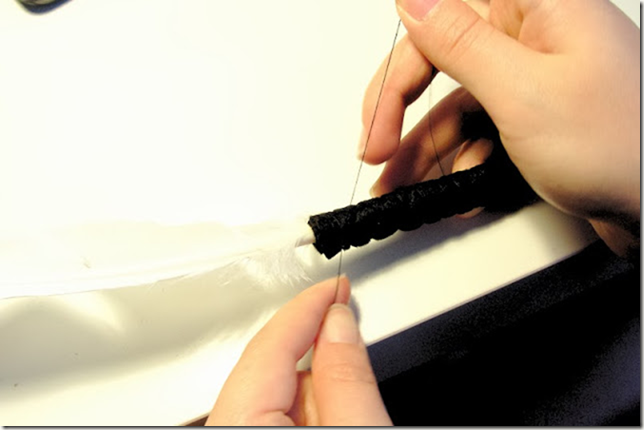
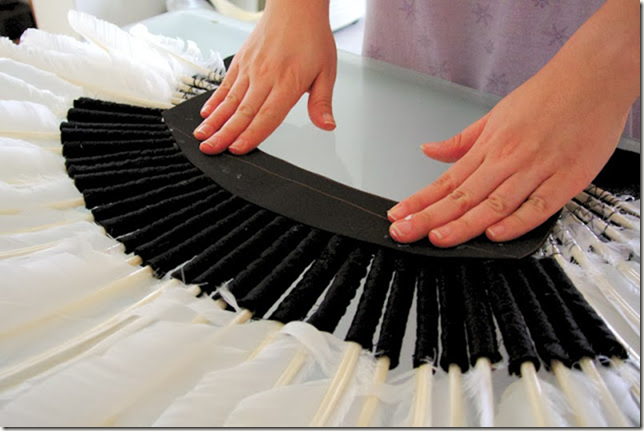
- We take a pre-sewn hat and make holes along its edge to attach feathers.
- We pass the cords through the cuts and tie them on the wrong side.
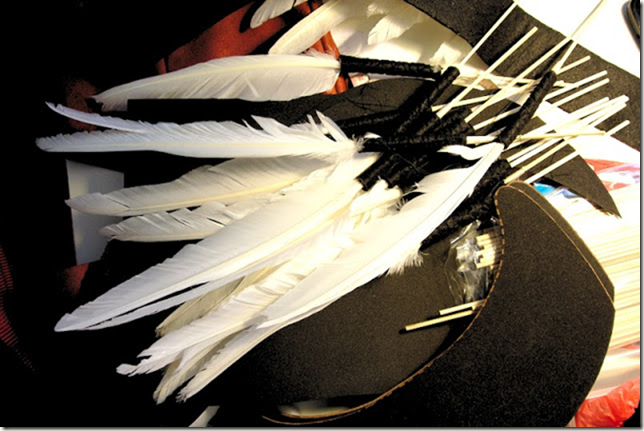
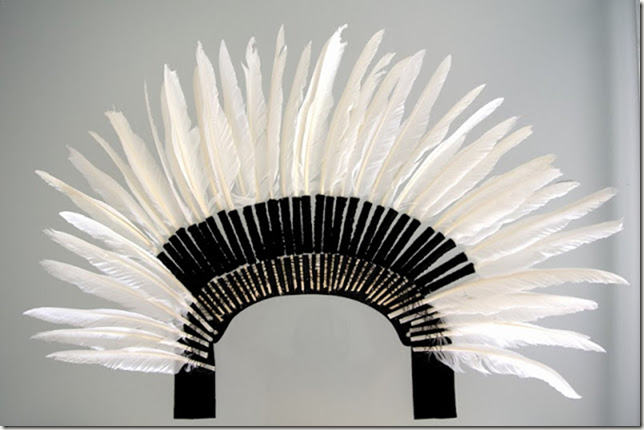
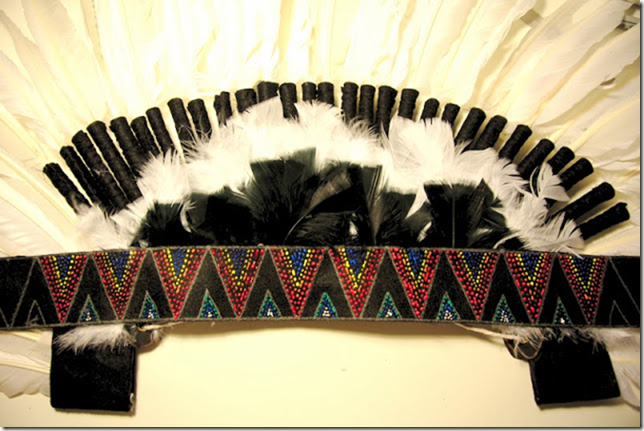
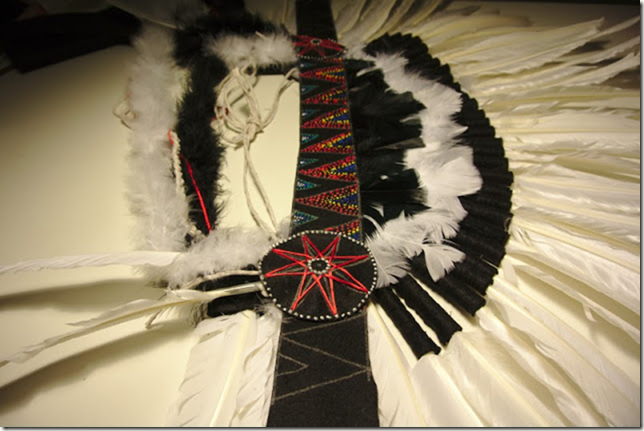
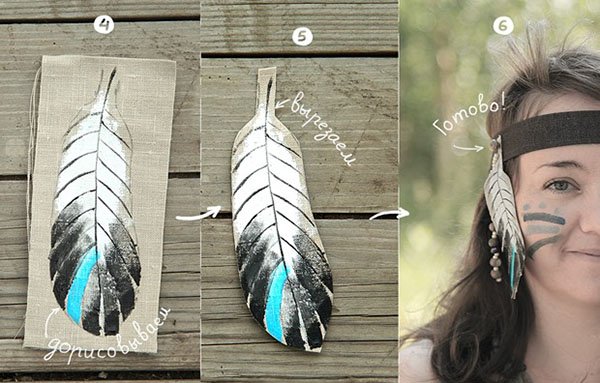
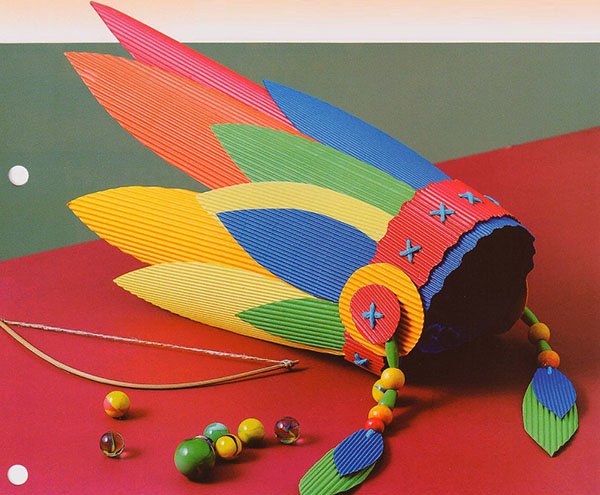
At the end of the work, we lay the feathers in a fan and complement the Indian roach with a bright forehead band. If desired, you can decorate the product with side pendants made of thin strips of fur, placing them in front of the ears. You will get a real Indian headdress.
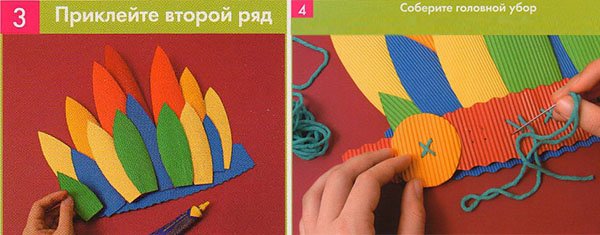
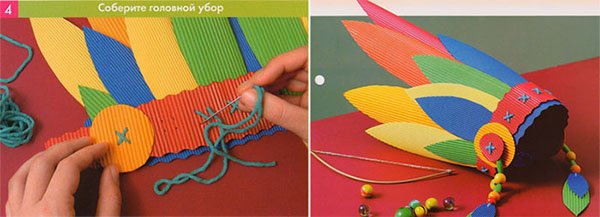
From paper
One of the materials at hand for making a roach can be ordinary paper. It should be thick and preferably tinted in mass. In addition to it, you will need scissors and glue for work. Creation algorithm:
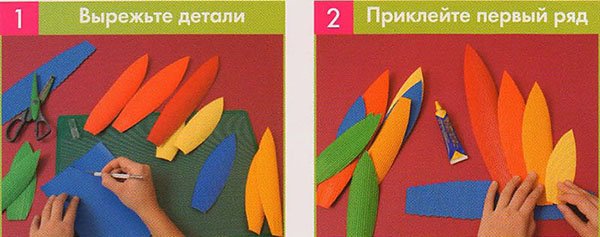
- We fold the paper like an accordion.
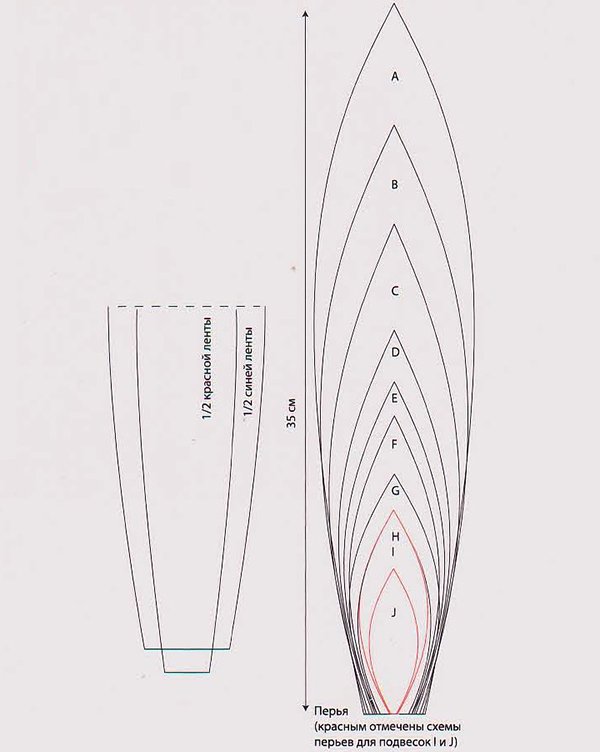
- From the blank we cut out a shape similar to half a feather. We leave 3-5 cm at the bottom for fastening.
- Cut the feather slightly from the top to the middle.
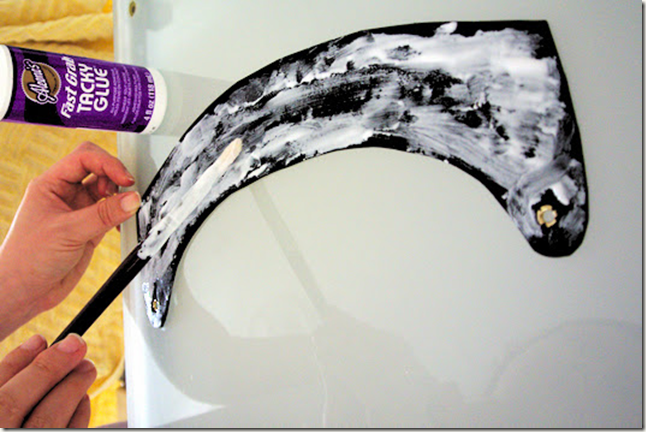
- We unfold the accordion, lubricate the attachment points with glue, and press it tightly against the cardboard headband.
- To hide the feather stems, decorate the headband with a strip of colored paper or fabric.
To make the roach look more fun, the feathers are colored with colored pencils or felt-tip pens. To complete the image of a real Indian, a boy can be given a battle hatchet or a spear, and a girl can wear ethnic bracelets on her hands. The child's face is painted with body paints, taking black, white, red and brown shades as a basis.
Video
https://youtu.be/l86qhT6kiRI