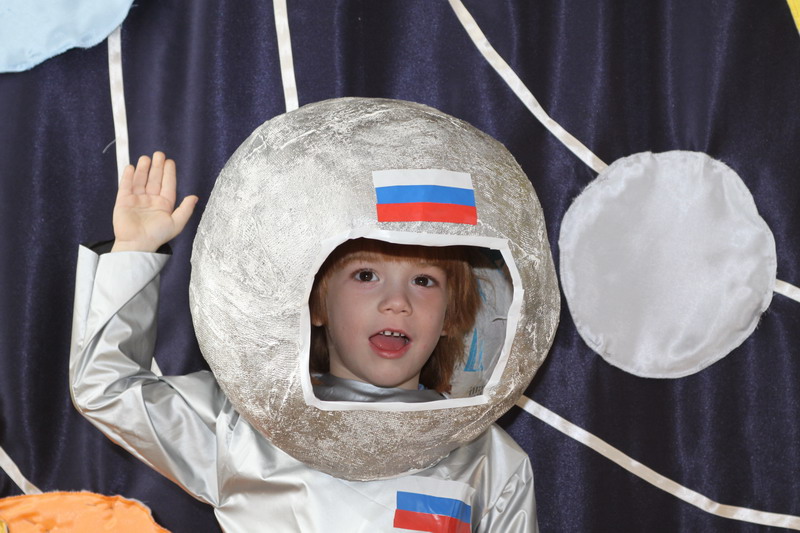
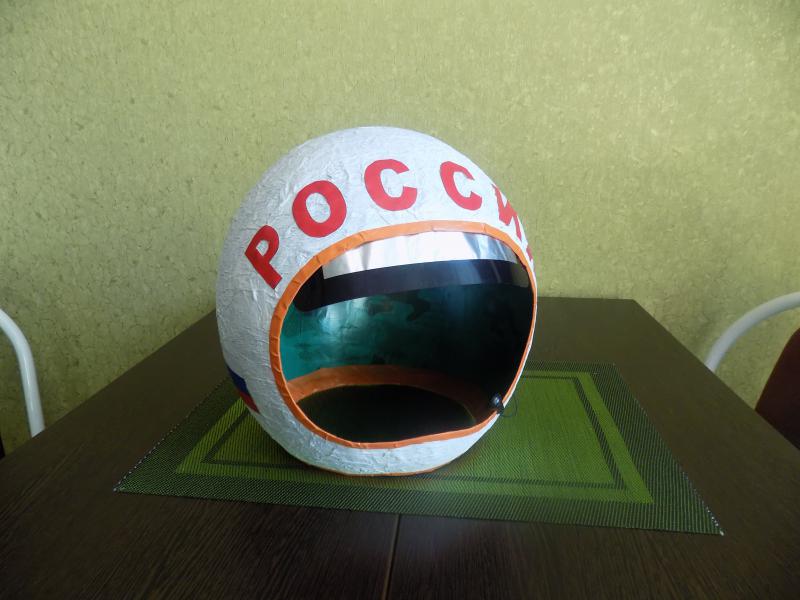
Almost every child dreams of becoming a pilot, a soldier, a ship captain or an astronaut. That is why costumes of people of these professions are especially popular. For a holiday or carnival, you can make an astronaut helmet with your own hands. This will be the final detail of the outfit. And the main thing is that mom or dad can do it together with the child.
Stages of work
Store-bought imitation helmets are bulky and heavy. They are not suitable for a child. In addition, they are very expensive. In order to make an astronaut helmet with your own hands, you do not need to buy expensive materials. All master classes contain instructions and a list of simple attributes that can be found in any craft store.
To make an astronaut helmet, you usually need PVA glue, a plastic bottle, a balloon, paper, cardboard, paints and other available materials. The process will not take much time, but will bring a lot of joy. Acrylic paint or gouache is used for painting.
For inscriptions, fade-resistant markers, felt-tip pens, and pencils are suitable. Watercolor will not give such bright shades. For additional decoration, you can use thematic stickers of stars, planets, and constellations.
From thermofoil
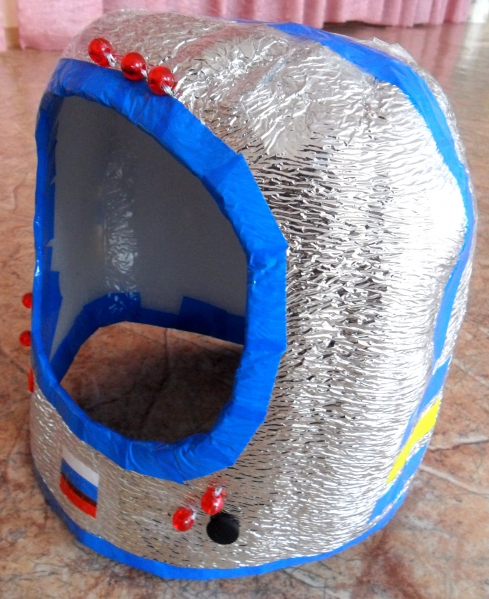
The astronaut costume is always complemented by a helmet. To make it, you will need foil insulation, scotch tape (colored and regular), a needle and thread, and beads. Then you need to follow the instructions:
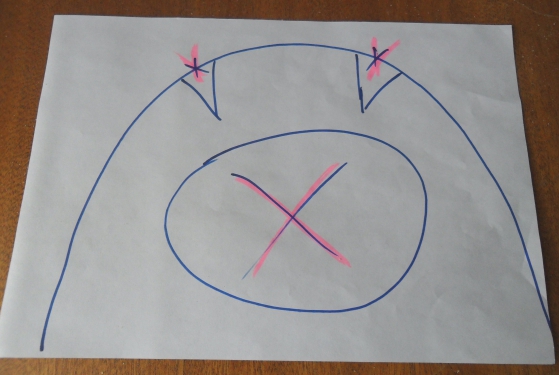
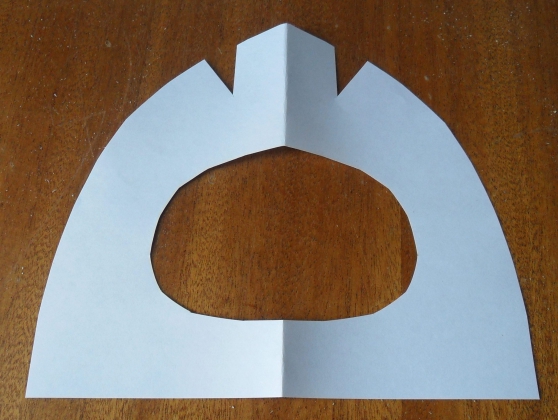
- The thermal foil is laid out on the table and the two halves of the helmet are marked out and cut out with scissors.
- Make a cut at the top so that when the halves are joined together, you get a round ball.
- On one half, make a hole for the face.
- At the top, the cut joints are sewn together to make the piece round.
- The halves of the helmet are connected with thread, the edges are covered with colored tape.
- Sew on beads.
You can additionally decorate the astronaut's helmet with colored tape (yellow, blue, red), imitate buttons and signal lights with it. From the second sheet you can create a spacesuit and armbands.
The astronaut's helmet made of thermofoil is interesting because it gives a metallic shine, but at the same time remains soft. To attach the parts, you can use a stapler; due to the thickness of the material, the staples are deeply recessed. The finished product can be used for children's games; it is not necessary to wait for the carnival.

From papier-mâché
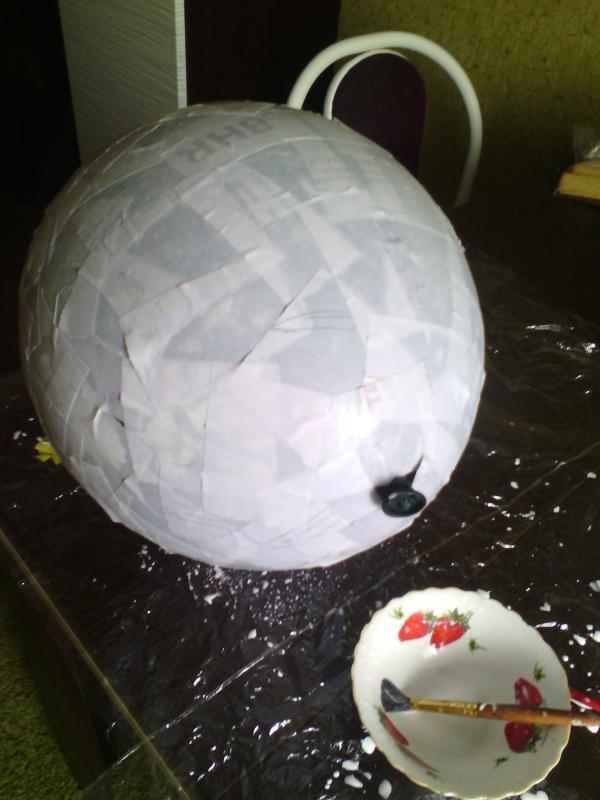
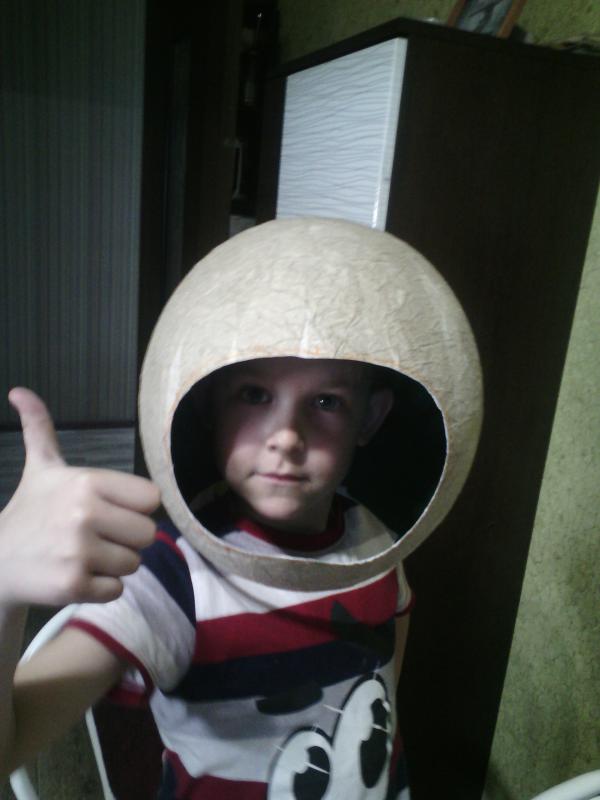
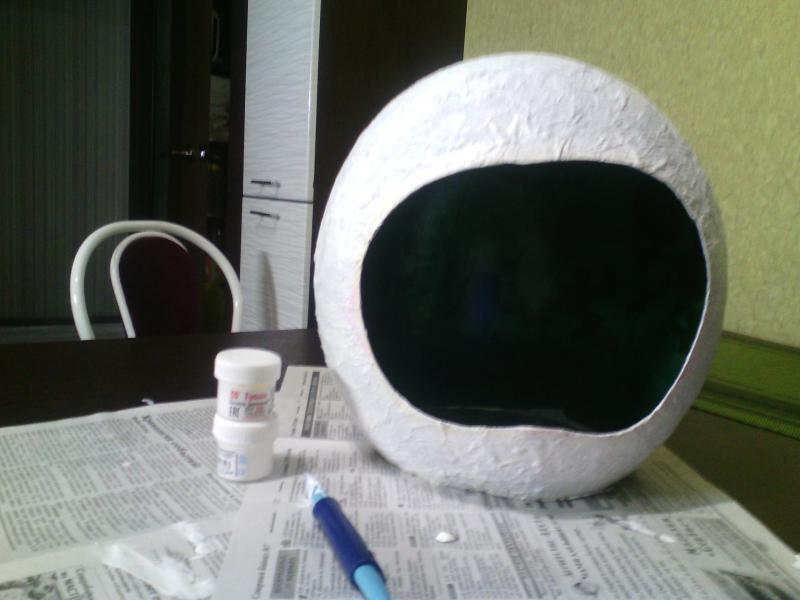
An interesting way to spend time with your child is to make something together with your own hands. To create an astronaut helmet for children from papier-mâché, you will need a balloon, glue, newspapers. Then you need to follow the instructions:
- The balloon is inflated so that the base is larger than the baby's head.
- The newspaper is torn into pieces of 3-4 cm.
- The mixture is diluted with 1 part water and 1 part PVA glue.
- The first layer of newspaper is placed on the ball, wetting the paper only with water.
- The next 5 layers are glued with a diluted composition.
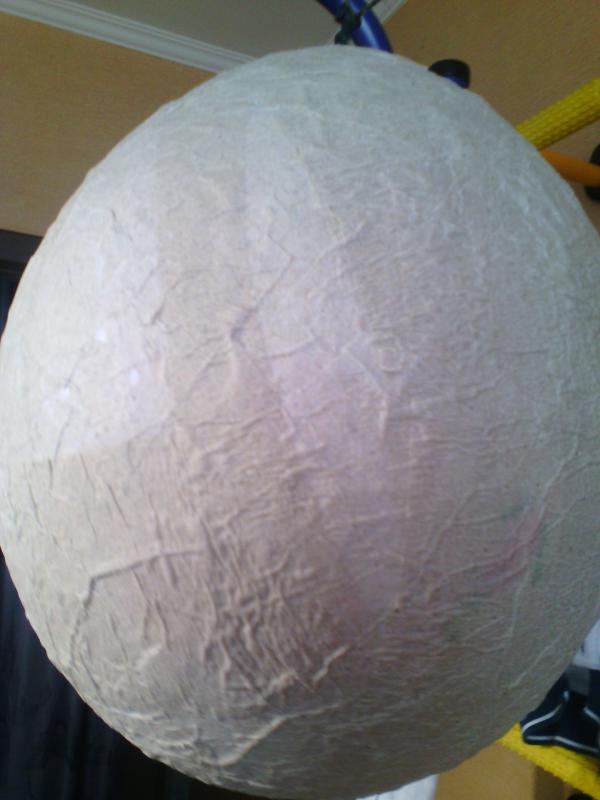
- After the newspapers have dried, the ball is pierced with a needle.
- The bottom part is cut out so that the child can easily put on and take off the product.
- The porthole is made from part of a 5-liter plastic bottle.
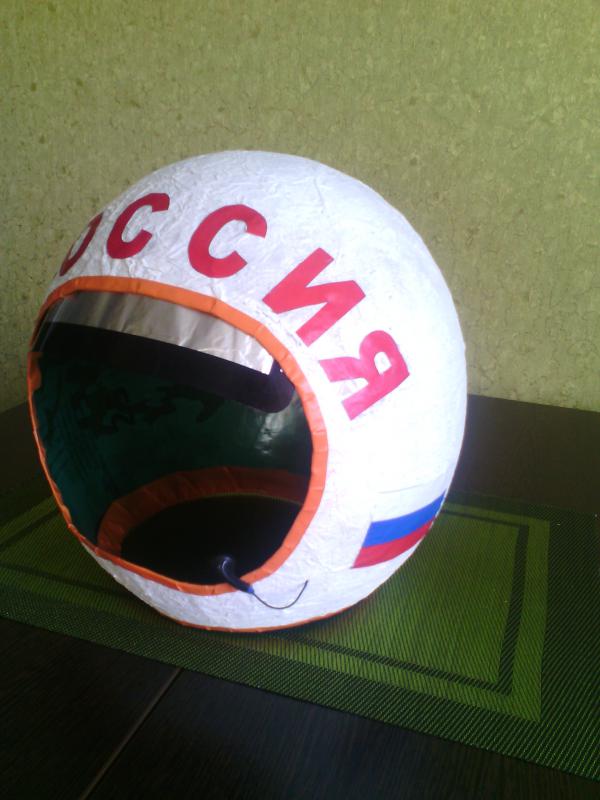
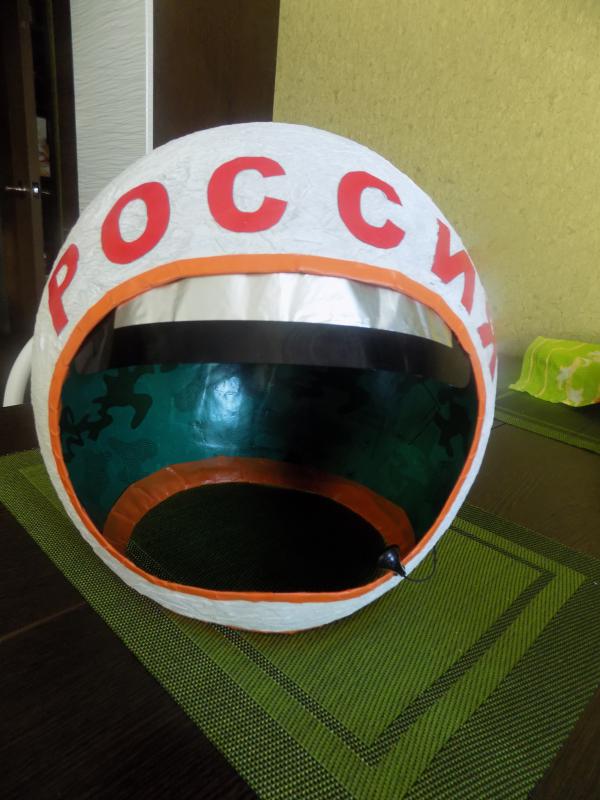
To finish the job, you can decorate the helmet. Using colored tape or paint, add inscriptions, draw buttons and icons.
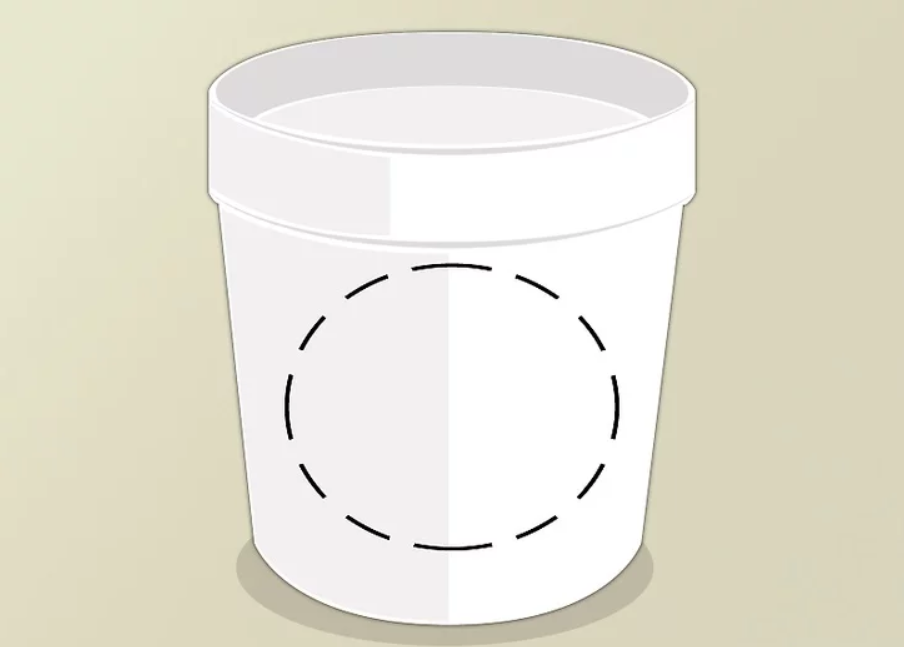
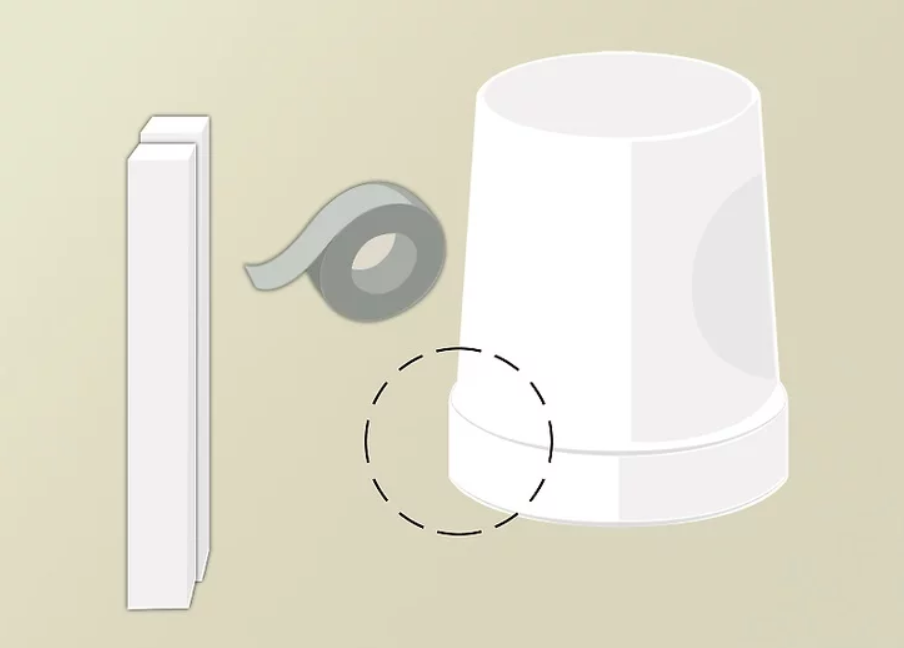
From a plastic bucket
A plastic helmet for an astronaut suit can be made from an ordinary bucket measuring 18 x 13 cm. Working on such an element is quick and easy, and the product looks great in the end. Step-by-step production:
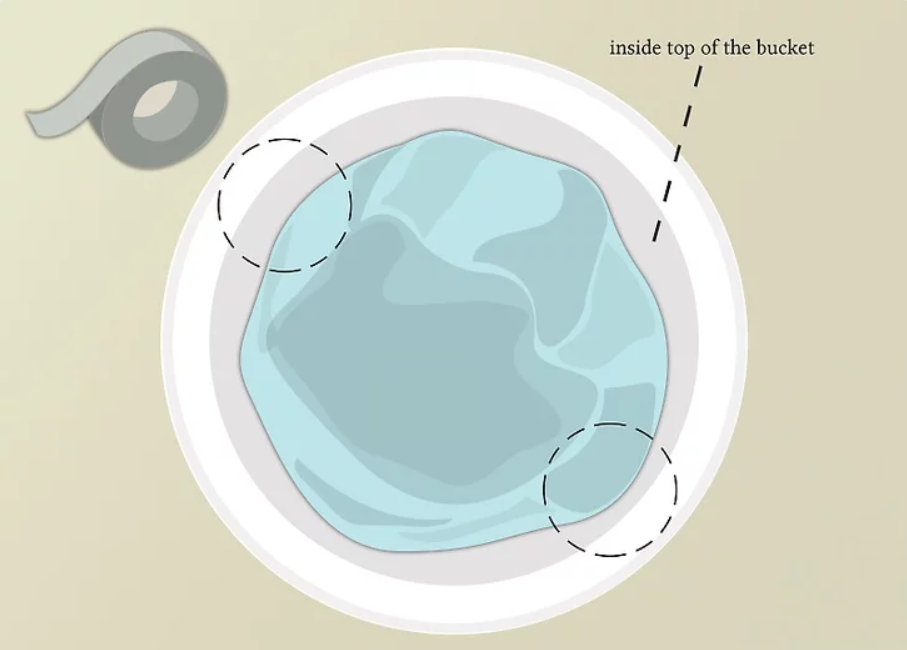
- Draw the approximate location of the porthole window on the bucket with a pencil. If you plan to decorate it further, you can mark it with a marker.
- They try on the future helmet and check that the opening is at face level.
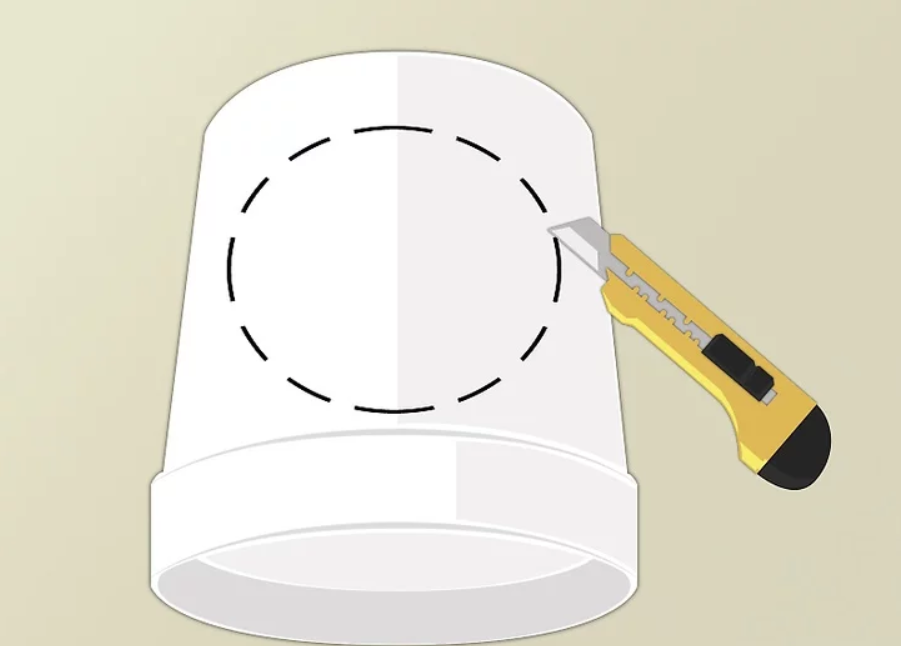
- To make cutting easier, the nail is driven in several times along the contour and pulled out.
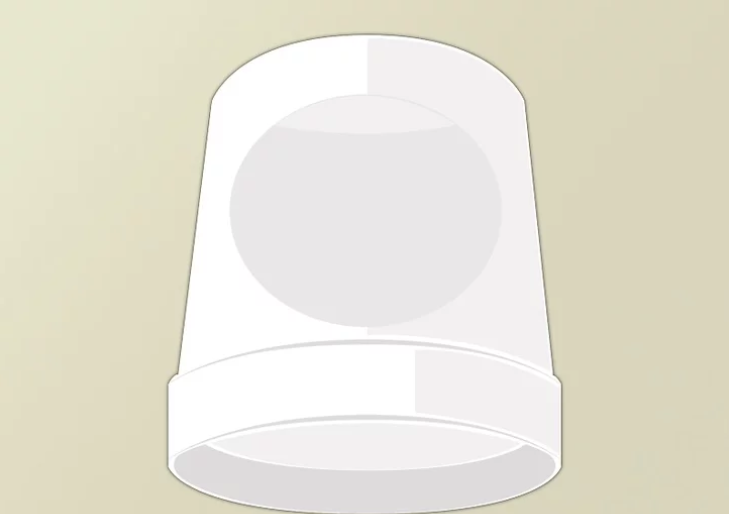
- Make a hole with sharp scissors. Cover the sharp edge with masking tape.
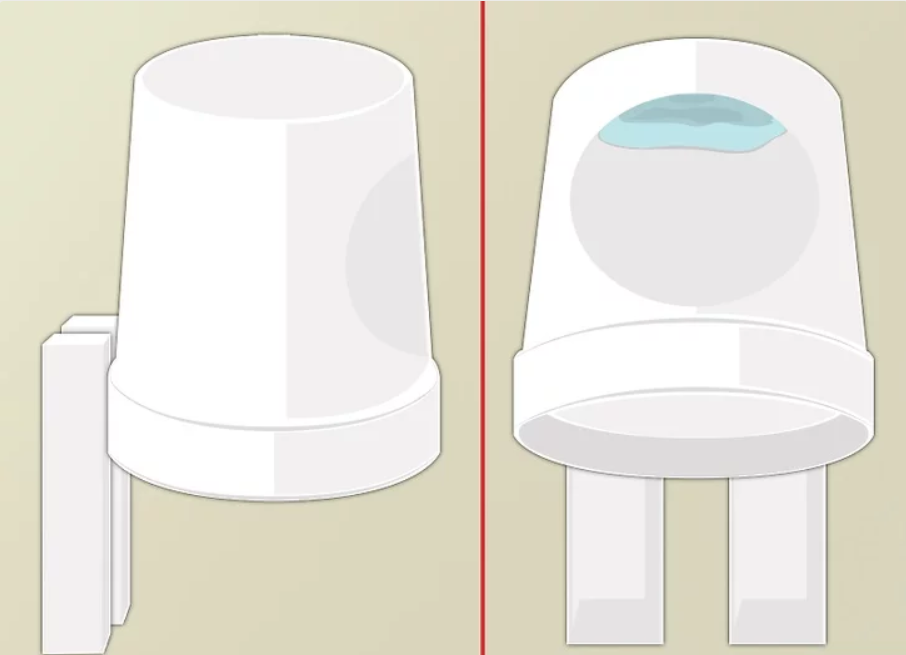
- Two strips measuring 5 x 23 cm are cut out of foam plastic. The corners are rounded.
- The strips are glued so that they go over the shoulders at the back. This will ensure a secure fit.
- A clean towel is attached to the bottom of the bucket from the inside to avoid discomfort when wearing it.
To make the helmet look realistic, you can paint the finished product with durable paint or wrap it in foil. The latter option is easier. If everything is done correctly, the structure should fit tightly on the head.

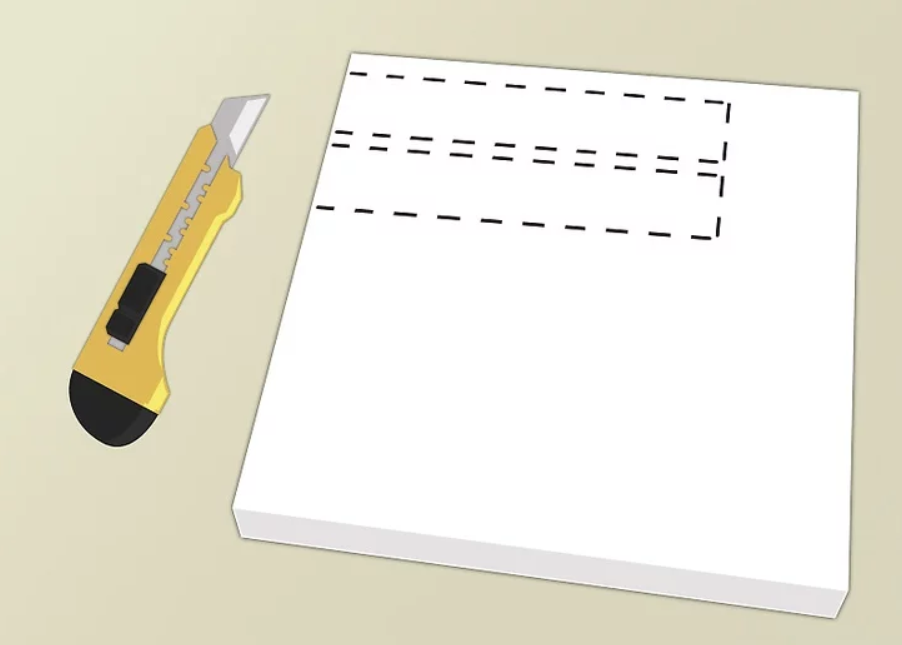
From cardboard
Many parents are interested in how to make a helmet quickly. If there is no time to mess around with papier-mâché, a plastic bucket or there is no thermal foil, then you can assemble the product from a cardboard box in a few minutes. For playing with a child at home, it is enough to simply cut a hole for the head and a porthole window. But you need to spend time to create a helmet for a festive costume. For this:
- Use a sheet of cardboard or lay out a box.
- Roll the cylinder carefully, paying attention to the edges.
- Glue the edges of the cylinder together and cut off the top part, which is higher than the crown.
- Make a circle from a new sheet equal to the top hole and glue it.
- They cut out a window and seal the edges with tape.
Cardboard is very easy to decorate. A parent can make a base and give the child the product for decoration. Pencils, paints, markers, stickers will do. You can also use such a material as foil for decoration.
If you need to make the most authentic astronaut helmet from a cardboard box, then before painting, the surface is primed with PVA glue in several layers. Let it dry and apply white or silver paint. This way, the product will look more interesting and will last much longer.
Useful tips
To ensure that the space helmet fits, you need to measure the circumference of your head so that the tape measure runs along the protruding part of your forehead and the back of your head. All measurements must be taken without taking into account the nose (there is a porthole on the product), otherwise the helmet will be too big.
Before you get to work, you need to prepare the tools. Among them, there must be tape, glue and decorative elements. Everything else depends on the technology used to make the helmet. In order to achieve similarity with the real prototype, the finished product can be painted white or silver, decorated with blue and red stripes, and a flag can be glued on.
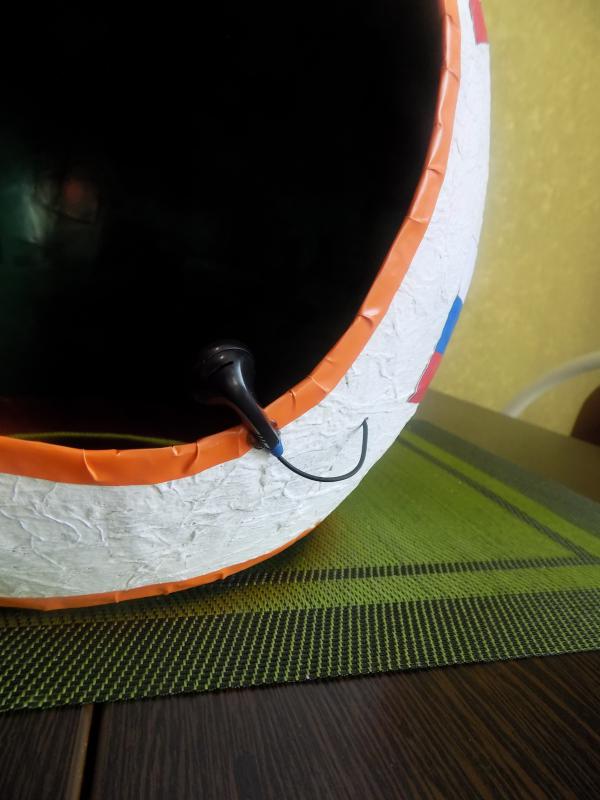
The helmet is part of the spacesuit, so it must eventually be attached to the carnival costume. Wires and corrugated tubes are often used for this. You can create the product yourself together with your child. For kids, such an action will be exciting and educational.
Video