A cape dress is an original model created by combining a classic basic dress and a cape with side slits. The result is an unusual stylish creation that combines femininity and functionality. The guide on how to sew a cape dress contains the nuances of creating a pattern and a step-by-step description of the sewing process. It is imperative to study it before making the outfit.
Materials and tools
The choice of material largely depends on the model of the outfit. Light flowing fabrics are for summer or spring warm weather, soft fabrics of medium density are for creating a casual look. Depending on the chosen material, completely different types of cape dresses are obtained:
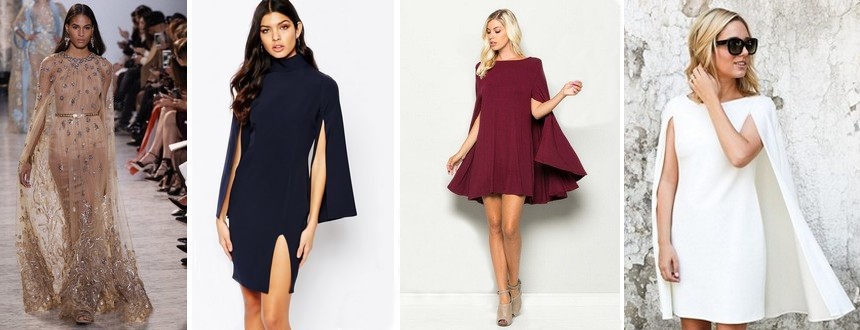
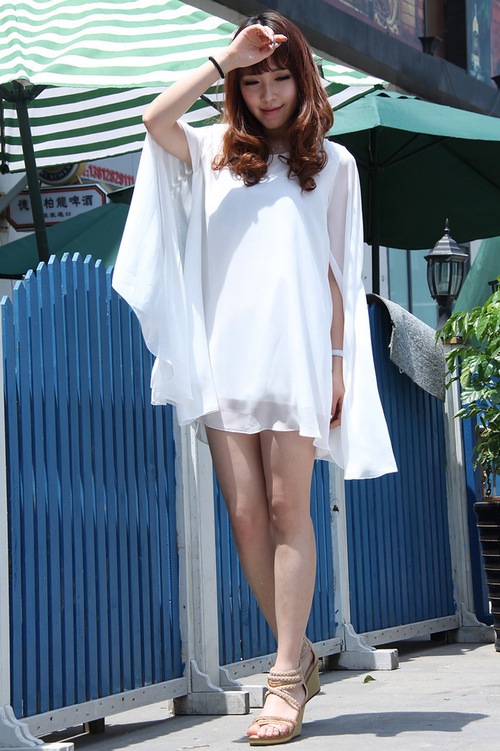
- Romantic models made of chiffon, silk, viscose are a real salvation in the heat. The fabric will protect you from sunburn and at the same time will not allow overheating. Such a dress will be comfortable, and the sophisticated image created by the fluttering "wings" of the cape will make an impression. The length varies from maxi to mini. The cut is a loose silhouette.
- The hooded version is a stylish improvisation of a medieval costume. It is sewn from medium-density fabrics: knitwear, soft wool, cashmere, jersey. The length is most often to the floor, but there are also practical models to the middle of the knee. It is made in the form of a trapezoid or A-silhouette.
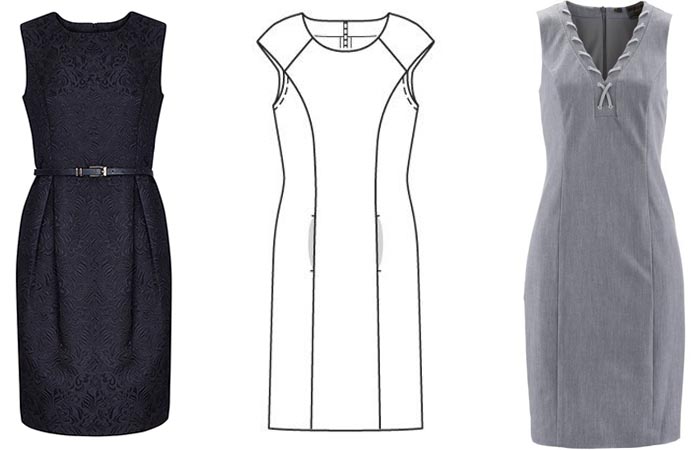
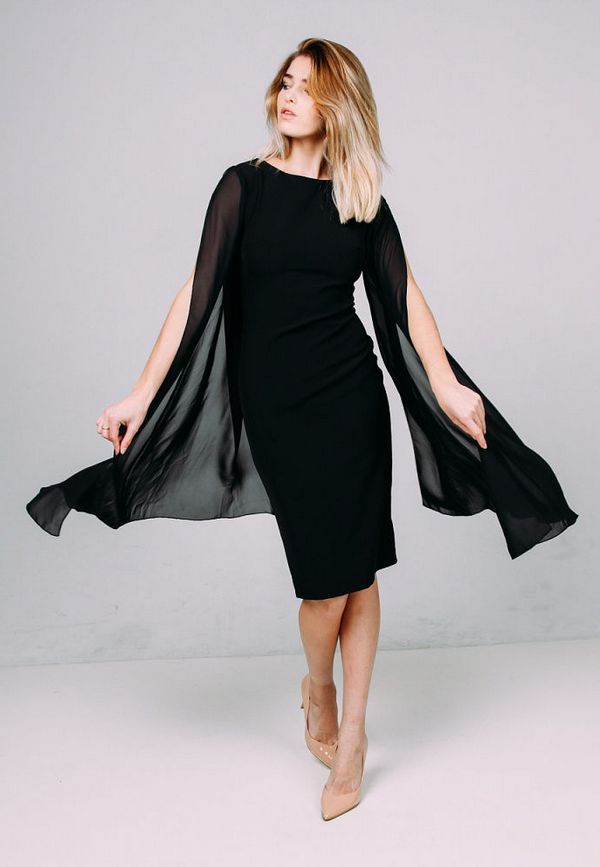
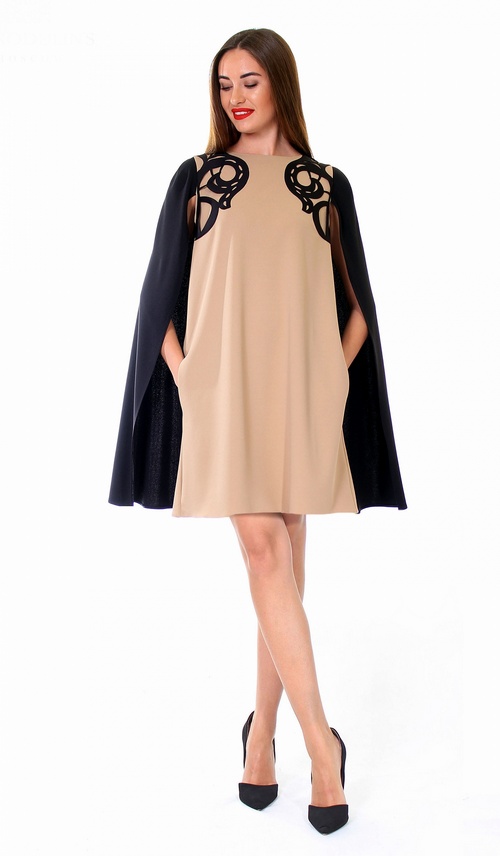
- A case with a sewn-in cape will emphasize the figure and taste of its owner. Strict silhouette, laconic design, minimum decorations - this option is quite suitable for a business woman. It is made of thick fabric that holds its shape. Length - midi.
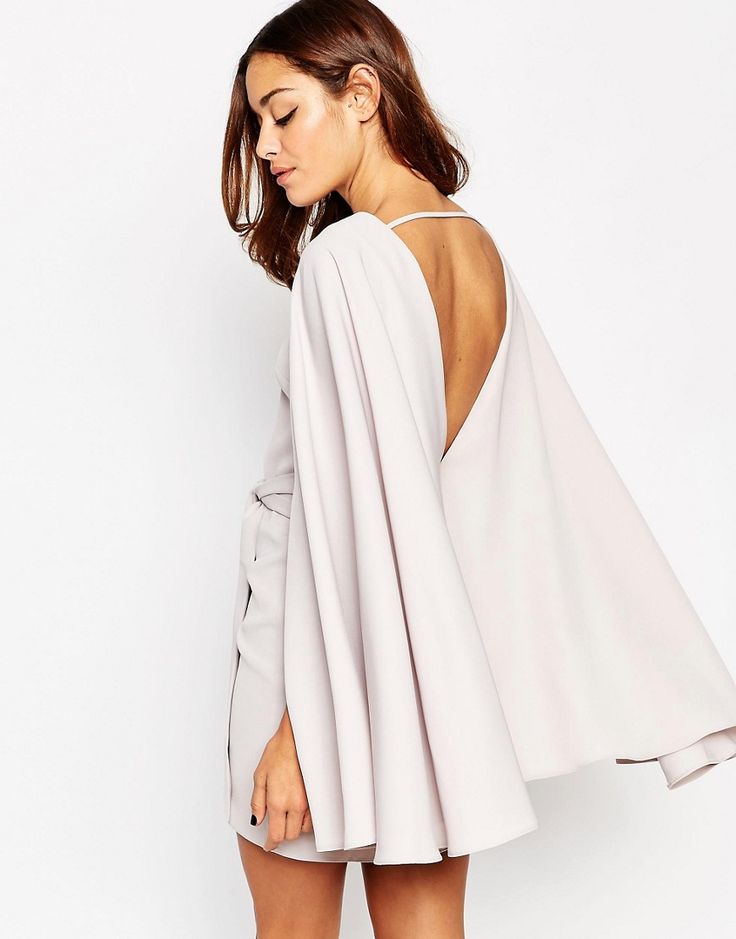
- The cape dress stylized as a transformer is a model with a wrap at the waist. The wide lapels of the cape are transformed into a hood, a voluminous collar or a flounce, beautifully revealing the shoulders.
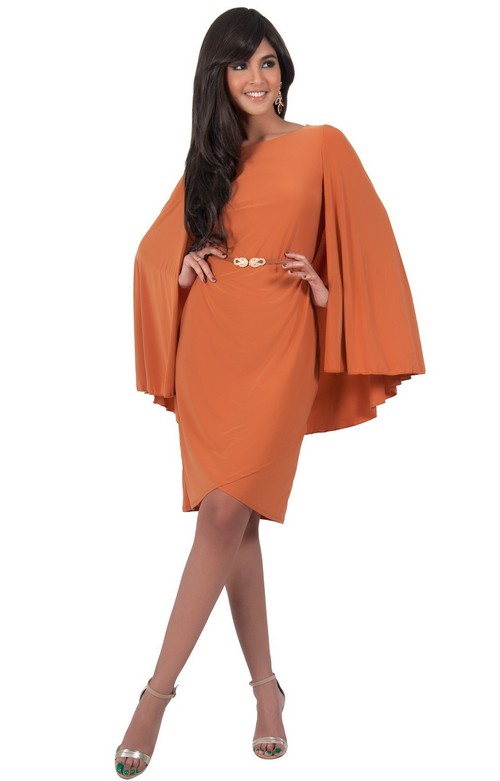
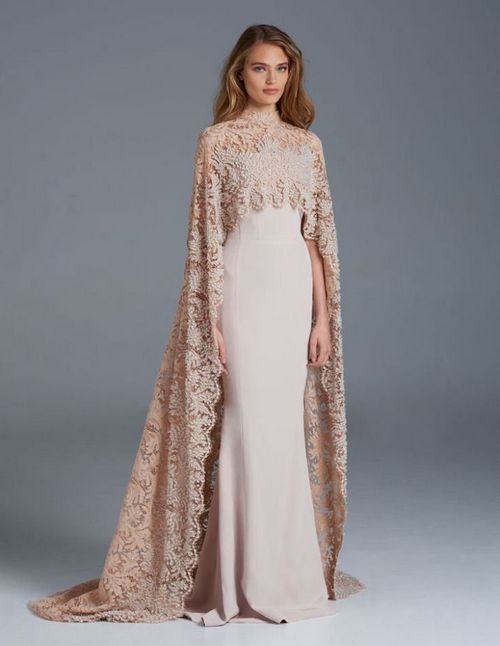
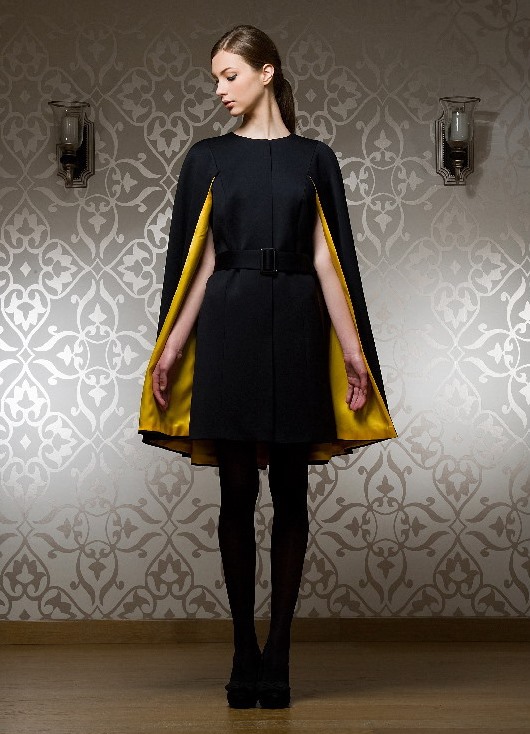
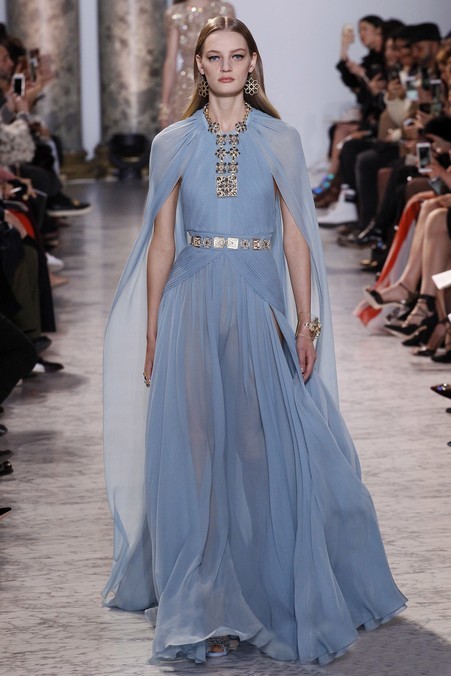
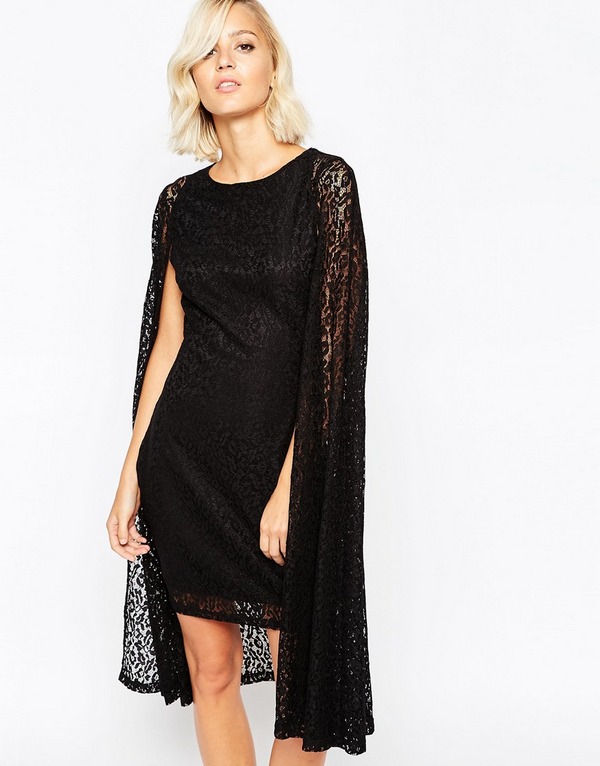
- A floor-length dress made of thick fabrics with a rich texture (satin, brocade, taffeta, velvet) is a worthy outfit for going out. Decorated with lace, embroidery, rhinestones. Sewn in the form of an A-silhouette or fitted.
- A translucent version made of organza, thin chiffon, tulle is necessarily complemented by an opaque underdress, tight or loose-fitting. The cape in this case can be removable, so the product can be worn in two versions: together and separately.
The tools needed for sewing are a basic set for every seamstress, which includes a meter, a ruler, scissors, a sewing machine, and an overlock. You will also need pins, threads with needles, and chalk. To create even seams, you will need adhesive tape and an iron.

Necessary measurements
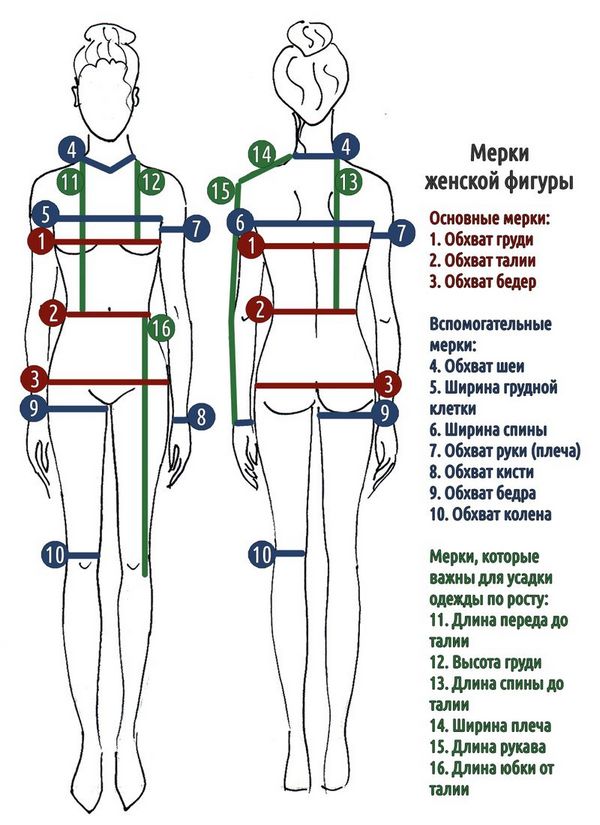
Before you start sewing a cape dress, you need to take measurements. Measurements are taken strictly on the naked body; for convenience, you can mark the main points with washable mascara. The pose is natural. For the simplest one-piece style, you will need several measurements.
- Half-girth length of the neck: the tape measure should fit loosely, without restricting movement or causing discomfort. The measurement is taken with a tape measure in the area of the seventh cervical vertebra, crossing the base of the neck, closing in the jugular notch.
- The shoulder length is measured from the neck to the shoulder drop.
- Sleeve length is measured from the point of the shoulder joint to the wrist bone.
- Total length of the product along the back: from the base of the neck to the knee (or mid-thigh).
- Overall length of the front.
- The waist length is necessary to know where to make the belt loops.
All measurements must be recorded. For convenience, you can use abbreviations: POSH (half-girth of the neck), DP (shoulder length), DR (sleeve length), ODS (total length along the back), ODP (total length along the front). If the dress has a hood, then the above measurements are supplemented by the height and head circumference.
Calculation of material taking into account the length of the product
The consumption of material depends on the cut of the chosen length of the future outfit, the characteristics of the fabric itself: texture, pattern, width. For a one-piece cape dress, it is better to take fabric 150 cm wide. Usually the length of the sleeves is added to the total length of the garment, but in this case they are replaced by free slits for the arms. The free cut style assumes the use of a cut equal to the length of the dress multiplied by two. It is necessary to leave the necessary allowances, not less than one centimeter. For convenience, there are tables with standards for fabric consumption for different types of products.
In cases where the style includes pockets or complex elements such as a transformable collar, it is necessary to take up to 40 cm in reserve. The same applies to the hood.
The material consumption depends on the size of the garment. For a cape dress of size 44-48, one-piece style with a hood and a total length of 106 cm, you will need three meters of fabric 150 cm wide. In the case where the cape is cut out separately and then sewn on in the shoulder seam area, the consumption is one meter more (with a width of 150 cm). It is better to use soft material of medium density.
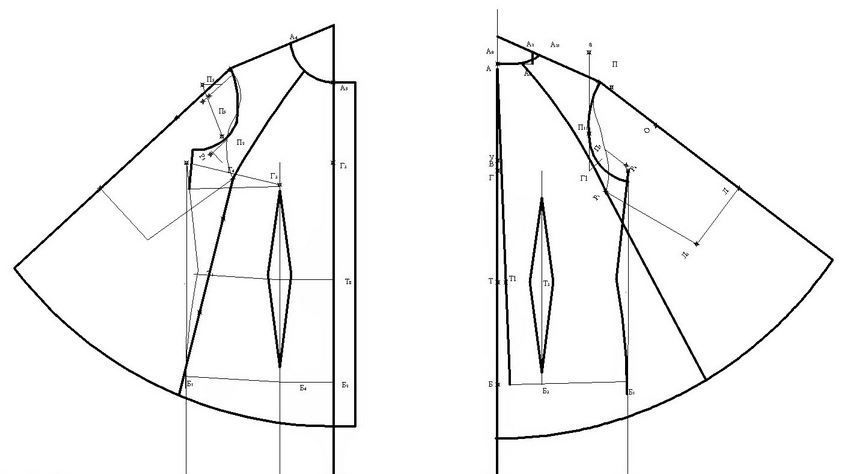
Construction of the pattern
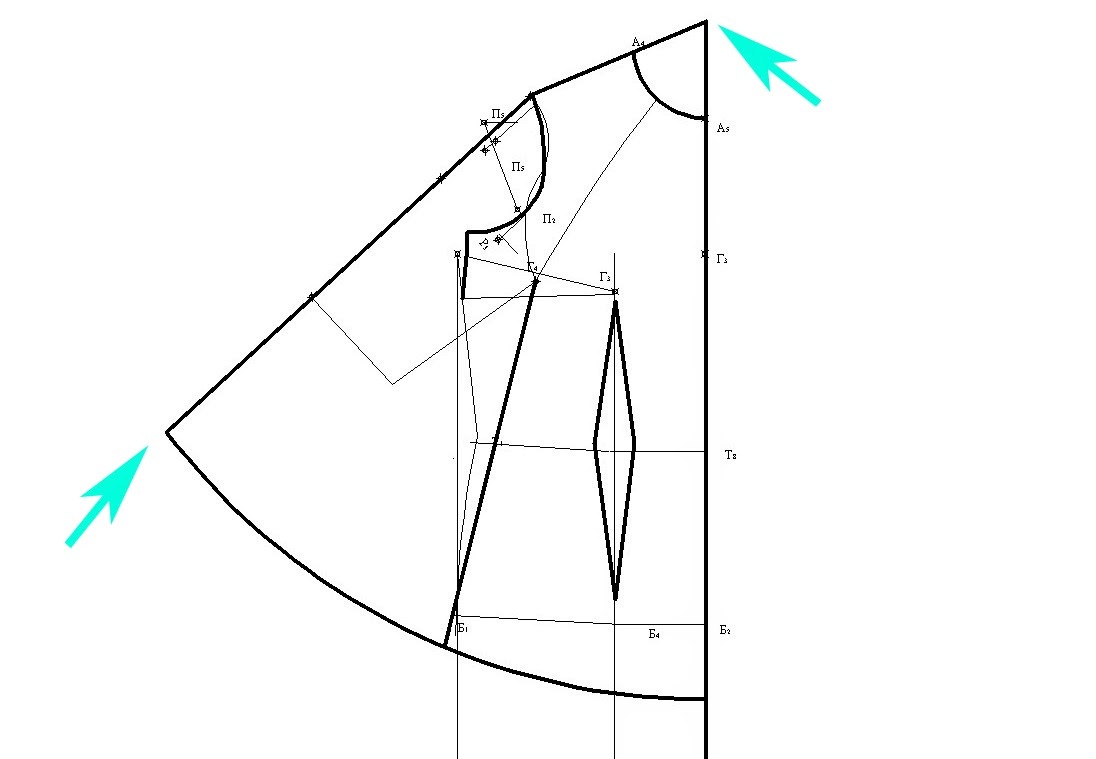
The style of a one-piece dress practically does not require a pattern. This is an option for beginners. The second most difficult type is a combination of a straight dress without darts and a classic cape with slits for the arms. The construction of such a pattern can be divided into 2 stages - creating a diagram and transferring it to the fabric. To do this, you need to perform several actions:
- Take measurements: neck, chest, hips, waist, front and back length to waist, shoulder and hip height, armhole depth, shoulder length.
- On a sheet of paper for the pattern, make an indent of 10 cm from the top edge, put a point, for example, A. Four marks are laid down vertically: the depth of the armhole, the length of the back at the waist and the entire product at the back, the height of the hips. It is more convenient to mark with dots: AG, AT, AN and TB.
- Draw horizontal lines from the obtained points (G, T and H, B) from the initial point (A).
- From G, measure a distance equal to half the chest circumference, put a mark G1. Through it, draw a vertical line down until you get intersections with the lines - points T1, H1, B1.
- From point G, the width of the back is measured to the right, obtained by dividing the chest circumference by 8 cm plus 5.5 cm – mark G2. From it, draw a perpendicular line up to the intersection AA1.
- From G1, measure to the left a distance equal to a quarter of the chest circumference minus 4 cm, obtaining G3.
- The center line of the armhole can be obtained by dividing Г2Г3 in half. In the middle, put a mark Г4. From it, a perpendicular goes down to the segment НН1.
- The neckline is measured at a distance of 1/6 of the neck circumference plus 1 cm.
- The shoulder lines on the back and front are constructed by setting off arced lines from points T and T1 with a radius equal to the height of the shoulders on the back and front minus 1 cm.
- Next, construct the back and front parts, putting aside the corresponding measurements.
The resulting pattern is cut out into pieces and transferred onto the fabric.
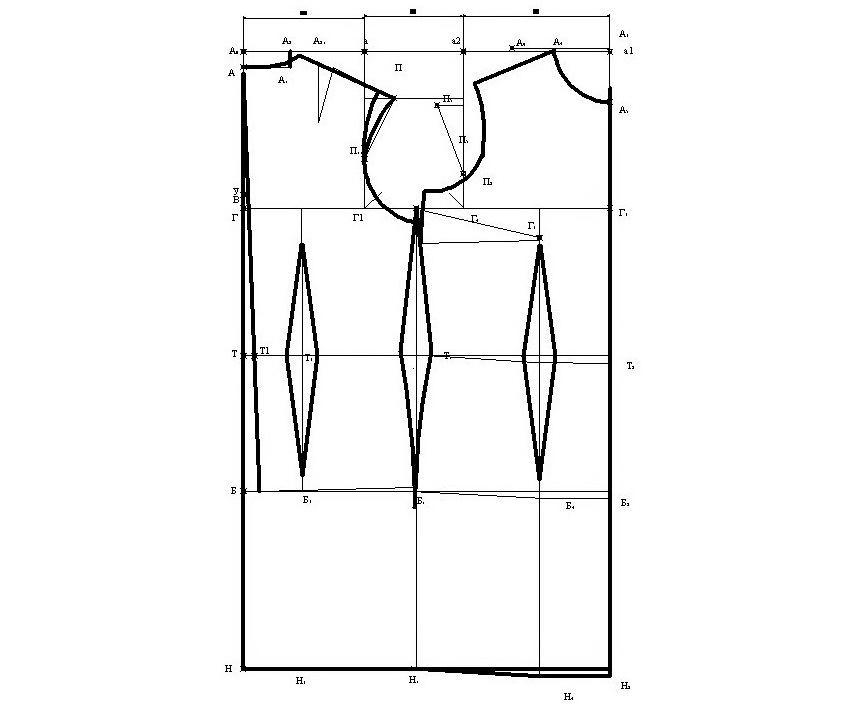
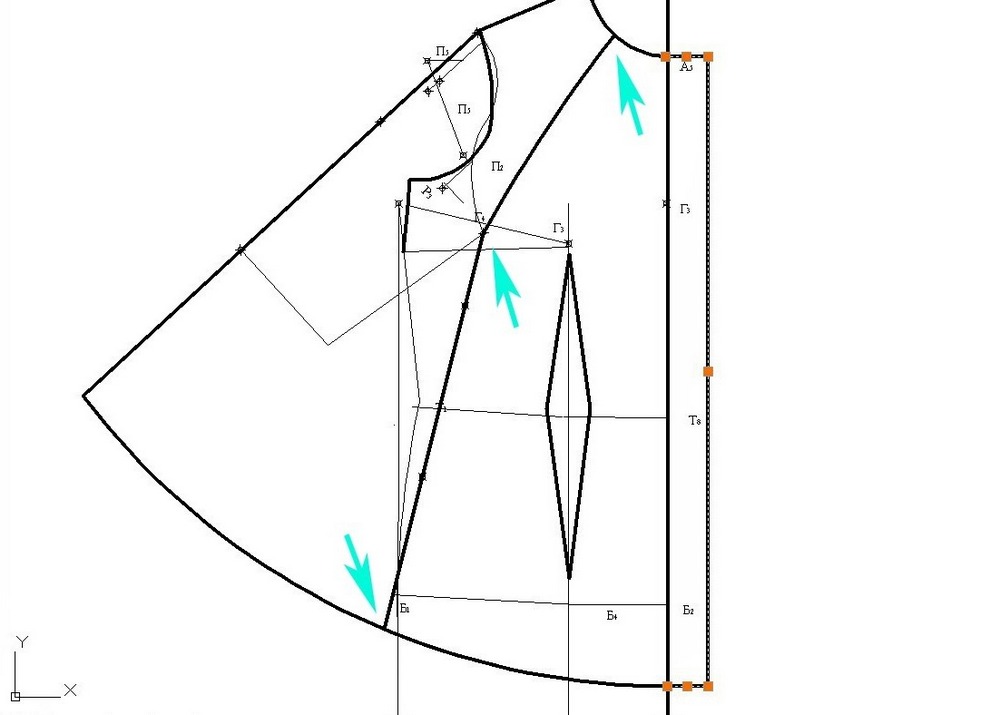

If the fabric is elastic, it is necessary to enter negative allowances. Otherwise, it is necessary to take into account the standard seam allowance of 1.5 cm.
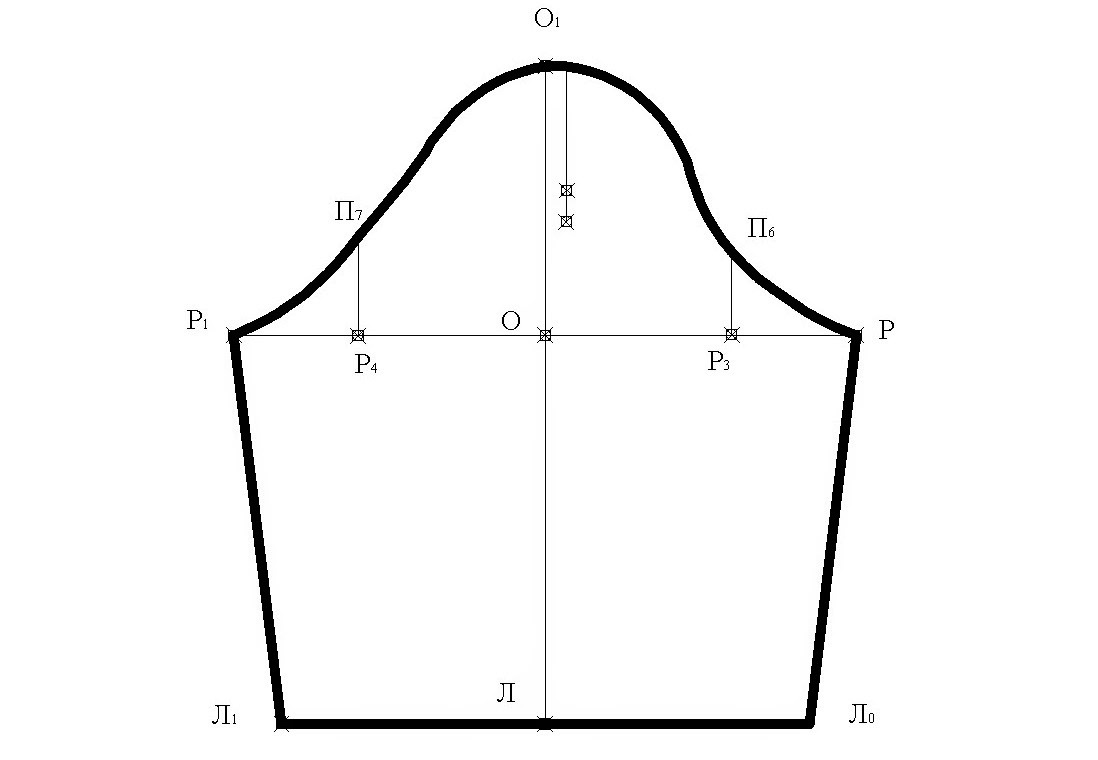
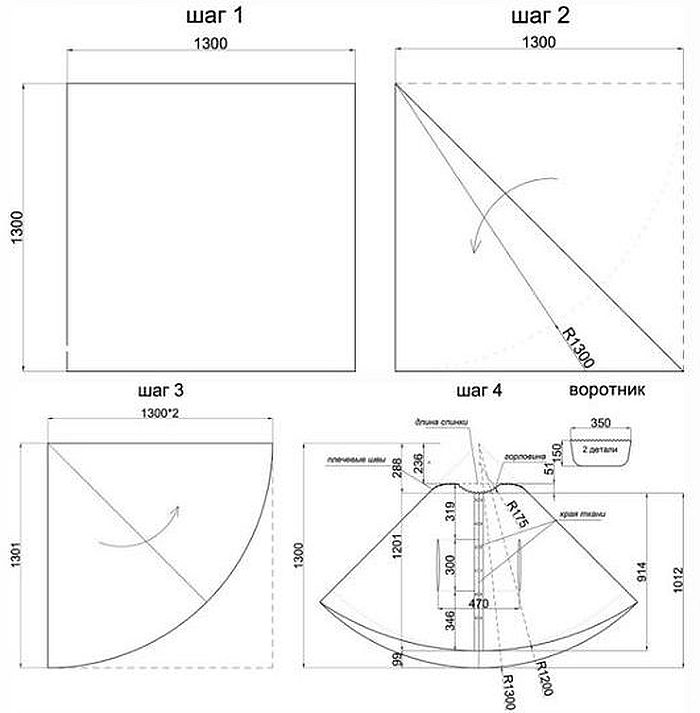
The pattern for a cape with slits is built directly on the fabric, without using tracing paper.
- A piece measuring 130 x 260 cm needs to be folded in half to form a square. Fold again into a triangle.
- Measure a radius of 130 cm from the top of the structure, cut off the excess. You will get a wedge, like for a sun skirt. The edges of the fabric need to be moved to the middle.
- Measure the length along the back, mark the neckline and shoulder seam.
- On the front, measure 5 cm in each direction, mark a vertical line and remove excess fabric to reveal the inner dress.
- Make the arm slits at a comfortable distance, to do this, try the blank on yourself, mark the points. The length of the cut is 30 cm.
The pattern is ready, all that remains is to stitch and sew. Instead of collar details, you can make a hood pattern. Another option is a collar, which looks like something between a voluminous collar and a hood.
Sewing stages
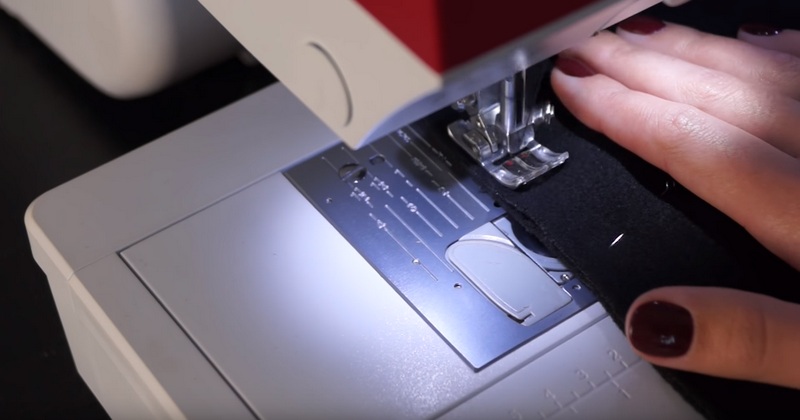
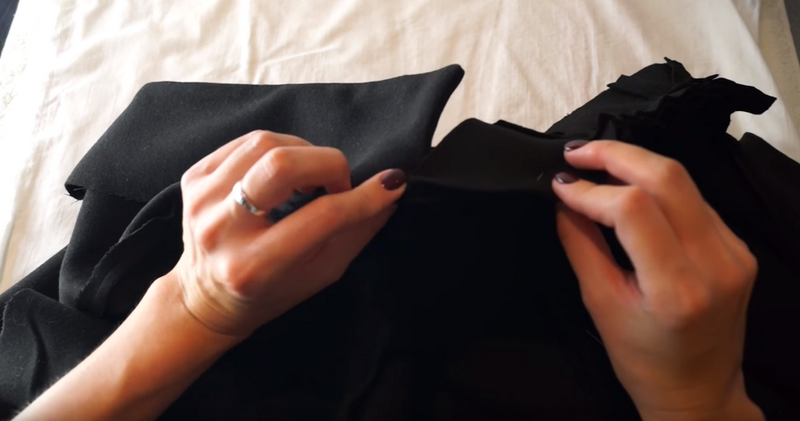
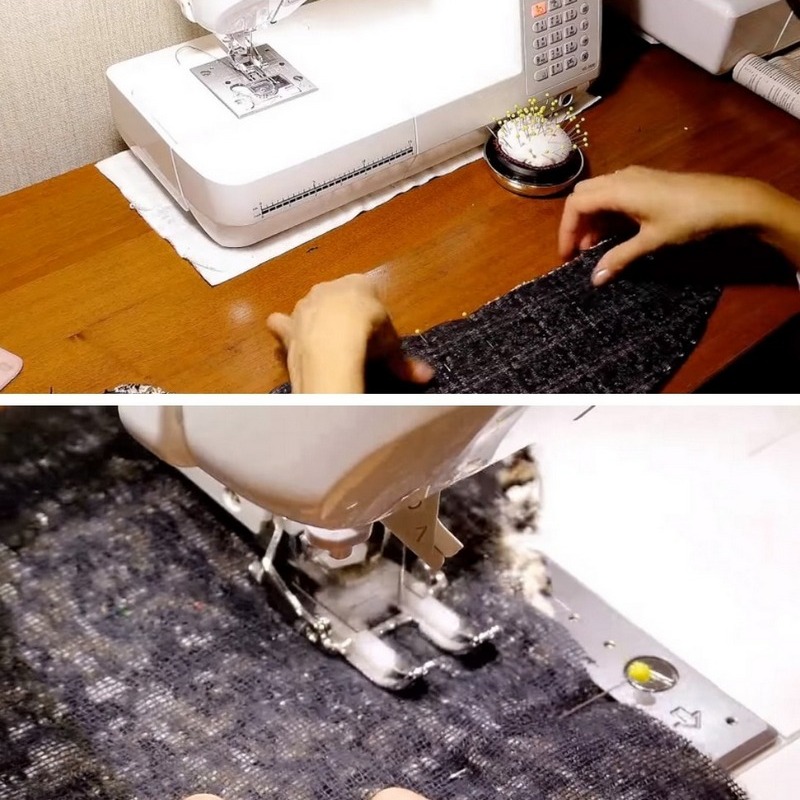
After the patterns are transferred to the fabric, the details need to be cut out. Then all that remains is to stitch the edges and sew them together. The step-by-step instructions will help with this.
Basic dress
A straight dress as a base is sewn taking into account the characteristics of the fabric. The edge processing depends on it. After the cutting is done, you can start sewing.
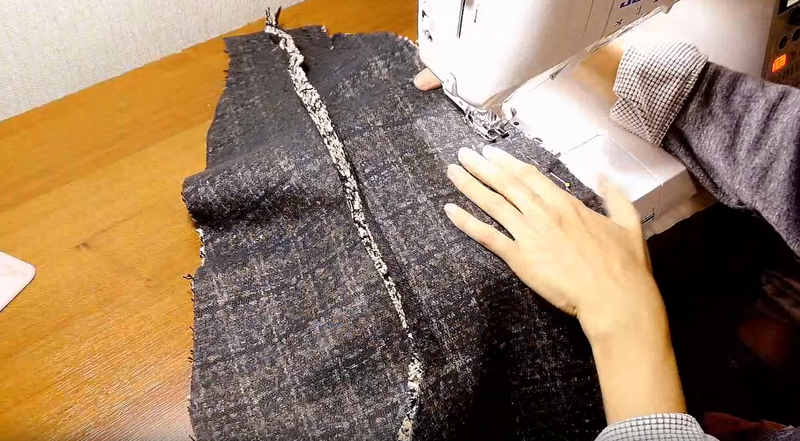
- The lower edges of the back and front parts must be folded and stitched. If the fabric is crumbling, it must be processed using an overlock.
- Neaten, then stitch the seams - shoulder and side. Allowances can be processed with piping.
- Work the edges of the armholes and neckline with facings.
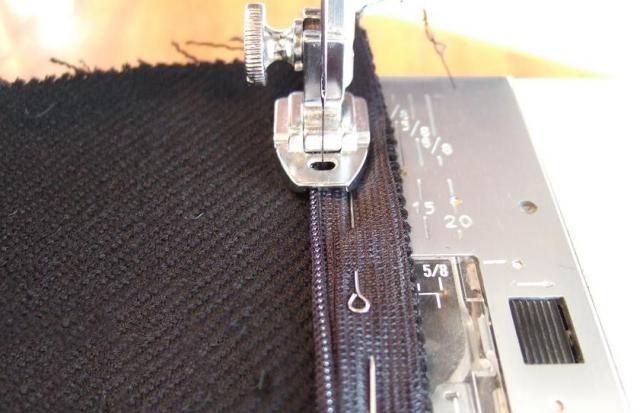
- Sew a concealed zipper into the side of the dress or along the back.
A cape looks better on fitted and tapered dresses. This is easy to achieve: just measure 10 cm from the hip line and stitch at a distance of 1-2 cm. From the waist line, use the same principle to make a narrowing, measuring 3 cm down and up.
Cape
The cape will look more elegant if its length is 3-5 cm shorter than the dress. The difference in the texture of the fabric is also welcome. For warm weather, the fabric of the cape should be thinner and airier than the main dress, for cold weather - on the contrary, a denser material will do: soft cashmere or a suit with wool in the composition. The base can be made of thin knitwear.
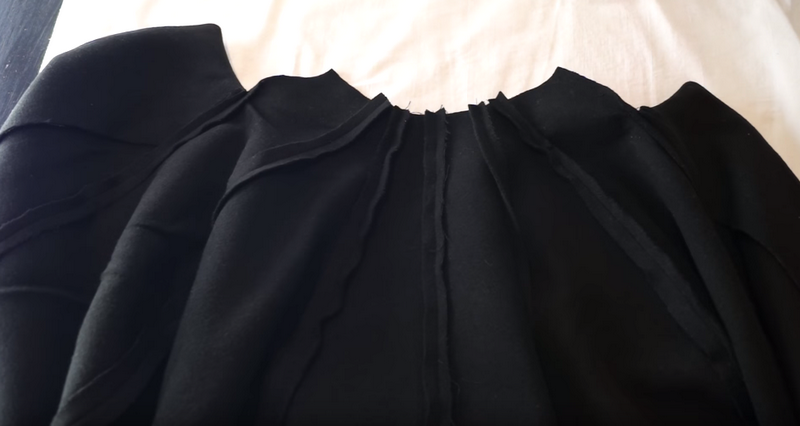
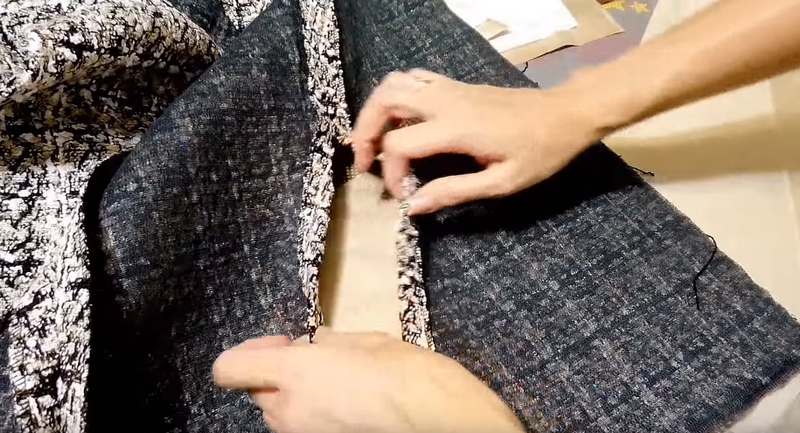
Sewing a cape comes down to processing the edges, since this piece is one-piece. The edges are overcast and stitched. If desired, you can use bias tape in the neck area. Particular attention should be paid to the slits: they are finished using the “frame”, “loop” technique or with piping on both sides.
The cape is sewn on in the shoulder seam area. If there is a collar or hood, it is sewn to the back neck of the dress. The choice of sewing method depends on the type of fabric of the cape: the lighter it is, the thinner and less noticeable the stitching should be. Do not forget about decorative trim.

Decor options
The decorations for this type of dress are varied. These can be eye-catching details in the form of brooches at the place where the cape is attached at the neckline in front or trim on the edge of the inner dress that sticks out. You can play on the contrast of these details:
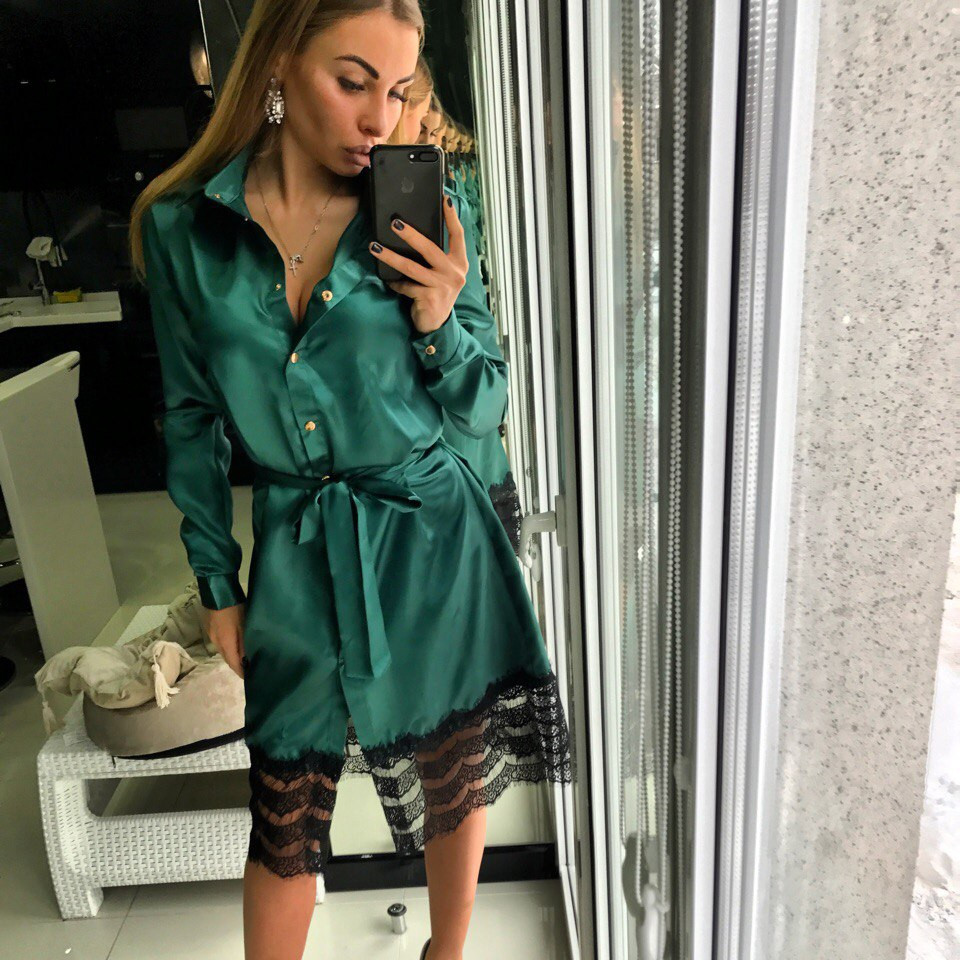
- the texture of the material is an airy, translucent top and a bottom in the form of a case made of coarser fabric;
- contrasting colors - delicate shades of the cape against the rich color of the same tone of the base and vice versa;
- combinations of printed and plain fabrics.
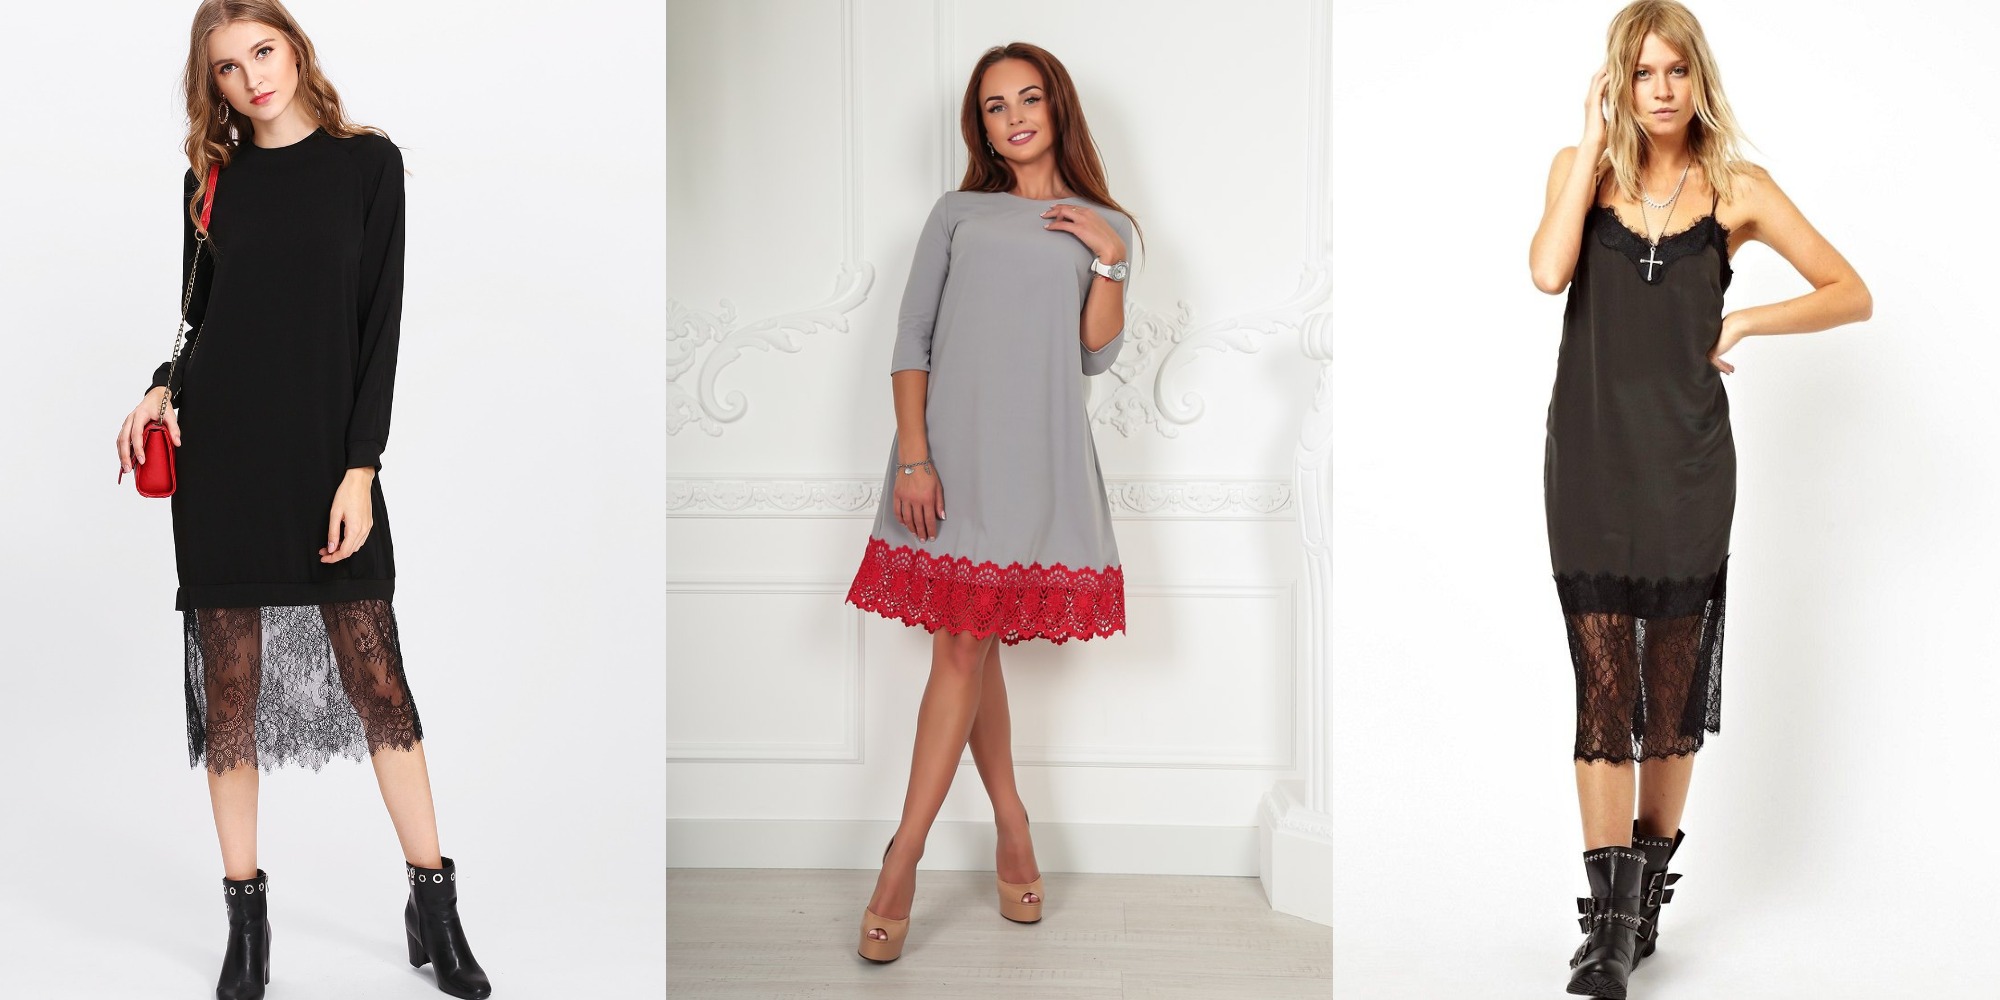
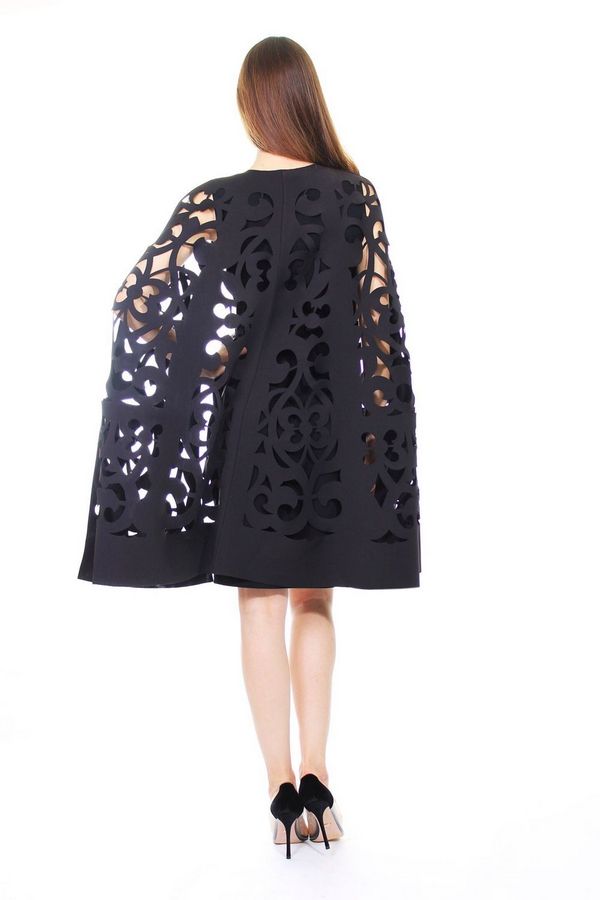
In addition to these techniques, you can put an accent on the cape. This is the trimming of the lower or side edges with lace, twisted cord in golden and silver shades, braid. Embroidery on the back or at the neck is also a great option to diversify the outfit. Fashion designers also use guipure trim on the back of the cape, creating the effect of a semi-open back in an evening dress. At the same time, the underdress has a deep neckline, repeating the contour of the trim fragment.
There are many variations of the cape dress. Gradually moving from the simplest design to more complex ones, you can master the technique of sewing this spectacular outfit. For working on the first dress, it is better to take a simpler fabric and with a reserve, without sufficient experience, there is a risk of ruining the material.
Video