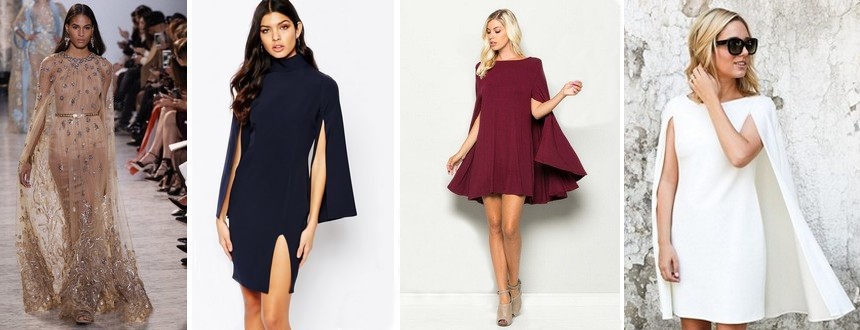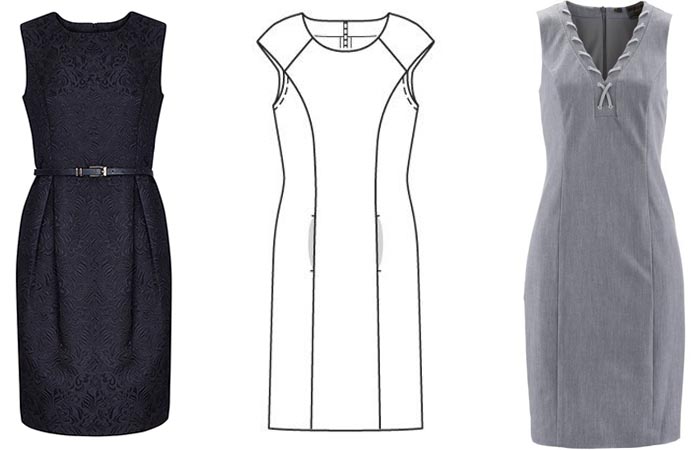
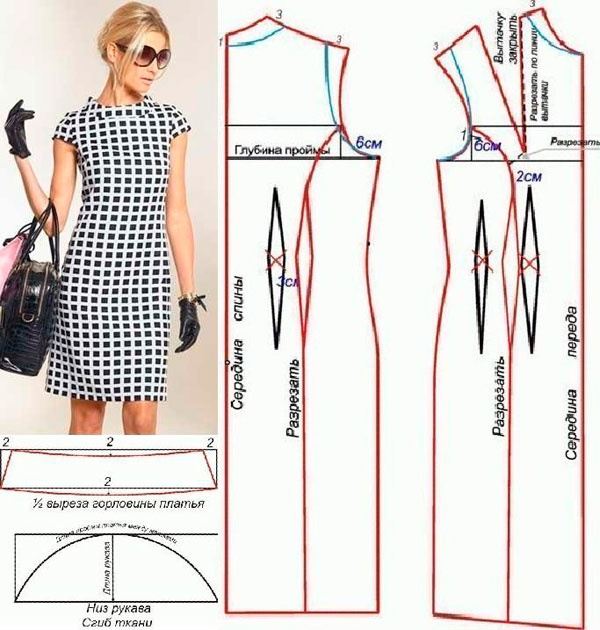
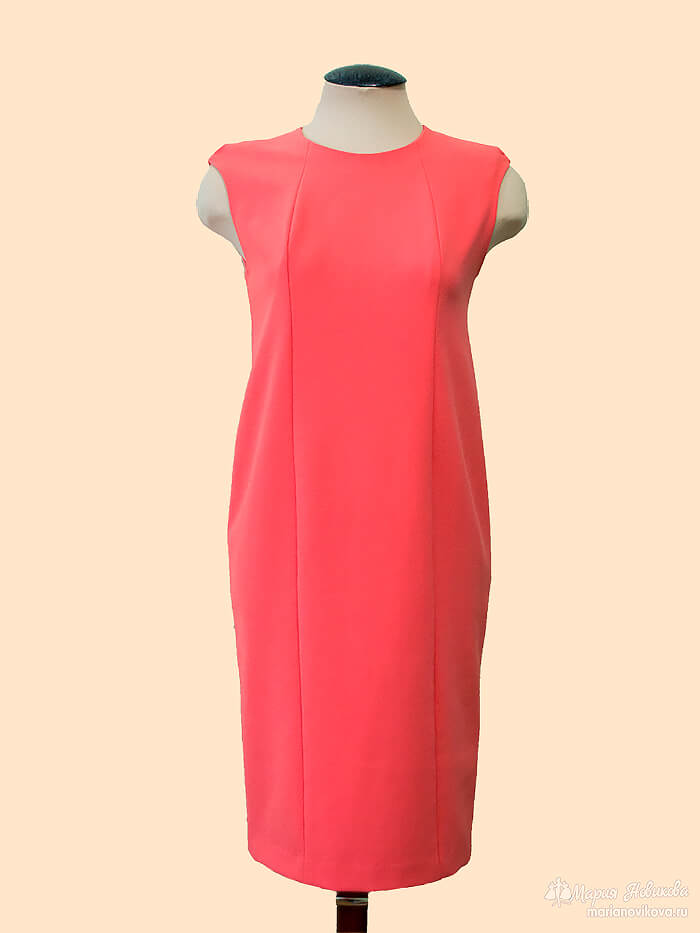
For over a hundred years, the sheath dress has been of interest to women. Everyone loves its cut, which hugs the figure and narrows at the legs. Over the century, the dress has been repeatedly modified, which made it more practical and modern. Depending on the materials, the pattern of the sheath dress in the future can be the basis for sewing other dresses or replace a suit at a business meeting. With suitable shoes and accessories, the model is suitable for both business meetings and a walk around the city. For reference, celebrities such as Jennifer Aniston, Scarlett Johansson, Blake Lively, Olivia Wilde are often seen in sheath dresses.
Pattern
The "cast" of the body is called a pattern, the imprint is individual for each person. Without a pattern, it is difficult for women to choose a perfectly fitting dress. All items sewn according to it will fit the figure well. Clothing models are drawn and sewn according to a single indicator - the main pattern. Such a dress will fit perfectly, cover all the curves of the body. Over time, only the neckline can be modified on the dress, giving it the desired shape that suits the contours of the face. Other dresses are just offshoots from a sheath, created by dreamers.
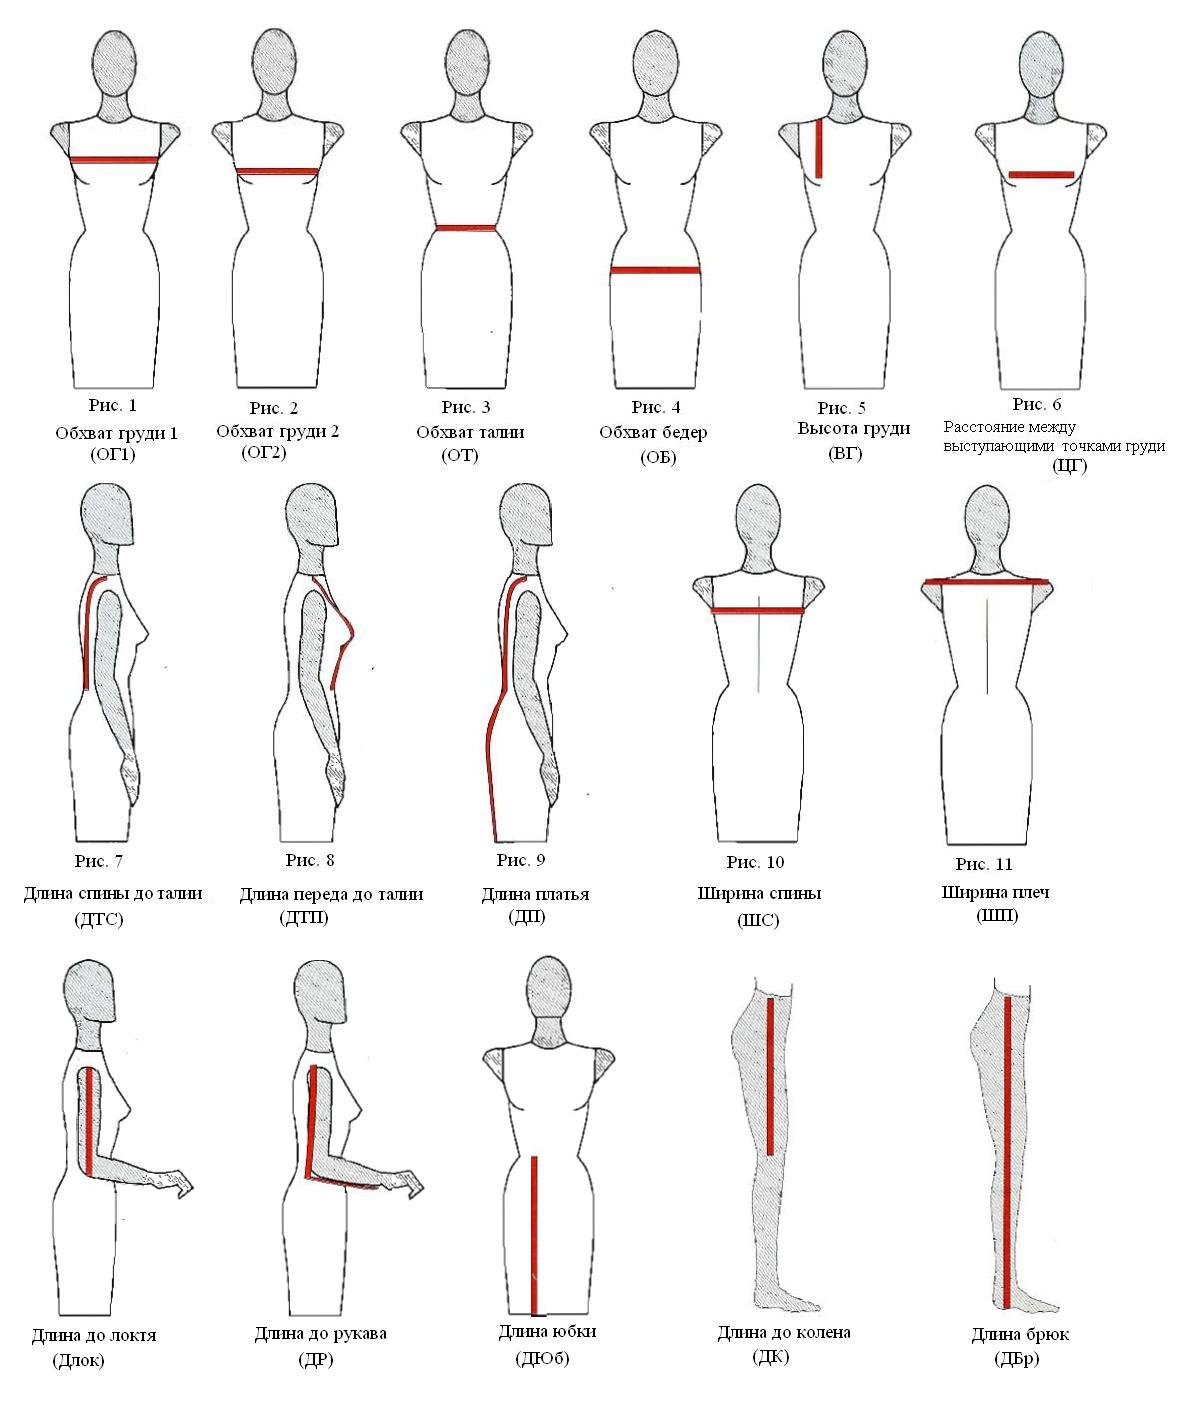
To create custom clothing, first take measurements of the figure. Only then will the dress bring joy to its owner. The following measurements are required:
- Chest, waist, hips, neck;
- Arm circumference, arm length;
- Shoulder line length;
- The length of the dress itself;
- Also measure the distance between your armpits.
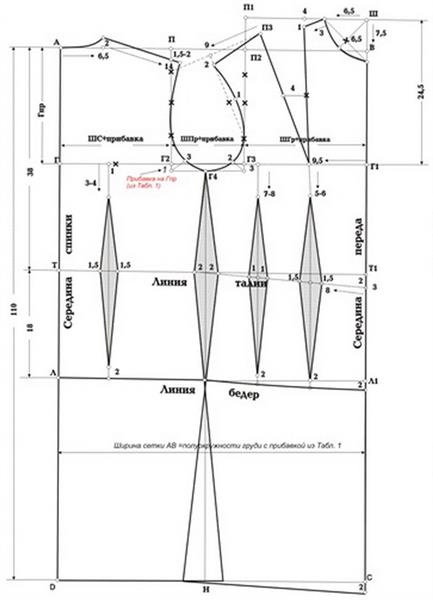
The basic pattern is divided into front and back. For calculations, take a tape measure, a pen, and a notebook. When measuring the chest circumference, skip the tape measure under the armpits and apply it to the back at the level of the shoulder blades and to the nipples in front. An error in measurements will lead to spoiled work and materials.
The waist is measured in approximately the same way. You need to take a tape measure and wrap it around your waist just above your navel. To measure your hips, take a tape measure and turn it over, placing it on your buttocks from behind and on your bikini line from the front. There is another way to measure hip circumference for beginners. Take a voluminous sheet of paper, wrap it around your hips, and close the edges. Measure the length of the sheet with a tape measure to determine the desired value.
The length of the dress is adjusted depending on the person's height and personal preferences. After completing the measurements, you need to decide on the length and width of the fabric needed for sewing.
Take fabric with a margin. Certain types of patterns should have a dart in the chest area.
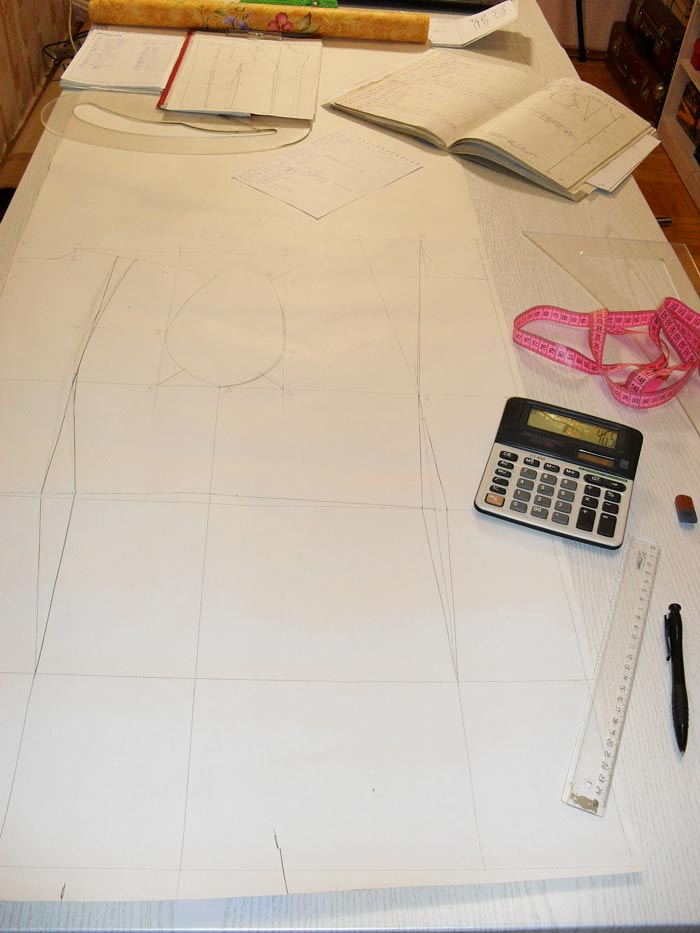
The main problem when sewing is transferring the paper sketch onto the fabric. After that, it will be clear what the dress will be like, whether it will be a sheath dress. A pattern made independently will help to avoid many inaccuracies when transferring the sketch. For the process to go off without a hitch, the clothing parts need to be cut out along the outline of the drawing, then pin each of them to each other.
Look at the balance right away. If you took measurements incorrectly and cut incorrectly, horizontal folds will appear, the fabric will hang. However, the marks on the waist may coincide, but this does not mean that the measurements are correct, rather the opposite. If excess fabric appeared on the shelf, you will have to rip the shoulder seams, pull it up. Now pin the shoulder seams of the back to the new lines of the shelf seams located on the shoulders. Modernize the chest dart that has gone up. To do this, you will have to re-mark them directly on the figure, fastening them with pins.
Check if the shoulder dart is too deep. If so, a "bubble" will form on the shoulder blades. If, on the contrary, it is too shallow, then unnecessary folds will appear from the shoulder blades to the armholes. Check the width of the fabric at the hips, chest, waist. Often, everyone wants to make the waist very tight. Do not overdo it, it will be uncomfortable to wear, the dress will ride up. Regarding the length in the side seams, you can narrow the fabric a little from the hip to the knee. It looks more attractive.

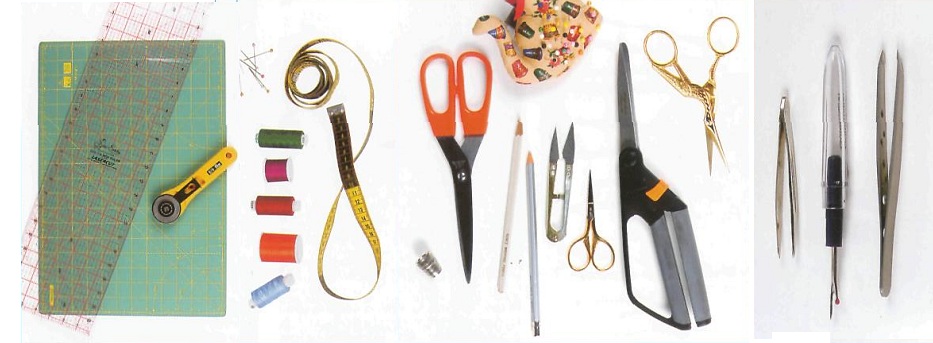
Necessary tools
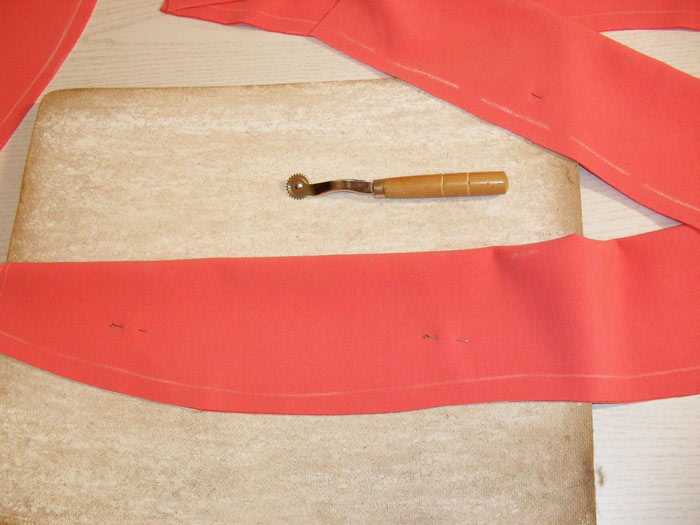
There are a huge number of useful accessories for sewing. Some can make the tailor's manual work easier, while others increase the productivity of machine work. A professional marking tool is great for transferring a pattern to fabric. A foot with a wheel is suitable for a machine, thanks to which it will be convenient to sew clothes from leather and not only. Special scissors for tailors and a transparent ruler are indispensable friends of cutters.
Without the following details, no one will be able to sew a beautiful everyday dress:
- Tape measure or centimeter, pen, notepad or notebook;
- Selected material;
- Chalk;
- Fasteners or long zipper;
- Scissors, prepare pins;
- Needle, thread, sewing machine.
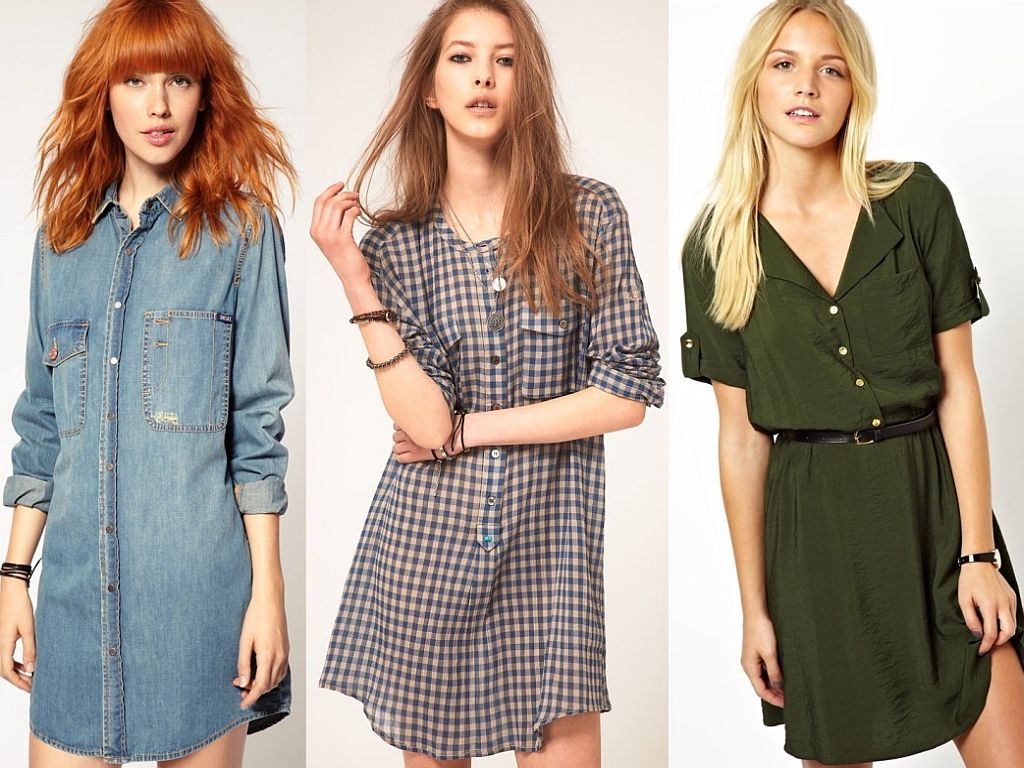
Before you start sewing, determine the color of the fabric. Choose a single-color or material with inserts. Sleeves for this type of clothing are used three-quarters. But when sewing on your own - everything is individual. They can be made long or short, although some ladies prefer to wear a dress without sleeves.
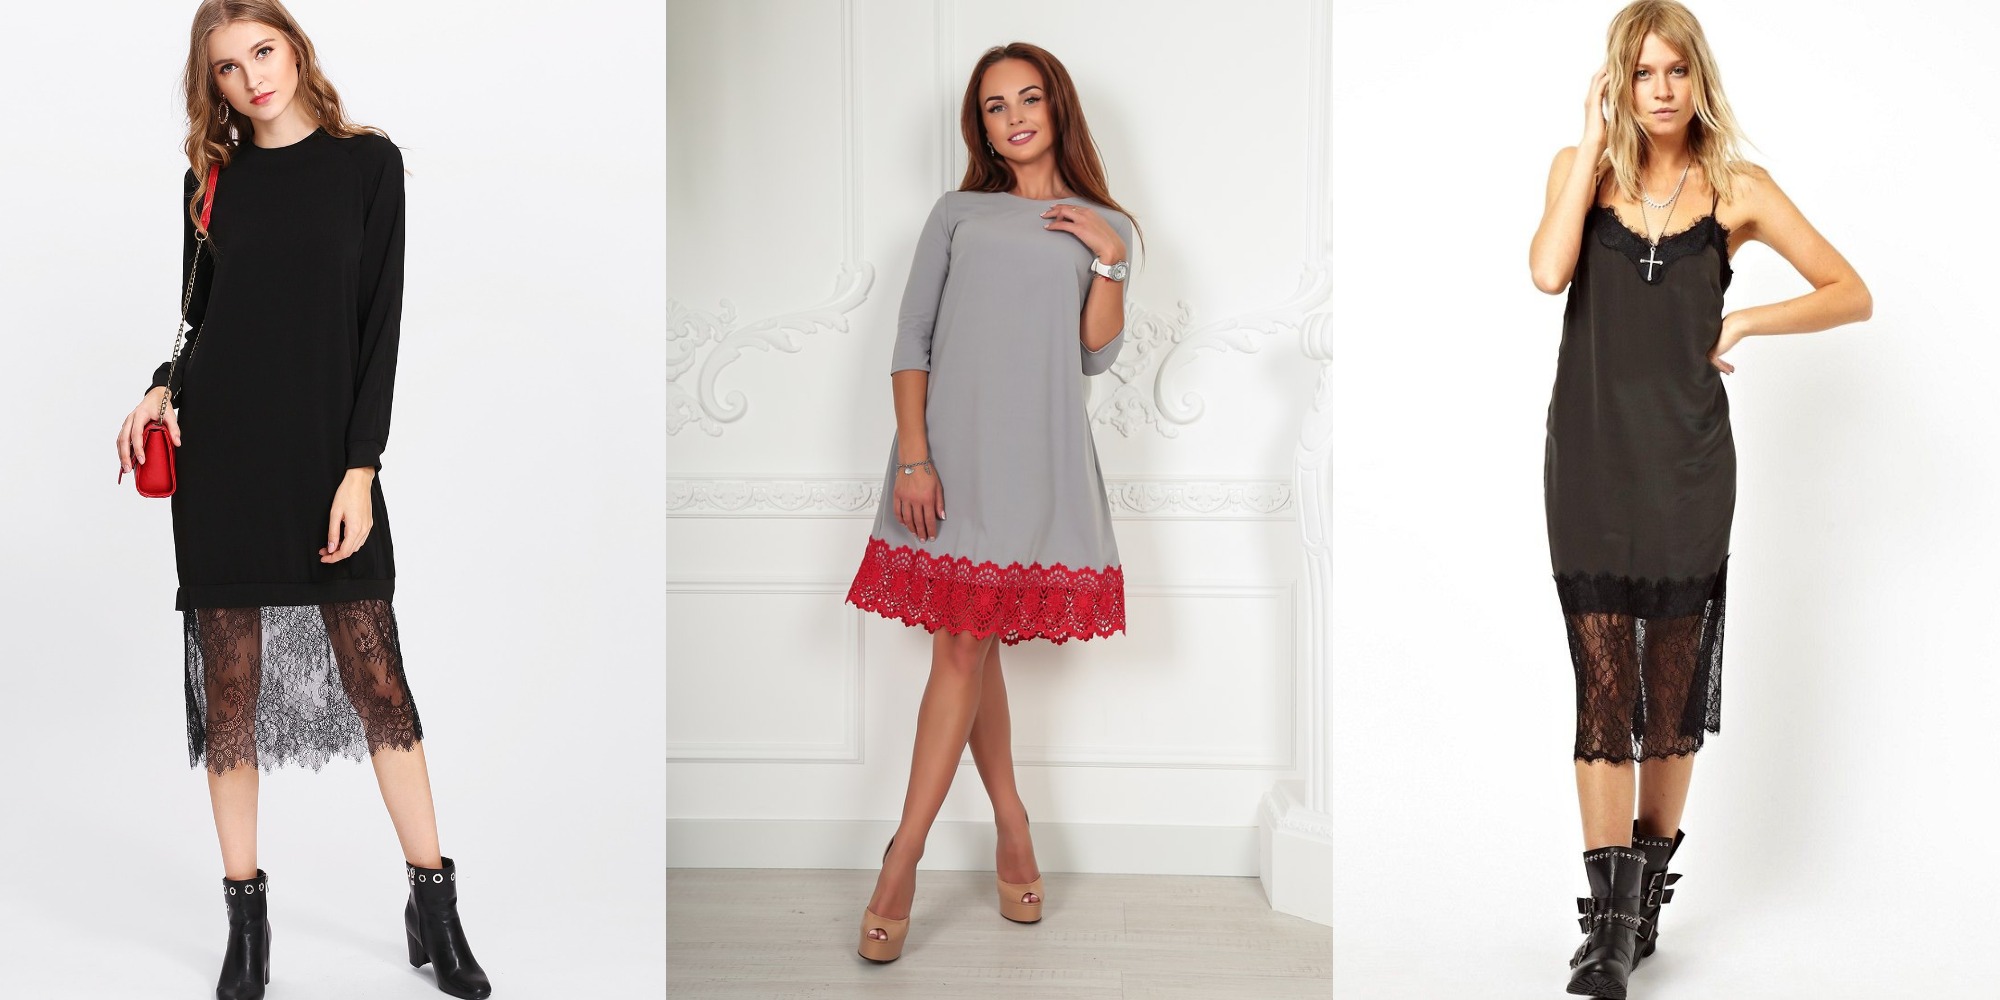
If a lady has beautiful and slender legs, there is no point in hiding them, so do not make the dress long. Sew a mini sheath dress. Although even people with a slender figure are not always happy with strangers' looks. There is an average length, you can use it - the middle of the knee.
Treat the neck. If you don't want the zipper to be located on the back in the standard way, come up with something original.
Dresses often have a slit. The classic one is in the back. But you can have it anywhere else. It all depends on your preferences. Choose wisely so as not to hang the dress in the closet with a feeling of disappointment.
Sewing rules
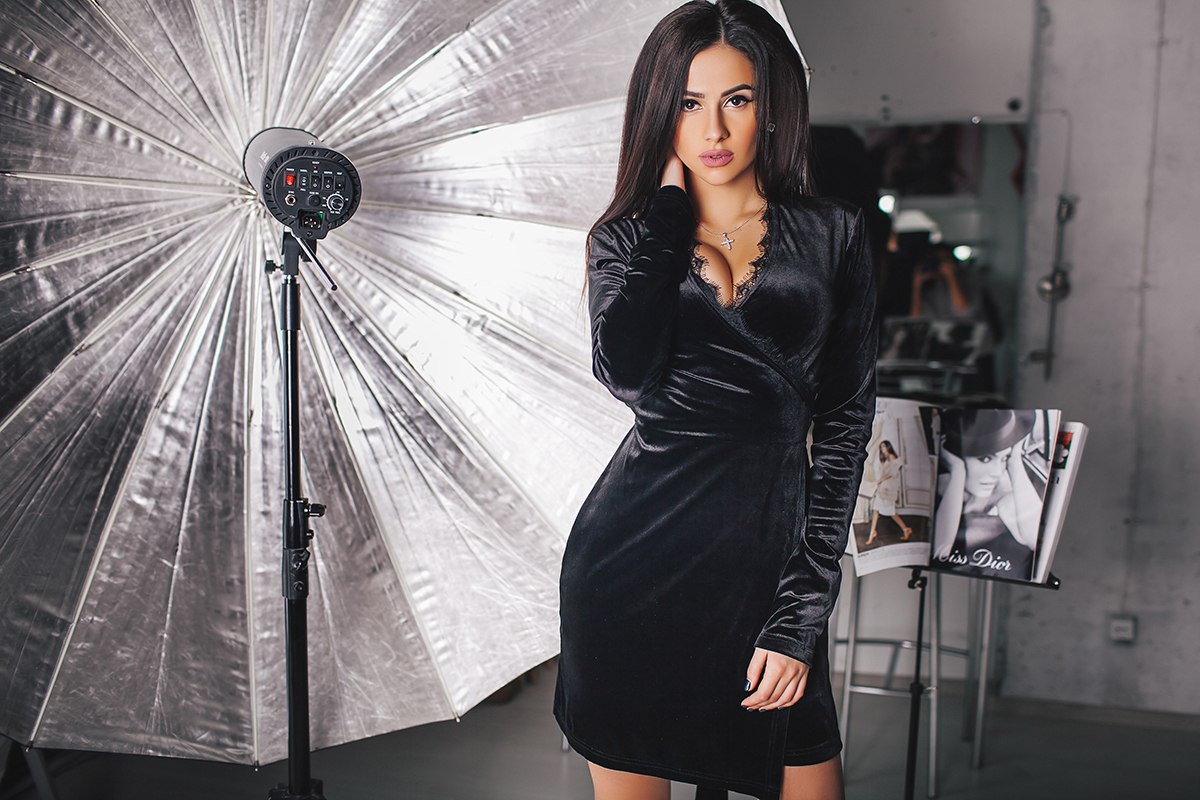
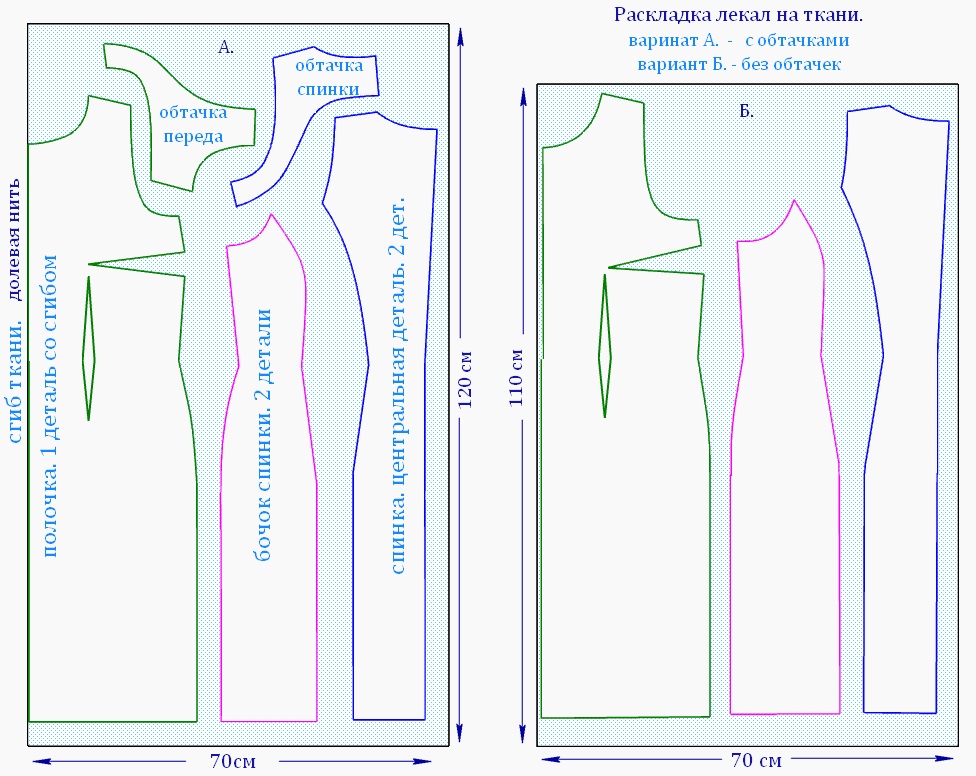
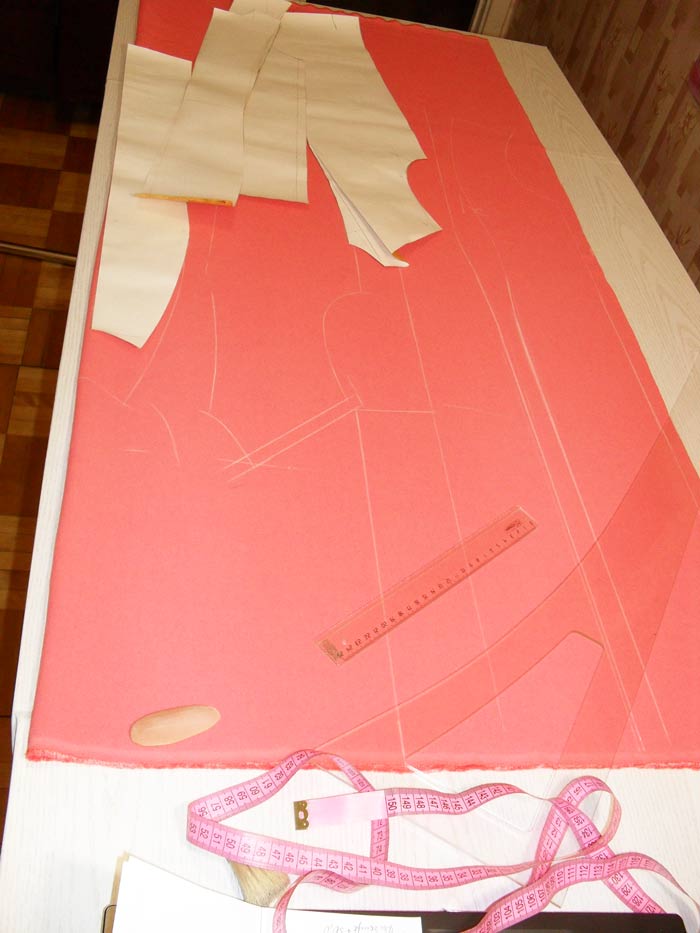
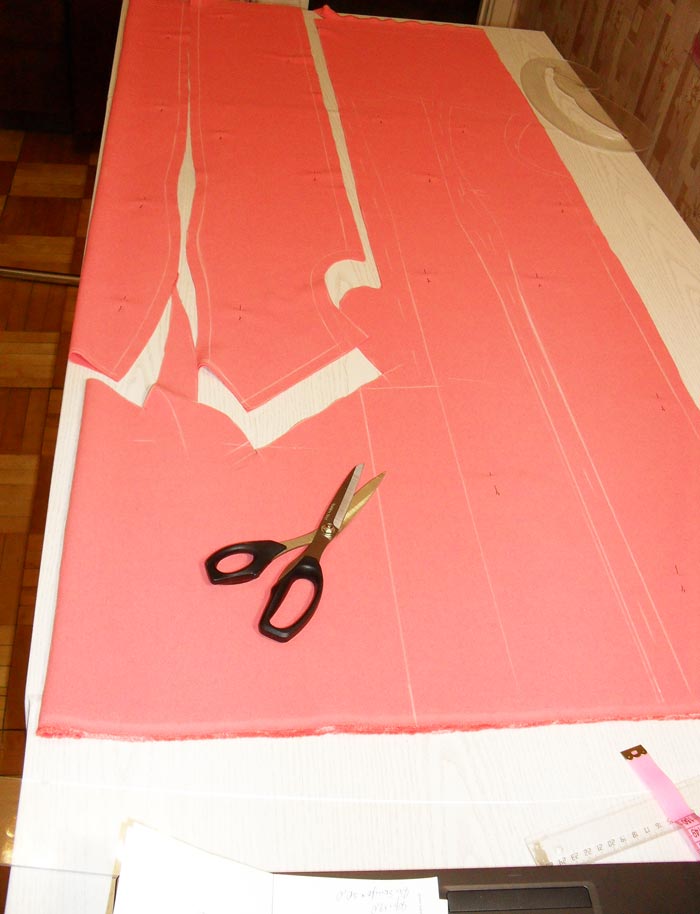
For sewing, you will need high-quality fabric, such as linen, thick cotton. Fabrics with elastin are suitable, they stretch and do not shrink after washing. After cutting and assembling the parts, add seam allowances using fasteners, and also outline the cut lines with chalk. At this stage, you already need to figure out the future length. Cut out the pattern pieces for sewing.
Step by step construction:
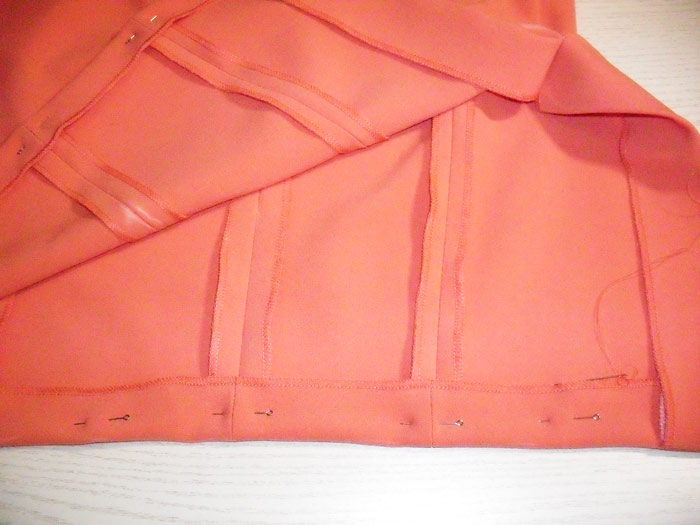
- Fold the material lengthwise, then in half, with the outer side facing inward. The edges should match. Place a sketch, previously made on paper, on the fabric. It should be pinned. Make allowances with chalk and a ruler at the bottom of the dress and sleeves, if any - 4 cm. On other cuts and on the seams - one and a half centimeters. Iron and grind the darts on the shelf;
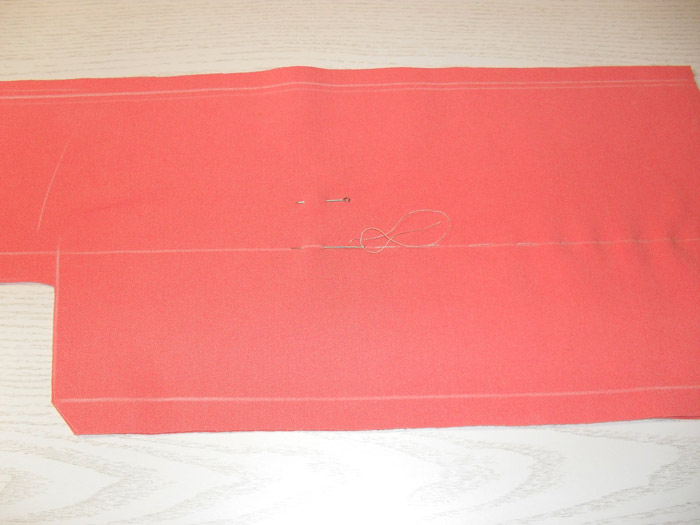
- Sweep the seam in the center of the back from the bottom of the vent to the line of the zipper. Now you need to hem the vent. Sweep the shoulder and side seams. Fit the bottom to the wrong side and baste;
- The front of the bodice should be folded with the front side inward, aligning the lines of the bust dart one by one;
- We make the strips in front. Duplicate each of the strip parts with a lining and place them on the non-duplicate part with the outer side, grind the longitudinal cuts. Carefully cut off the seam allowances. The strip needs to be turned inside out and the edges need to be ironed unnoticeably. At the end, you need to cut off the allowances to a minimum width of no more than 5 mm;
- Remove all unnecessary items, adjust the dress to your figure. It should not be too tight. If the fit is not satisfactory, sew the seams in the right places. At this stage, pins are no longer needed;
- To sew the front waist seam, place the bodice on the front of the skirt fabric and pin the cross-cuts together;
- To make a slit, press the seam allowances from the center back seam;
- Place the fabric in front of the skirt with the dress side facing inward, matching the lines of all the folds. They need to be sewn starting from the top to the very arrows. Be sure to make fastenings along the edges of the lines. Iron the depths of the darts to the center line of the front and baste along the upper edge;
- Make a central seam on the back from the fastener to the bottom. Process all seams. Smooth out, iron the seams on the side so that they become thinner;
- Treat the neck depending on the style. If it requires reinforcement, grind it. Often reinforced with dublirin;
- If you are sewing a dress with sleeves, place the elbow parts on the upper parts of the sleeves. Make a control mark, then sew. Pin the sleeve slits together and sew. Now everything needs to be folded with the dress side, matching the basting marks;
- Finish the armholes and sew in the zipper;
- Hem the hem a couple of centimeters.
Finishing of armholes and neckline
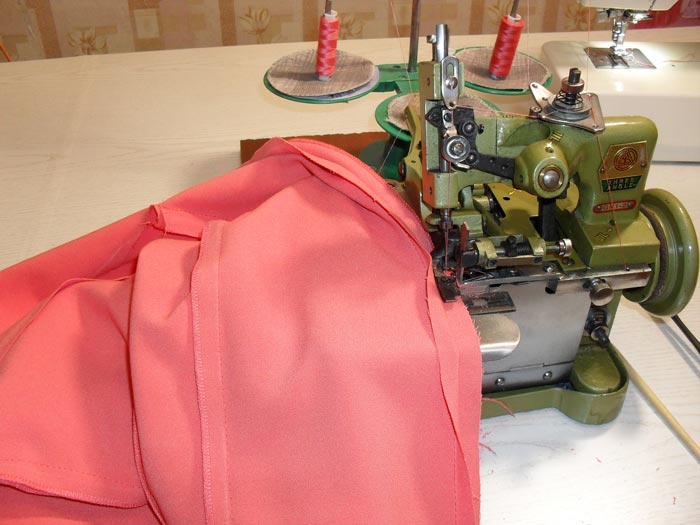
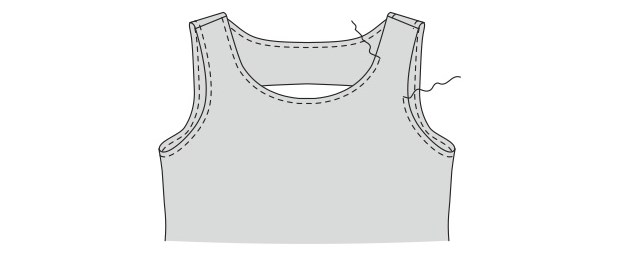
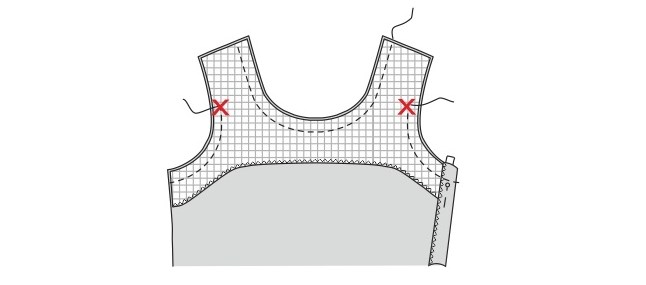
Now you need to complete the final stage. It is better to process the facings, which were made from the dress fabric. First, you need to process their bottom on the overlock. Fold them together with the dress with the front sides. Near the zipper, you need to fold the edge so that it is not tightly against the place of attachment. Next, we prick the hem of the neck.
Combine the front sides of the obtained facings and process the neckline. The seam should be finished 3 cm below the shoulder line, stitch the armholes. Trim the allowances, turn inside out and iron. Using a hidden stitch, sew the facing to the dress clasp.
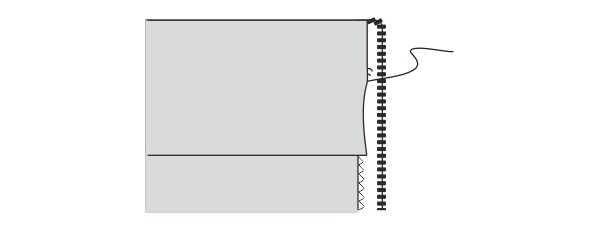
Now the dress needs to be turned inside out. Open the facings in the shoulder area. Pin the back facing to the same part in the front. The shoulders in the front and back need to be pinned, ground, and the allowances ironed.
Pull out the open areas. Pin them, but do not damage other areas of the fabric. File this area. Stitch with small stitches to the allowances on the side seam.
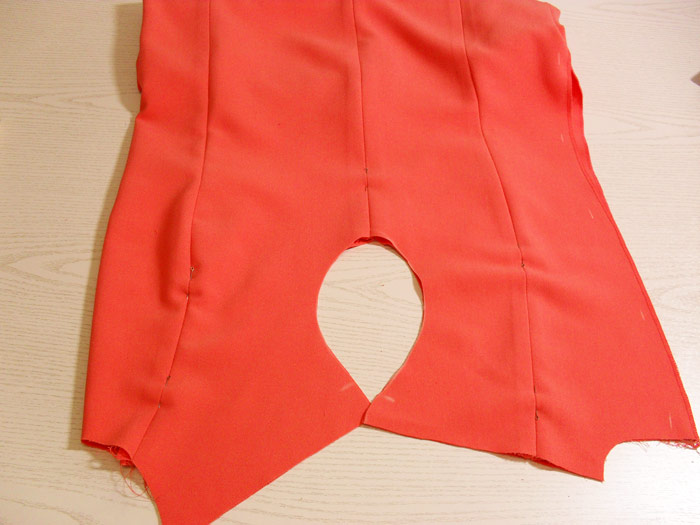
There is also a method of processing with one-piece facings, which is one of the popular ones. Upon completion of successful work, the cutouts on the dress look more than beautiful. The method is also useful in that you can sew a dress with a lining according to the sample. You only need to cut it out and sew it on the bottom of the facings.
Tips to improve results:
- Choose the processing method depending on the fabric you have;
- The facing should be made from the same material as the dress;
- It is advisable to sew the facing on a sewing machine; if you don’t have one, sew it carefully by hand.
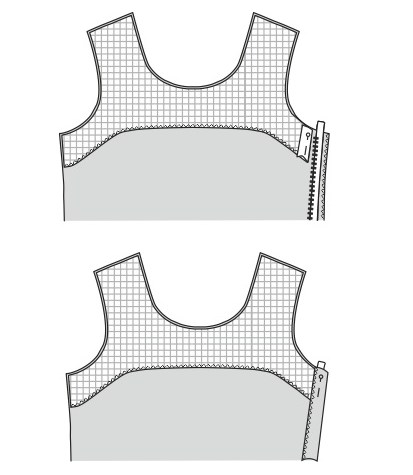
Description of the process:
- Sew the facing pieces together;
- The allowances need to be steamed with an iron and the cut located inside needs to be swept away;
- Attach the facing to the neckline with the front sides facing down and start sewing;
- The excess left for allowances - cut off to the line itself. In rounded areas, you need to cut very close to the seam. If the line accidentally did not go through, then it is enough to iron it, there is no need to cut it with scissors. Be careful so that folds do not appear;
- The facing should be joined with the allowances and sewn as close to the seam as possible;
- Now turn the facing inside out. Sew it so that the seam is on the front side, but is not visible. On the back side, it should be close to the fold;
- All that remains is to sew the facing to the shoulder allowances. If the garment has a fastener, it should be sewn on after finishing the neckline.
There is no need to rush. A quality product will only be obtained with maximum care. Upon completion, we get a feminine and elegant outfit that can be worn anywhere. The dress is equally comfortable in both summer and winter seasons. For business women, this is an integral part of the wardrobe. A sleeveless sheath dress perfectly complements a fashionable cardigan. In the evening, it goes well with shoes or sandals with a low heel. In addition, it can be complemented with noticeable accessories and jewelry, giving a very simple appearance a special twist.

Video