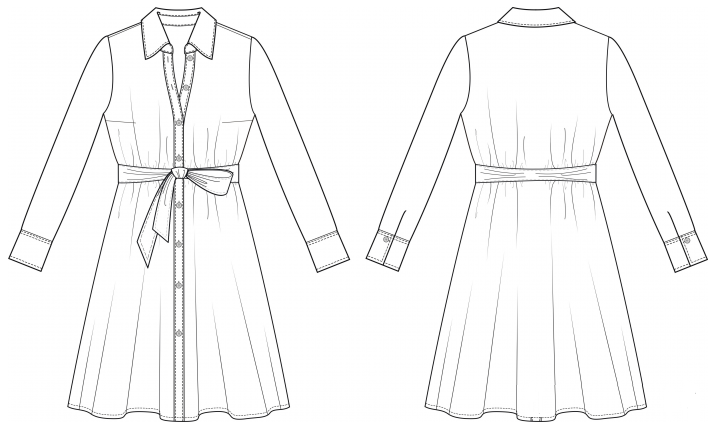
Shirt dresses are back in trend. This spring-summer season declares this model a hit of every woman's wardrobe. Moreover, fashion trends do not impose strict requirements on the product, giving wide scope for experiments with color and style. The correct pattern of a shirt dress will allow you to sew any model: from an elegant office option to a light, airy garment for a walk. To get the perfect outfit for any occasion, just follow the instructions.
Features and varieties of style
Looking through fashion catalogs, noting the simplicity and unpretentiousness of the cut, every third woman thinks about how to sew a shirt dress herself, because only in this case can you achieve an ideal fit. To begin with, you should decide on the style, it depends on it whether the work on creation will be easier or more complicated. There are many varieties, so as not to get lost in the variety of forms, you need to consider several factors:
- Decide on the silhouette. Every woman knows which design elements will suit her and which are strictly prohibited. What to add to the cut to emphasize beauty and hide imperfections.
- Choose the purpose of the dress. Will it be created for everyday life, work in the office, a trip to a picnic or an evening out - the style and the amount of work to be done depend on this.
- Choose a fabric. The type of material largely determines the cut, because it is difficult to create air waves from a rigid, unyielding material.
- You can sew a shirt dress using ready-made patterns or your own designs. Another option is to simply transform an old item.
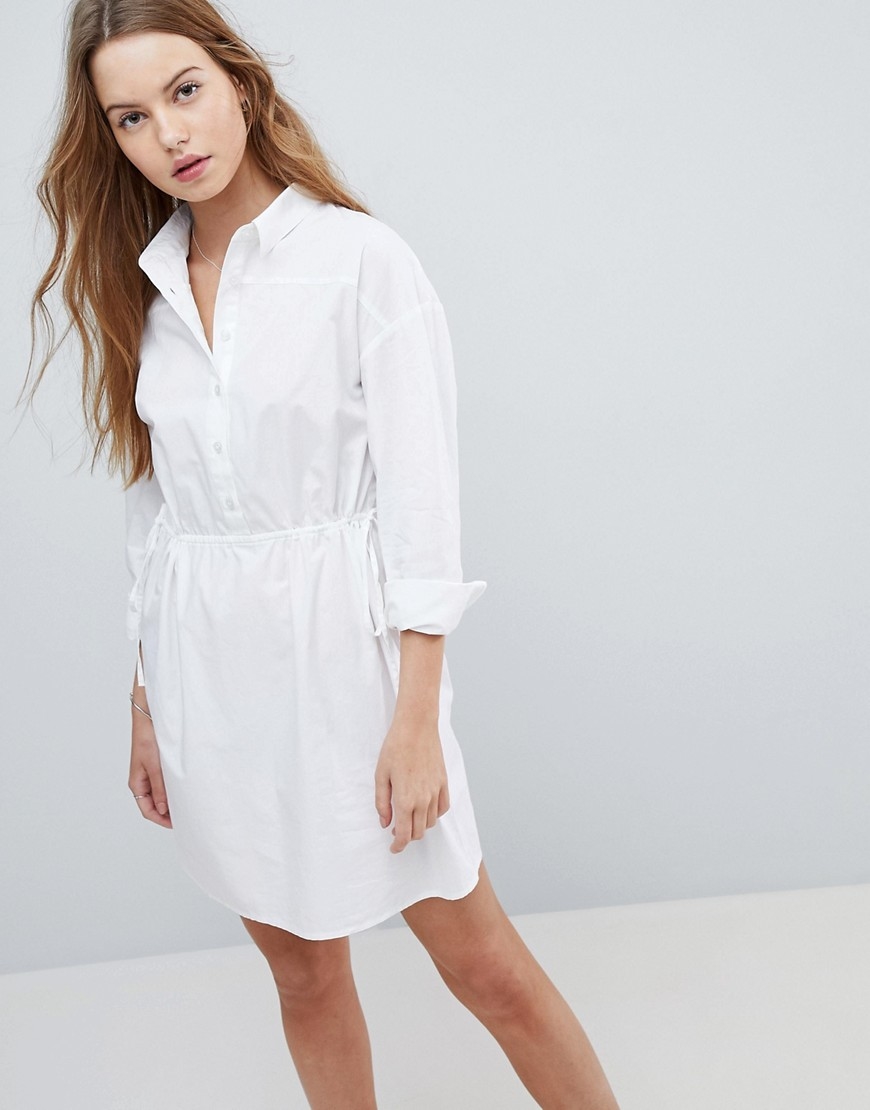
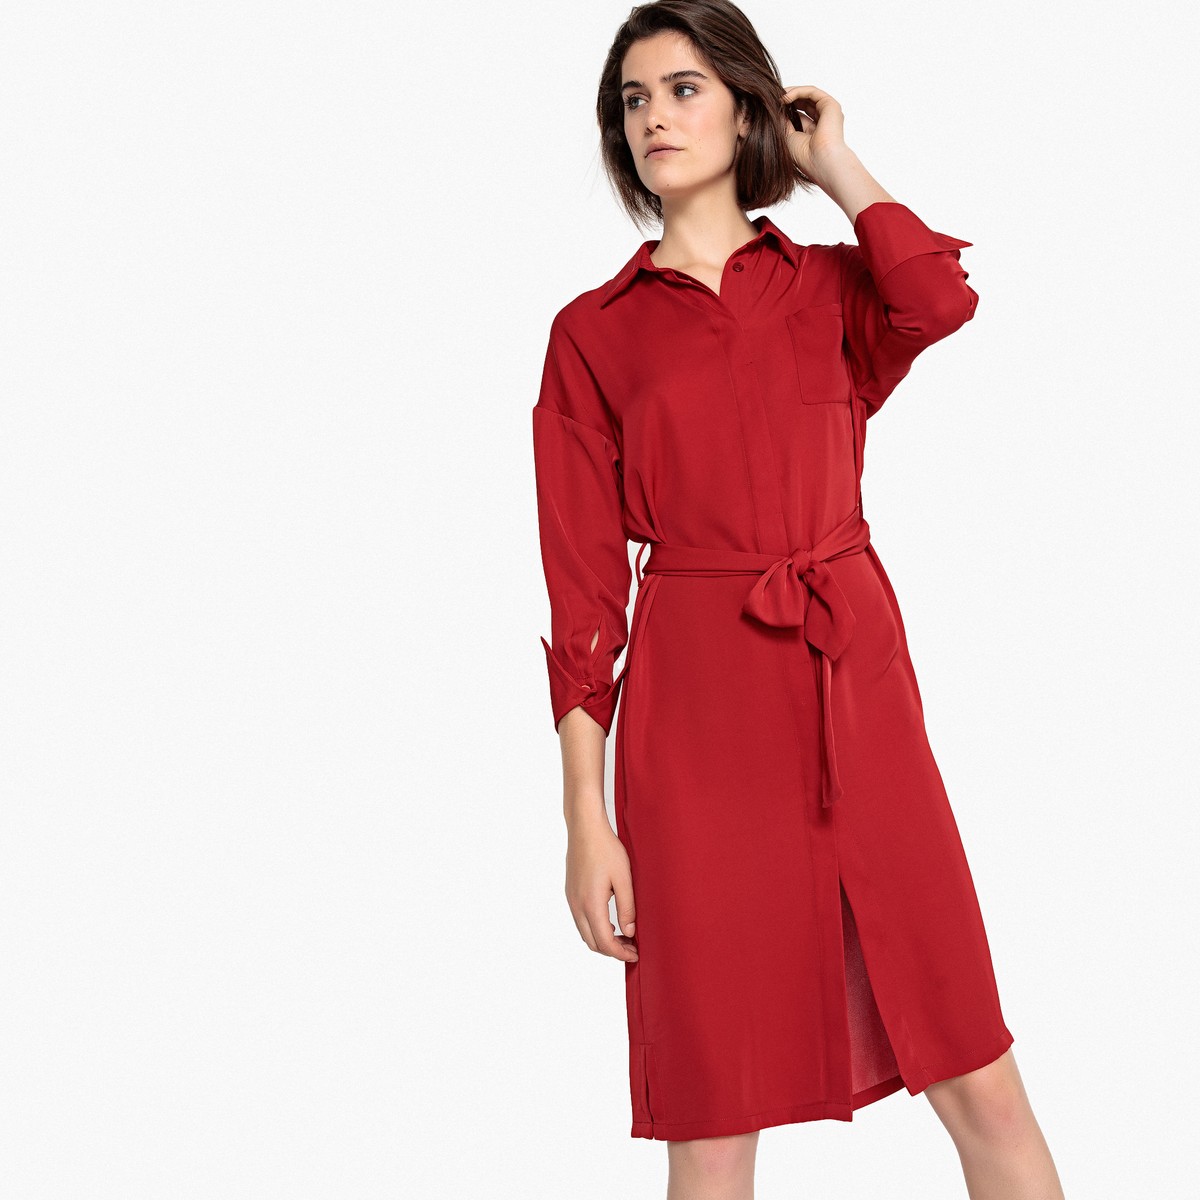
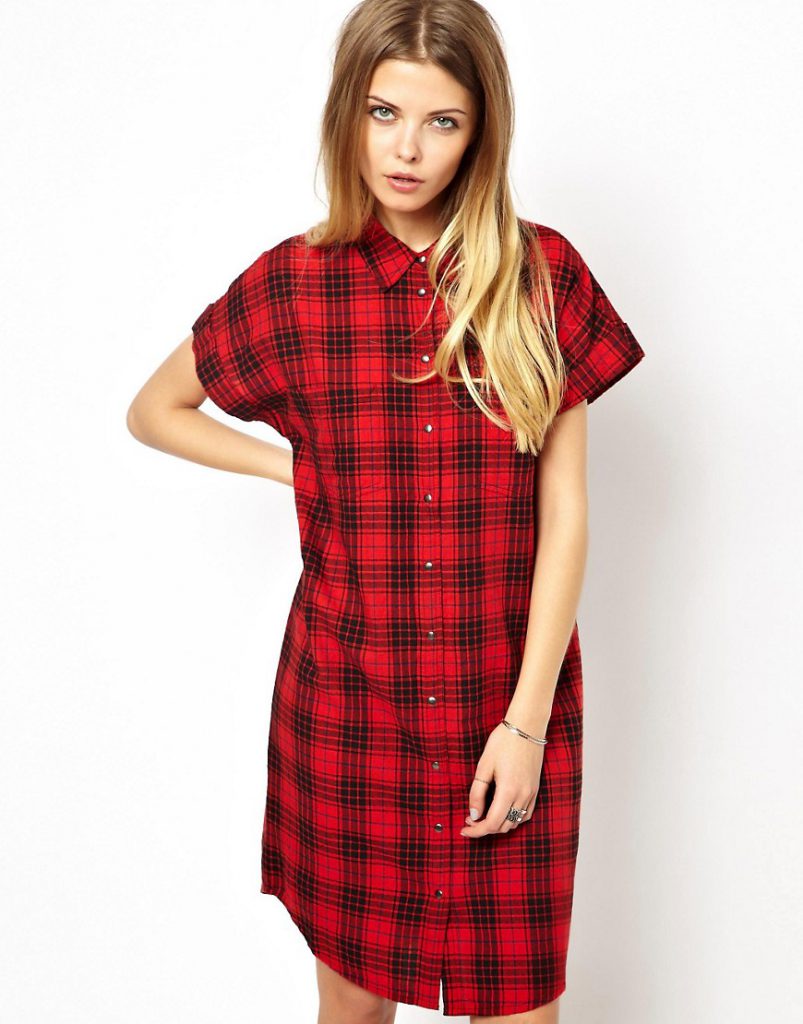
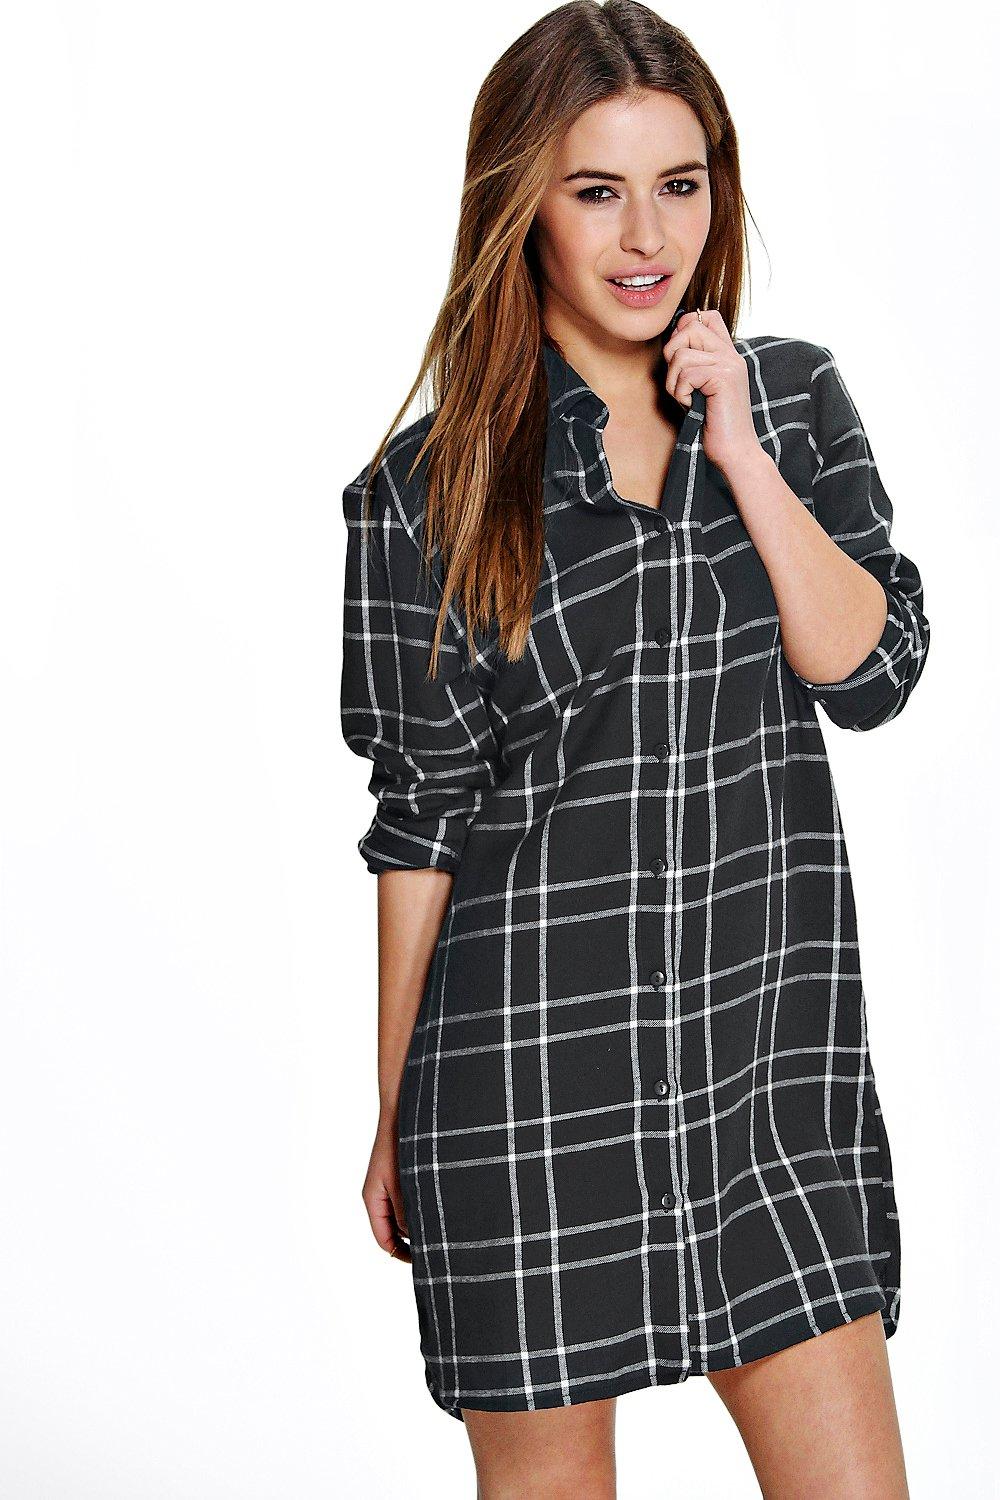
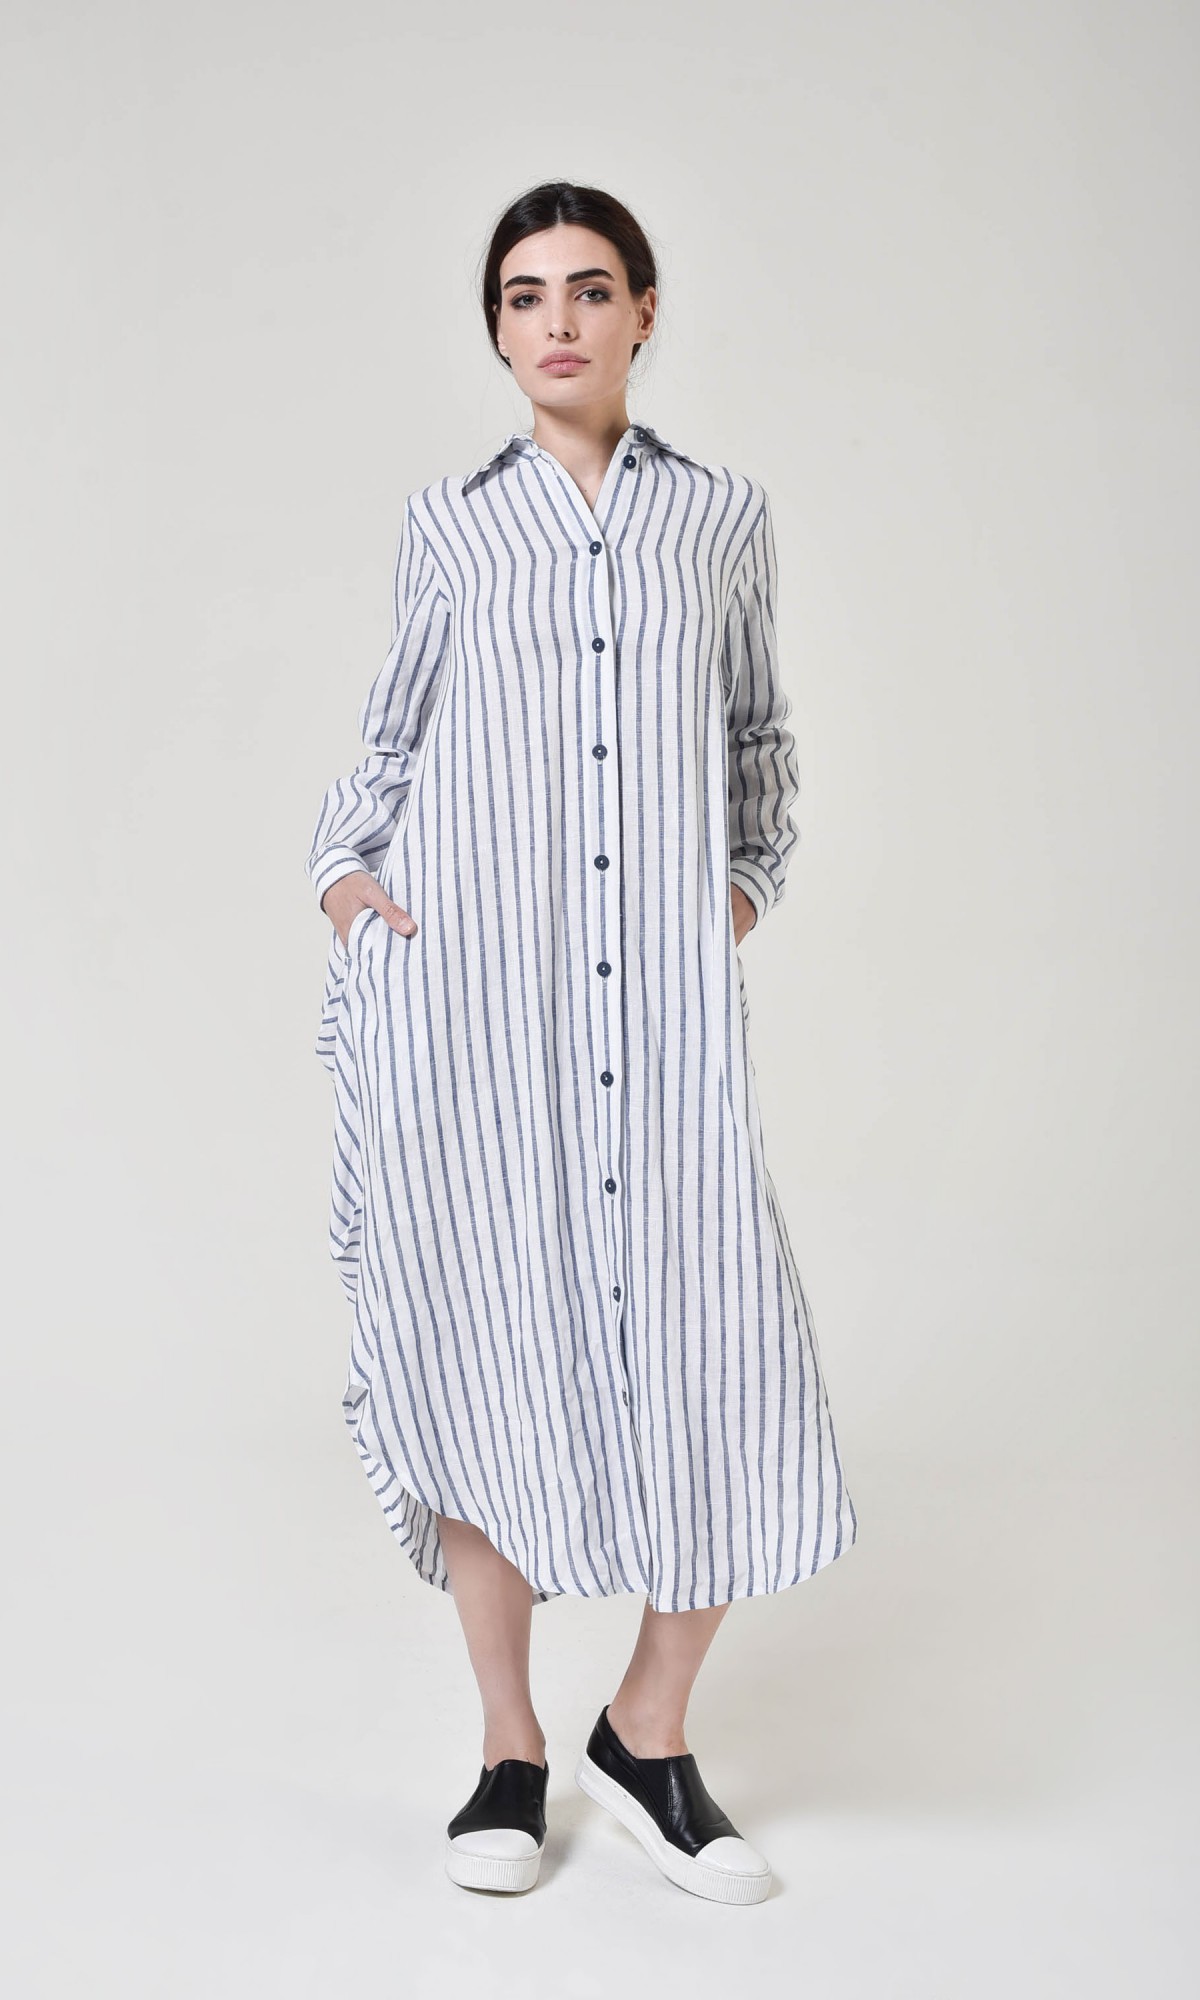
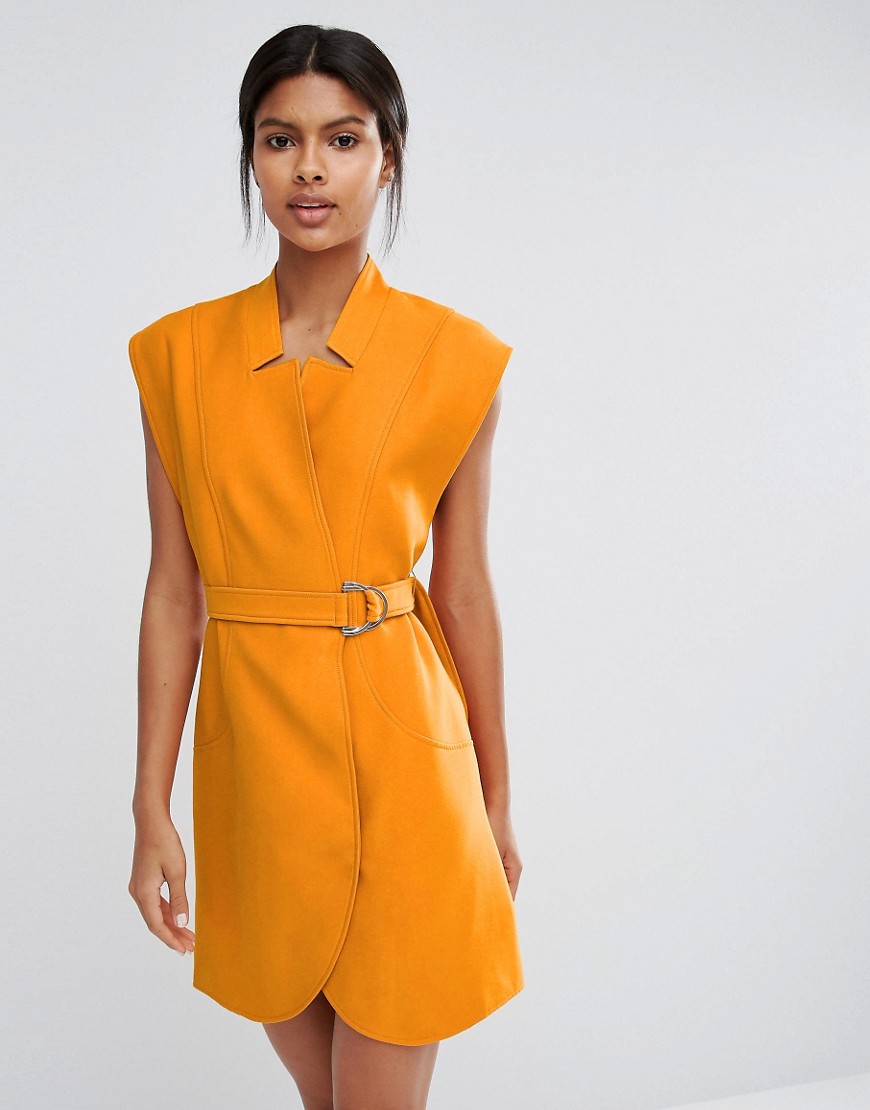
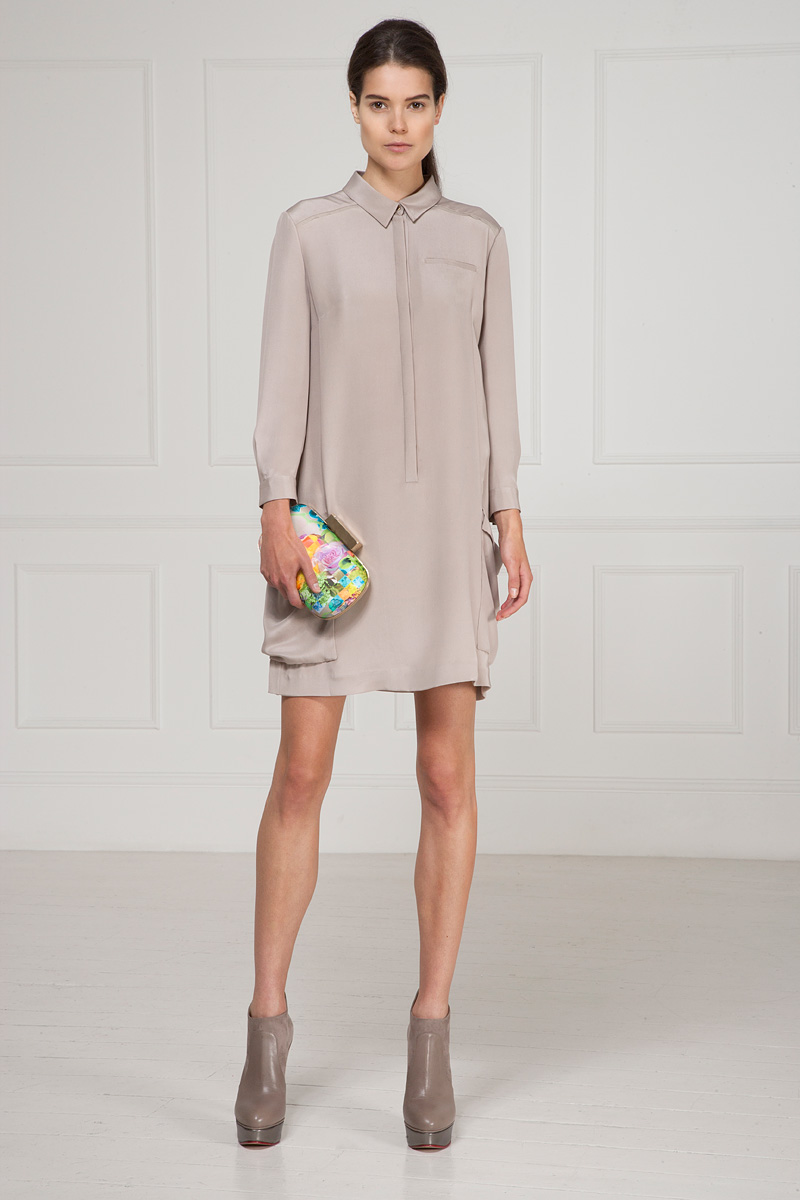
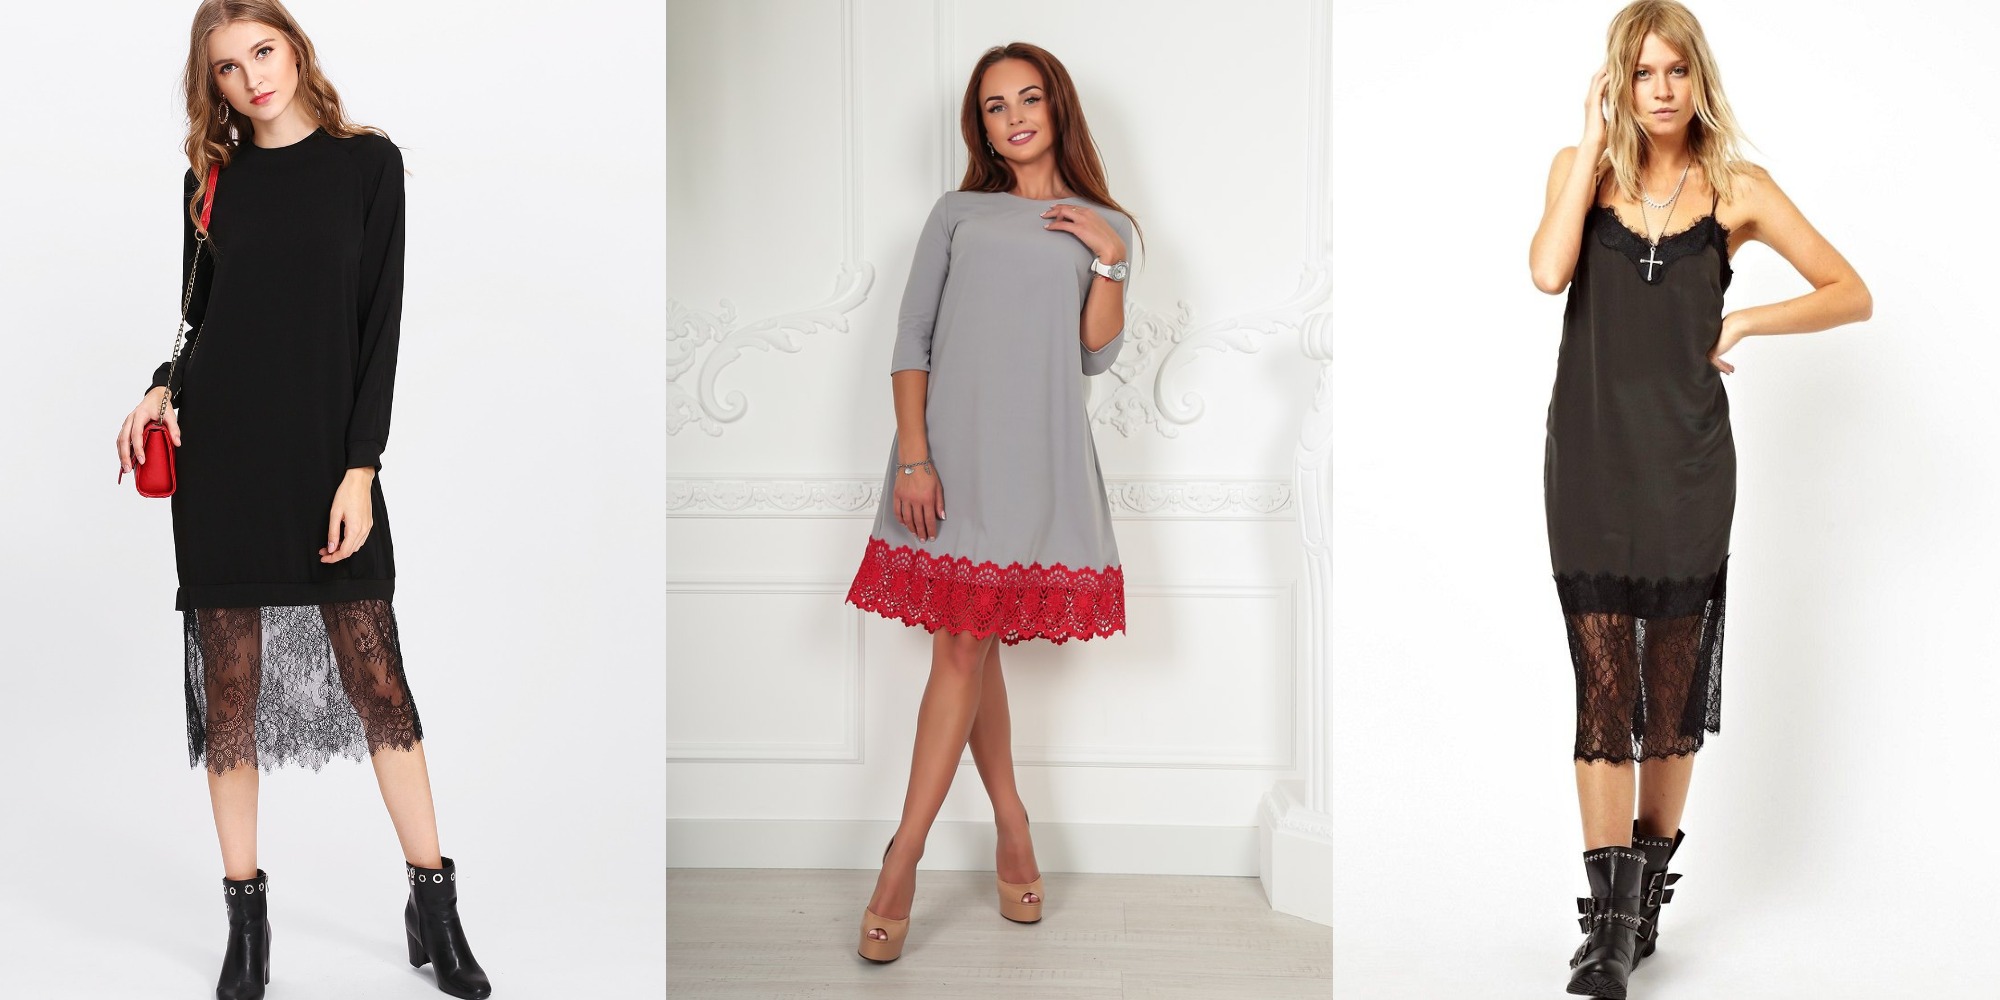
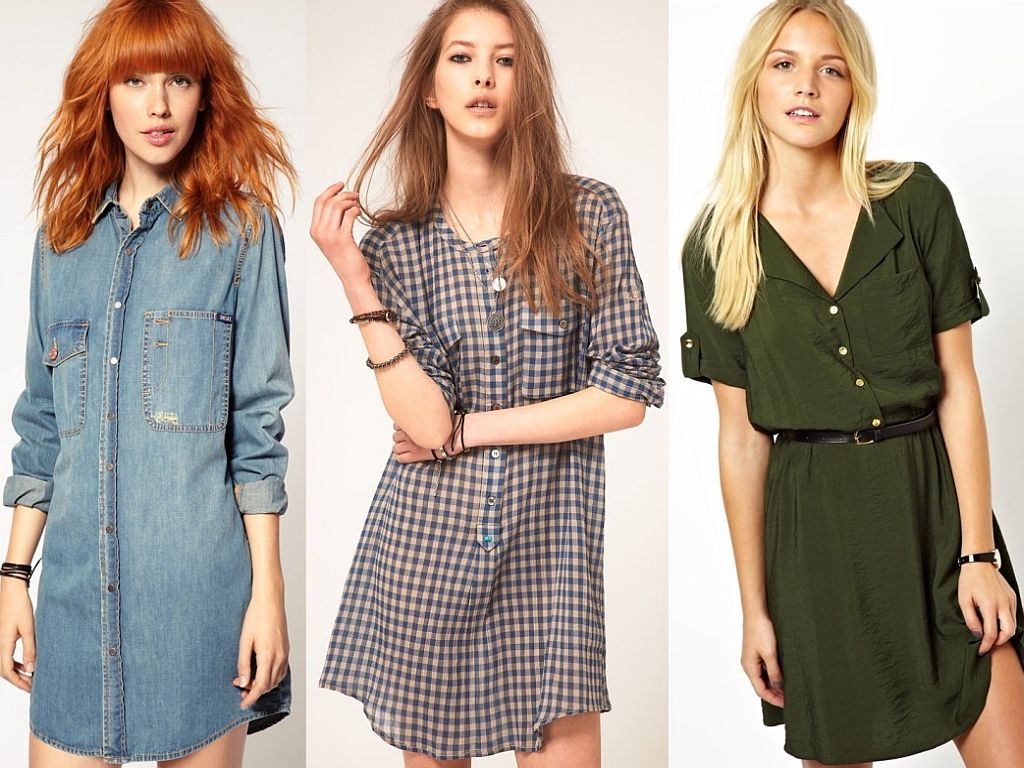
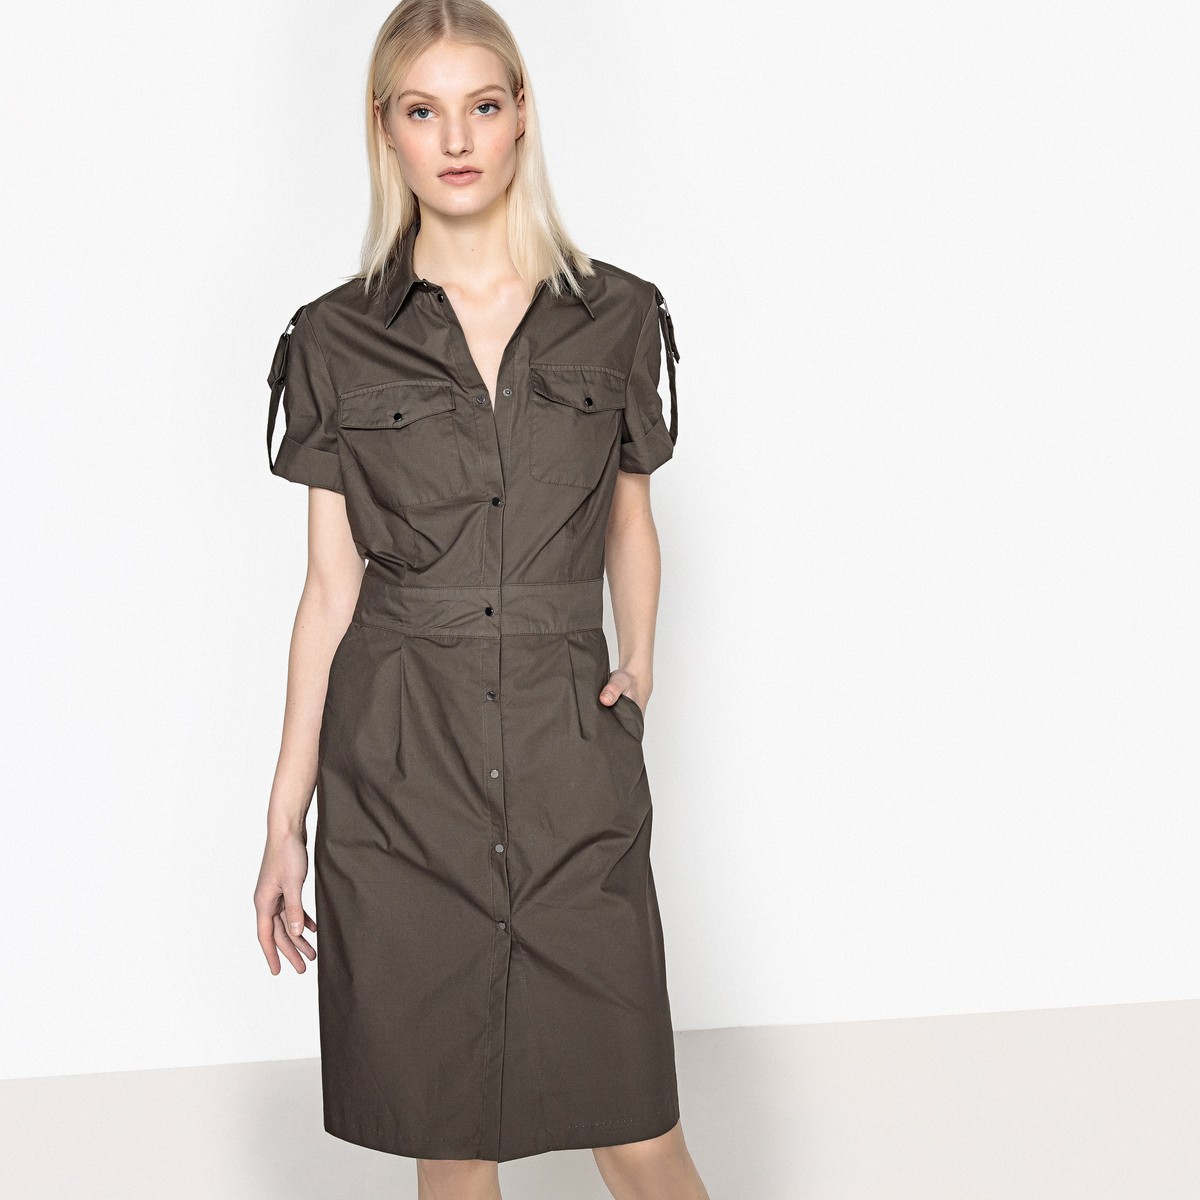
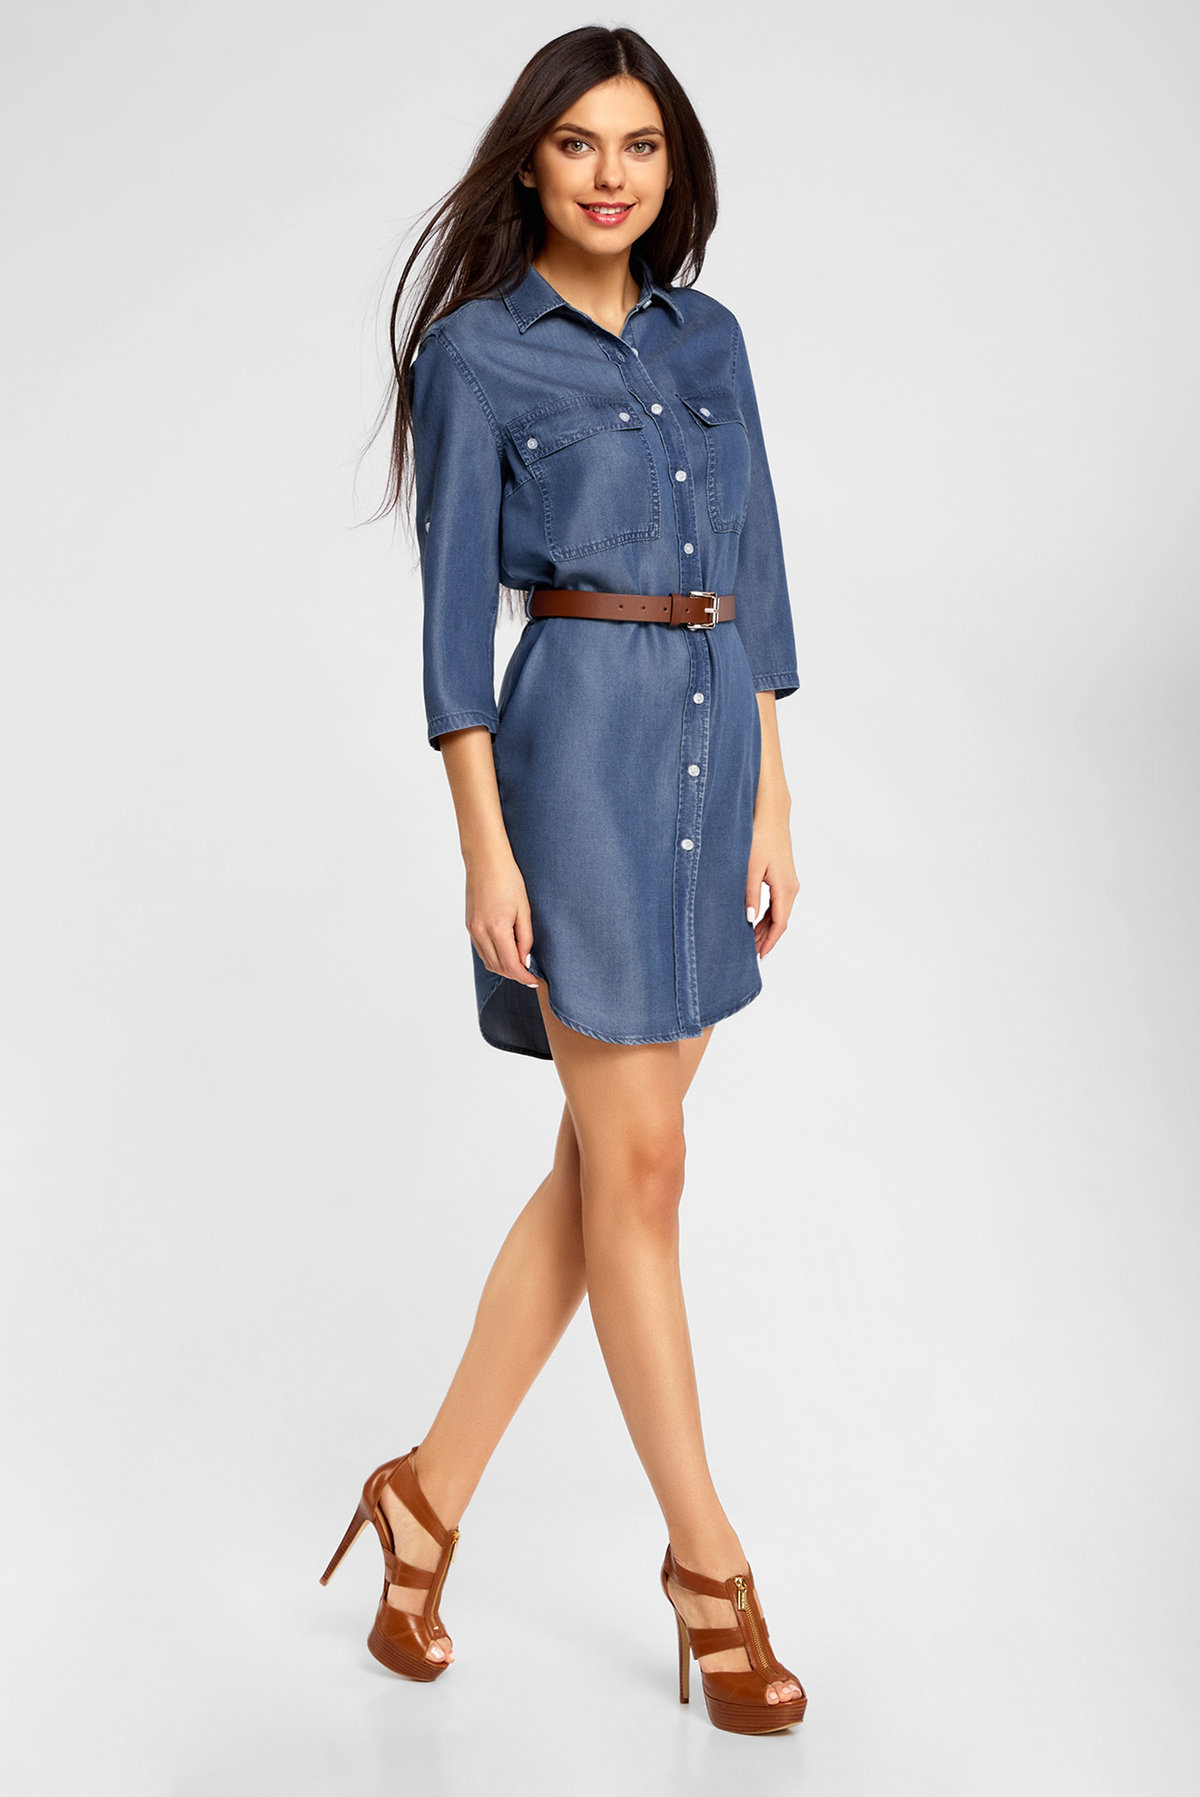
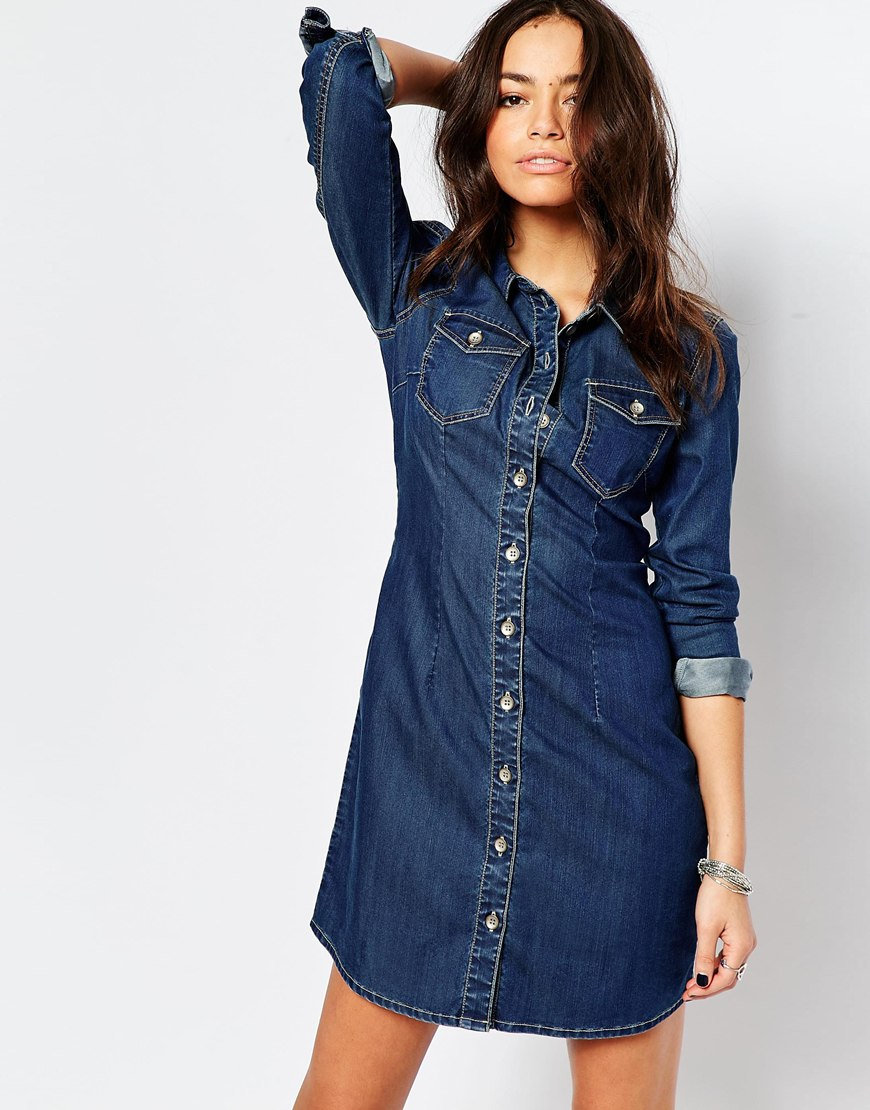
One of the most popular styles is a dress in the form of a classic men's shirt with an elongated silhouette.. The cut is straight, the sleeves are long or short. The length can be adjusted depending on the figure. A shirt-type dress for a woman has the following features:
- simplicity and elegance;
- loose fit bodice;
- classic collar;
- buttons on the placket.
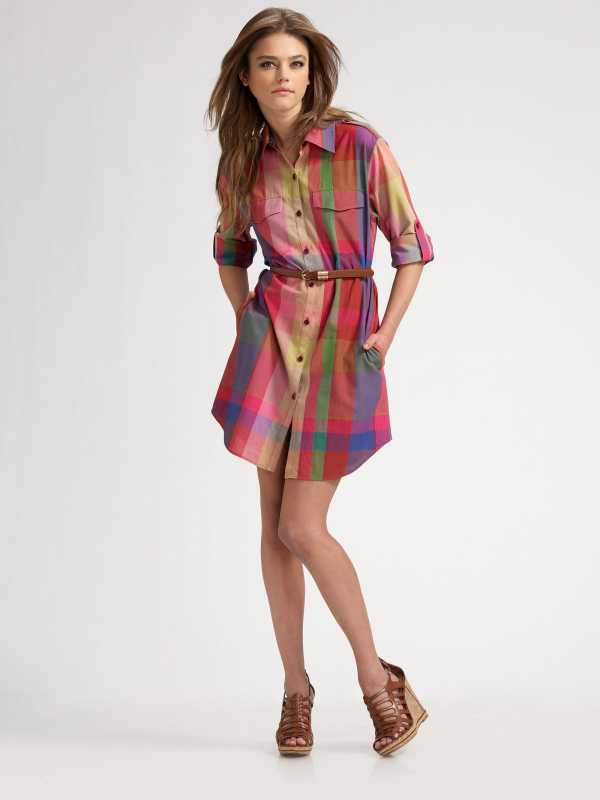
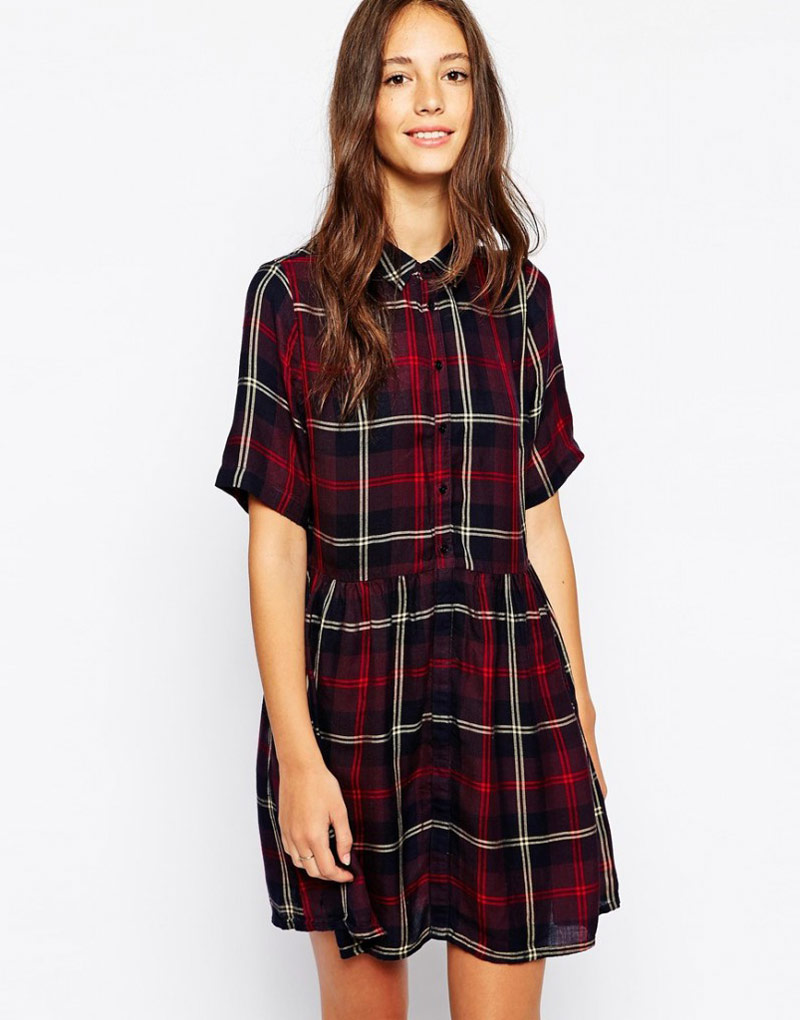
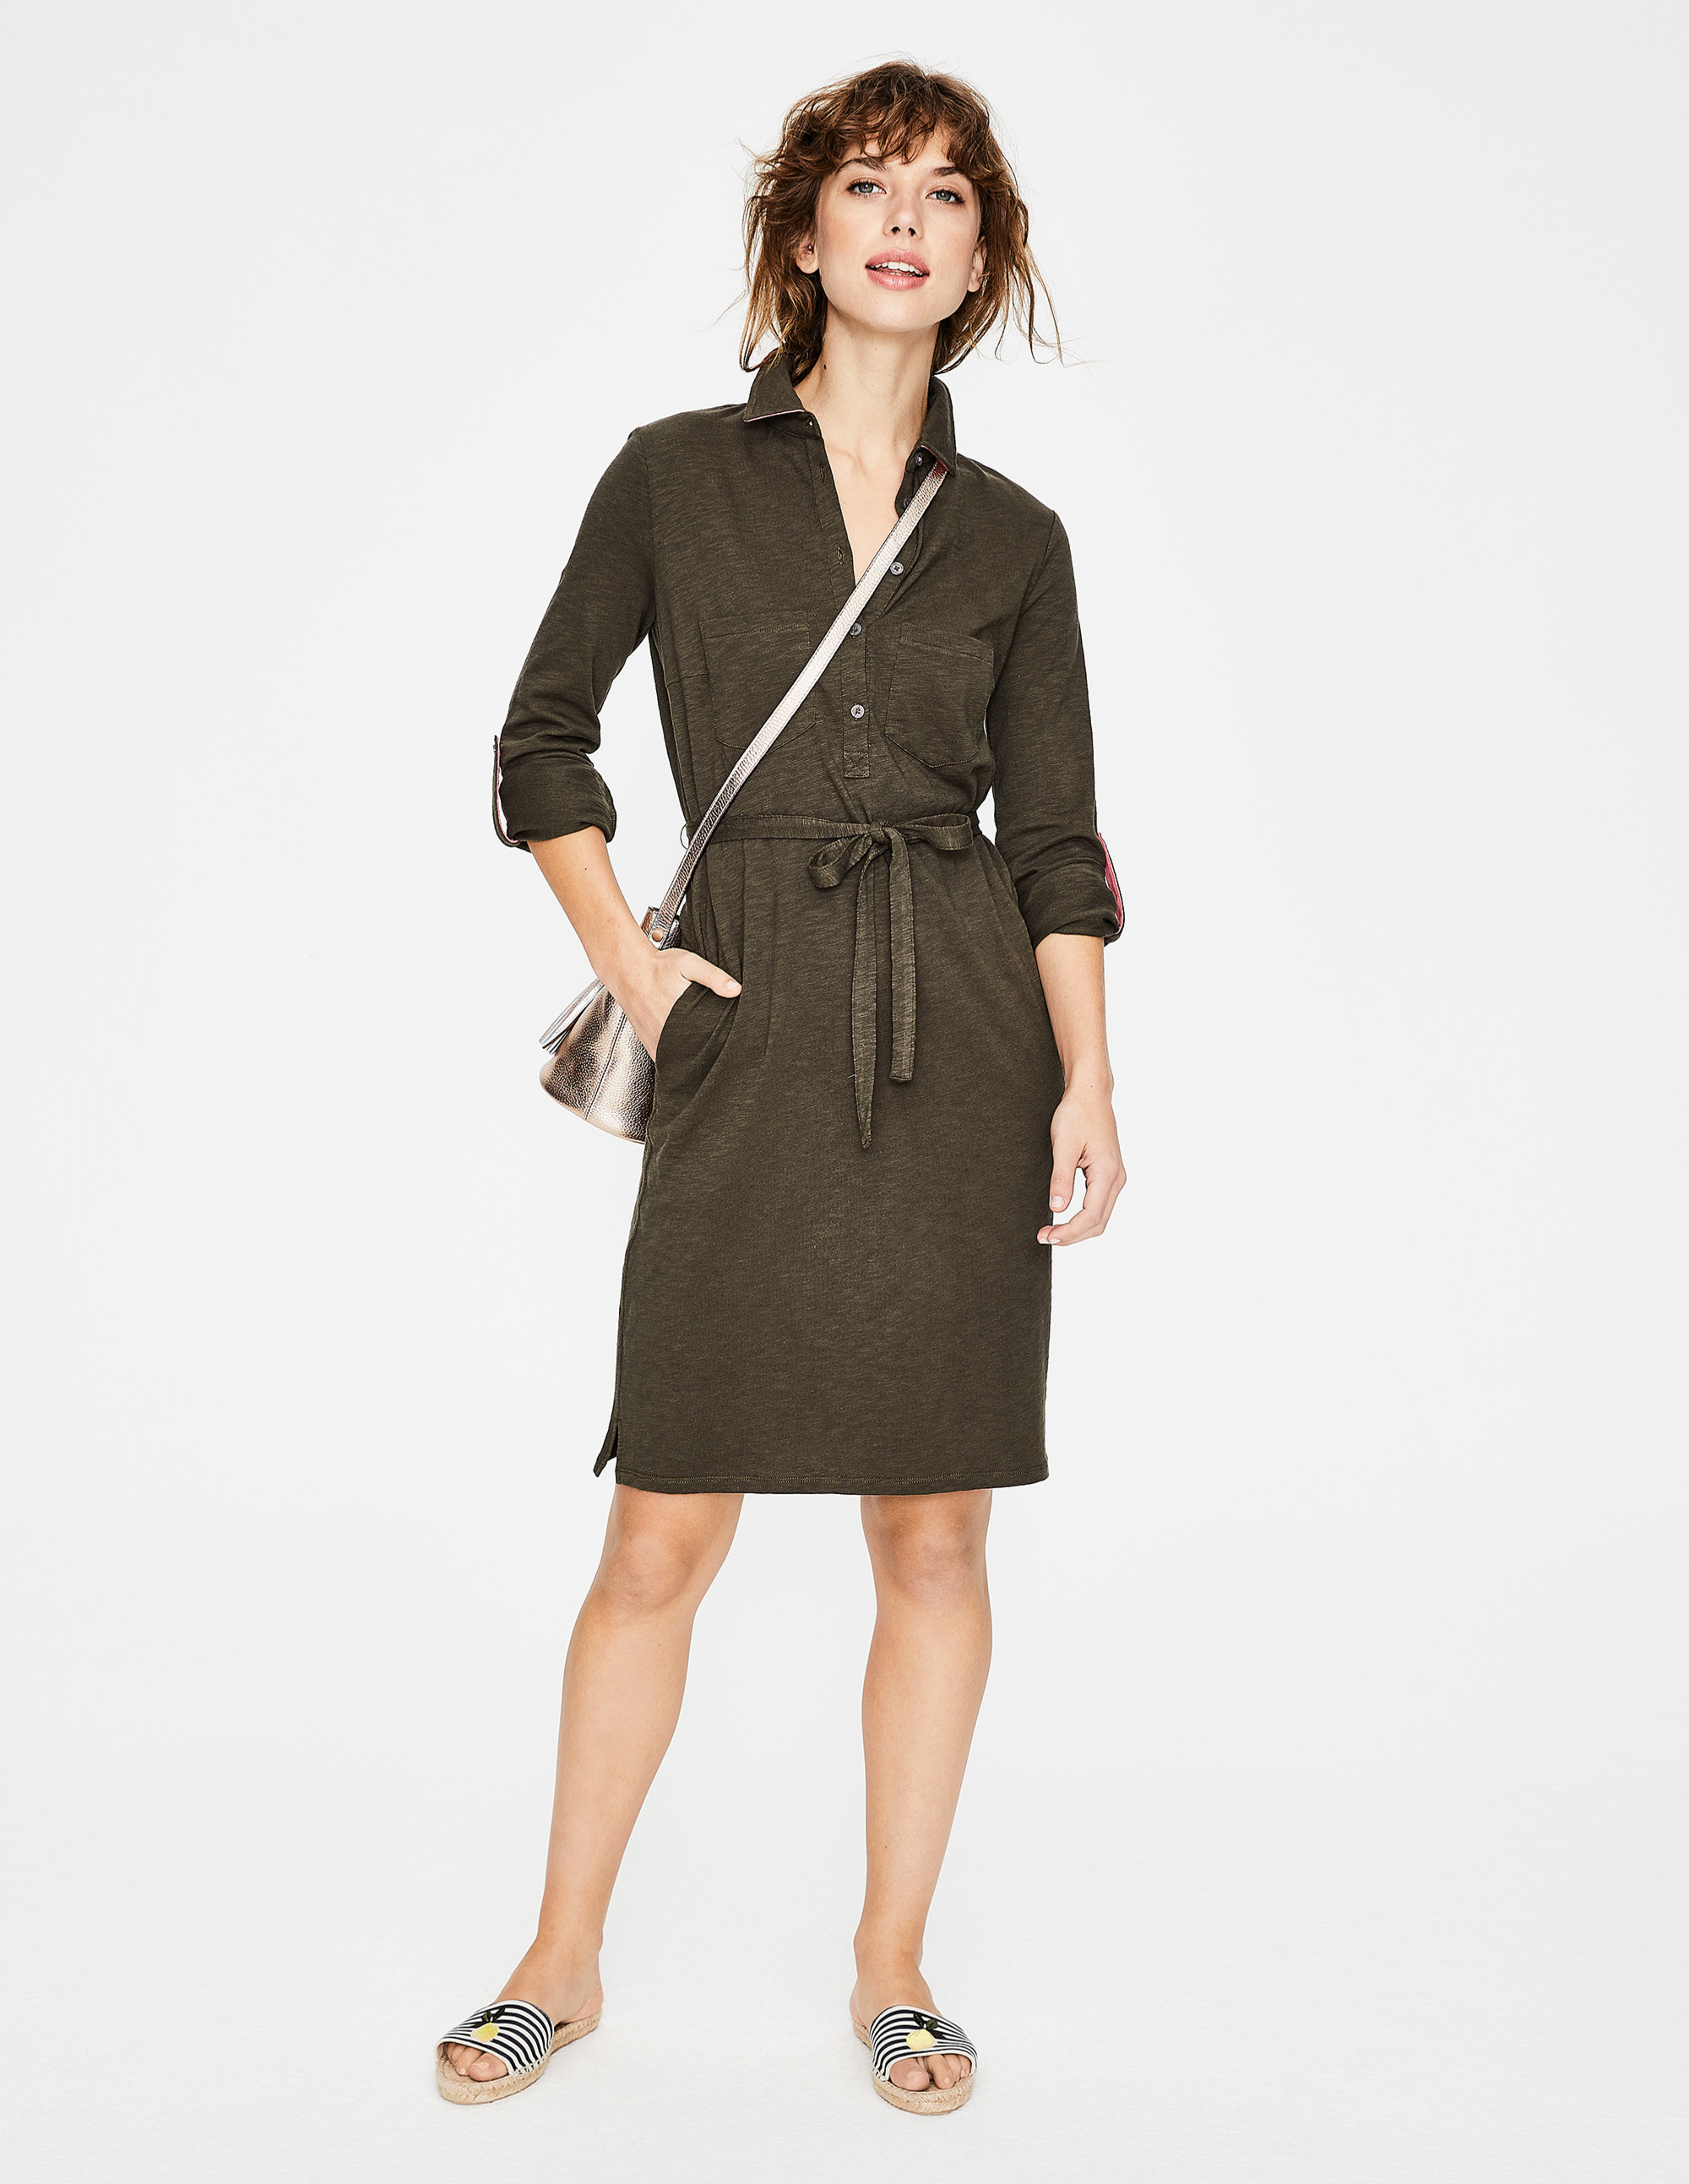
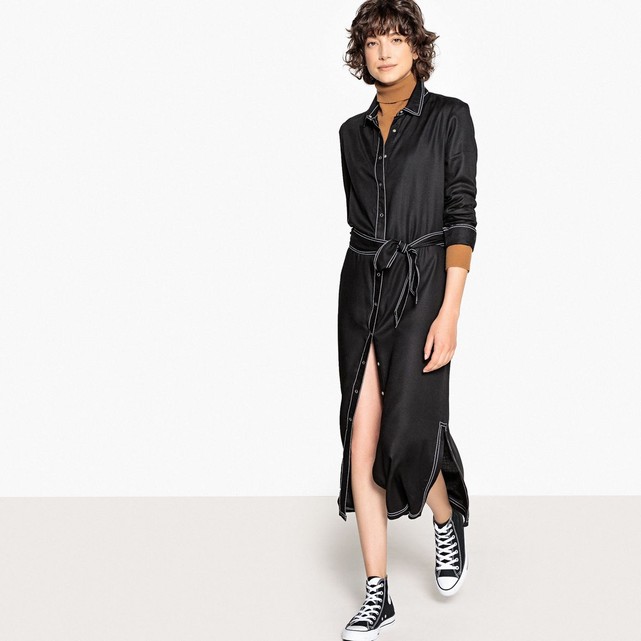
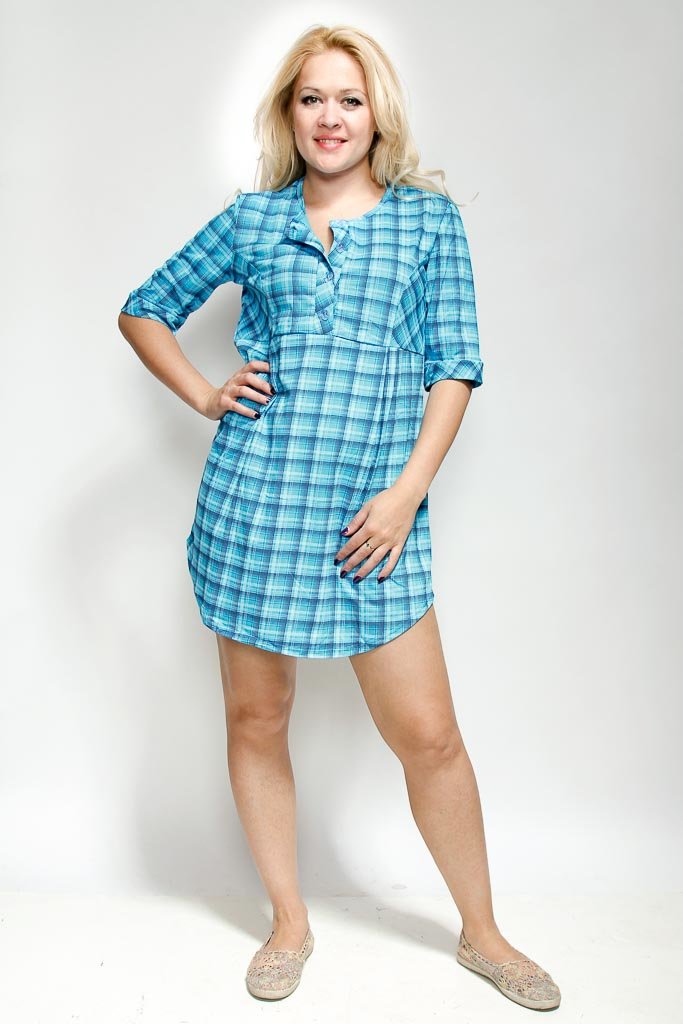
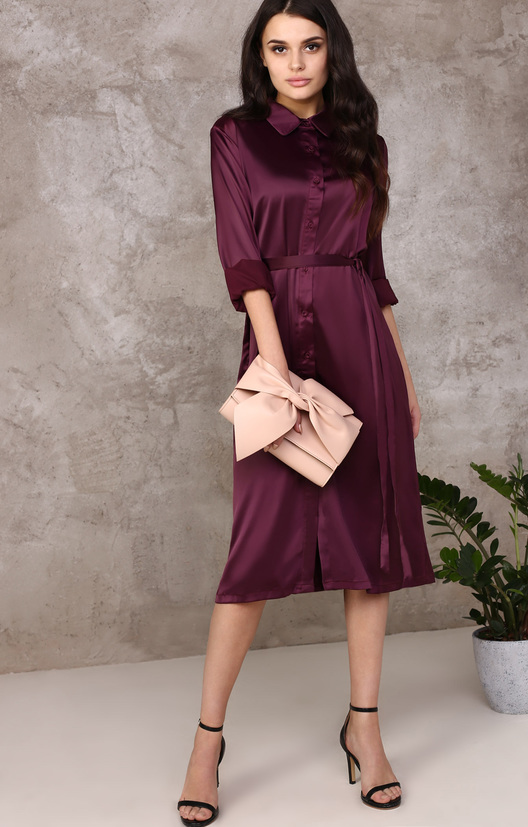
Monochrome models go well with high-heeled pumps, simple accessories such as a men's leather belt at the waist and a formal bag. Checkered multi-color shirts look better with ballet flats, loafers, moccasins, backpacks of bold design, textile, leather or suede belts.
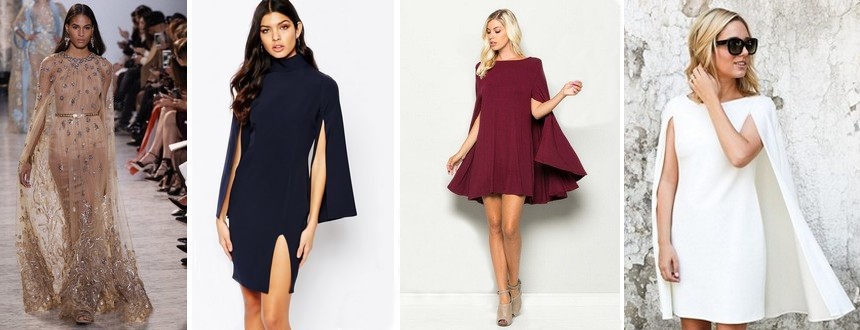
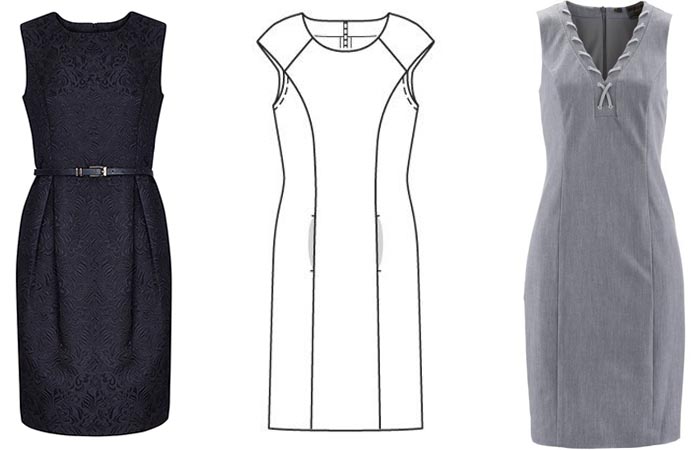
The pattern of a summer shirt dress often suggests open shoulders, emphasizing femininity and fragility. This can be a style where the top line is straight, it starts from the collarbone in the front, from the shoulder blade in the back. Or an option where the sleeve cutouts go from the collar to the elbow, opening the upper part of the arm.
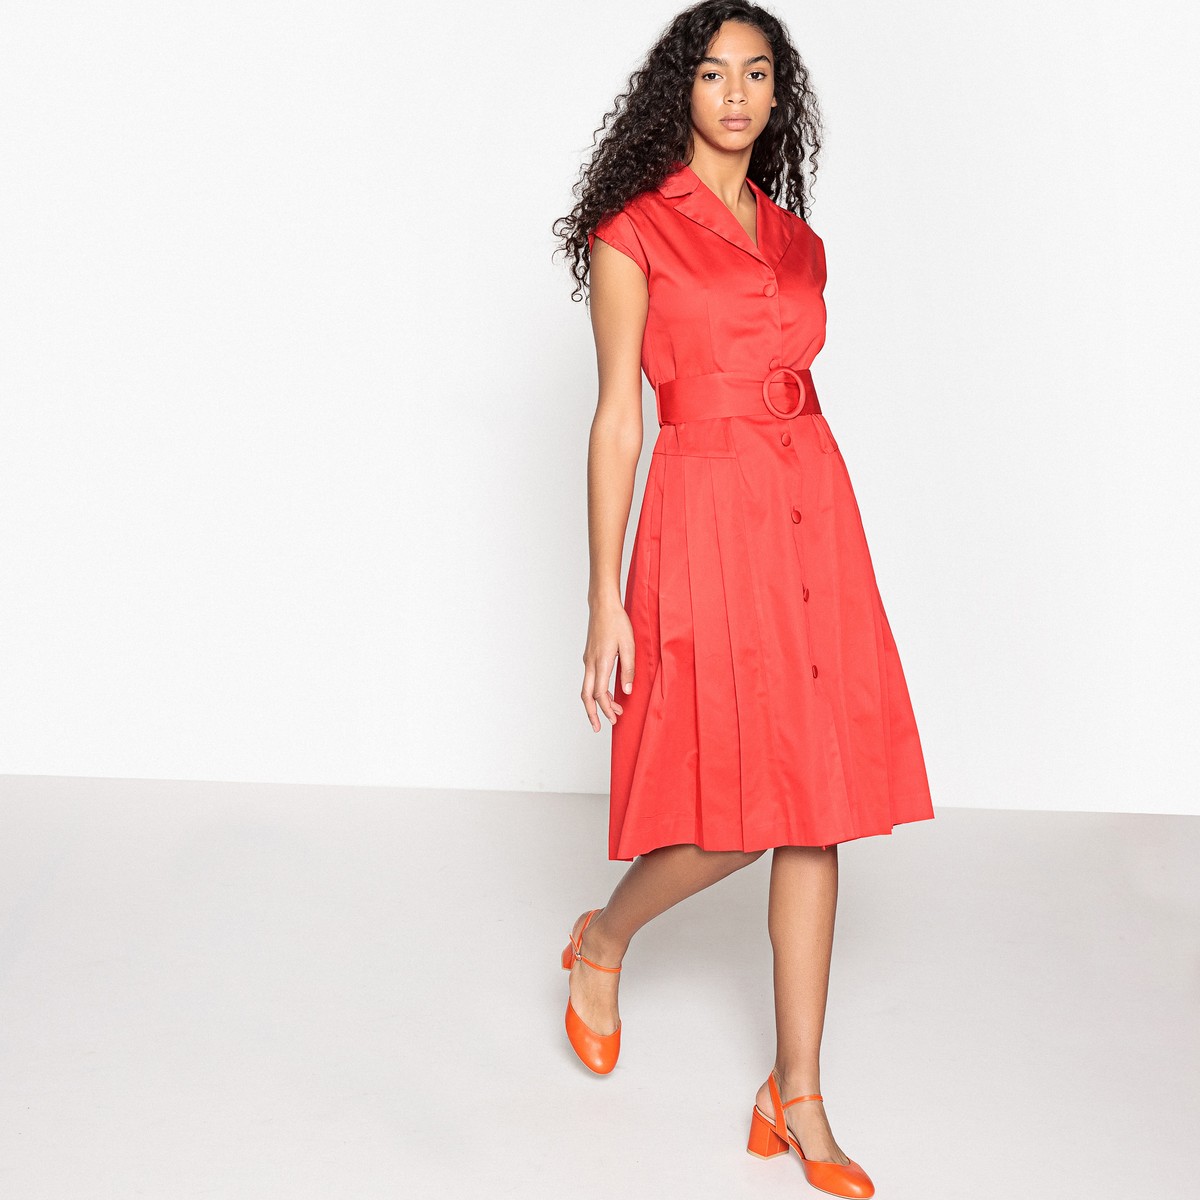
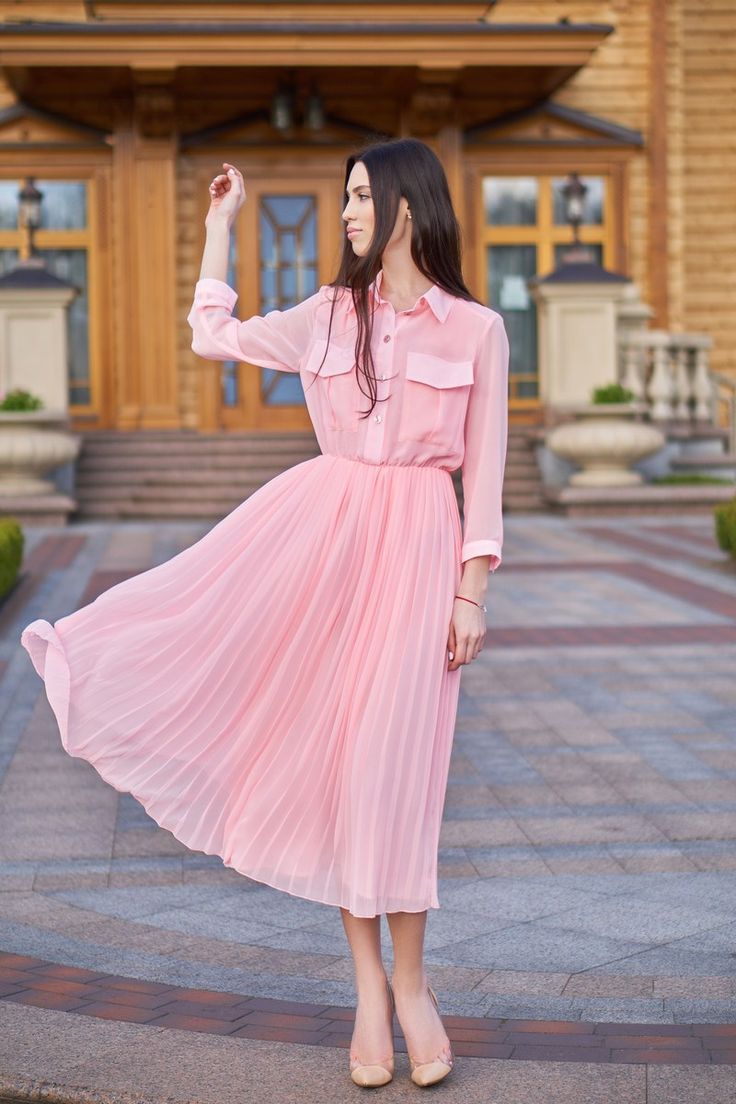
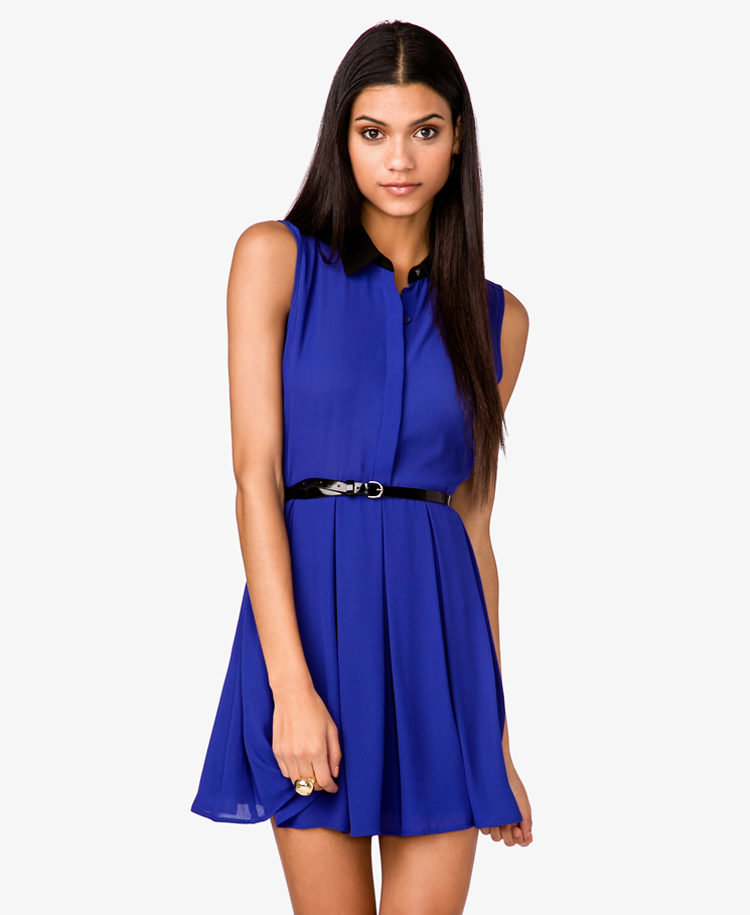
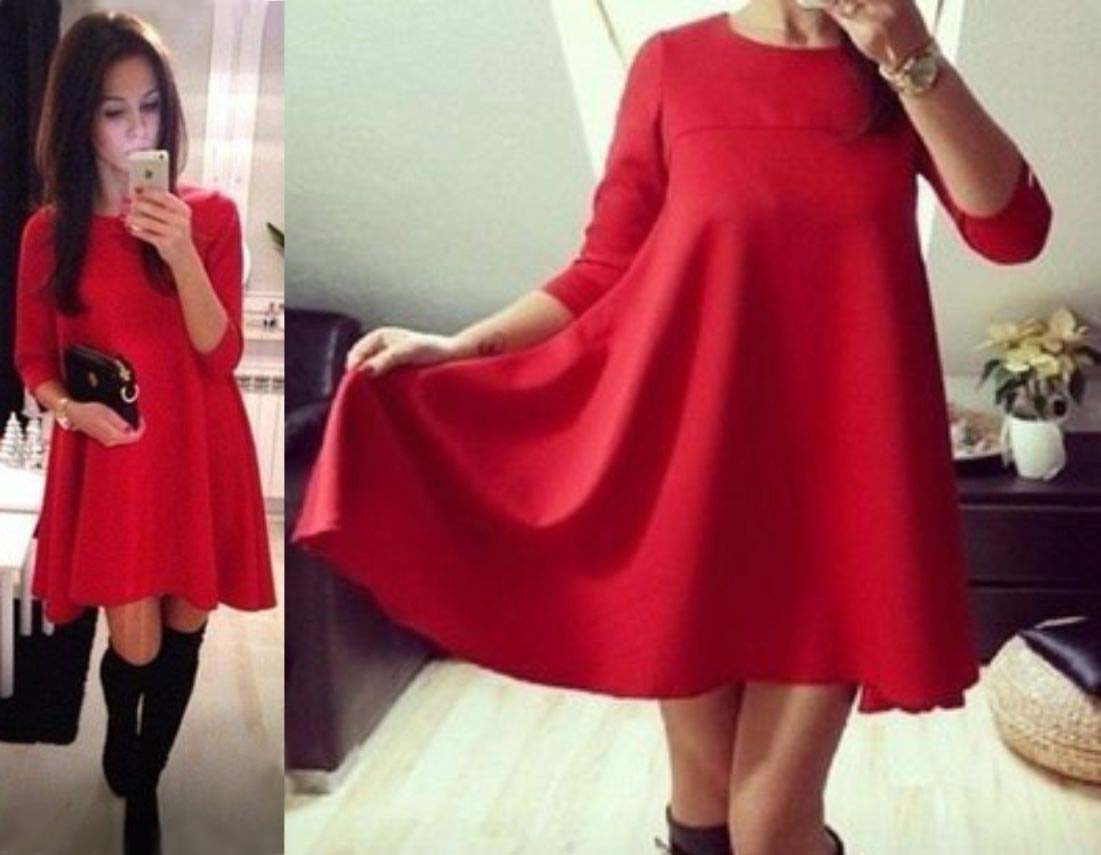
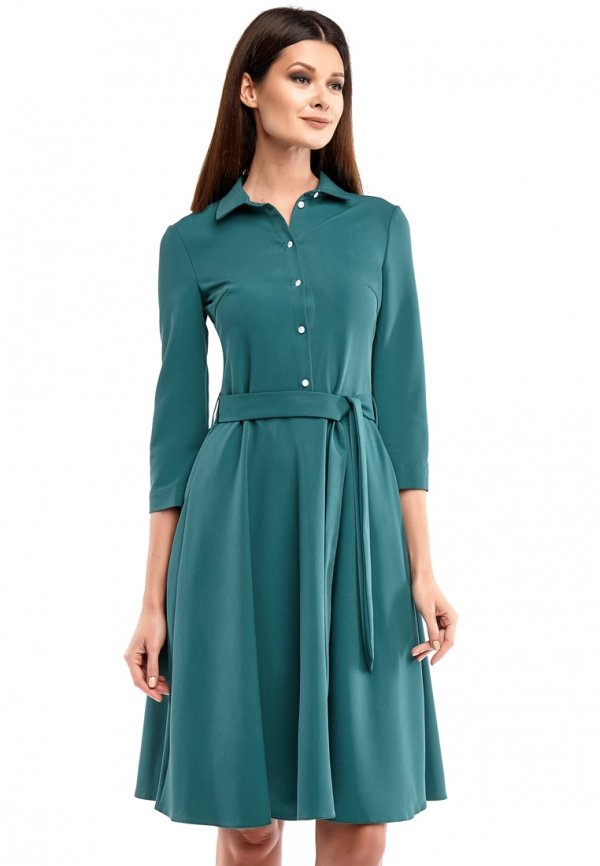
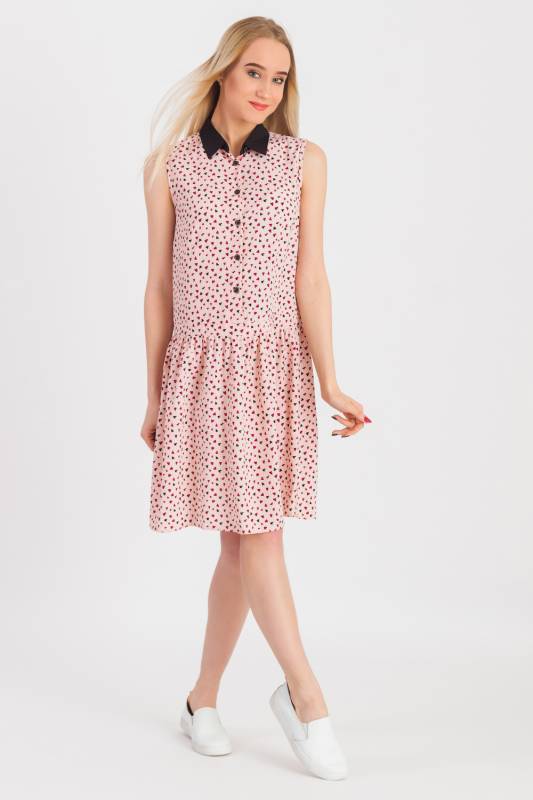
A dress with a flared hem and an accentuated waist in the style of the 50s is a little more difficult to sew. For those with an hourglass figure, the style will add charm, and with the right choice of fabric and accessories, the outfit is perfect for a walk or a date. The pattern of a sleeveless shirt dress in this style suggests a stand-up collar, which can be decorated with stones, embroidery or lace, which will add an evening accent to the image. All that remains is to choose high-heeled shoes, an interesting or, on the contrary, laconic clutch.
A shirt dress pattern for a full figure, as a rule, is distinguished by a loose silhouette. It can be not only a "fly-away" robe-type dress, but also an elegant garment with a belt below the waist (if height allows), or a shelf under the chest. Interesting voluminous designs (for example, pockets or a collar-yoke) will help to visually balance the figure, creating a beautiful image.
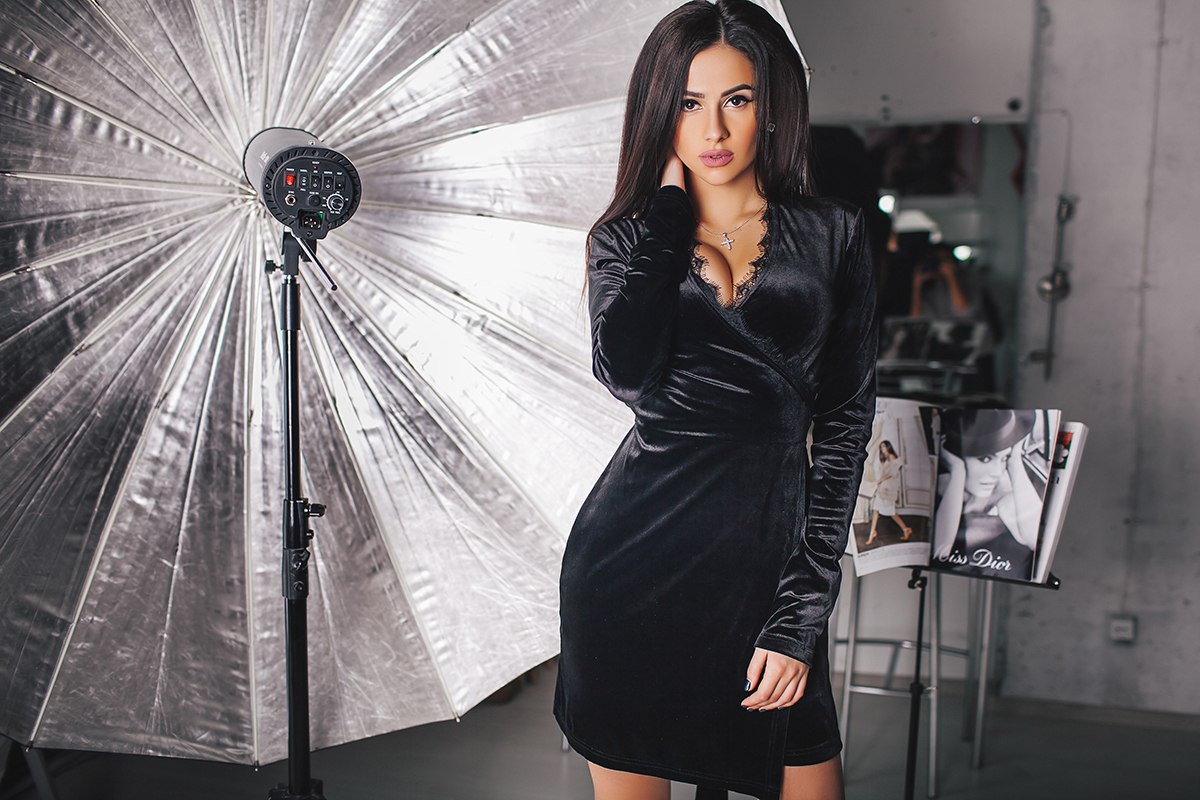
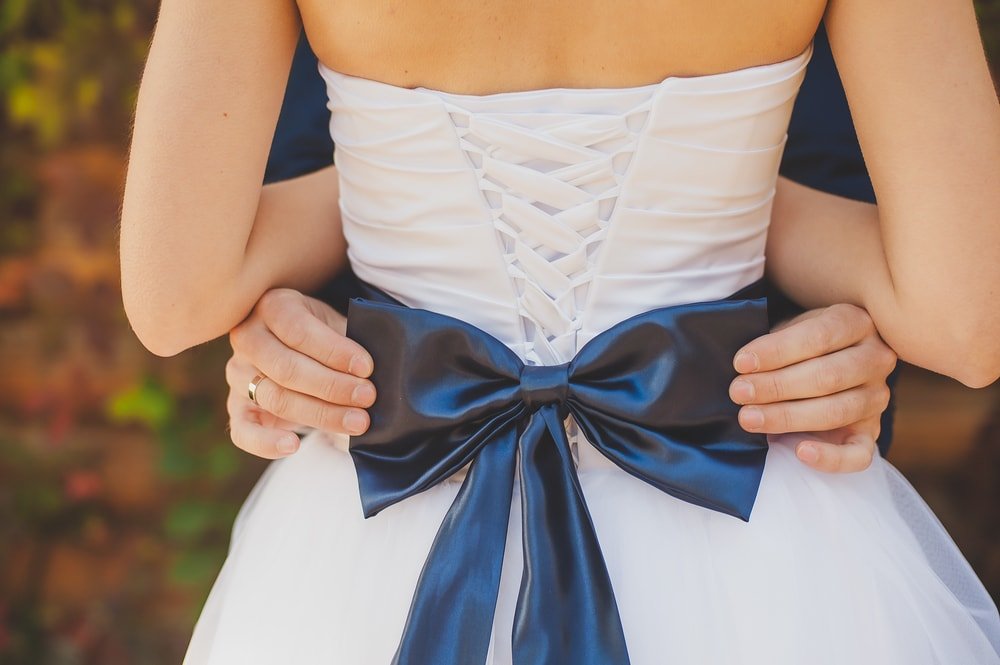
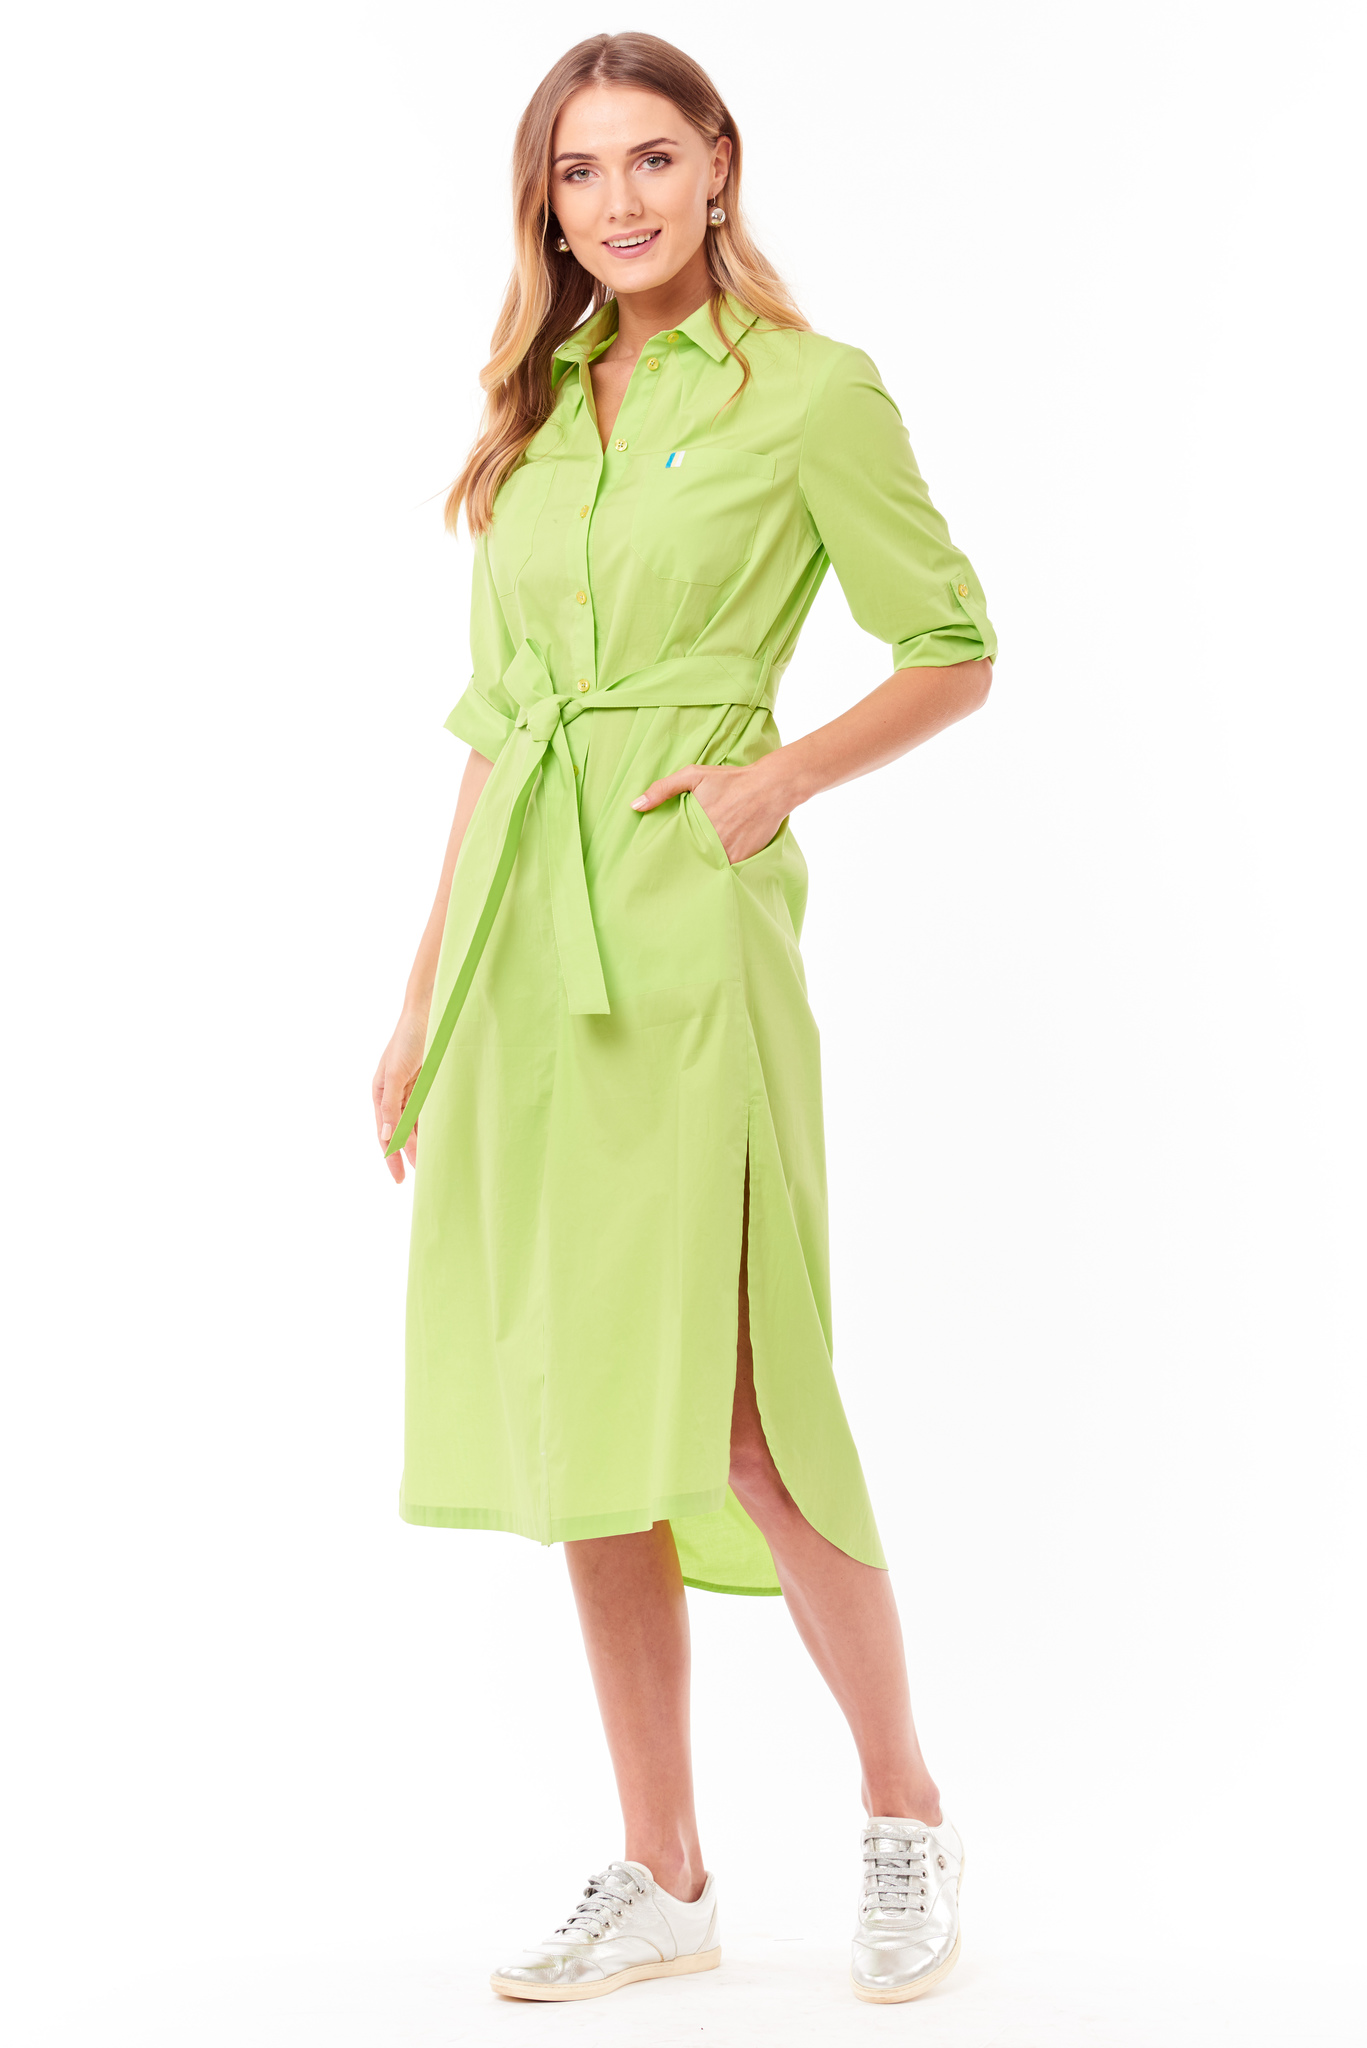
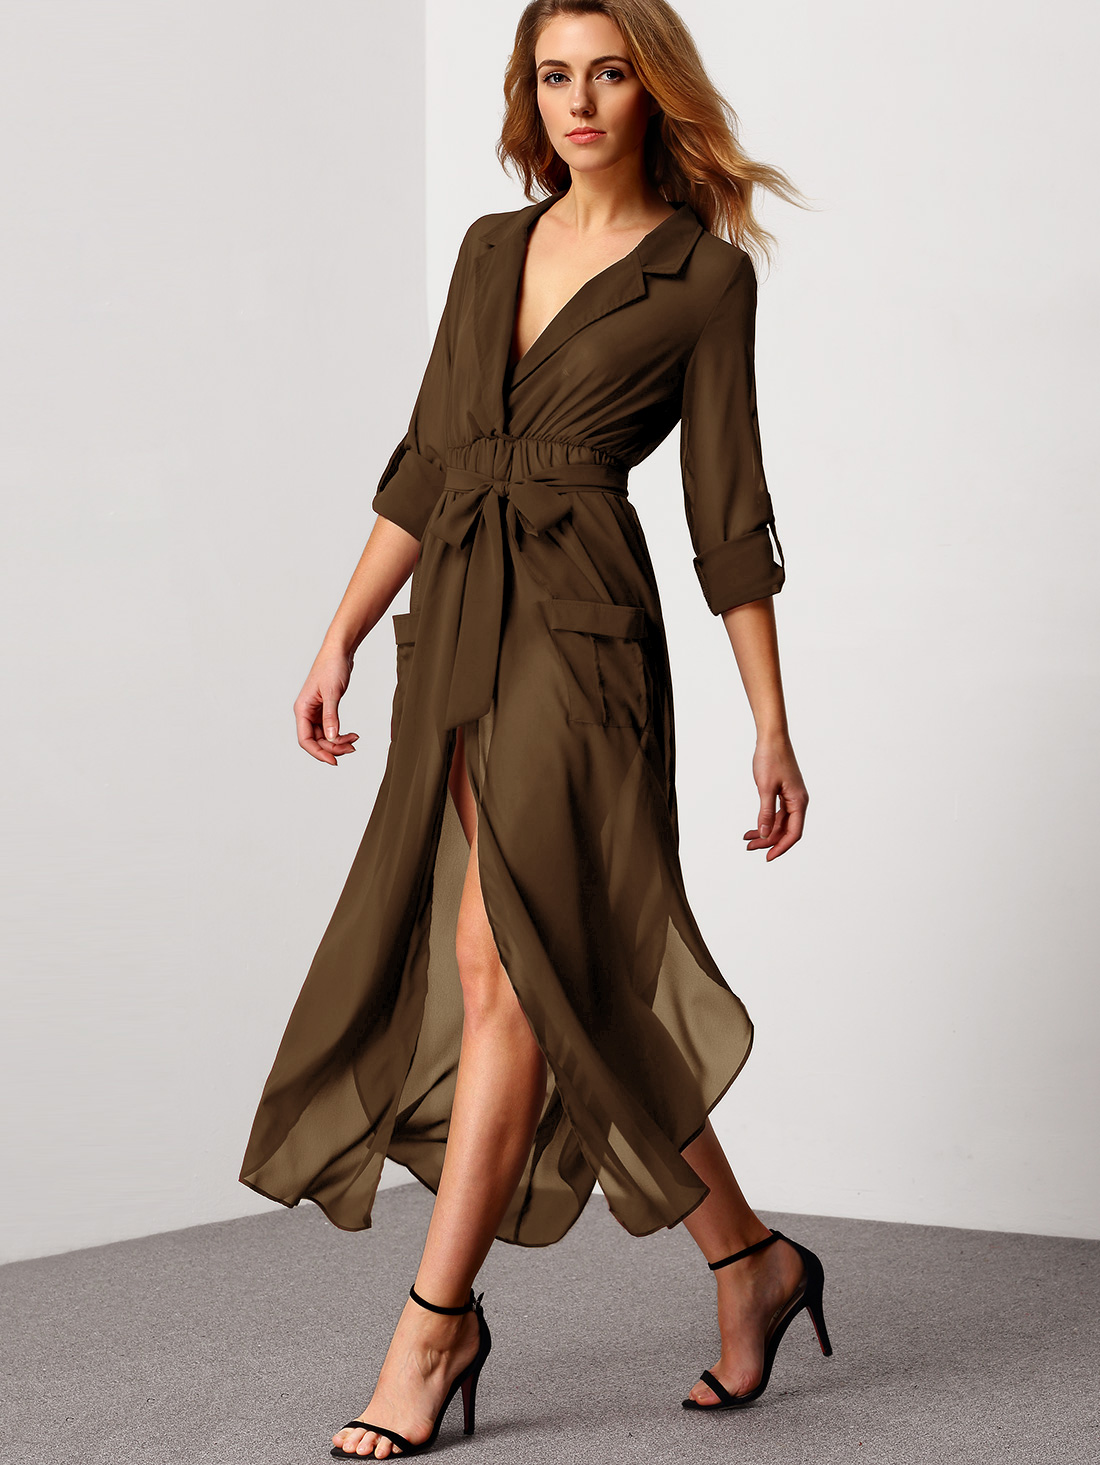
A wrap dress is another interesting variation of the shirt cut. It will suit almost any body type. A belt is a must. It can be a thin drawstring, a wide fabric sash or cute ribbons on the side.
Materials of manufacture
Having decided on the style, you need to choose the fabric. In this case, you need to consider the season and the preferred area of use. For example, frivolous chiffon flounces will be inappropriate in the office, and guipure - in a picnic outfit. When sewing shirt-style dresses, the following materials are used:
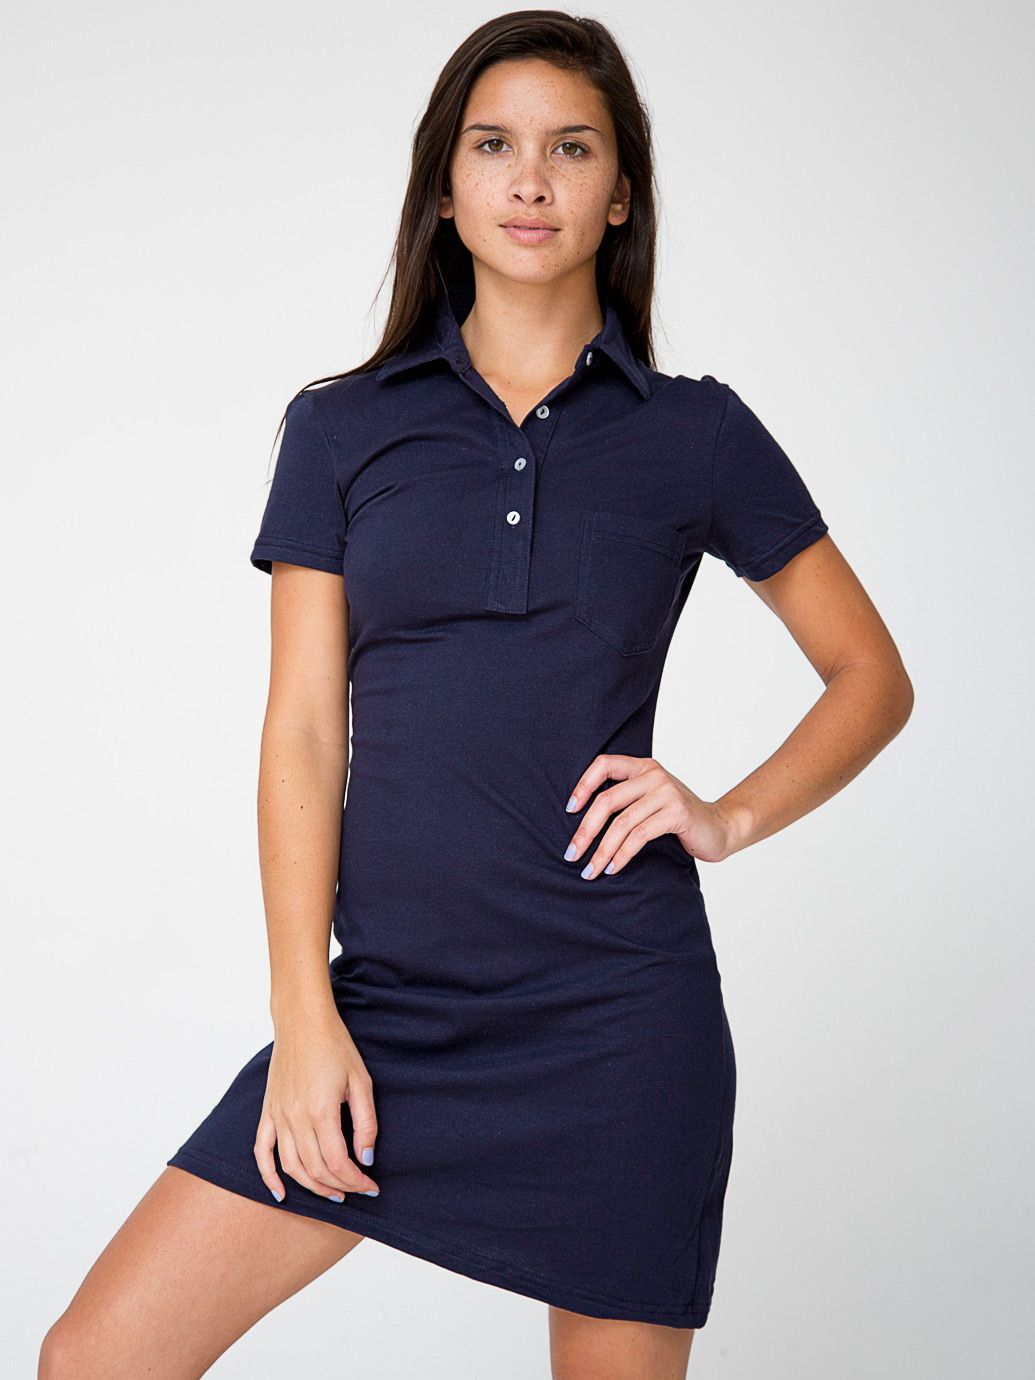
- Cotton. Cotton clothing is great for everyday use: walking, shopping, family outdoor recreation. This material is a great option for patterning dresses for beginners.
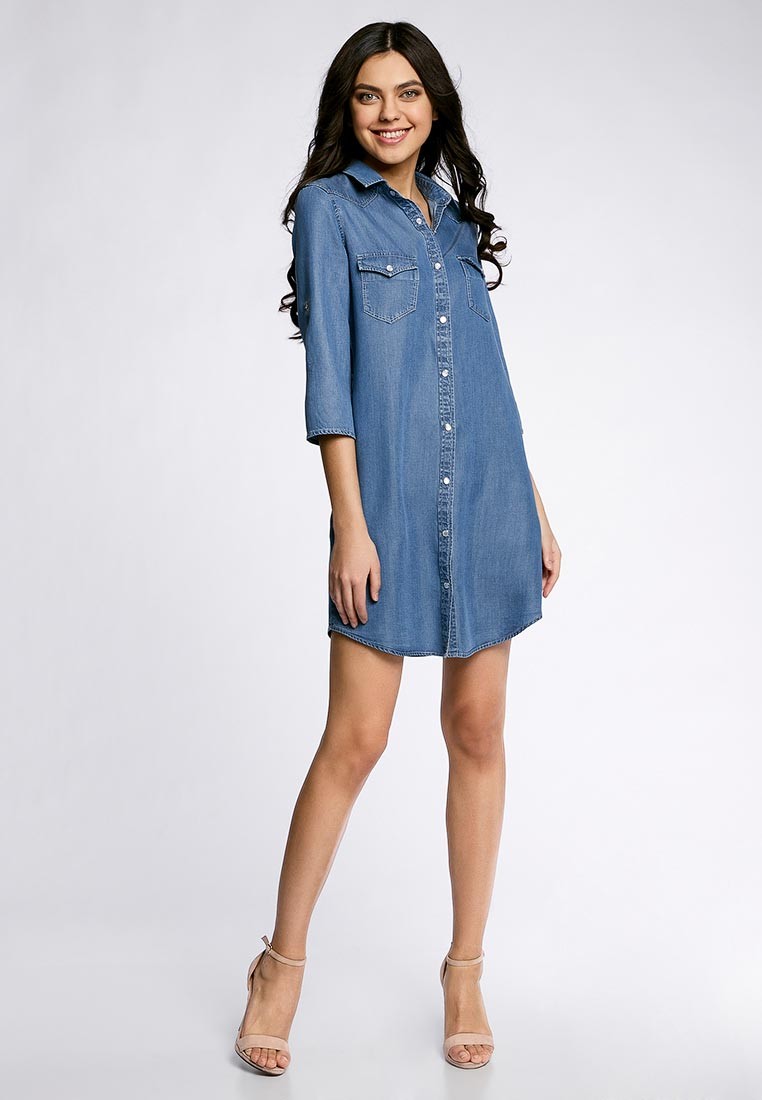
- A denim shirt dress is also perfect for these purposes. The dense, practical material requires certain skills when working with it, but the result will be an outfit that will definitely not gather dust in the wardrobe.
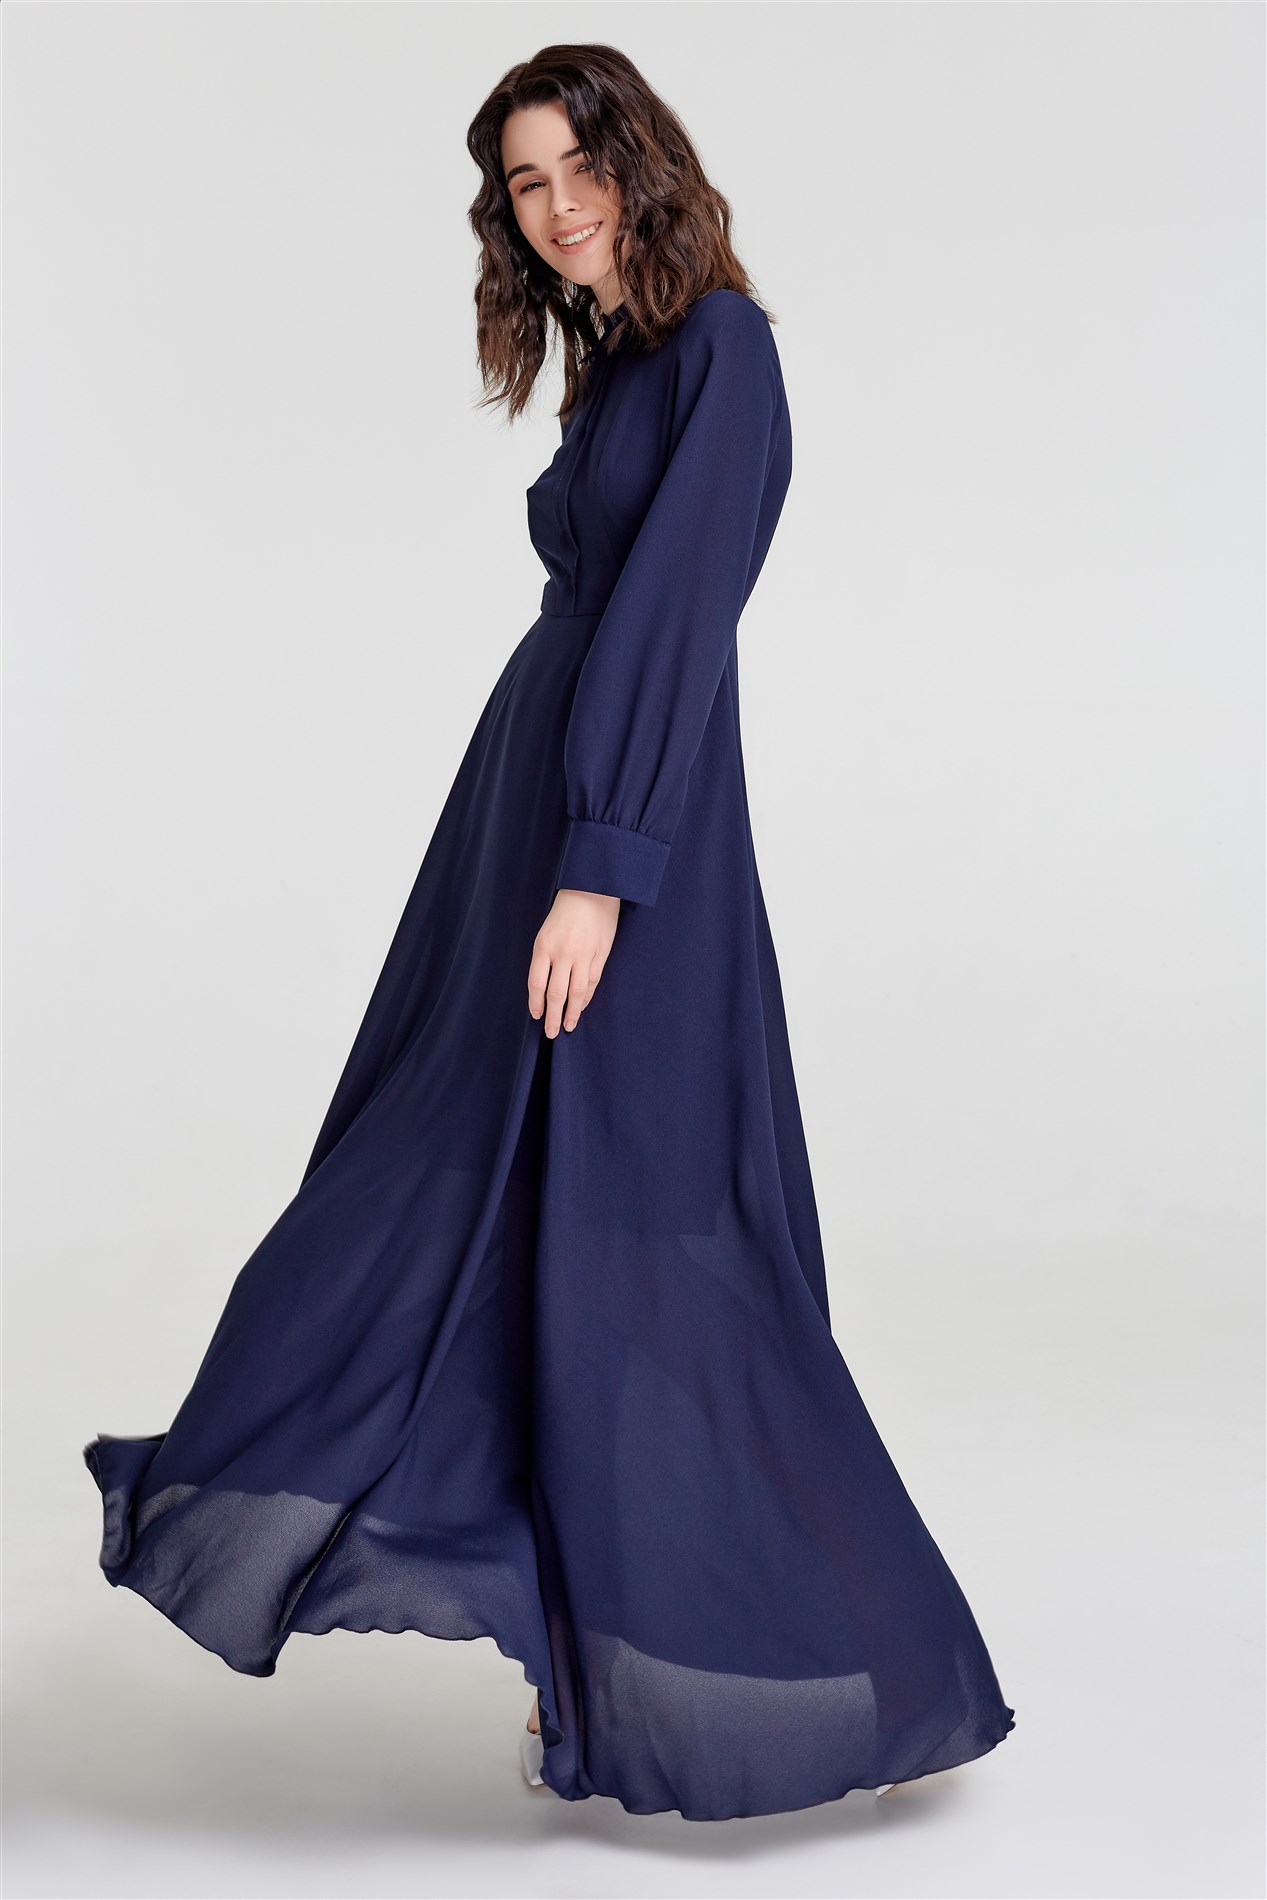
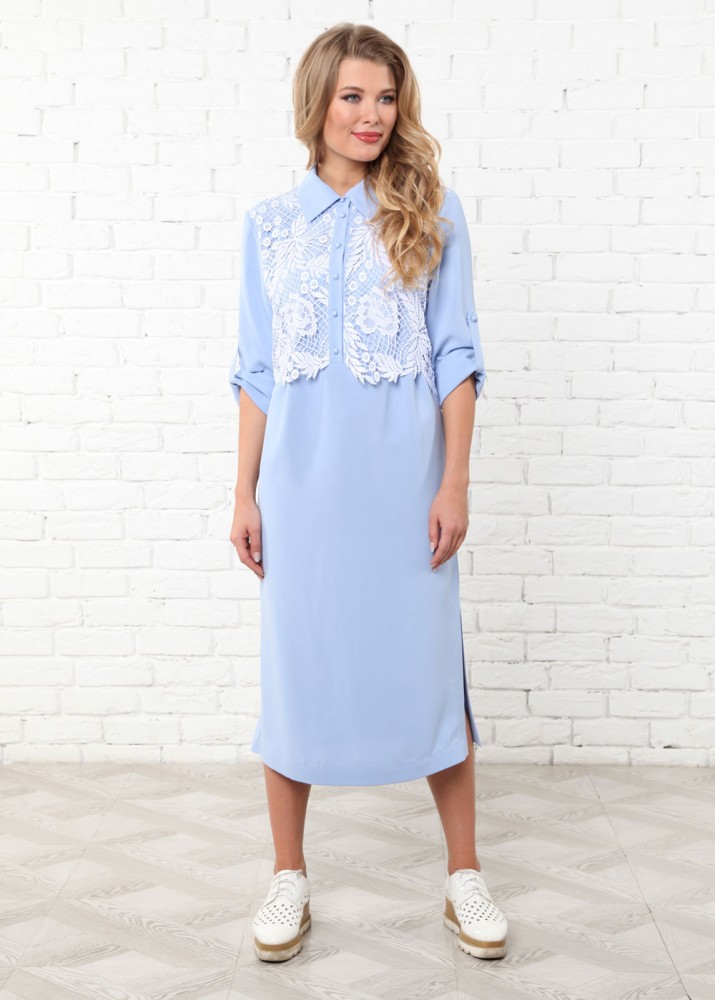
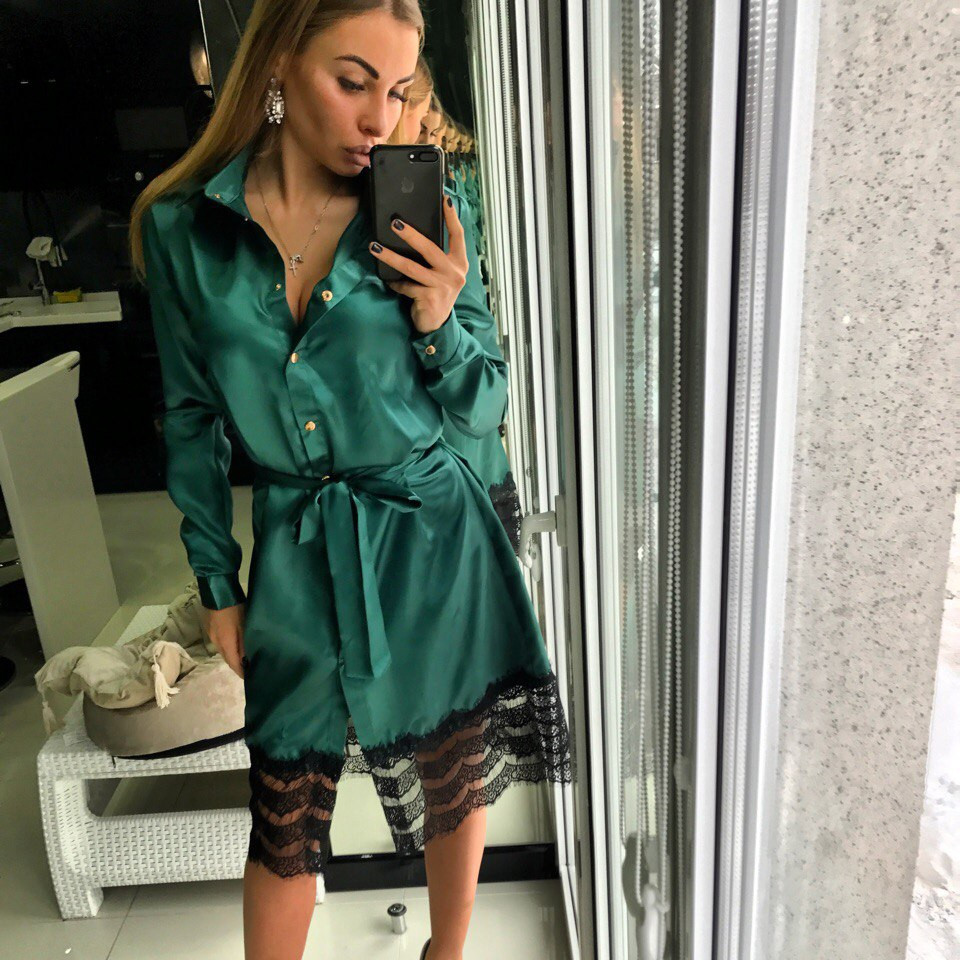
- More capricious silk is a great choice for sewing formal wear. A light shirt-type cocktail dress or a floor-length evening option made of this fabric will create an unforgettable image. The use of decorative inserts made of delicate lace is not prohibited. Elegant guipure will add solemnity.
- A chiffon shirt dress can have design elements: drapery, flowing sleeves, pleats, a hem of a complex cut. The airiness of the material will allow you to sew a magnificent outfit for a summer walk.
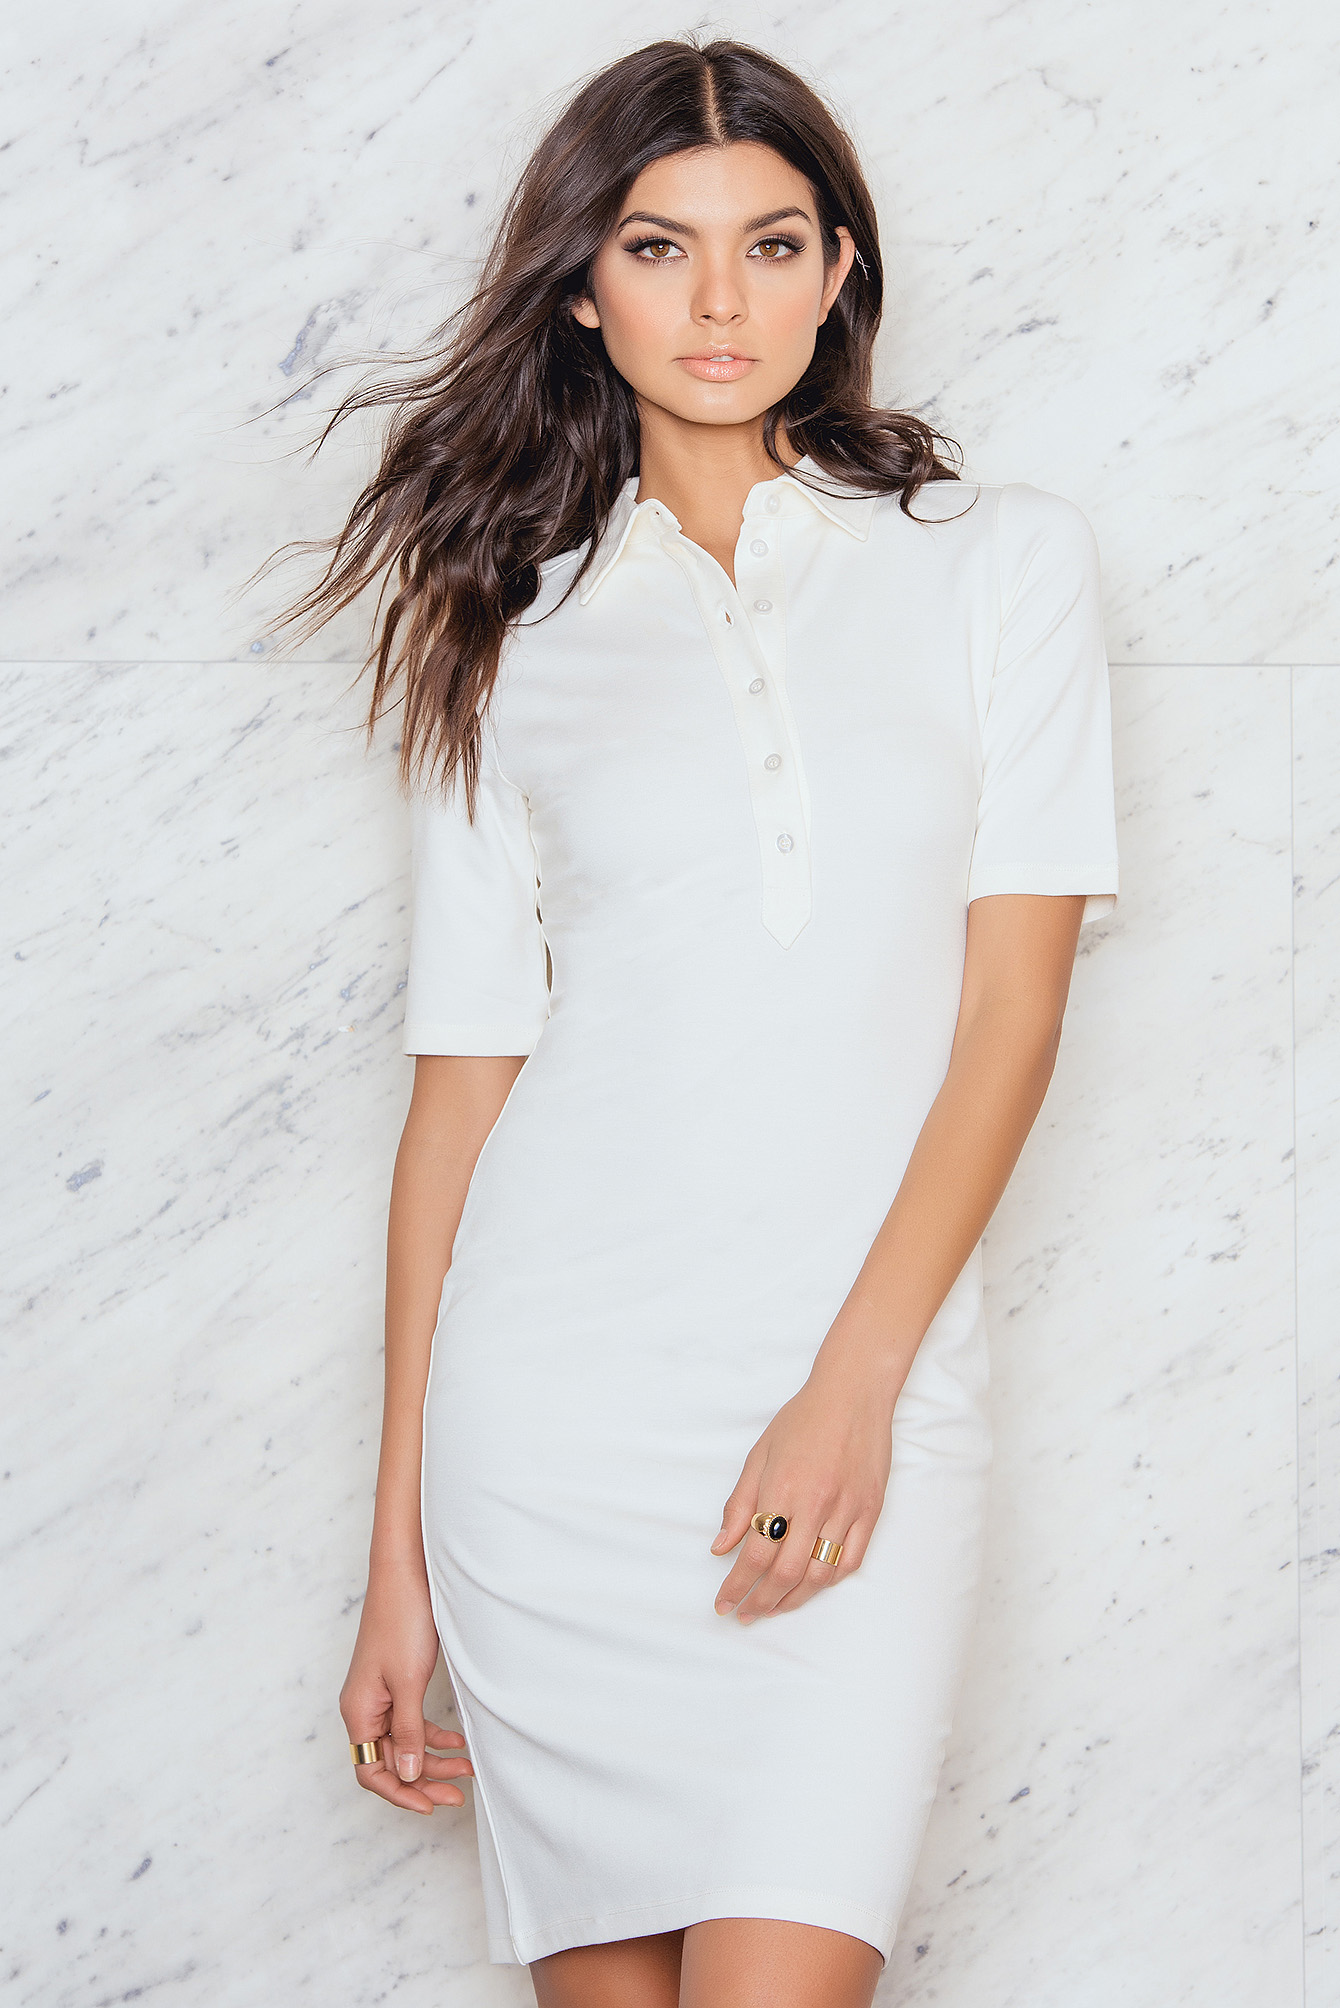
- A jersey shirt dress with a one-piece sleeve is a great option for the office. It will create a strict but neat look.
The right choice of fabric will make the work easier for a beginner, set the tone for the entire product, determine the need for lining, shape-forming elements. The type of stitching, choice of fittings and decor depend on it.
Creating a pattern
When asking the question of how to sew a shirt dress, beginning seamstresses initially feel unsure of their abilities, and therefore prefer to turn to ready-made patterns. They are provided in abundance by illustrated publications for needlewomen, blogs of skilled craftswomen, video tutorials, master classes. Undoubtedly, a shirt dress according to a pattern from the Burda magazine will be fashionable, but it may not fit the figure. The parameters of such patterns are not suitable for everyone. A ready-made pattern for sewing a shirt dress will come in handy if the future owner can boast of a slender figure.
Of course, you can pay attention to simple models. A basic shirt dress without a pattern is not so easy to sew with your own hands. But with a certain amount of skill, it is possible. If you want to start with the simplest option, you should ask how to sew a dress from a shirt that has gathered dust in the closet. However, if you want to get a more interesting outfit with a fluffy skirt and a fitted silhouette, you will have to work hard. Creating a pattern according to individual parameters is not so difficult if you break the process down into stages.
There are many different services on the Internet for making patterns with individual sizes. They make it easier to create a drawing: you just need to enter your data. Even professional seamstresses do not disdain to use similar programs.
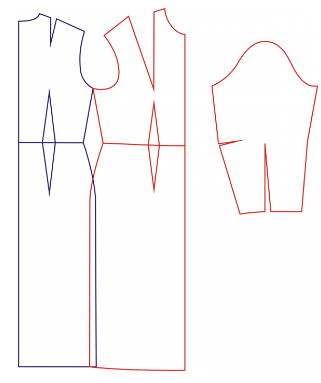
Modeling the bodice
As a rule, fitted shirt dresses are created with a cut-off waist, which makes it possible to model the bodice separately. In order not to be disappointed with the result, you should take as a basis the model of your own dress, which fits well and meets all the requirements for style.
Then you need to take all the necessary measurements:
- chest, neck, waist circumferences;
- length to the waist at the back;
- length of the front part to the waist;
- back width;
- center and height of the chest.
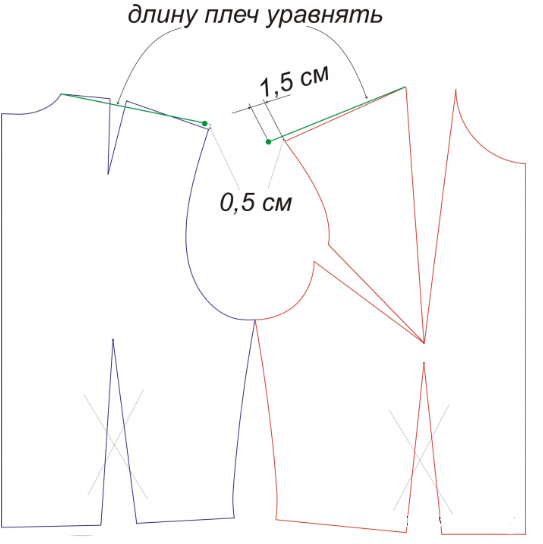
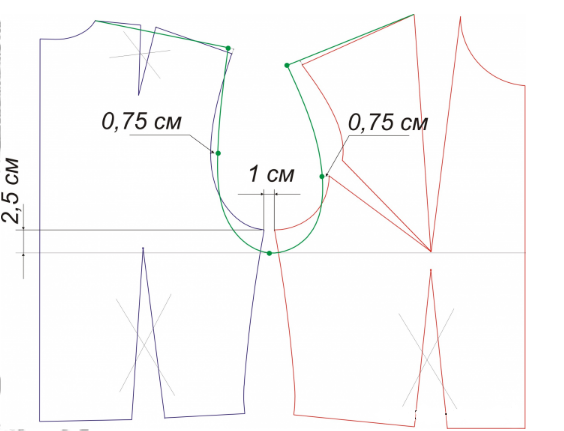
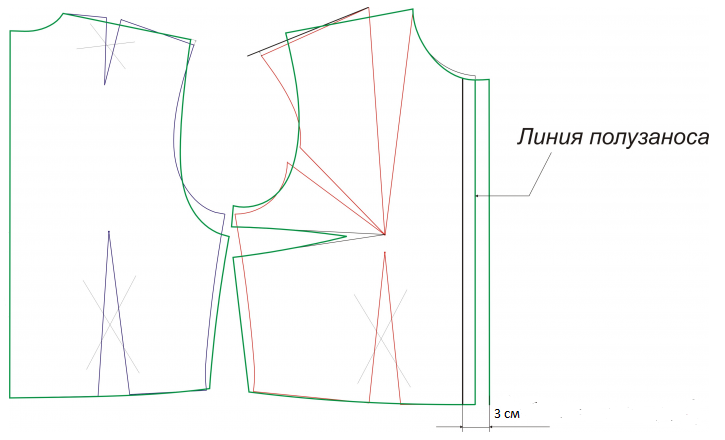
Next, mark the darts. They should be partially transferred to the armhole on the shelf (about 2 cm). Darts at the waist are optional: instead of them, you can mark folds that will softly frame the belt interception. It is important to monitor the alignment of the shoulder line. Otherwise, the product will turn out crooked. The next step is to draw a bar with future buttons. It is usually done with a fold, so you need to take this into account in the drawing.
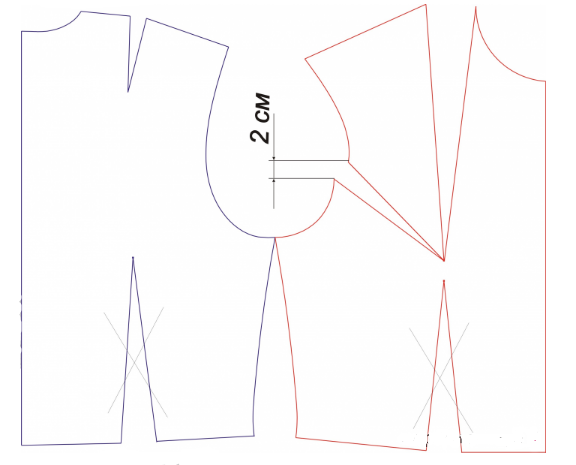

Sleeve pattern
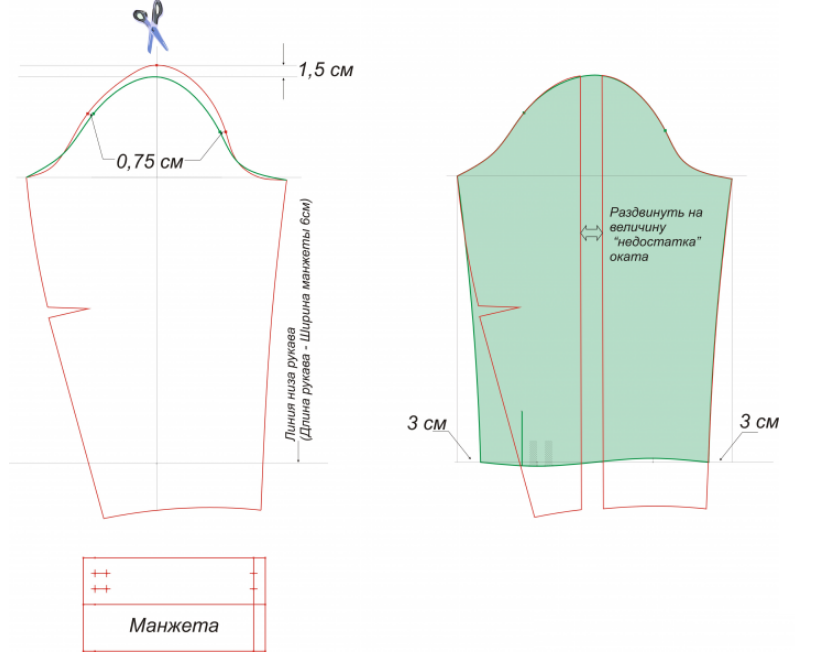
When creating the pattern for this element, it is necessary to take into account the width of the armhole modeled on the bodice. The sleeve cap can be adjusted by decreasing its height while simultaneously increasing its length in order to successfully sew the detail into the armhole.
An integral part of the sleeve is the cuff. It is quite easy to include it in the pattern - it is a rectangle about 12 cm wide, which is double the size of the finished piece. The length is equal to the wrist circumference.
Modeling the collar
The classic version is a stand-up, turn-down, with a cut-off stand. First, you need to measure the size of the neckline along the shelf and on the back. Draw a rectangle with the sides:
- a – length of the back neck and front;
- b – width 9.5 cm.
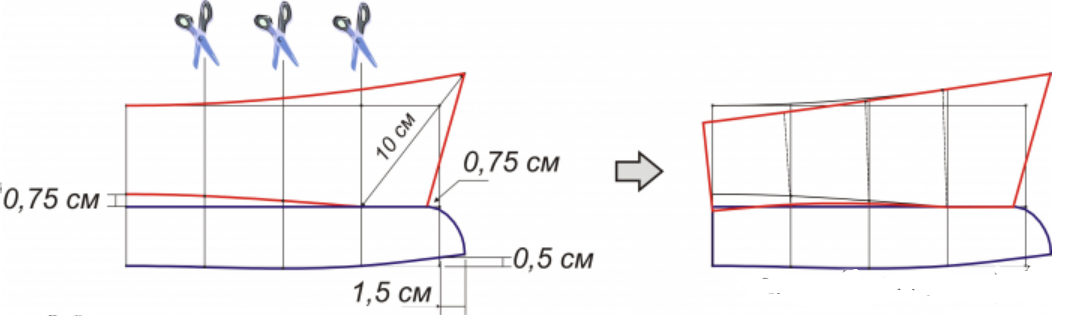
Next, you need to draw a line (horizontal) 3.5 cm lower. It divides the drawing into a stand (lower part) and the collar itself (upper half). It is necessary to make adjustments: rise above the stand and collar ledge by 0.75 cm. Then outline the contours of the finished part, taking into account the extension of the stitching line by 1.5 cm.
Creating a skirt pattern
The chosen model looks good with a sun skirt. You need to start creating the drawing with a circle equal to the half-girth of the waist, divided by 3.14. The belt line corresponds to the length of the lower edge of the bodice.
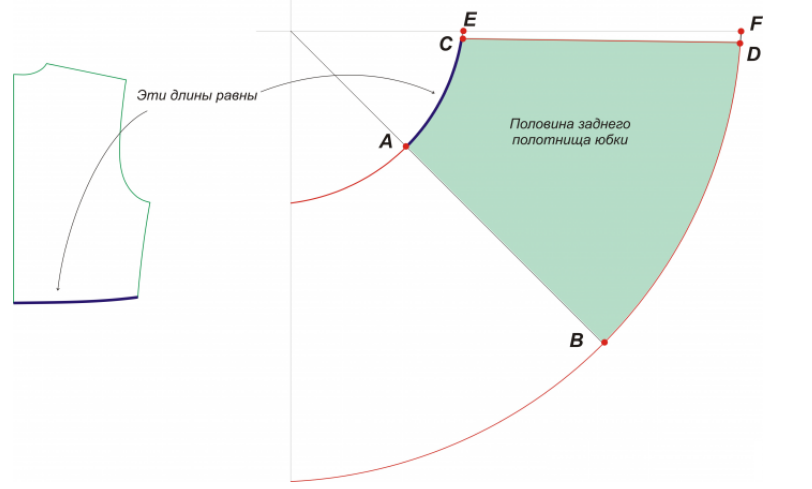
The radius of the circle is equal to the sum of the lengths of the cuts (lower) of the shelf and the back, divided by 3.14. Then it needs to be extended from the central point to the required length of the skirt. The resulting parts of the circle are one piece. You will need two of them.
So, all the parts are ready:
- 2 pieces of the upper part of the shelf;
- 1 piece of the upper back with a fold;
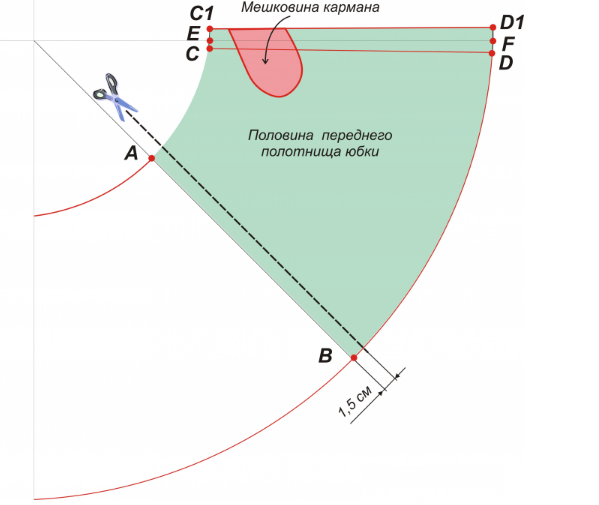
- 2 pieces of the lower part of the shelf;
- 1 piece of the bottom of the back with a fold;
- 2 sleeve pieces;
- 2 collar and stand pieces;
- 2 cuff pieces;
- 2 skirt pieces;
- 1 belt detail.
Cutting out a shirt dress for a girl is done in a similar way, taking into account smaller sizes. Styles for young fashionistas can be exactly repeated by adults. This creates a very cute family look, which is often used in photo shoots of mothers and daughters. This idea is also good for a portrait of the whole family, because fathers and sons also love shirts.
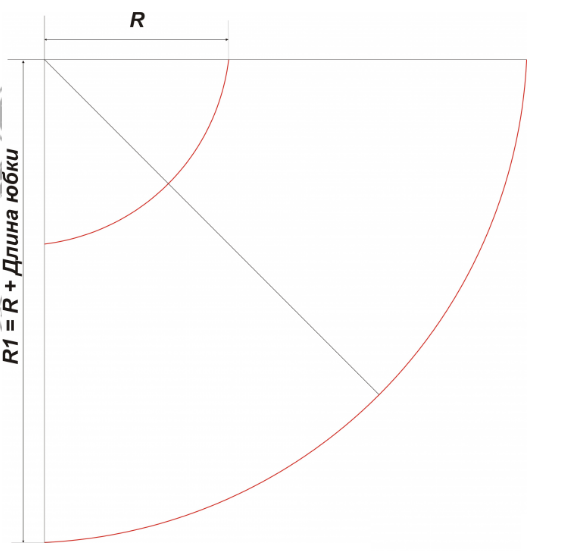
R = {Sum of the lengths of the lower sections of the shelf and back}/3.14/(1/2)
Sewing a shirt dress with your own hands
The simplest pattern of a shirt dress requires careful sewing. The main rule is to carefully transfer the pattern to the fabric, observing the seam allowance.
Opening
The first step is to prepare the tools and materials. To transfer the pattern to the fabric, you will need:
- scissors;
- chalk;
- ruler.
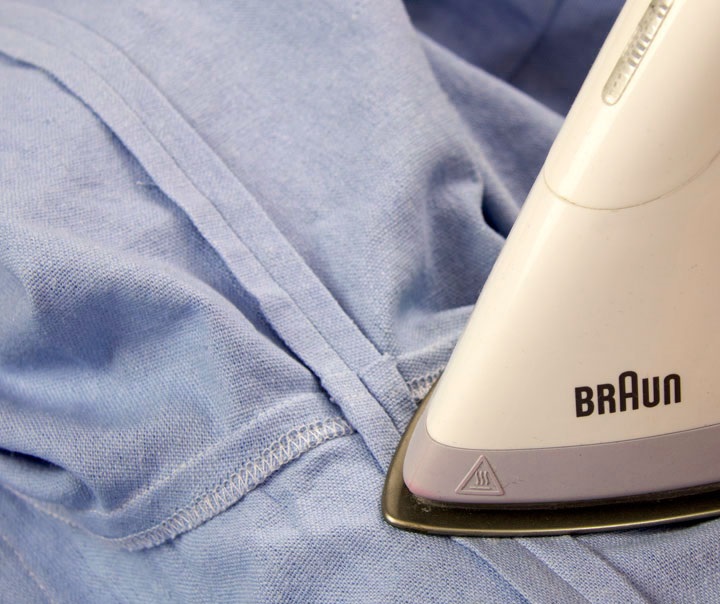
Before work, the material must be washed (this especially applies to those types that shrink) and ironed.
When buying cotton, wool, viscose, silk, and printed fabrics, it is worth adding an extra 15-20 cm to the required size for unforeseen cases.
Afterwards, you need to transfer the marks to the back side of the future product. Then we outline the outline of the parts, using an indent of one and a half centimeters for the seam allowance. In this case, it is necessary to remember about the alignment of the pattern (checkered pattern). Cut out the parts. The preparation is complete, now we sew a shirt dress with our own hands.
Sewing technology
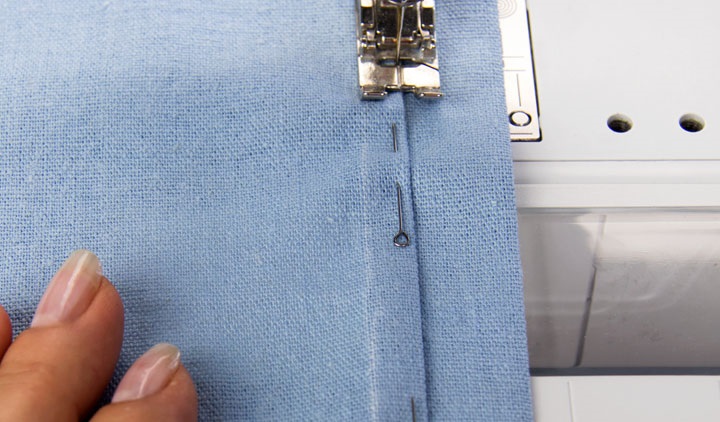
For work you will need a sewing machine with functions of straight, elastic and zigzag stitch or additionally an overlock. It is better to start sewing a shirt dress by basting the details on a live thread. This will allow you to adjust the sizes by preliminary fitting. The work process is as follows:
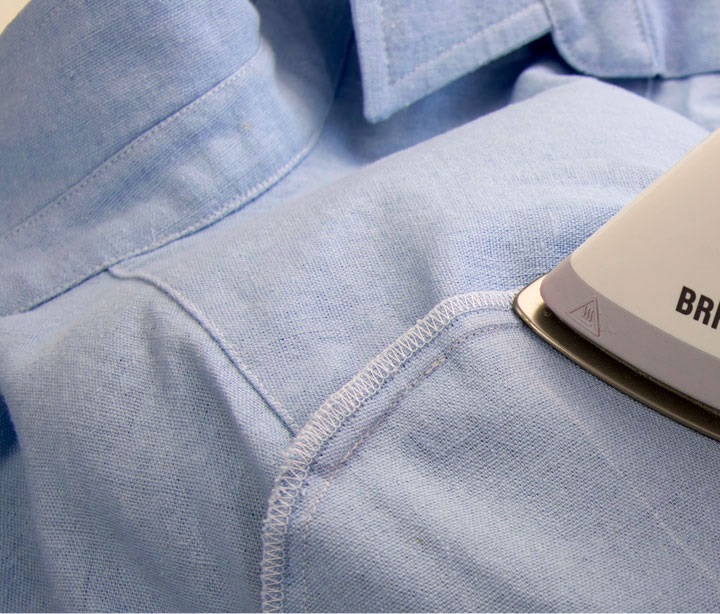
- First, you need to duplicate the facings, which will allow the finished product to retain its shape. Then process their inner edges with an overlock. Connect them to the sides.
- Make a shoulder seam. To do this, connect the parts and stitch.
- Duplicate and assemble the collar parts, sew it into the neckline, and finish it.
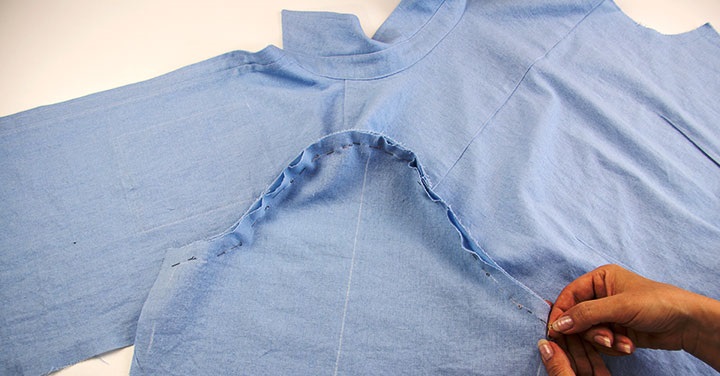
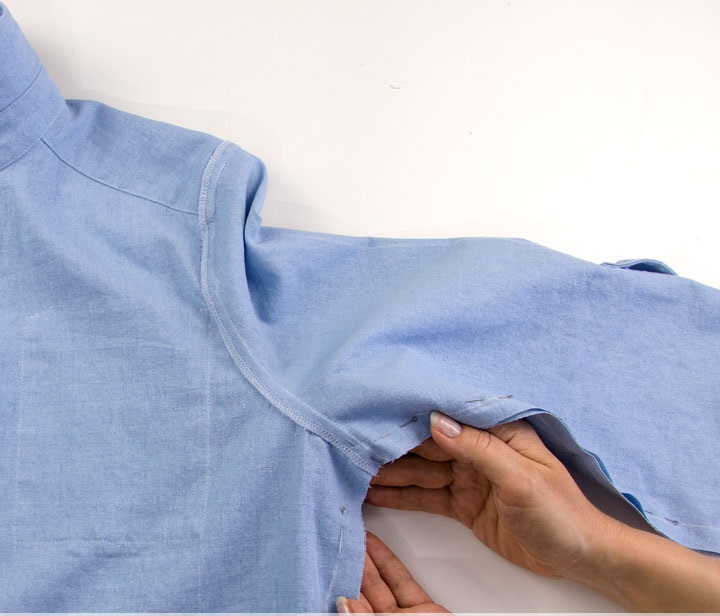
- Sew in the sleeves, processing the cut at the bottom. Connect the inner seam with the side seam on the bodice.
- Perform processing and attach cuffs.
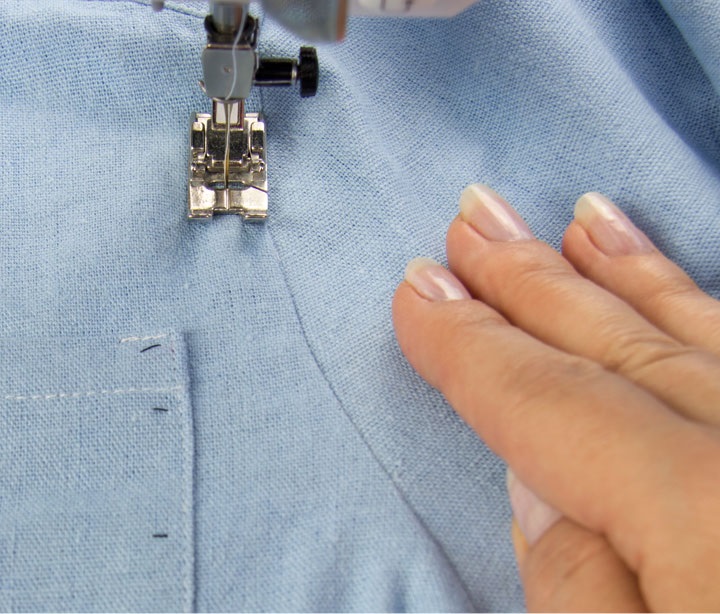
- Sew the skirt pieces together, stitch them to the bodice, not forgetting about the darts or folds.
- Make a hem at the bottom of the skirt.
- Sew the belt, attach buttons.
A shirt dress for a girl is sewn according to the same principle. However, children's clothes should be comfortable first of all, so it is better to use natural breathable fabrics. The pattern, color and length can be any. For example, mini for a girl of nursery age (a convenient option with leggings for kindergarten), midi for a schoolgirl or maxi for a teenager.
DIY Children's Shirts - A Good Rehearsal Before Creating an Adult Dress. It is worth starting small: sewing simple styles. Ready-made adult batniks will be a great help in this matter. You can sew a charming outfit for a baby girl from them. Narrow daddy's shirt on the sides, adjust the length, intercept the waist with a belt, a couple of nice little things in the form of a decorative lace insert along the hem or a bow - the girl will be delighted.
There are many cute styles for little ladies, very easy to make. If you are interested in how to sew a shirt dress with your own hands, so that it is easy, you can start with a simple style. The neck is a regular round one, short sleeves - this option is easy to make, cutting out only four parts: the front, the back and two flaps for the "lanterns".
Shirt dresses have been trending for a reason for many years: they are versatile, elegant, and the variety of lengths, colors, styles and fabrics allow you to use them for any occasion. The abundance of options with a simple cut makes it possible to sew such an outfit with your own hands, spending a little time and effort.


Video
Photo