The collar is a part of clothing that appeared back in the distant 13th century, but for a long time did not deserve due attention, performing an exclusively practical function - protecting the neck from the cold. Today, the stand-up collar is not only the most common clothing element, but also a stylish decor. Designers are happy to use it in their collections due to the harmonious combination of simplicity of construction and processing with versatility. Indeed, with the help of this small detail, you can give things individuality, elegance and a special style. And the variety of styles opens up wide opportunities even for independent modeling.
What is it
A stand-up collar is a garment that frames the neckline. It can be one-piece or sewn-on. It differs from other types of collars by the simplicity of modeling; even a novice seamstress will not have much difficulty constructing, cutting out and sewing on an element. Despite the apparent simplicity, the construction of collars has its own specific nuances, while the styles differ in height and degree of fit to the neck.
The first mentions of this item of clothing appeared in the 13th century. At that time, mystical properties were attributed to it. It was believed that collars could protect the owner from the negative influence of otherworldly forces. Initially, this detail was a fairly narrow strip. Later, the element expanded, and gradually its design began to resemble a modern stand-up collar. Its functionality consisted of protection from bad weather and demonstrating the social status of the owner. Gradually, the stand-up collar was finally transformed into a removable wardrobe item. In Russia, it became known thanks to Peter I and was initially called the "English collar".

Varieties
According to the type of construction, the element can be one-piece or cut-off, when the stand is sewn into the neck. This method is most often used for jackets and coats. One-piece styles differ in the type of construction; their production requires special wet treatment of the collar with an iron.
According to the type of modeling, products are of two types:
- Standing collars - made vertically along the neck;
- Stand-up collars - made with a flare.
When designing men's, women's and children's clothing, the second option is most often used.
The stand-up collar is available in 10 main varieties:
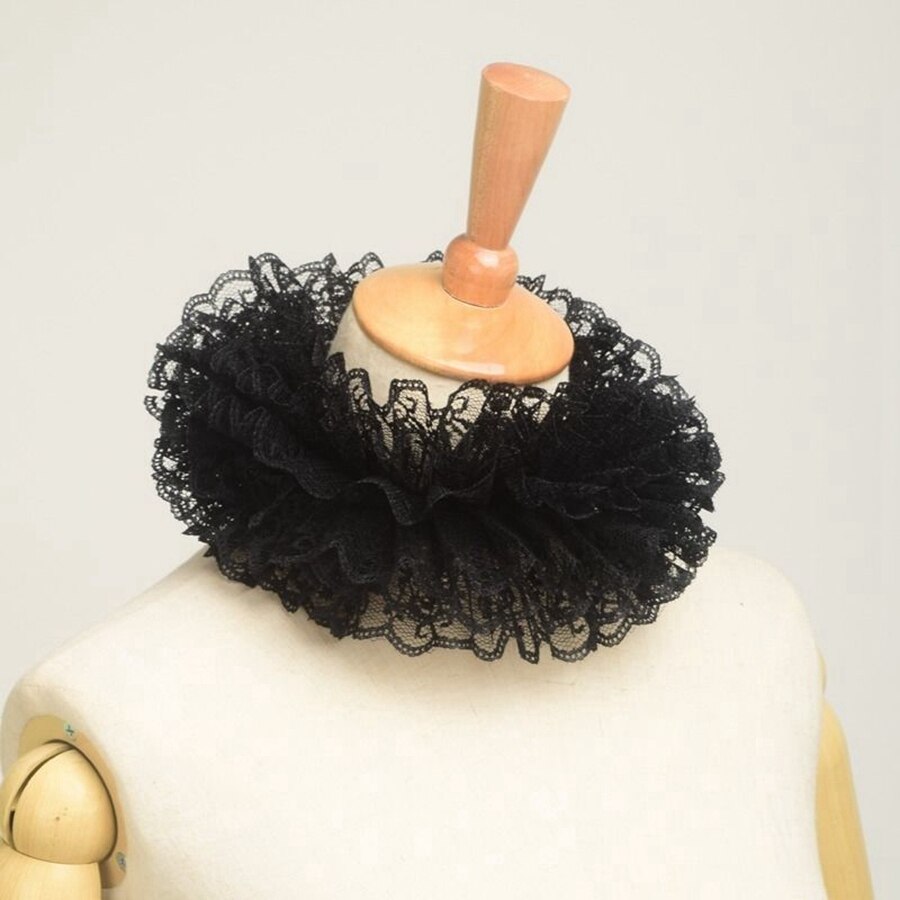
- Elizabethan - a round frame element that appeared in the second half of the 17th century. It can be flat or voluminous, lush, starched. Nowadays, such items are used on clothes for masquerades and children's matinees.
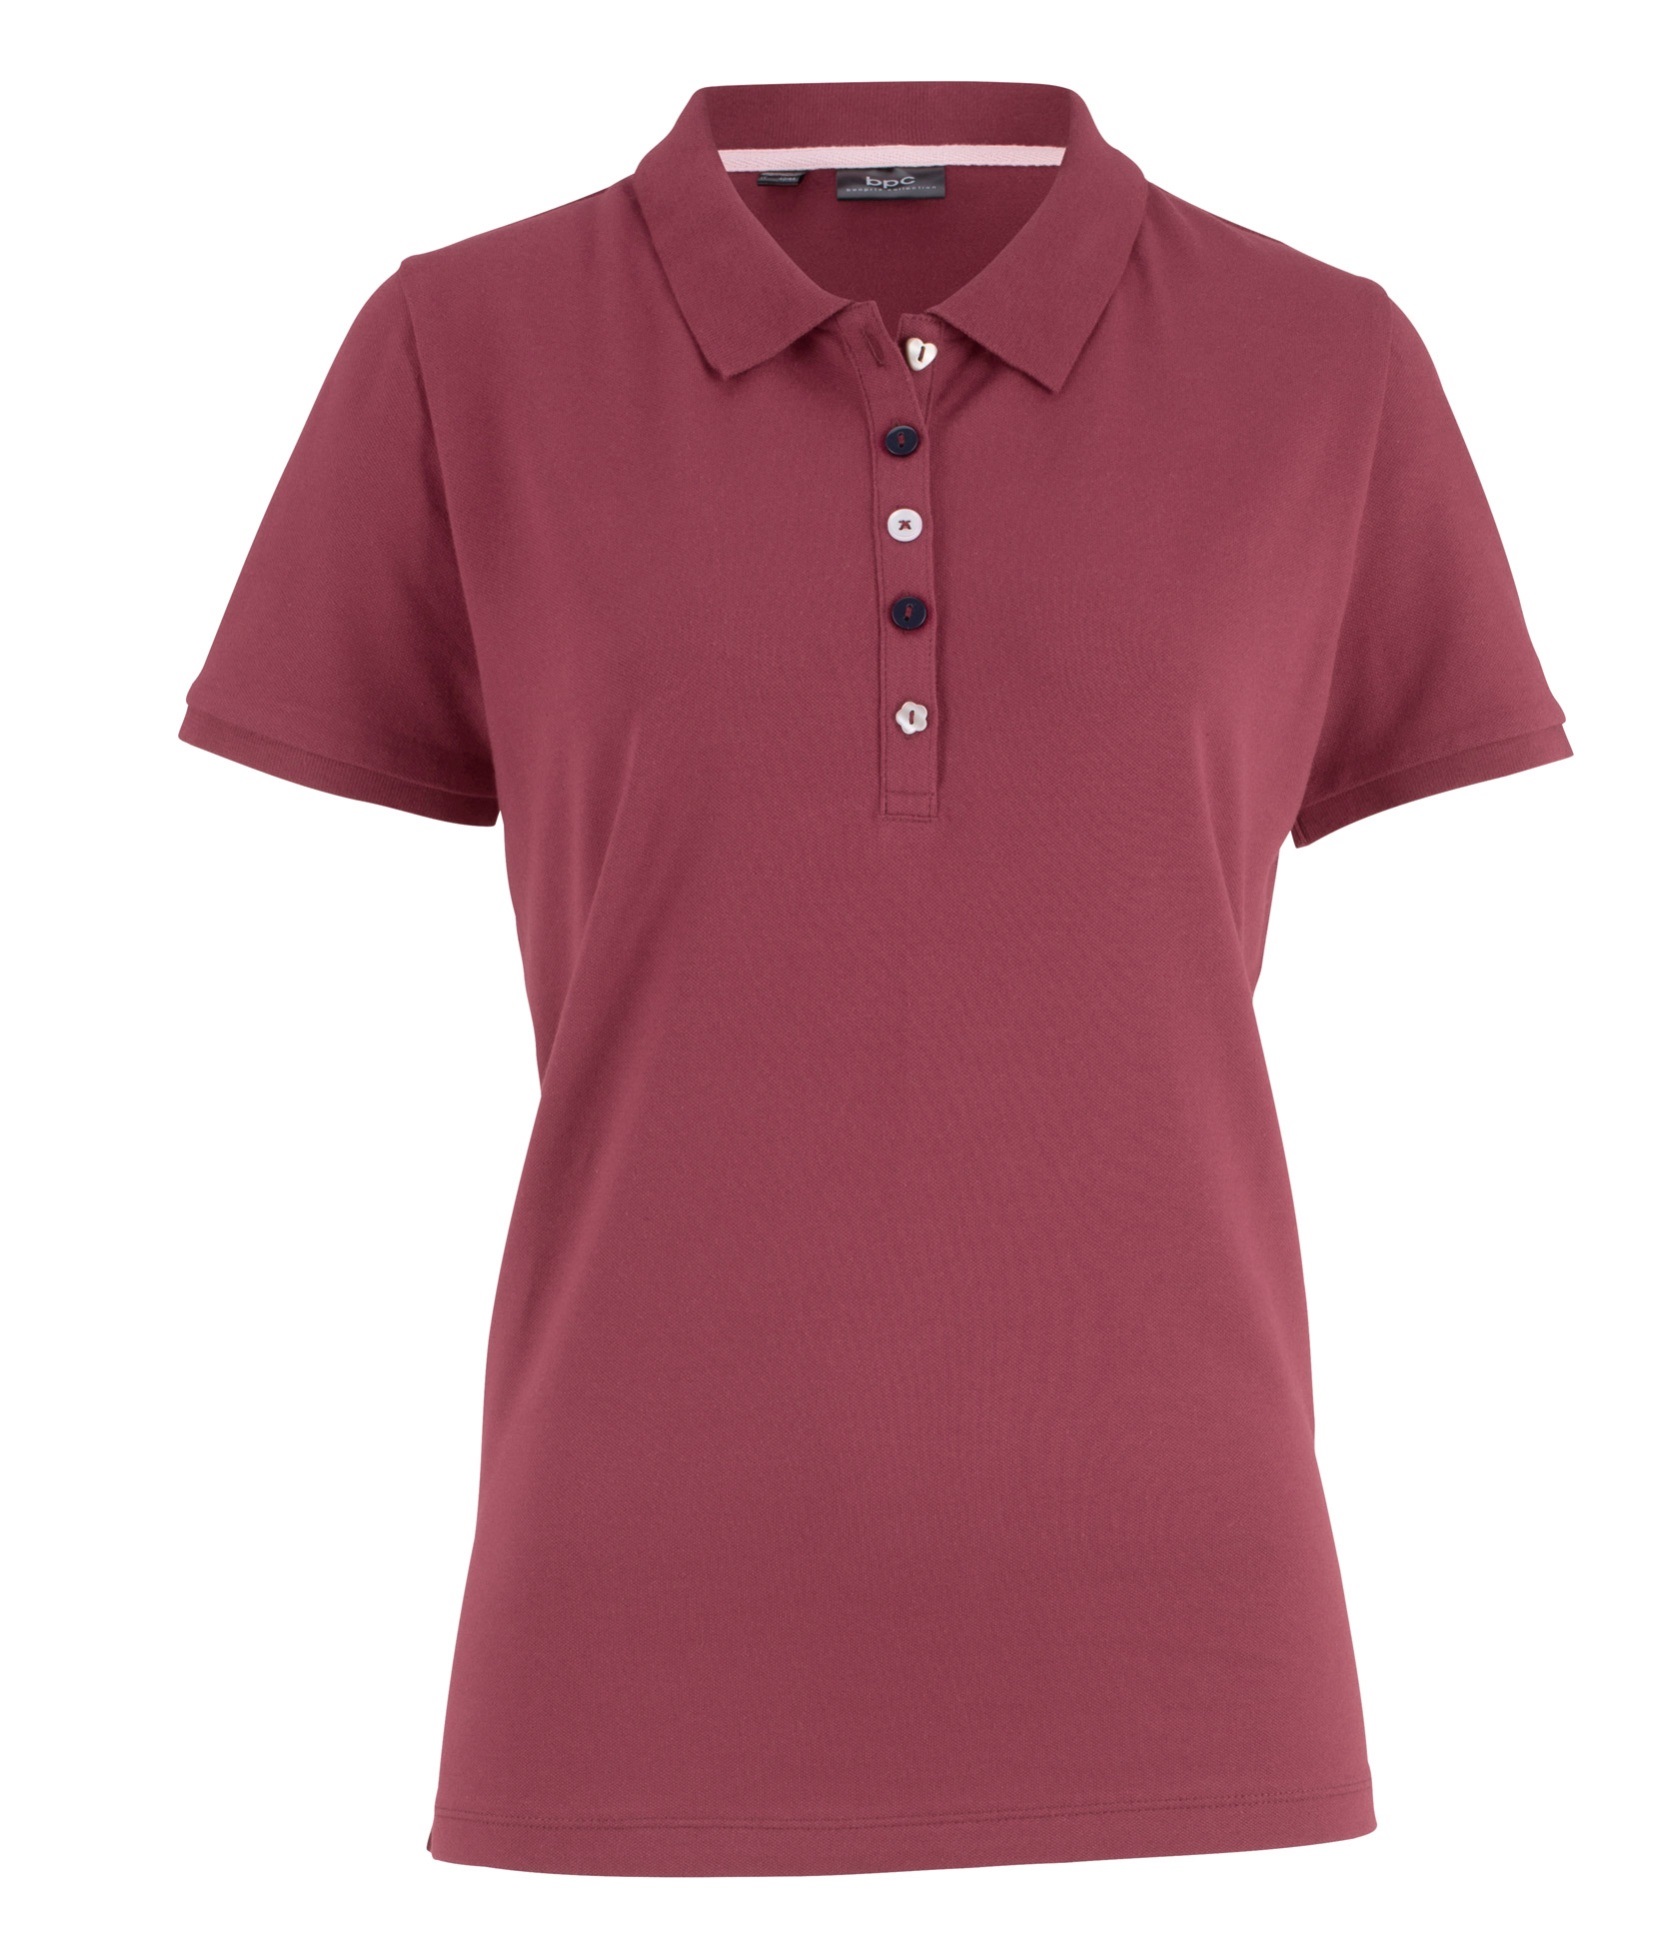
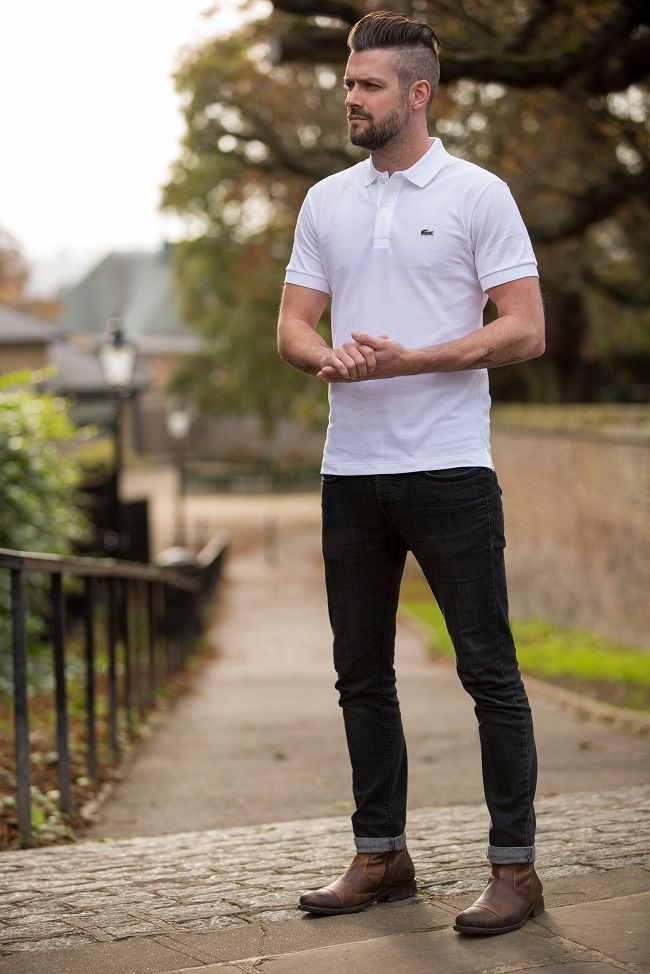
- Polo - a turn-down collar on a stand with a placket and buttons. Usually made of soft knitted fabric.
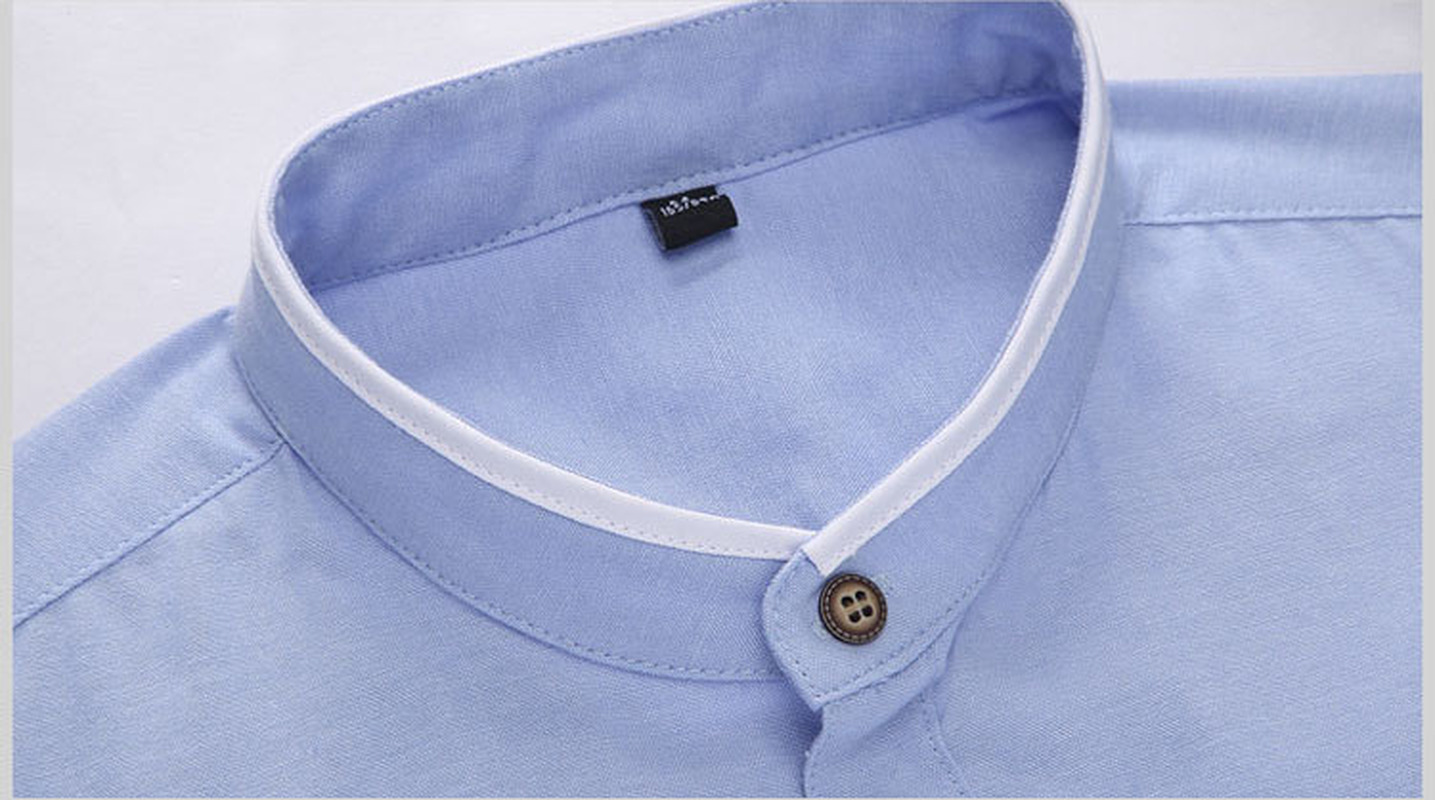
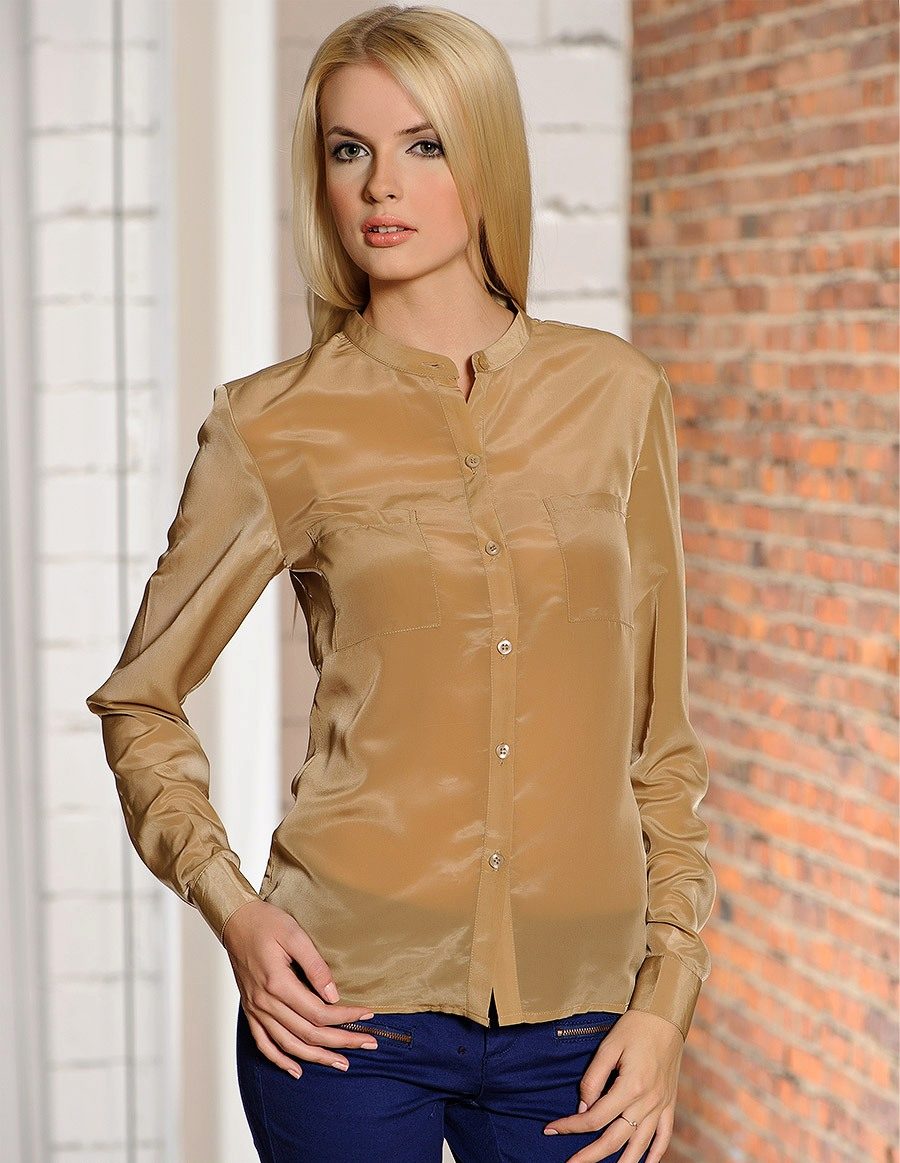
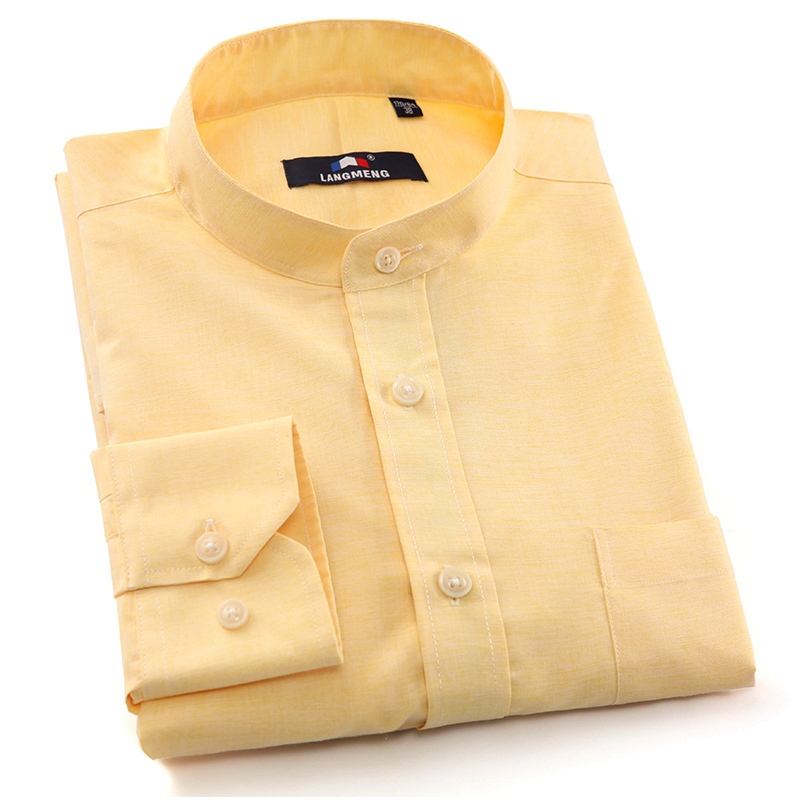
- Mandarin - most often used on a shirt or jacket. It has no turn-down corners, the edges are rounded, and is complemented by a single-button fastening.
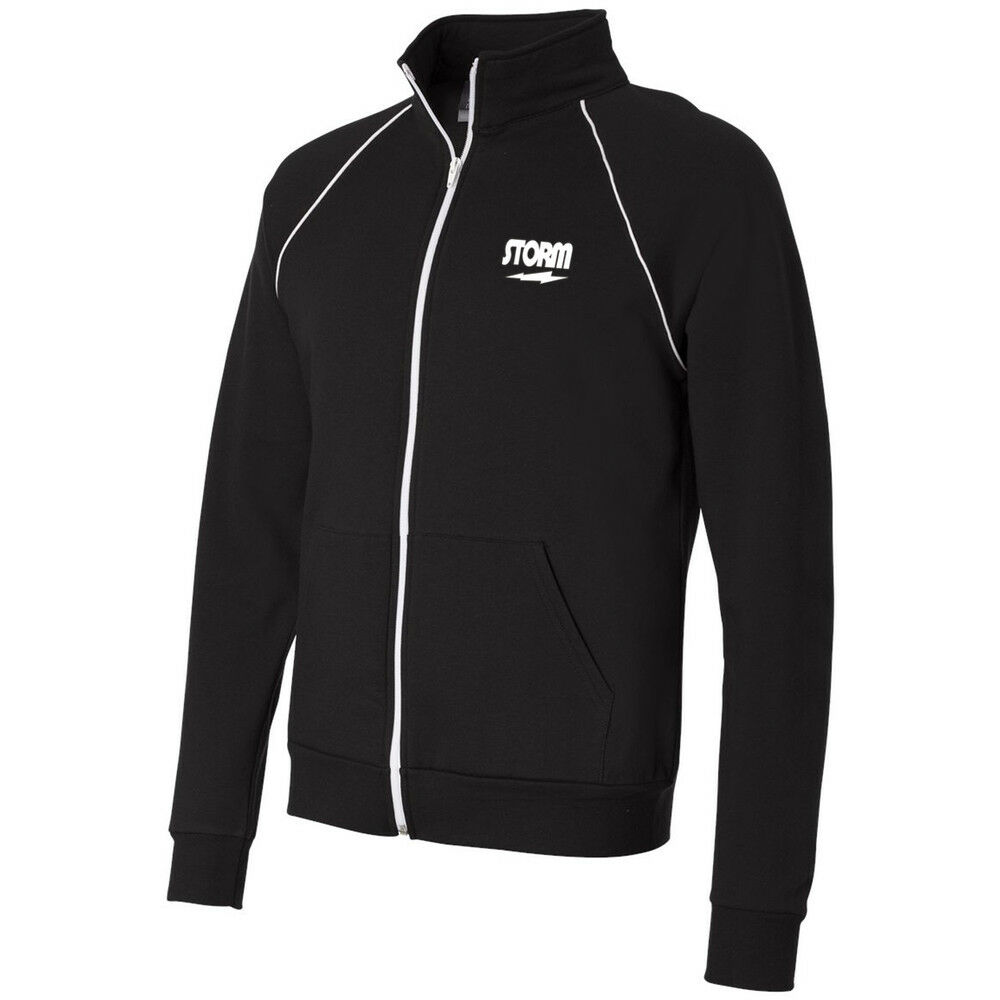
- Cadet - a typical collar of sports jackets or Olympic jackets. Fastens with a zipper. It is worn straight or turned back.
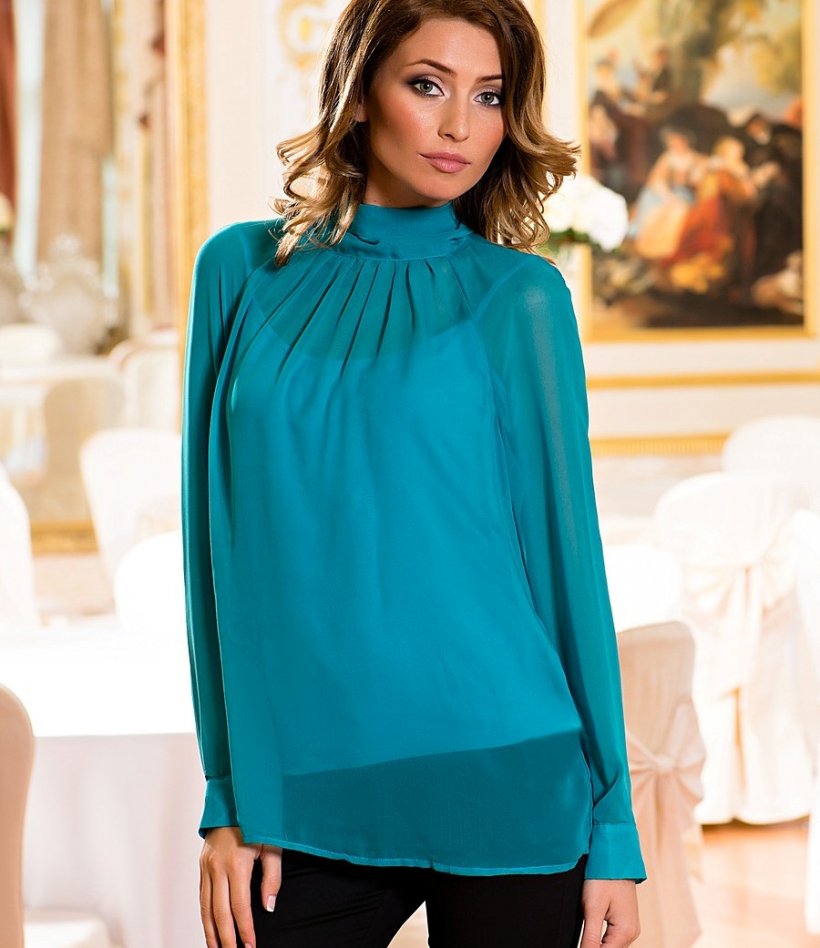
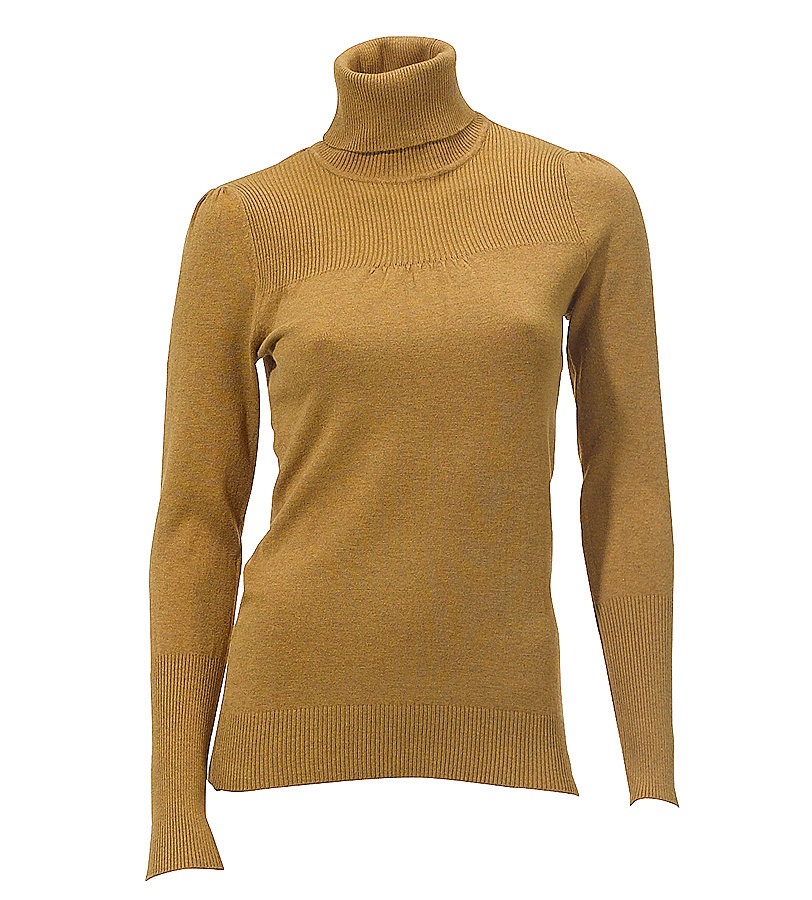
- The golf is soft, easy to drape, and rolls up. It fits tightly to the throat, covering it completely.
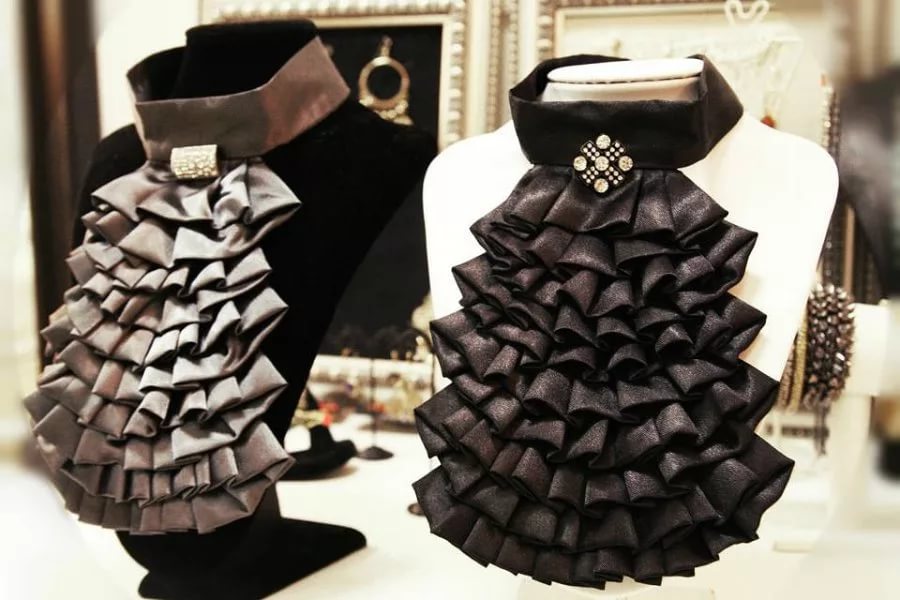
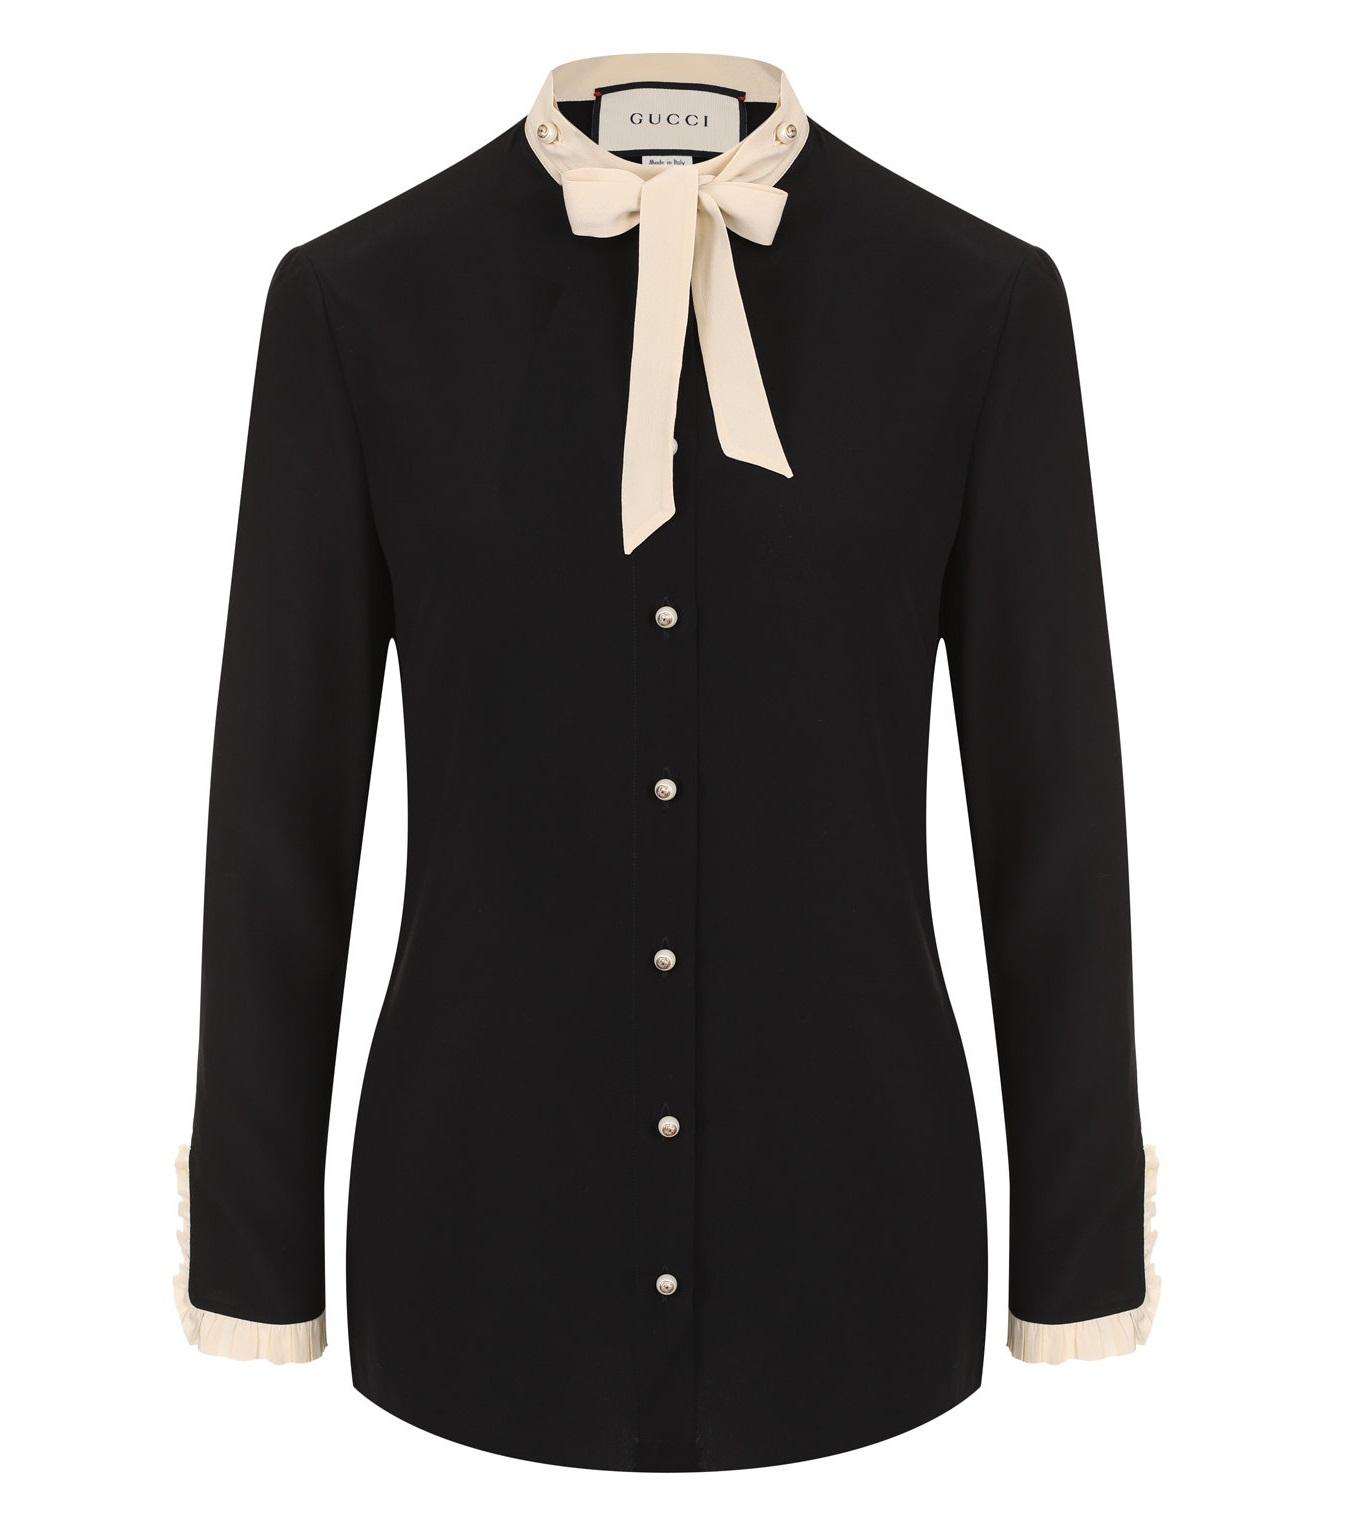
- Ascot - used in women's wardrobe, it is a stand with ribbons that are tied in various ways and serve as a bright accent in the image.
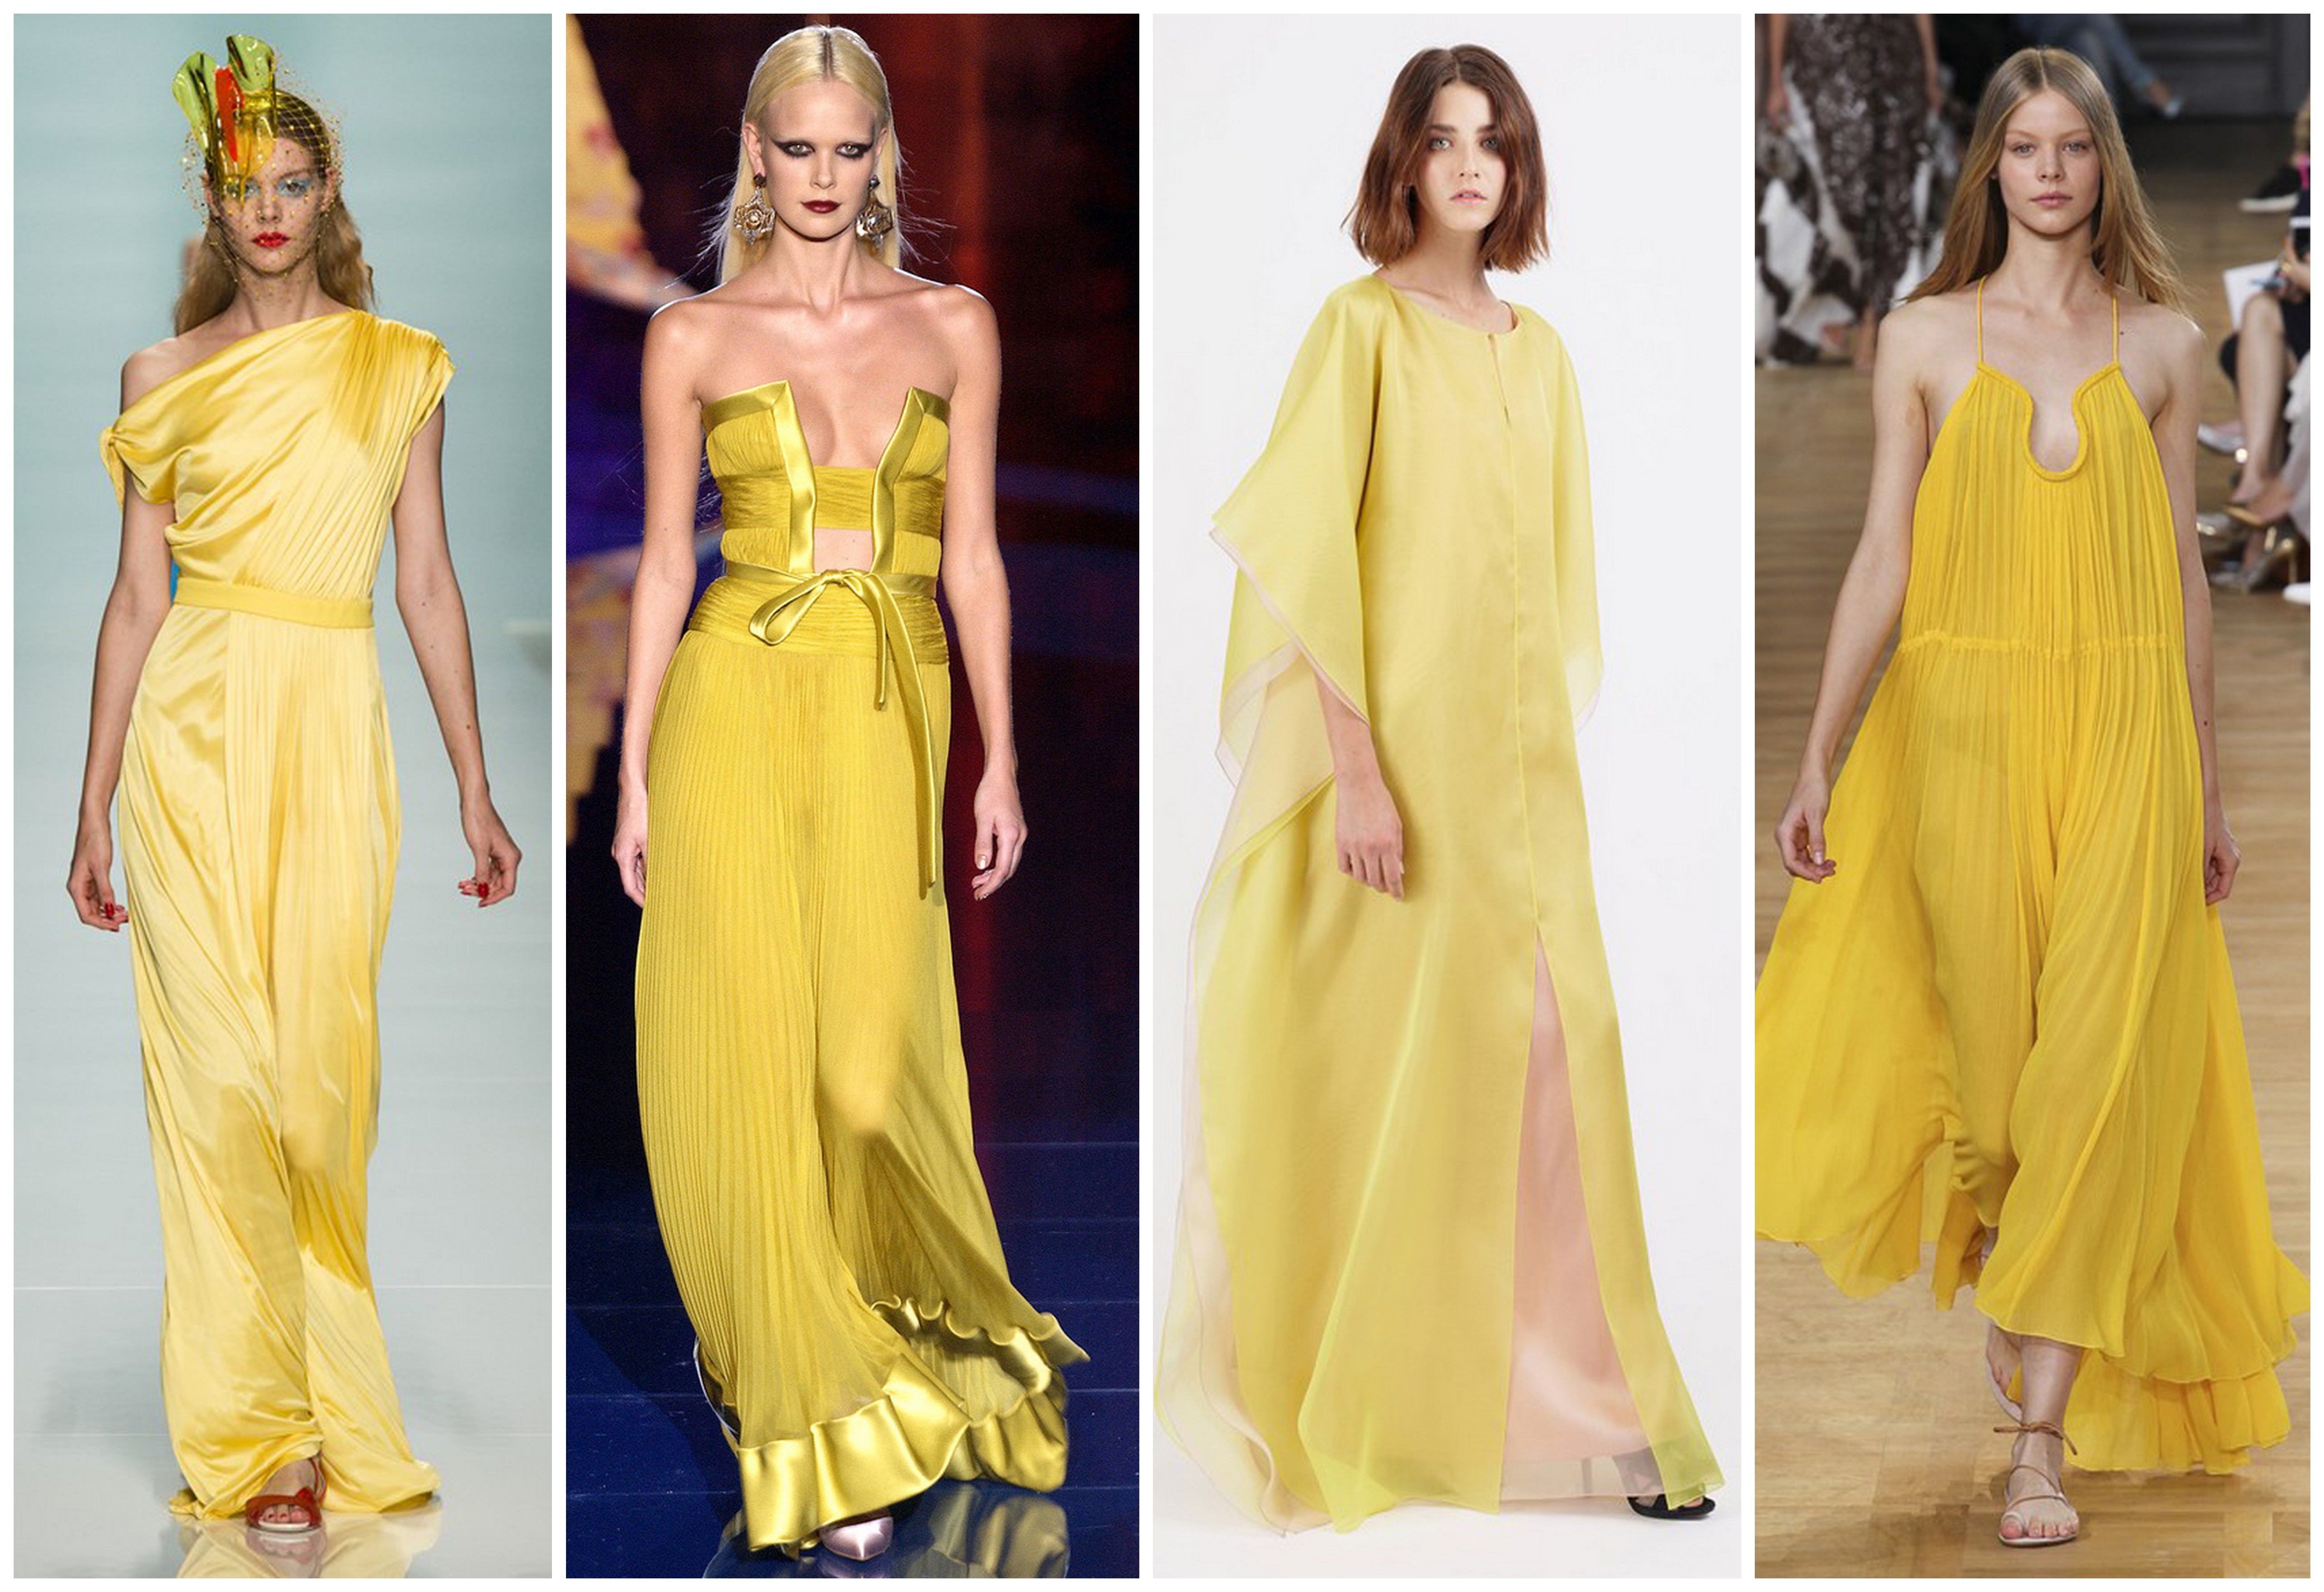
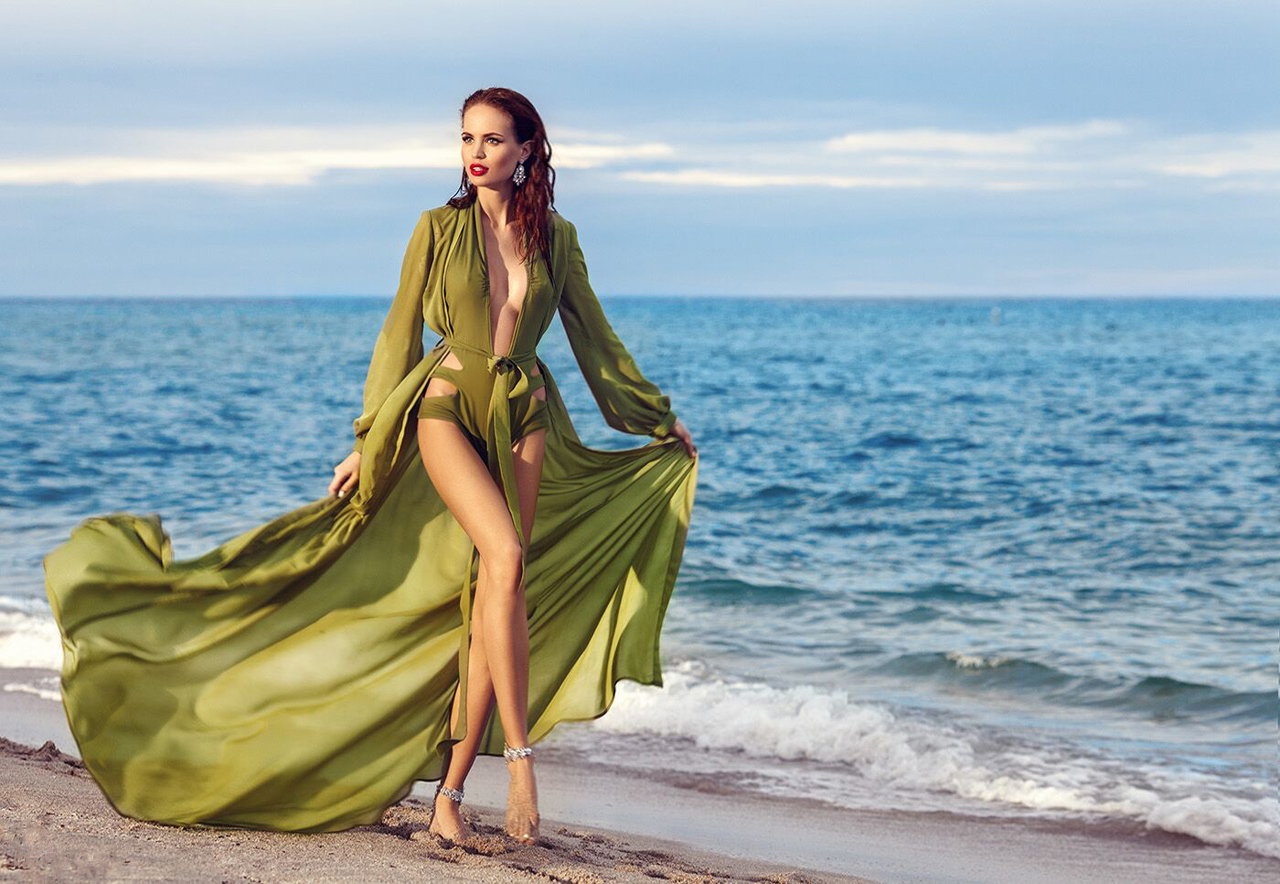
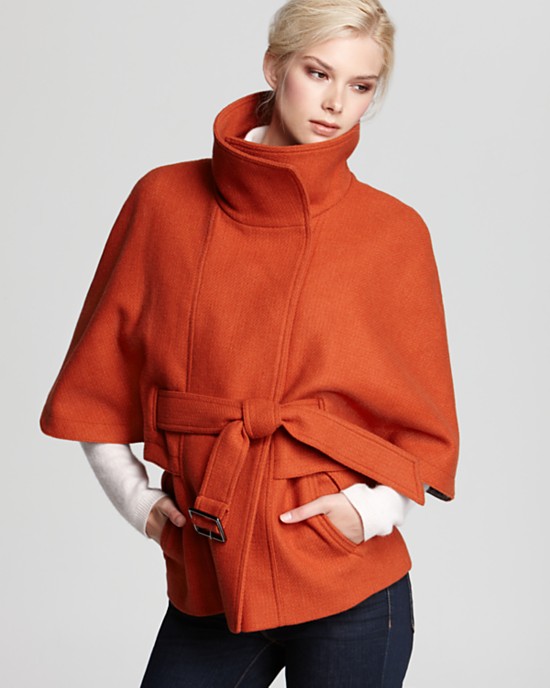
- Funnel - a fairly high model, widening towards the face, found in men's and women's clothing.
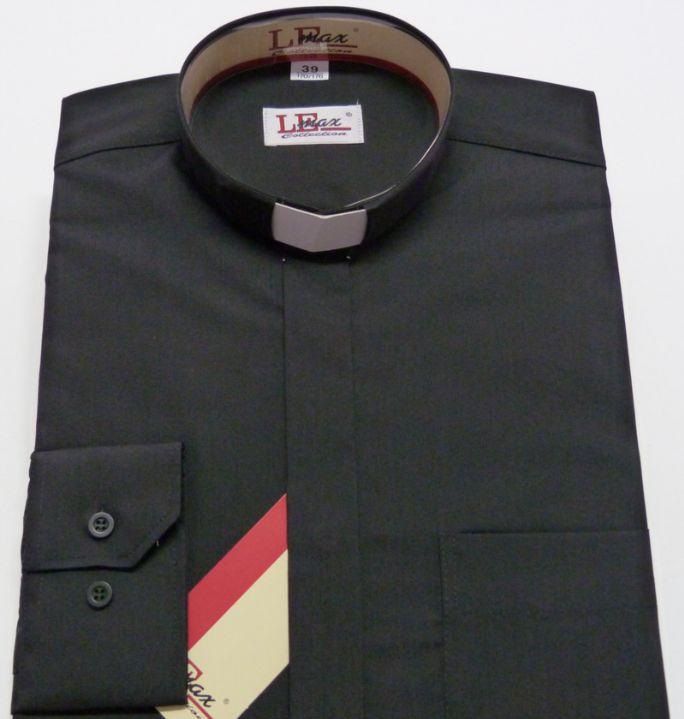
- Roman or pastoral - this collar with a cut-off stand is worn by Protestant and Catholic priests. It is detachable, with buttons or snaps, made of cotton or plastic.
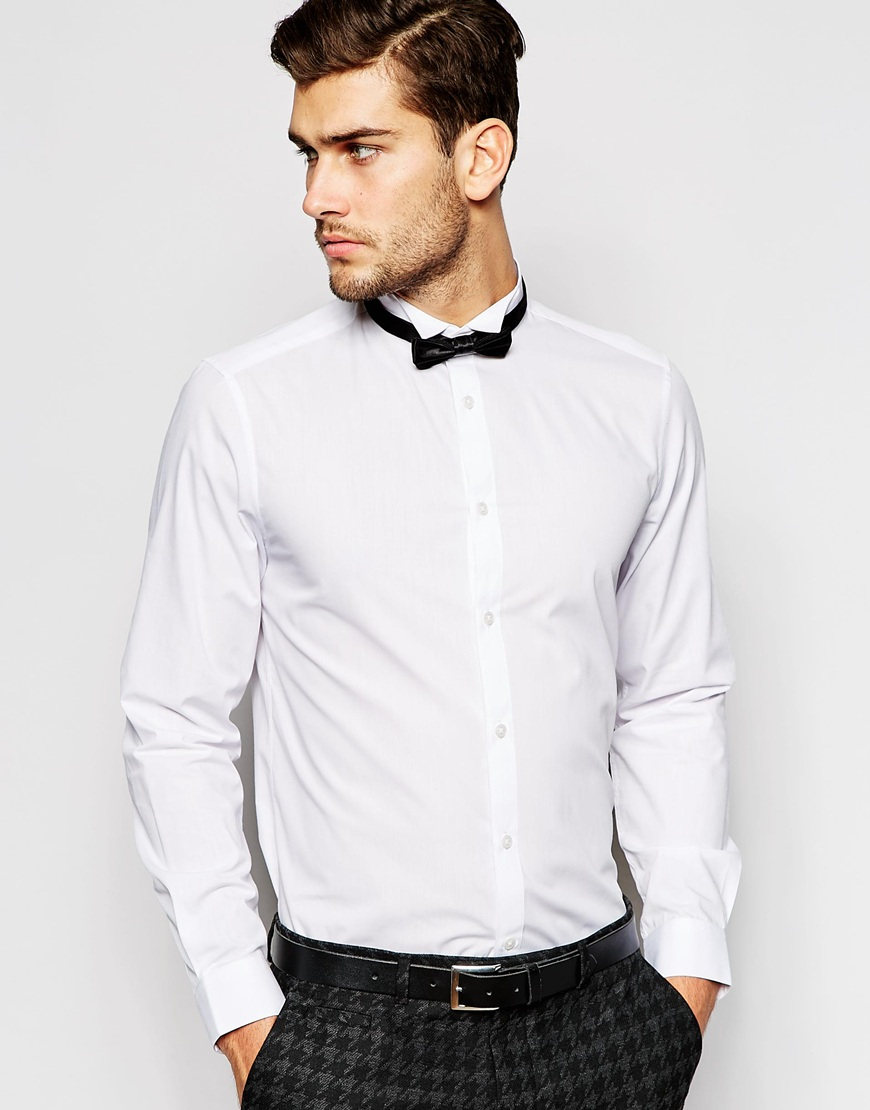
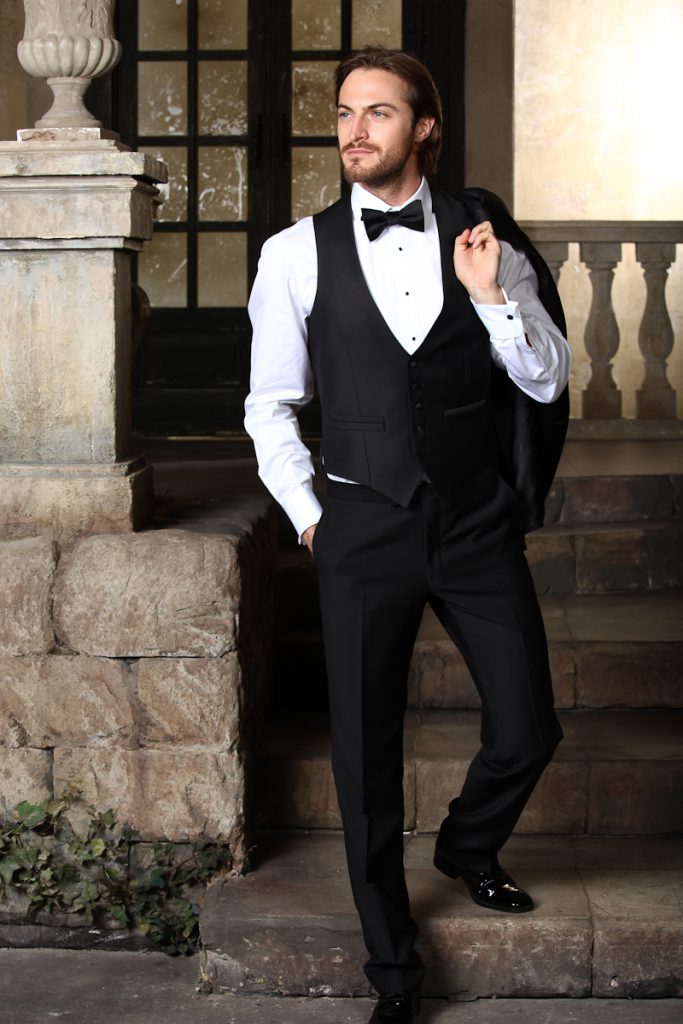
- With beveled ends - worn on special occasions under a tuxedo, this collar is starched to give it a shape that resembles a butterfly, as the ends are slightly turned up.
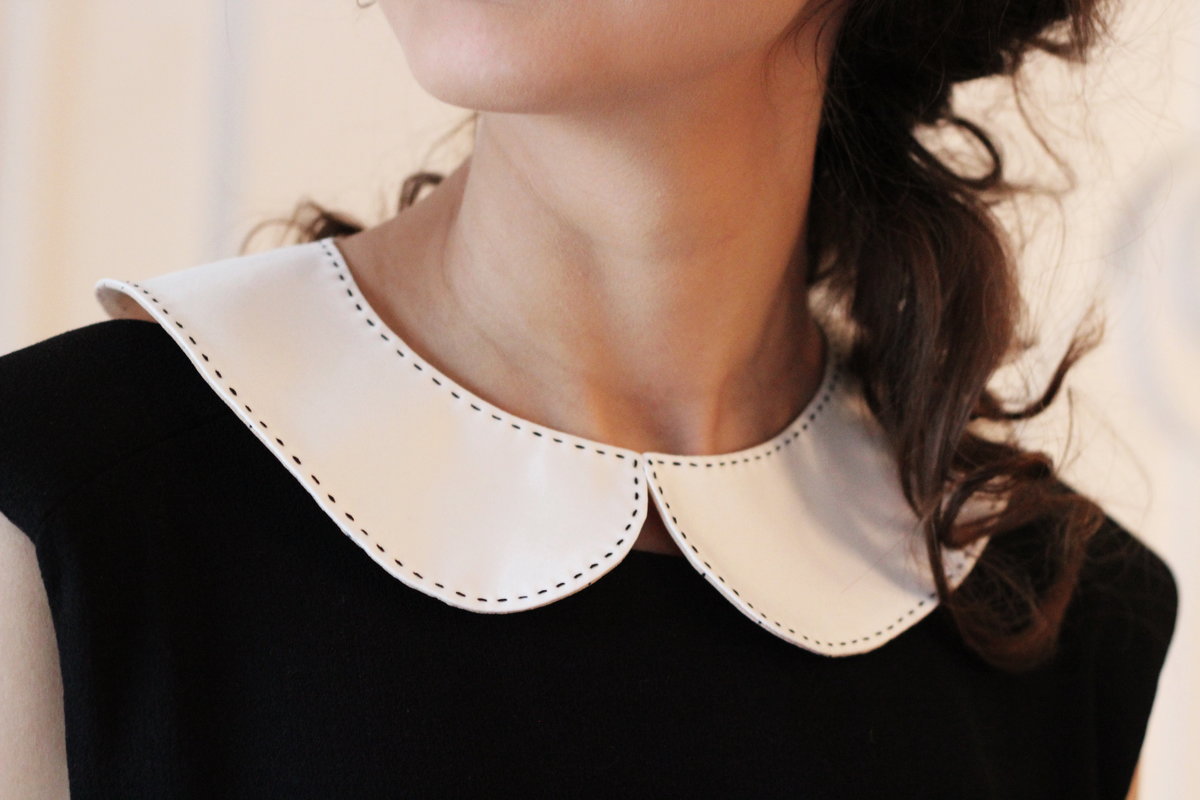
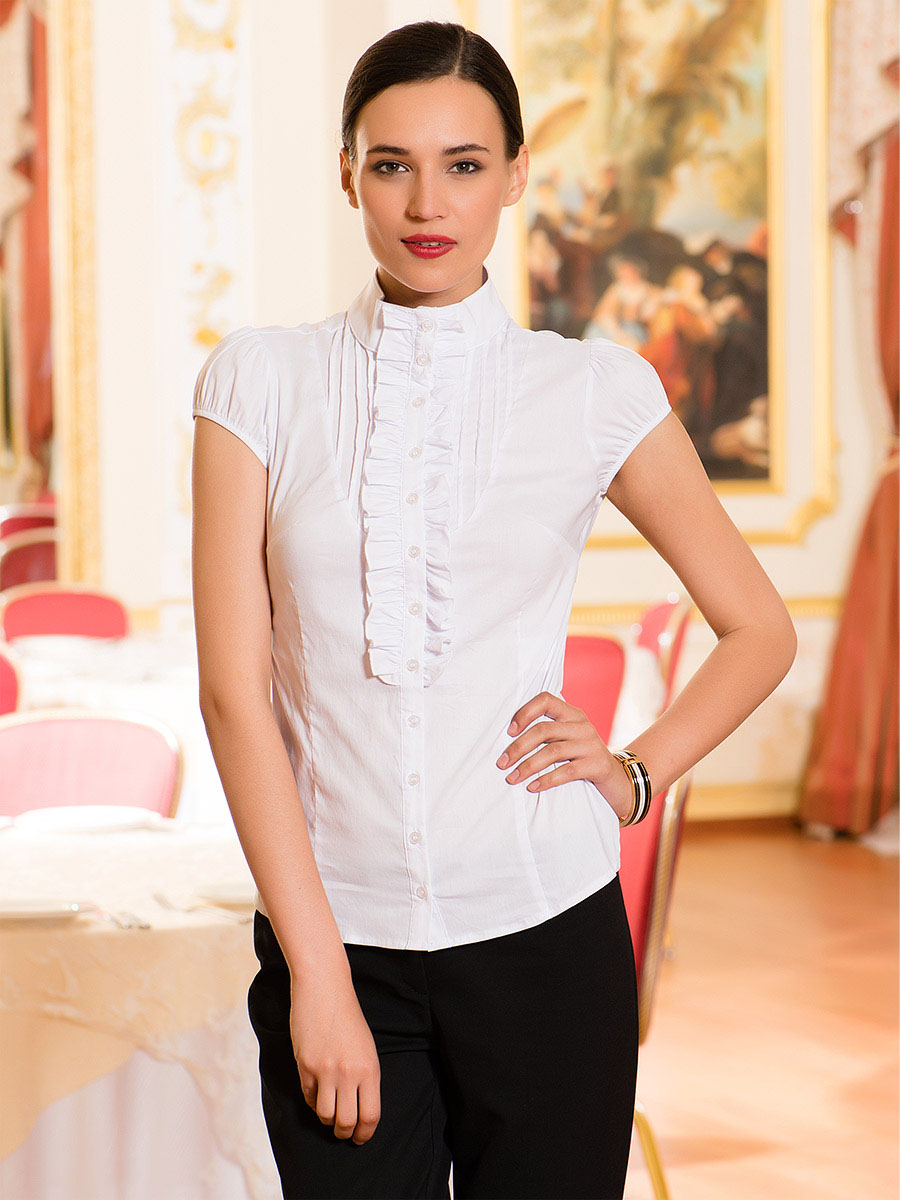
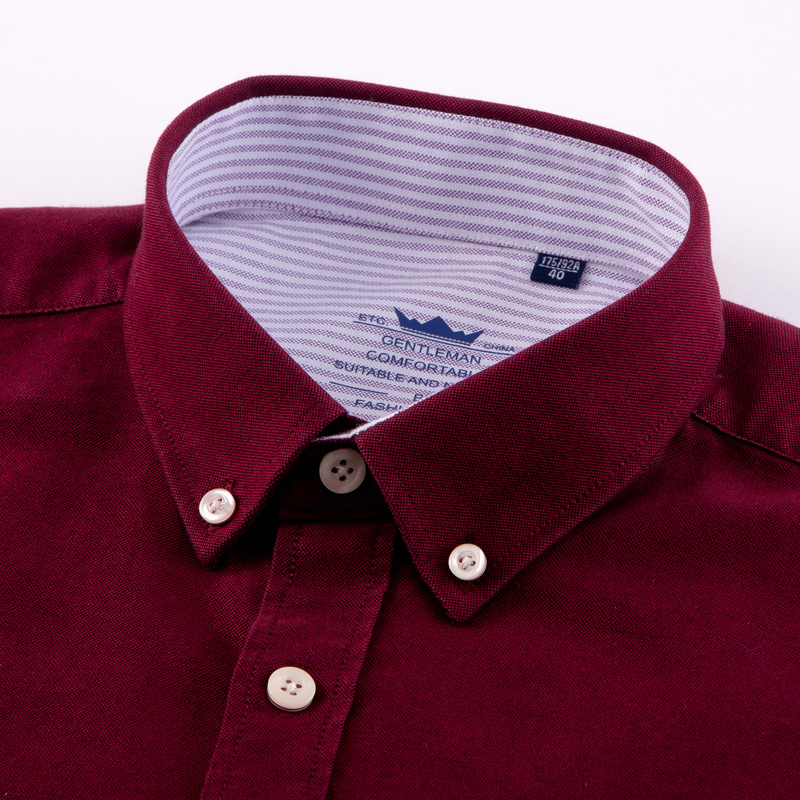
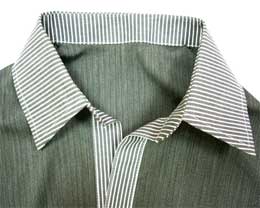
- Shirt collar - used in classic women's blouses and men's shirts, has a stand, which can be either one-piece or sewn on.
The shirt collar is multifunctional: it can serve as protection from bad weather, confirm status, or demonstrate a particular style.
What does it go with?
A stand-up collar can be worn with a wide variety of clothes. The main thing here is to maintain harmony:
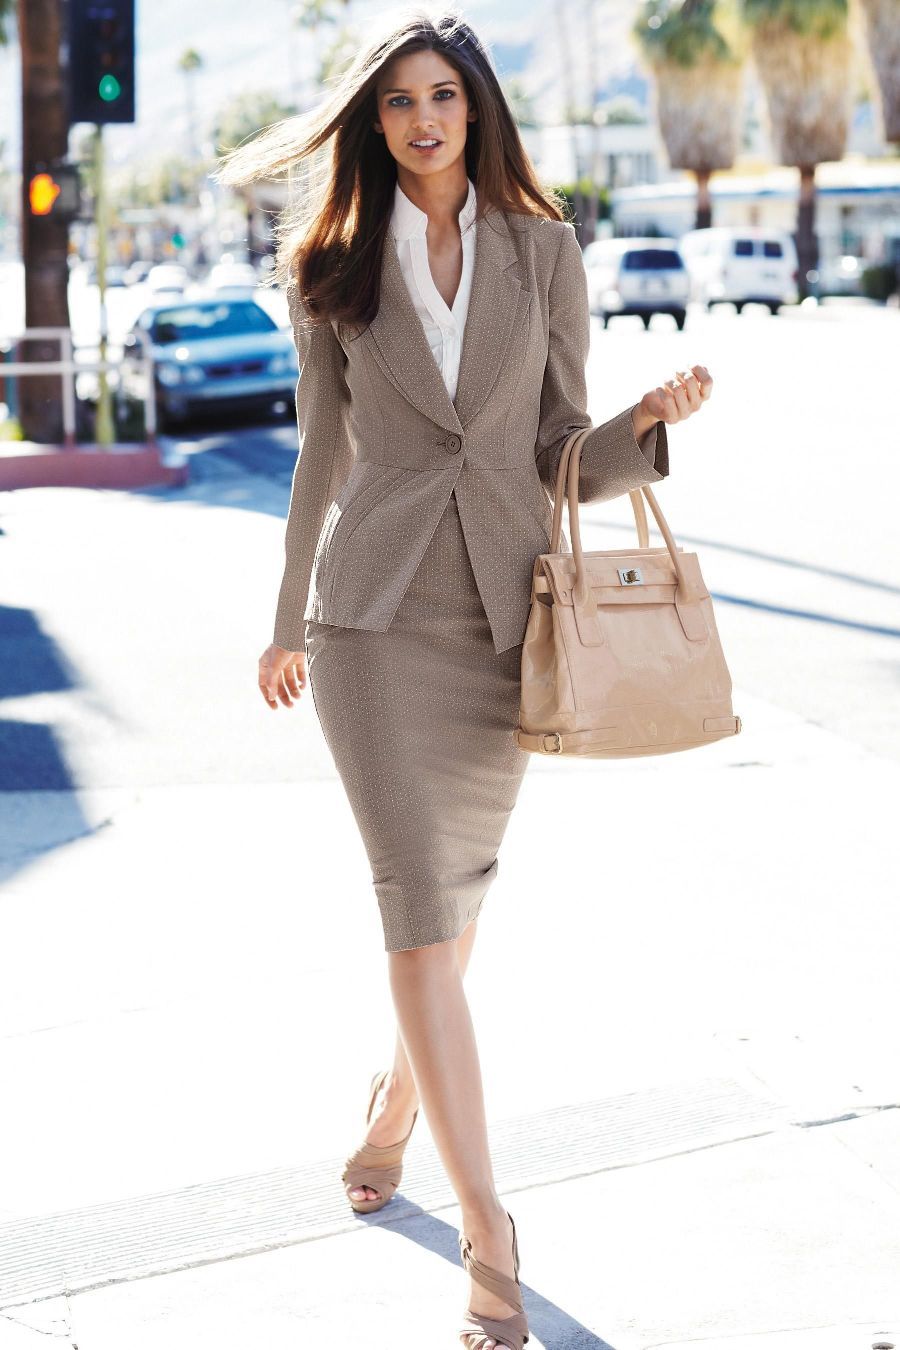
- The perfect combination of a stand-up shirt collar with a business style. This element looks organic with a variety of jackets, blazers, trousers or skirts.
- A top with a mandarin or turtleneck collar will be appropriate for a casual look. Successful companion items are jeans, trousers, straight or flared skirts.
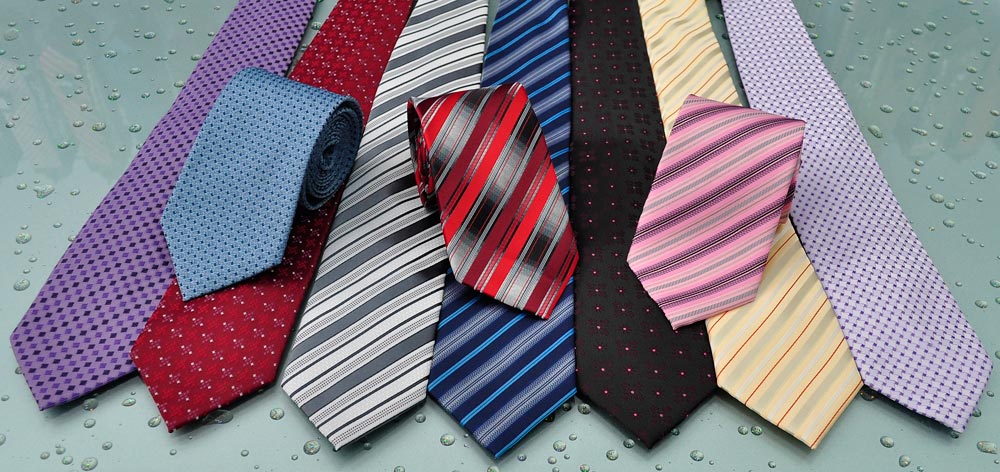
- For special occasions, a tuxedo with a beveled collar and a bow tie is perfect.
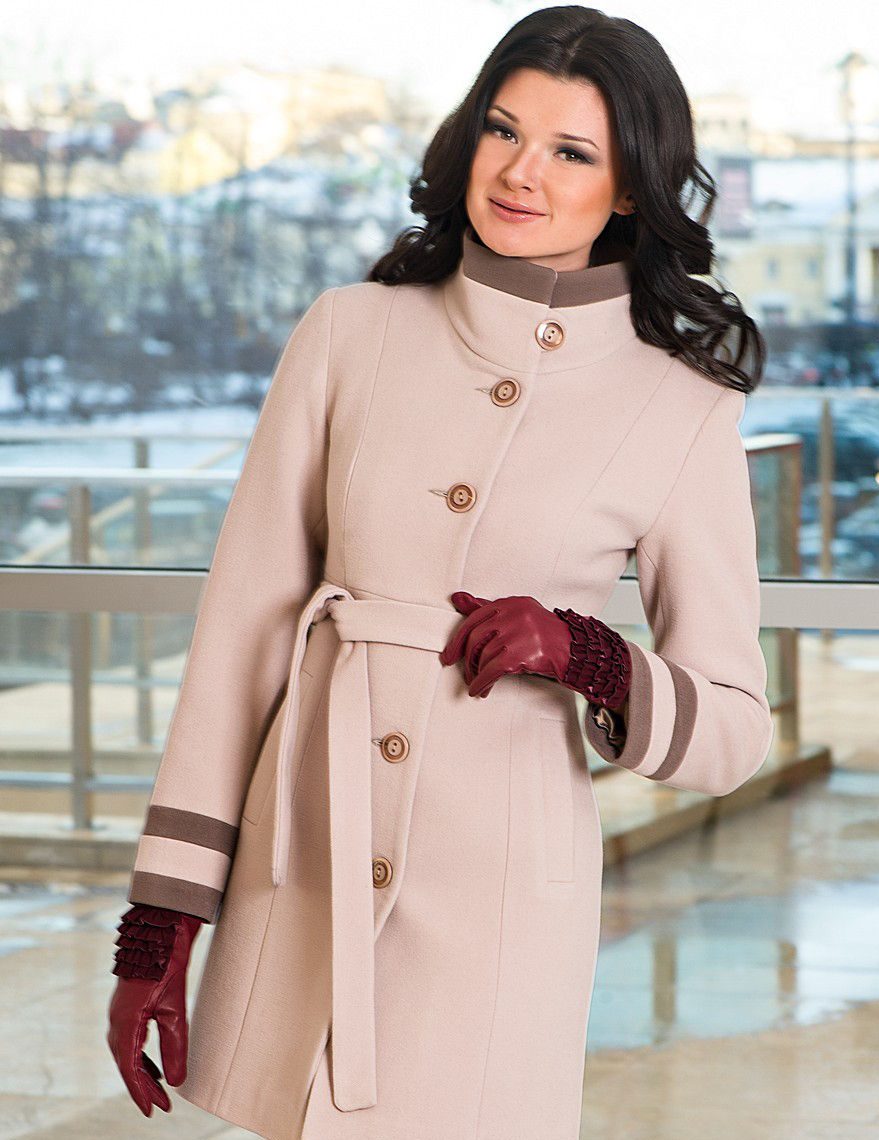
- Outerwear with such an element will be relevant in the cold season, protecting the neck and décolleté from wind and frost. Accessories and shoes can be chosen in any style and style. The main thing is to combine them by color scheme.
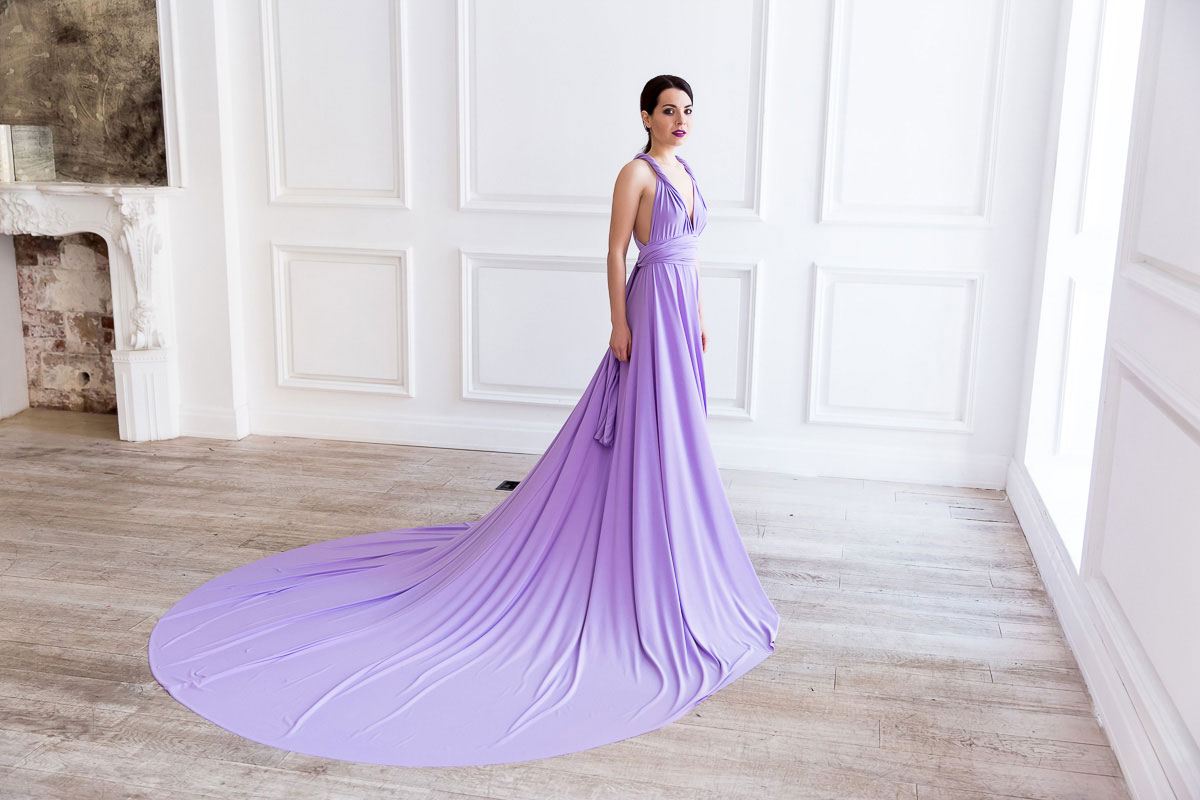
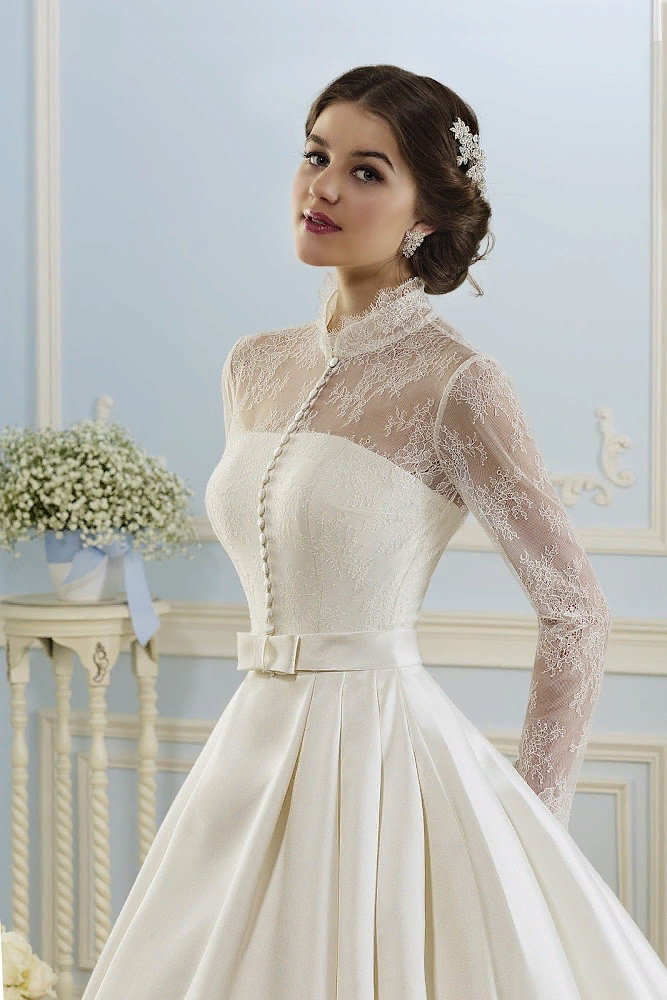
A stand-up collar on a wedding dress looks especially elegant.
Nuances of modeling
The stand-up collar consists of an upper and an inner part (undercollar). It can be used to design various types of necklines: with a fastener, a cutout or closed. To pattern the collar, first of all, a base is created on which the structure will be sewn. To make the task easier, it is better to use a special thermal fabric. It is very important to correctly match the shape of the neck and the product itself. If the outer length is short, the fit to the neck will be stronger. The nuances of constructing different types of stand-up collars will be discussed below.
Shirt collar on a stand
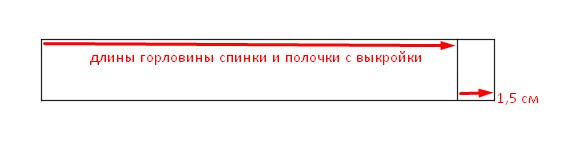
First of all, you need to measure the length of the back and the front of the shirt on the neck. Then draw a rectangle with a length equal to the sum of the neck measurements, add 1.5 cm to it. After that, follow the instructions:
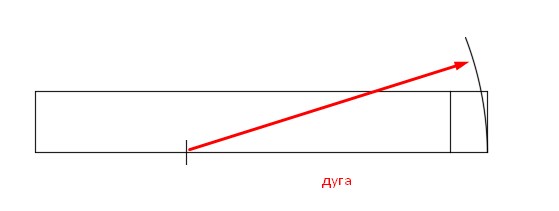
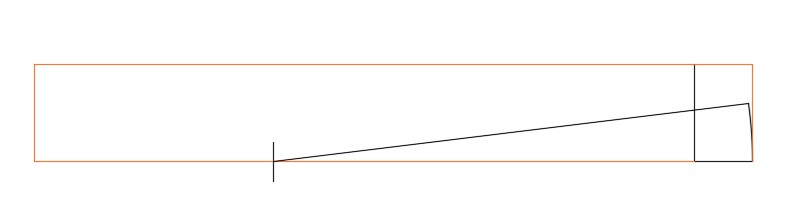
- Measure a third of the length and make a mark.
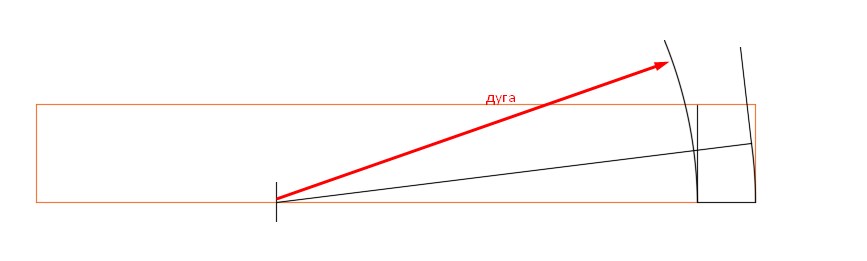
- Draw an arc from it with a radius equal to the remaining length.
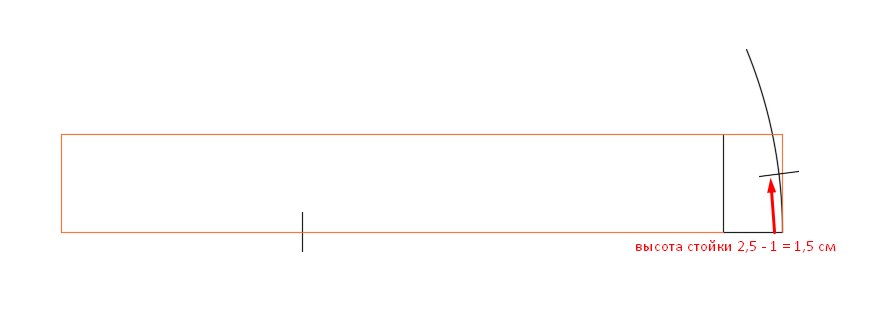
- Place a mark 1.5 cm up from the arc and connect these points with a line. The upper part of the arc can be erased.
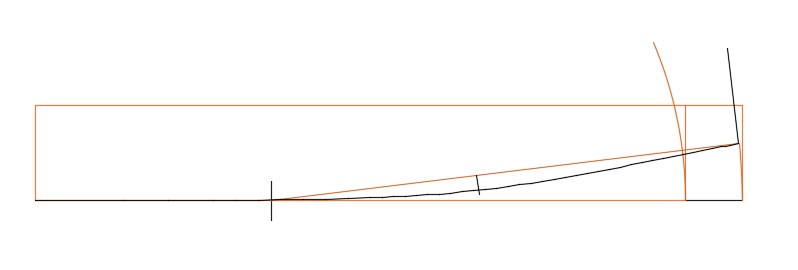
- Draw a perpendicular along the height of the rack.
- Create another arc from the center of the mark and the first line.
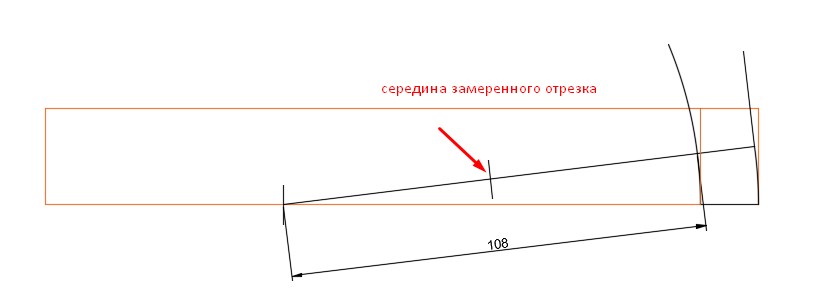
- Make a mark in the middle of the segment towards the near arc.
- Step down about 1 cm, smoothly draw an arc from this mark to the edges of the segment.
- Repeat the same for the top of the rack.
- Shape the corner into the desired shape.
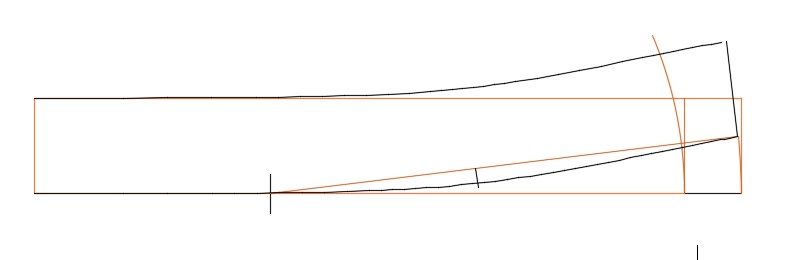
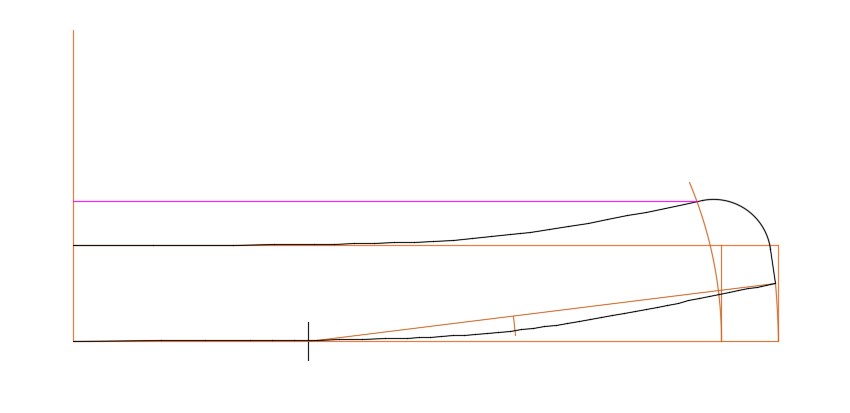
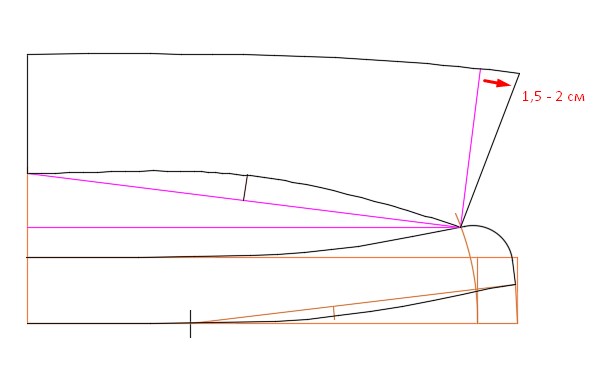
- To pattern a turn-down collar, the left side needs to be extended upwards, and a horizontal line needs to be drawn exactly along the top point of the corner.
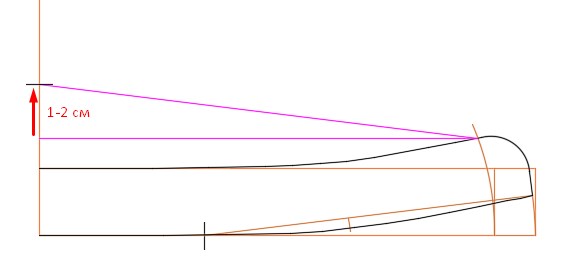
- Make a rise of about 2 cm, draw a line from the mark to the corner of the rack.
- In the middle of this line make a perpendicular mark at a height of 1 cm.
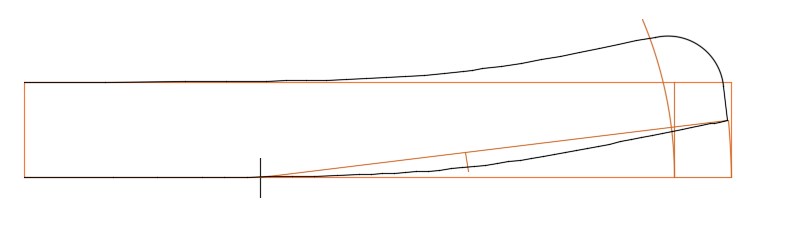
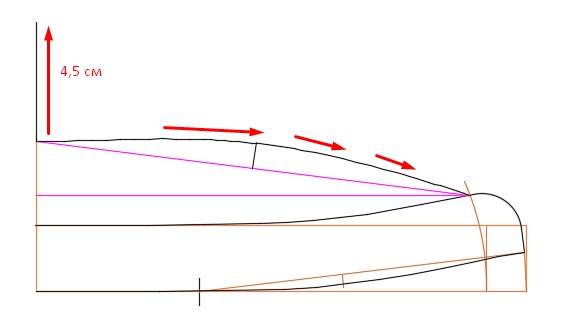
- Draw an arc from the mark to the corner and the middle of the collar.
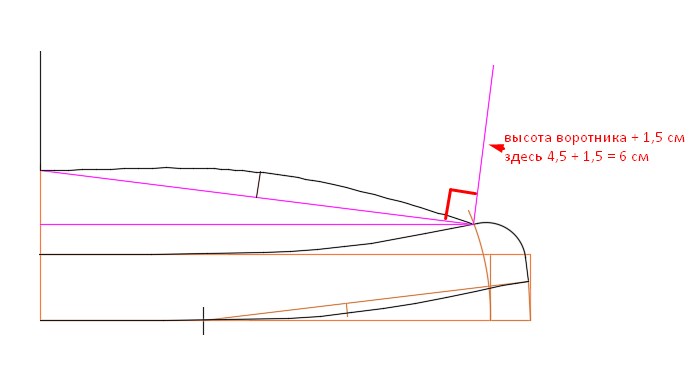
- Draw a line about 6 cm long perpendicularly from the corner of the stand. Then, using a smooth arc, mark the line of the shirt collar from its middle to the corner, adding 1–2 cm.
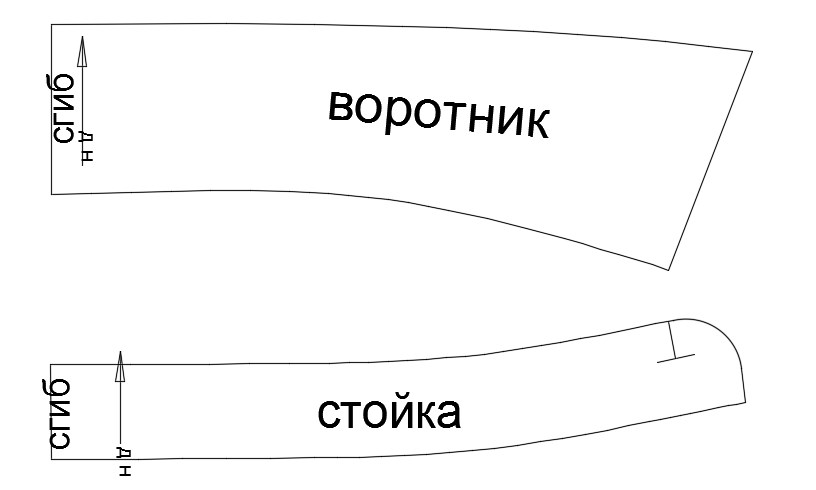
You can sew a collar for a shirt either as a one-piece or as a cut-off collar, but in any case, we cut it out with a stand.


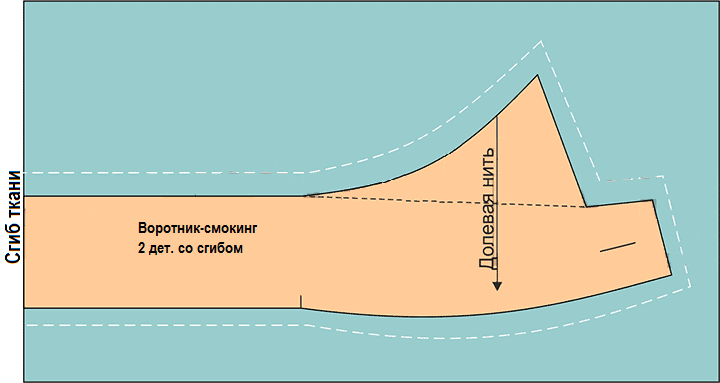
Tuxedo collar
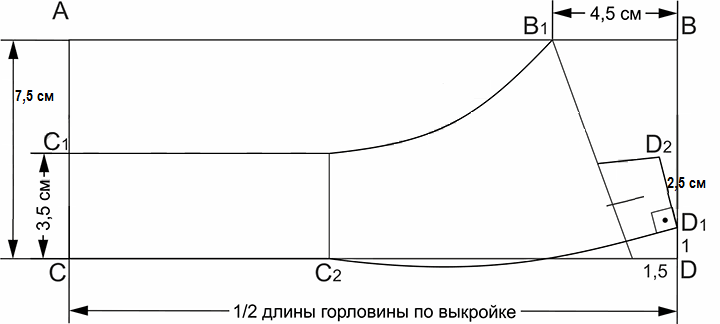
As in the first case, you need to take measurements from the neck, back and front of the shirt. Draw a rectangle, its length is equal to half the neck, the height is 7.5 cm.
The order of actions is as follows:
- From the middle of the neck, make a mark up 3.5 cm.
- From the right side, make a mark 1 cm up, draw an arc from it to the central mark.
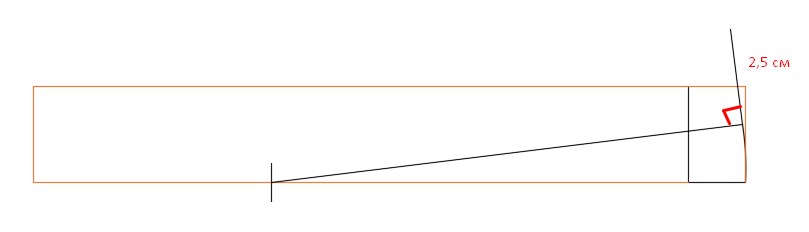
- Now place a mark 1.5 cm from the lower right corner to the left, and 4.5 cm from the upper right corner, and connect the resulting marks.
- Mark a point at a distance of 2.5 cm along the right edge upwards, make a right angle for the edge of the rack.
This type of collar is sewn exclusively for special occasions. It is often worn with a tuxedo, hence the name.
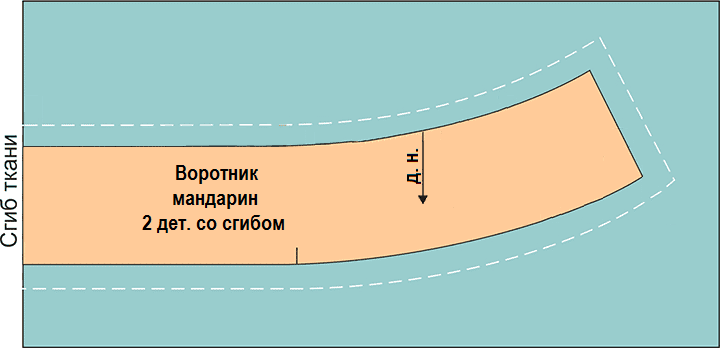
Mandarin collar
It is very easy to create a pattern for such an unusual shirt collar. Beginners are recommended to start with it.
Procedure:
- Take measurements from the back neck and front.
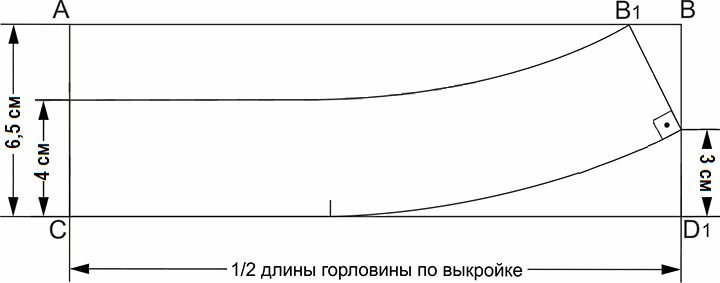
- Draw a rectangle with a length equal to half the neck measurement and a height of 6.5 cm.
- From the lower left corner make a mark 4 cm up, and from the lower right corner – 3 cm up.
- Place a mark at the top of the pattern at the bottom, and draw a line from it in an arc to the right mark.
- Place a mark 1.5 cm to the left from the upper right corner and draw an arc from it to the left mark.
This collar will be an ideal addition to a women's blouse, dress and elegant men's shirts.
Funnel
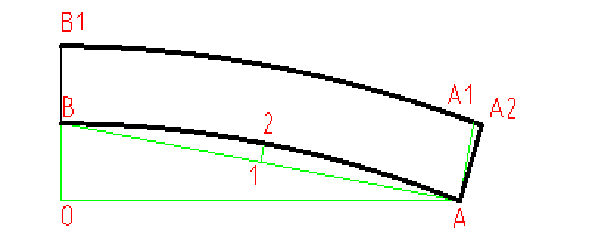
After taking measurements from the back and front neck, you need to draw a rectangle with a length equal to half the neck measurement and a height of 5 cm. To model the collar, you need to:
- Make marks 4 cm up from the left and right bottom corners.
- From the left mark, step back 3 cm upwards and draw an arc from it to the right mark.
- From the lower right corner, make an indent of 1 cm, connect it with a line to the right mark.
- Construct an arc from the bottom mark to the middle right mark.
This collar pattern provides for a small height and angle of expansion. If the model assumes a wider neck, a more right angle can be made.
How to sew
Before sewing the collar to the neck, it must be treated with a special thermal fabric. Then the front parts of both parts are connected with pins. At this stage, you need to give shape to the future product, baste the seams, as a result of which the lower part will decrease slightly. You also need to baste the seams on the outer and short sides.
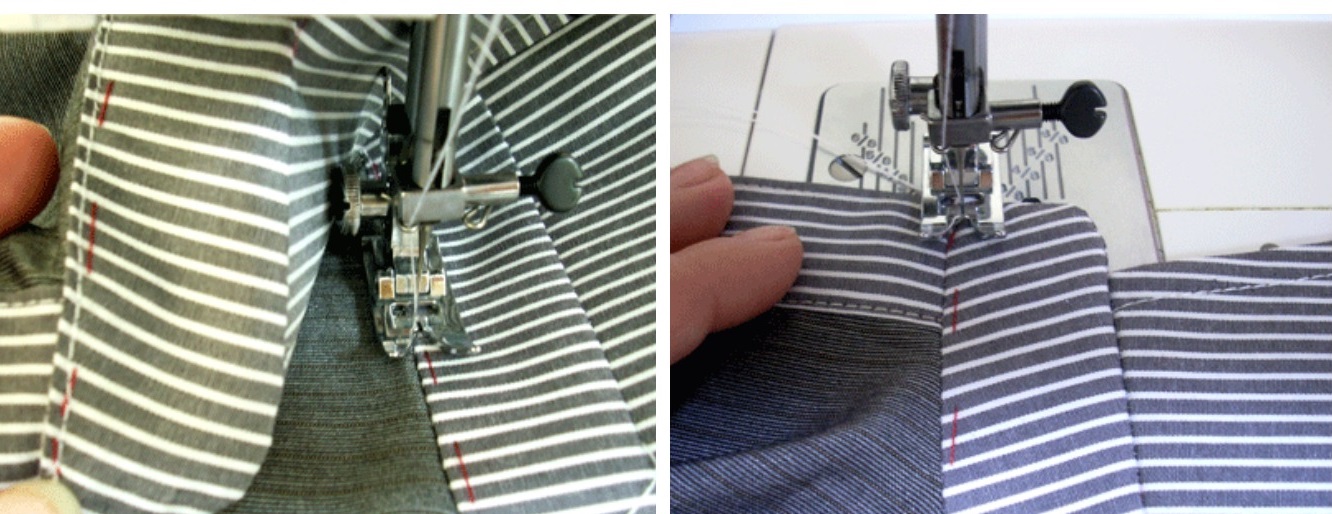
How to sew a collar step by step:
- Without sewing the edge of the thermal fabric, stitch the seams.
- Trim the seam allowances, leaving about 3-4 millimeters from the edge of the fabric.
- Turn the collar right side out, baste the edges, and sew them into the shirt neck at a distance of about 5 millimeters.
- There is an open edge of the collar that needs to be folded and basted.
- Connect the front parts of the reinforced stand and the turn-down collar, baste, and then stitch them along the edge of the thermal fabric, without going over it.
- Connect the front side of the product with the back side of the shirt or jacket, baste and stitch together.
- There will be an allowance left on the short side, to which the collar needs to be sewn.
- Cut the neckline seam allowances, leaving about 3 millimetres to the seam.
- Combine both halves of the collar, sewing the edges. Baste, taking into account that the allowances are on the reinforced part.
- Now you need to sew the two halves along the seam allowances.
- Trim off excess material, leaving a little more fabric at the short edge.
- Turn the product right side out and align the halves.
It is quite easy to model samples of different types of stand-up collars. It is necessary to follow the instructions, which will be useful when constructing patterns on your own. And step-by-step recommendations will help in the procedure of processing the stand-up collar and will tell you how to sew it to the shirt correctly.


Video