Original interior decor helps to create a unique atmosphere at home. To make the atmosphere romantic and cozy, you can use a butterfly stencil cut out of any available materials as decoration. It is not difficult to make a stylized figurine, especially if you have the opportunity to use template schemes.
Purpose of decor
Butterfly stencils are used to create decorations in the style of Provence or Art Nouveau. The fashion for vytynanka (products in the style of artistic cutting) and paper decor in the interior arose in Russia and Eastern European countries at the turn of the 19th and 20th centuries. It is known that in Ukraine and Belarus, figurines of animals, birds, insects made according to a template were considered amulets and were used to decorate the "red corner" - the place where icons usually stand in the house.
In the East, this type of artistic creativity has been widely known for several centuries. Japanese craftsmen created real masterpieces from the thinnest paper. Such crafts were characterized by a play of light and shadow and resembled painting canvases. Traditional subjects were landscapes, animalistic genre and even portraits. Nowadays, elements made using a stencil are most often used for:
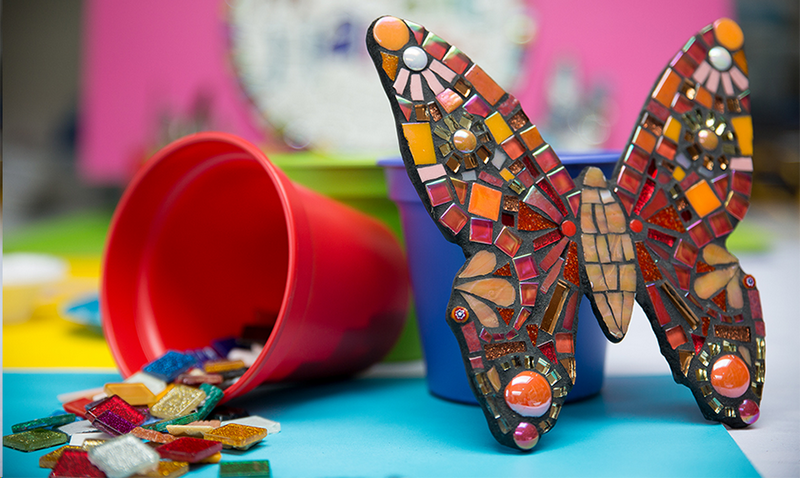
- creating mosaics;
- stained glass production;
- decorating gifts;
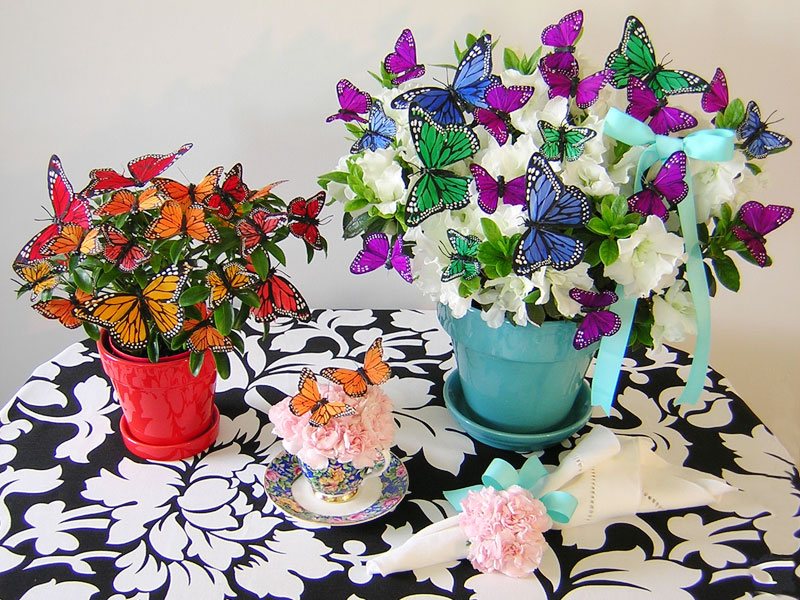
- formation of tabletop compositions.
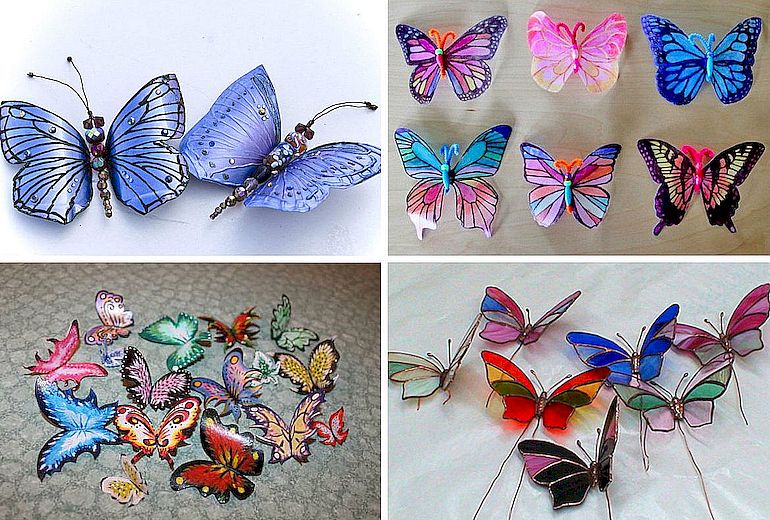
Images of insects are very popular. Traditional Japanese motifs are dragonfly, beetle, spider. In Russia and Belarus, the interior is most often decorated with butterflies.

Types of stencils
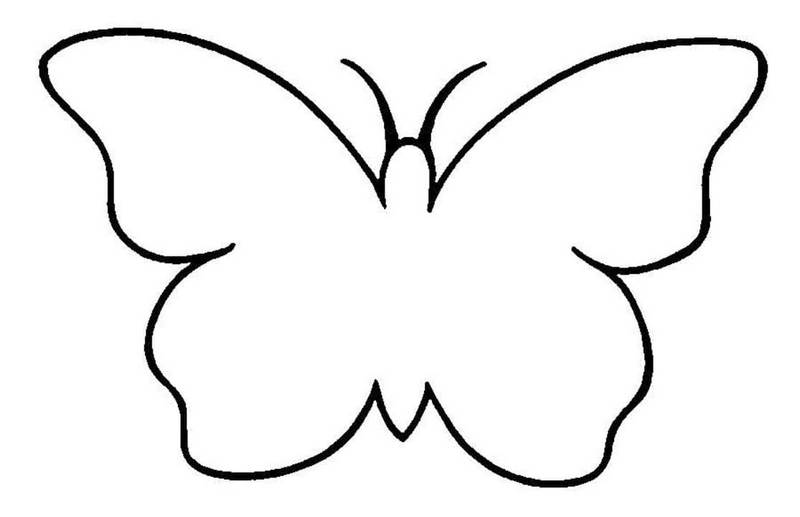
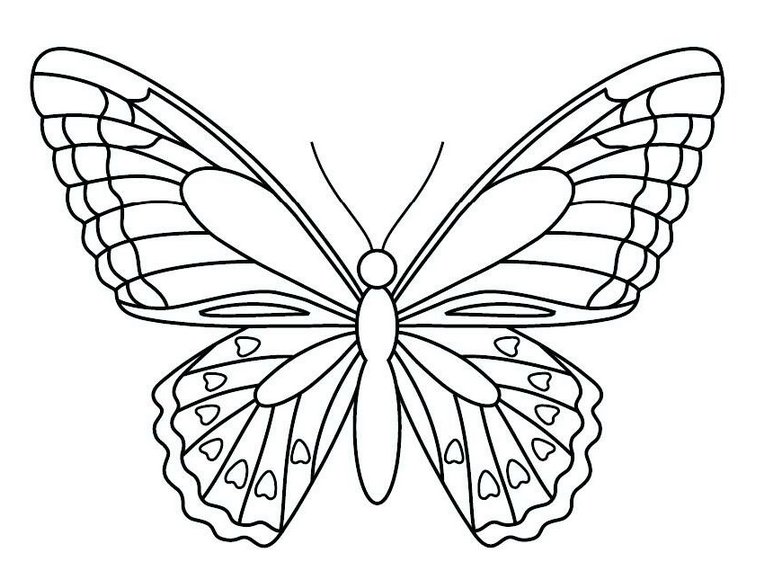
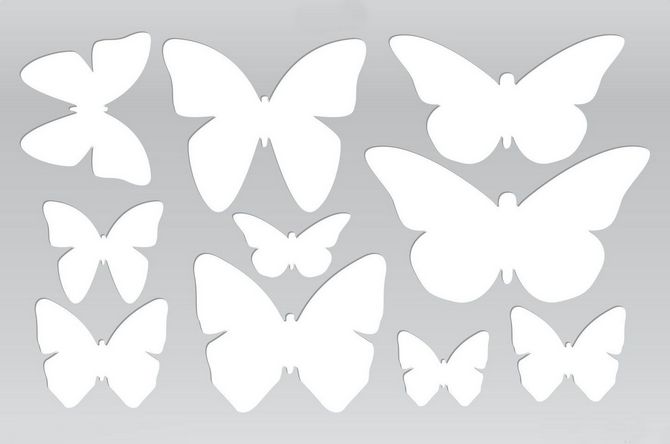
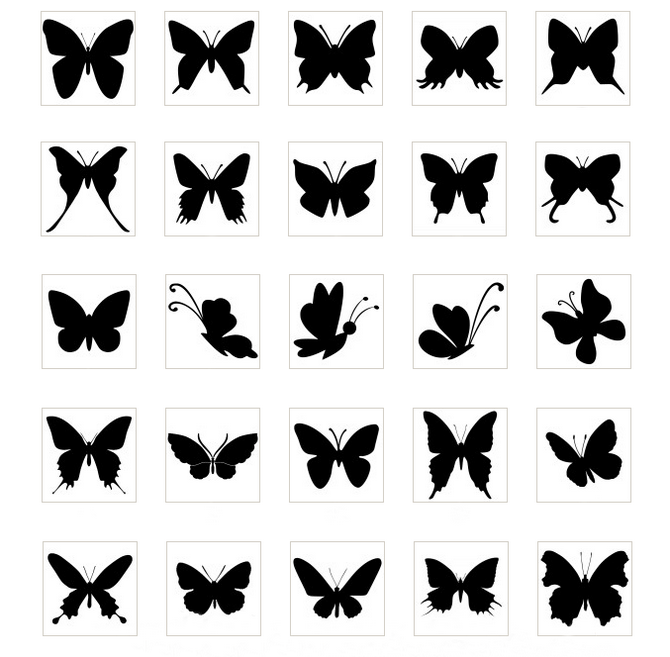
There are two types of stencils: silhouettes (general outline) and sketches (images with small details drawn). The size can be:
- large (for decorating walls);
- medium (on windows);
- small (for mosaics, stained glass, garlands).
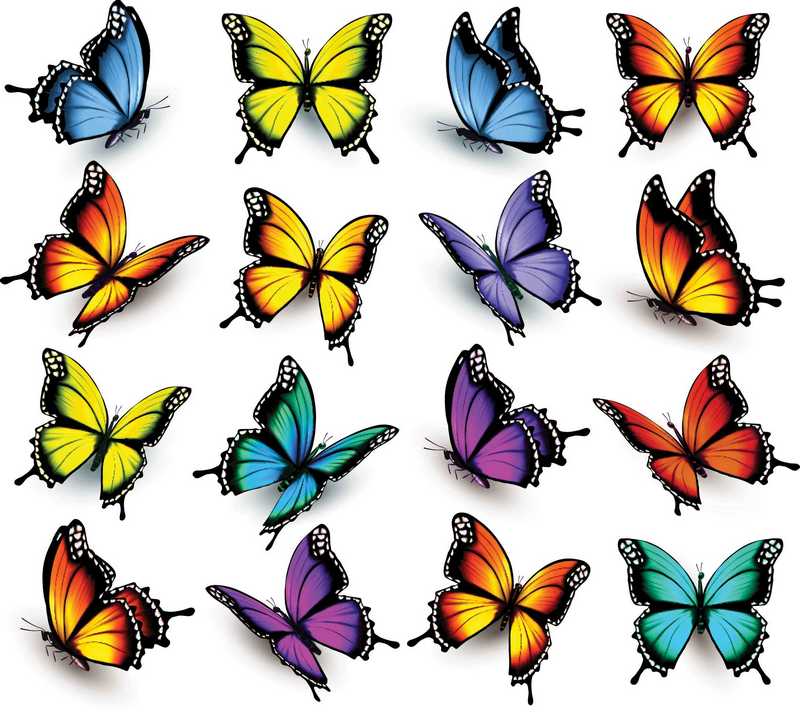
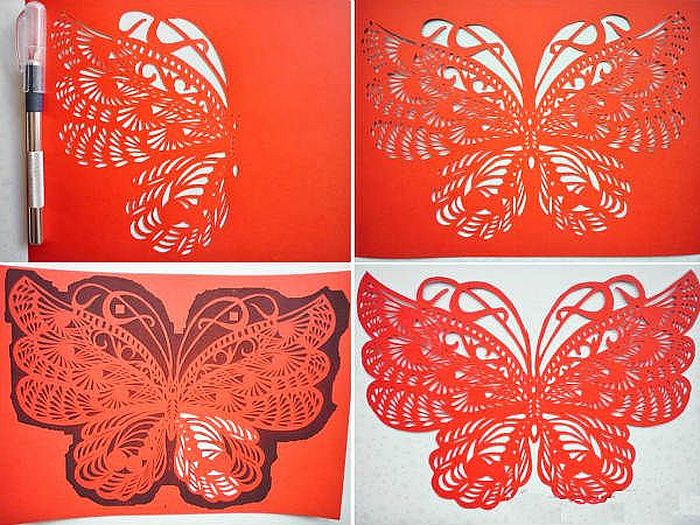
You can choose a color or black and white version. When working with paper, openwork templates are usually used: the more holes, the more beautiful the finished craft turns out.
| Location | Recommended form | Suitable design |
| On the wall | An image inscribed in a circle or oval | A generalized stylized figure with a recognizable outline |
| Stained glass | Butterflies for decoration, consisting of several squares, rectangles, diamonds | Clear design of the smallest details. A picture that can be broken down into simple geometric shapes |
| Hanging composition | A row of small triangles of the same size | A figure divided into two parts - solid and openwork, contrasting with each other |
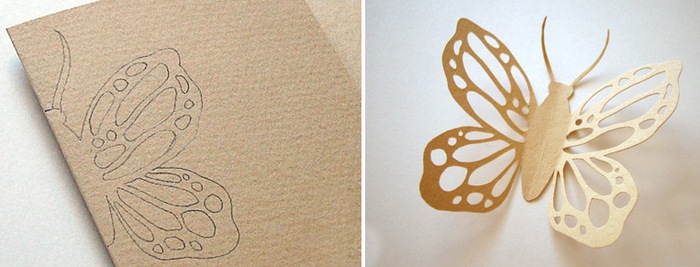
To design and make accessories from rope and colored wire, contour stencils are used, which are empty inside. The template for simple figures is usually a sheet of paper with a butterfly drawn on it. If the product is multi-layered, the scheme consists of several separately drawn parts. The plan of the three-dimensional image, in addition to the cutting lines, contains dashes along which the workpiece must be bent in a certain direction to achieve the 3D effect.
Materials for vytynanka
The following raw materials are most often used to make butterfly stencils:
- Paper. For creating figures using a template, the best choice is the regular office variety or sheets from school notebooks (if the cell or line is pale enough). The recommended texture is smooth, without roughness, the thickness is the smallest. The thinner the material, the easier it is to cut out.
- Cardboard. It can be regular or corrugated. The first has a smooth surface, but it is more difficult to give volume to finished products. The second is embossed, in this case the vytynankas are easier to bend, they turn out more expressive. When working with regular material, the fold lines can be located anywhere. If the cardboard is corrugated, it is desirable that the lines along which the workpiece should be bent coincide with the lines of the existing embossed pattern. The texture and size of the pattern depend on the length and width of the products. Smooth and beautiful small ornament looks good on small vytynankas, large and convex - on large butterflies. A template is used to make bends.
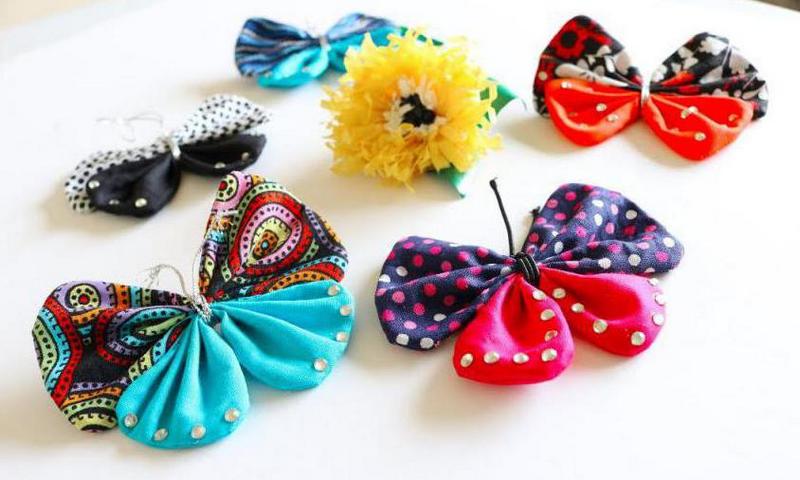
- Fabric. Thick materials are best suited for cutting - cotton and denim. In the first case, it is more convenient to make small details, in the second - to create a model of the product.
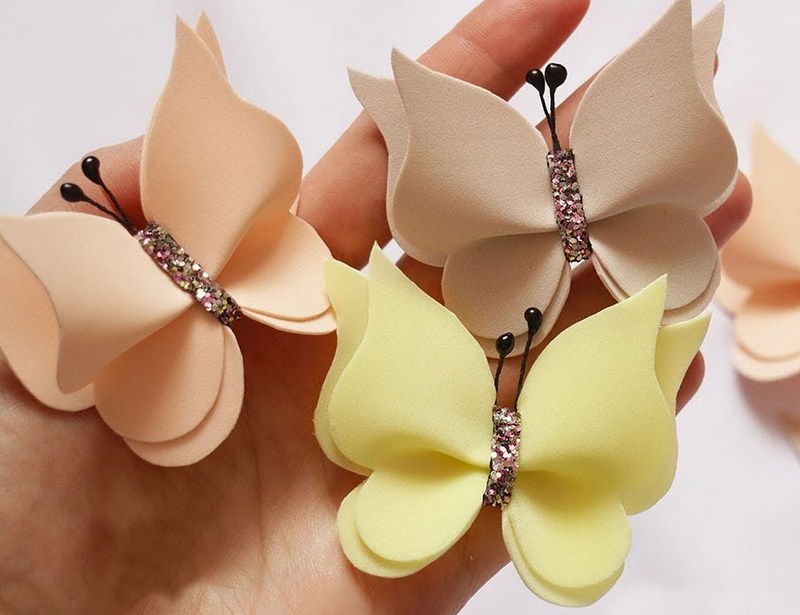
- Foamiran. This is a decorative rubber that easily takes any shape. It is produced in the form of multi-colored plates resembling sheets of paper. The main features are plasticity and pliability. Foamiran is well suited for making garlands and large wall compositions.
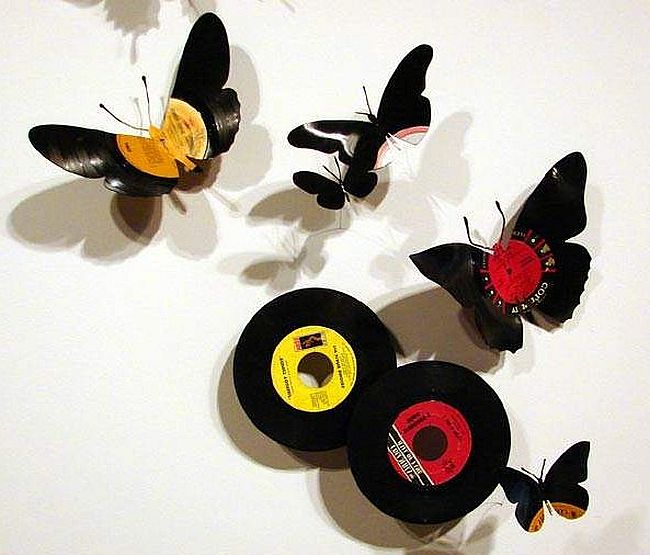
- Materials at hand. Vinyl records (they can be used to create an elegant, winding silhouette), tin cans (a flat, stylized image that can be painted in bright colors using acrylic), and plastic bottles (a three-dimensional butterfly with several large, openwork details) are suitable for making crafts.
When working with different materials and stencils, craftsmen will also need auxiliary tools:
- Large flat templates with a large number of openwork details are cut out with sharp scissors.
- Cardboard blanks for three-dimensional products are additionally pressed along the fold lines with a sharp knitting needle.
- To fix fabric images onto a thick base, use a glue gun.
One of the varieties of vytynanka is called kirigami - this is cutting out three-dimensional figures from paper. The material can be folded in two directions - away from you and towards you, which is indicated on the diagram by dotted and dotted lines.
What tools will you need?
To make elegant openwork butterflies, you need not only a material of the appropriate thickness, but also an additional tool. It will differ for each type of raw material:
- For accessories made from tin cans, you will need metal scissors.
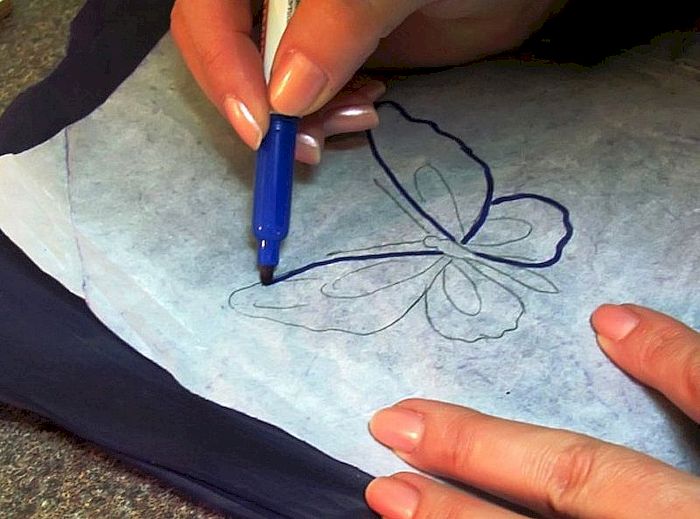
- When working with fabric, you should prepare a marker for writing on textiles and a glue gun to fix the decorative elements on the finished butterfly. The felt-tip pen can be successfully replaced with a piece of chalk or laundry soap.
- When working with foamiran, the template will need to be heated with an iron to give maximum volume to the finished craft. You will also need any paints (gouache, watercolor) and school wax crayons to color the butterfly, regular felt-tip pens will also do.
- To make a large number of decorative holes in the vytynanka without spending a lot of time and effort, you should arm yourself with a hole punch. It can be a regular one or one with shaped holes.
- If you want to decorate a fabric butterfly with embroidery or applique, you will need a set of needles with different eye sizes and floss thread.
For paper, it is recommended to use scissors with rounded ends to make it easier to cut out curved parts. For cardboard, it is better to use a stationery cutter.
Basic rules for working with stencils
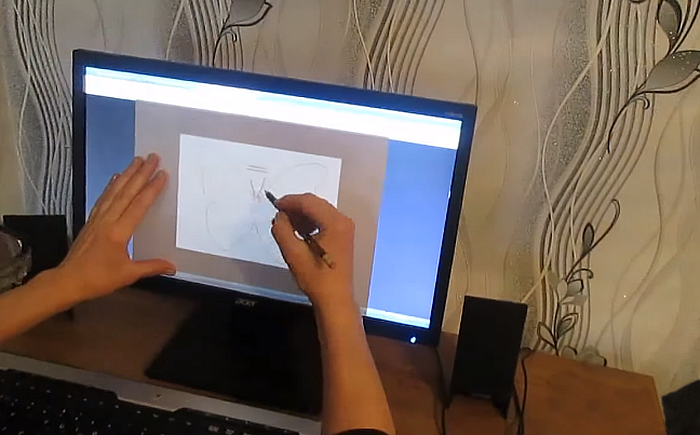
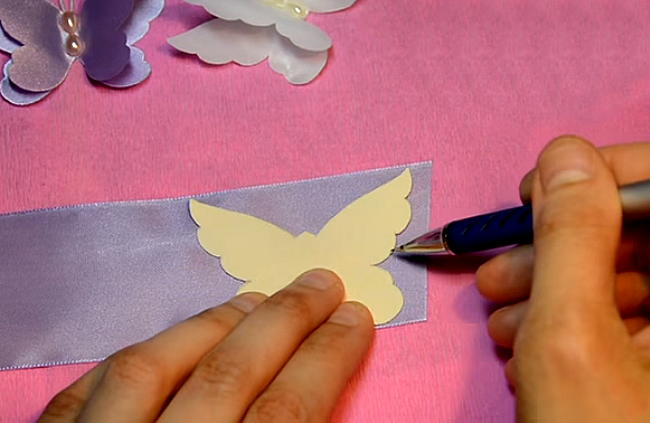
To make butterfly cutouts yourself, you need to draw them with a pen or a sharp pencil on a sheet of paper. If you don’t want to draw anything, the easiest way is to choose a stencil you like from thematic resources and print it. You can use Adobe Photoshop to change the size of the pattern.
Sometimes the picture is not printed. There are simple ways to save the image without a printer. Alternatively, you can put a sheet of paper to the monitor and carefully trace the translucent contours. If the template is drawn in a book, it is recommended to transfer it to paper using carbon paper.
If the butterfly has its own pattern outline on each wing, the sketch must be cut out completely at once. When the two halves are completely identical, before picking up the scissors, you need to fold the sheet in half to precisely maintain symmetry. When working with color templates, you must strictly adhere to the scheme so that the different shades alternate in the recommended sequence.
Step-by-step master classes
There are many options for making small and large original vytynankas. Even children can handle the simplest methods. The main thing is to choose a simple template.
Openwork figures
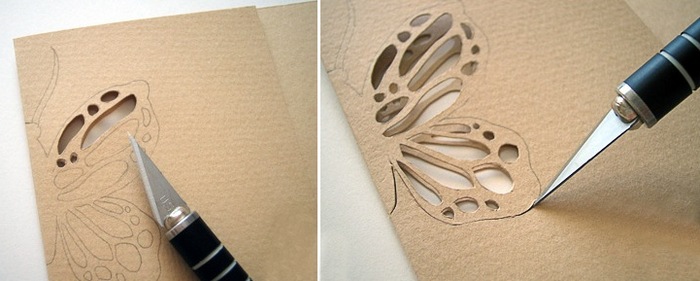
To create an openwork paper silhouette, place the sheet of paper with the printout on it on a flat surface with the design facing up. You can additionally secure it to a wooden board with adhesive tape so that the image does not shift. You need to work with scissors and a cutter. The order of making the craft:
- Fix the sheet in a stable position.
- Use a knife to cut out the butterfly stencil along the outline.
- Take the template in your hands and carefully straighten the edges.
- Use manicure scissors to create an openwork pattern on the wings.
Once the cutting is complete, the product is decorated. You can stack several sheets at once and cut out patterns at the same time. As a result, you will quickly get several butterflies.
Made of fabric
This craft is well suited for decorating a lampshade. First, you need to print out the template, then transfer the stencil from paper to fabric. Next, you need to:
- Cut out the blank with the pattern.
- Make it tough.
- Attach wire antennae.
- Apply beads to the wings using a glue gun.
- Attach the craft to the lamp.
Additionally, you can embroider veins on the wings. Any dark threads will do for this. Such decor will make the openwork stencil more lively.
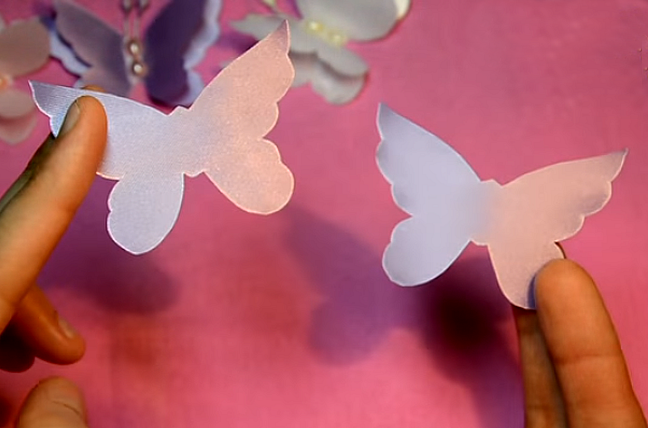
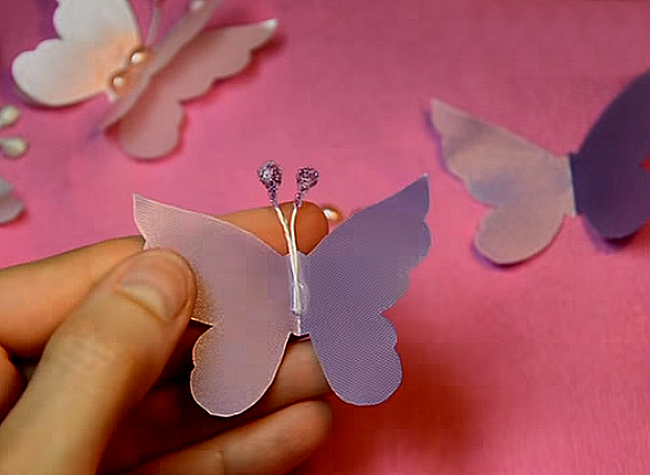
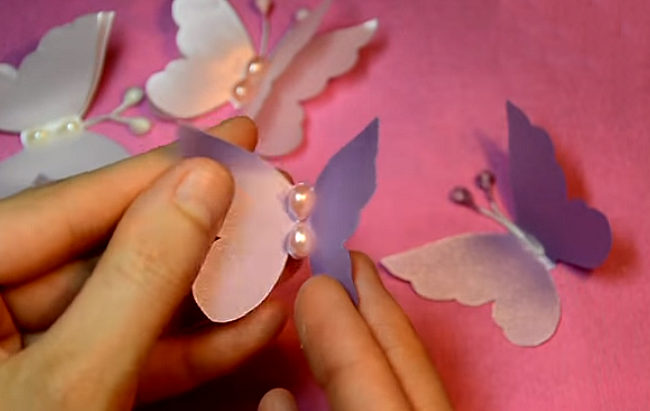

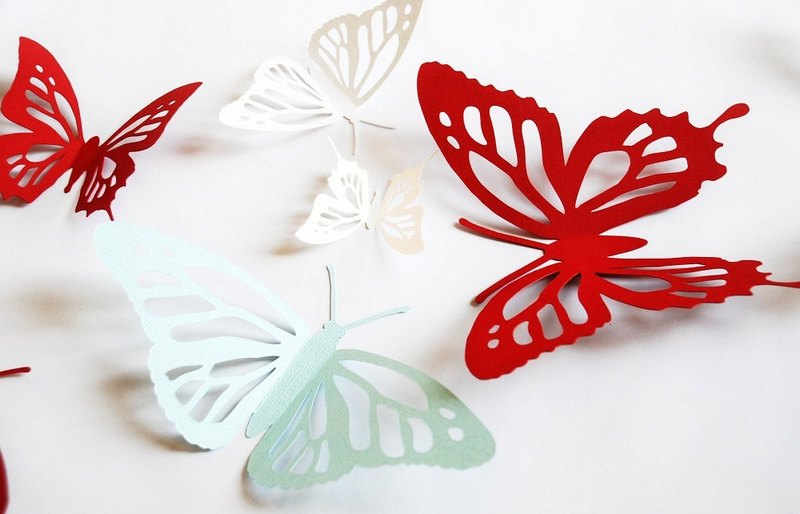
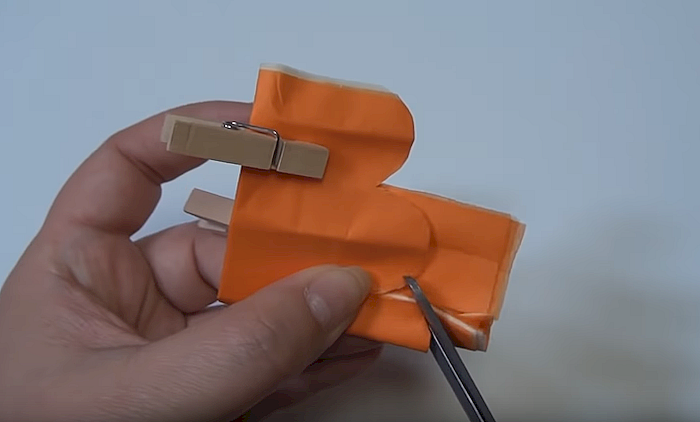
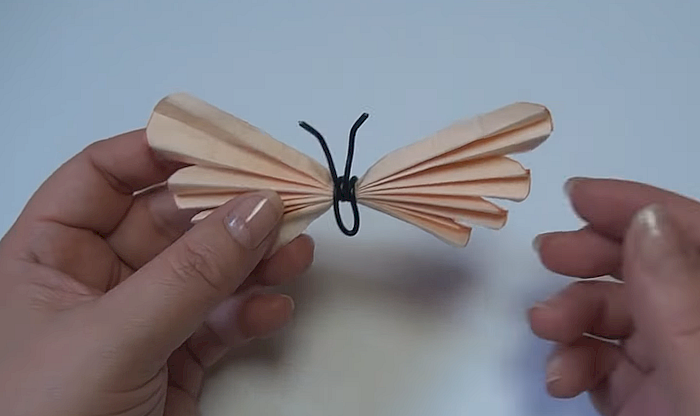
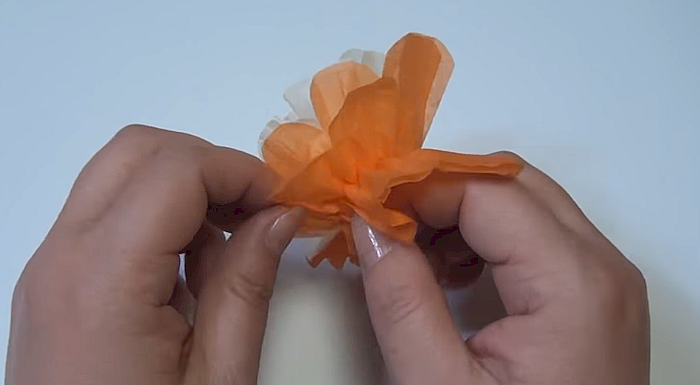
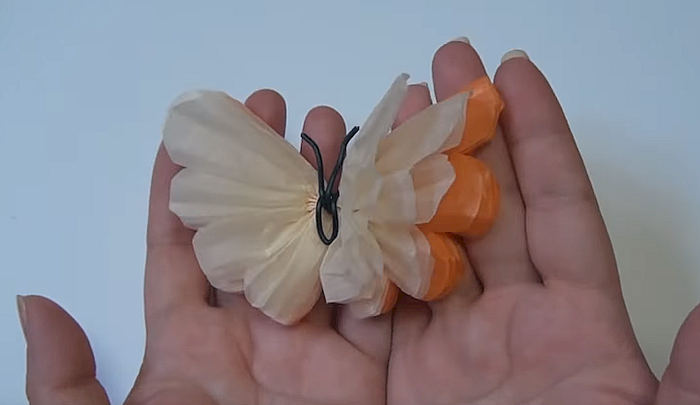
Multilayered volumetric butterflies
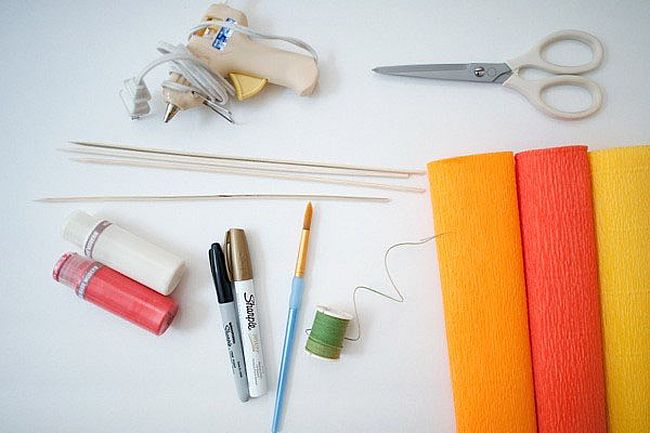
This butterfly will look beautiful on the wall. You can make one butterfly or a whole flock of different sizes. It is allowed to use thin colored corrugated paper, which was previously called tissue paper. Step-by-step algorithm of actions:
- Stack and fasten 6-10 sheets.
- Cut out butterflies from paper.
- Place them on top of each other.
- Glue the butterflies' bellies together.
- Bend the wings in opposite directions.
It turns out to be an original decoration. At the slightest breath of wind, the paper insect begins to move its wings. Additionally, you can glue on antennae made of thin threads or fishing line. Flower stencils are made using the same principle.
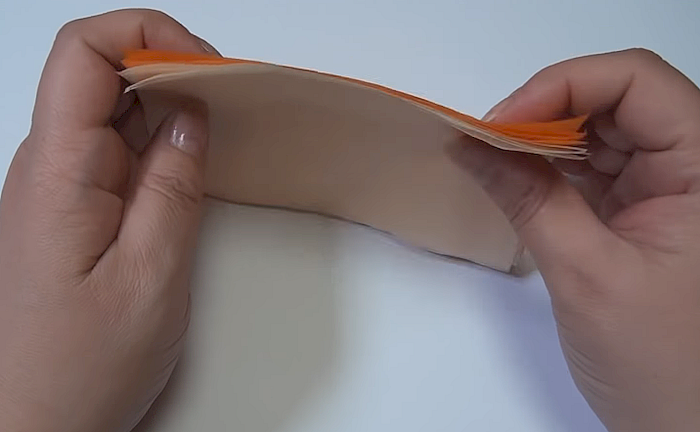
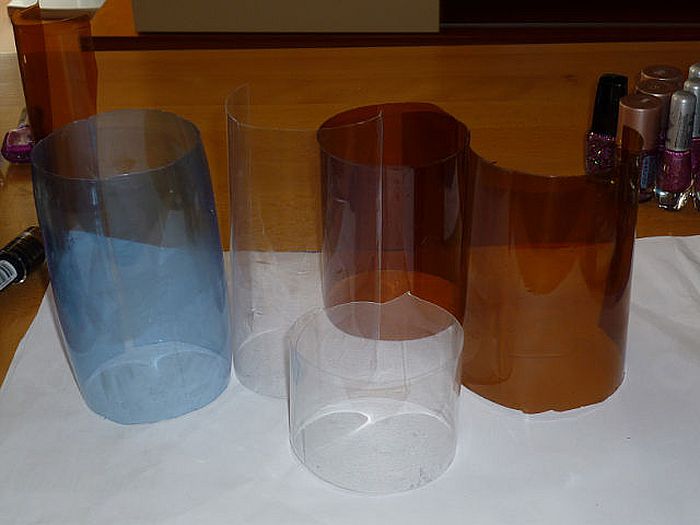
From plastic bottles
This craft will be a great decoration for a children's playground. You can also "settle" a smart bright butterfly in your summer cottage. Step-by-step instructions for making:
- Wash the bottle thoroughly and remove the label completely.
- Cut off the bottom and the neck.
- Divide the resulting small cylinder into two halves.
- Iron the plastic between two sheets of paper until the material is flat.
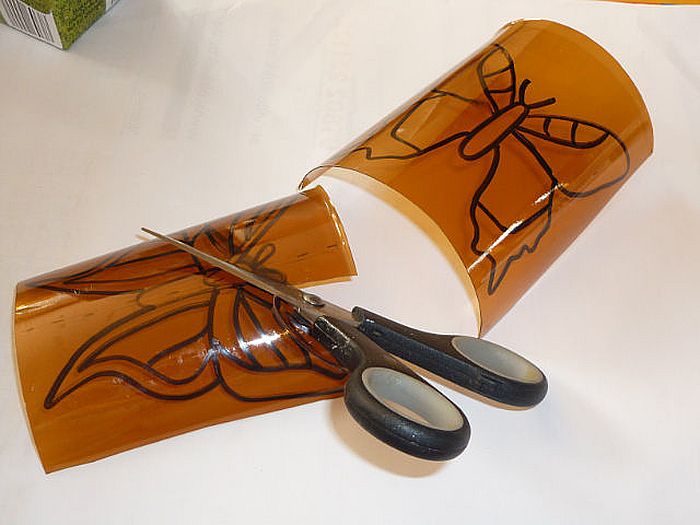
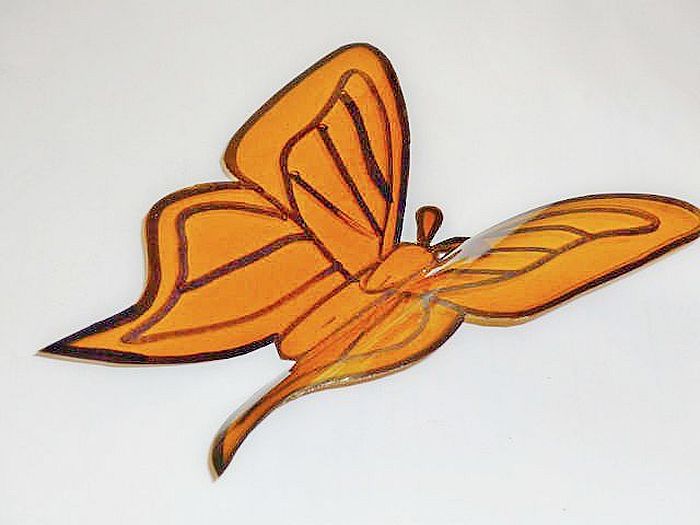
- Cut out the butterfly using the template.
Sharp edges need to be melted with a lighter. The wings are slightly bent upwards. Attention should be paid to decoration; stained glass paints are used for this purpose.
Useful tips and fashion ideas
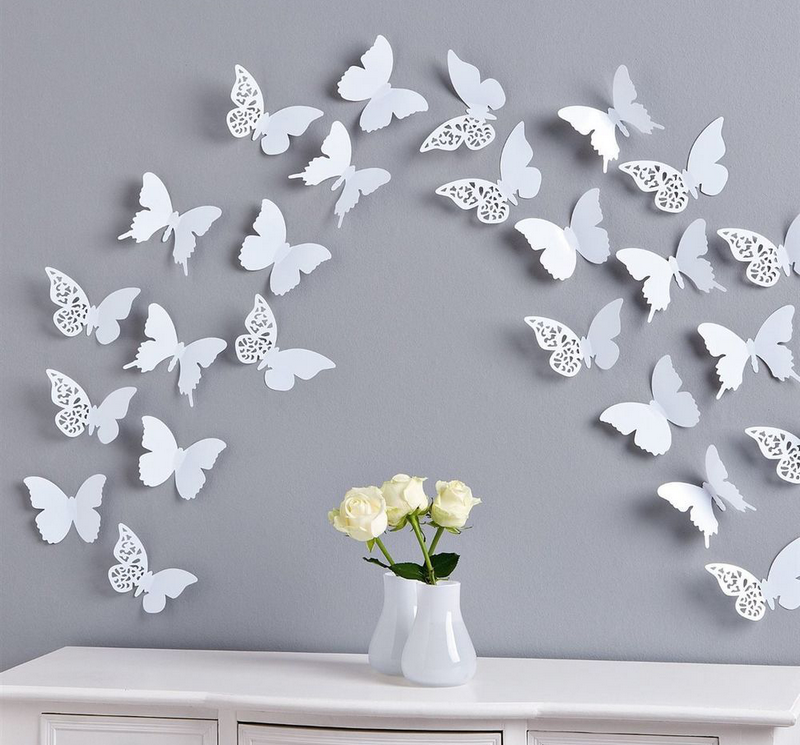
You need to know how to make a butterfly pattern truly spectacular. For placing a wall composition, it is better to choose a surface without wallpaper, covered with water-based paint or covered with plastic (wooden) panels.
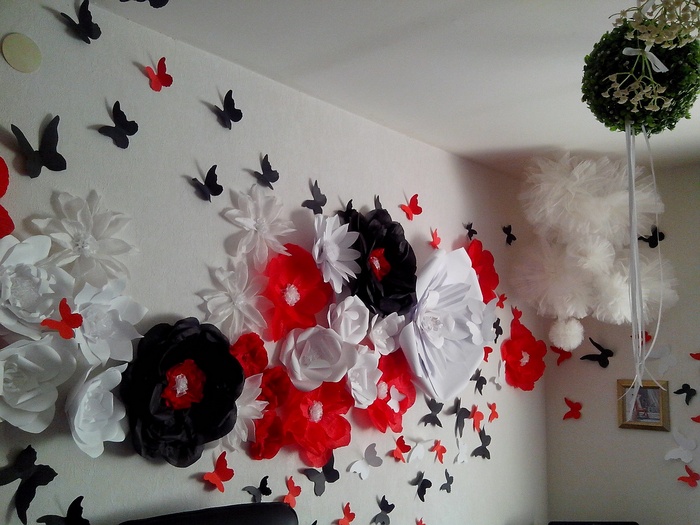
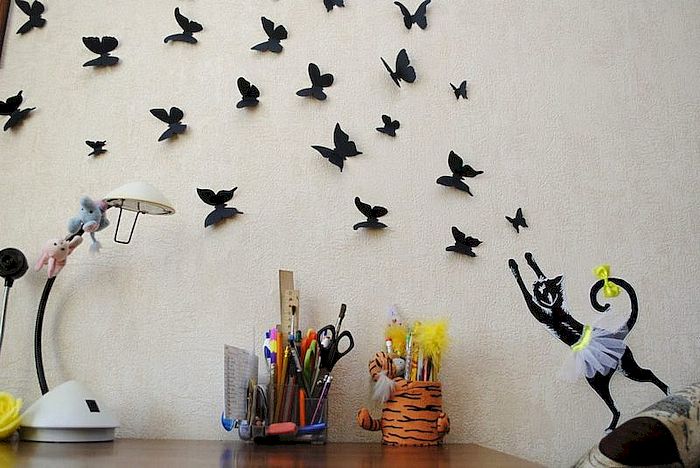
A large panel of 15-20 small butterflies will look good in the living room, and a medium-sized painting with a couple of large insects in the kitchen. In the children's room, a wall carpet of 50-100 images of butterflies of different sizes, arranged in a chaotic order. For additional decor, you can use glitter or rhinestone trim along the contour.
| Type of premises | Suitable composition scheme |
| Living room | A panel resembling photo wallpaper |
| Children's bedroom | A garland or pendant that is attached to the ceiling |
| Hallway | One large bright silhouette on the wall |
It is not recommended to use more than 3-5 colors in the composition, otherwise the picture will be visually tiring. It is desirable that all the butterflies "fly" in one direction - up, to the right or to the left. The details of the decorative panel should be placed with such frequency that there is free space between them. The recommended shape of the composition is an oval, circle or rectangle.
Before cutting out a butterfly, you need to think about how it will be attached. You can decorate the ceiling using fishing line, attaching the components of the garland to it. It is appropriate to complement the hanging composition with artificial flowers and small toy birds.
When creating decor, you should focus not only on ready-made templates, but also on your own imagination. Standard color and black and white patterns can be modified and decorated, choosing a butterfly silhouette depending on the style of the surrounding environment. Original figures will serve as a wonderful decor for a living room or a child's room on a holiday.

Video