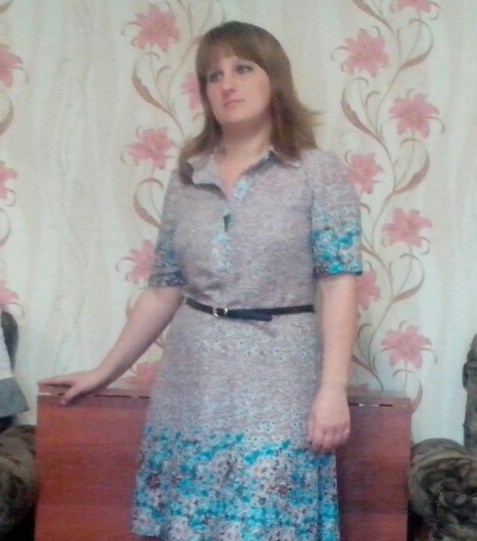
Custom tailoring of clothes allows not only to create unique and inimitable models, but also to take into account the anatomical features of each individual figure. Sewing at home or in salons is especially popular among girls with non-standard figure types. Last season, models with an A-silhouette came into fashion. This cut suits girls with different proportions, but it was especially appreciated by owners of the "pear" type. The pattern of an A-silhouette dress is quite simple, and, having at least basic sewing skills, you can cope with the work even at home, using the help of modern magazines.
Patterns
Planning the modeling of an A-line dress is only advisable for girls with small body parameters. Burda magazine provides ready-made patterns in different sizes. In issue 12/2015, this dress is presented in pattern 120 B. This pattern assumes clothing sizes 34-44.
When cutting out an A-line dress, remember that it is only suitable for girls with narrow shoulders and small breasts. Otherwise, the dress can visually add a few kilograms to the girl. This dress does not emphasize the waist and does not have a pronounced hip line, so the main emphasis is on the shoulders and chest.
On the pattern sheet, this model is presented in pink, so the pattern is easy to find. After choosing the desired size of clothing, the pattern is transferred to silk paper. For convenience, this can be done in the following sequence:
- All 12 pattern pieces are outlined with a red or other bright marker. This is done for convenience, so that the desired outline is visible through the silk paper, and so as not to make a mistake with the size;
- Silk paper is placed on the paper with patterns;
- All 12 parts are transferred to silk paper using a sharp wheel. To prevent the silk sheet from slipping, it must be pinned to the patterns. When transferring parts, it is necessary to mark all the inscriptions on and around the parts, as well as mark the part numbers;
- Details 12 and 11 are scallop templates. The pattern of this particular dress assumes scalloped edges. If you want scalloped sleeves and a hem, these details are transferred. If you plan to have a straight hem, these details are not needed. The cut out scallop templates are applied to cardboard, transferred onto it and cut out.
The numbers are decoded in the table below.
| Part No. | Name | Cut out on the fold of the fabric |
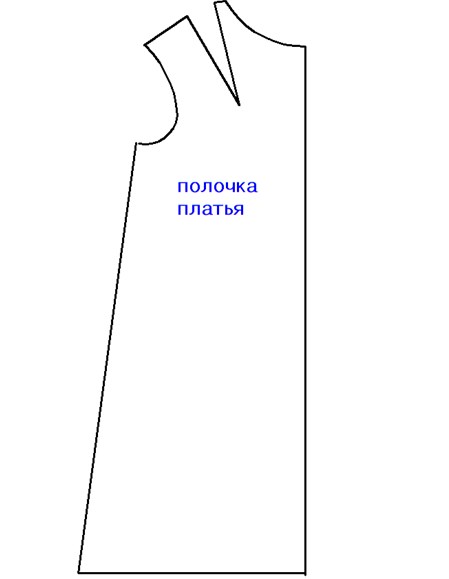
| 1 | Front with a fold. | Yes |
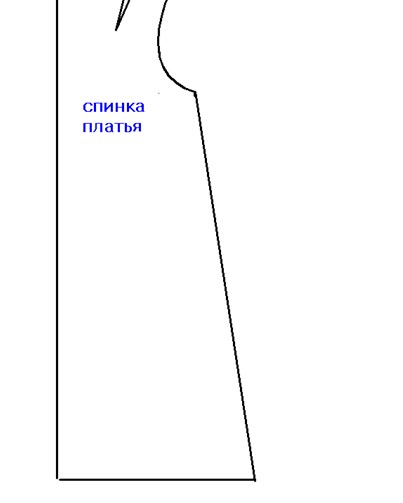
| 2 | Back with a curve. | Yes |
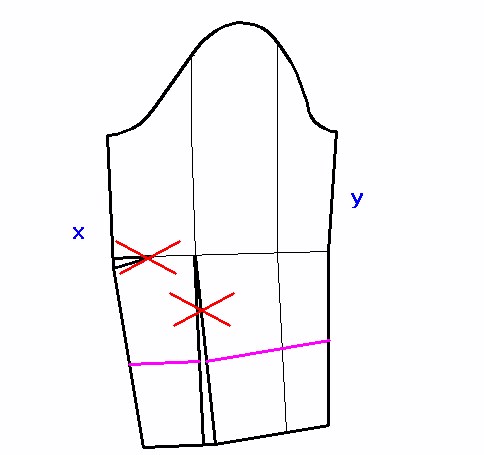
| 3 | The sleeve is made in 2 copies. | No |
| 4 | Detail for trimming the front neckline. | Yes |
| 5 | Detail for trimming the back neckline. | Yes |
| 7 | Detail for trimming the lower edge of the front. | Yes |
| 8 | Detail for trimming the lower edge of the back. | Yes |
| 9 | Detail for turning sleeves. Manufactured in 2 copies | Yes |
| 10 | Pocket burlap. Cut out in 4 copies. | No |
| 11 and 12 | Scallop. | No |
The details are cut out like this:
- The pieces cut out on silk paper are applied to the fabric. They should definitely be pinned. The pieces marked in the table, which are cut out on the fold of the fabric, should be located at the edge of the fold. To do this, the material is folded in half;
- First, pieces 1 and 2 are cut out. 750 mm are measured from one edge of the cut. A mark is made at this point. The fabric is folded in half. The front side of the fabric should be inside. The edges of the fabric should be near the marked line;
- Parts numbered 1 and 2 are applied to the fold. Pinning them along the contour is mandatory;
- Using chalk or soap scraps, outline the detail. Allowance for all seams should be 1.5 cm;
- The remaining pieces are laid out on the remaining piece of fabric. When tracing them, you should adhere to the rule: + 1.5 cm for all allowances;
- In addition, it is necessary to cut out the bias binding. It must be cut out directly on the fabric - 6 cm in length and 2 cm in width. All cut out parts are cut out.
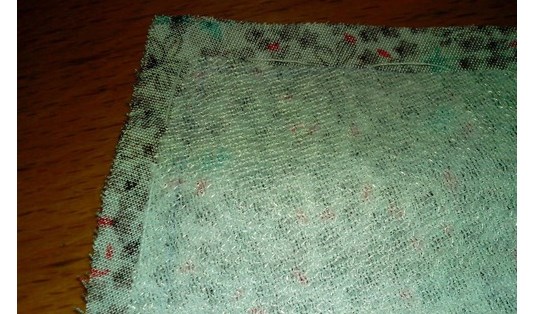
To strengthen some parts, interlining is used. Before sewing, it also needs to be cut out.
It is done like this:
- A piece of interlining is folded lengthwise. The adhesive side should be on the inside;
- Parts numbered 4, 5, 7, 8 are attached to the fold. Part number 9 is attached separately;
- All details are outlined taking into account allowances of 1.5 cm on each side;
- The cut out interlining pieces are cut out.
This is how you begin sewing an A-line dress with your own hands. Before you start sewing, it is recommended to iron all fabric parts. This will make the sewing more neat and will facilitate the process of heat treatment after sewing.

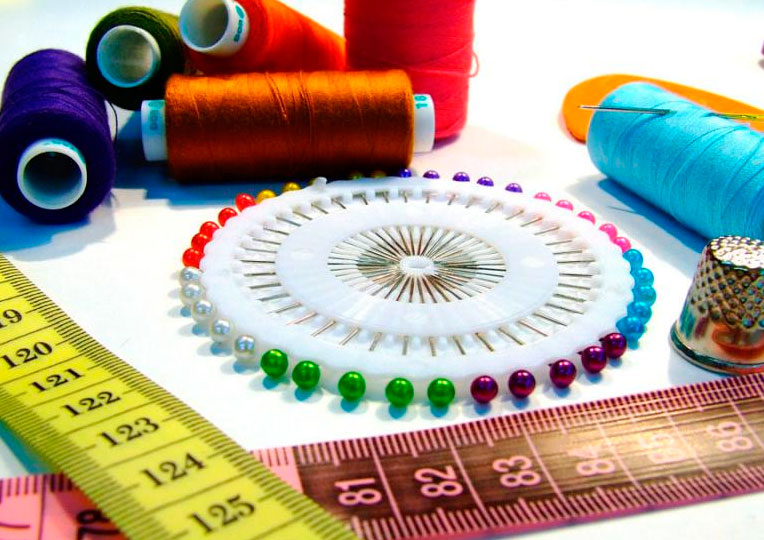
Necessary tools and materials
To sew a dress that is flared at the bottom, you need to prepare all the tools before you start sewing. If you sew items regularly, there will be no problems with collecting the necessary components. What materials are needed to sew this clothing:
- Sewing fabric (crepe is recommended). The material can be (for this dress pattern) plain linen, crepe or other fabric. You will need a piece measuring 1500 mm by 1800 mm;
- Grosgrain Tape. Tape width 25 mm, length 950 mm;
- Nonwoven formband;
- Small button – 1 pc;
- Non-woven fabric G 785, width 0.9 m – 500 mm;
- Sewing threads in the color of the material.
What tools will be needed for sewing:
- Stationery scissors;
- Sewing machine;
- Silk paper (used to transfer the pattern from the sheet);
- Scissors of different sizes for fabric for cutting out cut-out elements and making scallops;
- Centimeter measuring strip;
- Burda carbon paper;
- Pattern translation wheel;
- Stationery pencil;
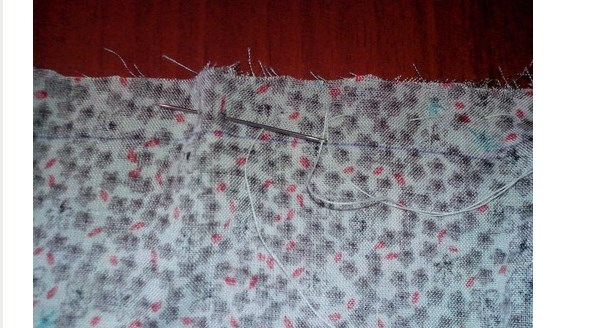
- Sewing pins and needles;
- Chalk or soap;
- Cardboard for making scallops;
- Needles for hand processing of fabric.
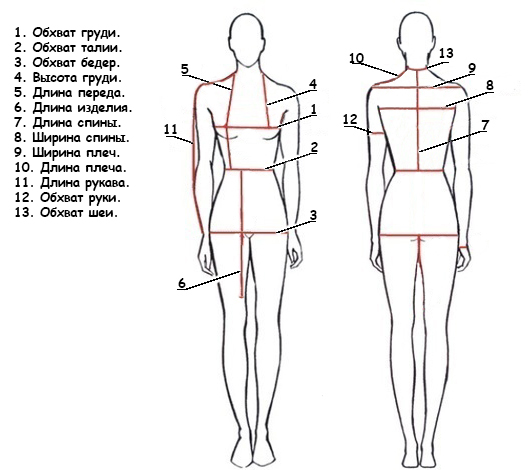
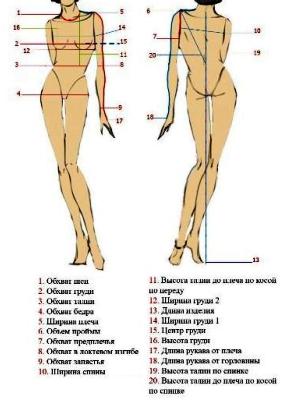
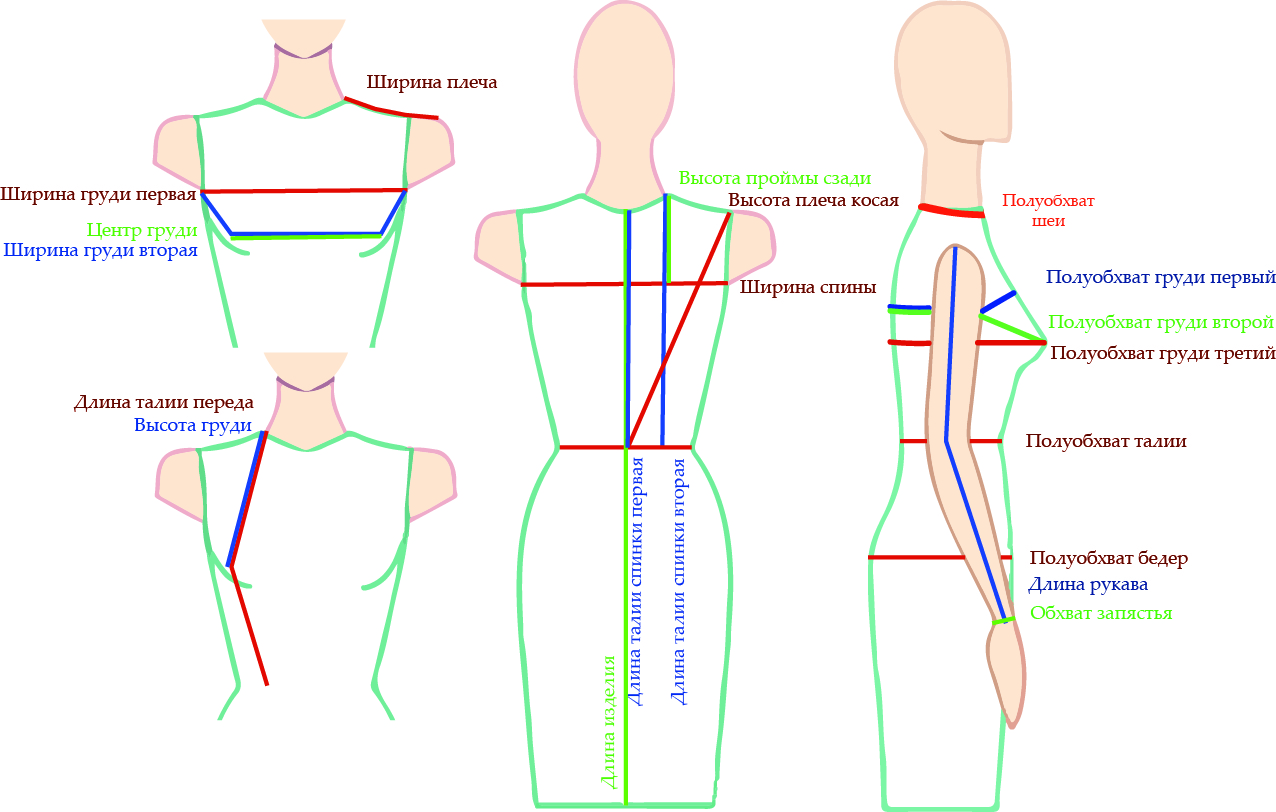
How to take measurements
Taking measurements is one of the most important stages in sewing any item. An A-line silhouette requires fewer measurements than a fitted dress model. At the same time, to create a dress (A-line) for plus size women, you must take all the measurements to choose the right size. After taking all the measurements, the obtained values are compared with those presented in the table to determine your size. This is how the pattern is selected. In order for the measurements to be correct, you must adhere to the following rules and order:
- When taking measurements, the person must stand straight;
- Slouching or hunching is not allowed;
- To take any data, it is necessary to select either the most protruding areas on the body, or the most sunken ones;
- Measurements are taken while standing;
- The legs should be straight, the feet together;
- Bending your legs or leaning on one leg is not allowed;
- The measuring tape must never be stretched;
- When holding the tape on the body, it should be possible to breathe freely;
- The strip for measuring body parameters should be made of non-stretchy material;
- The body should be measured while wearing the underwear over which the item will be worn. When wearing a push-up bra or shaping tights, they must be put on when measuring to obtain the correct result after sewing;
- You cannot run the tape diagonally or obliquely;
- The measuring strip must always be positioned either strictly vertically or strictly horizontally;
- During the operation, all data is recorded immediately.
Having the body measurements, you can find out your size using the table below. Since this pattern is presented in sizes from 34 to 44, the table below indicates the parameters of these sizes.
| Parameter/size | 34 | 40 | 36 | 42 | 38 | 44 |
| Shoulder length, mm | 120 | 130 | 120 | 130 | 120 | 130 |
| Waist circumference, mm | 620 | 740 | 660 | 780 | 700 | 820 |
| Sleeve length, m | 0.59 | 0.60 | 0.59 | 0.61 | 0.60 | 0.61 |
| Arm circumference, mm | 260 | 290 | 270 | 300 | 280 | 310 |
| Chest height, m | 0.25 | 0.28 | 0.26 | 0.29 | 0.27 | 0.30 |
| Chest circumference, mm | 800 | 920 | 840 | 960 | 880 | 1000 |
| Neck circumference, mm | 340 | 370 | 350 | 380 | 360 | 390 |
| Back width, mm | 335 | 365 | 345 | 375 | 355 | 385 |
| Back length, mm | 410 | 420 | 410 | 430 | 420 | 430 |
| Front length, mm | 430 | 460 | 440 | 470 | 450 | 480 |
| Hip circumference, mm | 900 | 1020 | 940 | 1060 | 980 | 1100 |
Sewing technology
After cutting out all the details, you can start sewing. Sewing begins only after preparing all the necessary details. How to sew a dress:
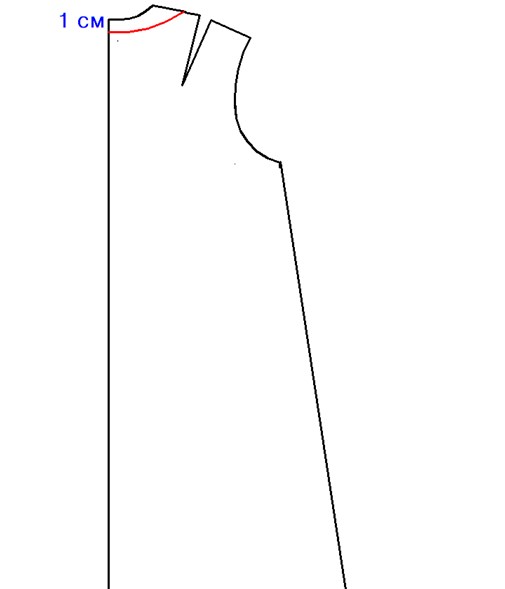
- The interlining formband is glued along the neckline and armholes. These manipulations should take place on the invisible side of the dress;
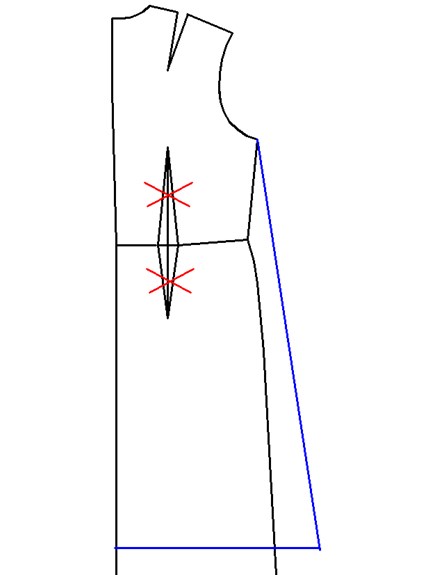
- The location of pockets and darts is transferred to the main side of the material;
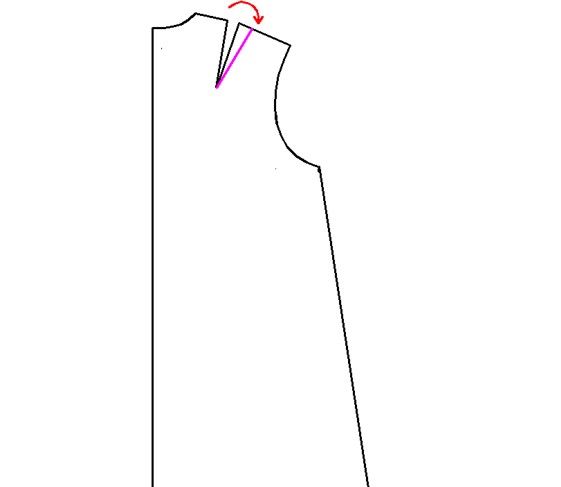
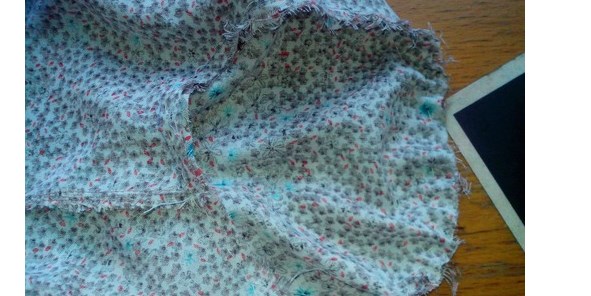
- To sew darts, fold the material along the center of the dart. Stitch the dart. The main side should be hidden;
- The pocket burlaps are sewn together. The strips of pocket lining are ironed over the markings. Then the stitching is applied. It should be 2 mm from the edge;
- The cut interlining is applied to the fabric from the non-main side. Details numbered 4 and 5 are glued to the fabric pieces, and interlining numbered 7, 8, 9 is glued along the lower edges of the main parts;
- After cutting the main piece, the pocket burlap is sewn on from the non-front side;
- The grosgrain tape is applied to the pocket and arranged to form corners;
- The main parts are sewn together. After joining the front and back, you can start edging the neck. For this, cut out parts are used. The line is laid at a distance of 3 mm from the cut;
- Using a template in 12 and 11, scallops are formed on the sleeves and the edge of the dress;
- The sleeves are sewn along the cut line;
- On the front side of the dress, the front side of the sleeve is pinned and attached to the back side. After ironing, the sleeve is turned inside out;
- The edge trimming details are pinned to the edges along the marked scallops. The stitching is laid along the scalloped edges;
- The scallops need to be swept out, the edges carefully ironed. This is done not only along the bottom of the dress, but also with each sleeve.
Decorating and beautifying
When sewing semi-fitted models, more attention is paid to decoration than when sewing an A-line dress. To decorate this dress, you should sew on a loop and a button. After sewing all the components, special attention should be paid to their ironing. It is necessary to iron not only the material, but also each seam, each dart, line and edges. The appearance of the product will depend on the quality of ironing. Since during use, the item rarely gets used at the seams (more often only the main fabric is ironed), the quality of ironing the seams should be very high.
The above-described dress can be additionally decorated only at will. Scallops and pockets are the main decorative details. If desired, the dress can be decorated with rhinestones, beads or embroidery.
When deciding to decorate a finished product with embroidery, it is necessary to apply the design before starting to sew the product. In this case, the embroidery will be neat, and the likelihood of damage to the dress during the work will be reduced.
Dresses can also be decorated with beads and seed beads. For these purposes, you can buy water-soluble interlining and the required amount of beads and seed beads. Drawings are applied to water-soluble interlining. Most often, this is done by the manufacturer, taking into account the color scheme. Therefore, when choosing a beaded decoration, you need to choose interlining with an applied pattern, taking into account the color of the dress. After embroidery, the fabric must be left in water for a short time or washed in a gentle hand wash. The interlining will dissolve, while the embroidery will be completely preserved. When caring for such a thing, it can only be washed by hand.
As can be seen from the information described in this article, sewing an A-line dress is possible with special diligence and desire. The patterns from the Burda magazine are of great help in this matter. With their help, cutting out an A-line dress becomes easy and simple.
Video