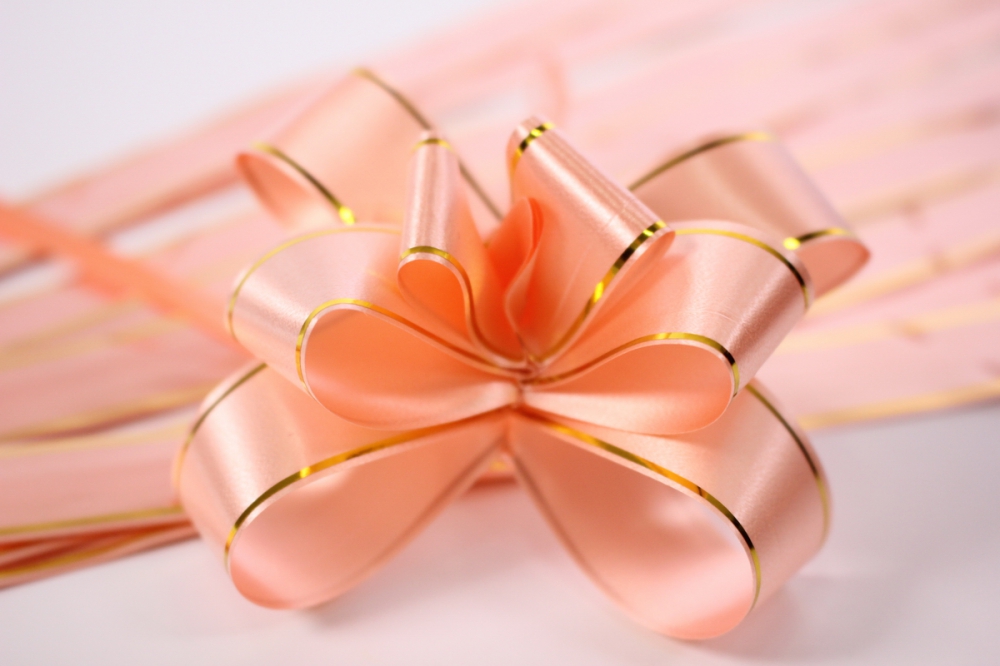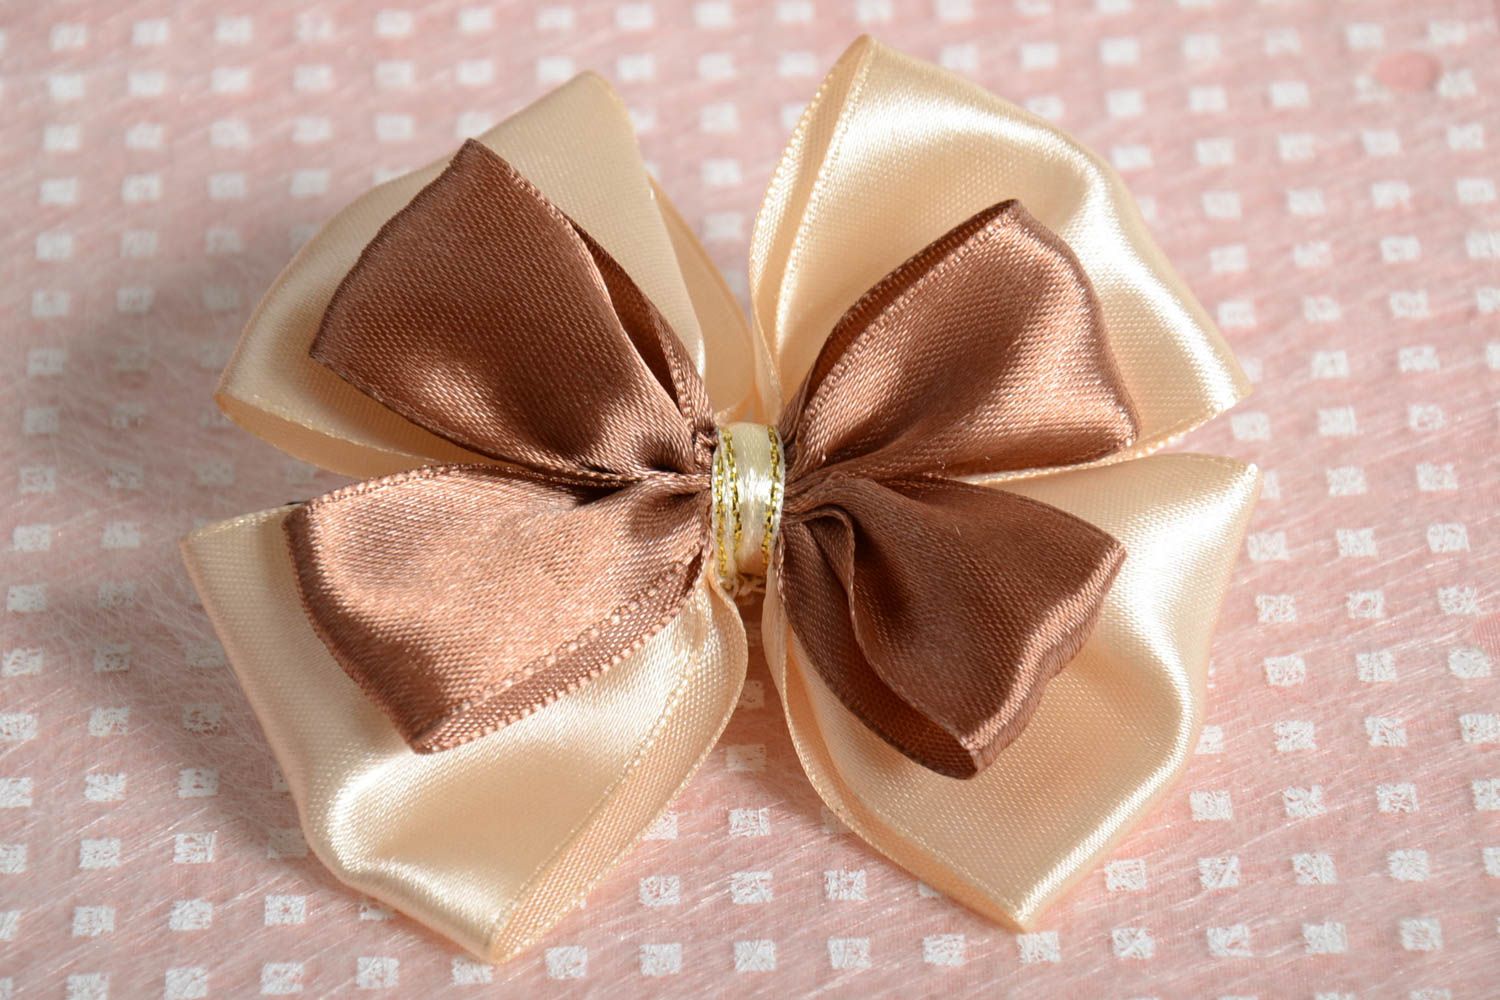
Lush tulle bows and miniature satin bows are found everywhere in our lives: they decorate hairdos, gift boxes, holiday tables, children's things, belts, hair accessories. The scope of application of these decorative elements is expanding every year, and at the same time, the interest of adults and children in the features of their manufacture is growing. Learning how to make an elegant bow from a ribbon with your own hands is not at all difficult, even without experience. There are many ways to tie a cute accessory, the choice of the right one depends on the size of the product and its future purpose, the characteristics of the material from which you plan to make the bow, the availability of additional tools at hand.
- Materials and tools
- How to make from satin or nylon ribbon
- Classical
- On the fork
- Double layer of thin ribbon
- Twisted
- Dior
- On a headband made of wide material
- In the style of Minnie Mouse
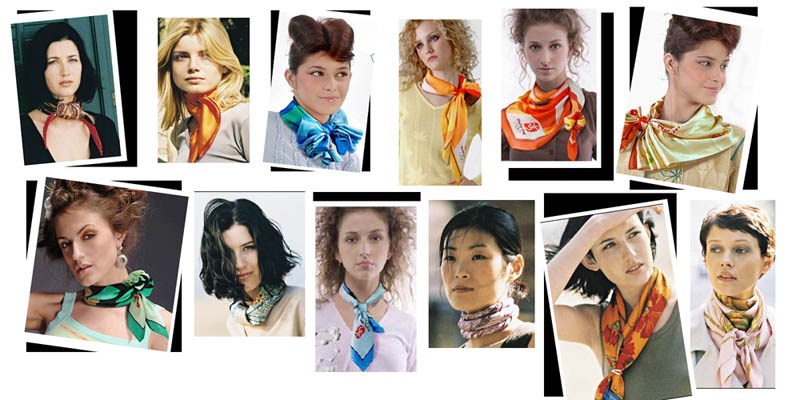
- On the neck
- On the belt
- On the back of the chair
- Made using kanzashi technique
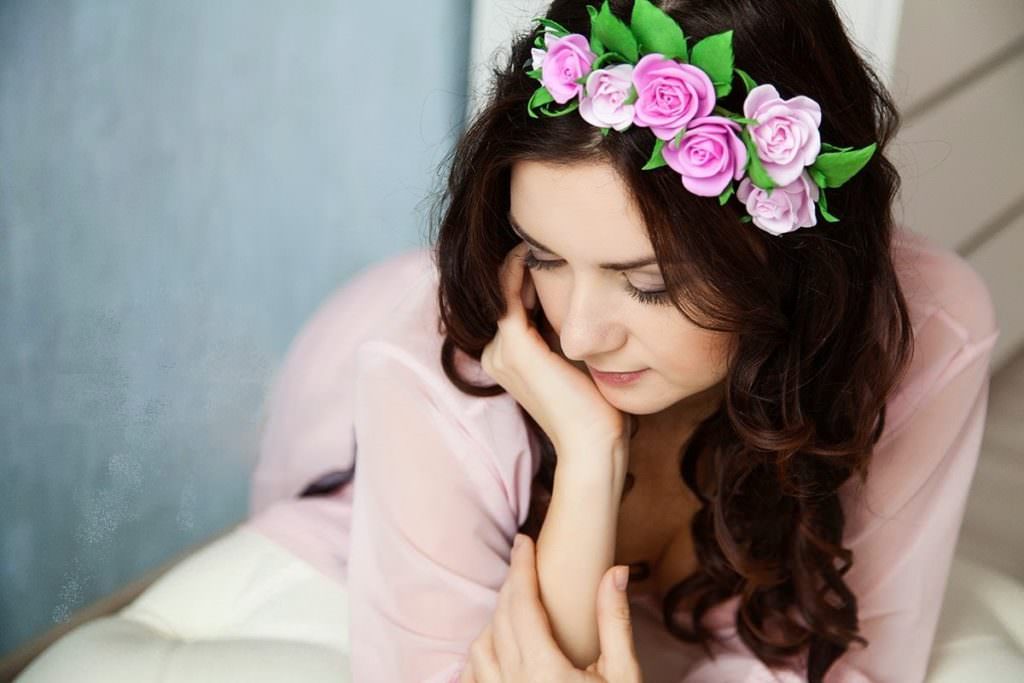
- Flower shaped hairpins
- On discharge from the maternity hospital
- Ways to beautifully tie a grosgrain ribbon
- Multilayered
- On an elastic band
- In the form of a bow tie
- American
- Create a decoration for a gift box
- Product decoration options
- General recommendations
- Video
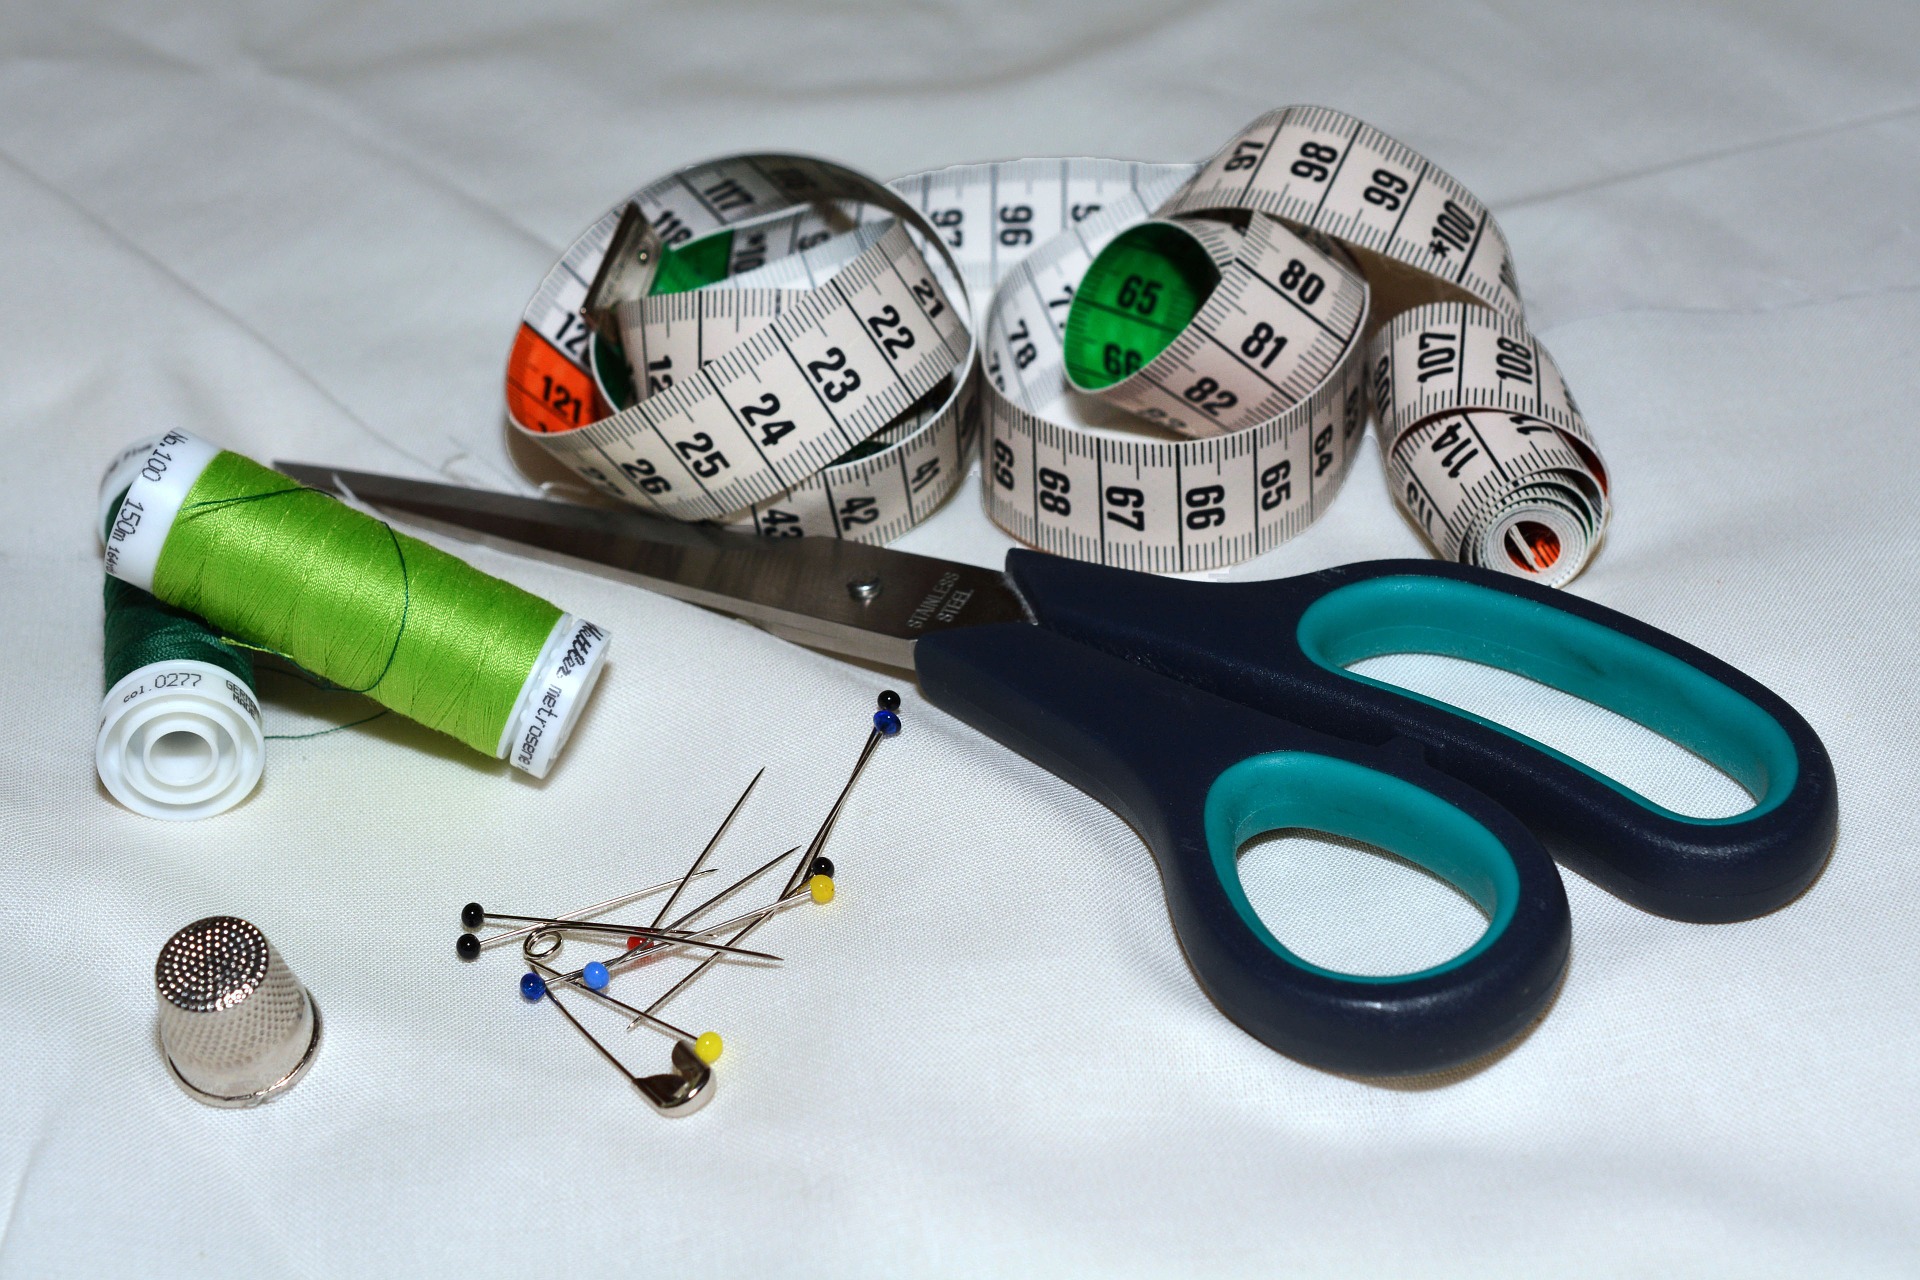
Materials and tools
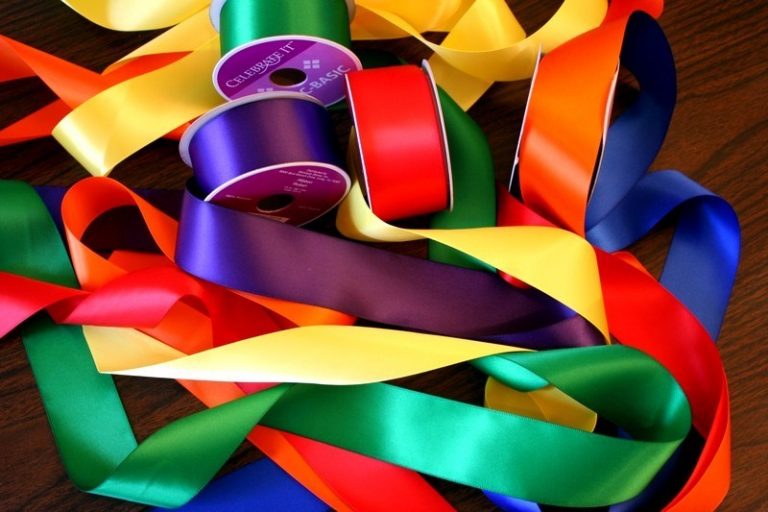
To make bows you will need a sewing needle, sharp scissors, a measuring tape to measure strips of fabric of the desired length. You can sew by hand or on a sewing machine. Tapes made from various materials are suitable for this work. The most popular:
- Atlas - looks impressive, easy to sew.
- Nylon is strong and rigid.
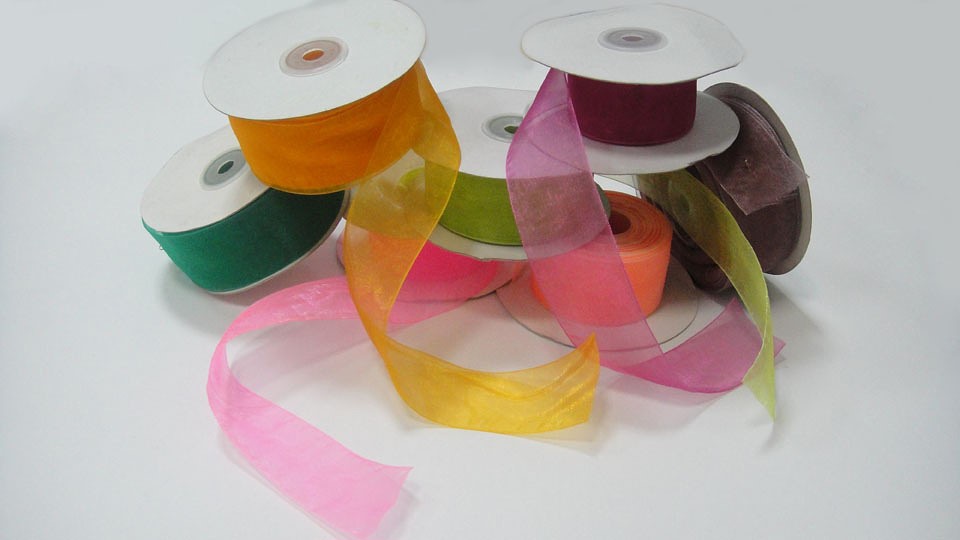
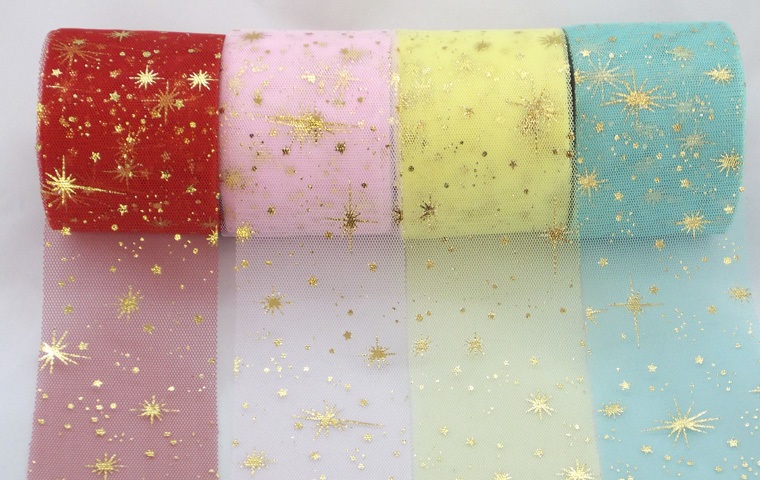
- Tulle and organza are airy, translucent fabrics. A significant drawback is that the ends often fray, so they need to be melted with a lighter.
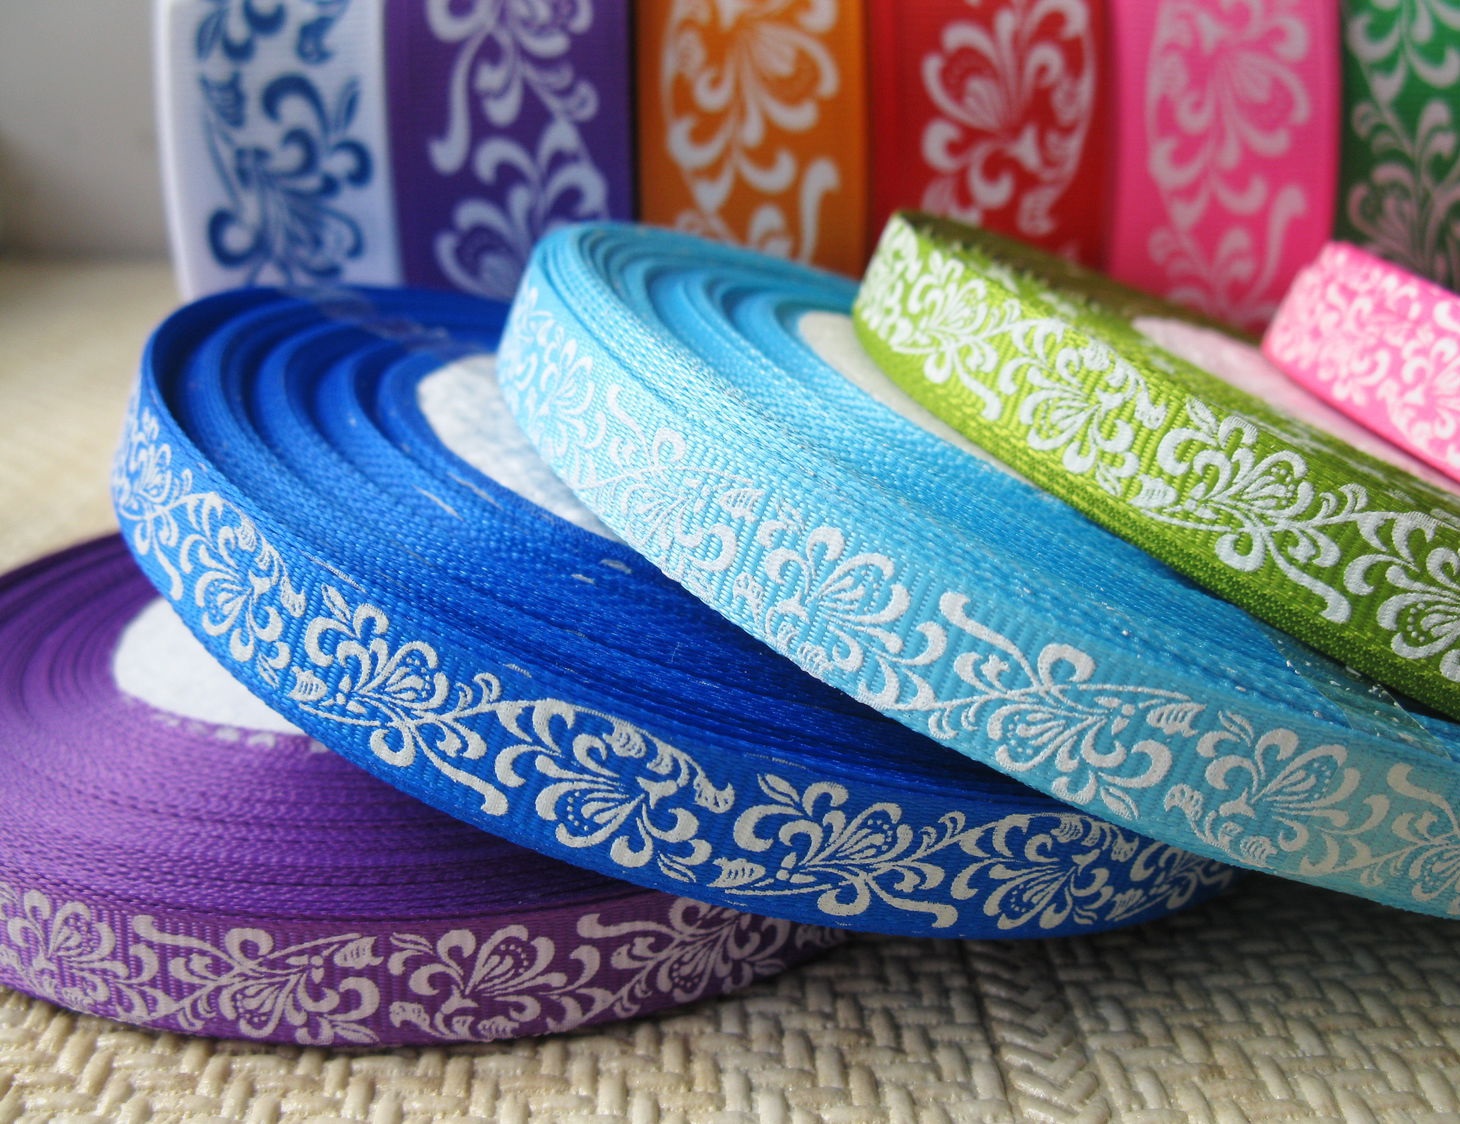
- Rep is a flexible material with a long service life.
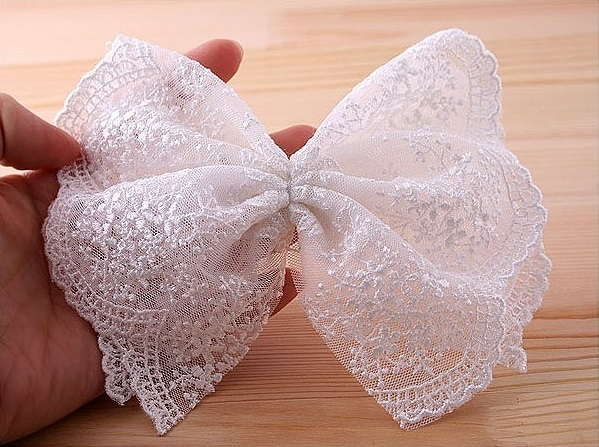
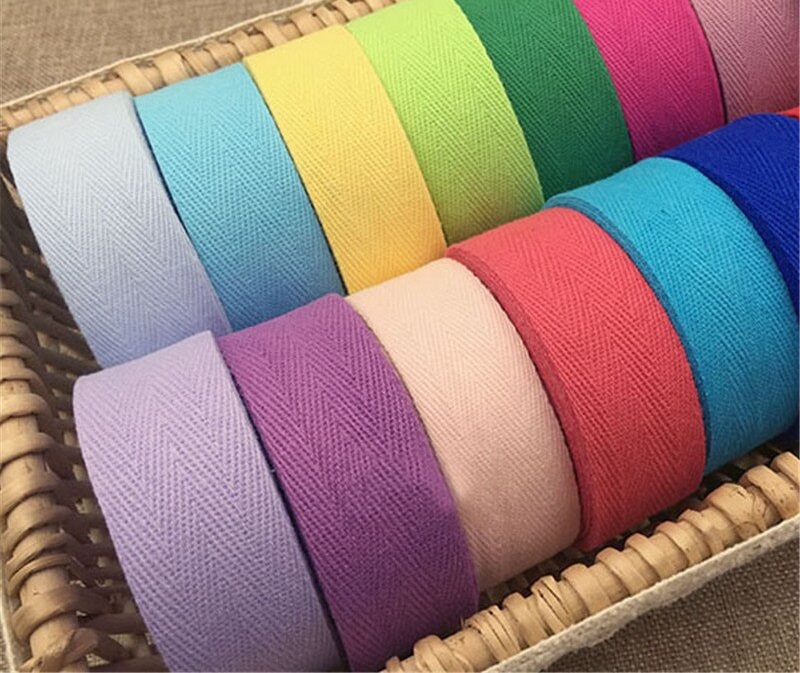
A lace bow made of ribbon is no less popular. This material holds its shape well, the finished accessory looks elegant and expensive. At the same time, lace wears out quickly, and it is difficult to care for it. Cotton products are durable, do not crumble at the edges. Of course, they quickly get dirty, but washing this material does not cause difficulties. The simplest technique for sewing an accessory from multi-colored ribbons is considered to be the Japanese kanzashi method, which allows you to get beautiful multi-layered flowers of the most bizarre shapes.
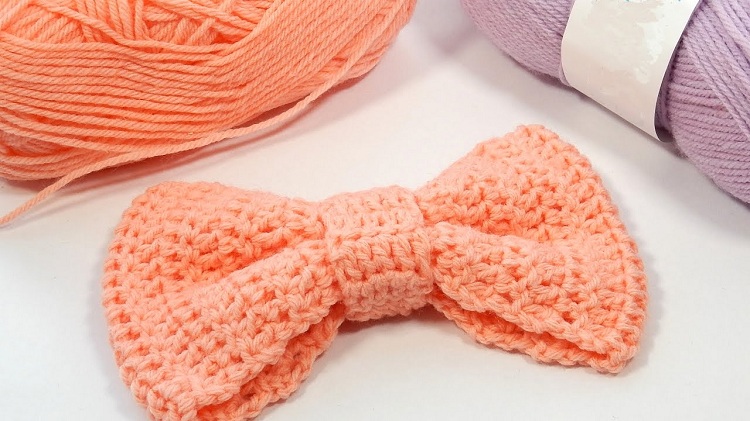
The best option for beginner craftswomen is a grosgrain bow made from wide ribbon, because this fabric is the easiest to work with.
How to make from satin or nylon ribbon
Most often, satin or nylon ribbons are used to make bows. There are many ways to make a beautiful accessory. The most popular methods are the classic and two-layer ones made from a thin strip of fabric.
Classical
This is the easiest way, its advantage is that no tools are needed for work. Only manual dexterity is required.
| Step by step instructions | Recommended tape width |
|
Any |
The finished product can be used to decorate a hair clip. Another option is to decorate your hair. By attaching a chain, you can wear the bow around your neck instead of a pendant.
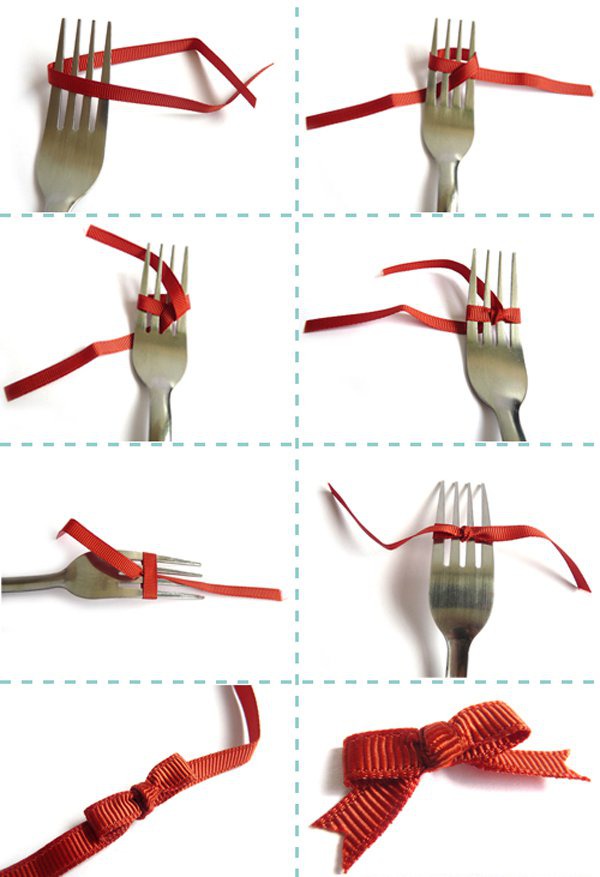
On the fork
This way you can easily make a cute little bow. You will need a metal or plastic fork. Even cutlery from toy dishes will do.
| Step by step instructions | Recommended tape width |
|
1-2 cm |
You can decorate a handbag, wallet or keychain with such an accessory. It is also suitable for decorating children's toys. The bows are very beautiful: they turn out perfectly even and symmetrical.
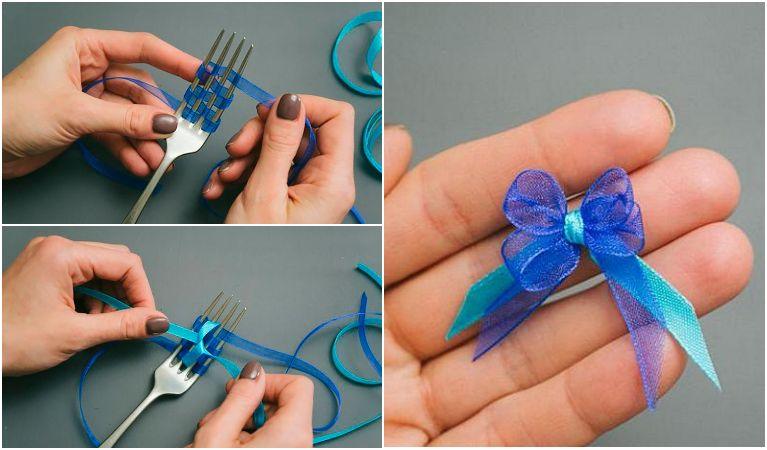
Double layer of thin ribbon
This is a rather labor-intensive method. You will need a fork and scissors to do the job. To prevent the ends of the ribbon from fraying, you will need to singe them with a lighter.
| Step by step instructions | Recommended tape width |
|
1–1.7 cm |
The finished product can be used to decorate clothes, and it is also suitable for decorating hairpins. A large two-color ribbon bow will also look good as a bookmark.
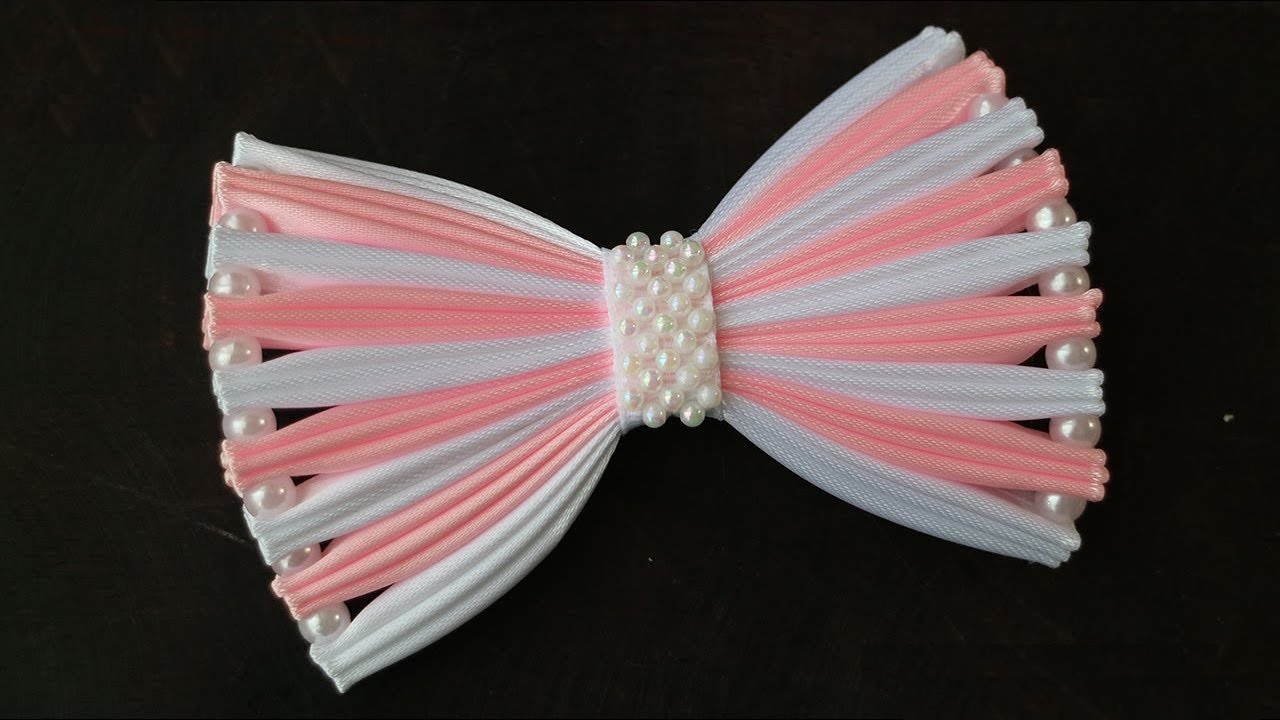
Twisted
The finished handmade accessory resembles a three-dimensional rose. The "flower" is made from two-color fabric. A fork, thread and needle are needed as auxiliary tools.
| Step by step instructions | Recommended tape width |
|
2–2.5 cm |
This bow is perfect for decorating a headband or hair clip. By attaching a wire "stem" to it, you can get an artificial flower - a great option for decorating a wedding or holiday costume.

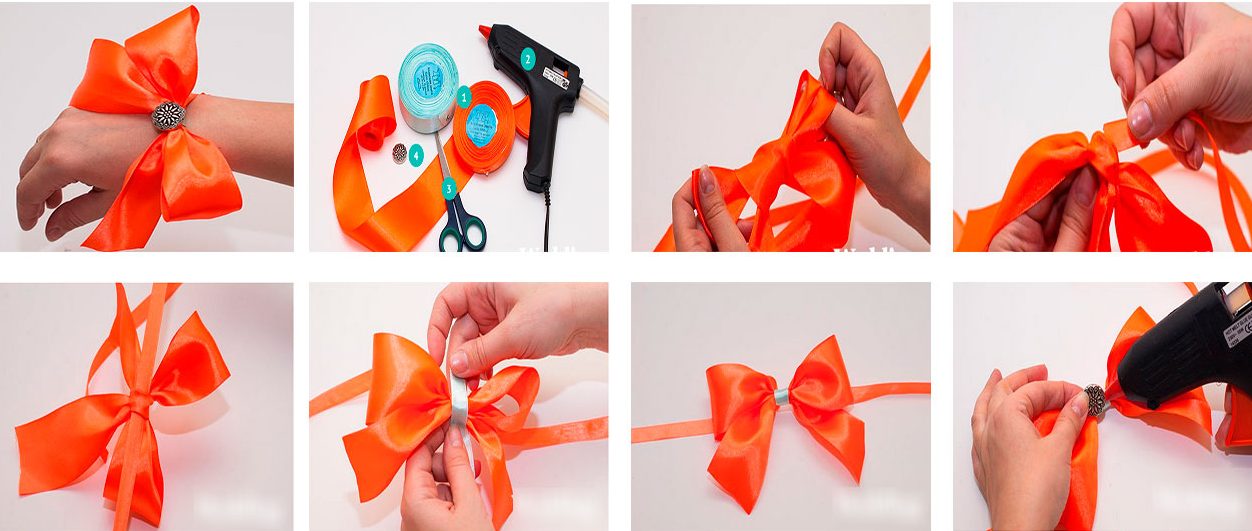
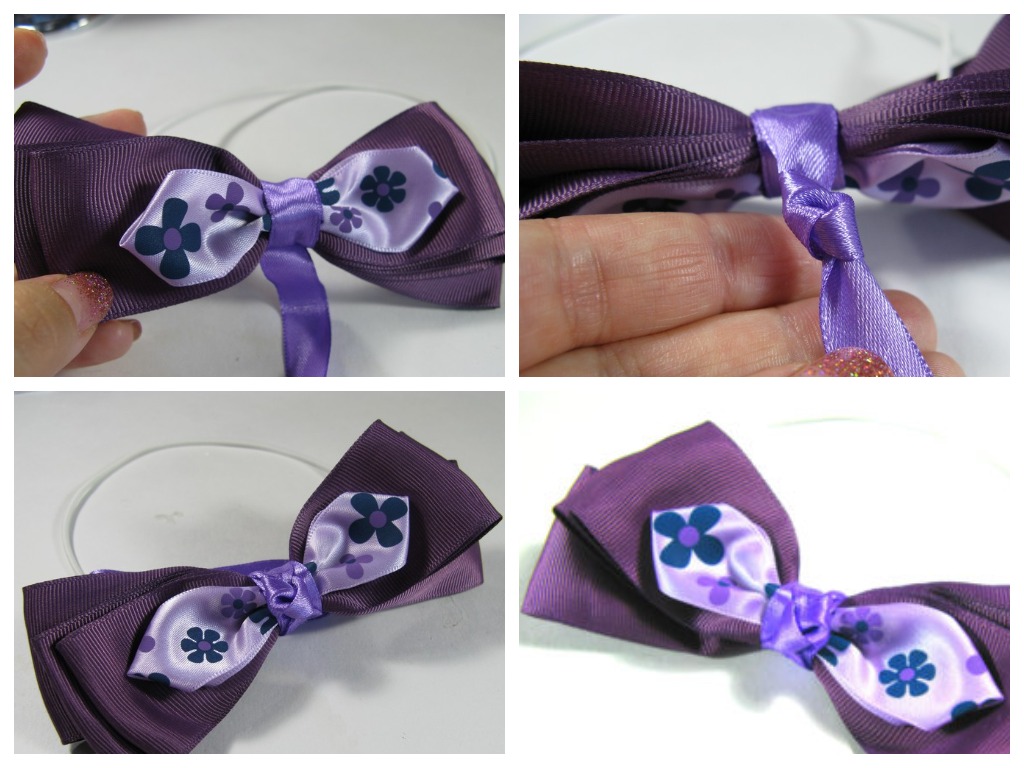
Dior
You can roll such a bow without using any additional tools. To fix the resulting structure, you will need textile glue. After work, its excess is carefully removed with a napkin.
| Step by step instructions | Recommended tape width |
|
1-3 cm |
The finished product can be used as a gift or as a costume decoration. If you attach a metal ring, the elegant accessory can easily turn into an original keychain.
On a headband made of wide material
For work you need a needle with thread and scissors. The finished product is attached to a plastic or metal hoop with a glue gun.
| Step by step instructions | Recommended tape width |
|
2-3 cm |
Instead of a headband, you can sew the craft onto a hair clip or hair tie. It is most convenient to use an alligator clip. It is better if it is a neutral color without decoration.
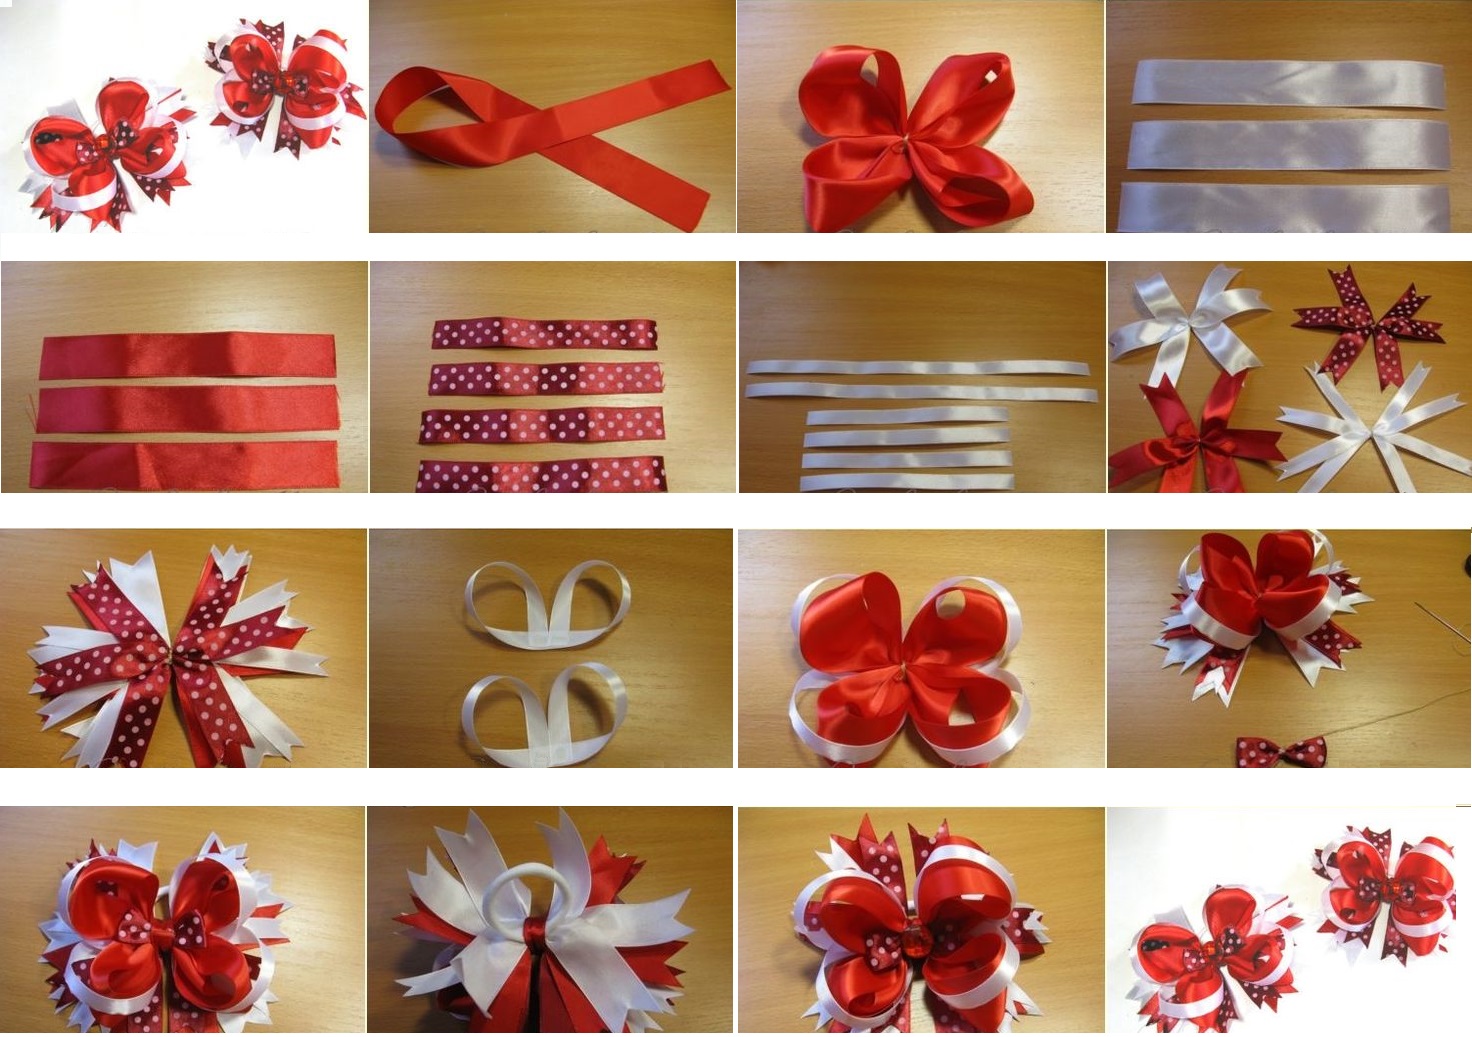
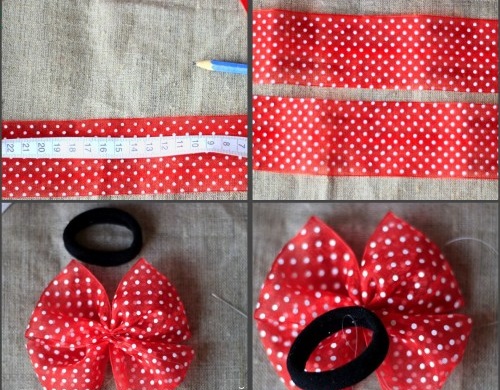
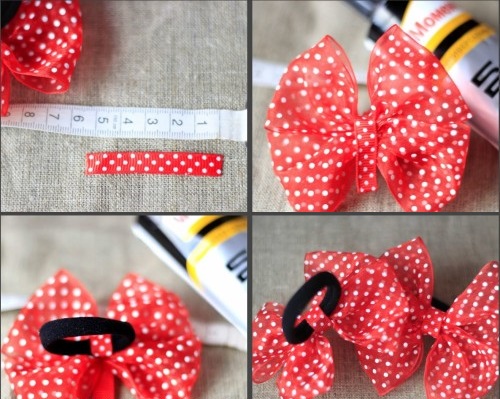
In the style of Minnie Mouse
The child will be delighted with such a gift. For work you need sharpened scissors, a needle and thread. It will be faster to sew the accessory on a machine than by hand.
|
Step by step instructions |
Recommended tape width |
|
4–5.5 cm |
Typically, this ribbon accessory is used to decorate a headband with the ears of the famous Disney mouse (they can be cut out of black felt). The child can also put a bow on the Minnie Mouse soft toy itself.
On the neck
You can make a lush bow that will become a real decoration for a child’s costume. No additional tools are required for the job. You may need a lighter to singe the ends of the tape.
| Step by step instructions | Recommended tape width |
|
4-6 cm |
The accessory can be safely used instead of a bow tie. It will suit both boys and girls. You can also decorate a doll or a plush toy with it.
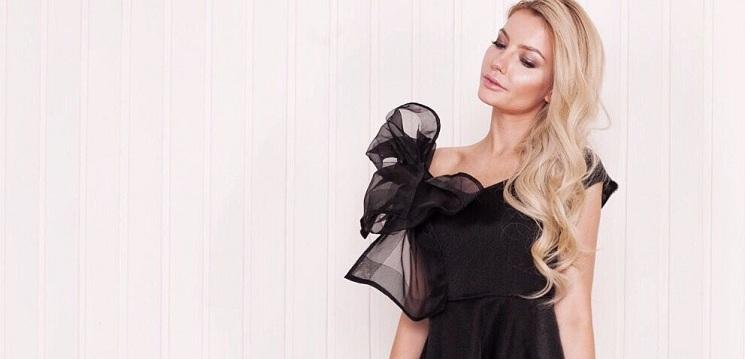
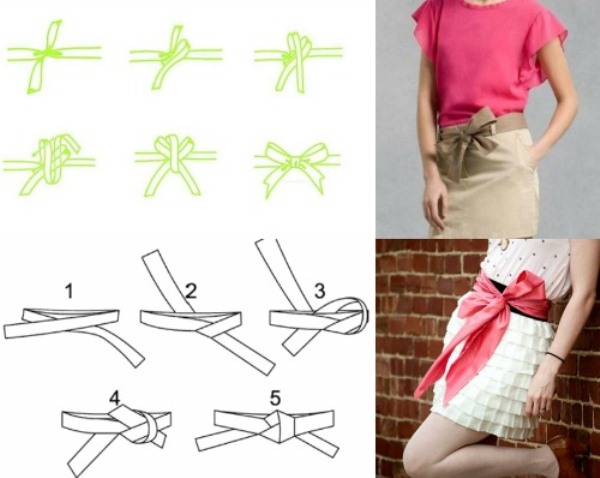
On the belt
This satin ribbon bow can decorate a wedding or any other festive dress. No additional tools are required for work.
| Step by step instructions | Recommended tape width |
|
Any. You can use a wide belt instead of a ribbon. |
The bow on the dress serves a decorative function and also emphasizes the elegance of the thin waist. An accessory made of fabric in a contrasting color to the clothes looks beautiful. Popular color options are black, blue, bright red, rich dark green.
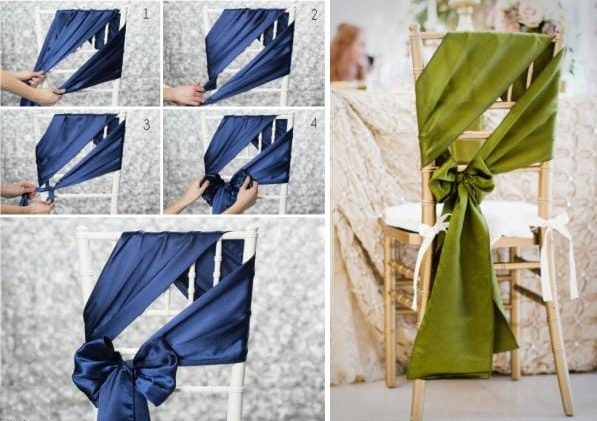
On the back of the chair
This bow will be an original decoration for the interior. It will look good on the back of a wooden chair with soft upholstery. For work you will need a needle and thread, as well as a ruler and scissors for cutting out strips. You can put a cover on the furniture beforehand.
| Step by step instructions | Recommended tape width |
|
7–10 cm (depending on the width of the chair back) |
Before tying a lush bow from nylon ribbons, it needs to be straightened.
You can decorate chairs in the kitchen, living room, or children's room in this way. The color should match other furniture elements. This type of decoration goes well with the Provence (country) style.
Made using kanzashi technique
Kanzashi is a Japanese technique for making lush bows from ribbons.In the East, this method has been known since the Middle Ages and has remained virtually unchanged. Asian needlewomen decorated clothing and religious objects with elegant ribbon flowers.
Nowadays, the art of kanzashi is very popular in Russia and Western Europe. Bows made of satin fabrics, made using this technique, can be used to decorate hairpins, gift wrapping, children's and women's clothes. A flower made of ribbons will look good on the lid of a box for handicrafts or other small items.
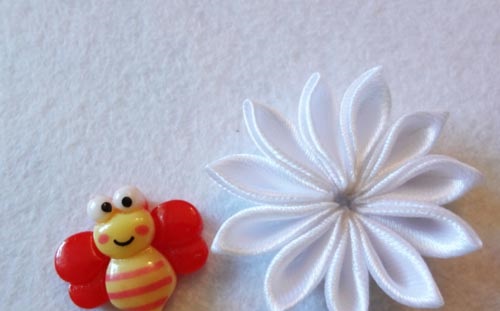
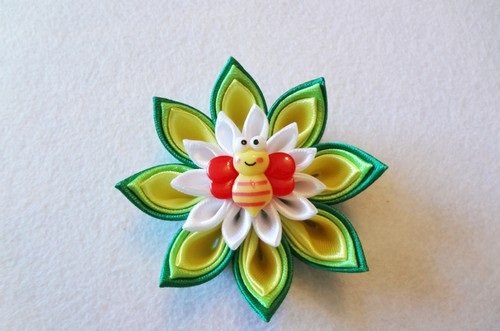
Flower shaped hairpins
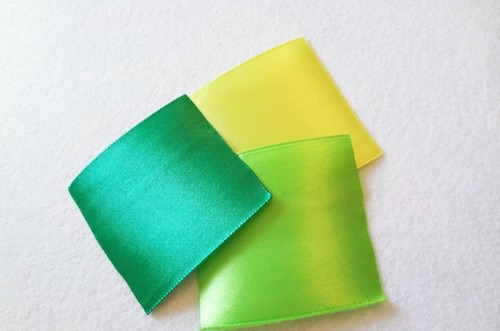
This is the simplest work in the kanzashi technique. The finished product is glued to a metal base for a hairpin. You can use additional decor - gold or silver cord, rhinestones, sequins. Step-by-step algorithm of actions:
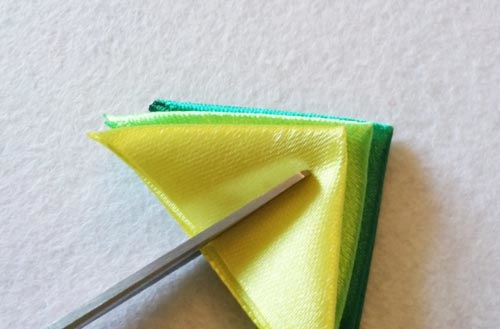
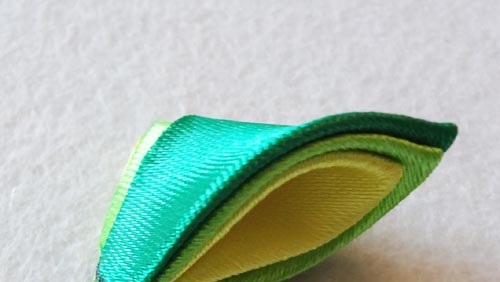
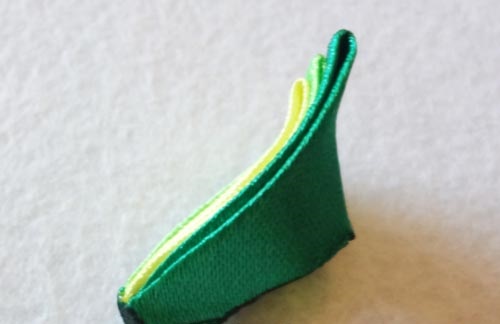
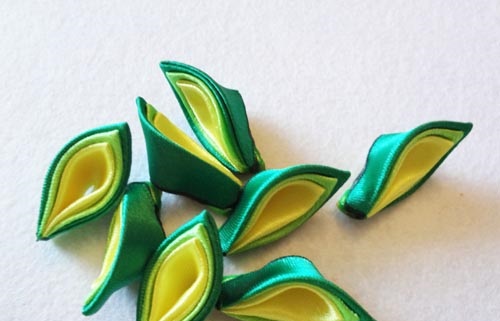
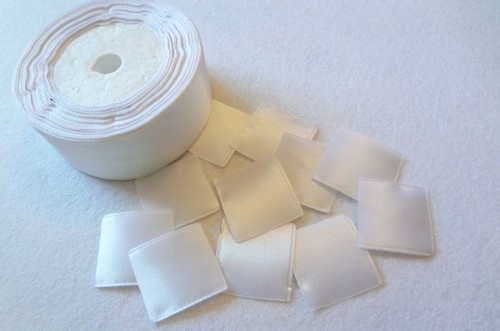
- Cut multi-colored strips of fabric into squares.
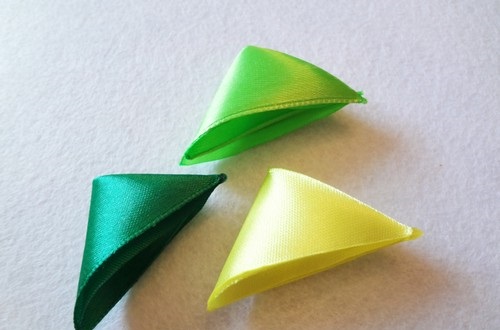
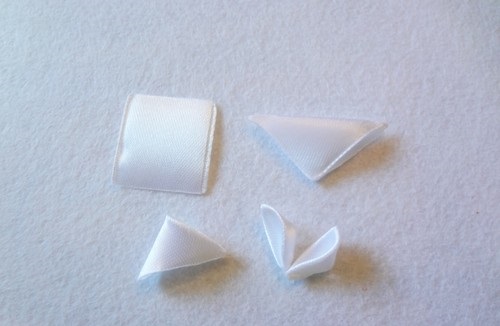
- Form them into multi-layered triangular petals.
- Glue each piece together to give it a rounded shape.
- Connect all the elements to each other one by one to make a flower.
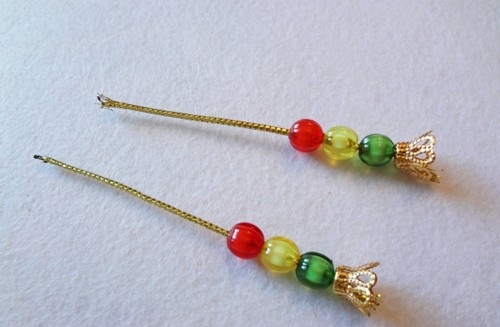
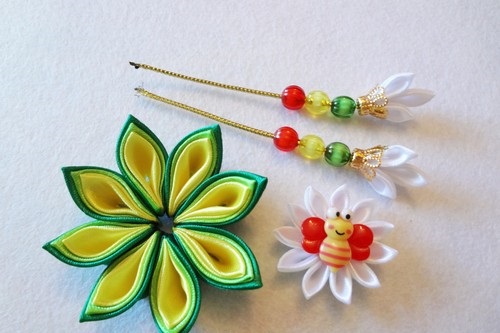
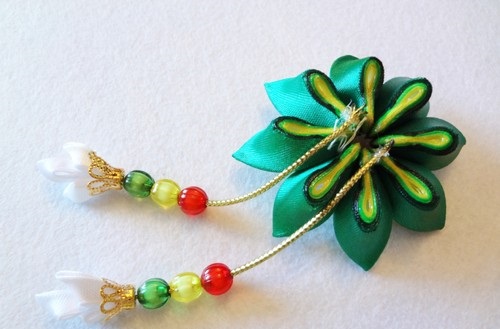
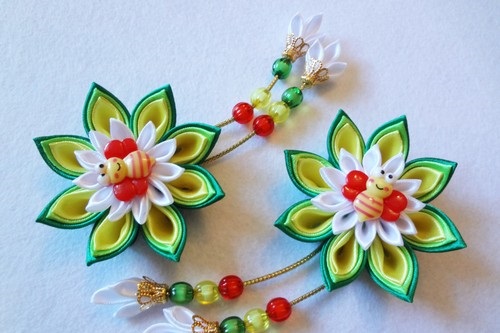
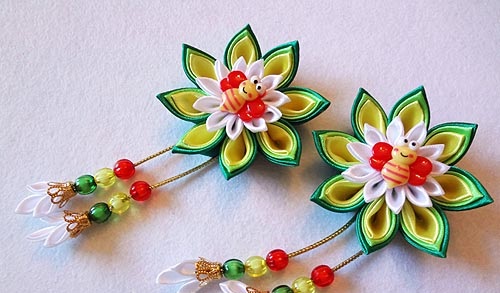
After this, the finished craft is decorated according to your own taste. A small figurine of a bee or butterfly can be placed in the center for decoration. Hanging pieces of colored cord will give the product a playful note.
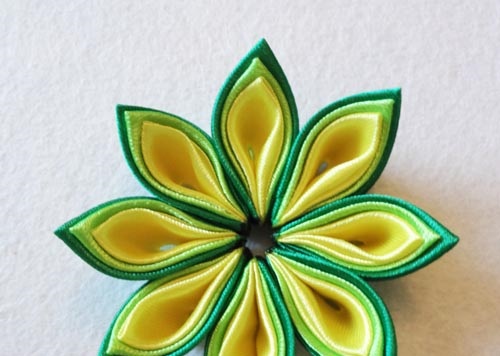
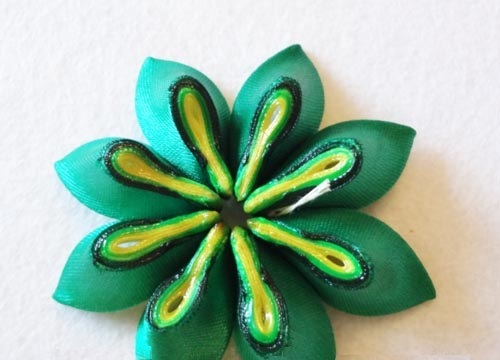
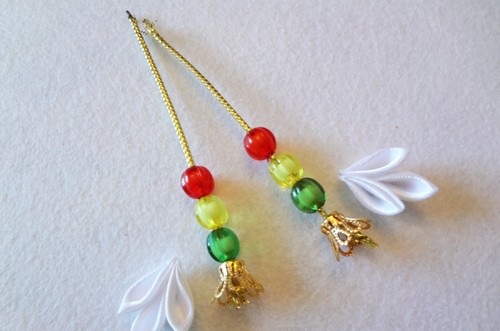
Another elegant option for making a bow from hair ribbons:
- Form five petals from blue squares.
- Gather each of them into a fold, “sculpt” a flower.
- Make two green leaves and glue stamens to them.
- Attach this decoration to the flower from the back side.
Next, the resulting structure is fixed on a hairpin. A cabochon is placed in the middle of the flower. Such an accessory will go well with a white or blue dress.
On discharge from the maternity hospital
A lush rose, sewn using the kanzashi technique, can be used to decorate a jumpsuit for a newborn. For boys, all shades of blue are traditionally chosen, for girls - red, pink, orange. It is not difficult at all to create an original decoration:
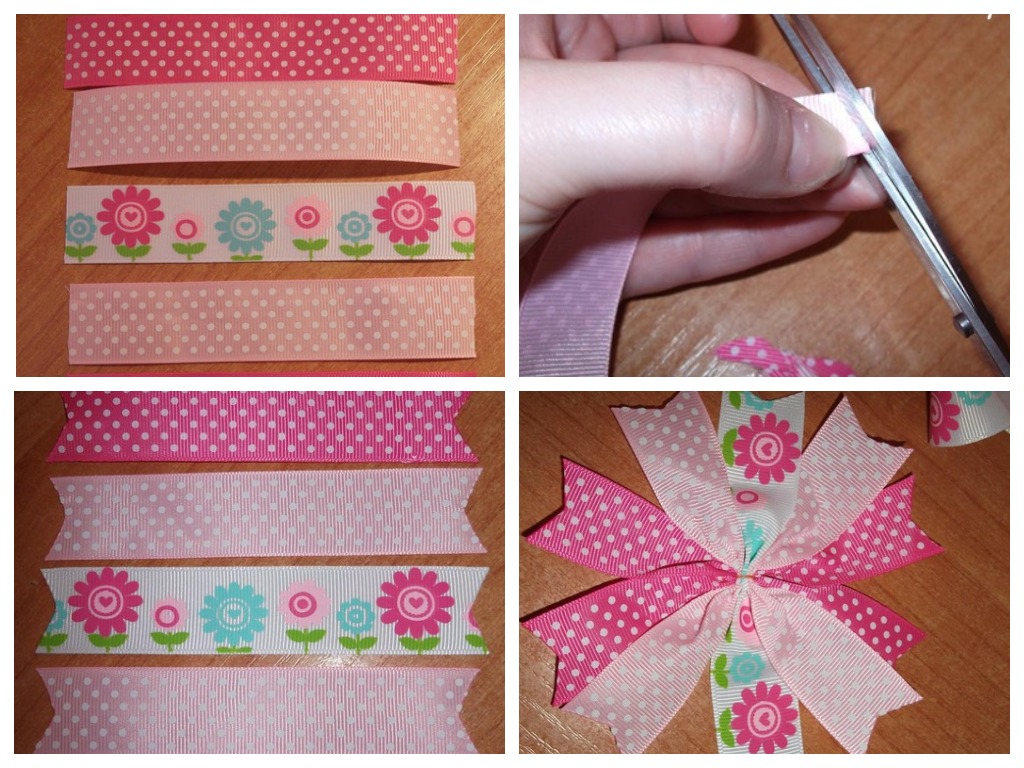
- Cut the strip of narrow ribbon into 6 pieces, 14 cm long.
- Burn the edges with a lighter to prevent them from fraying.
- Fold each piece in half and connect them to each other one by one.
- Attach 6 more blanks as a second tier.
- Make several petals from silver or gold cord and form the third row.
Next, decorate the center: as an option, glue small beads there. You can attach the craft to the jumpsuit using a glue gun.
To create accessories that will decorate the newborn's clothes, you need to choose hypoallergenic materials. You should not buy a bright, saturated ribbon to create a bow, it is likely that it was made using harmful dyes.
Ways to beautifully tie a grosgrain ribbon
The main features of rep ribbons are increased strength and pliability, the ability to acquire any shape as a result of mechanical action. They can be found in craft stores. A multi-layer or double bow made of this material looks impressive, serves for a long time, without losing its external attractiveness over time.
Multilayered
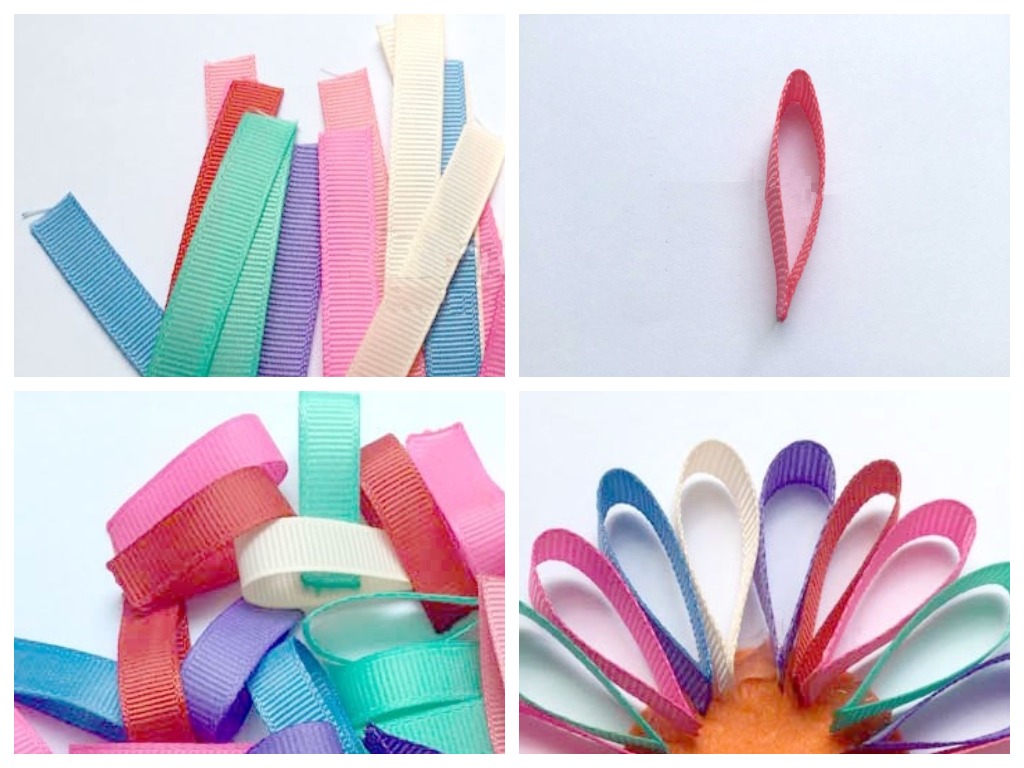
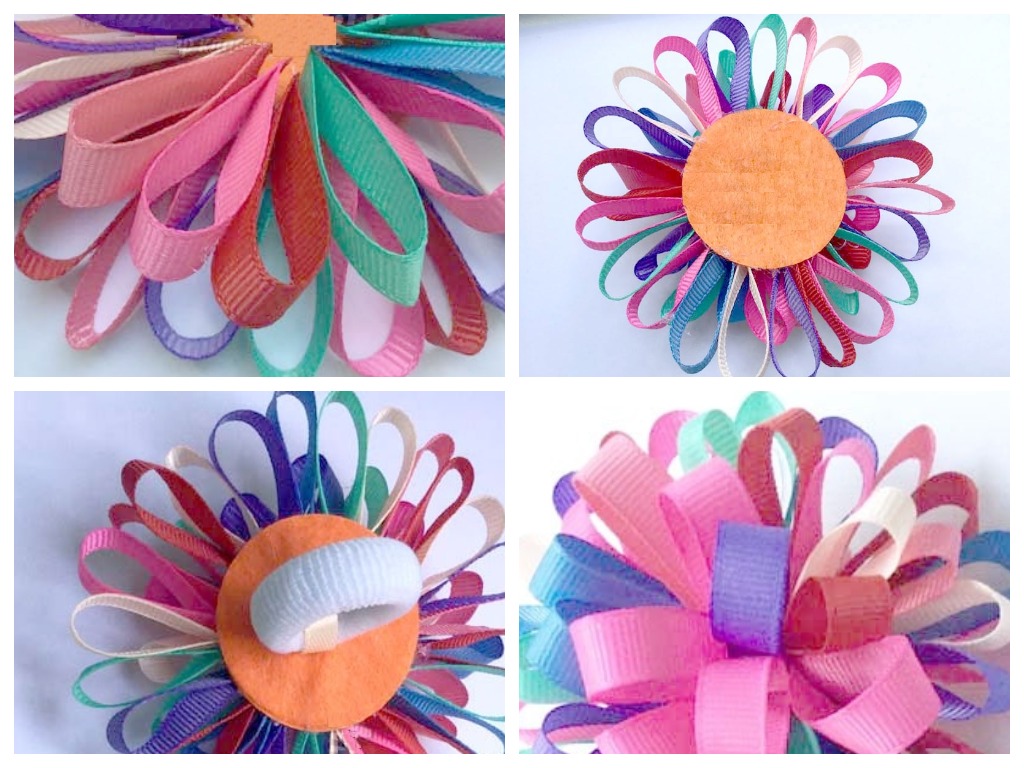
This craft can be used to decorate a photo album or a hair clip. The more flowers you use, the more elegant and lush the accessory will look. Step-by-step instructions for making:
- Form multi-colored petals from the pieces (22 pieces).
- Attach them to a round felt base.
- Glue the second of 16 pieces on top of the first tier.
- Make the third row of 10 elements.
If there are still a few pieces of ribbon left, they can be attached to the felt base. The craft is glued to a headband, elastic band, hair clip or photo album using a special glue gun. You can make several identical bows of different colors at once.
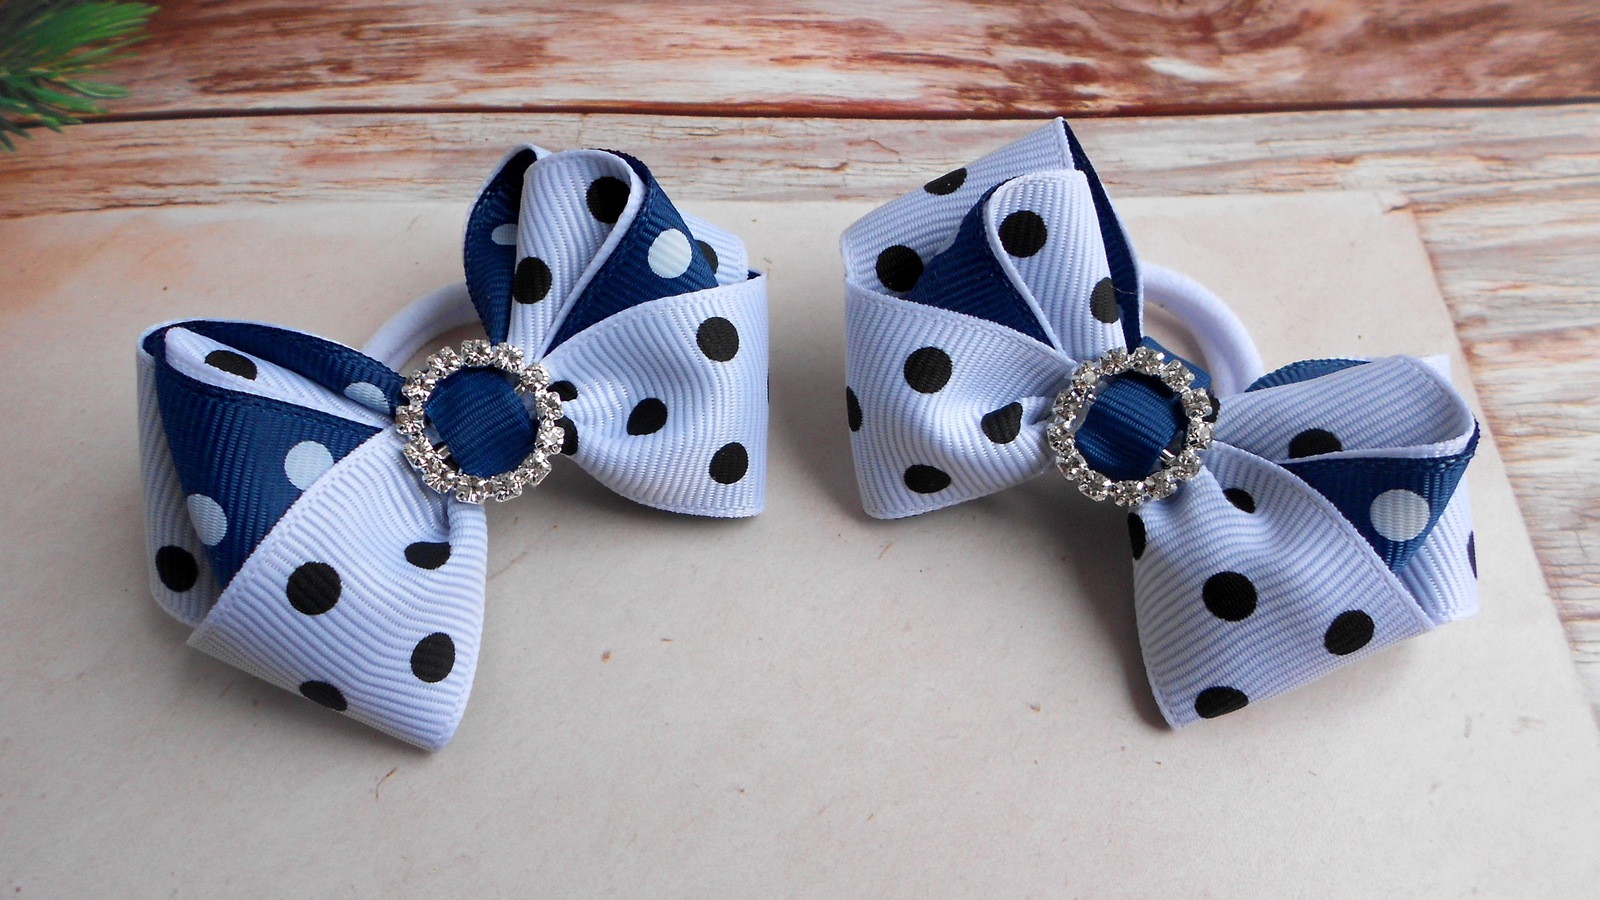
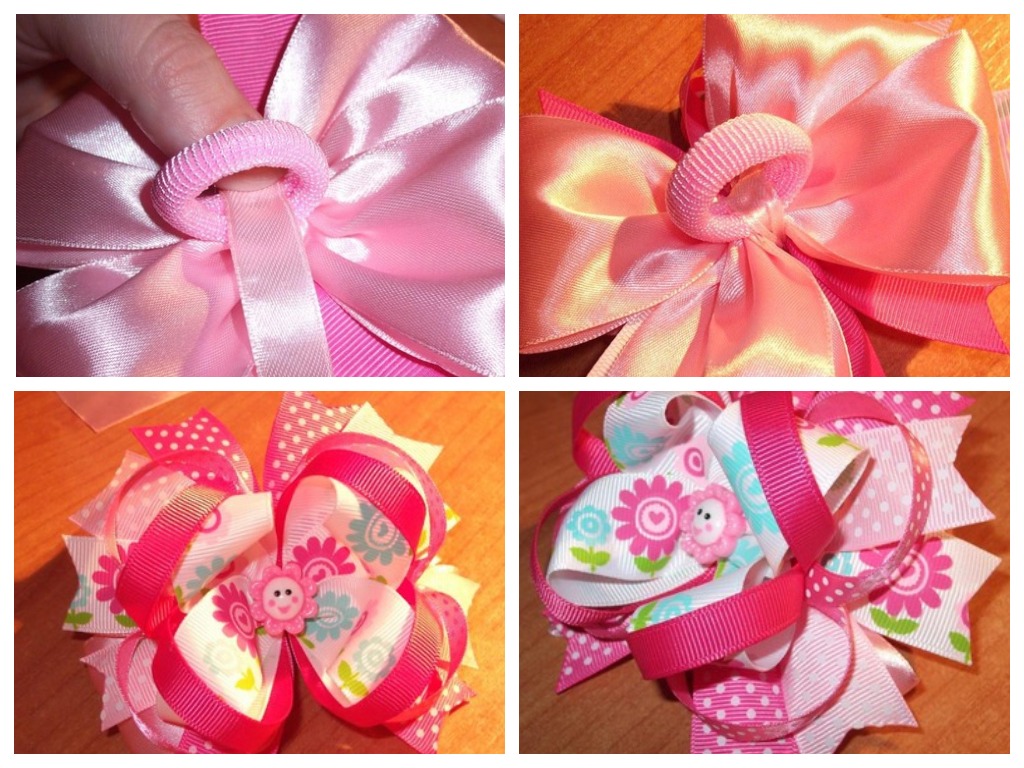
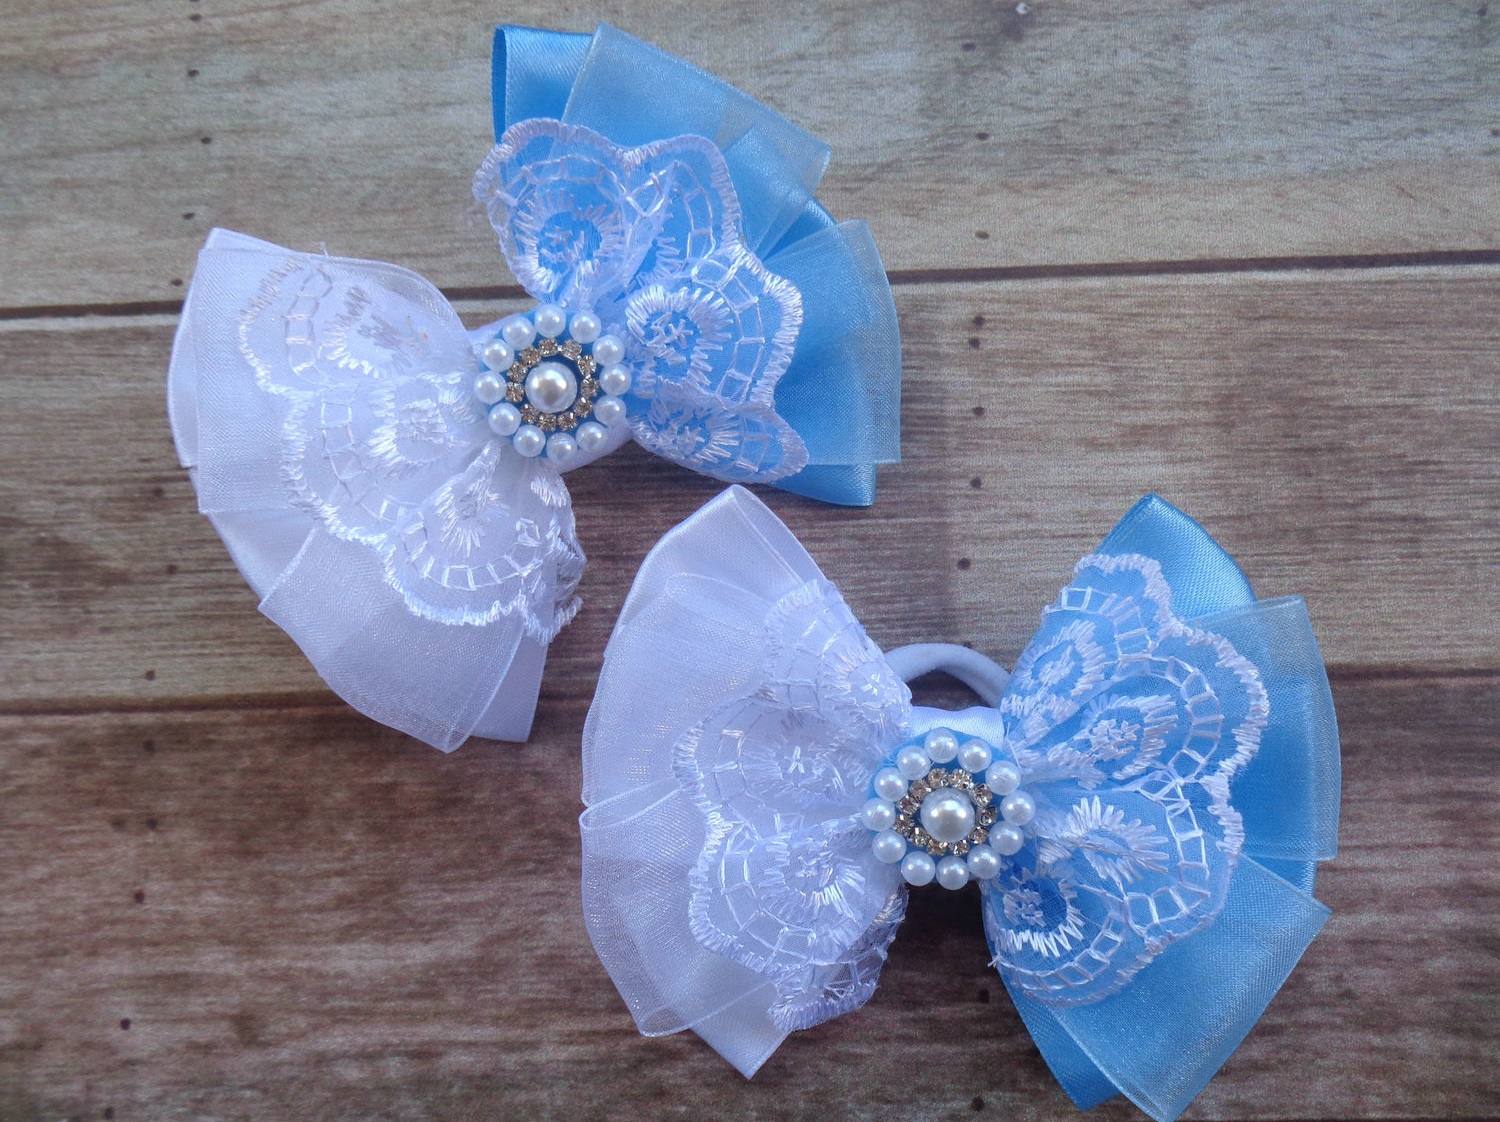
On an elastic band
This accessory can be used to decorate children's hair, for example, to secure braids with it. It is better to choose bright colors for making ribbons - red, orange, yellow. When working, follow the step-by-step instructions:
- Take two grosgrain strips of the same length and fold them together crosswise to form the base for the bow.
- Glue the decorative mesh on top.
- Form a flower from the oval white blanks and fix it on the base.
- Place decorative stamens in the center.
Additionally, you can collect leaves from green pieces and decorate ribbon bows with them. After that, the resulting structure is securely fixed on an elastic band. The elegant accessory will go well with a summer dress or sundress.
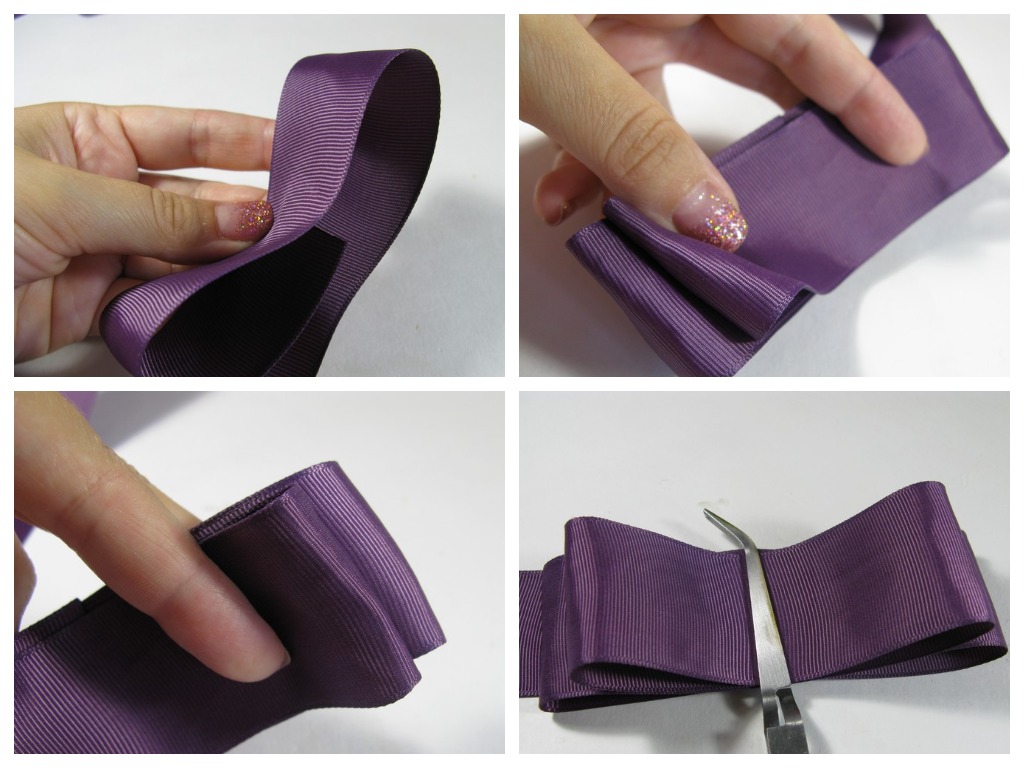
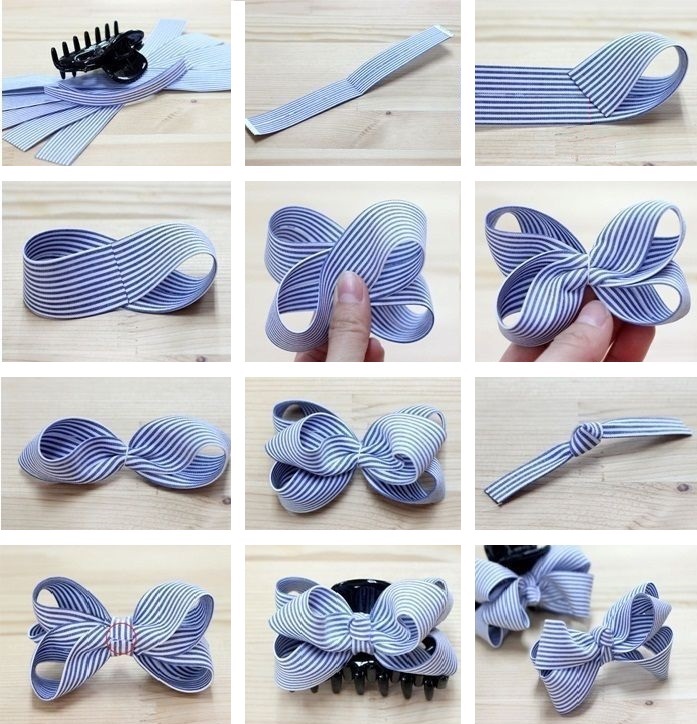
In the form of a bow tie
This product will be a great gift for a boy aged 5-7. It is better to choose a single-color color: dark blue, gray, brown. An accessory made of a small-checked ribbon looks stylish. To work you need:
- Place two grosgrain strips together.
- Solder or glue one end to form a loop.
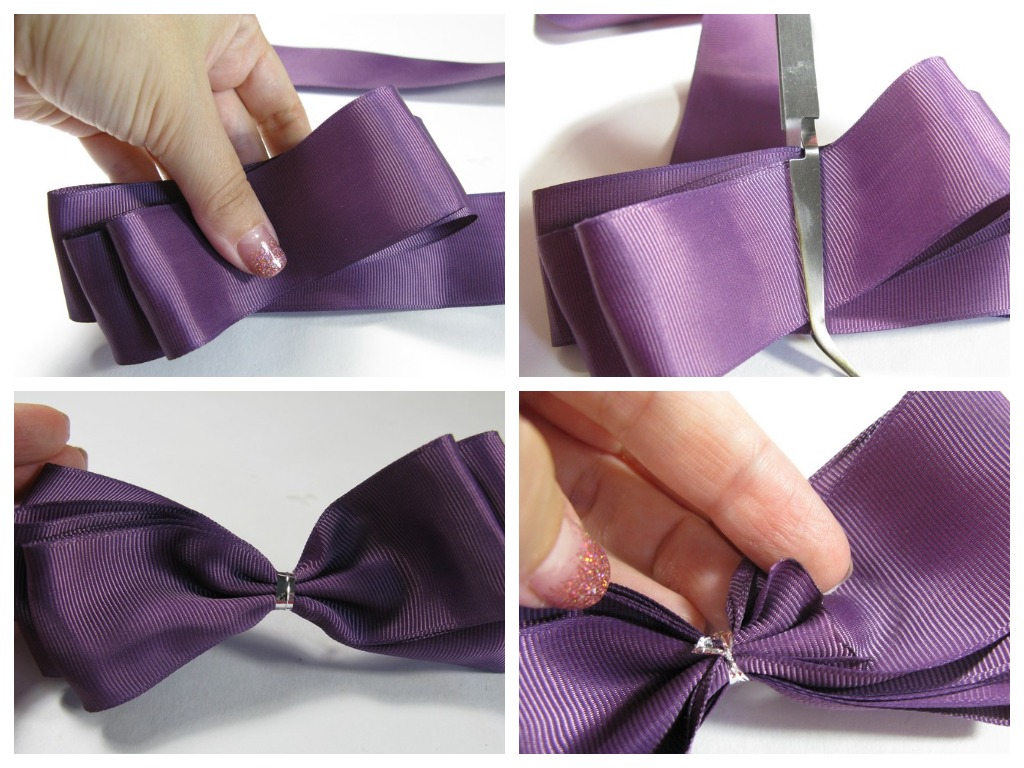
- Form a butterfly bow with pointed ends.
- Fix with clothespins, trim carefully.
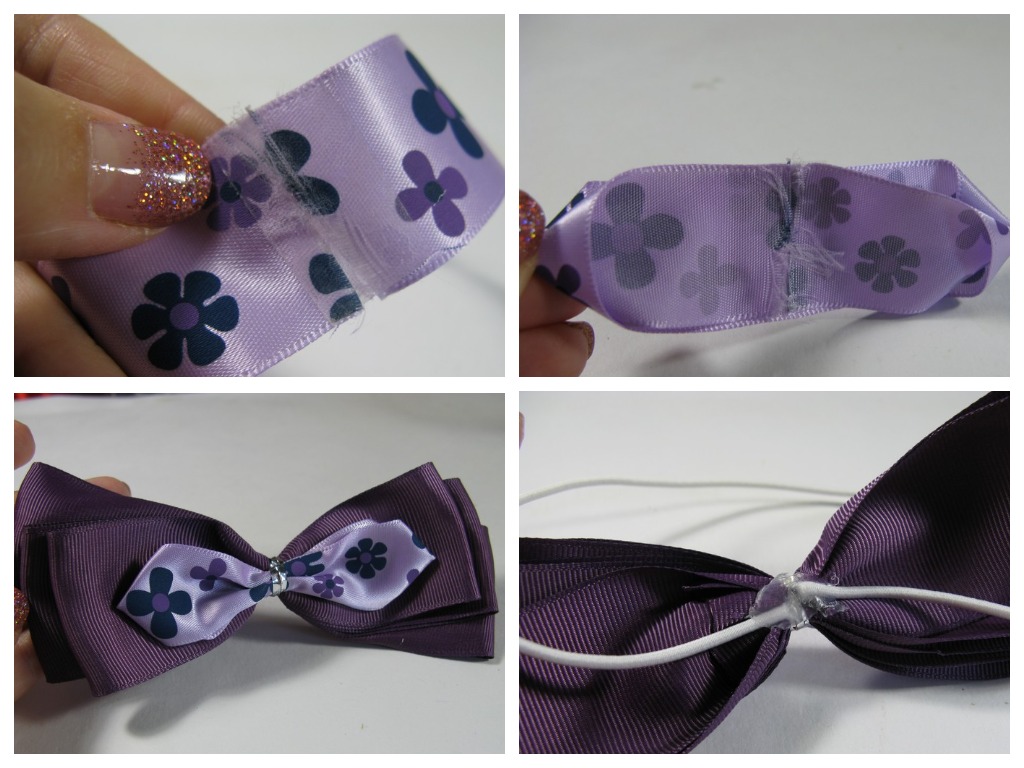
The resulting structure is placed on a wide band that serves as a base. After that, both strips are sewn on. A tie is made in the middle.
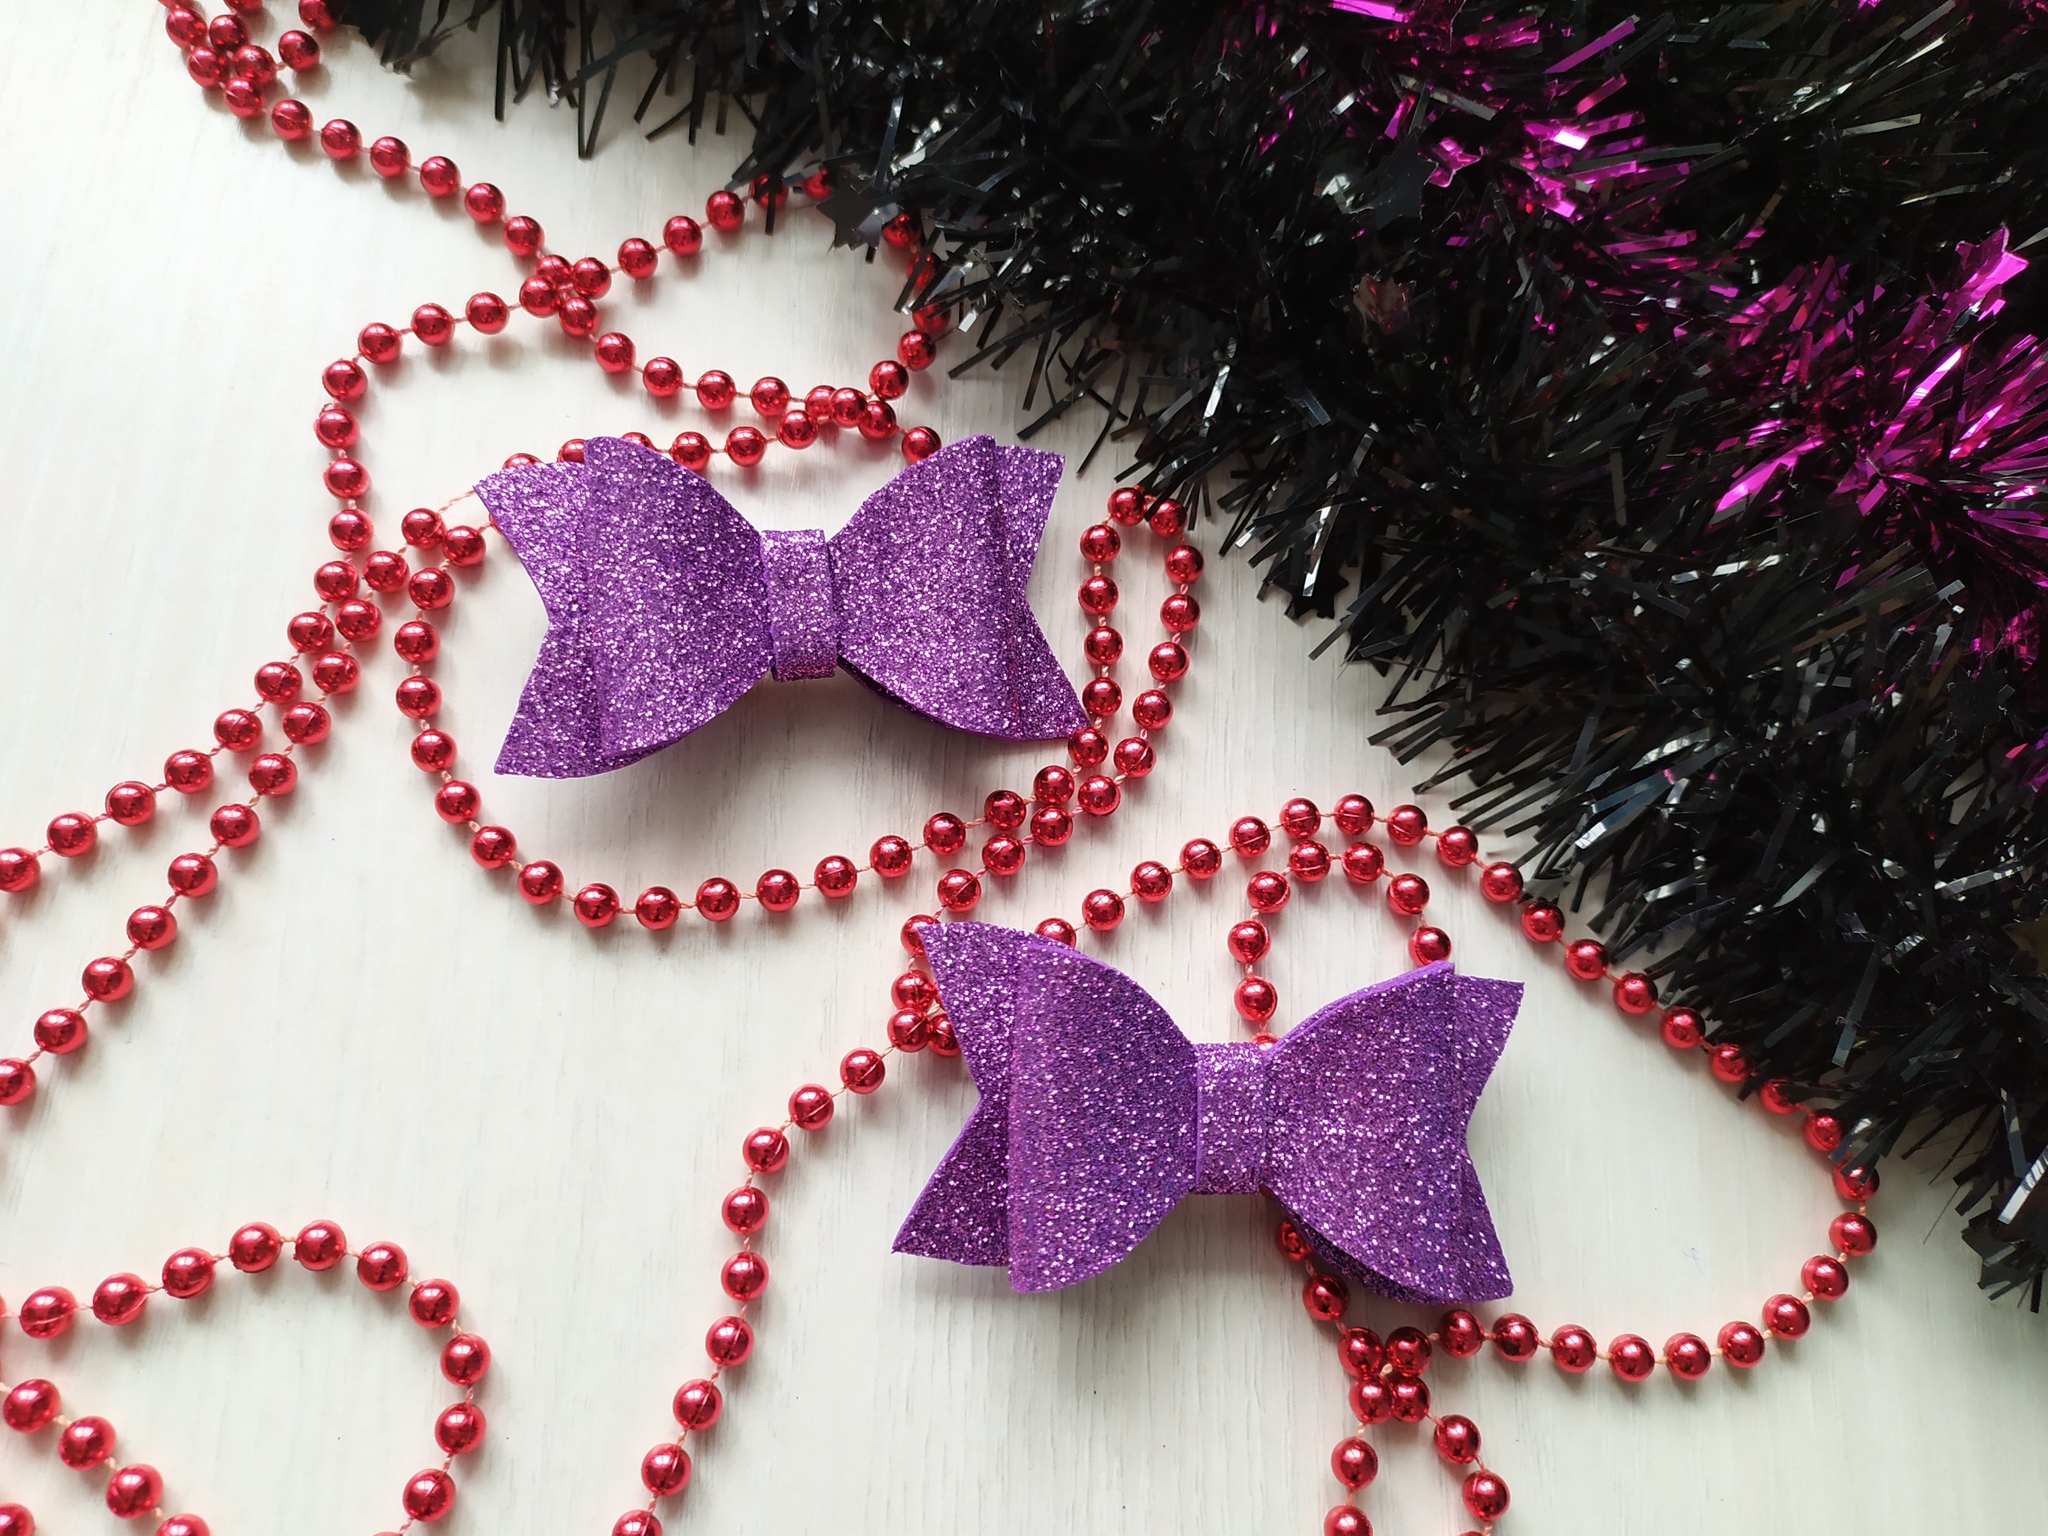
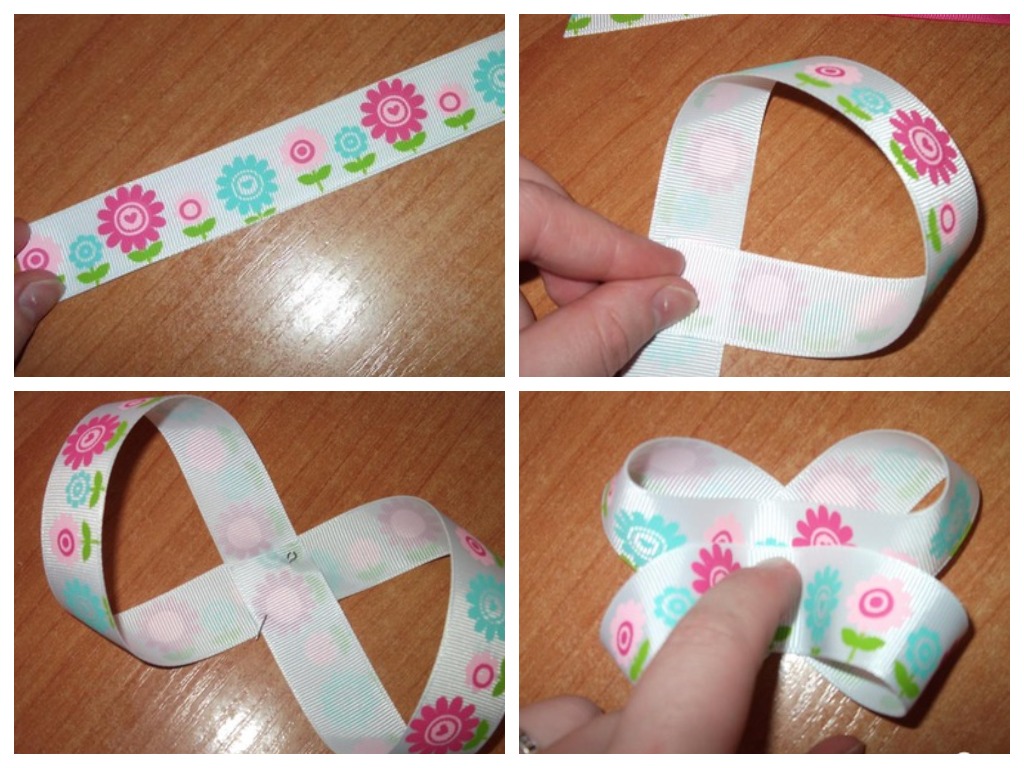
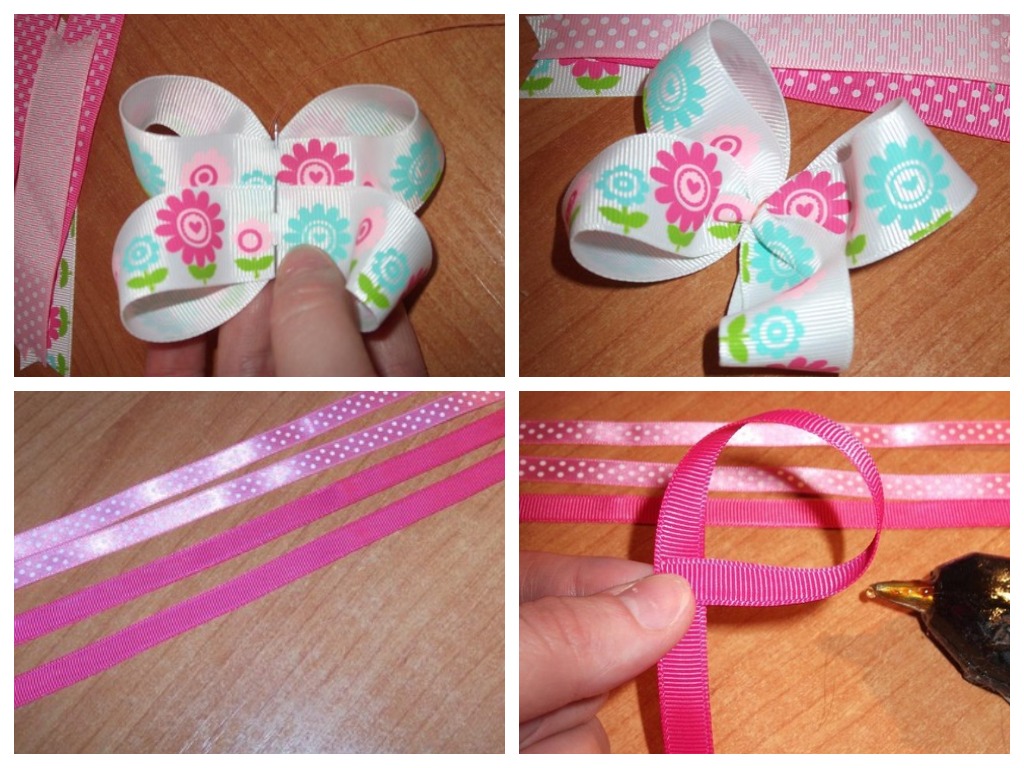
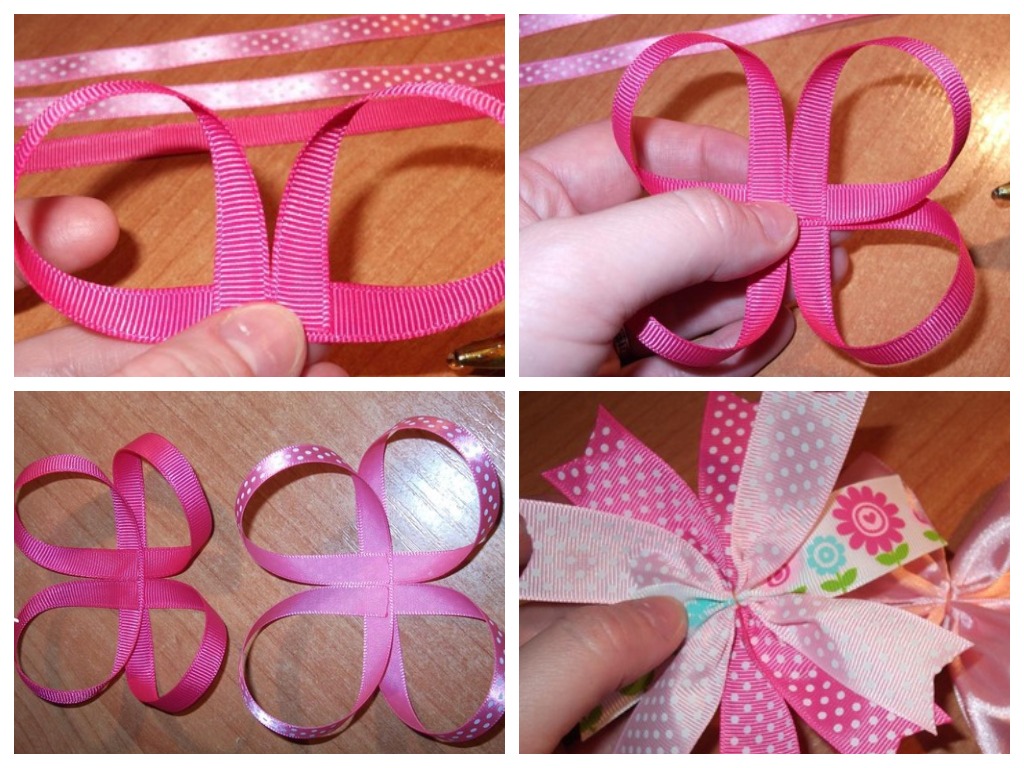
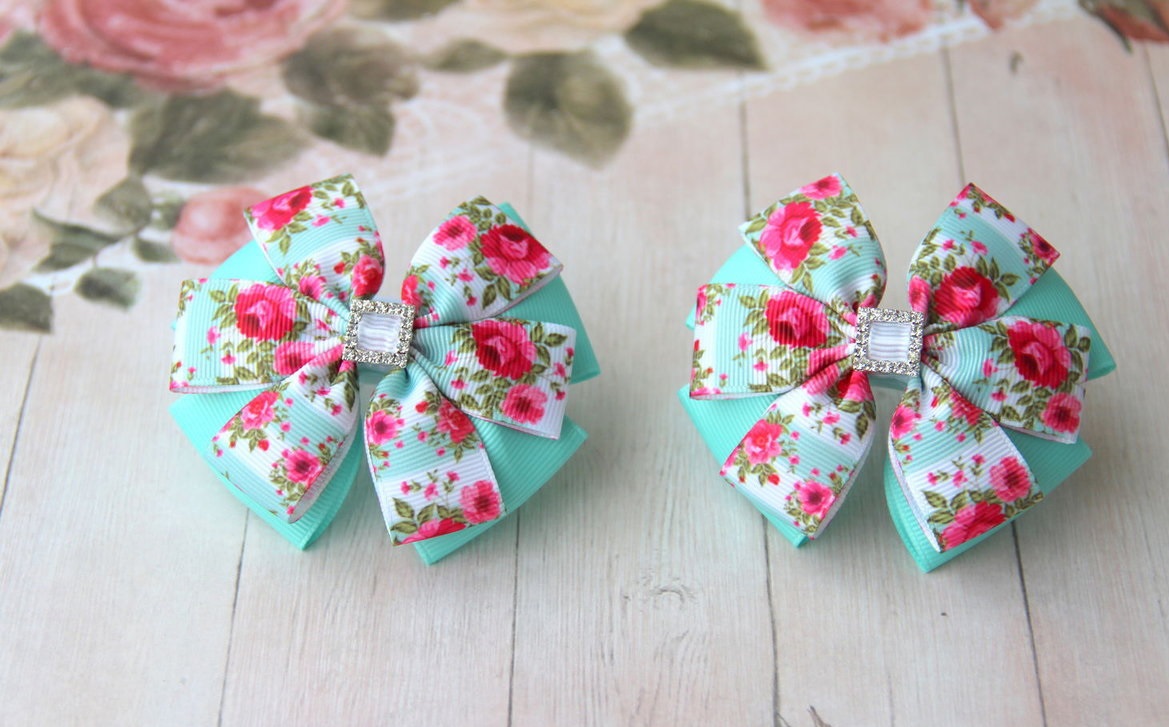
American
Beautiful ribbon bows are made in the American style. They can be of different colors. The finished product is glued to a hair band or a decorative headband. Step-by-step instructions:
- Form two figure eights from the pieces of material.
- Attach them together to form a flower.
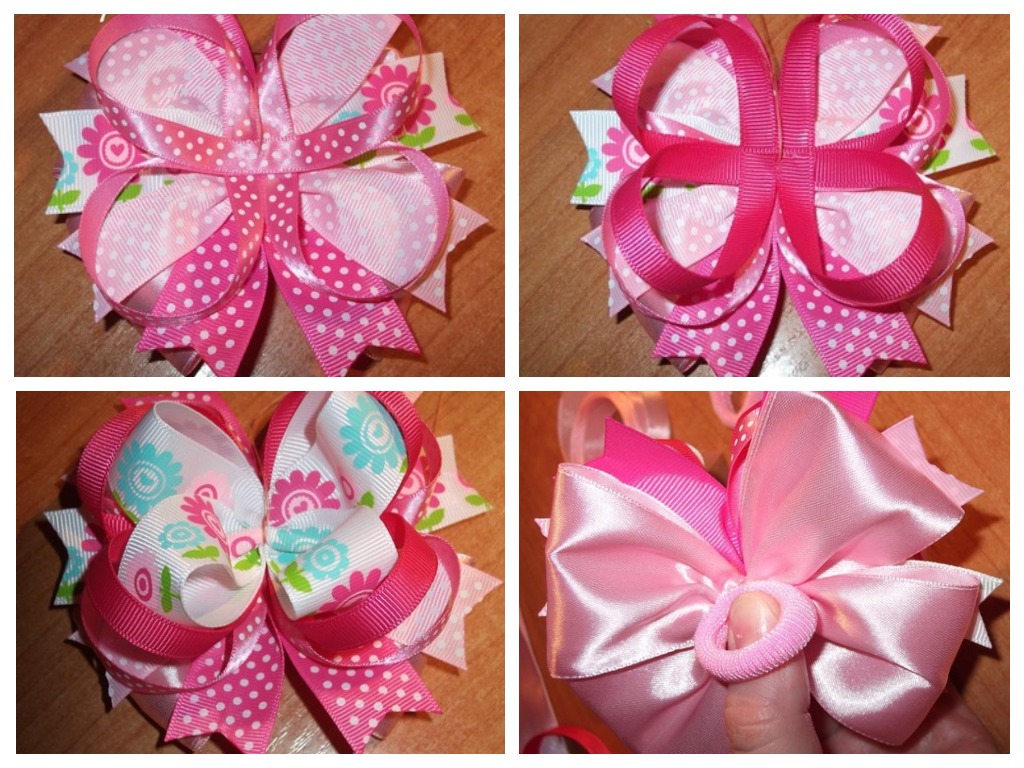
- Sew and pull together in the center.
Then layer several more layers: the more, the more lush the product will be. The finished accessory resembles both a star and a flower. Bright stones can be glued into the middle of the bows.
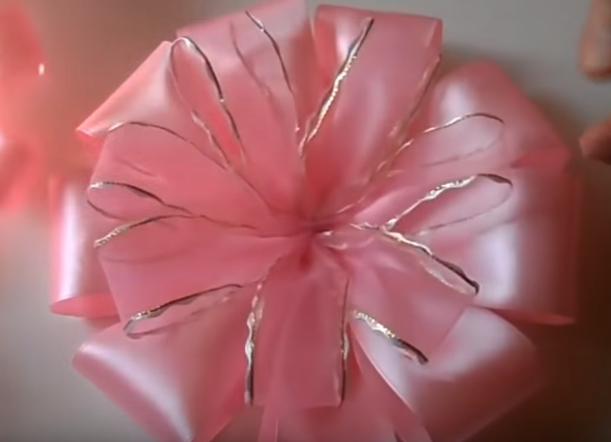
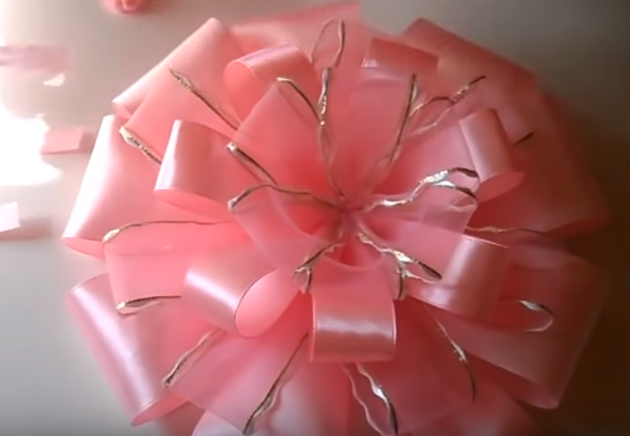
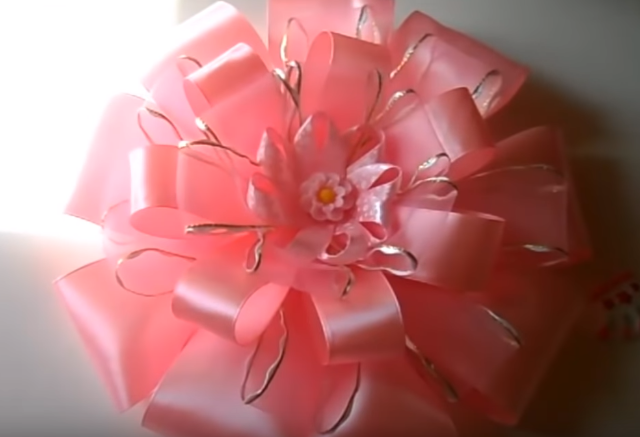
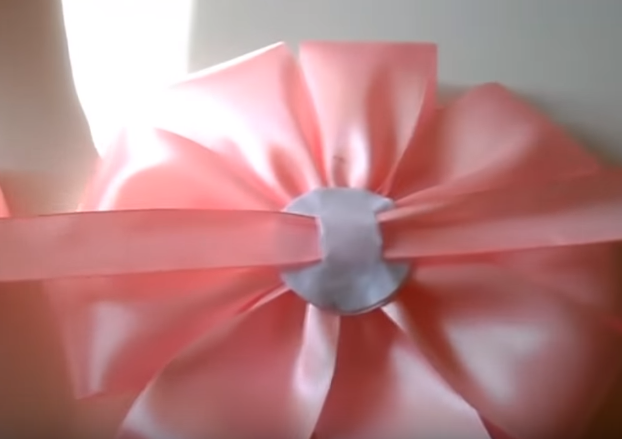
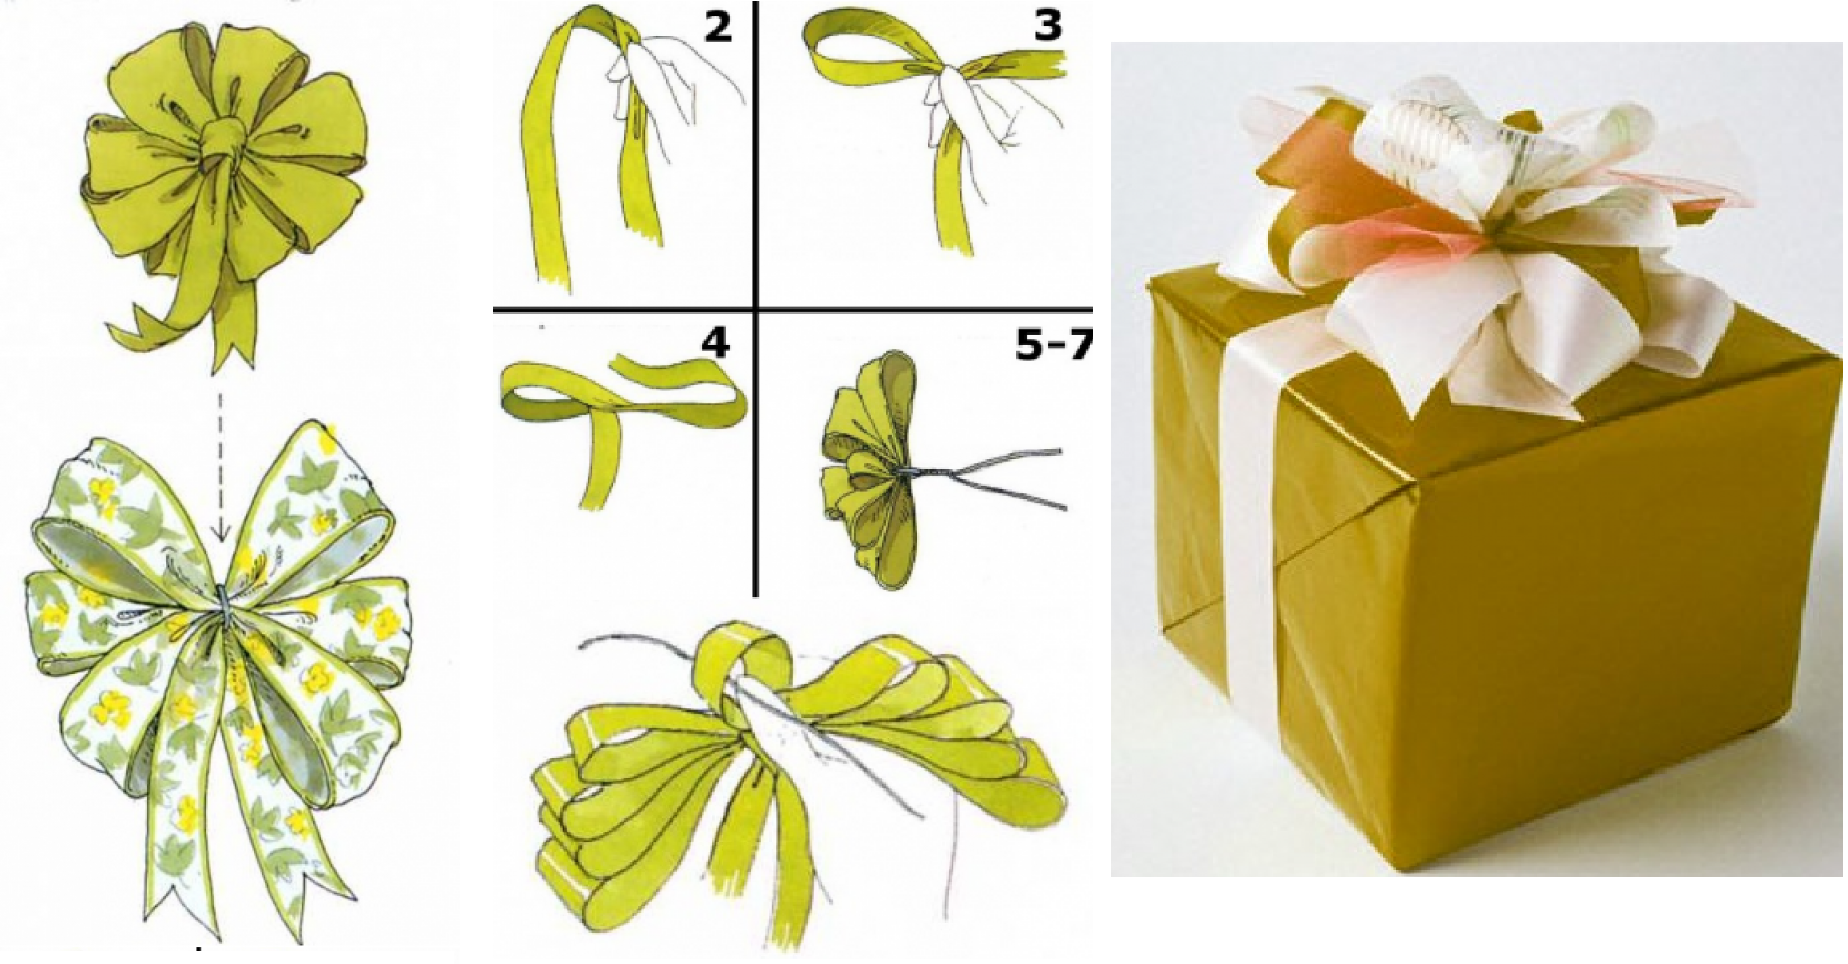
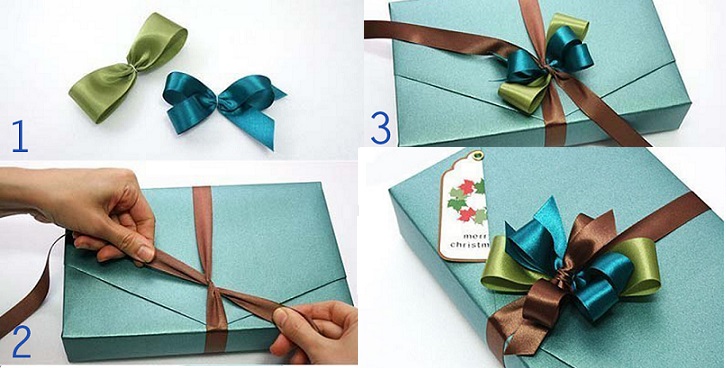
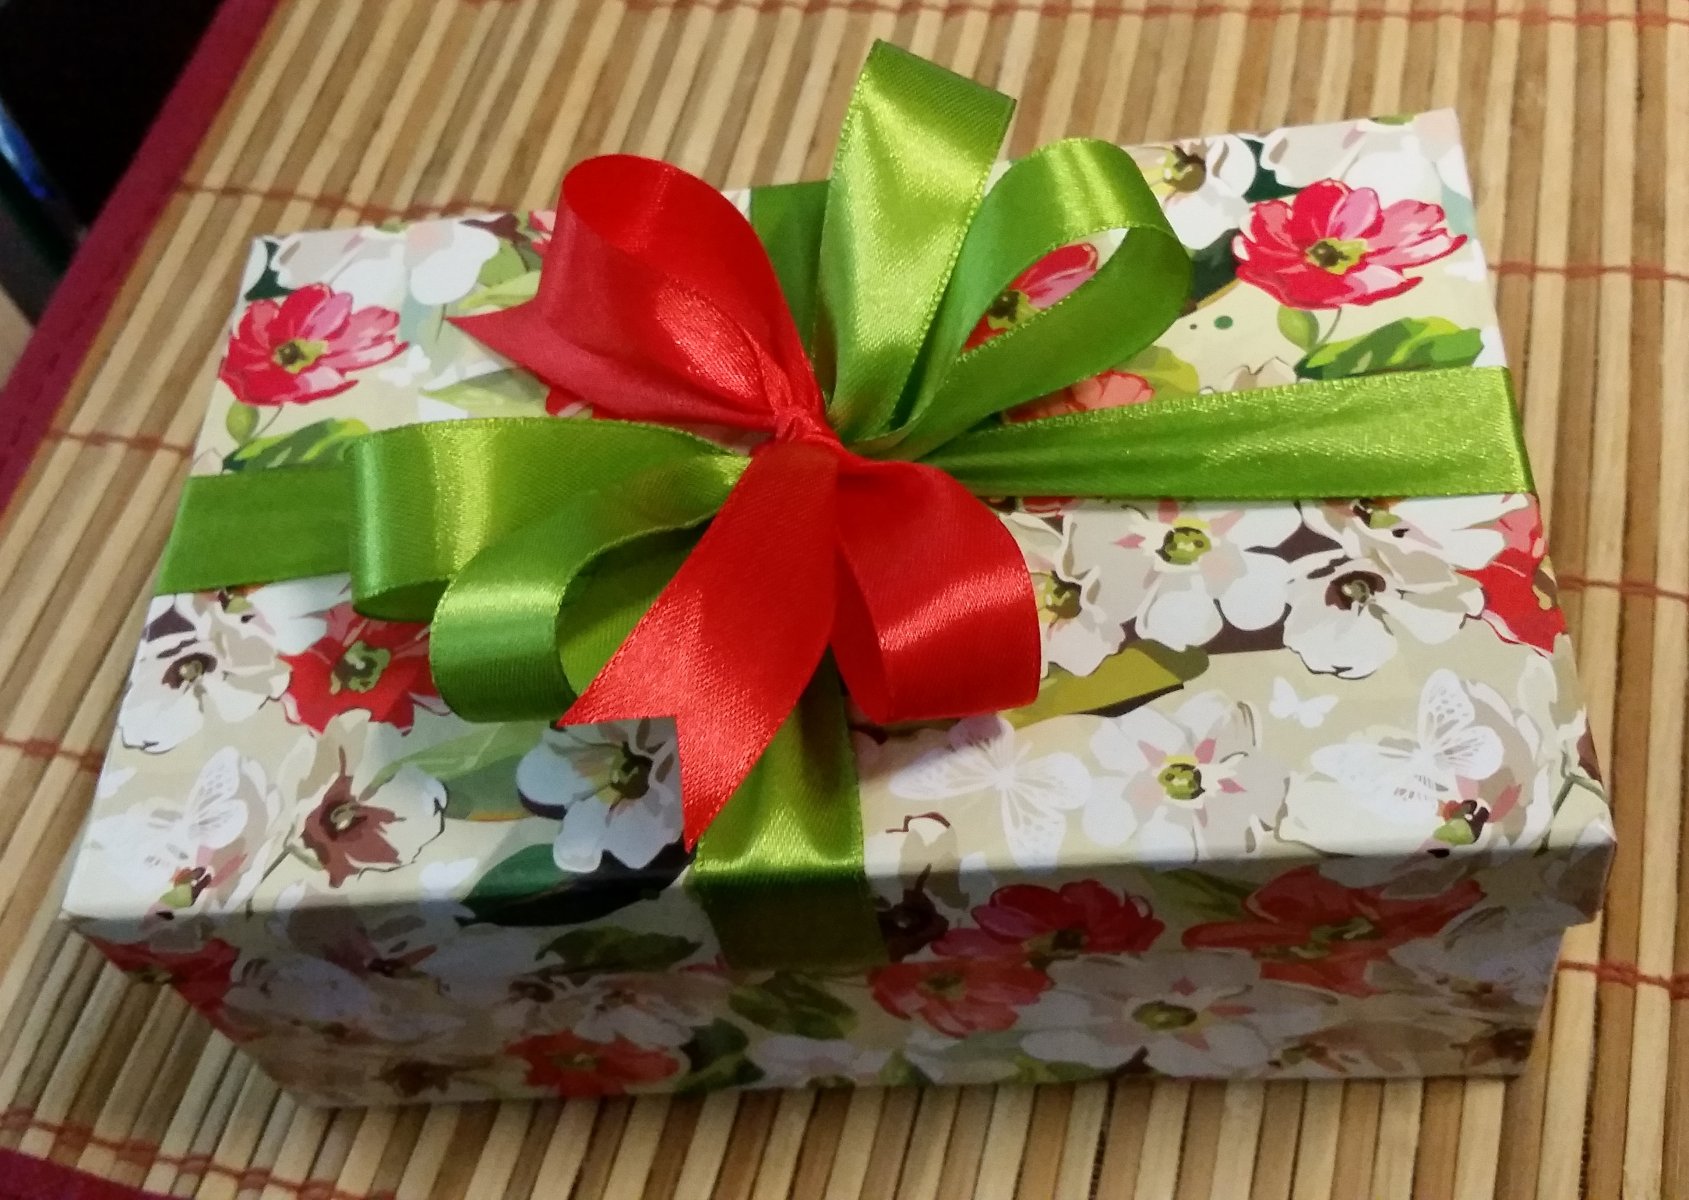
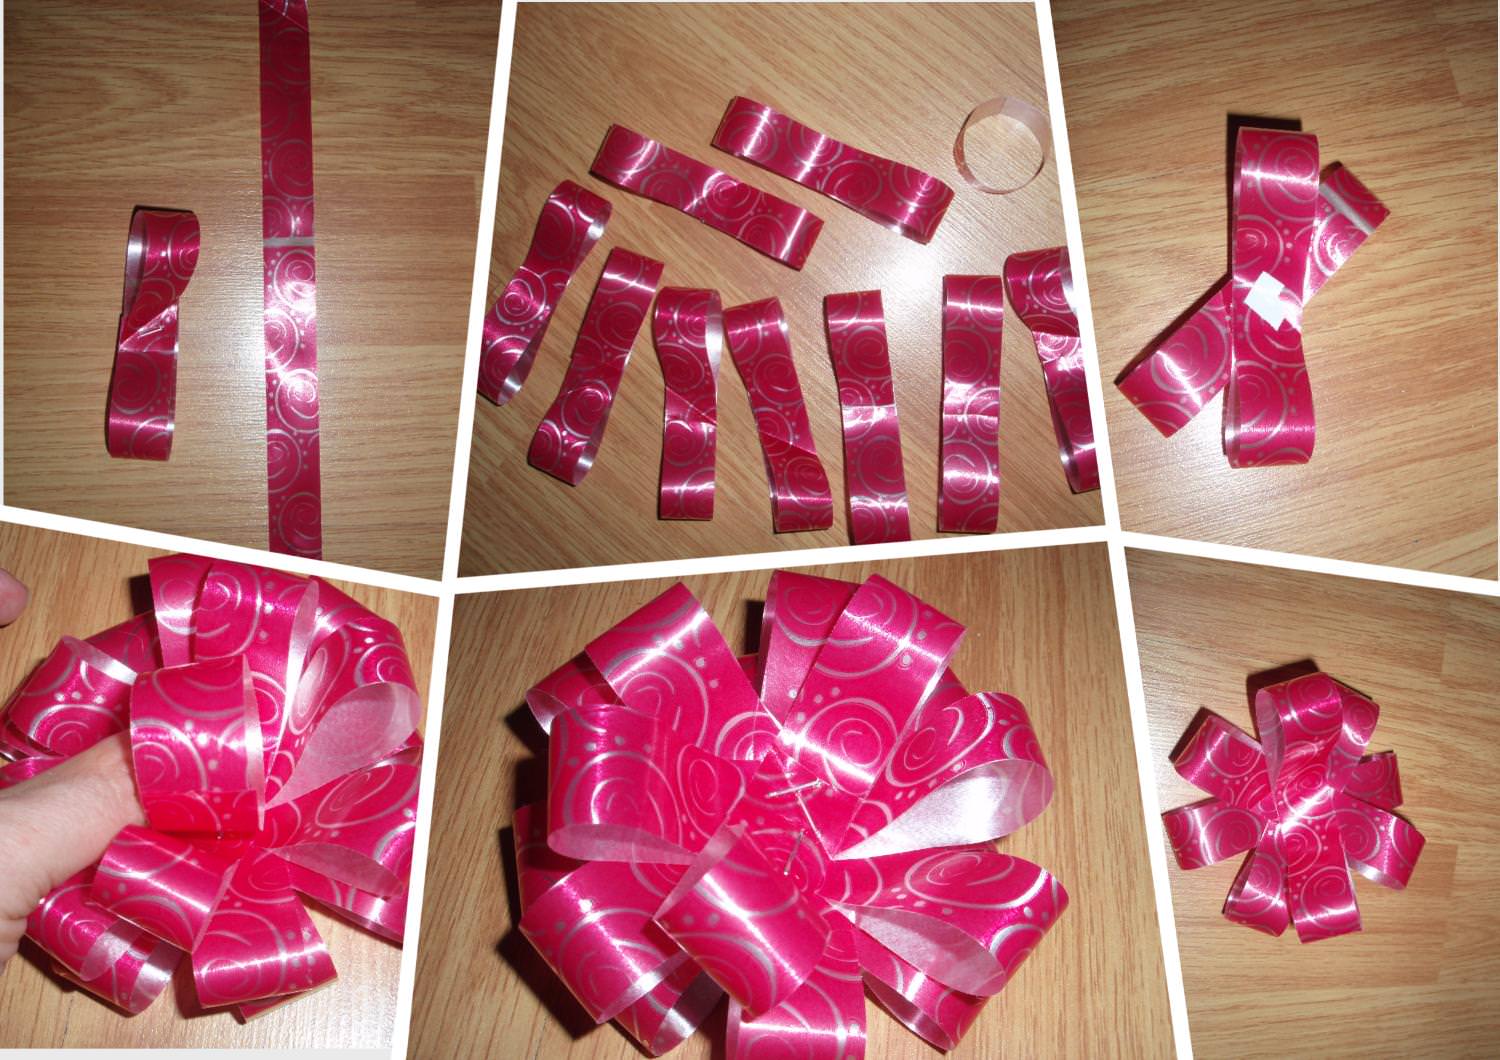
Create a decoration for a gift box
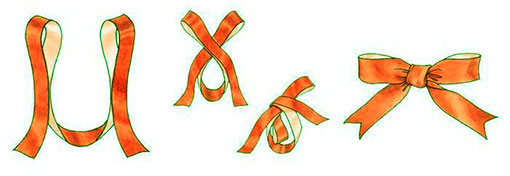
There are several ways to make bows for attaching to boxes. The coloring should match the color of the gift packaging or be contrasting. You can make several small decorative elements, placing them in different places, or one large one.
| Name | Size and shape of the bow | Type of suitable tape | Manufacturing |
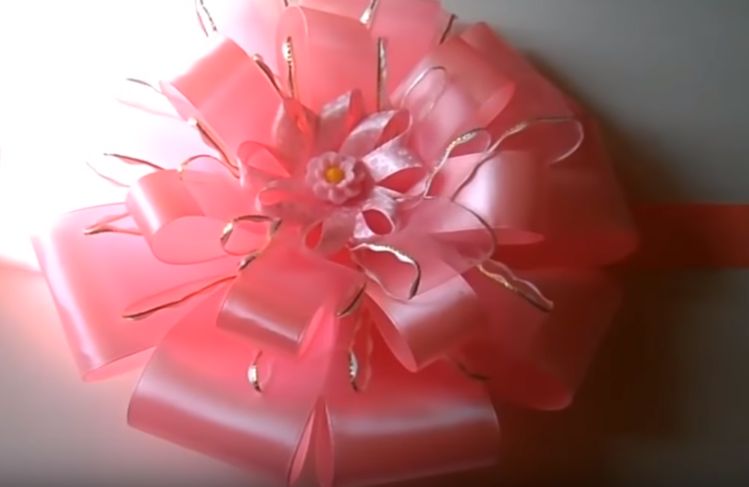
| Lush | Medium, X-shaped | From rep or satin |
|
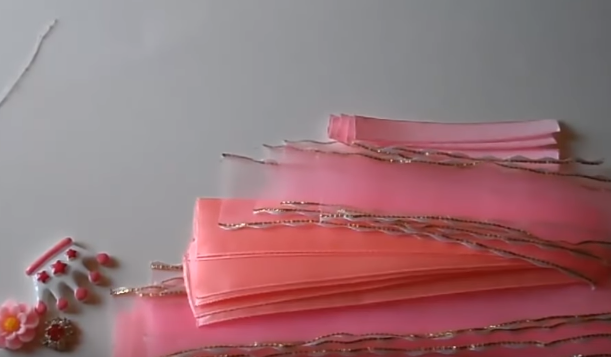
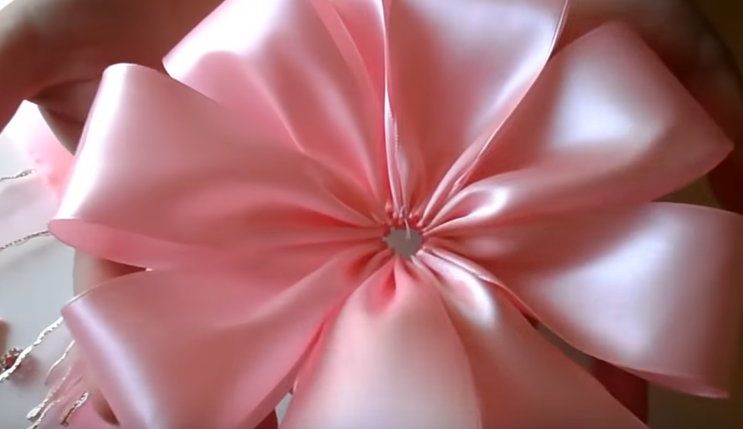
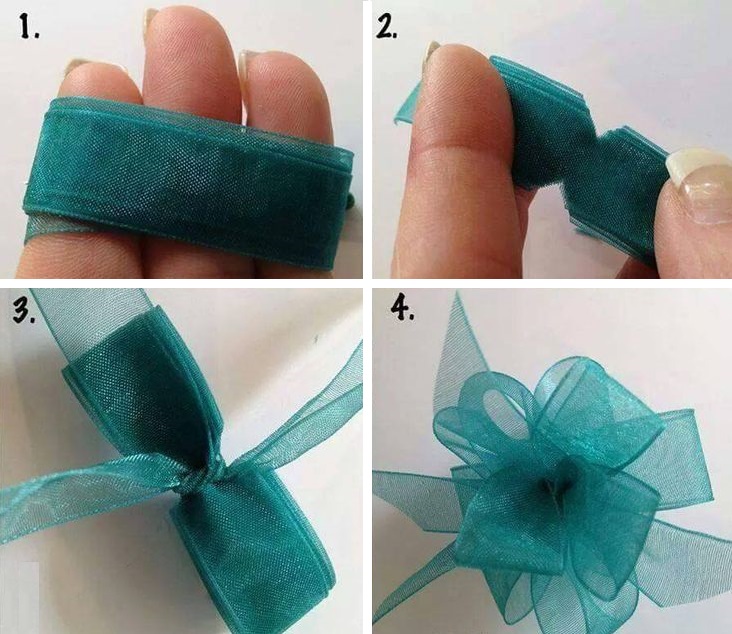
| Terry | Large, round flower | Tulle, organza, lace |
|
| Double | Small, X-shaped with ends hanging freely | Satin, nylon, cotton |
|
The color of the bow should match the style of the gift wrapping. For men, strict options are suitable: black and white checkered pattern, checkered pattern, longitudinal or transverse stripes. For women - romantic, feminine: pink (decorated with hearts or flowers), noble burgundy or scarlet. Light, pastel colors go well with the Provence style. With the high-tech direction - silver and all shades of gray, as well as any color with a glitter effect.
If the bow is the same color as the box, it may visually get lost against its background, so it is better to choose a contrasting color. Recommended combinations: red and blue, black and white, green and orange.
Product decoration options
Having figured out how to make an accessory with your own hands and how to tie a lush bow from a nylon ribbon, you can move on to the decor. For decorations, you can use any materials at hand. It is best to attach them to the finished product using a special glue gun. You can also use regular textile glue in a tube, but then you must remove the excess with a soft napkin, otherwise the accessory will look untidy.
You can make a beautiful ribbon bow if you use the following as decoration:
- lace and guipure of any shades;
- beads and bugles;
- beads of different sizes, artificial pearls look especially impressive;
- semi-precious stones;
- Rhinestones and sequins with a glitter effect.
A cotton or rep bow can be decorated with a small brooch. But for less dense fabrics, nylon, organza or tulle, it is better to choose other options.
The easiest way to decorate a bow is to use ready-made patches. They can depict stylized flowers, geometric figures, symbols and logos, cartoon characters. These elements are glued or sewn on (by hand, by machine).

General recommendations
When working, remember that the back side of the handmade ribbon bow should be hidden. The cuts of cotton and rep strips are carefully processed with a blind stitch. The ends of tulle, organza, nylon and satin are singeing over an open fire so that the threads do not crumble.
You can determine the required size of the ribbon for wrapping the box and creating a bow using a universal formula: measure the height and length of one side of the package, add these figures together, and multiply the resulting sum by six.
The free ends of the ribbon when tying the bow should not hang down from the lid of the box. If the edges are too long, they are shortened. To do this, they are carefully trimmed with sharpened scissors (both at the same time, to maintain symmetry), and then singe with fire (a lighter).
Before making a bow from satin ribbons with your own hands, experts recommend practicing a little in making paper crafts. This will help you better understand the general principles of folding fabric accessories. You can use photos and step-by-step instructions with graphic illustrations.
If you plan to use the finished product to decorate a suit, its coloring should match the clothes, or at least not stand out from the overall ensemble. These simple rules and recommendations will help you not only understand how to make a bow, but also find a worthy use for the accessory.
Video