A cap is a unique headdress, part of the uniform in various units of the armed forces. It is also used as an addition to the distinctive uniform of representatives of some civilian professions. Not everyone knows how to sew a cap with their own hands. But this accessory can be useful for various purposes: a school play, a masquerade, festive performances for May 9.
Product Features
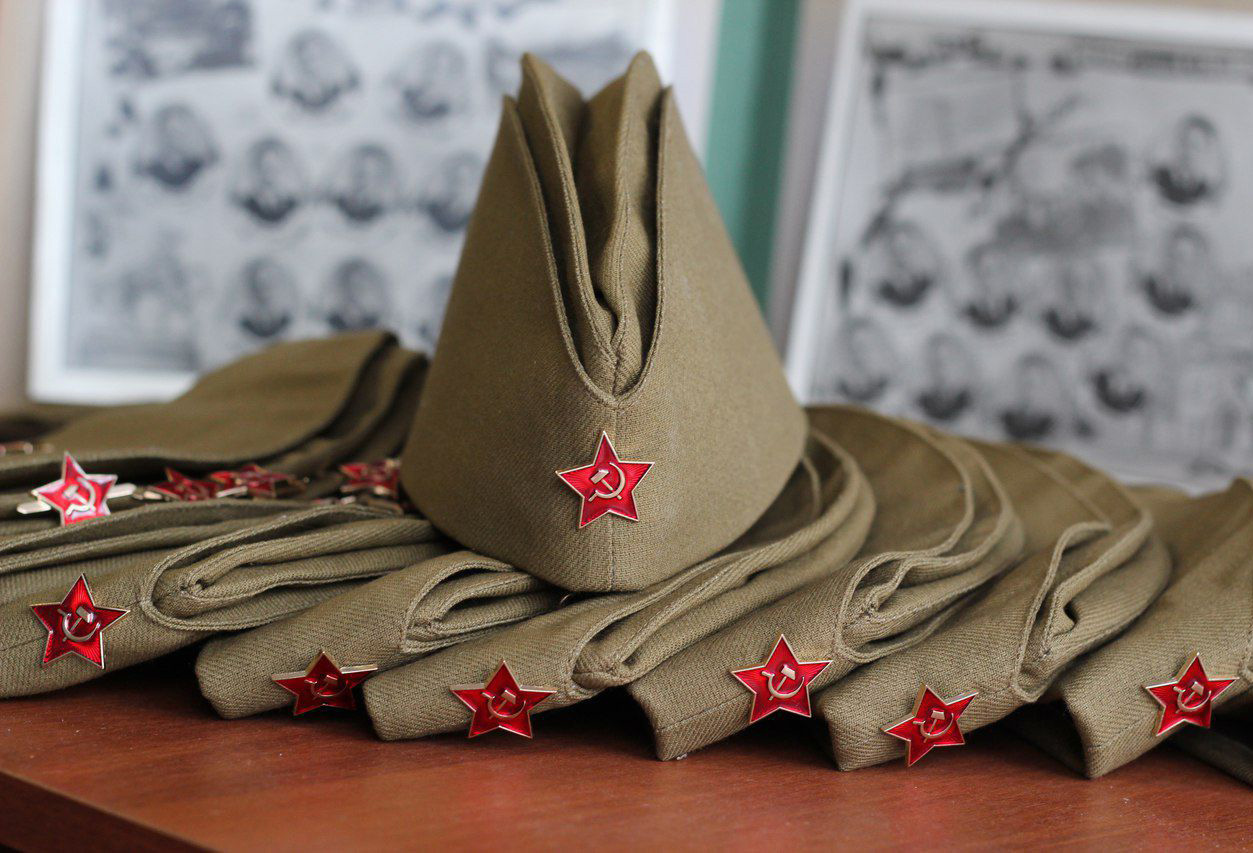
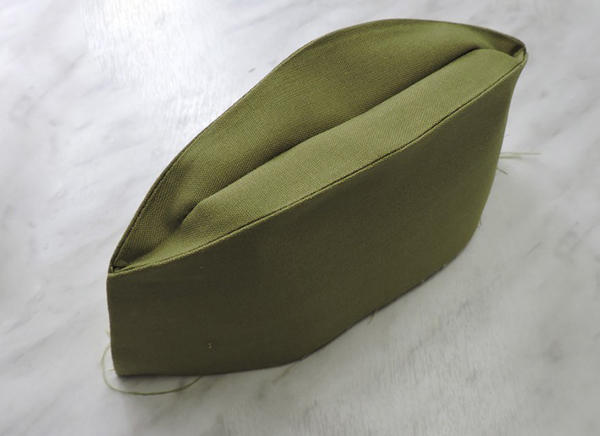
This cap, flattened on the sides, was originally used as a spare headdress by pilots from the officer corps of the aviation troops of the Russian Empire. Hence the name, derived from the word "pilot". It is a compact hat made of soft material. In the middle there is a fold, allowing to give a flat shape. There are many decor options: signs of belonging to the Armed Forces of a certain country, colored edging, corporate badges.
Pilot caps are also used in the uniforms of cadets of military and police schools, as well as representatives of the following professions:
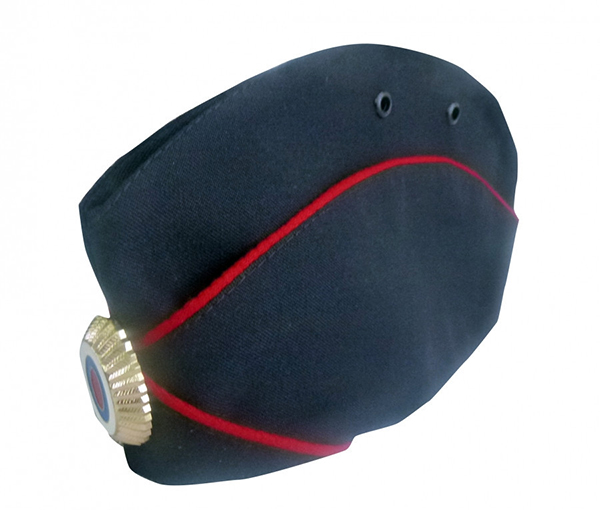
- police officers;
- stewardesses;
- sellers;
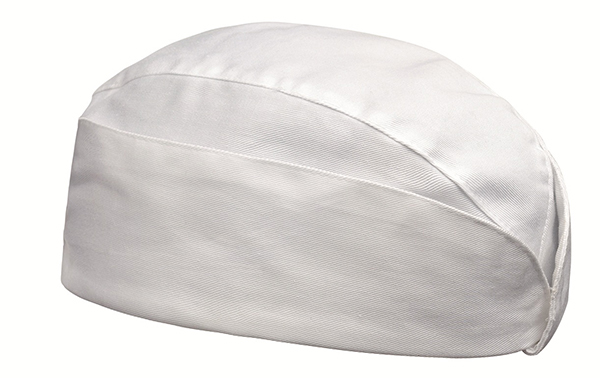
- cooks.
In addition to the purely practical and decorative function, caps also serve an informative function: the badges, the main color, and the shade of the edging make it clear to which branch of the armed forces the owner of the headdress belongs. The idea was adopted by large airlines and supermarkets – corporate colors and logos adorn this element of the uniform.
Often, such a headdress acts as a prop in school amateur performances, especially at celebrations dedicated to the Great Victory. And in masquerades, at children's matinees, concerts for the Defender of the Fatherland Day, the cap is so popular that it becomes difficult to get it on the eve of the holiday. Then the solution is to make it yourself. Numerous master classes on thematic resources will help you figure out how to sew a cap yourself. The labor intensity of the process largely depends on the selected material, which can both significantly complicate and facilitate the work.
Materials and tools
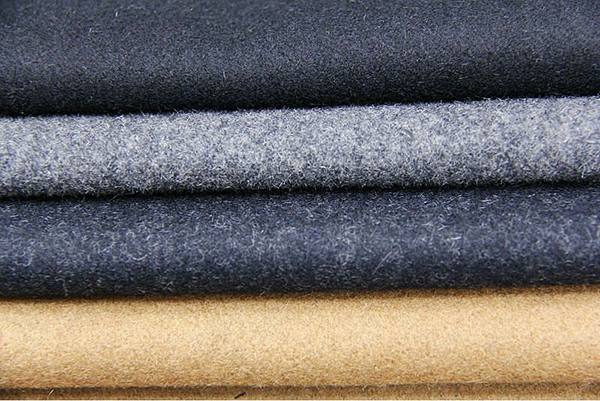
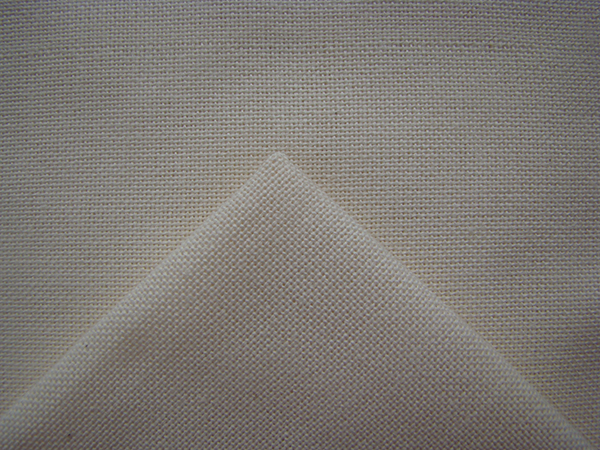
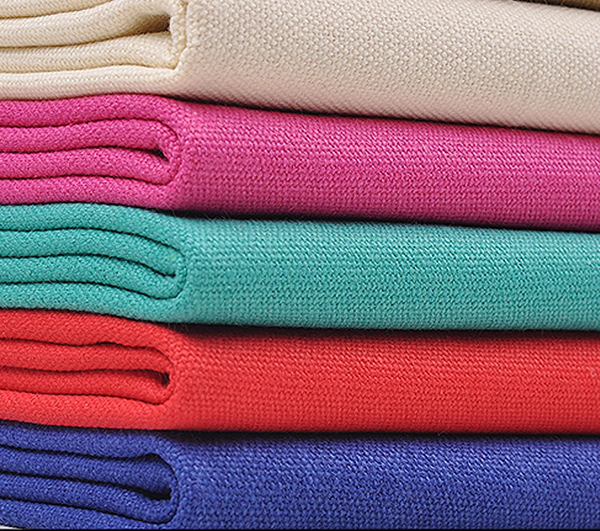
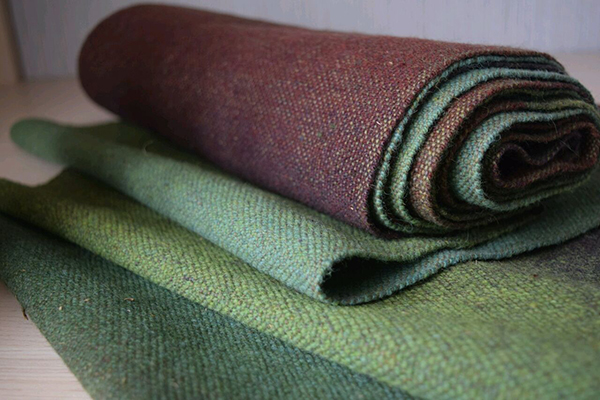
Dense fabrics that can hold their shape are used as the basis for the future product. The exception is summer options, especially for children: they are sewn from light, breathable material in light colors. Hard linen and cotton are suitable for this purpose, as they produce caps that retain their shape and allow air and evaporation to pass through freely. The main selection criteria are: suitable color, smooth texture of the fabric, density. The most successful materials for caps are:
- cloth;
- hard flax,
- thick cotton;
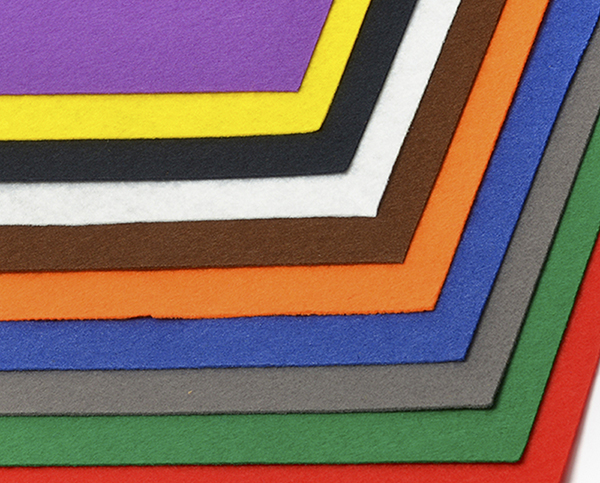
- felt;
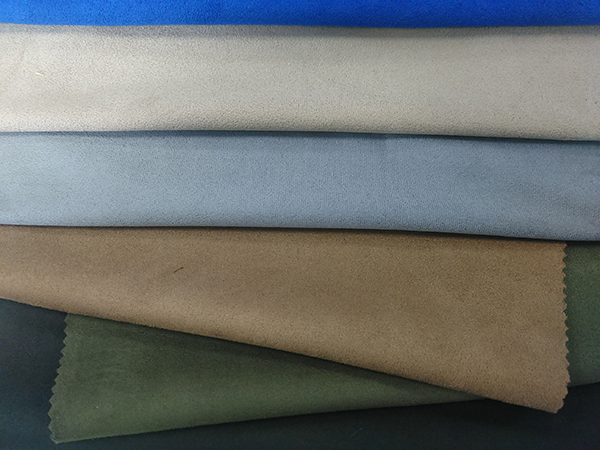
- suede;
- drape.
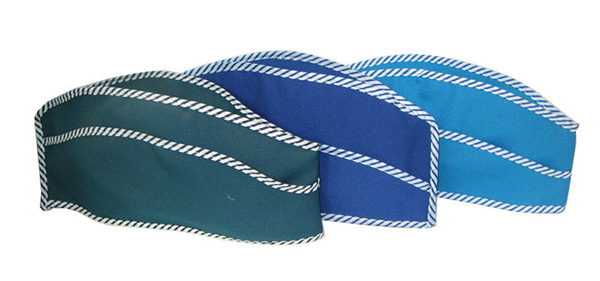
When choosing a material, it is worth considering not only the season and the age of the wearer, but also the purpose. If the product is stylized as a military cap, it is better to take cloth of a characteristic gray-green color. For a sailor, it is worth using cotton in blue shades, a flirty headdress for a little stewardess can be sewn from suede. A felt product is an excellent solution in a situation where there is little time and skills of a seamstress, since it holds its shape well, is easy to work with, and does not require edging seams.
An adhesive backing will help to simplify the work with insufficiently dense material. The tape on an adhesive base makes the sewing process much easier.
Using the adhesive backing you can:
- give the cap a clear contour edge;
- it is easy to glue the parts of the bottom together, forming distinct folds;
- to tighten the edges of the product, helping to maintain its shape.
To sew a pilot's cap with your own hands, both for a child and an adult, you will need one set of necessary tools. It includes measuring accessories (tailor's tape measure, ruler), scissors, chalk or a piece of soap for marking, a sewing machine.
Necessary measurements and pattern preparation
The next step will require patterns. They are ready-made with the necessary measurements. There are also pattern calculators on various resources dedicated to handicrafts: just enter your own measurements and print out the finished version. The model of such a headdress is simple, so you can make the pattern yourself.
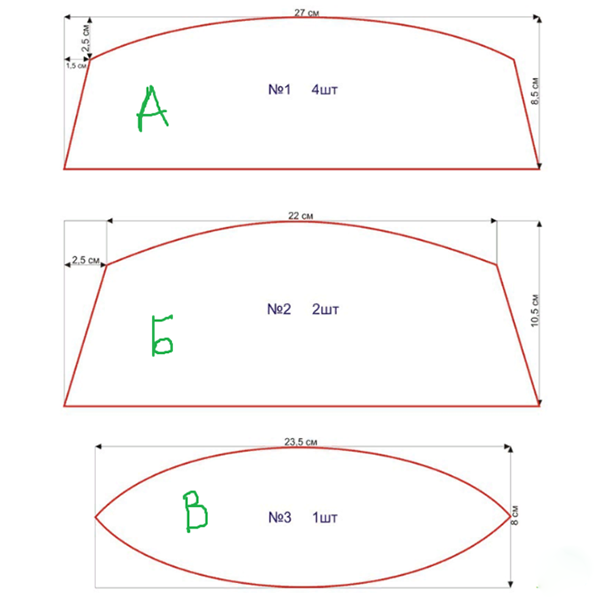
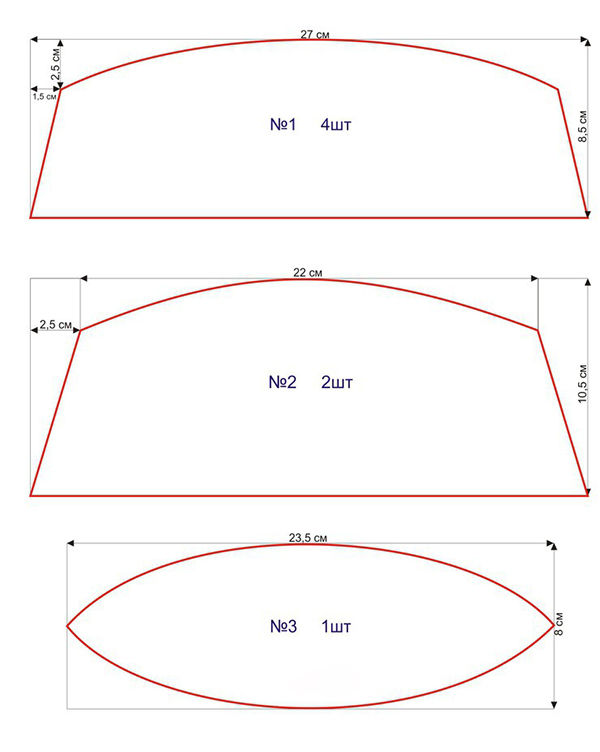
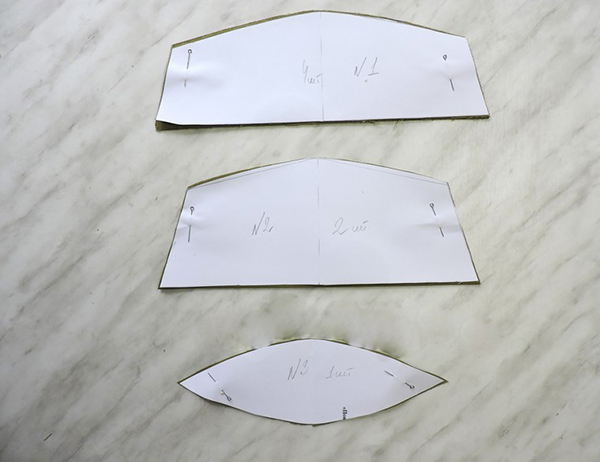
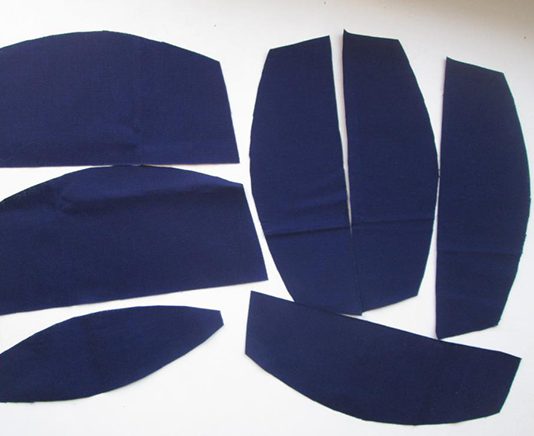
The simplest pattern of a soldier's cap consists of three types of parts: a quadrangular base, a bottom and a band. To create a drawing, you need:
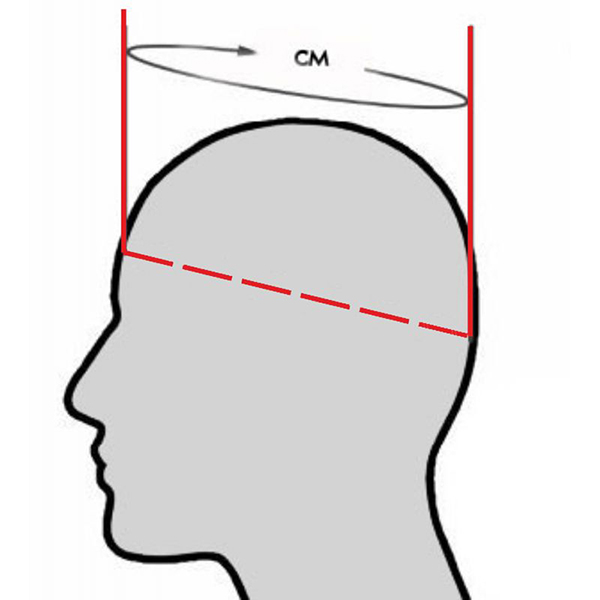
- Measure the head circumference.
- Decide on the height of the product (usually no more than 11 cm).
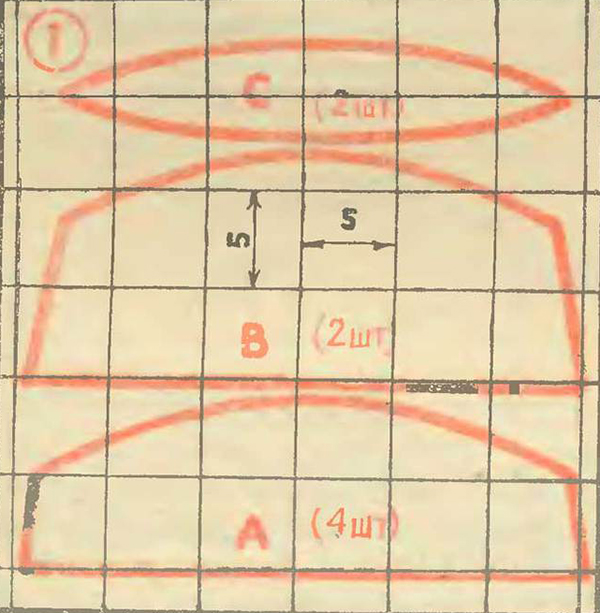
- Draw the first part of the cap - a rectangle with a base equal to the head circumference divided by two. Add half a centimeter for the fit error. The sides are equal to the height of the product. Make the second base on the diagram rounded - measure two points at a distance of 2.5 cm from the top edge and the sides. The result is a trapezoid with a rounded top with a difference in the length of the bases of 5 cm.
- The band is constructed using the same principle with the only difference being that the overall height is 2 cm less, and the indentation of the points of the upper base is 1.5 cm.
- The third part is the bottom. It is an oval pointed at the ends, one side of which corresponds to the length of the upper part of the cap.
Next, the pattern is cut out and transferred to the fabric. Patterns for other types of caps are created in a similar way. There are only minor design differences, such as lapels or the shape of the bottom.
Sewing instructions depending on the model
Most often, for theme parties, school performances and holiday costumes, soldiers' caps are sewn. No less popular are the headdresses of stewardesses, pioneers and sailors. We sew all products according to the instructions in accordance with the chosen image.
Pioneer
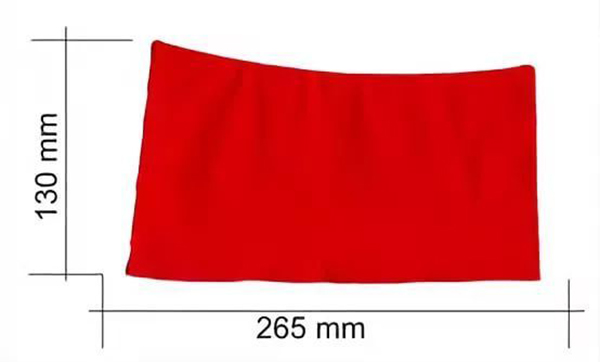
The red pioneer cap is by no means a relic of the Soviet past that might only be needed for a performance. In some schools and sports camps, it is still an integral part of the uniform. In this sense, it can be considered a tribute to the historical movement and fashion for the revival of certain traditions. Therefore, knowledge of how to sew a pioneer cap yourself can be useful.
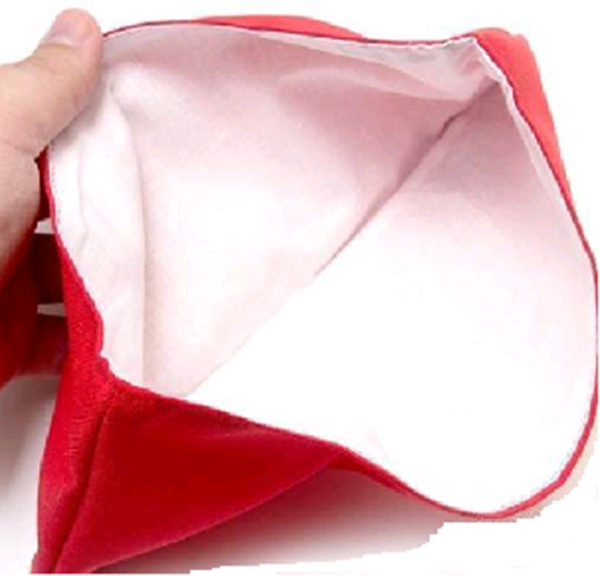
The classic uniform is very simple to make. Unlike the soldier's uniform, it lacks the top part - the bottom, which greatly simplifies production. It is sewn from red fabric without a distinct reverse side. If the density of the material is insufficient, a double layer can be made. Sewing is carried out as follows:
- Take the measurements of the head circumference. Add one centimeter to the resulting figure for allowance.
- Prepare a pattern. The pioneer cap consists of two rectangular parts, the length of which is equal to half the circumference of the head, and the sides are the height of the product. In this case, you should add a 5 cm allowance to the depth of the fit so that the model sits nicely.
- Transfer the patterns onto the fabric. The cut-out part should be outlined with chalk or soap along the contour. Leave at least three centimeters at the bottom for the lapels, which are typical for this model.
- Cut out. Using sharp scissors, carefully cut out two (or four, if the fabric is not thick enough) pieces.
- Make edging lines. Sew the cap parts from the top and sides to the lapel, not forgetting about the allowances.
- Go over the lapels with an iron.
- Sew the lining to the bottom edges.
The finished cap can be decorated. There are several decor options - ready-made badges, stripes. Emblems embroidered or applied to the fabric with a special marker are also used.
Soldier's Day for May 9
This is the most popular option for self-sewing, since by May 9th, ready-made products quickly disappear from the shelves. For this reason, mothers and grandmothers of numerous schoolchildren have to sit down at the sewing machine. The cap pattern is first transferred to the fabric. Then the order of actions is as follows:
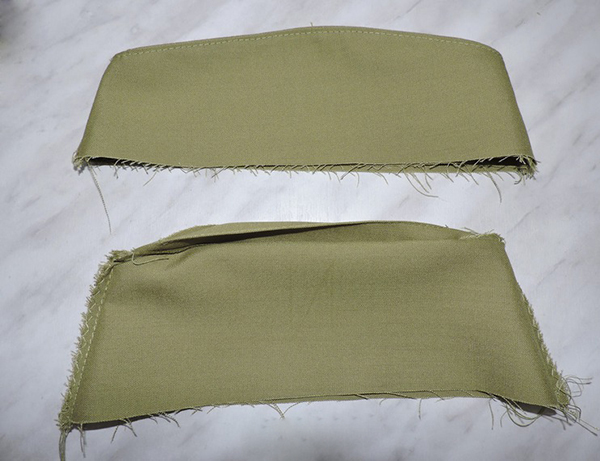
- We make the cutting (4 band pieces, 2 base pieces, 1 bottom piece).
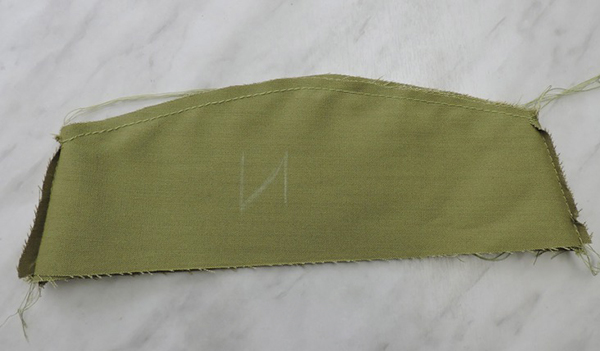
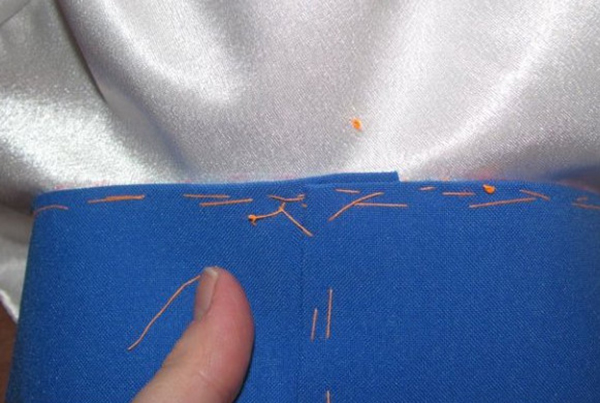
- We mark the back side of each piece with an inconspicuous cross for ease of work.
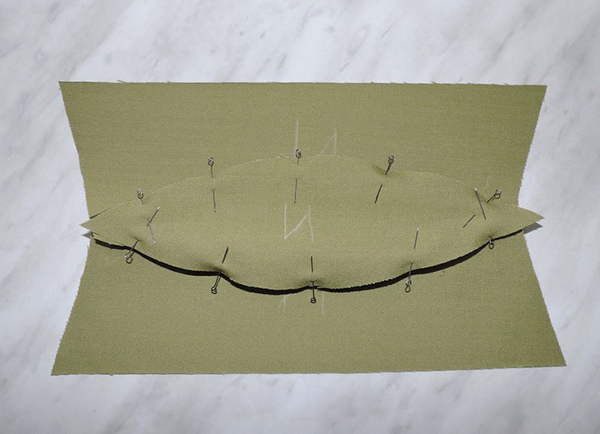
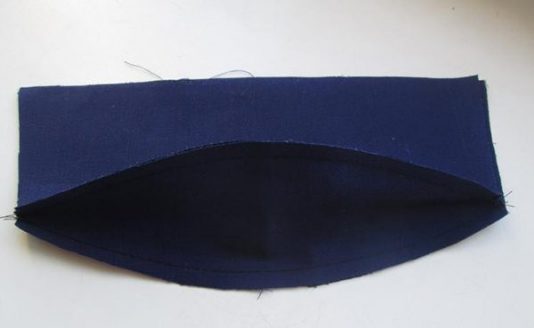
- We baste the bottom with the base onto the thread, wrong side to wrong side.
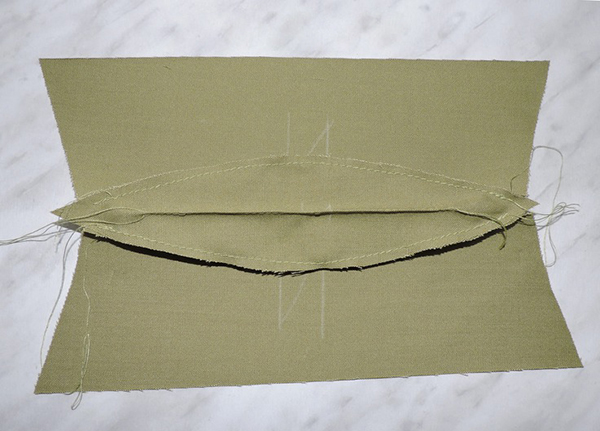
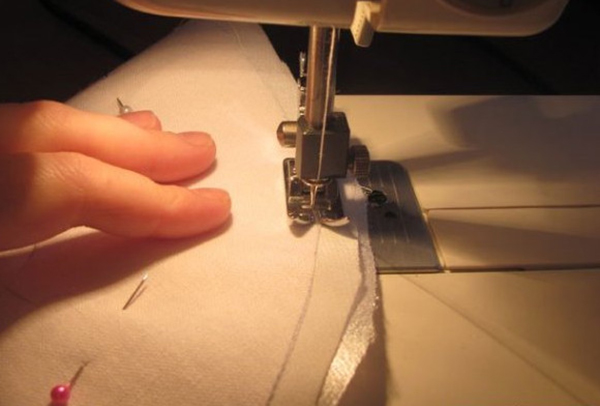
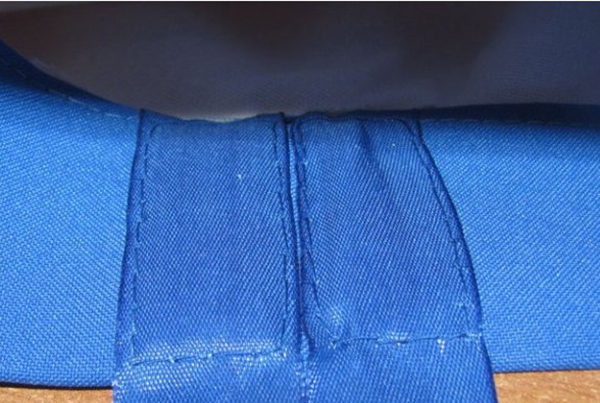
- We stitch along the basting line and make a longitudinal stitch on the bottom.
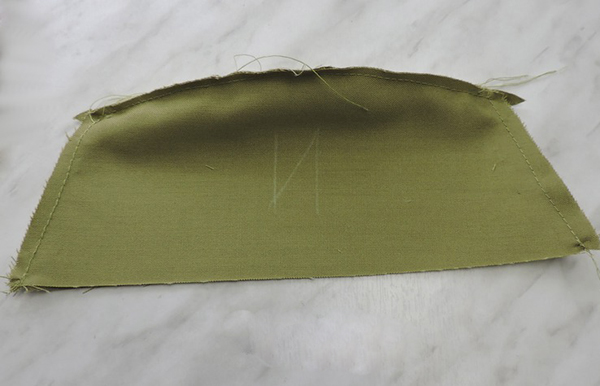
- Sew the sides of the product. Next, iron the workpiece, paying special attention to the longitudinal seam on the bottom.
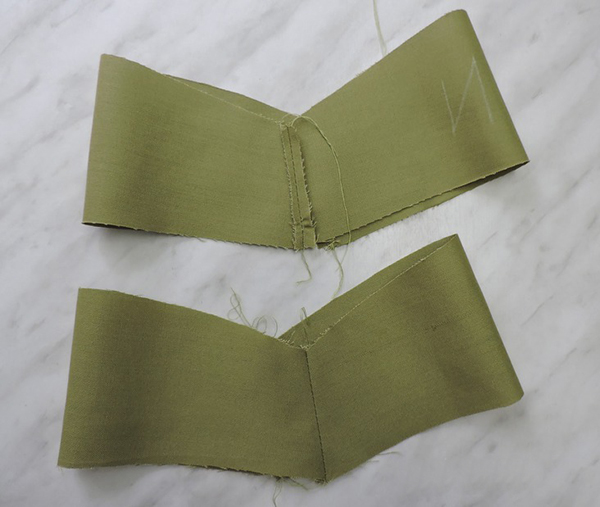
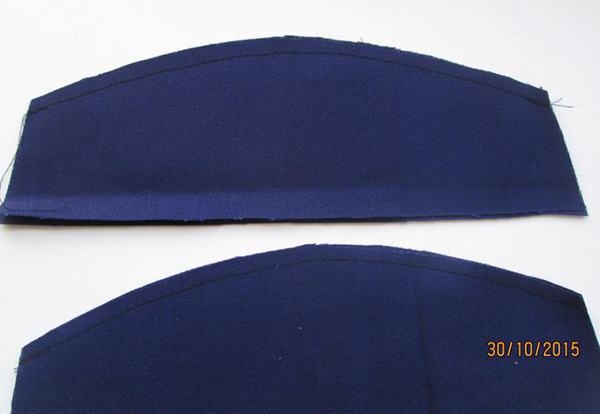
- We stitch the sides of the bands in pairs, turn one of them inside out and fold the resulting parts with the right sides facing each other.
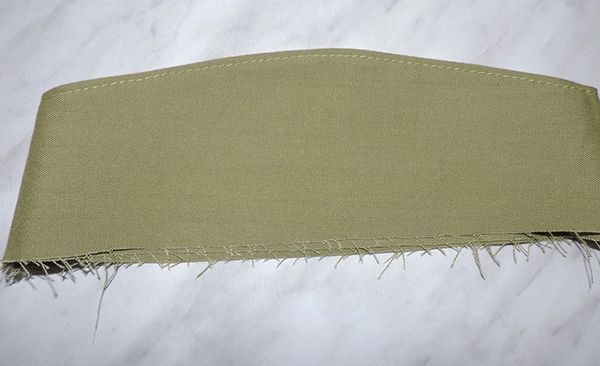
- We stitch the upper edges. We make a face stitch, turning the piece inside out.
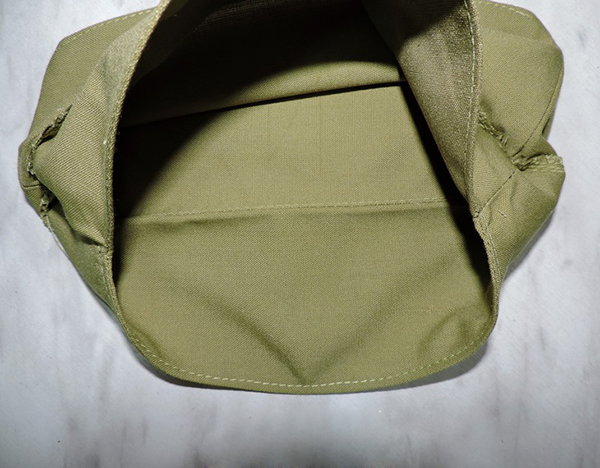
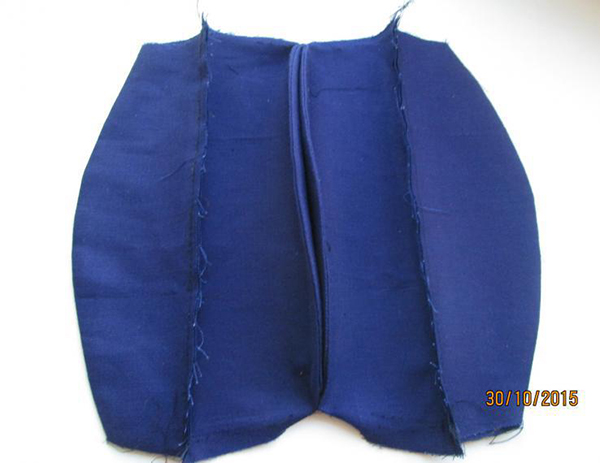
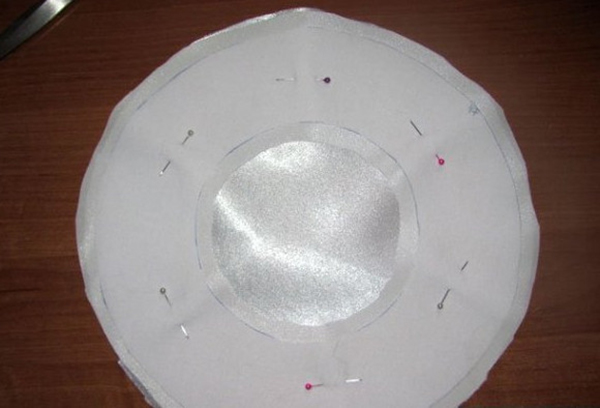
- We pin the band and the base with needles at the lower edges, stitch. We overcast the lapels of the cap.
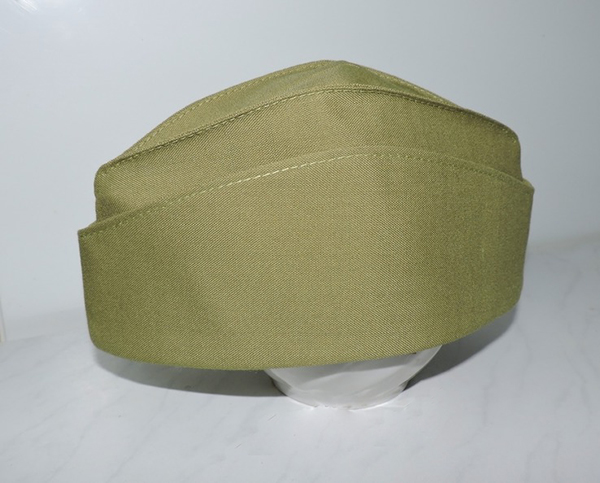
- We turn it inside out so that the band is on the outside and iron it.
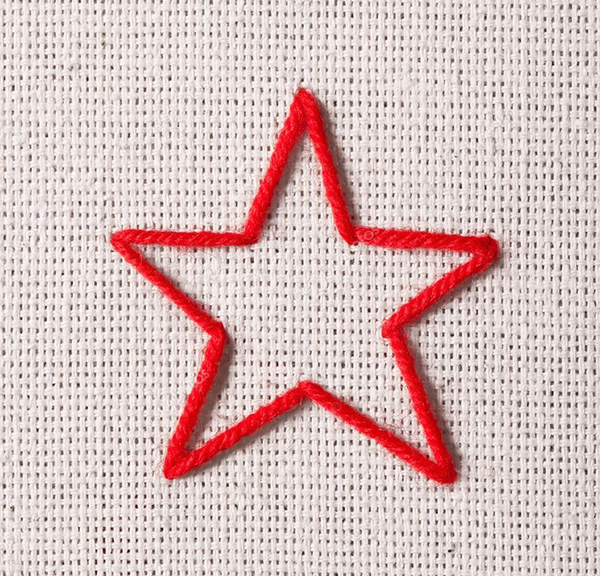
The finished cap for the child should be decorated with a traditional red star. Ideally, use original badges, attaching them to the front. If you don’t have them, you can do with embroidery with red threads, or make an applique from scarlet shiny fabric. A piece of felt will do, from which you need to cut out a star and glue it with a gun. The military cap is ready.
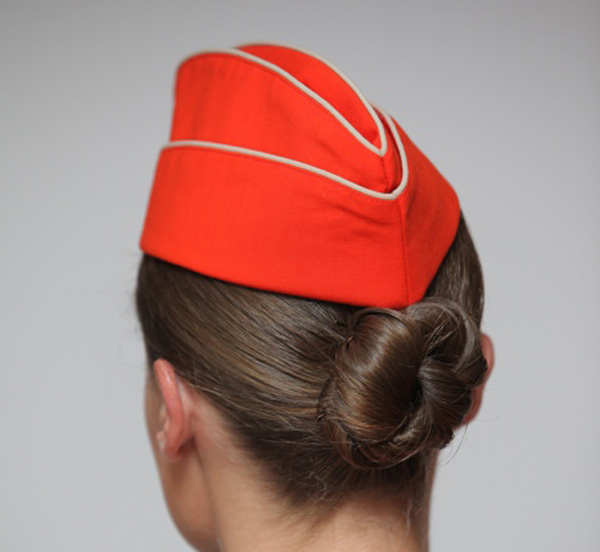
Stewardess headdress
The distinctive feature is a less deep fit. The hat should lie almost on the crown. The design of the band is such that the front part is narrowed, which allows the headdress to coquettishly cover the forehead.
Before sewing a flight attendant cap, you need to choose the material. The main condition is that it must be dense enough. The color is selected in accordance with the range of the entire suit (jacket, skirt). It is not necessary to have a complete match, but it is important to add a decoration of the same color to the girl's image: edging on the sleeves of the shirt or a scarf in the tone of the hat. As a fabric for sewing such an accessory, unlike a military cap, suede of different colors and drape can be used. Step by step, the manufacturing process looks like this:
- Create a diagram. The stewardess cap pattern is similar to the soldier's, but it also has differences in the number and sizes of parts. You will need two pieces of the band (as well as the base), plus one piece of the bottom. For a head circumference of 52 cm, you need a base size of 21 x 8 cm with indents at the top of 1.5 cm on the sides and top. The band is slightly longer and narrower (26 x 6 cm with an angular bevel of 1.5 x 1 cm (on one side). The bottom is an even oval with diameters of 6 and 22.5 cm.
- Transfer the patterns and cut out the cap. It is necessary to remember about the allowances.
- Next, you need to sew the base to the bottom with the upper edge. Do not touch the sides yet.
- Sew the band with the lower edge to the lower edge of the base. Stitch the top, then sew the sides of the pieces. Turn the product right side out and iron.
The decoration consists of sewing a contrasting edging onto the finished products. You can use a pilot's badge - silver wings. Another option is to download the Aeroflot badge, print it on self-adhesive paper and attach it to the side. A homemade stewardess cap will complete the festive look.
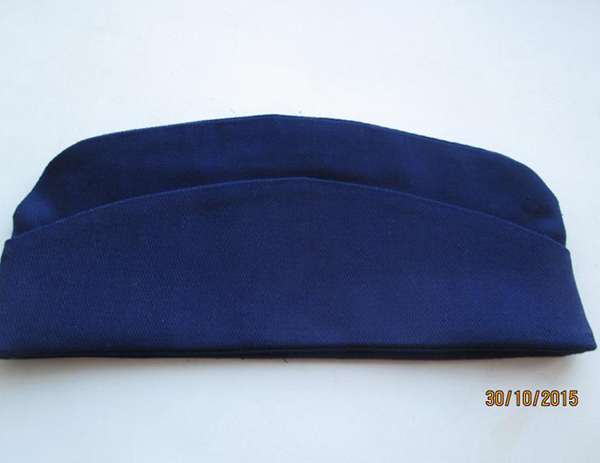
Sailor's cap
The sailor's cap pattern is almost indistinguishable from the soldier's cap, except for the similar tight stitching of the parts, as in the case of the stewardess's headdress. The sailor's cap has much more differences. It can be sewn from shiny fabric, for example, crepe satin, gabardine, dense interlining. The step-by-step manufacturing instructions are as follows:
- You can cut out the details at the same time as taking measurements. A strip of paper 5 cm thick should be wrapped around the child's head, folding it into a ring. Mark the place of fastening, cut off the excess length. The pattern of the band is ready.
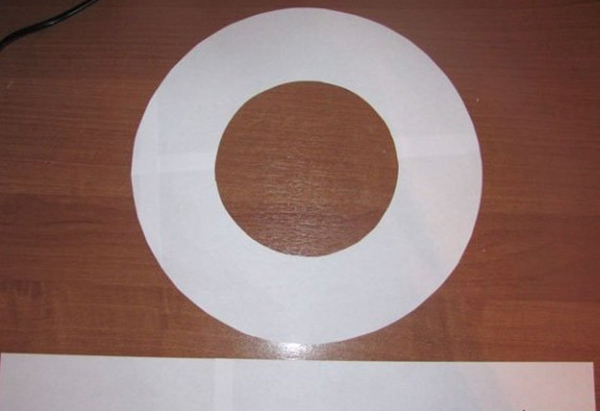
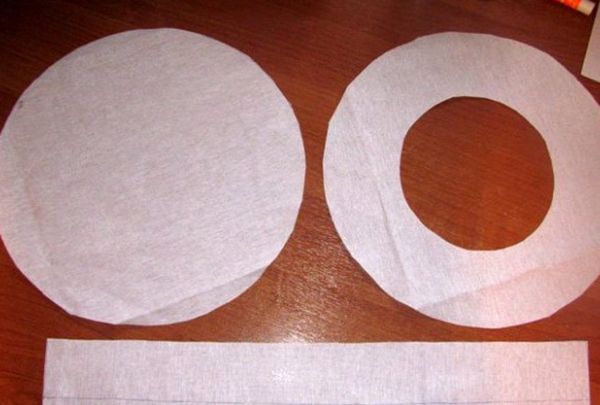
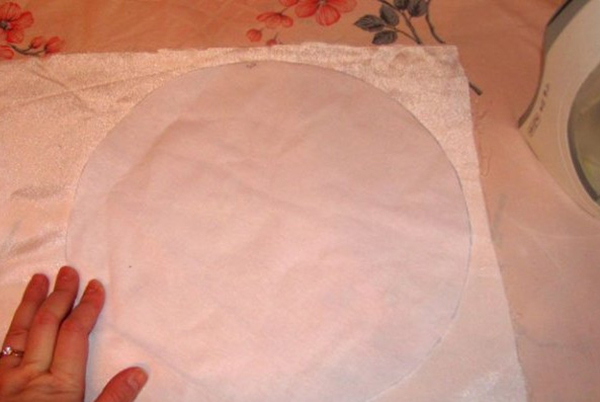
- Cut the bottom and the crown out of interlining, using the dimensions. The inner radius of the crown circumference is equal to the length of the resulting band, divided in two. Add seven centimeters to the found value, to get the outer radius. Cut the bottom as a solid circle with a circumference equal to the outer radius of the crown. Take the band of double width (10 cm).
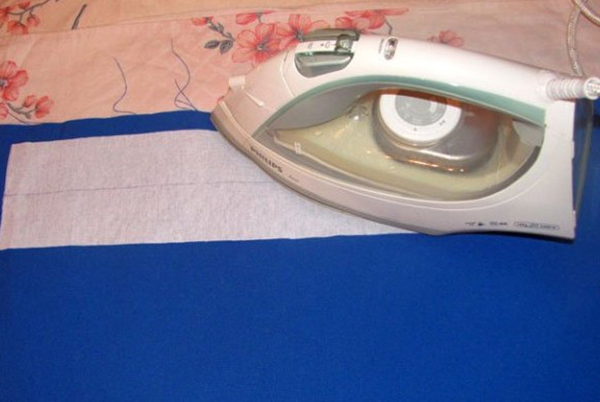
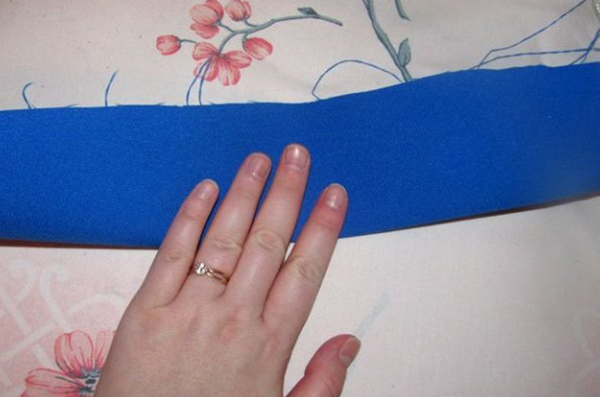
- Apply the interlining in the form of a band to the blue gabardine and glue it with a hot iron. Trim off the excess edges, adding 1-1.5 cm for allowance.
- Attach the crown and bottom to white crepe satin with an iron and trim (with an allowance).
- Iron all the resulting pieces thoroughly along the folds (where there are any) and stitch.
- Next, sew all the details together from the wrong side – the band to the crown, the crown to the bottom.
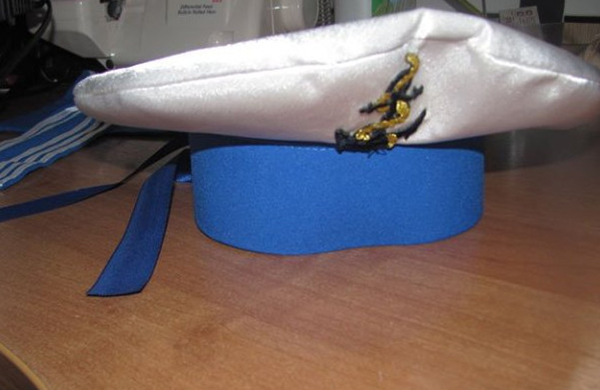
The finished sailor cap should be turned right side out and ironed. Use two ribbons sewn on the back as decoration, as well as anchor appliques on the front of the crown. If you don’t have a ready-made one, it is recommended to make one from scrap materials (felt, fabric). You can also sew on contrasting words (“navy”, “admiral”, funny names of ships).

Additional tips from craftswomen
Among the ready-made templates and patterns for pilot caps, sizes for adults and teenagers are common. But sometimes it is necessary to sew a festive outfit for a baby. In this case, you will have to adjust the pattern. Based on the head circumference, on the finished pattern, you need to proportionally reduce the sizes of the parts:
- We mark a line on the bottom side of the band piece along the length corresponding to half the circumference of the child’s head.
- We mark the points of the top line and the sides of the cap inside the diagram, maintaining the proportions. This can be done by eye, since the correct version for an adult is always available.
- We reduce the height of the sidewalls, maintaining the required planting depth.
- We do the same with the base and bottom parts of the cap.
- Don't forget about the centimeter indents for the seam allowance.
According to this principle, the size of the cap for the doll is reduced if there is a need to make a traditional military uniform for the toy. The same, but in the direction of increase, can be done with the pattern for an adult. It is important not to forget about the need for marks on the back side. This will help to avoid confusion when sequentially sewing the parts.
Another issue that can cause a lot of problems is decorating the product. Ready-made badges and emblems of military caps of the Soviet period are a great rarity. They cannot be purchased in departments for needlewomen, and ordering through catalogs is associated with a long wait. Therefore, you have to get out of the situation with a trick:
- If you have handicraft skills, you can simply embroider the star emblem on your cap with red thread.
- The hammer and sickle is a more delicate work, requiring painstaking embroidery. If you need the emblem to be completely authentic, you can use applique. You should cut out a star from stiff red fabric, and a miniature hammer and sickle from yellow, glue them together and attach them to the cap.
- The fastest option is to paint the fabric on the front of the cap using a spray can. To do this, you will need to cut out a stencil of a star and separately - Soviet symbols. First paint it with red paint, then silver or gold. Finally, spray it with hairspray so that the paint on the cap does not crumble.
There are ways to create a cap badge from polymer clay, metal wire, paper. The main factors here are time, imagination and a set of materials at hand. You can involve little helpers in this matter: joy for children, help for parents in fine work, where nimble fingers are needed.

Video