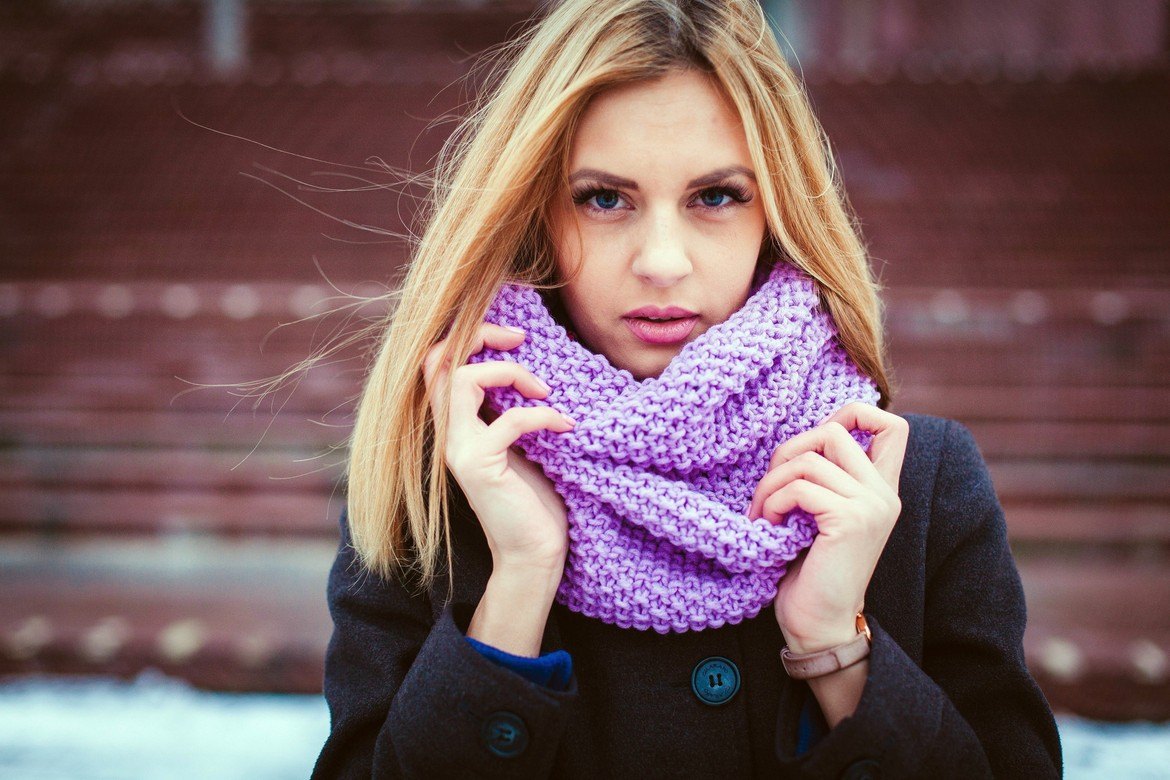
Hand-knitted items are the latest trend. This is especially true for accessories, in particular, scarves. This wardrobe item can literally transform your look, and even a novice needlewoman can make it. The main thing is to decide on the style, pattern, and type of yarn before knitting a scarf. The process itself is simple, does not take much time, and the result of the work will please the owner for many years.
Knitting techniques
There are many techniques for making an accessory, among which there are both simple and more complex ones. Therefore, before knitting a scarf, you need to decide which model of the product will suit you best. You can do this based on the time of year when you plan to use the accessory. Light, beautiful, openwork scarves made of thin yarn are suitable for the warm period. Warm, thick knitted models are recommended for the cold season.
Before you start working, it is advisable to decide on the type of knitting. Among the most common are the following methods:
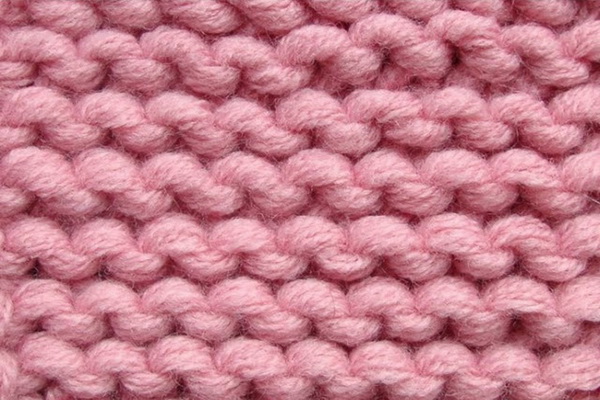
- Garter stitch is simple at first glance, but a thing made using this method is very warm. It is convenient to use and is suitable for a gift. Even inexperienced needlewomen can make garter stitch scarves.
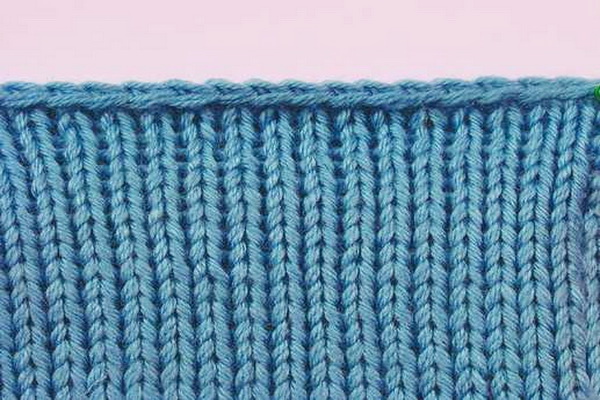
- The stockinette stitch is also a very simple method. This method is especially suitable for long scarves. Knitting is done only with face loops, but it should be remembered that the product can roll up into a tube.
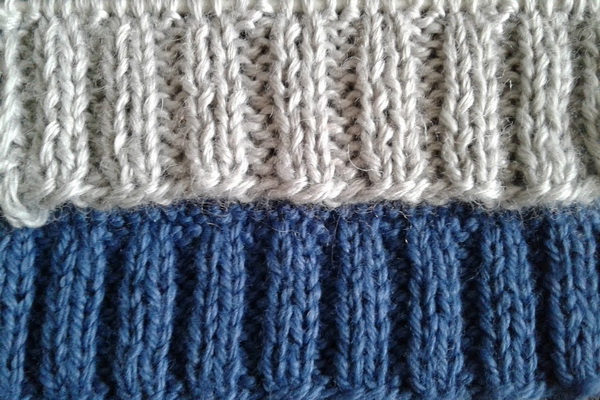
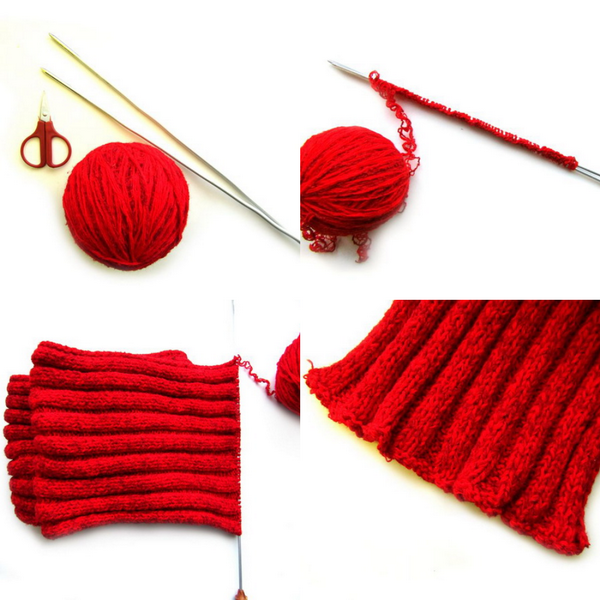
- The elastic band is a very popular method and the simplest pattern. The product knitted in this way looks relief, stylish and fashionable. If you use thick threads, the finished scarf will be voluminous.
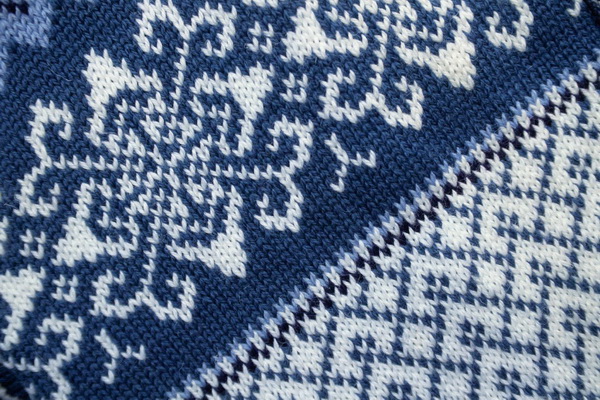
- Jacquard pattern for a scarf. It will be more difficult to make, however, by experimenting, you can get unusual, colorful accessories. With this technique, you can create unique products for women. In the process of needlework, you will always need to keep the pattern in front of your eyes. This will help you not to get confused. Knitting with knitting needles in this way will require preliminary training.
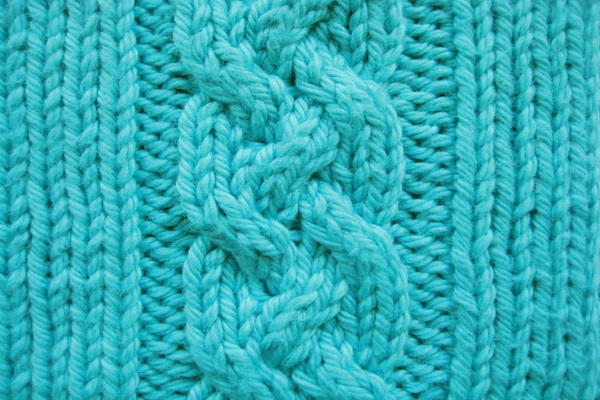
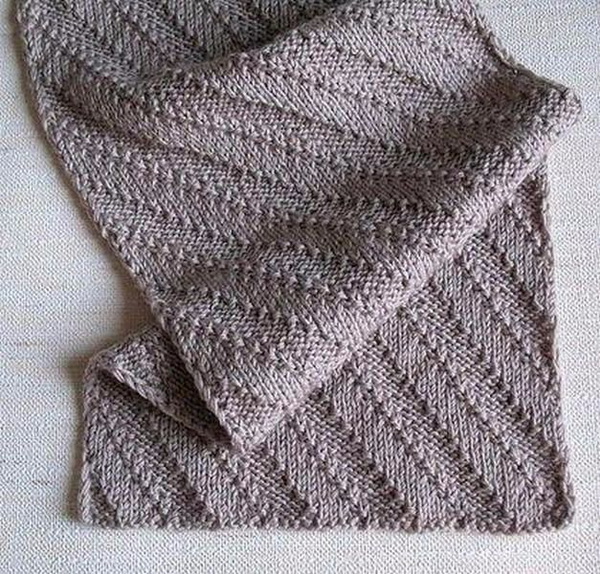
- Embossed patterns for a scarf with knitting needles, for example, braids, plaits and others. They have an interesting appearance and warm perfectly. Such a product will require a lot of yarn. To make it, you need a detailed knitting pattern or video instructions. This method will not be difficult for an experienced needlewoman, but a beginner will have to practice.
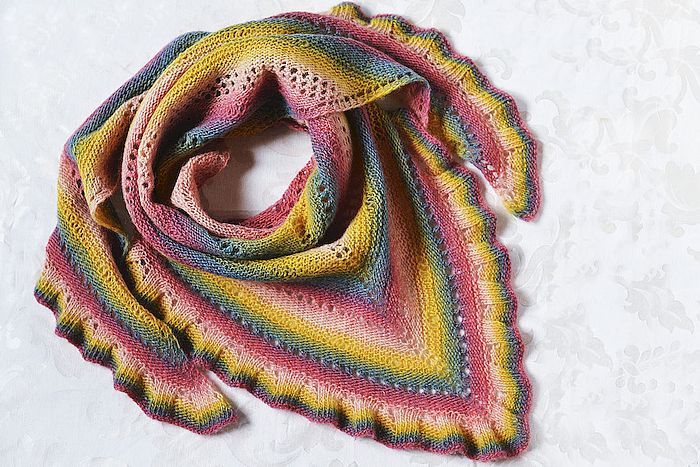
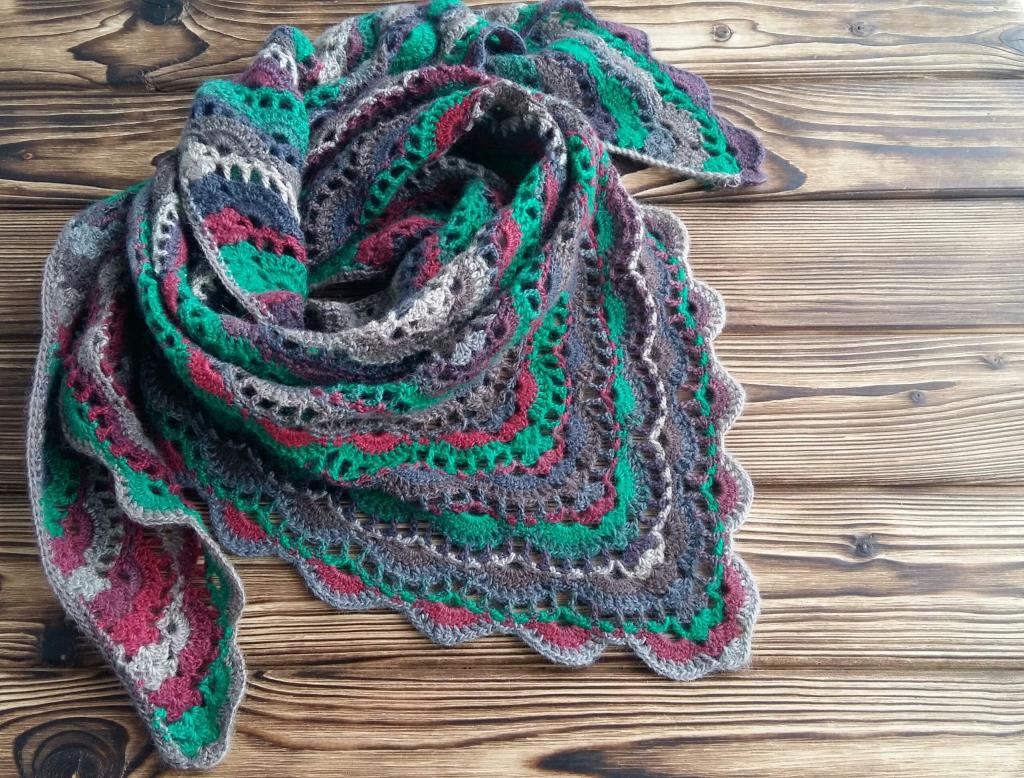
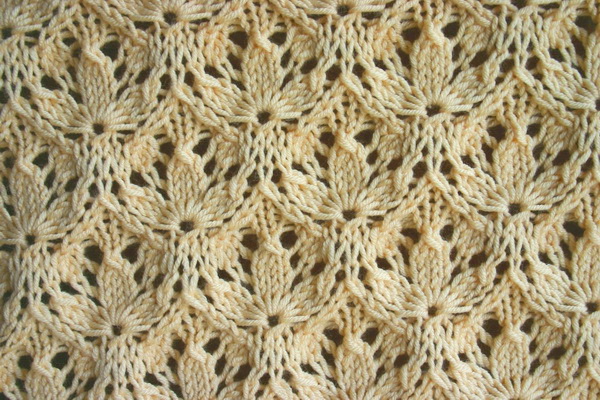
- Openwork patterns. The product is beautiful, delicate and feminine. The item is more suitable for spring or autumn. There are many patterns for knitting a scarf with knitting needles - in order not to get confused, you will have to act according to the scheme.
It is essential to select the optimal density of the product. To do this, you should make a test sample from the threads that you plan to use. It should be 10 x 10 cm in size. After that, wash it and dry it in a straightened state. Then, use a ruler to determine the number of loops horizontally and vertically.
Making a sample will also help to choose the right yarn if the needlewoman cannot decide on this issue.
Materials and tools
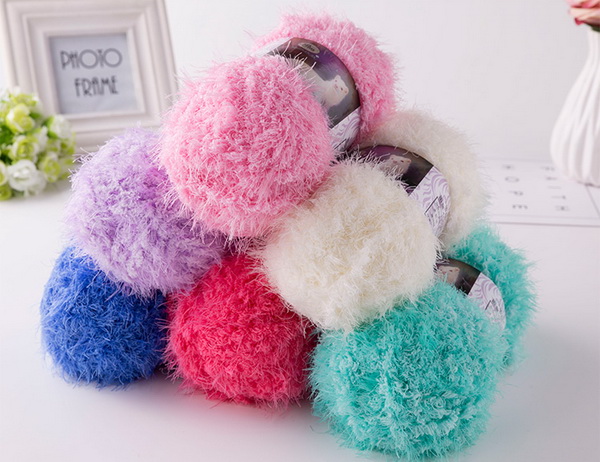
Hypoallergenic yarn is best for making a scarf, since the product will touch your bare neck during use. The threads should be soft and not shed. Acrylic products do not provoke reactions on the skin, so they will be appropriate for adults and children. However, this option is not suitable for a winter model. For frosts, it is worth choosing threads made of wool, semi-wool. Twisted yarn is one of the best options. The product made from it will be wear-resistant and durable.
It is easy to check whether the threads are suitable for knitting a scarf. It is enough to make a loop and pull it sharply; if the yarn does not break, then it is suitable for work.
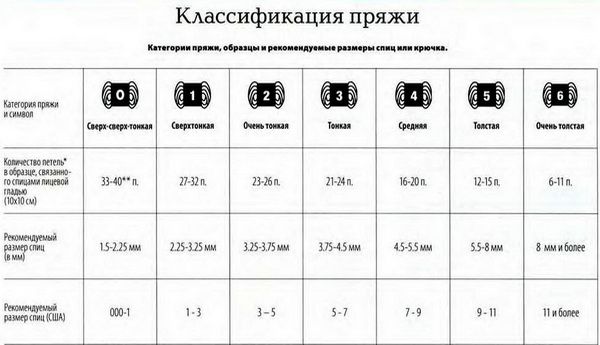
If you need to make a scarf with knitting needles for spring or autumn, it is acceptable to take linen or cotton threads. For a voluminous accessory, you should give preference to thick products. Each type of yarn requires its own knitting needle number, which can be found on the packaging. However, if you want to get a denser knit, you should take a tool with a lower numbering and, conversely, the higher the number, the looser the fabric will be.
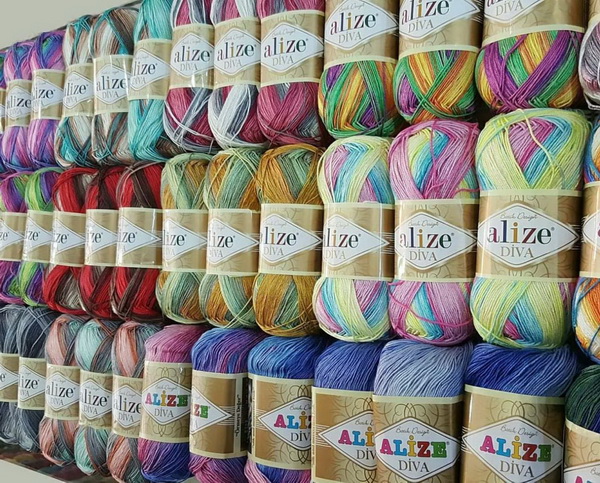
Today, the market offers a wide range of thick yarn, which has quickly won the love of many knitters. You can knit a scarf from such threads very quickly, and the finished models look beautiful and stylish, and retain heat well. However, working with such yarn has its own characteristics:
- there are very few thick threads in one skein, since the material is quite dense;
- this type of yarn comes in a variety of variations, the main thing is to choose the right one for the product;
- When choosing, you need to make sure that the surface of the thread is smooth and even along its entire length;
- You should knit with thick yarn carefully, because if you make the loops too loose, the finished scarf will look untidy; too tight loops will also not decorate the product.
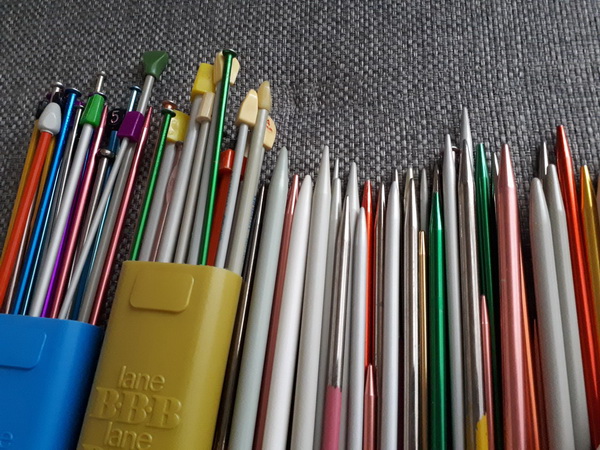
When choosing knitting needles, it is important to consider the thickness of the thread. Taking this indicator into account, it is necessary to select the tool number. As a rule, the recommended numbering is always on the yarn packaging. It is imperative to take into account what pattern the item is planned to be made with.
For a thing that is made with crossed loops and braids, it is advisable to give preference to knitting needles 1.5 mm wider than the thread thickness, for a freer knitting. For an openwork pattern with yarns, dropped loops, choose a tool 0.5 mm smaller. It is worth knitting an elastic band with knitting needles one size lower.

Stages of work taking into account the model
You can make different models of scarves with knitting needles, the patterns will allow even beginners to master the necessary technique. It is not difficult to do this, it is enough to follow the advice given in the master classes. In such instructions, everything is described in stages.
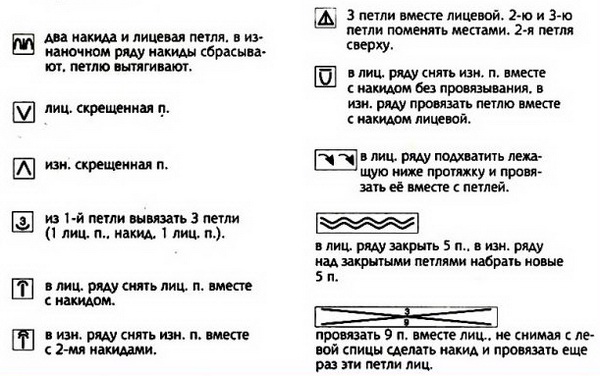
Knitting patterns contain special symbols and designations:
- LP – front loop;
- ip – purl loop;
- n – yarn over.
Sometimes the letter designation is replaced by a special symbol. In this case, the decoding is next to the diagram.
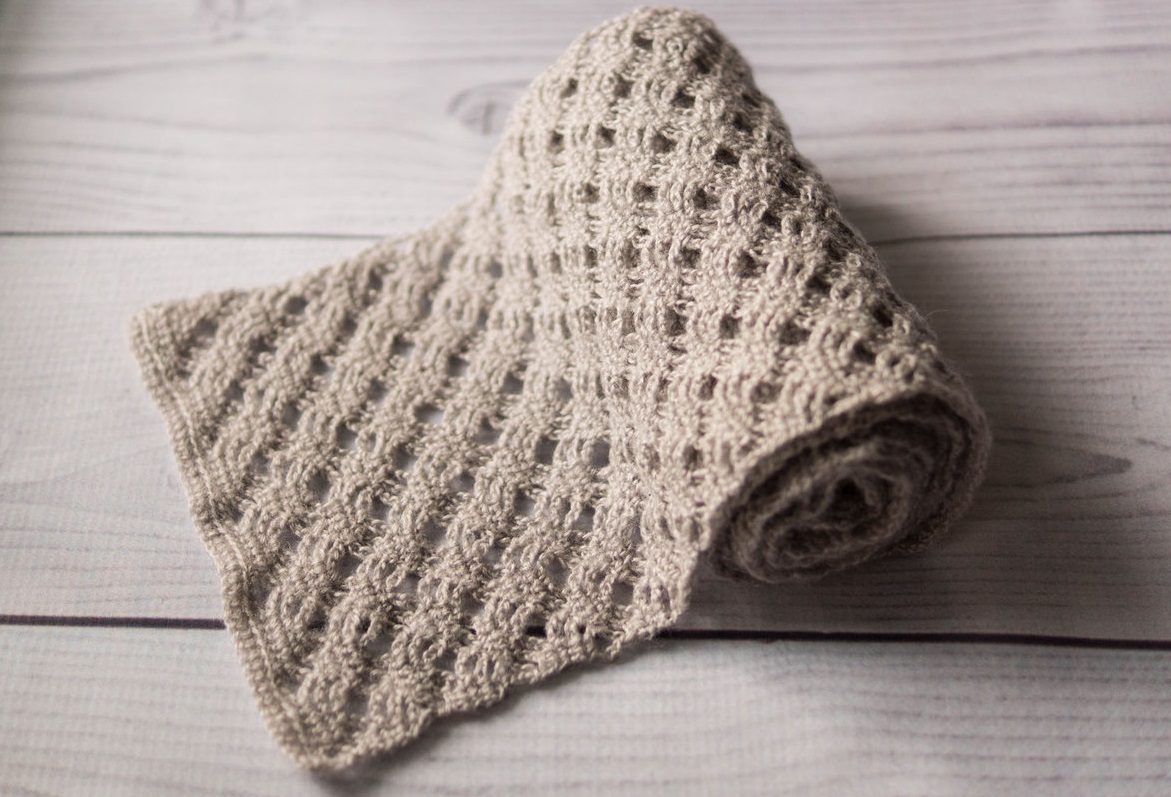
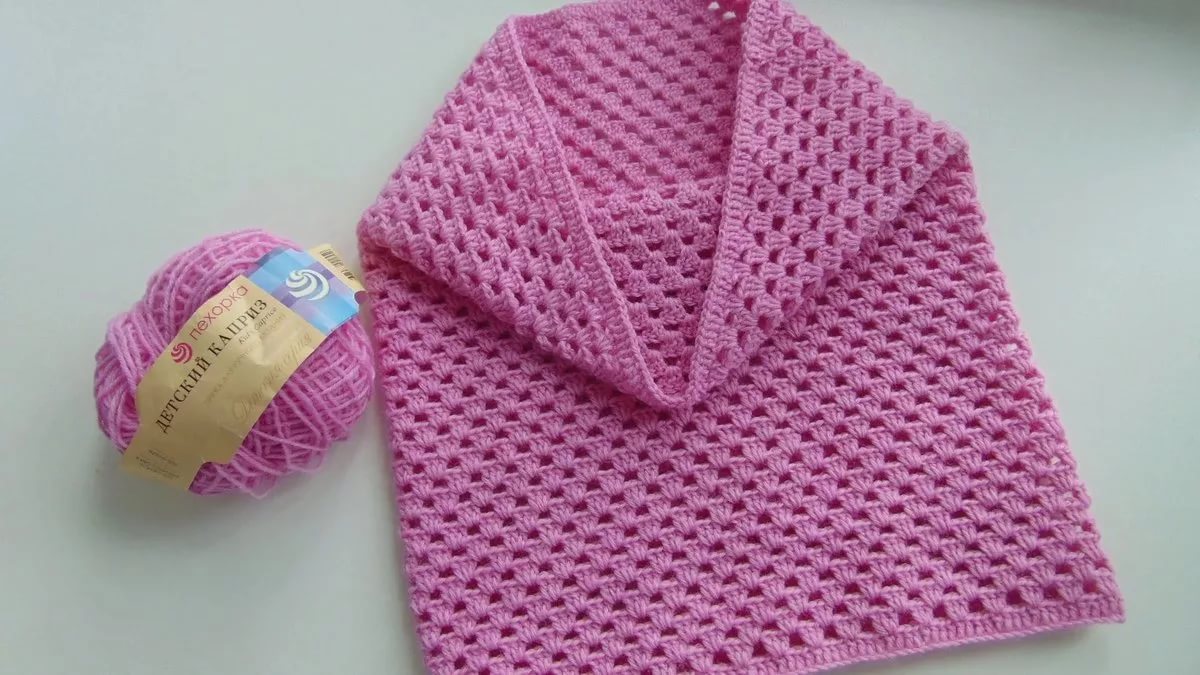
Openwork
To make a delicate accessory, you need to prepare materials and tools. This is a beautiful scarf that has the shape of a cone, narrowed at the top. This is how it is more comfortable to use. For work, you need to select 2 skeins of yarn, knitting needles.
It is not so difficult to knit an openwork scarf with knitting needles, the diagrams reveal in detail the features of the process. Stages of work:
- On 2 knitting needles you need to cast on 153 loops.
- First row - only knit stitches and close the product into a ring.
- The second one is IP.
- Third - front loops.
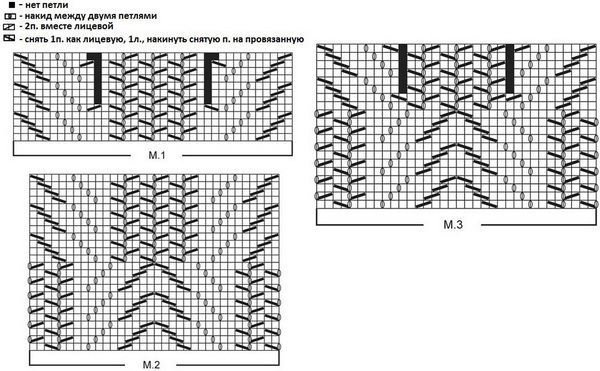
- The fourth row begins with a pattern that is knitted according to a separate scheme.
- First row – 3 knits, 2 together with knits, 4 knits, sl st, 6 knits, sl st, 2 knits together, sl st, 4 knits, sl st, 4 knits, 2 knits together, 3 knits four times, finish with knit stitches. Knit 4 rapports upwards.
- Then take knitting needles 0.5 size smaller and continue working.
- First row: slip 1 st as if to knit, 2 knits, yarn over, slip stitch again, 2 knits, yarn over, 4 knits, slip stitch, 6 knits, 2 sts together with knits, 4, knits, yarn over, 4 knits, yarn over, slip 1 st, 2 knits.
- Second row: 2 knits, 2 sts together with knits, yarn over, 5 knits, slip 1 stitch, 4 knits, 2 sts together in knits, 4 knits, yarn over, 6 knits, yarn over, slip 1 stitch, 3 knits, yarn over, etc. Knit pattern M2 to the end. Also 4 rapports up.
- Next we knit pattern M3, rapport up.
Finish the work with three rows similar to the beginning of the product. The openwork pattern makes the accessory light and weightless. Then close the loops and cut the thread. The openwork scarf is ready.


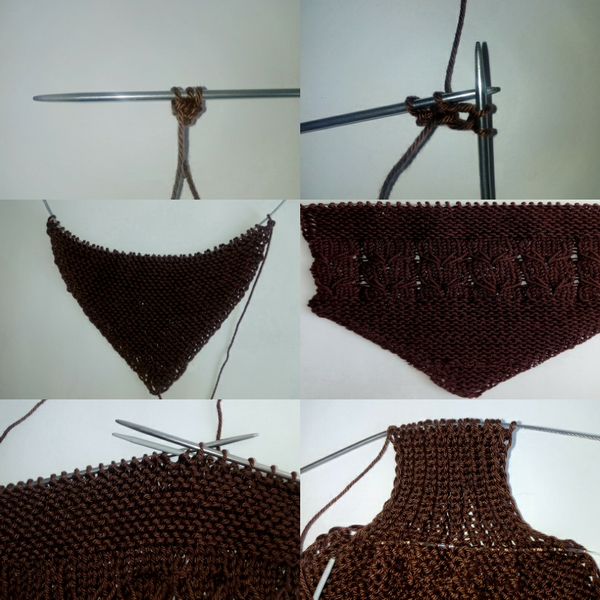
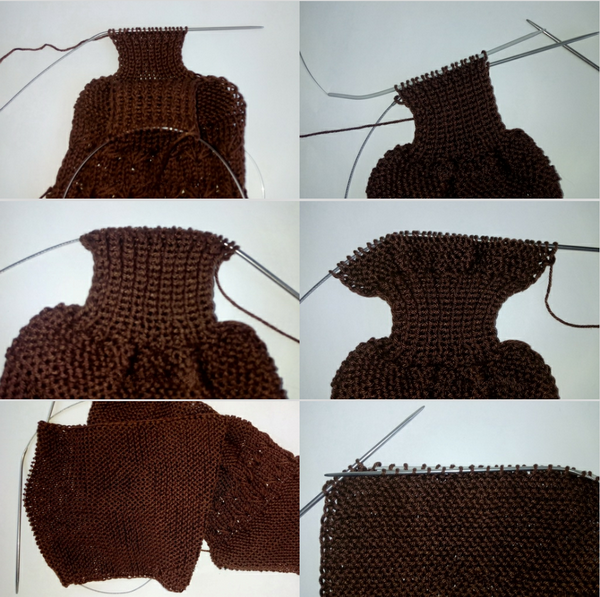
Double loop
This is a very interesting model. Its peculiarity is that it does not require tying. The original scarf has a special loop, into which the opposite end is threaded. The production is carried out with knitting needles, the patterns and description allow even beginners to knit the product.
Knitting work for beginners step by step consists of the following stages:
- cast on the required number of stitches according to the width onto the knitting needles;
- next you need to remove one loop and make a yarn over;
- after – 2 lp, n, edge loop, n, 2 lp, n, edge loop, edge loop, n, 4 lp, n, edge loop;
- in this way the product is knitted to the required length;
- after this, you should take 2 more knitting needles and slip the stitches, alternately onto one and then onto the other;
- then you should knit from one knitting needle to another up to 7 cm in height and again transfer to one knitting needle and finish knitting the product to the required length.
Afterwards, you should also knit the second "tongue". Only you do not need to add or remove loops. The knitted scarf should be washed after finishing the work, and you can wear it.
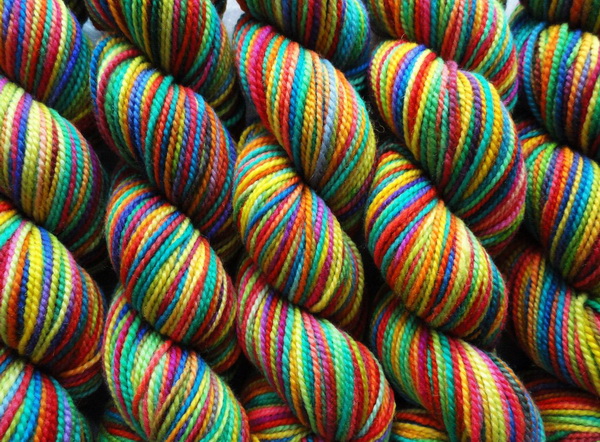
You can make two-color scarves with knitting needles. To do this, it is recommended to select yarn of different shades and change threads during the process.
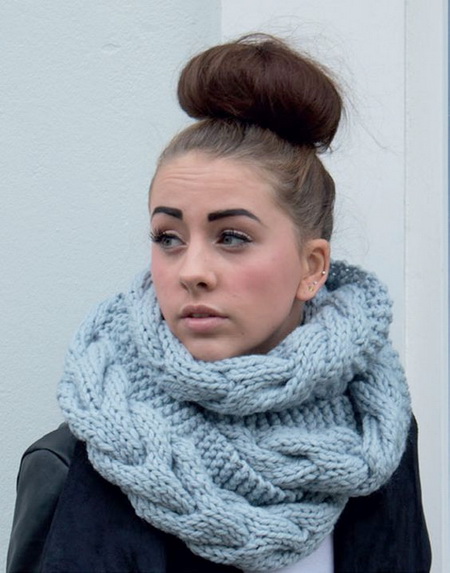
Snood
A thing with a "braid" pattern is a stylish accessory that looks very original. To make it, a little experience in handicrafts is enough. Master class:
- The required number of loops should be cast on the knitting needles. When calculating, it is important to take into account that the distance and thickness between the braid strands should be equal.
- Knit the initial row with knit stitches.
- The next row is knitted, taking into account the appearance of the strands, focusing on the knitting patterns. The satin stitch between the components of the braids is knitted with ip. The interlacing of the strands is knitted with face loops. The pattern is knitted from the wrong side.
- Knit 10 rows in a similar manner.
- On the front side, make an interlacing.
- Divide the loops marked for the cord into two parts. Leave one half on the working needle, and transfer the other to the auxiliary one. Then knit according to the pattern chart.
- You need to knit using this method until the end of the row.
- Then you should turn the product over and knit according to the pattern again.
When knitting, you should remember about the loops on the additional needle. In this way, you need to work to the desired length. Then the loops need to be completed and the product connected. The snood is ready.


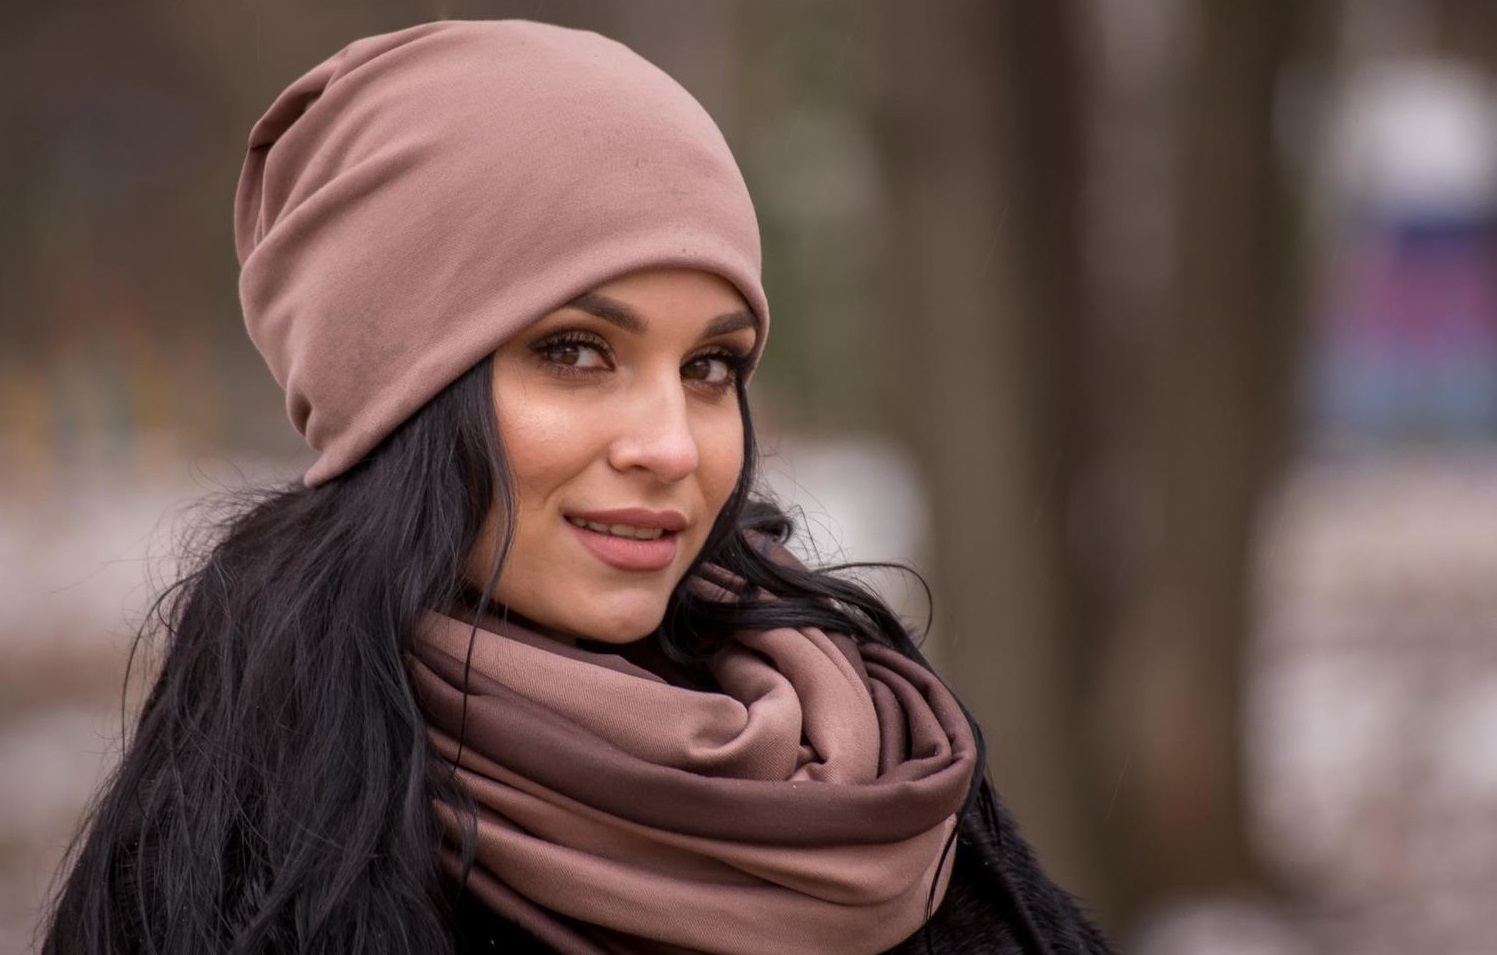
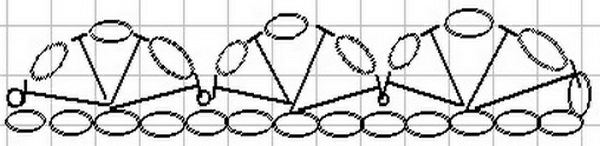
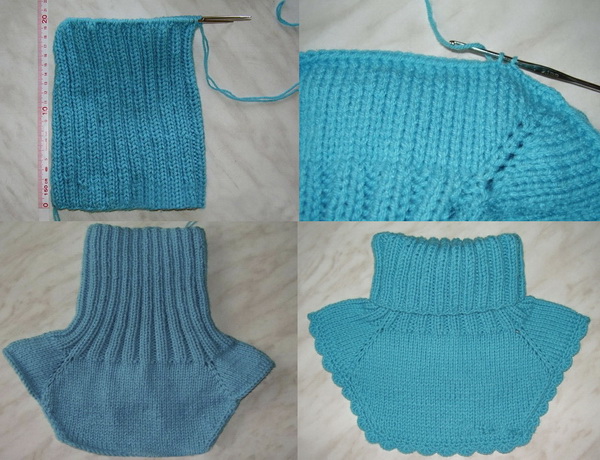
Collar
A women's scarf-collar is made simply - by alternating front and back loops. You need to knit in a circle. Rows are made using front loops over front loops, back loops over back loops.
The initial stage is knitting the collar. It starts with the neck using stocking stitch. The height is determined based on personal preferences. The collar can be made with a turn-up. During the work, it is necessary to periodically try on the item. Instructions on how to knit a scarf with knitting needles for beginners:
- First of all, you need to cast on the required number of loops on the tool and knit in a circle about 20 cm on both sides.
- Next, make the neck - divide it into the front and back parts. Knit the raglan, dividing the loops into 6 parts. Put 4 loops aside for the yoke. Knit the side parts at the rate of 15 loops for each. All marks should be made with a marker beforehand. Make the front part at the rate of 31 loops.
- In places marked with a marker, the product expands. After them, add one loop. Every other row, you should also add a loop.
- Next, you need to change the knitting needles to circular ones and knit the collar with the front surface. The product needs to be knitted to the desired length.
Once finished, you need to close the loops. You can decorate the edge of the product with an openwork crochet trim. The scarf-collar is ready.

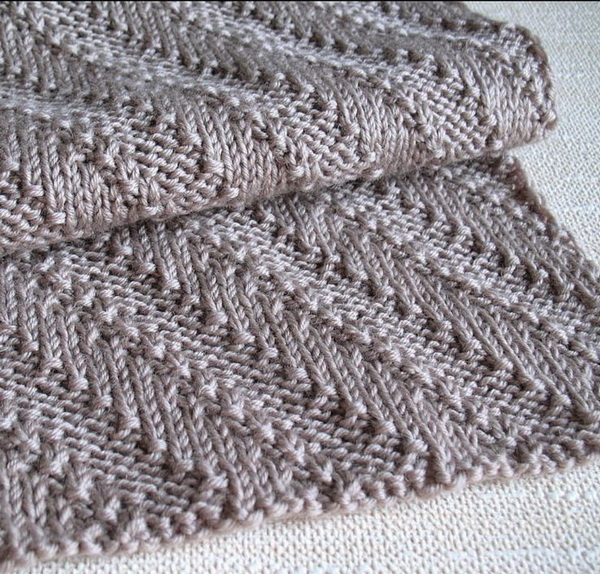
Double sided
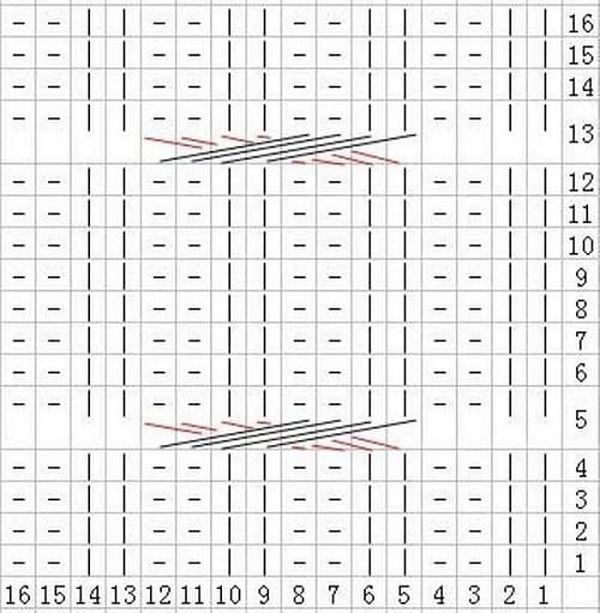
Double-sided knitting patterns for a scarf assume that the product looks the same on both sides. To work, you need to dial the required number of loops, a multiple of 3, taking into account two edge loops. Knit a double-sided pattern according to the scheme:
- First row – 3 knits and 3 ips.
- In all even numbers, knit over knit stitches, and knit over purl stitches. Then follow double-sided patterns with knitting needles.
- In the third row 1 ip, 3 lp, 3 ip, 3 lp, 1 ip.
- After – 2 sp, 3 sp, 3 sp, 3 sp, 1 sp.
- Row 6 is knitted according to the algorithm: 3 ip, 3 lp.
- Next row: 1 knit, 3 ip, 3 knit, 3 ip, 2 knit.
- 11th row – 2 LP, 3 SP, 3 LP, 3 SP, 1 LP.
- From the 13th row everything is repeated.
The product is knitted to the required length. Double-sided patterns continue throughout the product. Upon completion, the loops are closed. The double-sided scarf is ready.

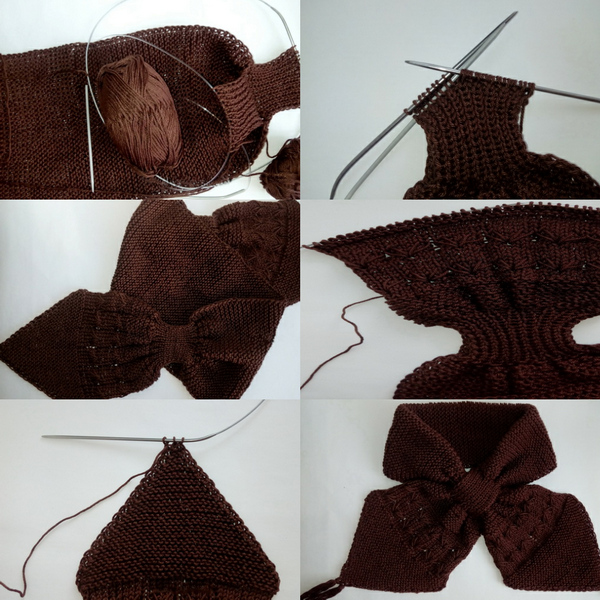
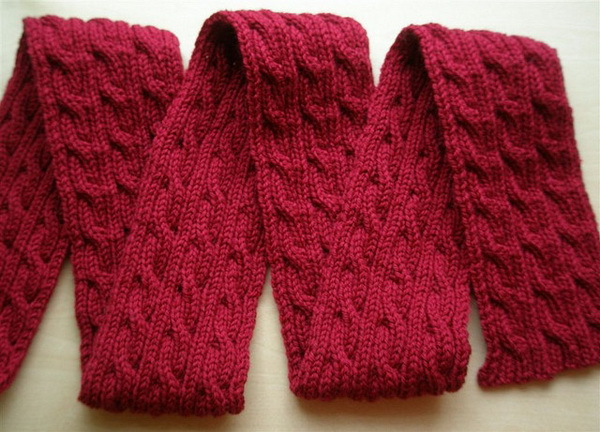
Transformer elastic band with button
This is an interesting model of a scarf-transformer, which can be easily turned into a vest, a cape. For work you will need knitting needles, two buttons with a diameter of 2.5 cm and, of course, suitable yarn. Sequence of work:
- Cast on stitches onto the knitting needles. Their number should be divisible by 4.
- Next, knit the product with a rib pattern. Row – 3 knit stitches, 2 ip, 2 knit stitches, so on until the last 5 stitches, then – 3 ip, 2 knit stitches.
- Second row – 3 ip, 2 knit, 2 ip to the last 5 loops. Then knit 2 knit, 3 ip.
- Alternate these rows until the desired length of the product is achieved.
- After that, you need to fold the scarf in half and mark where to attach the buttons.
Next, all that remains is to sew on the buttons, and the transformable scarf is ready. If desired, you can decorate it with fringe, tassels or pompoms.


![]()
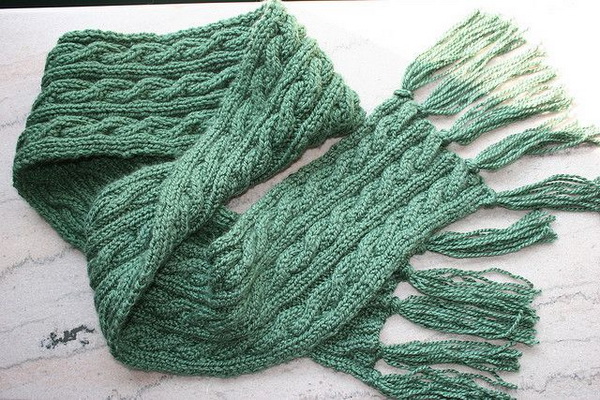
With braids
Scarves with braids are similar to weaving. Provided that the master class sequence is followed, you can easily get an elegant product. Even a beginner knitter can make such an accessory. Master class:
- The first thing you need to do is knit the loops (in the required quantity). At the same time, you should add 5 loops on each side to create the edge.
- Remove the first loop, then knit 5 knits, 2 ip, 9 knits, 2 ip, 8 knits, 1 ip, 8 knits. Knit like this twice and finish with 5 knits, 1 ip.
- Second, knit all even rows like this: edge, 5 knit stitches, over purl stitches – knit stitches, over knit stitches – purl stitches. Repeat this twice. After – 5 knit stitches, edge stitch, turn.
- Knit 3 rows in the same way.
- After the row, use the following method: edge, 5 lp, 2 ip, 3 lp.
- Then a braid of 6 loops on the left side begins. The first 3 loops need to be transferred to an additional knitting needle, make 3 knit stitches, knit the loops from the additional knitting needle. After that, make 2 ip, 8 knit stitches, 1 ip.
- After – a braid of 8 loops, crossed to the left. First, 4 loops need to be thrown onto an additional knitting needle and knitted with face loops. Repeat this twice. After – 5 knit stitches, edge stitch and turn.
- Knitting should be repeated from rows 1 to 12 until the desired length is reached.
- After this, all that remains is to close the loops in any way.
You can leave the product as a piece of cloth, or you can sew it and get a snood.
Children's with tassels
This warm accessory will keep you warm in cool weather. To make scarves with knitting needles, you will need to prepare yarn and tools. The work will not be difficult if you follow the recommendations of the master class:
- First, you need to cast on the number of loops indicated on the diagram.
- Remove the first loop and then knit a row with a rib pattern - 3 knit stitches, 3 ip. Make the last loop an edge stitch.
- Work in this manner until the required length is reached.
It remains to close the loops, then cut the yarn for the tassels. You will need about 18 bunches of 20 cm each. You need to divide them into two equal parts, thread them with a hook and secure them along the edges of the accessory. The children's scarf with tassels is ready.
Knitting a scarf yourself is a way to make a unique thing, an opportunity to show creativity, relax and unwind. With its help, you can add femininity, style, and originality to your appearance. It does not matter whether it is a simple scarf or some unusual, interesting model.

Video