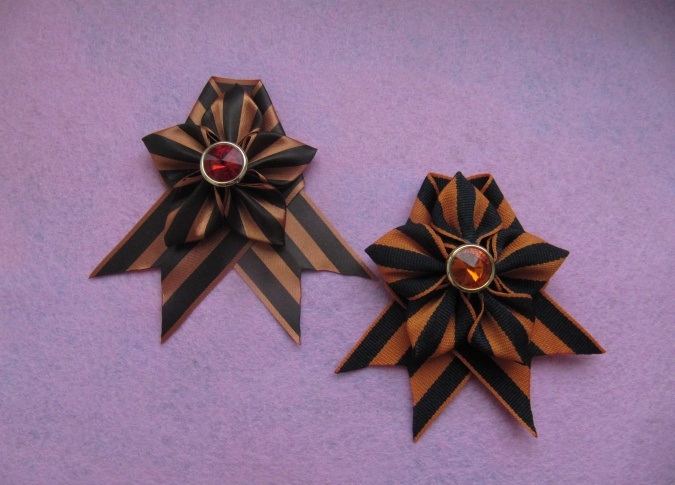
Victory Day is associated with the St. George ribbon for many people. During events dedicated to this great holiday, people, demonstrating unity, respect for living veterans and grief for the fallen participants of that terrible war, attach this attribute to their chest. Most often, the St. George ribbon is decorated with your own hands, kanzashi - a special technique of folding fabric helps to create real masterpieces from it. Beautiful brooches not only carry a certain message, but also decorate their owners. It is quite easy to make a victory symbol, you can even involve children in the process, which will be an excellent reason to tell them about those terrible times.
Features of symbolism
The St. George ribbon is one of the most recognizable and popular symbols of Victory in the Great Patriotic War today. Its coloring has a special meaning:
- orange - the eternal fiery flame of war;
- black - smoke from burnt cities and villages.
In the 18th century, Catherine II signed an order to found the Order of St. George the Victorious, which became an award for special services to the Motherland. The order was attached to a strip of black and orange fabric, which was called St. George's.
During the Soviet era, servicemen were awarded the "Guards Ribbon", the coloring of which was similar to the ribbon of St. George the Victorious. During the Great Patriotic War, the ribbon bar of the Order of Glory was covered with black and orange fabric. All these facts explain why the use of the St. George ribbon as a symbol of Victory is logical and acceptable.
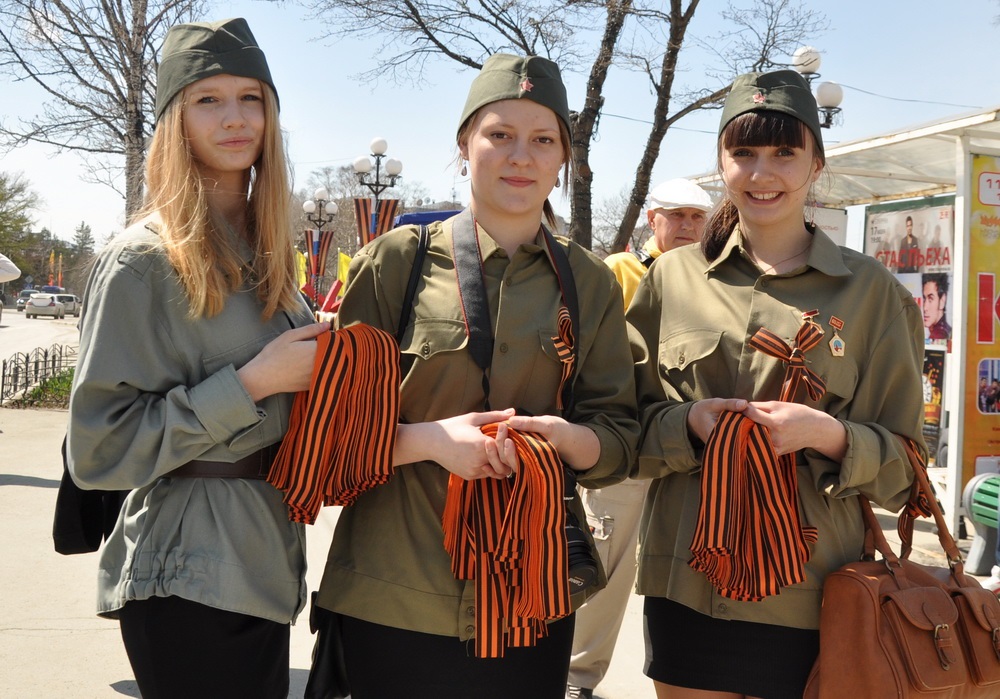
In 2005, the RIA Novosti news agency staff first organized the St. George Ribbon campaign for Victory Day. Their desire was to pay tribute to the participants of this terrible war, who stood firm and died on the battlefields. The creation of symbols that carry the depth of the legacy of the Great Patriotic War led to the spread of the campaign throughout the country. Every year it gains momentum, attracting more and more people.
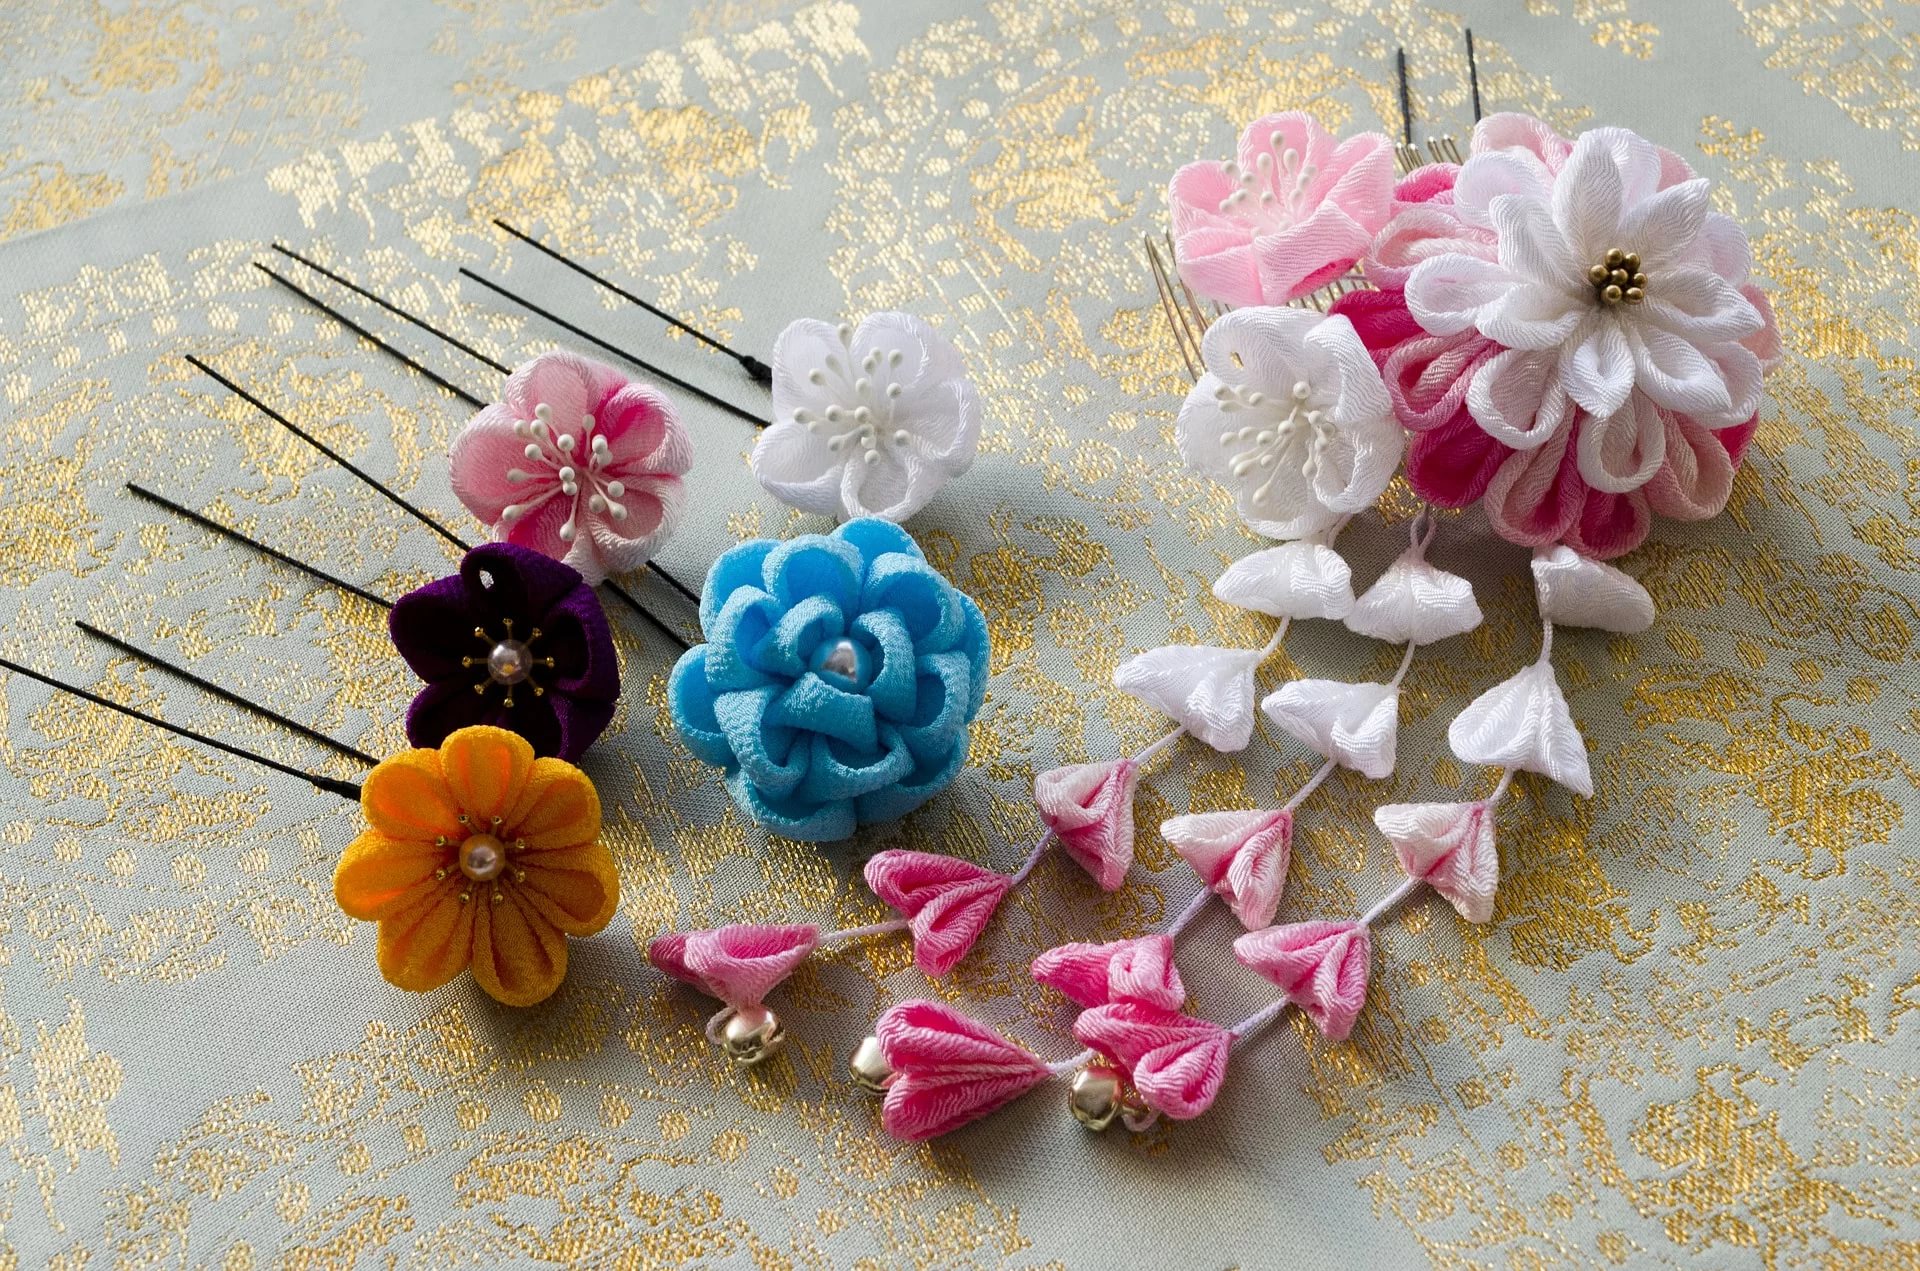
Methods of production using the kanzashi technique
St. George ribbons made with your own hands using the kanzashi technique can be given to dear, close people, or attached to the chest on May 9. Accessories resemble beautiful brooches, being both a symbol of victory and an original decoration. Making a kanzashi ribbon with your own hands is not difficult, you just need to follow the instructions, which will be a great help for beginners.
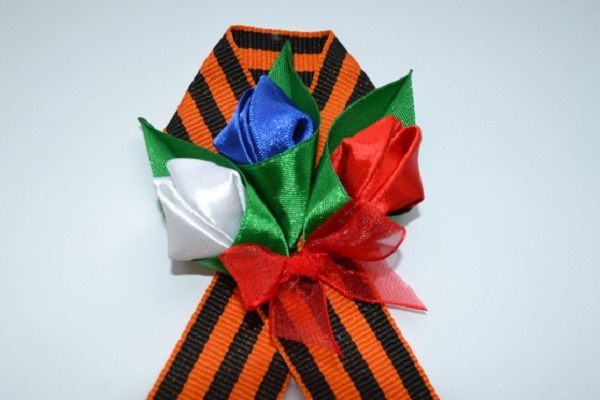
Brooch with tulip buds
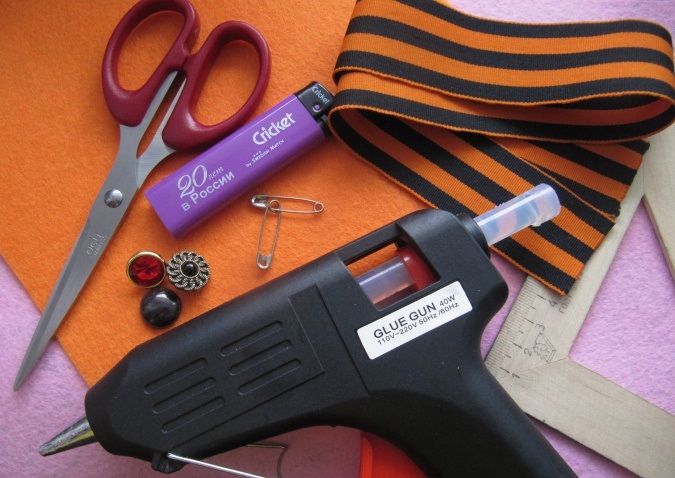
It won't take much time to create a kanzashi brooch from St. George's ribbon, decorated with beautiful tulip buds from satin ribbons. Anyone can handle the task. You just need to prepare the necessary materials for working in the kanzashi technique:
- narrow long strips of satin fabric in white, blue, emerald, red colors;
- St. George's ribbon;
- pin;
- glue, heat gun;
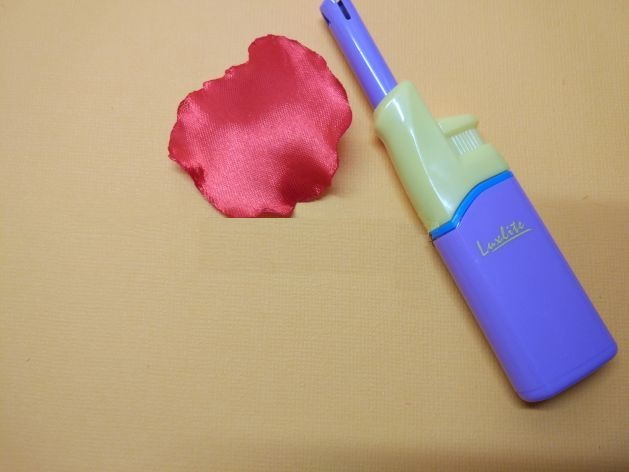
- a small gas burner or candle;
- ribbon for bows.
Now you can start your handicrafts:
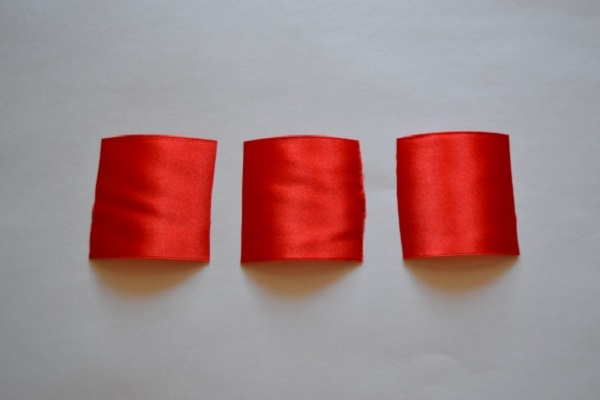
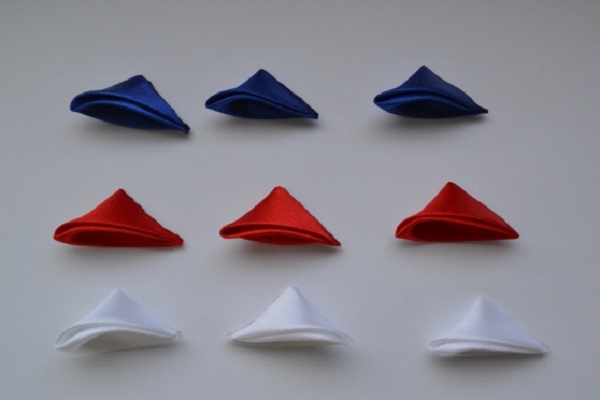
- Make three squares with sides of 5 cm from red, white and blue ribbons.
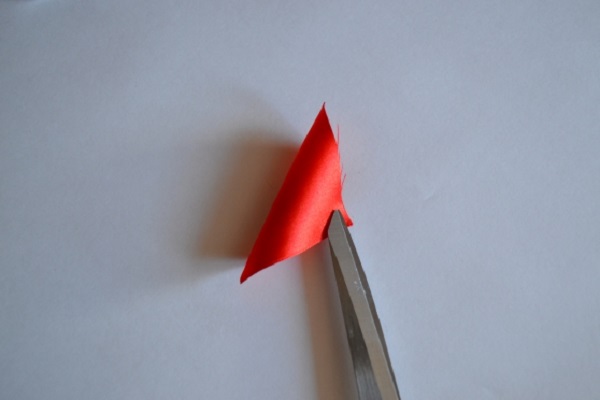
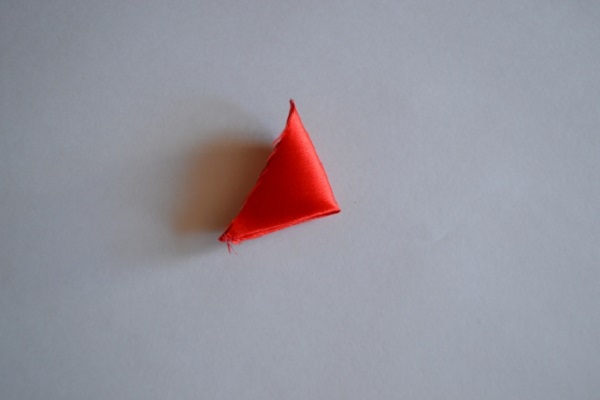
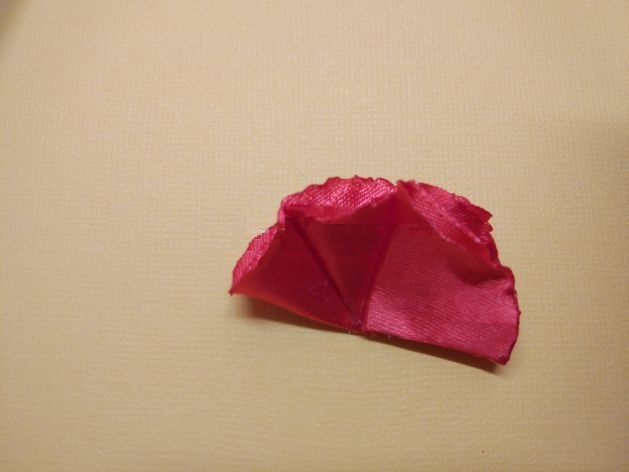
- Fold the elements diagonally. Melt the edges of the resulting parts slightly, connect them, and then turn the blanks to the front side.
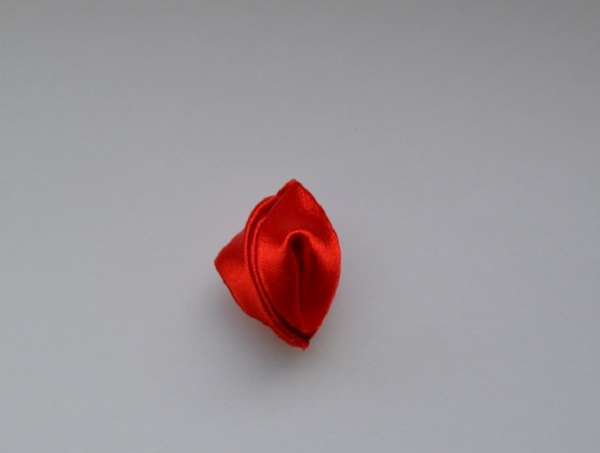
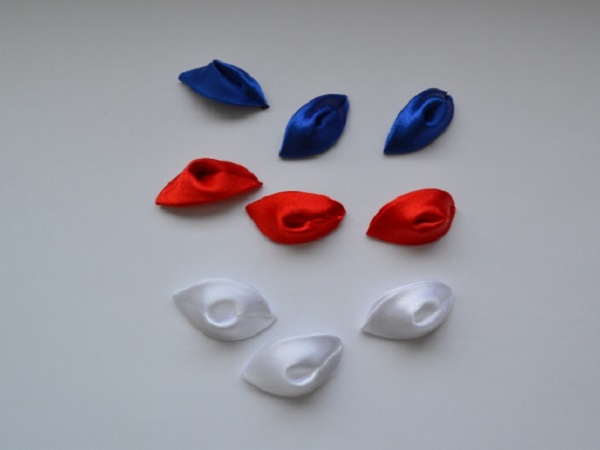
- Form buds from satin elements, connecting petals of the same color with glue.
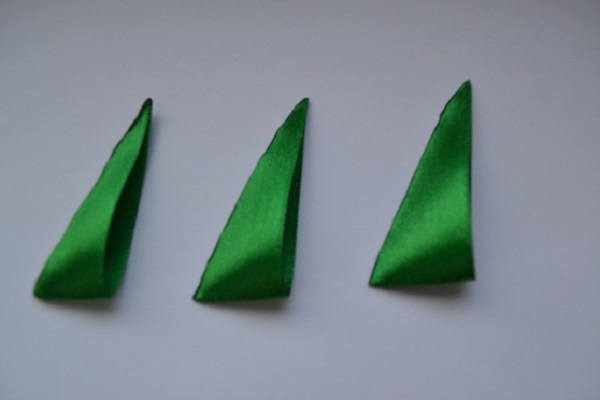
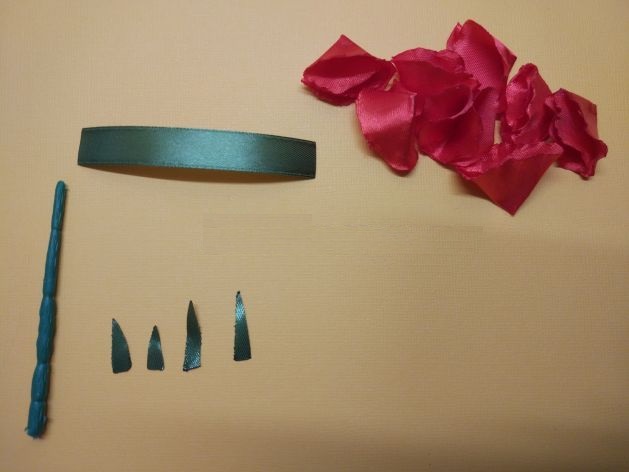
- Cut a 10 cm piece of emerald ribbon. Roll it into a cone, lightly singe the edges with fire, and glue together. The result is blanks that resemble tulip leaves.
- Place flowers inside and fix them with glue. Then form a bouquet. Make a bow from a thin ribbon and decorate the composition with it.
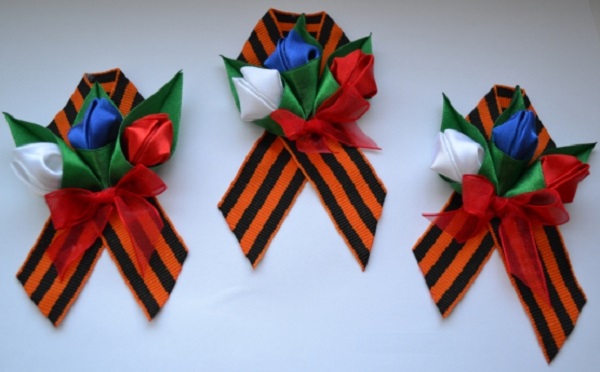
After that, it remains to fix the bouquet on the folded St. George ribbon, which is placed on the pin. The kanzashi-style brooch is ready. This master class shows how to create a tricolor in the form of three tulips.
You can make buds in one color - you will get an equally original composition, or make a brooch from St. George ribbons, where only one tulip is attached.
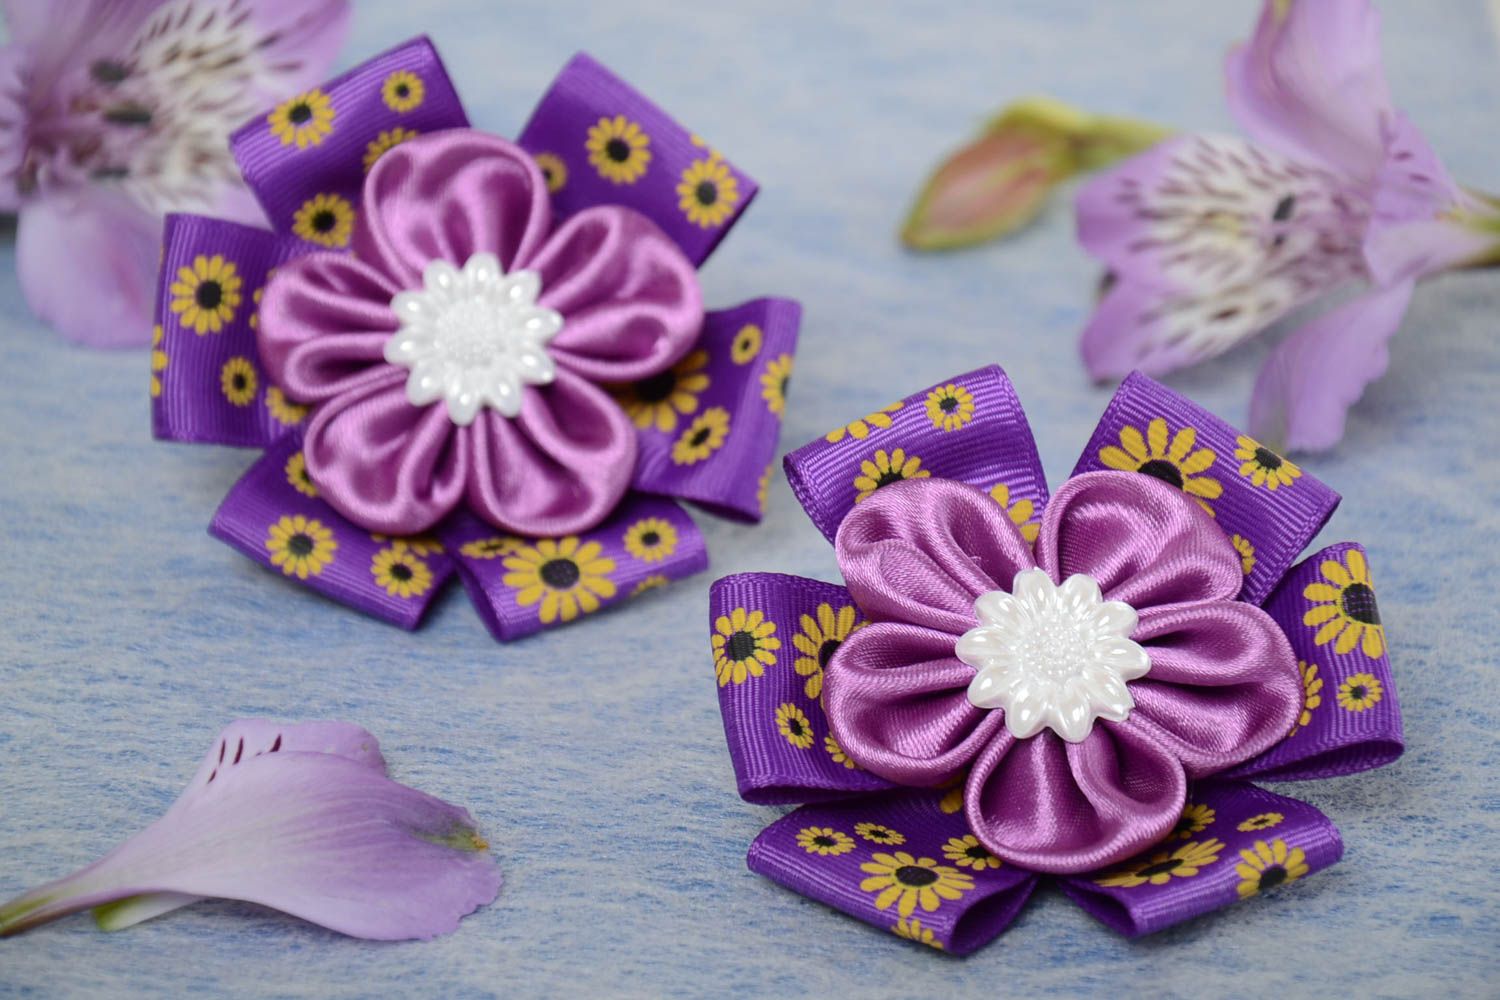
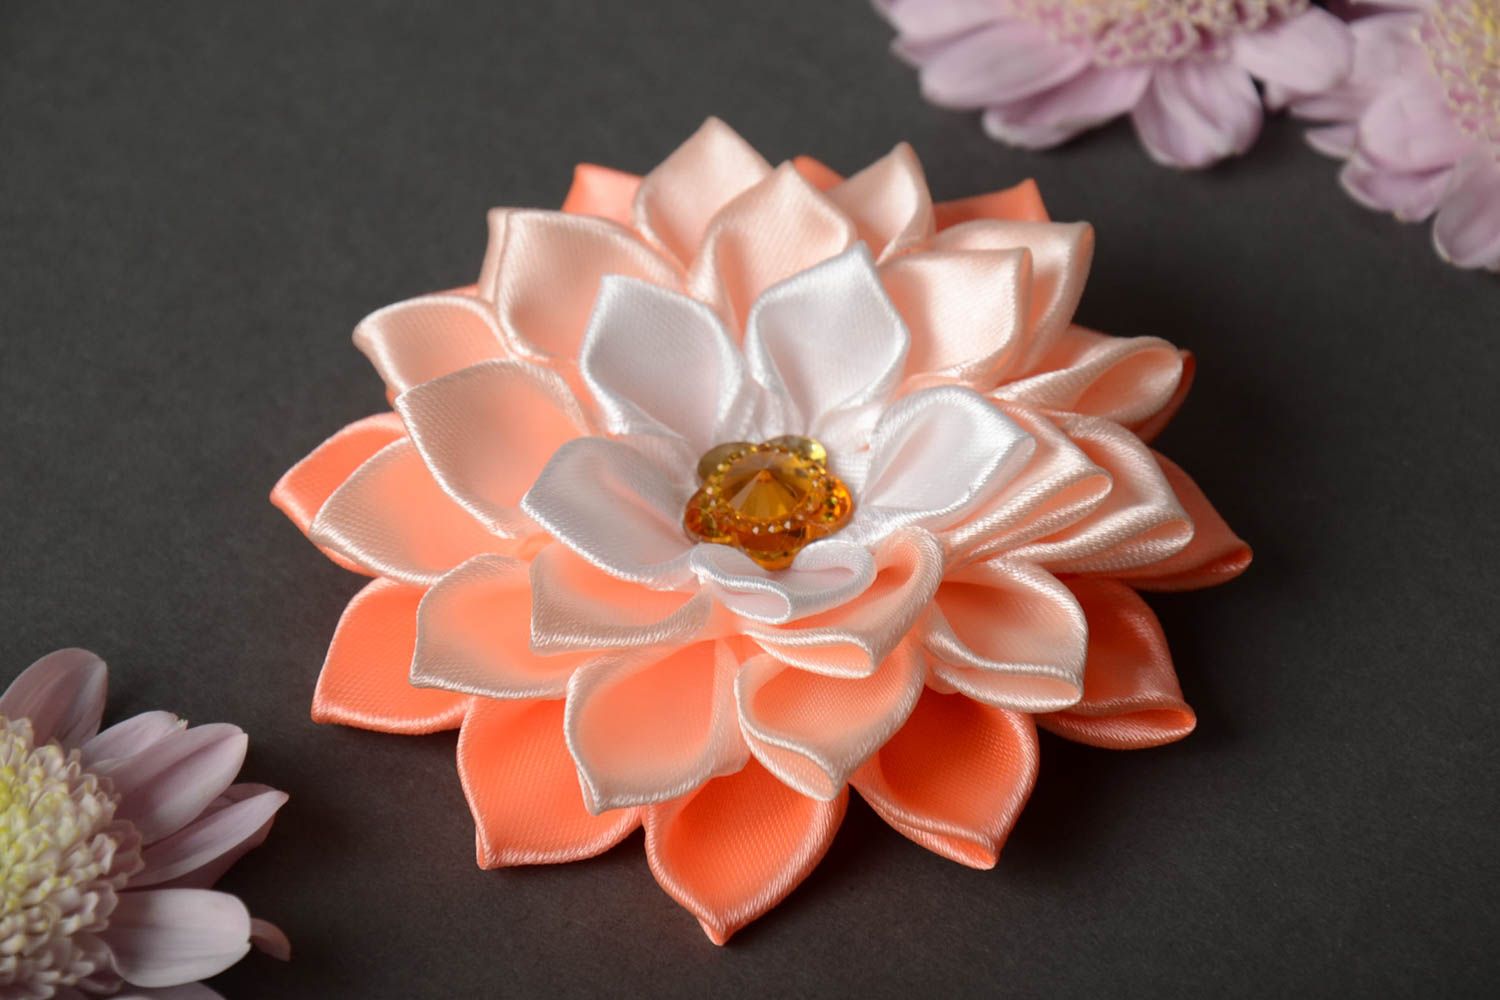
A flower with round or pointed petals
St. George ribbons with kanzashi flowers attract everyone's attention and always look very elegant. A strict accessory symbolizing involvement, gratitude for the Victory, love for the Motherland, is appropriate both at official events and during ordinary walks on May 9. Making a kanzashi brooch does not require special skills, large material or time costs.
You will need the following tools and materials:
- St. George's ribbon - 60 cm;
- beads or rhinestones;
- base for a brooch;
- centimeter;
- scissors;
- tweezers;
- candle or small burner;
- glue.
Instructions for making a brooch for May 9:
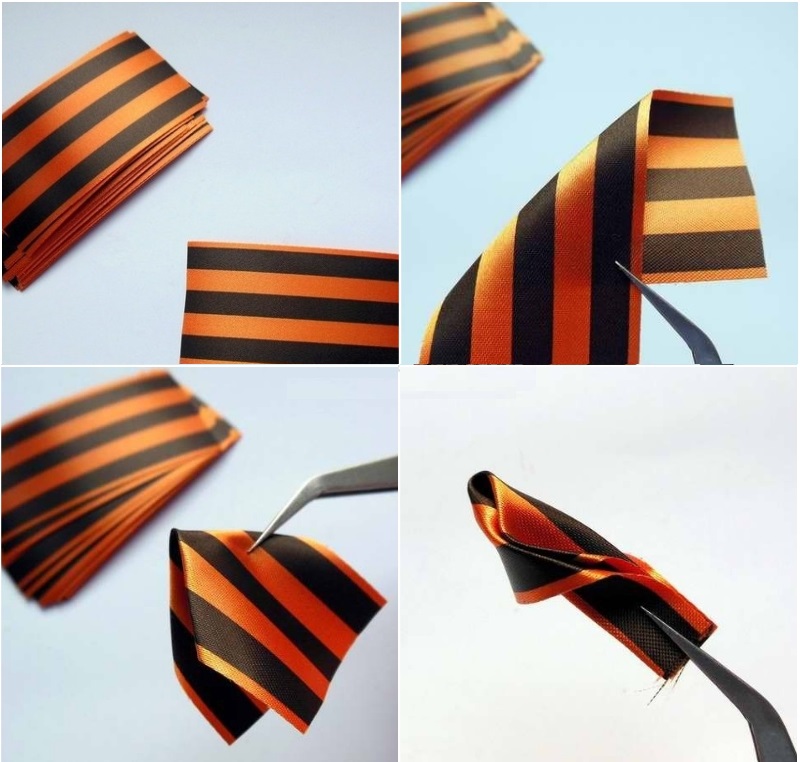
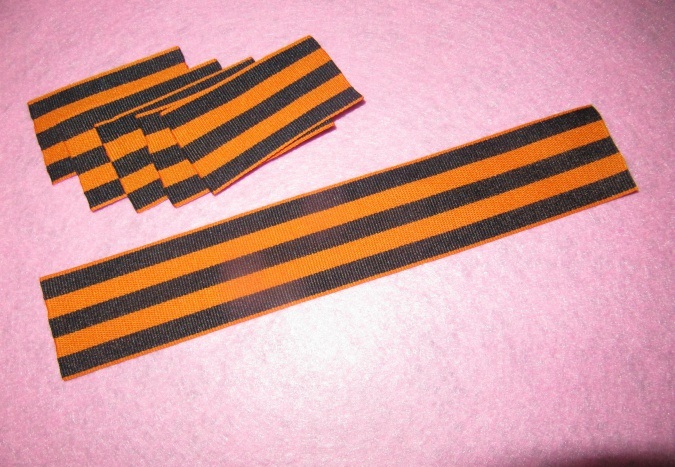
- Prepare five pieces of ribbon, 7 cm each.
- Form a right angle from one piece, align the lower parts. Then bend the lower side so that it matches the upper one. After that, cut off the flat fragment, melt the edges and press them together, achieving gluing.
- Prepare 5 petal blanks in the same way.
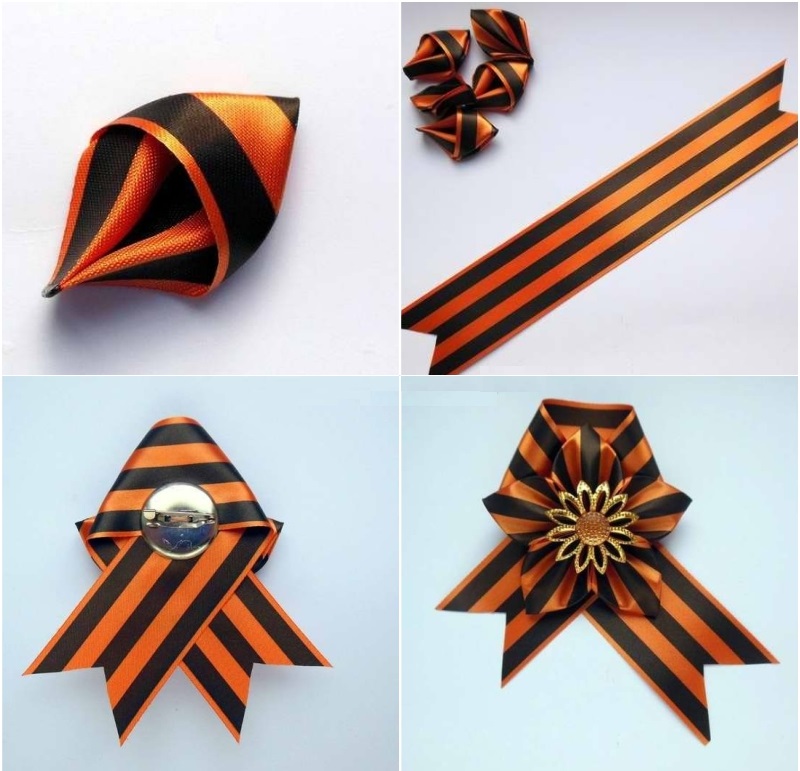
- Cut 20 cm of ribbon and flame the ends.
- Fold the strip of fabric into a loop, secure with glue, and attach the base to the back with a pin.
- Place and glue the flower-shaped petal blanks on the resulting base. Decorate the middle with a bead or rhinestone.
The flower brooch is ready. Such decoration, made by hand for May 9, will be a worthy gift to a loved one.
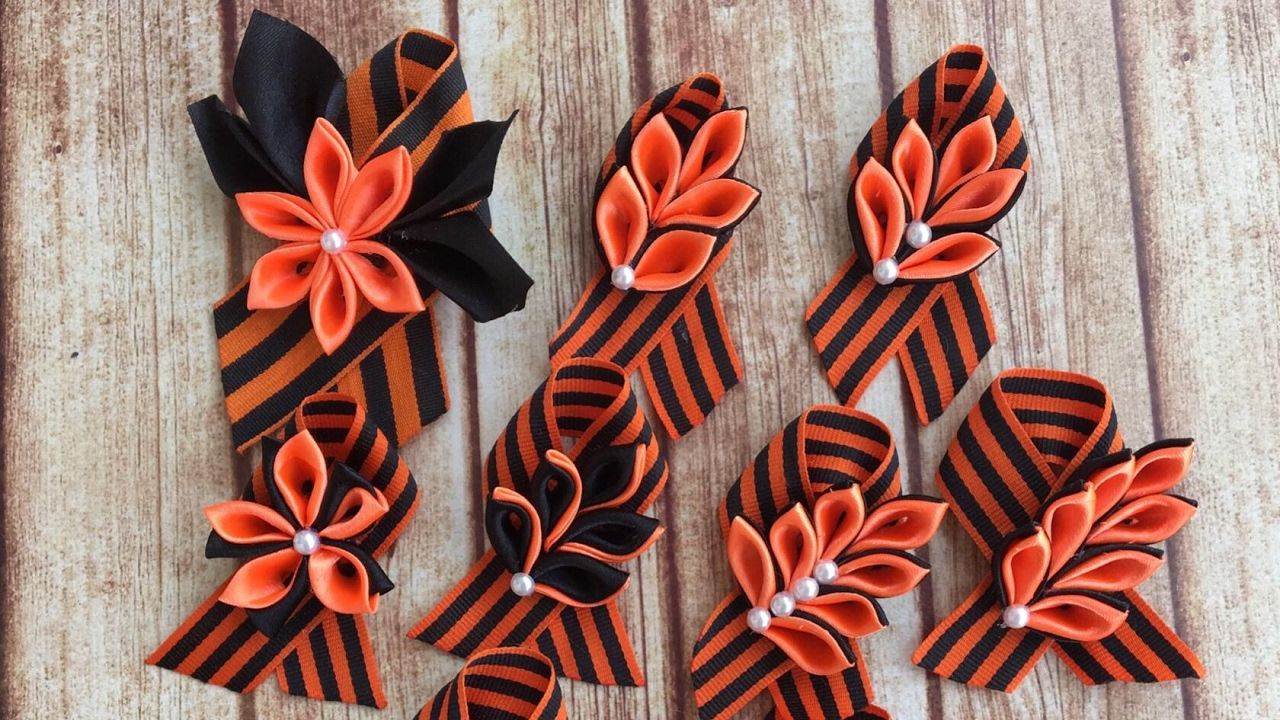
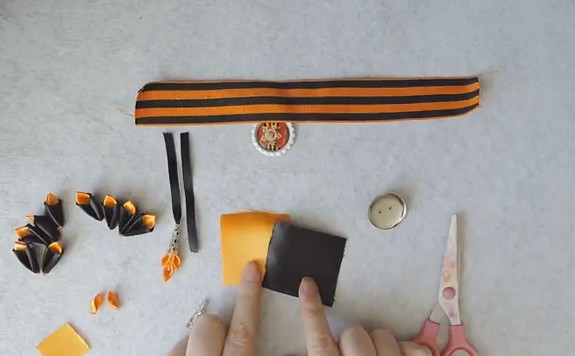
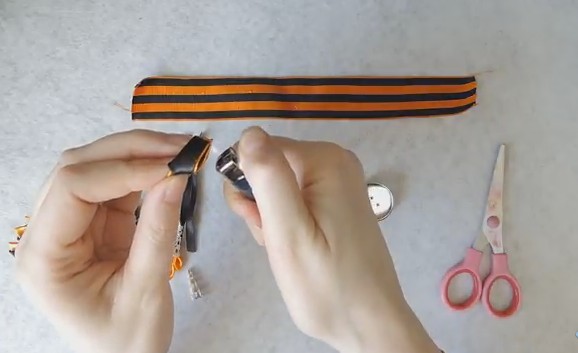
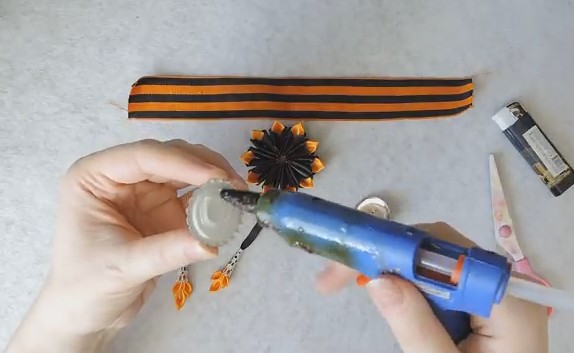
Accessory with spikelet
The Japanese technique of kanzashi is also used to create another unusual thematic brooch. The finished decoration looks very original, and the manufacturing process itself will not cause any difficulties.
You will need the following set:
- St. George's ribbon;
- satin ribbons of black and orange colors;
- tweezers;
- black beads;
- glue;
- scissors;
- a lighter, a candle or a small gas burner.
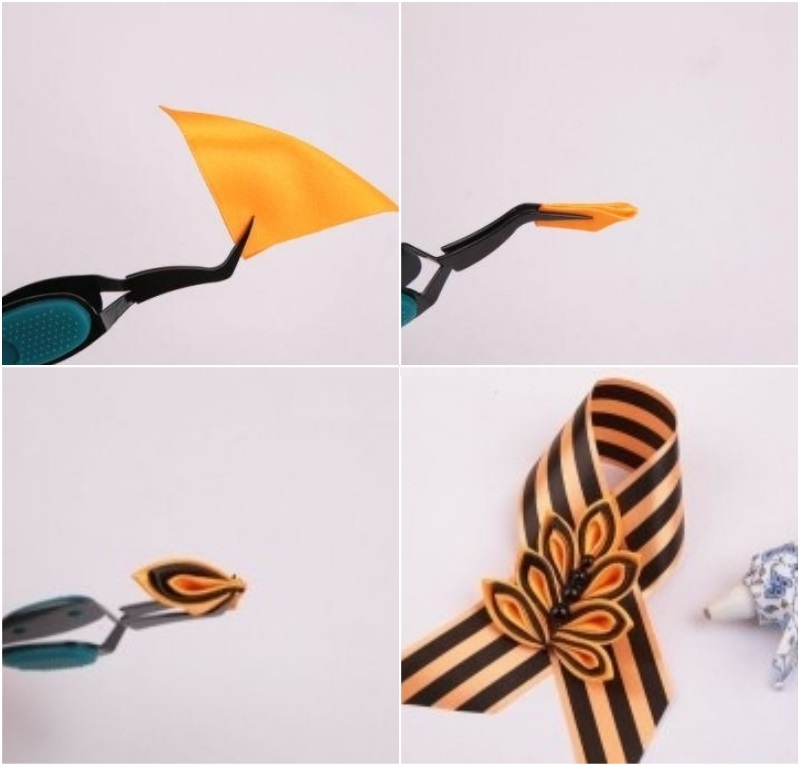
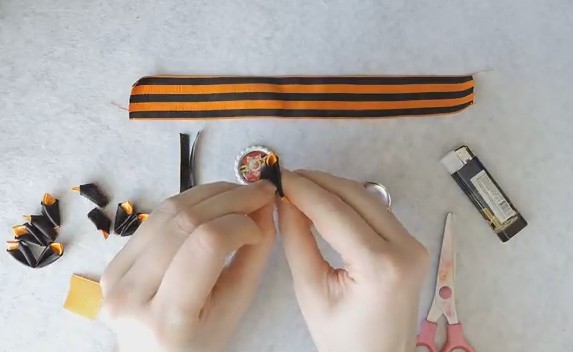
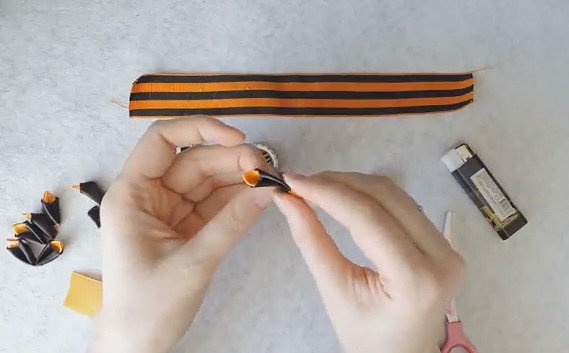
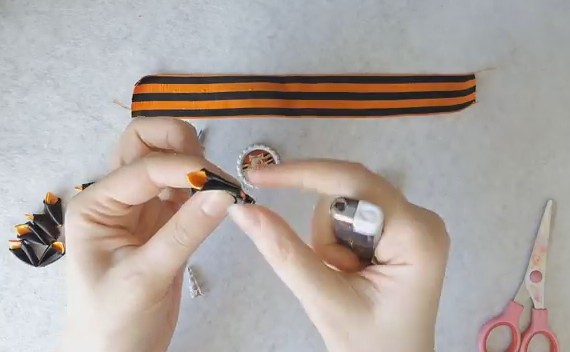
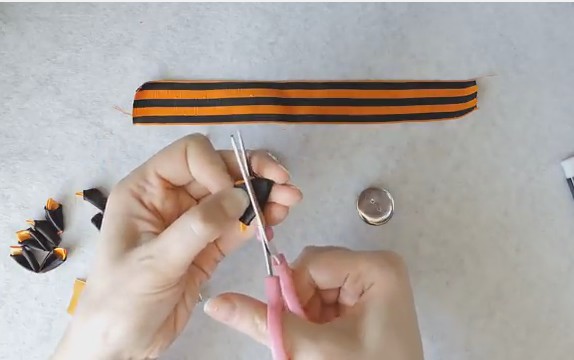
Instructions for making:
- Cut the satin ribbons into square pieces with a side of 5 cm - you will need 7 such pieces. Melt the edges with a flame.
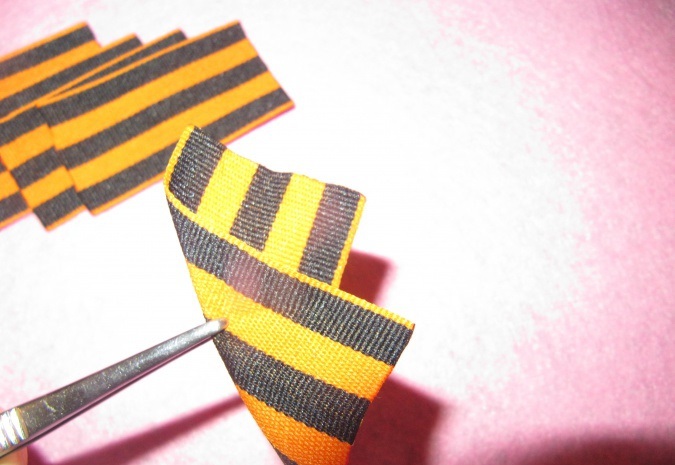
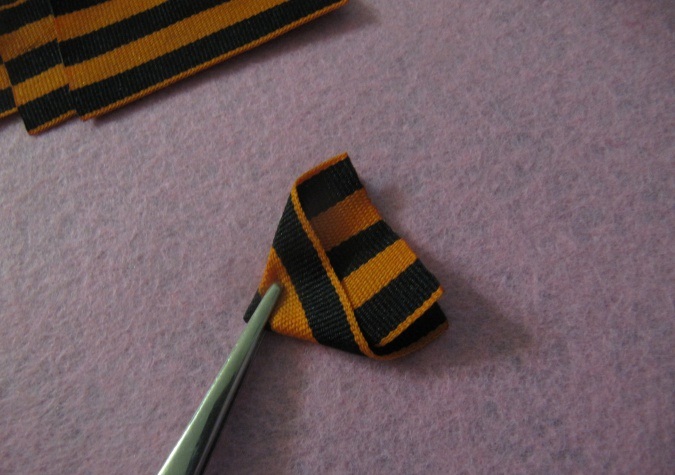
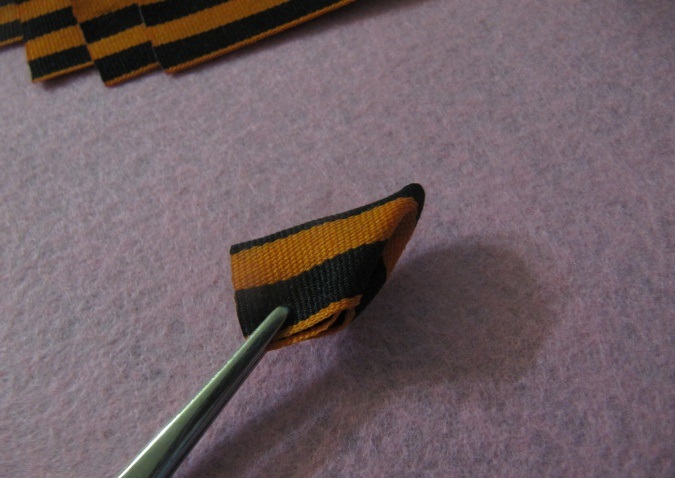
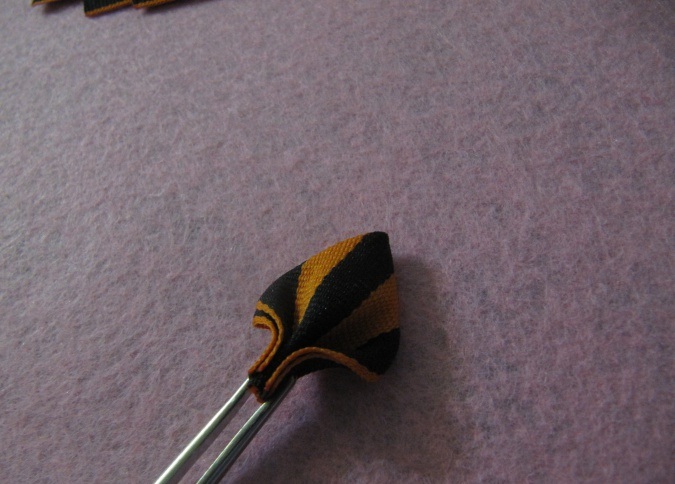
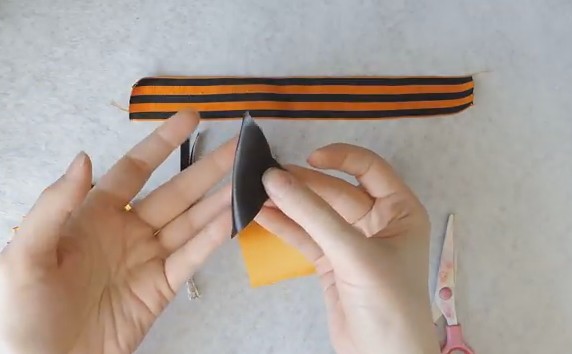
- Fold the orange piece diagonally to form a triangle, fold it again. Form a petal blank with a sharp top. Clamp the piece with tweezers.
- The ends of the element are cut and melted, the ends of the workpiece will be glued together.
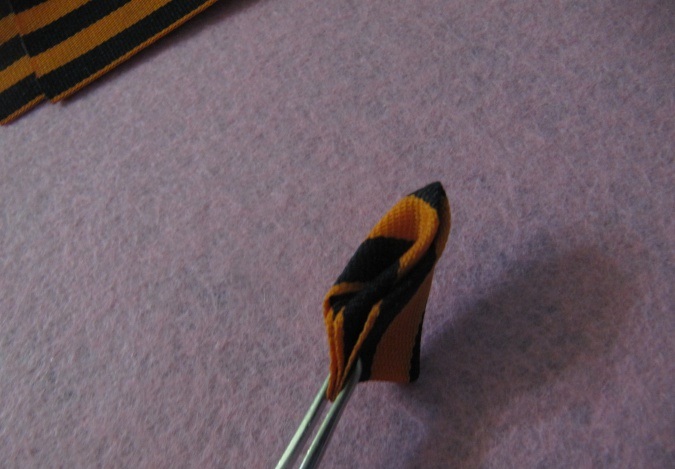
- Clamp the fragment lengthwise with tweezers, cut off the bottom and singe it with fire. Treat all orange pieces in the same way.
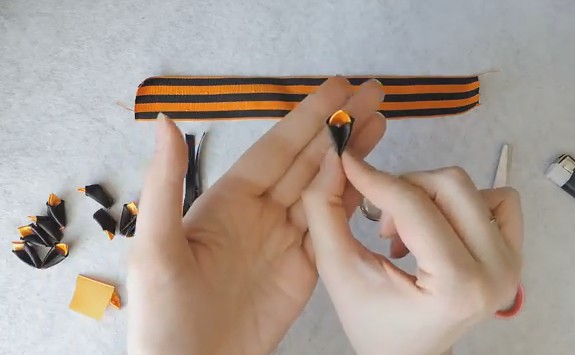
- Cut a black ribbon.
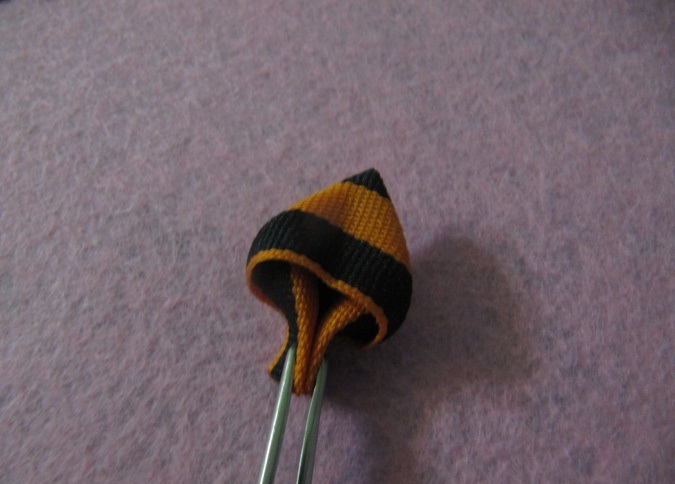
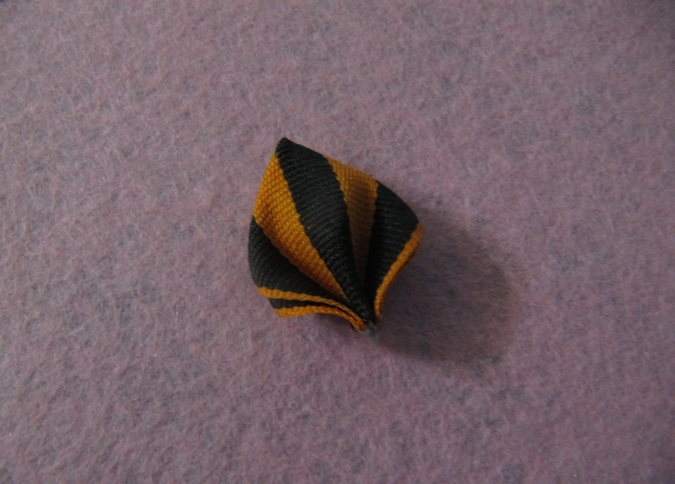
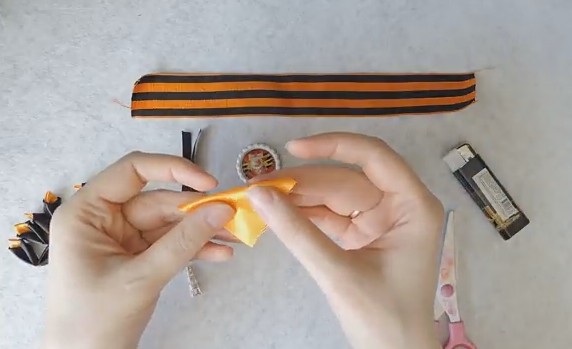
- Wrap the orange blank in a black triangle. Cut off the bottom part and singe it to connect the parts.
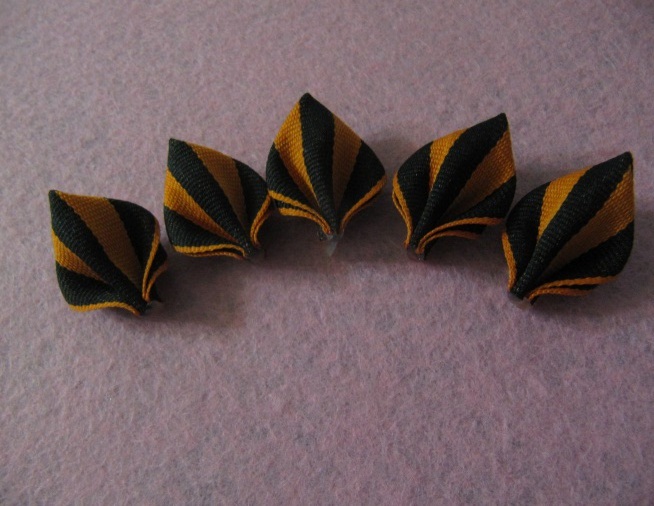
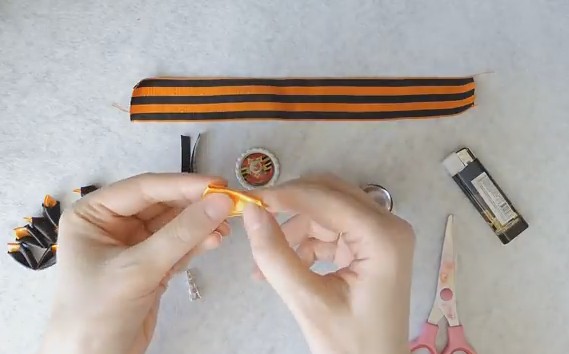
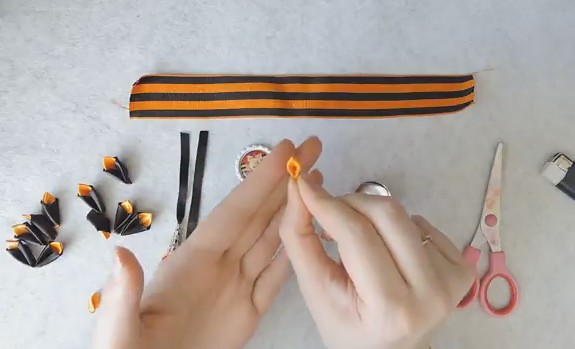
- Make seven sharp-shaped blanks from black and orange ribbons.
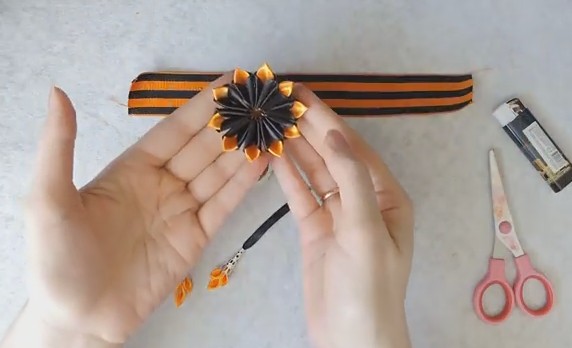
- Gather the elements into a spikelet, and then glue them together. Attach black beads to the center of the figure.
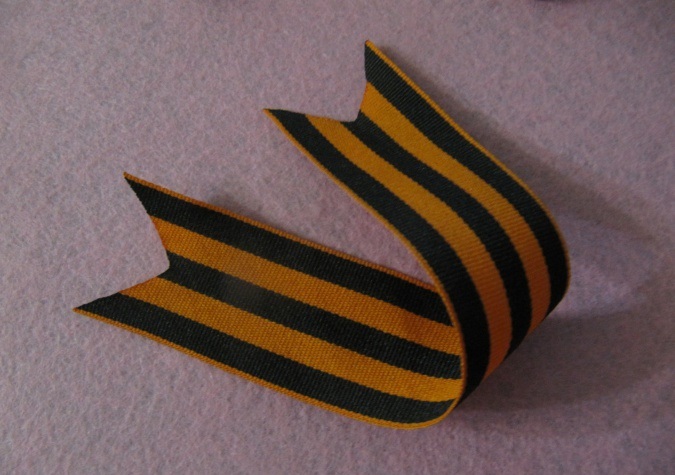
All that remains is to twist a loop of St. George's ribbon and glue the spikelet on top of it. The base for the brooch can be attached to the back side.
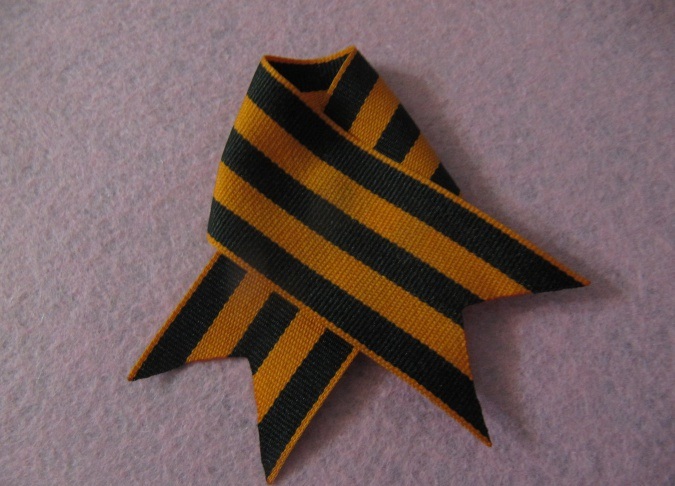
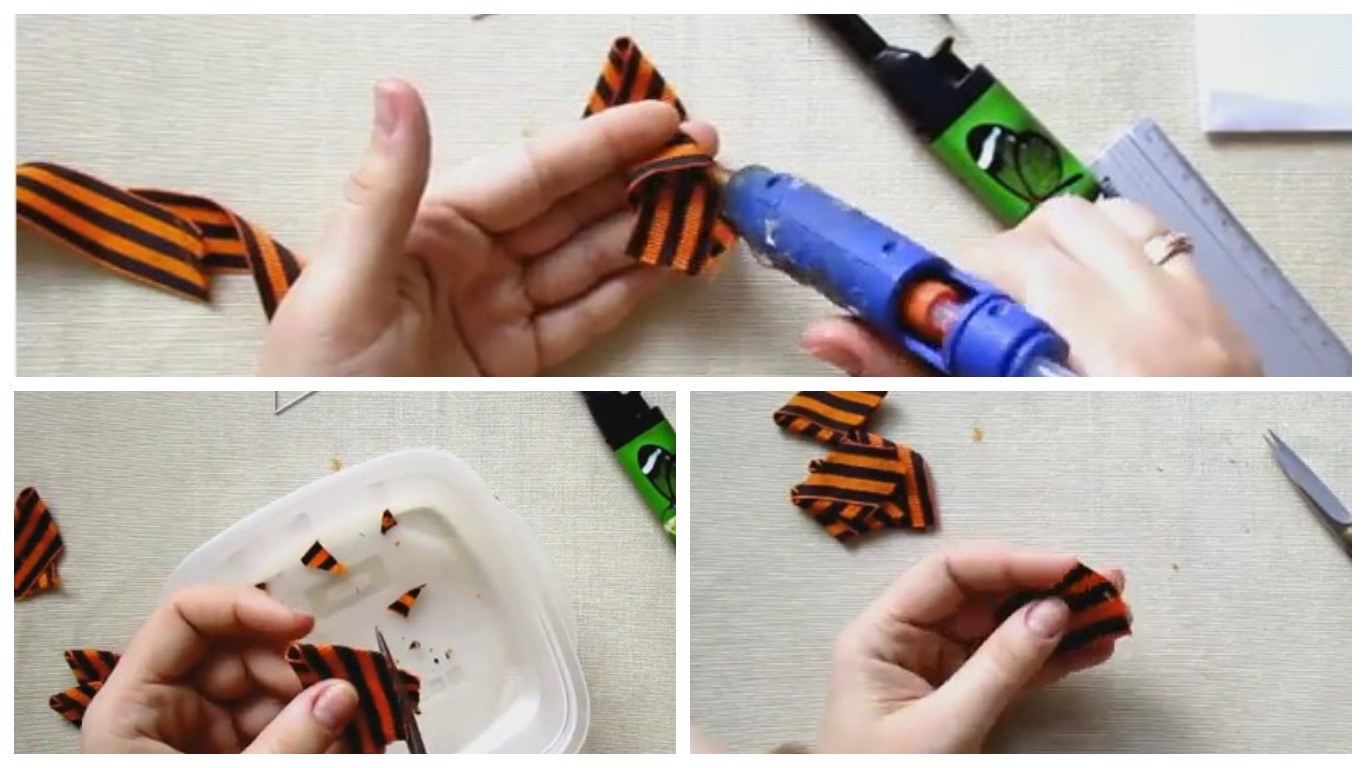
In the form of a star
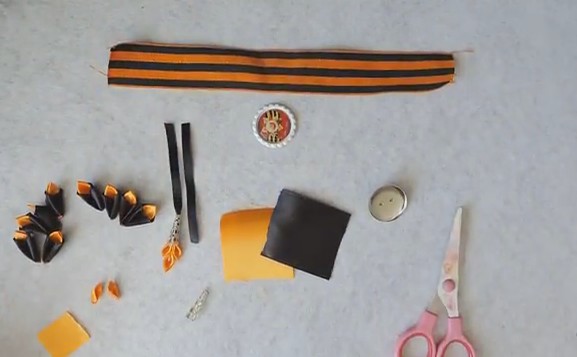
A star brooch made from the St. George ribbon is another version of the legendary symbol. The finished product can be conveniently attached to clothing. To create it you will need:
- pieces of tape 2.5 × 11 cm - 5 pieces;
- a piece of St. George's ribbon for the base of the star;
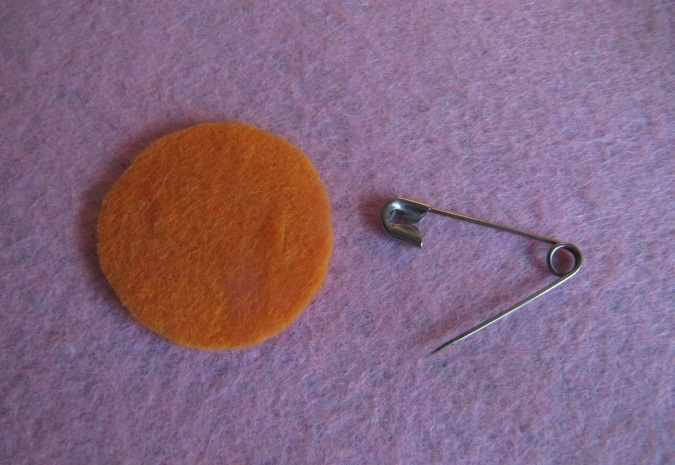
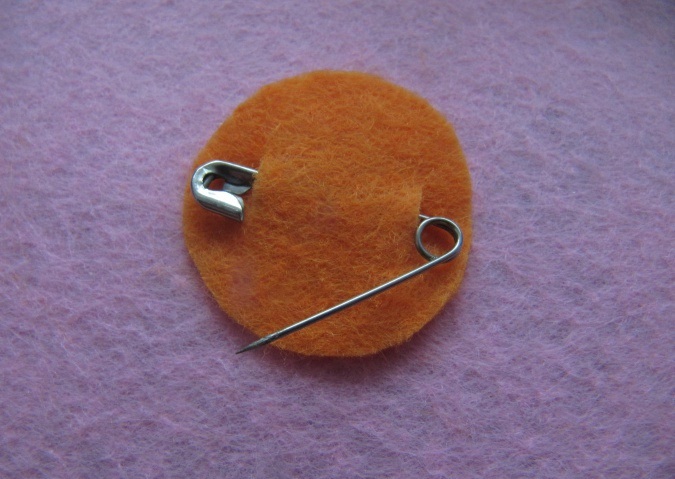
- felt blank in the shape of a circle;
- button on a leg;
- glue;
- scissors;
- candle;
- base for a brooch.
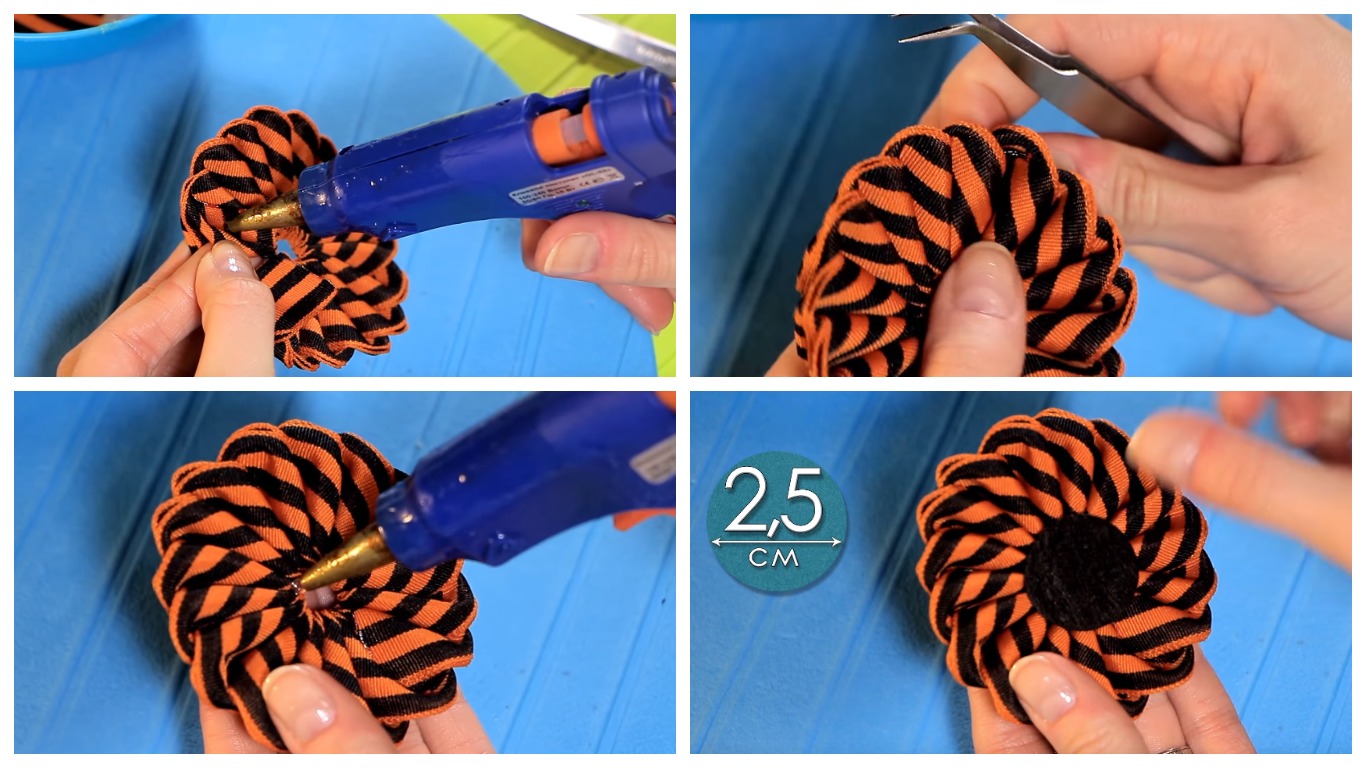
Instructions for making:
- Fold the pieces of ribbon into a loop so that the top part is nicely rounded.
- Press the bottom of the workpiece into an accordion shape and secure with tweezers. Then cut off the excess and melt the edge. In this way, you need to make 5 petals.
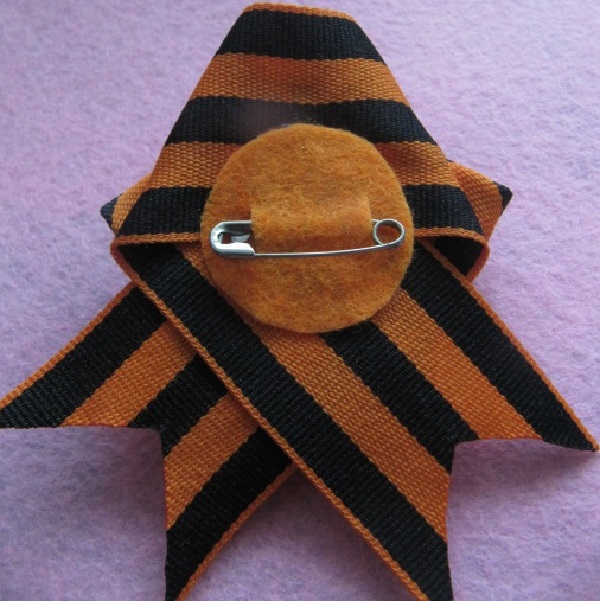
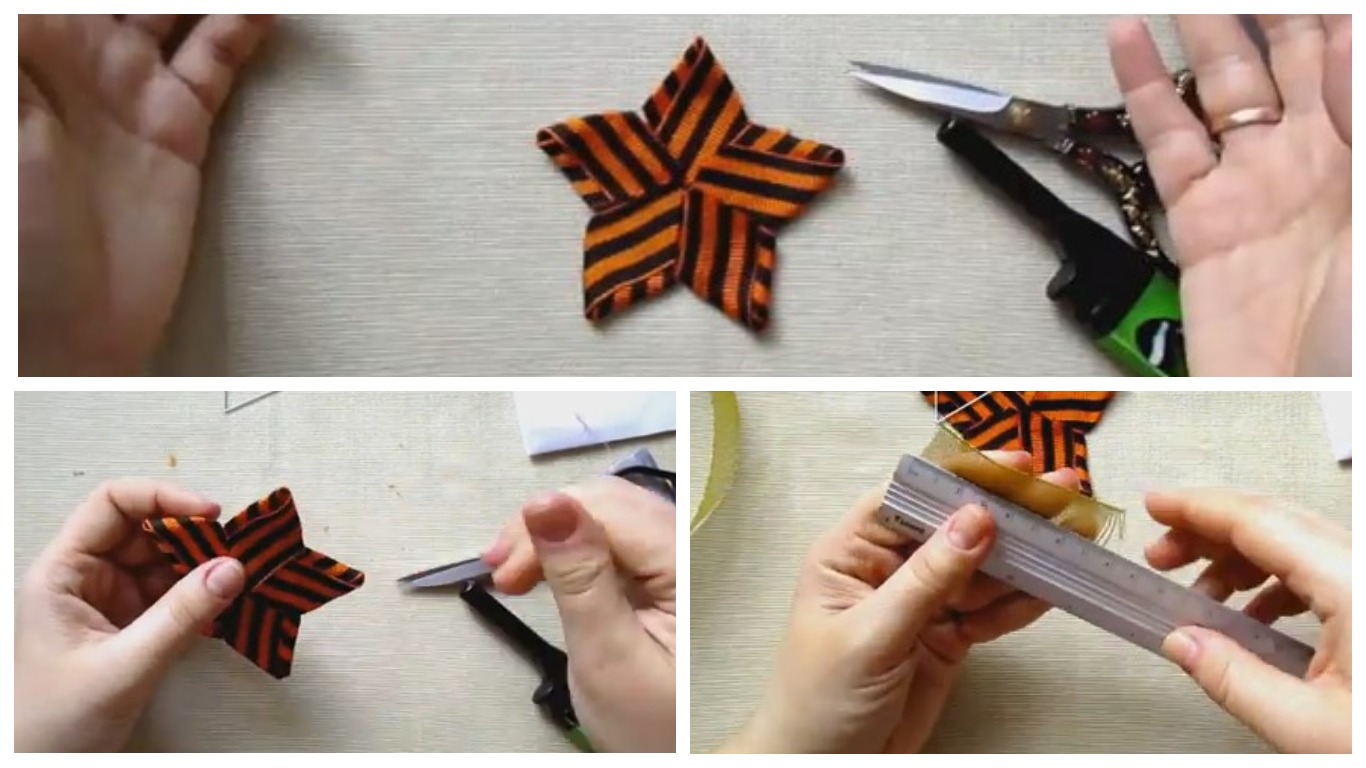
- Glue the blanks together to form a five-pointed star. Insert a button on a leg inside.
Now you can fix the finished star on the ribbon, which you first need to fold in half, bending the ends of the fold inward. The resulting composition of kanzashi St. George's ribbon is very decorative. It remains to fix the product on the felt base, and then attach the brooch clasp.
Marshmallow-kanzashi for May 9
This product made from St. George's ribbon turns out to be very voluminous and beautiful. It will take a little more time to make, but the finished result is worth it. This elegant thing can be used as a pendant in a car.
You will need a set:
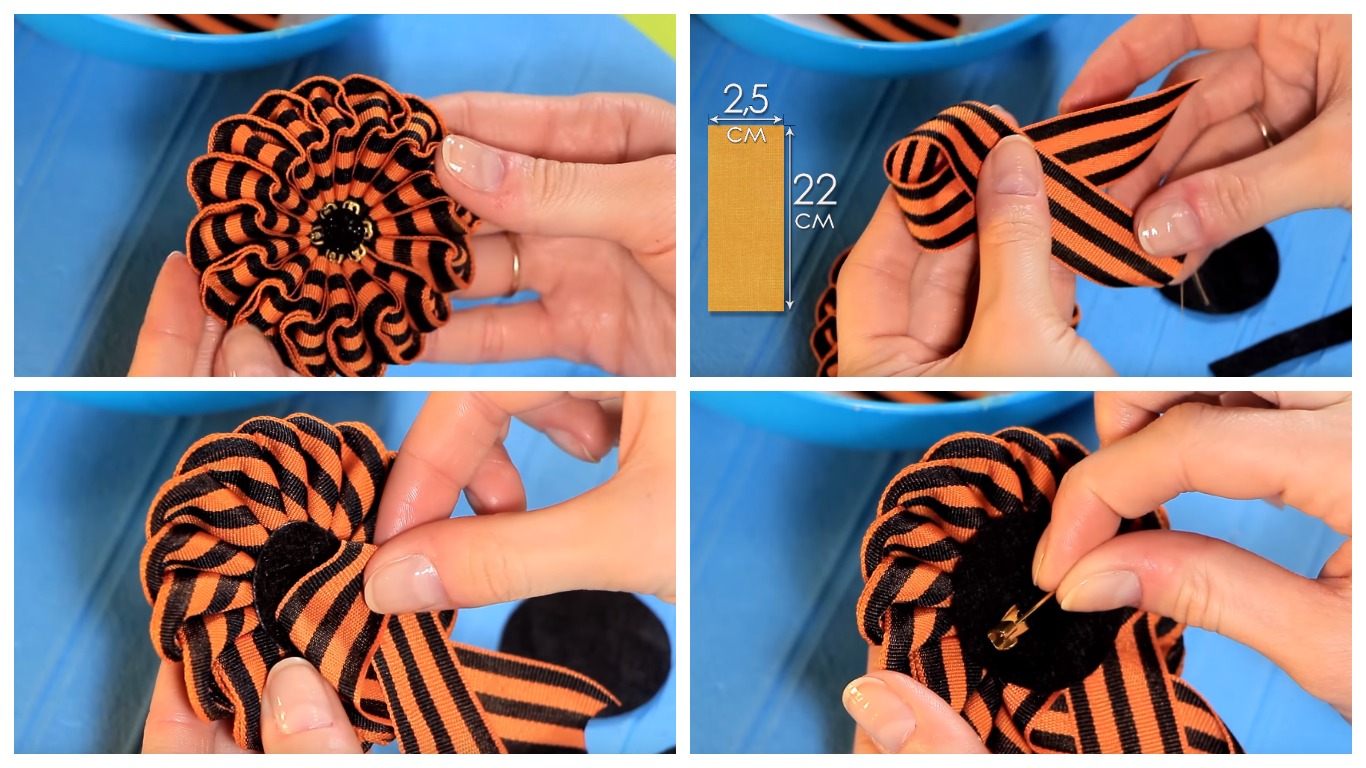
- St. George's ribbon - 2 pieces measuring 2.5 x 90 cm;
- scissors;
- thread and needle;
- candle or lighter;
- glue;
- large rhinestone or button;
- felt;
- base for a brooch.
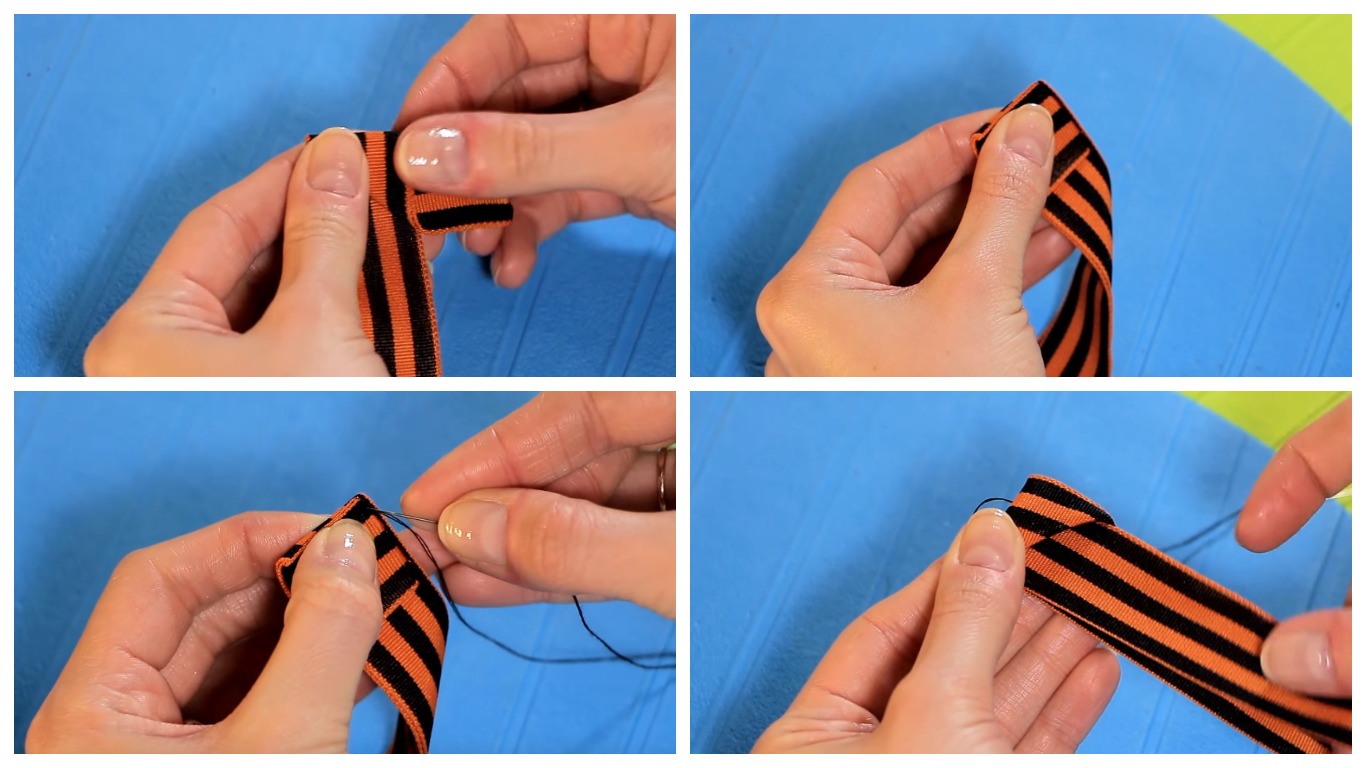
Description of the manufacturing process:
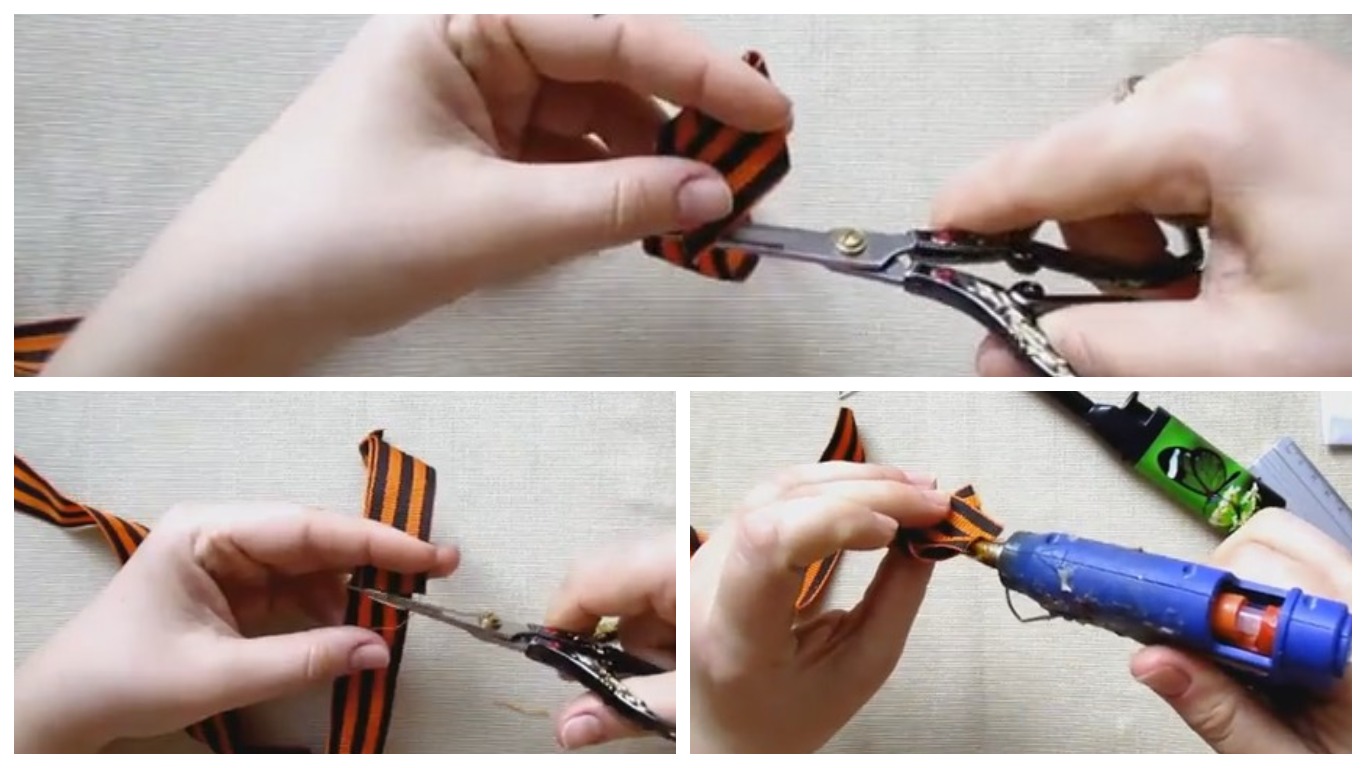
- Fasten two pieces of tape together by melting and pressing the edges together.
- Fold the tape diagonally, slightly away from the edge. Fold the resulting triangle again, wrap the free end of the tape around the triangle and secure it in the fold.
- Secure the resulting piece with thread.
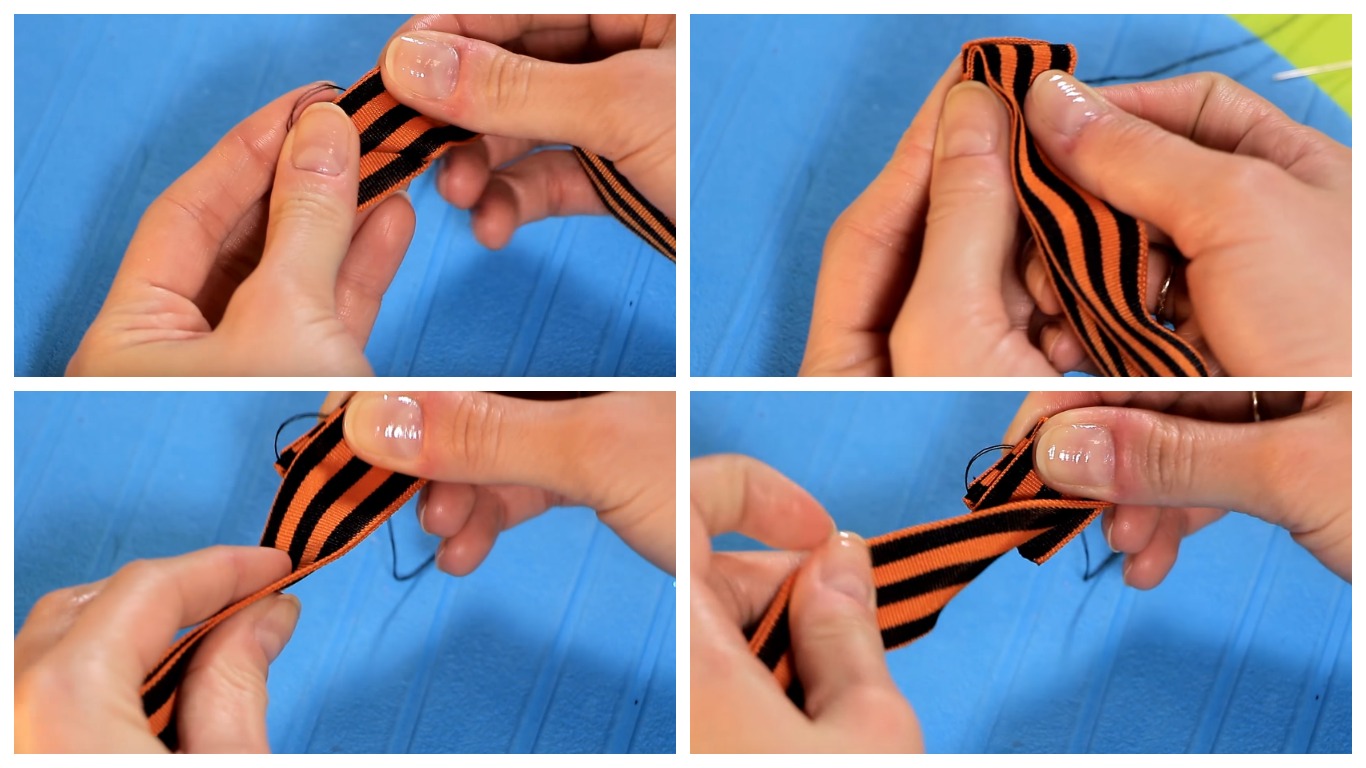
- Wrap the triangle over the free part of the ribbon and bend this edge over it. Fold the ribbon into a loop and put it on the triangle, tightening it slightly. Secure with ribbon.
- Make the remaining petals according to the described algorithm until the ribbon ends.
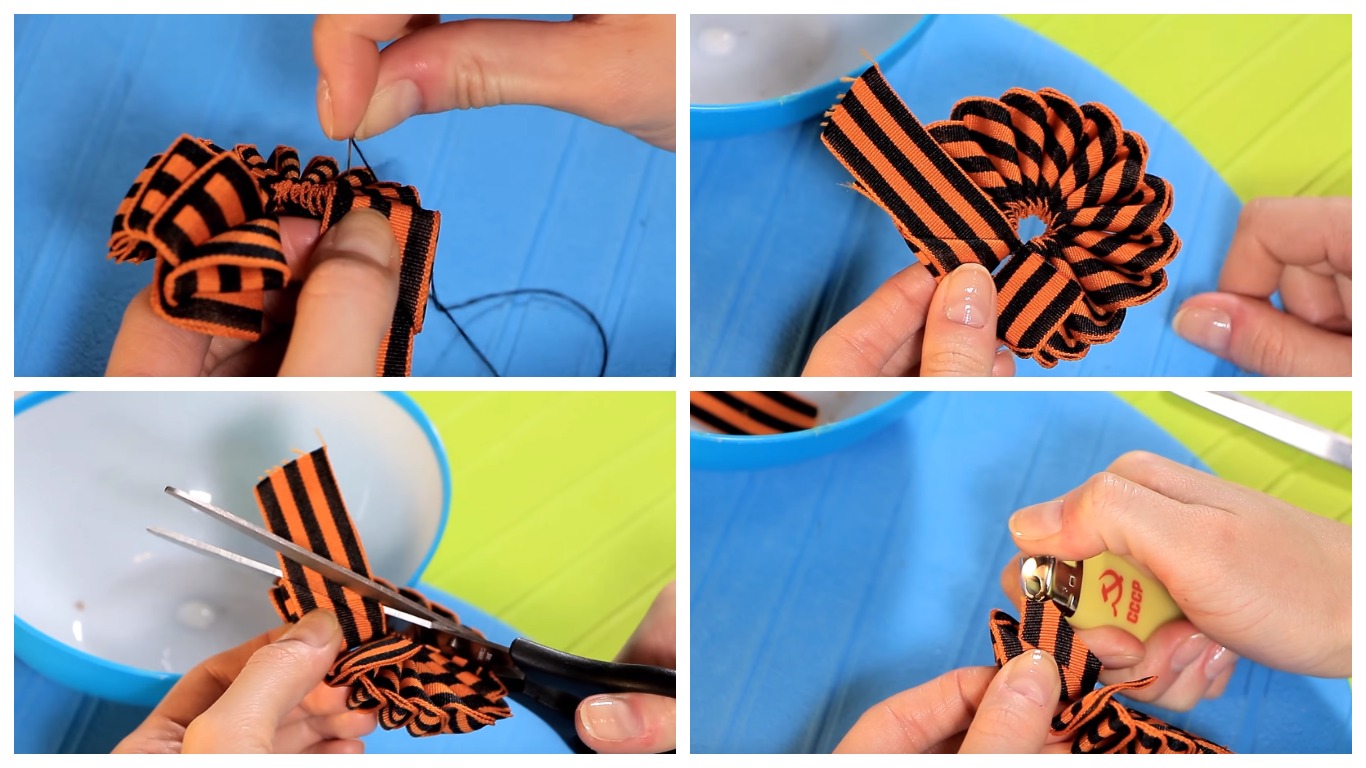
- When the material is finished, cut off the remains and singe the edges with a flame.
- Secure the marshmallow into a circle using glue.
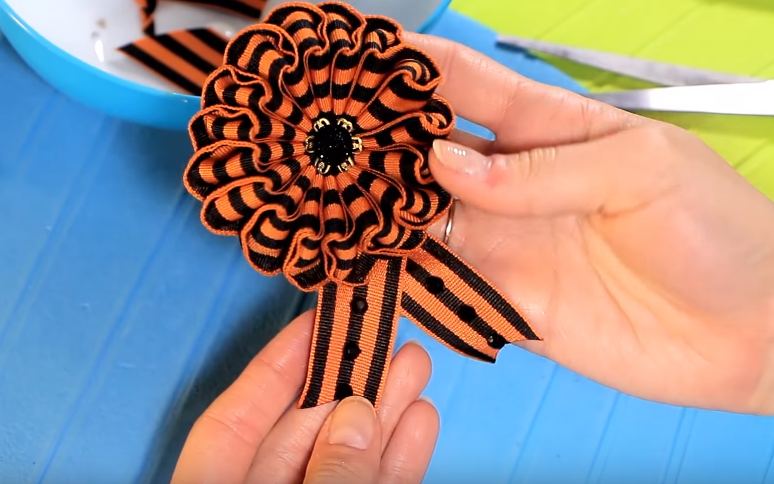
- On the reverse side, attach a loop of St. George's ribbon, a felt base and a brooch clasp.
The front side of the product is decorated with a button or a rhinestone - the marshmallow brooch is ready. It turns out unusually lush and looks original.

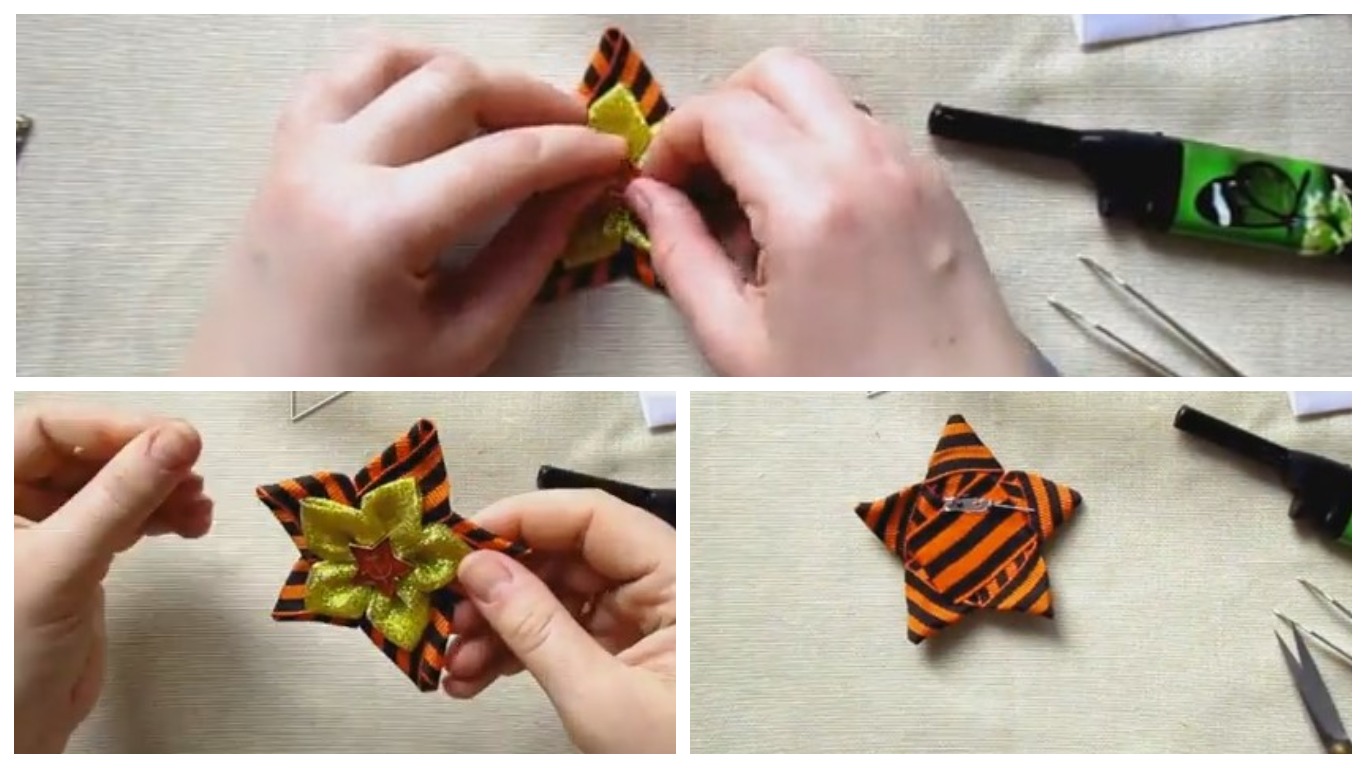
With the symbol of eternal flame
This brooch symbolizes the everlasting flame that burns in memory of those who died in the war. Even schoolchildren can handle making it. It is important to follow the instructions and try to perform all actions as carefully as possible.
To work you will need:
- St. George's ribbon and a narrow strip of gold brocade fabric 5 x 8 cm;
- scissors;
- candle or lighter;
- glue;
- base for a brooch.
Algorithm for creating jewelry:
- Fold a piece of St. George's ribbon in half, measure 2 cm from the top corner and cut off. You should get a trapezoid with a bottom of 8 cm and a top of 4 cm.
- Fold the part in half and solder the ends along the entire surface of the oblique cut. In this way, you need to prepare 5 parts, then turn them inside out.
- Glue the elements together to form a star, with the closed parts facing upward.
- Do the same with the gold ribbon pieces. Only attach them with the concave part facing up.
- Also assemble a star from the gold parts.
The final touch is to attach a golden star to the first blank. The rays of the upper star should pass between the lower ones. The middle of the product can be decorated if desired. The brooch is ready.
This winning symbol is perfect for men.

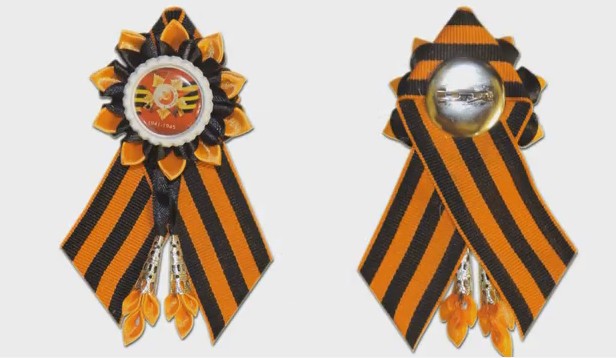
In the form of a medal
The medal-shaped brooch looks very unusual. It will take a lot of time and effort to make. To get the perfect result in the needlework process, it is important to follow the instructions step by step and accurately.
You will need to assemble a set of:
- St. George's ribbon;
- satin ribbons (4–5 cm wide) in orange and black;
- central cover for kanzashi and a thematic picture for it;
- scissors, tweezers;
- lighters or candles;
- brooch bases;
- cardboard;
- a piece of felt.
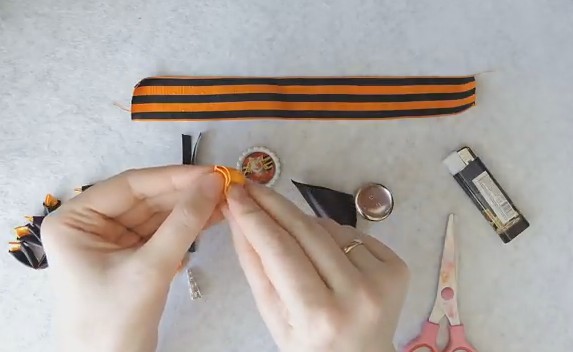
Instructions for making:
- Attach the picture to the lid.
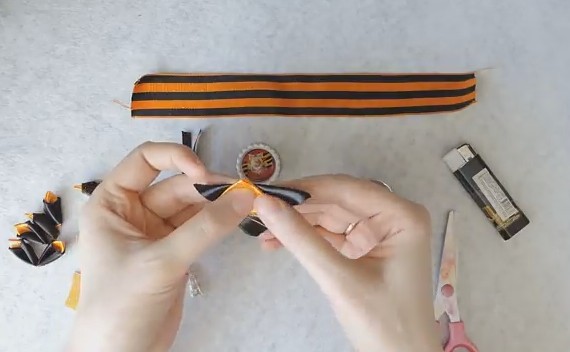
- Cut squares from orange and black ribbons, from which form petals. To do this, fold each element diagonally, press the corners of the triangle to the top. Trim the tip by 0.5 cm and solder everything over a fire.
- According to the given diagram, prepare 8 black and 8 orange petals.
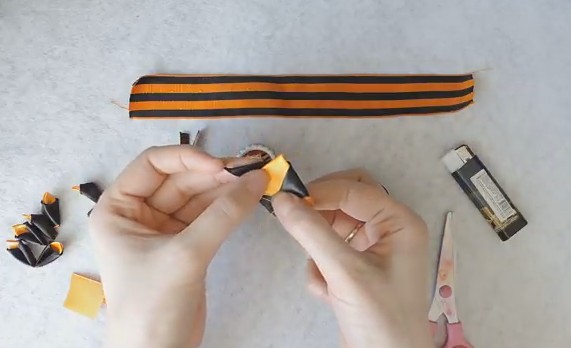
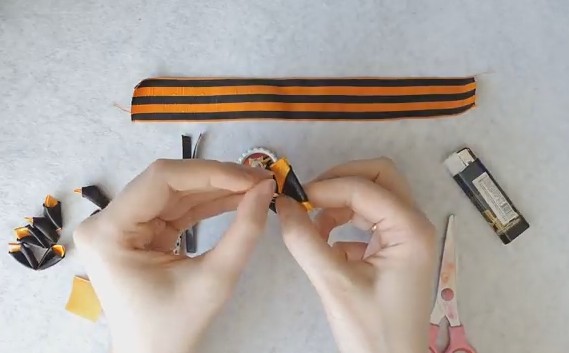
- Insert one petal coated with glue into the side fold of another. Connect them all in a circle in this way, then glue the first and last one together.
- Place the lid with the picture in the center of the resulting circle.
- Cut a pentagon out of cardboard: length - 3 cm, side - 4 cm, bottom - 2.5 cm, cover it with St. George's ribbon.
Attach the brooch clasp to the pentagonal base, and fix the ribbon blank on several links of the fittings. The product is ready.


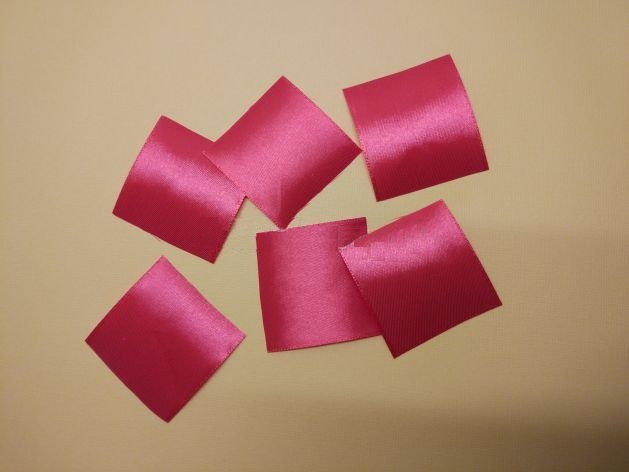
With cloves
A brooch made from the St. George ribbon, decorated with a carnation, symbolizes eternal memory to the defenders of the Motherland. It is not difficult to make such decoration for Victory Day, so you can involve children in the process. You will need the following set:
- red and green satin ribbons, 50 mm wide;
- glue gun;
- stem for carnation;
- fastening the brooch base;
- star;
- lighter, scissors.
Master class on making:
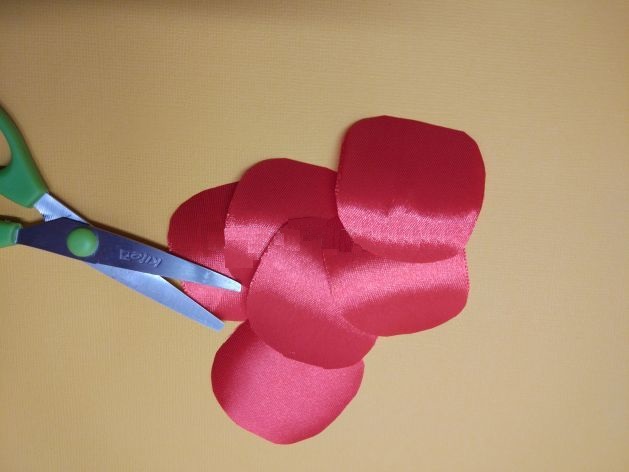
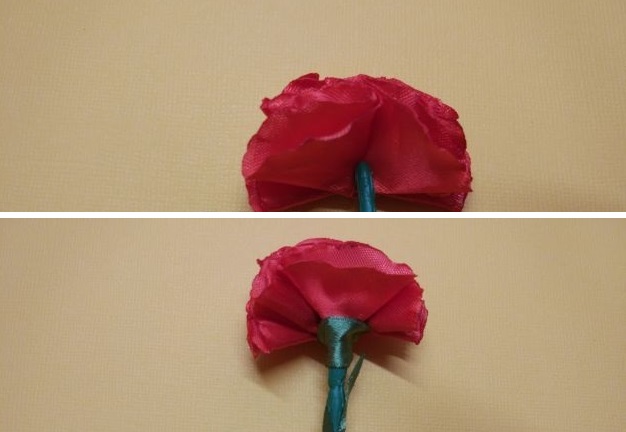
- Cut eight 5 x 5 cm squares from the red ribbon, then cut out circles from them. Melt the edges slightly over the fire, bending and stretching them so that they become slightly wavy.
- Fold each circle in half twice and glue 7 pieces together into a flower using a glue gun.
- Cut out leaves from green ribbon and melt them a little.
- Attach the stem to the flower blank, hide it behind the last petal. Then close the joint with a piece of green tape. Attach the leaves to the stem.
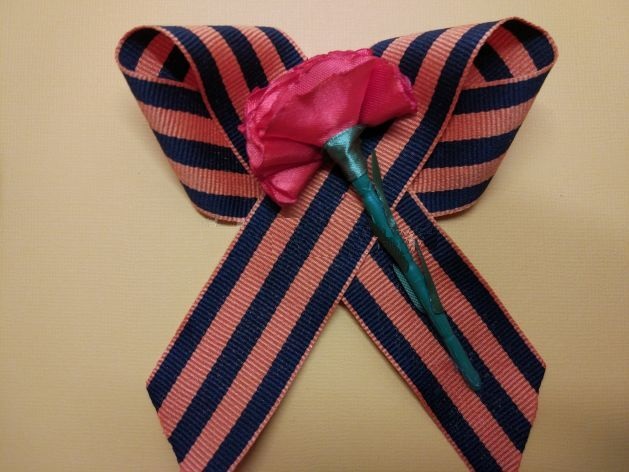
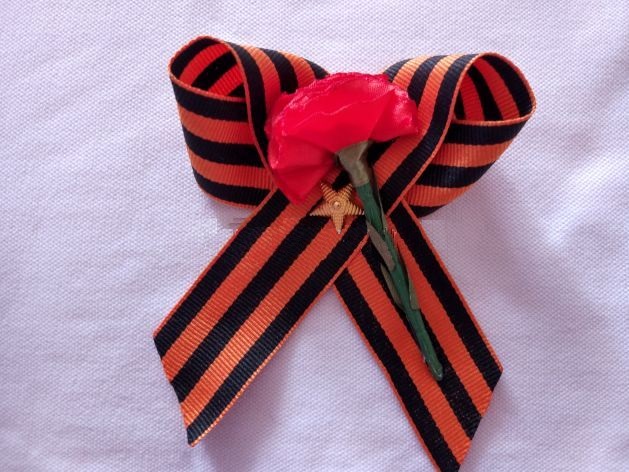
- Fold the St. George ribbon into a bow and secure. Attach a carnation and a small star on top.
All that remains is to attach a pin or a clasp - and the brooch is ready. Such decoration can be worn by adults and children, it attracts attention and looks very beautiful.
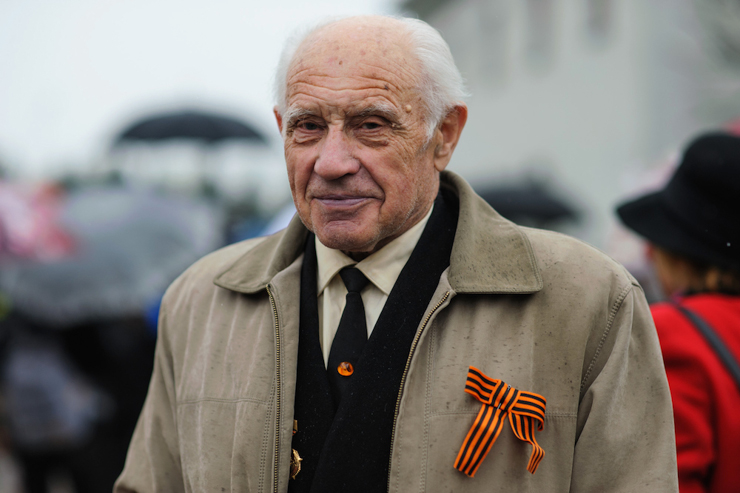
Accessory placement rules
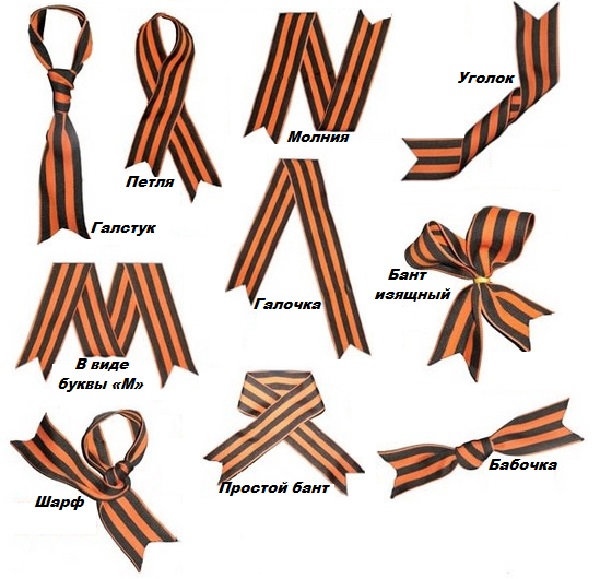
There are several popular ways of tying the St. George ribbon:
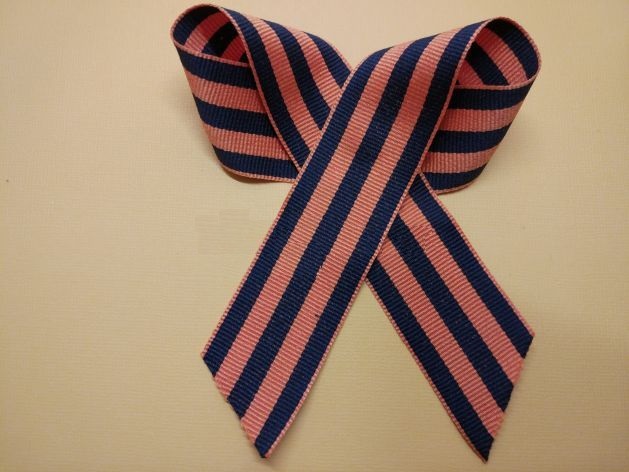
- Loop. Simply fold the edges of the ribbon crosswise, leaving a loop at the top, and pin it. This is one of the most common and simple options.
- Tick. This method is also very simple - the tape is folded into a V shape and secured.
- Butterfly. To tie it, you need to put the ribbon around your neck so that one end is longer than the other. Then thread the long side through the loop and fold the short side in half to form a bow. Then you need to straighten the ends - you will get a butterfly.
- Simple bow. A very popular method, it is usually used for children. It is necessary to tie a ribbon on a bow and secure it.
- The bow is elegant. It is easy to make, and the attribute looks exquisite. You need to tie a regular bow and tighten its middle with an elastic band.
- Corner. Looks very unusual. You will need to roll the ribbon into a tube, form a corner, and pin the ends.
- Scarf. The method is extremely simple. You need to tie a ribbon like a scarf around your neck, leaving the ends hanging down.
- Tie. Wrap the ribbon around your neck so that one end is longer. Then cross the elements and thread the right one around the left one. Pull the end out of the resulting loop, put it through the resulting eye and tighten the tie.
- Lightning. It is easy to make the decoration, you need to repeat the image of the letter N from the ribbon and attach it to the clothes.
- In the shape of the letter "M". Fold the ribbon in four, stretch the upper end to the right, and the lower end to the left. Secure the resulting figure with pins.
You shouldn't mindlessly use ready-made ideas for tying a ribbon; you need to understand where and how it would be appropriate to wear this symbol. So, it is acceptable to fasten it on the chest, wrist or shoulder. Wearing ceremonial jewelry below the waist is prohibited.
It is not appropriate to attach ribbon to hair clips.
Kanzashi brooches for May 9 will be wonderful gifts for family, loved ones, friends, and colleagues. Such an attribute is appropriate for a walk, an official event, at work. Children will be happy to make kanzashi from St. George ribbons, and it is important to explain to them that this is not just a decoration, but a special symbol that must be treated with respect.
Video