Various homemade decorations are very popular. One of the most interesting and beautiful handicraft techniques is kanzashi. This art came from Japan, where hair decorations made from different materials were called that. Now kanzashi are made from ribbon, silk or organza. They make unusually beautiful flowers that decorate hairpins, headbands, and interiors. It is not difficult to learn how to make such products, especially if you use silk or satin ribbon.
- Features of the technique
- Necessary materials and tools
- Basic methods of creating petals
- Spicy
- Volumetric rounded
- Flat round
- Complex with a fold
- For the rose
- Making leaves and bows
- How to assemble the product
- Step-by-step master class for beginners
- Hairpin with kanzashi roses
- Headband for a girl
- Brooch for May 9
- Curtain Tieback
- Video
Features of the technique
The Japanese technique of kanzashi appeared several hundred years ago. At that time, women decorated their hair with hairpins, combs and hairpins with various flowers and other decorative elements. They were made by hand and called kanzashi, from the Japanese phrase "stuck in hair". Such decorations were previously made of metals, tortoise shell, bone, wood, silk. They were different in shape, color, style.
In modern Japan, this art has not lost its popularity. There are now different types of kanzashi. Decorations are made in the style of hairpins, round combs, brooches, they can have pendants, rhinestones and other decorative elements.
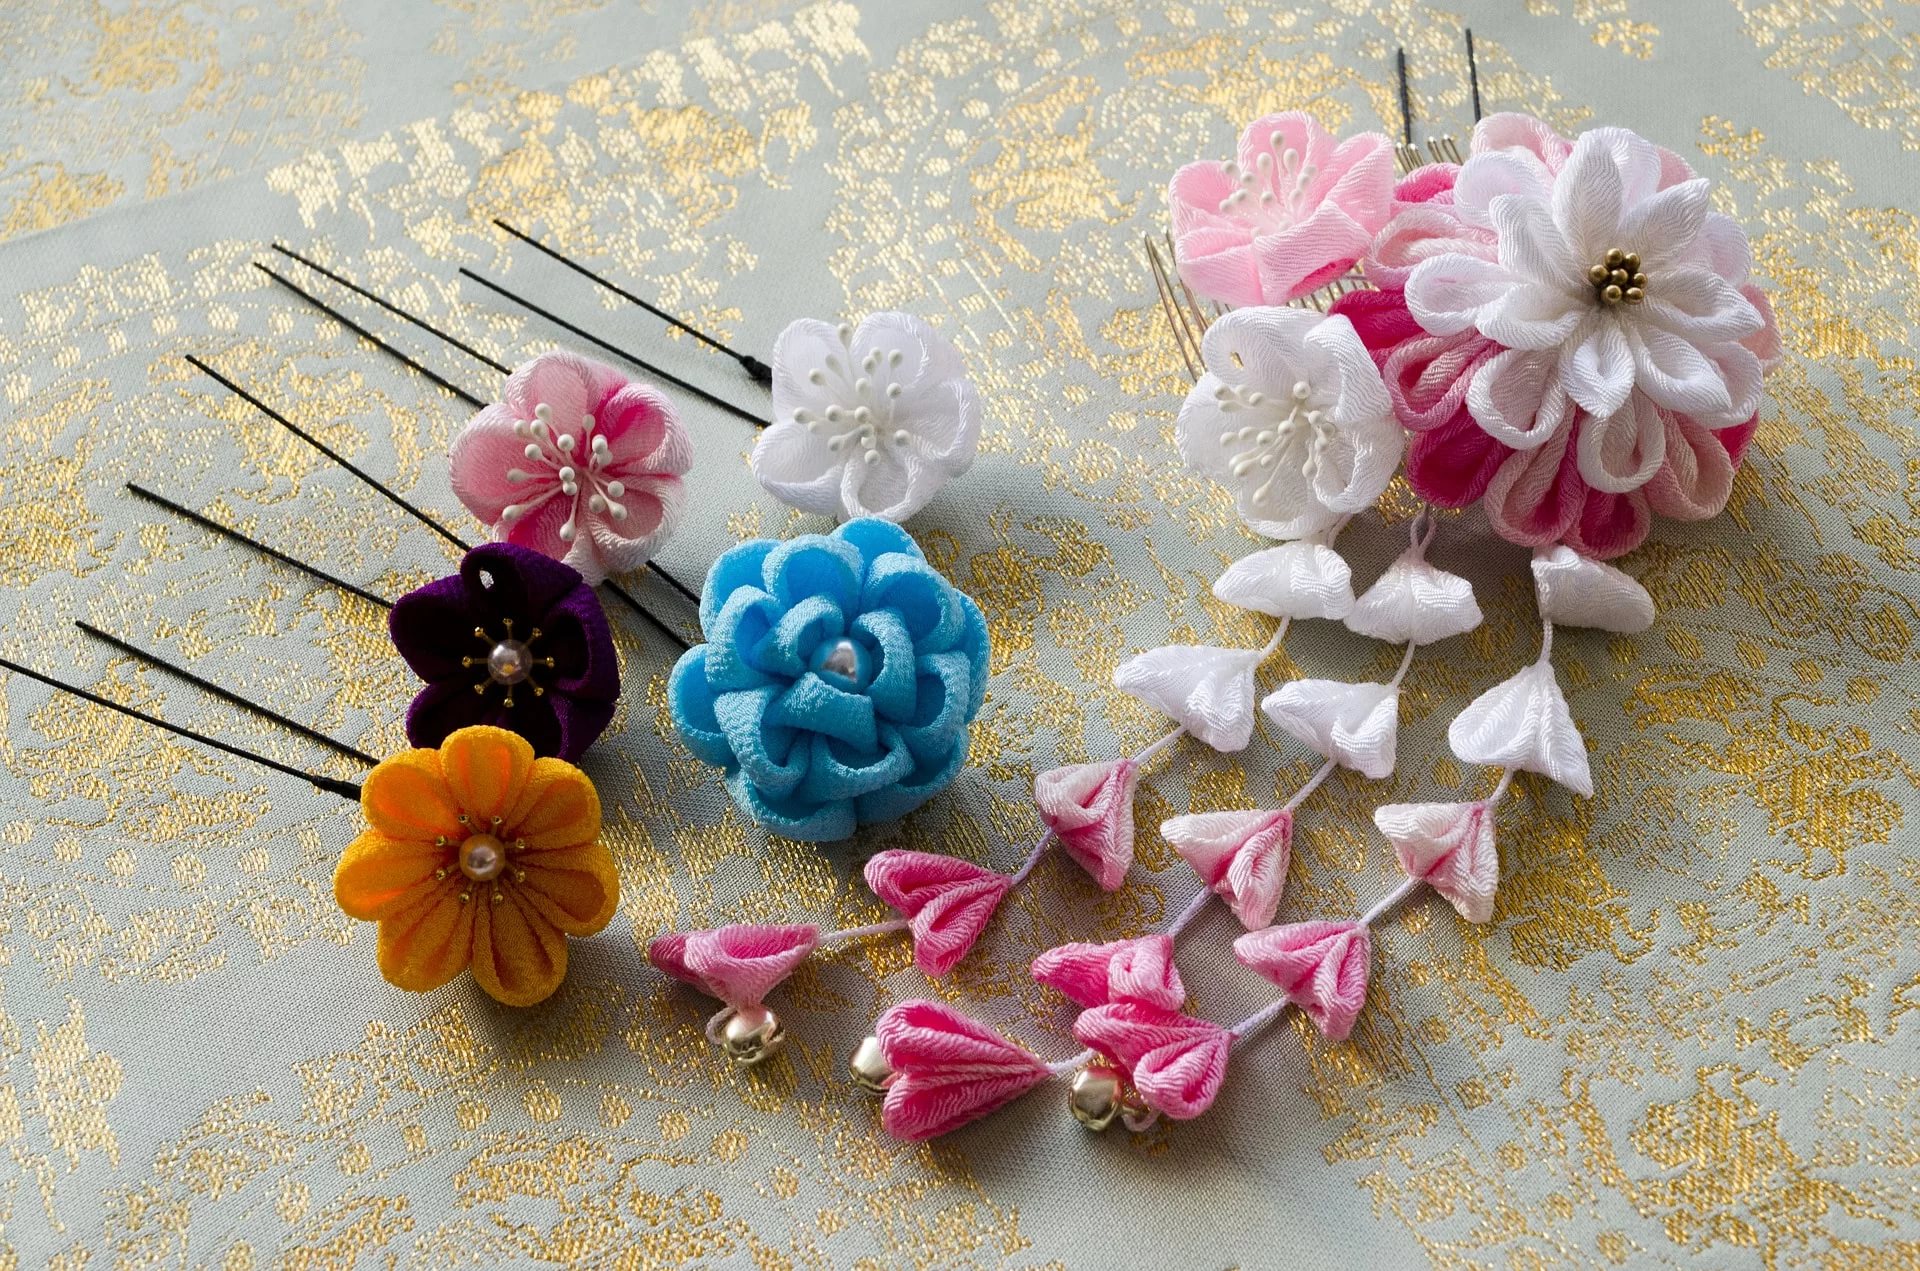
One of its directions is hana-kanzashi, which has spread all over the world. These are decorations made of silk in the form of flowers. The tsumami method, similar to origami, is used for the work. In this technique, kanzashi flowers are folded from pieces of silk. Each petal is made separately, then a beautiful plant is assembled from them. Depending on the type, it can include from 5 to 80 petals. The composition is decorated with beads, rhinestones, metal elements.
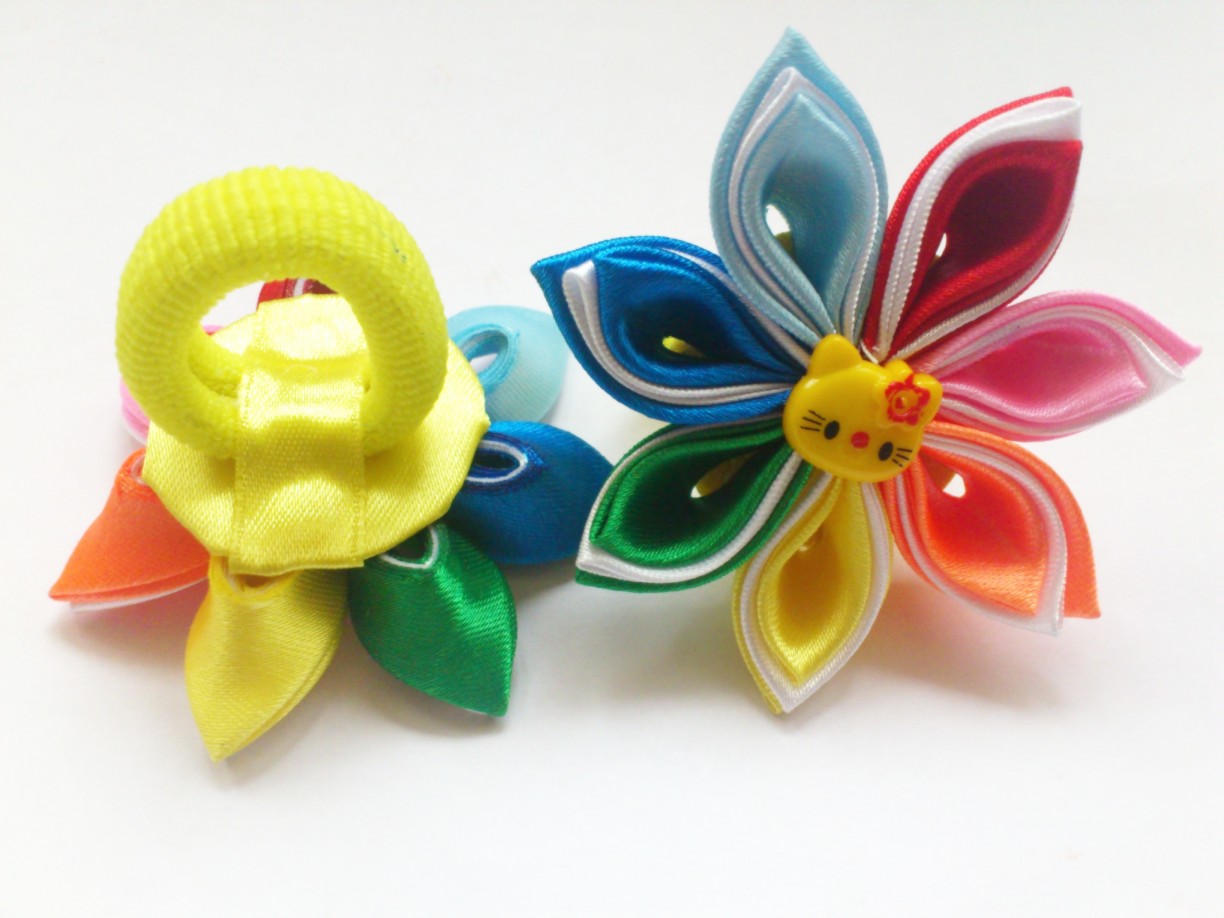
Nowadays, flowers made in the kanzashi style are popular among needlewomen all over the world. They decorate hairpins, brooches, headbands, necklaces, bracelets, make paintings, boxes. Beautiful flowers in the kanzashi technique will become a real decoration for the interior on a holiday. Unique lush bouquets will bring originality to wedding accessories, and cute hairpins will please little fashionistas.
Even a child can make simple kanzashi flowers with their own hands. This exciting activity develops perseverance and imagination.

Necessary materials and tools
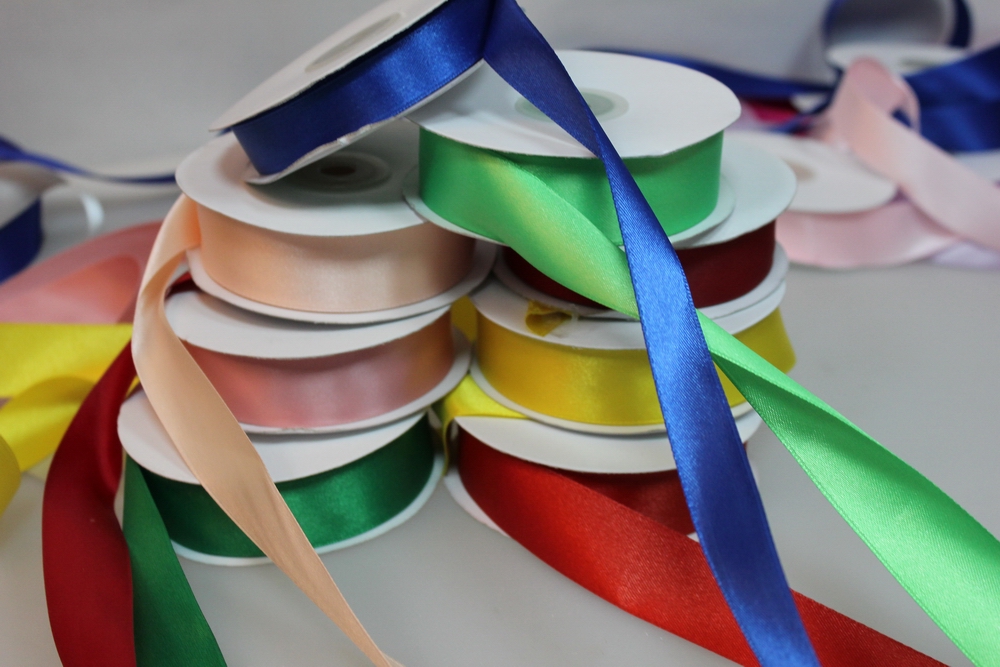
Decorations in this technique can be made from pieces of silk, organza, satin, brocade, rep. Experienced craftswomen prefer to work with one material. For example, crepe satin makes beautiful petals, but it is difficult to care for. Beautiful decorations with large elements can be made from organza. It is worth noting that it is crumbly when cut.
Beginner craftswomen are better off making kanzashi from satin or silk ribbons. It is important to consider the density of the material: thick products are more pliable and hold their shape well. If you have to work with soft fabrics, the finished product should be treated with hairspray.
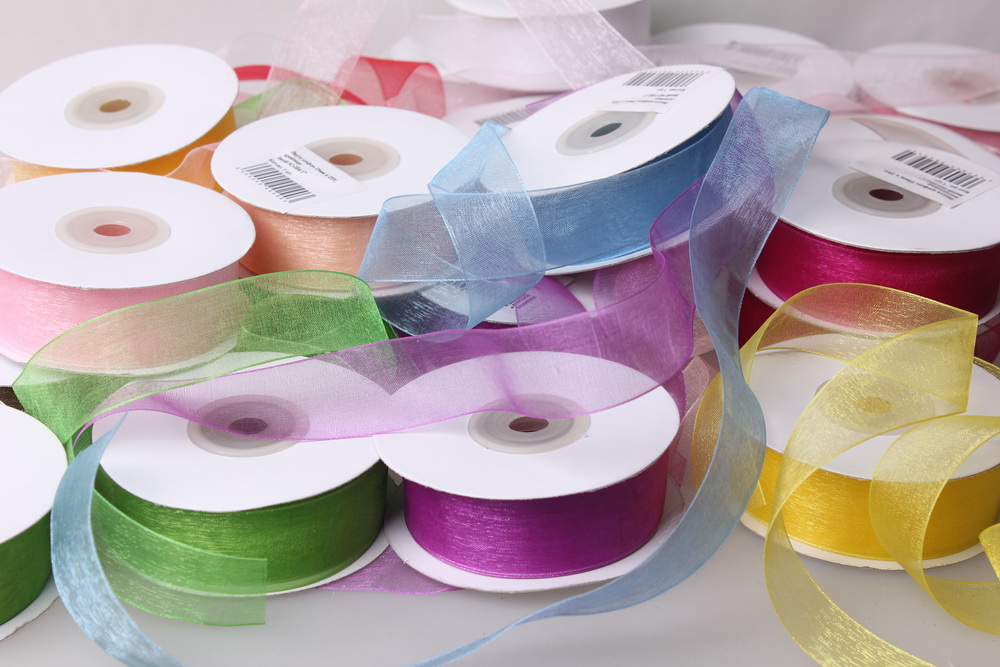
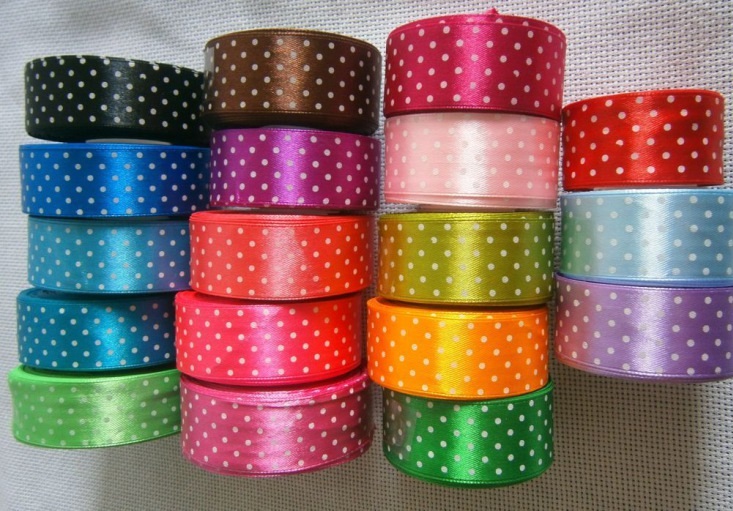
Most often, such decorations are made from satin ribbon. This material is pleasant to the touch, pliable, easy to cut, and the edges are easy to process. After manipulation of the petals, the product does not change its shape and is not deformed. For different colors, you may need ribbons of different widths - from 1 cm to 5 cm. It is recommended to start with 5 cm, it is more convenient to work with them. A wide selection of colors allows you to realize any fantasies from satin. Moreover, you can work not only with single-color ribbons.
You can find special kits on sale that contain the tools necessary for the job. They usually contain patterns for making simple elements for beginners, as well as ideas for more complex flowers for craftswomen. But, as a rule, experienced needlewomen use their own tools.
To start work, you need to prepare a place. Making kanzashi involves many small parts, so it should be carefully thought out. The surface of the table should be protected with a board, you can use a large tile, it is convenient to singe the edges of the ribbons on it. For kanzashi you will need a certain set of tools:
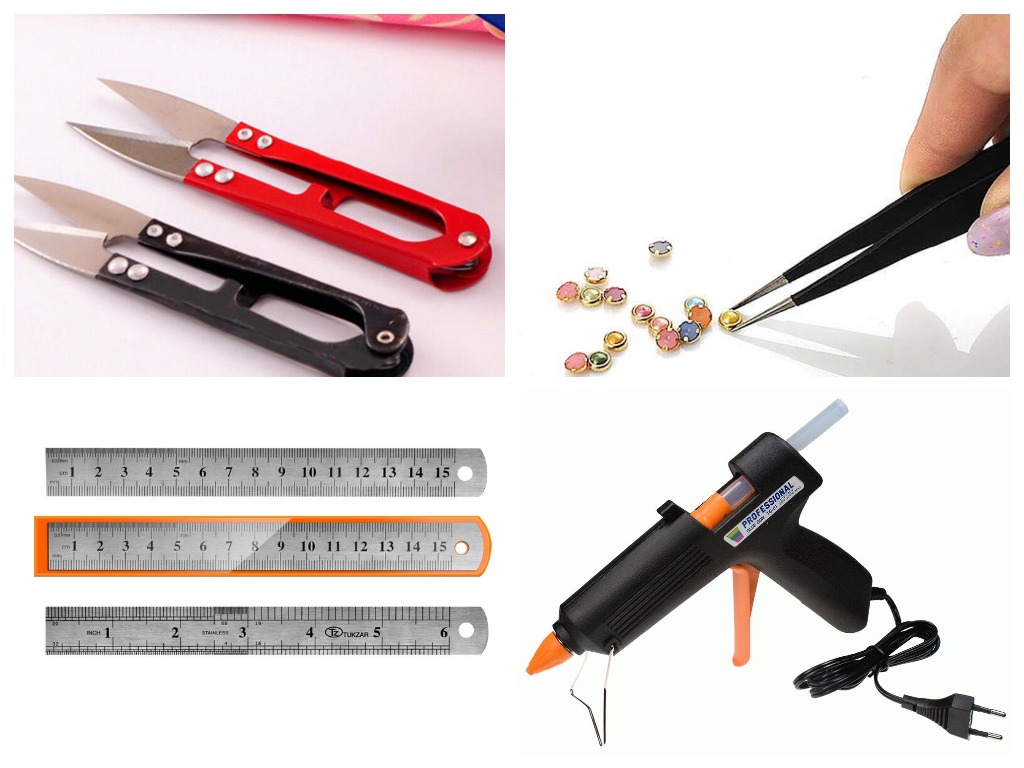
- Scissors for cutting ribbons and threads. They should be sharp, with long blades.
- Tweezers for folding small flower elements and also for holding them during singeing.
- A metal ruler. You will need it to measure the ribbon. Many craftswomen do not need a ruler, as they use templates - cardboard squares of the size needed for the petal. They are applied to the ribbon and cut out. If a lot of petals are needed, then the latter is wound on a template, cut off and then pulled out.
- Glue. Transparent is preferable, so as not to spoil the appearance of the finished product. Not only flower petals are glued, but also decorative elements: beads, rhinestones. Transparent "Moment" or a hot glue gun will do.
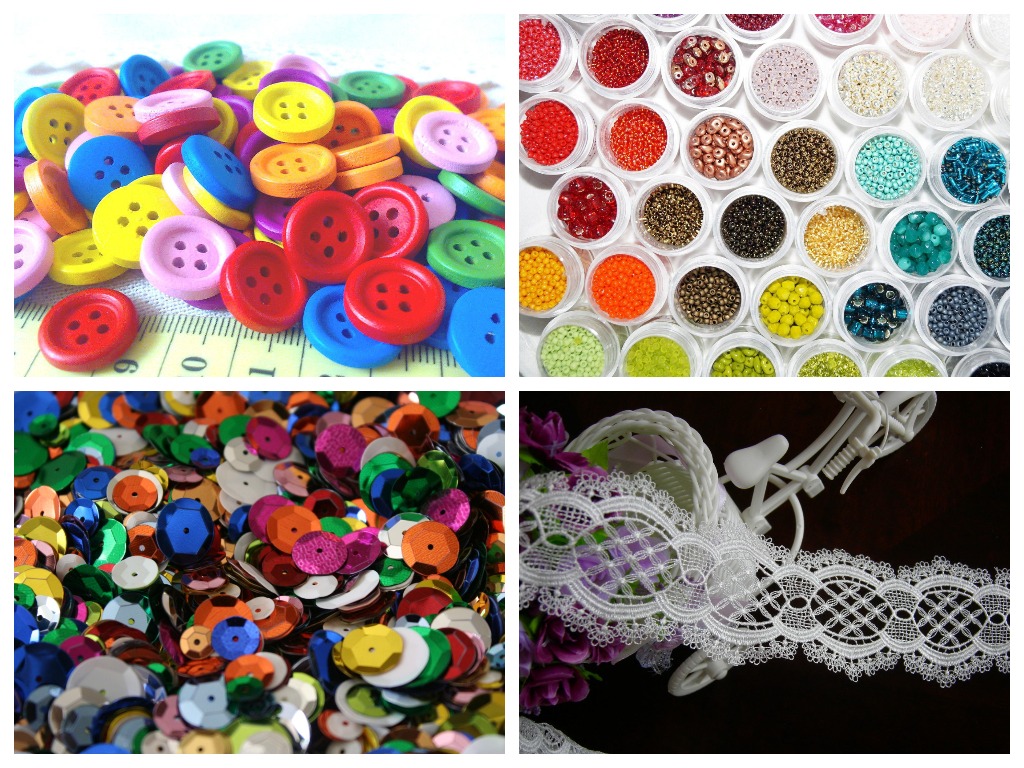
- Threads. Necessary for assembling the finished product, should be the same color as the ribbons. It is better to choose silk - such threads are stronger and thinner than usual.
- Needles, pins. You need several of the first ones, but they all need to be thin and long.
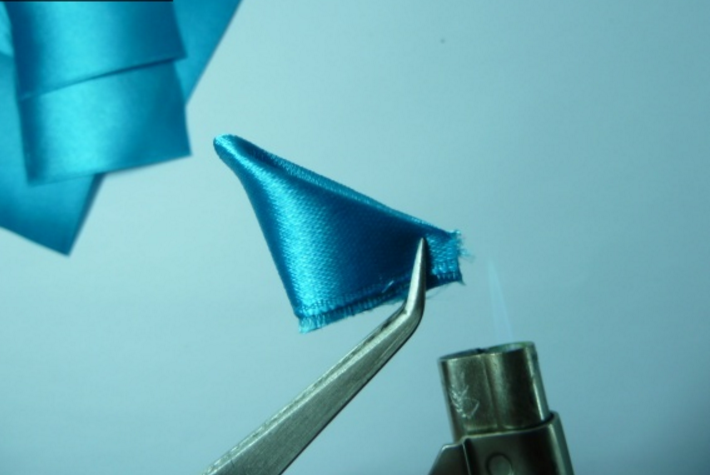
- Candle. It is needed for burning the edges of the ribbons. Sometimes a lighter or a burner is used for this, but they leave only one hand free. It is convenient to work with a soldering iron. Some needlewomen use it to cut off the necessary piece of ribbon, process the edges.
- Beads, sequins, rhinestones, balls, buttons, lace. All the accessories are needed for decoration. This set depends on the imagination of the needlewoman.
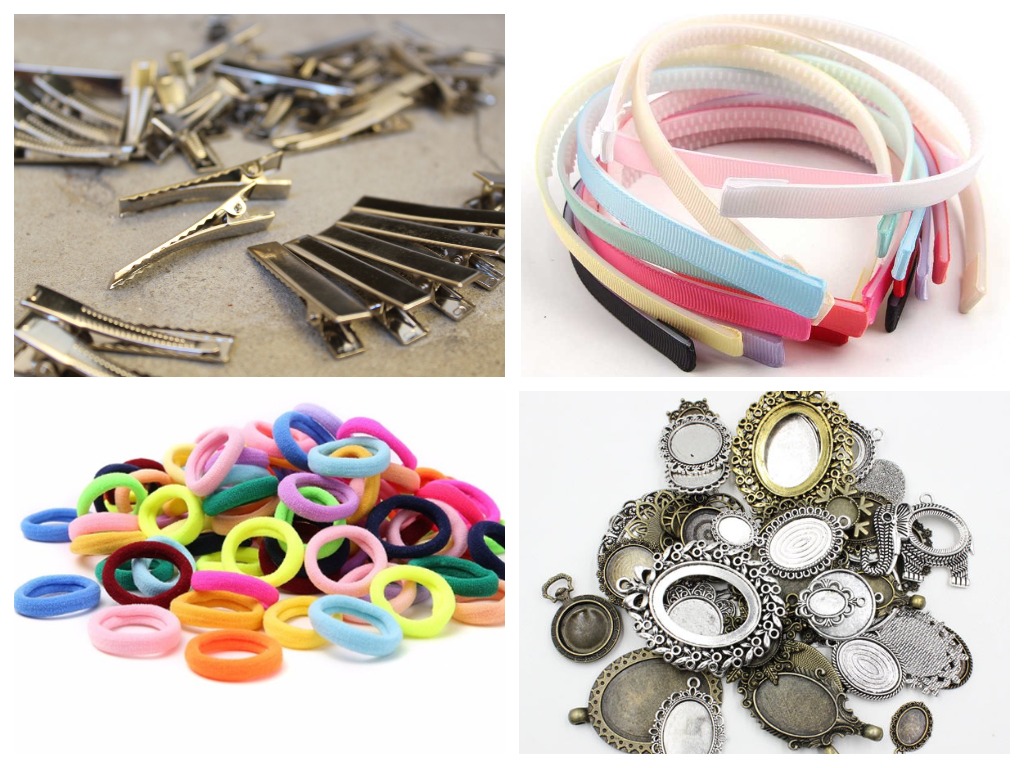
- Simple hairpins, headbands, elastic bands, brooches. They will be needed as a basis for finished products. Pieces of cardboard covered with fabric can also be used.

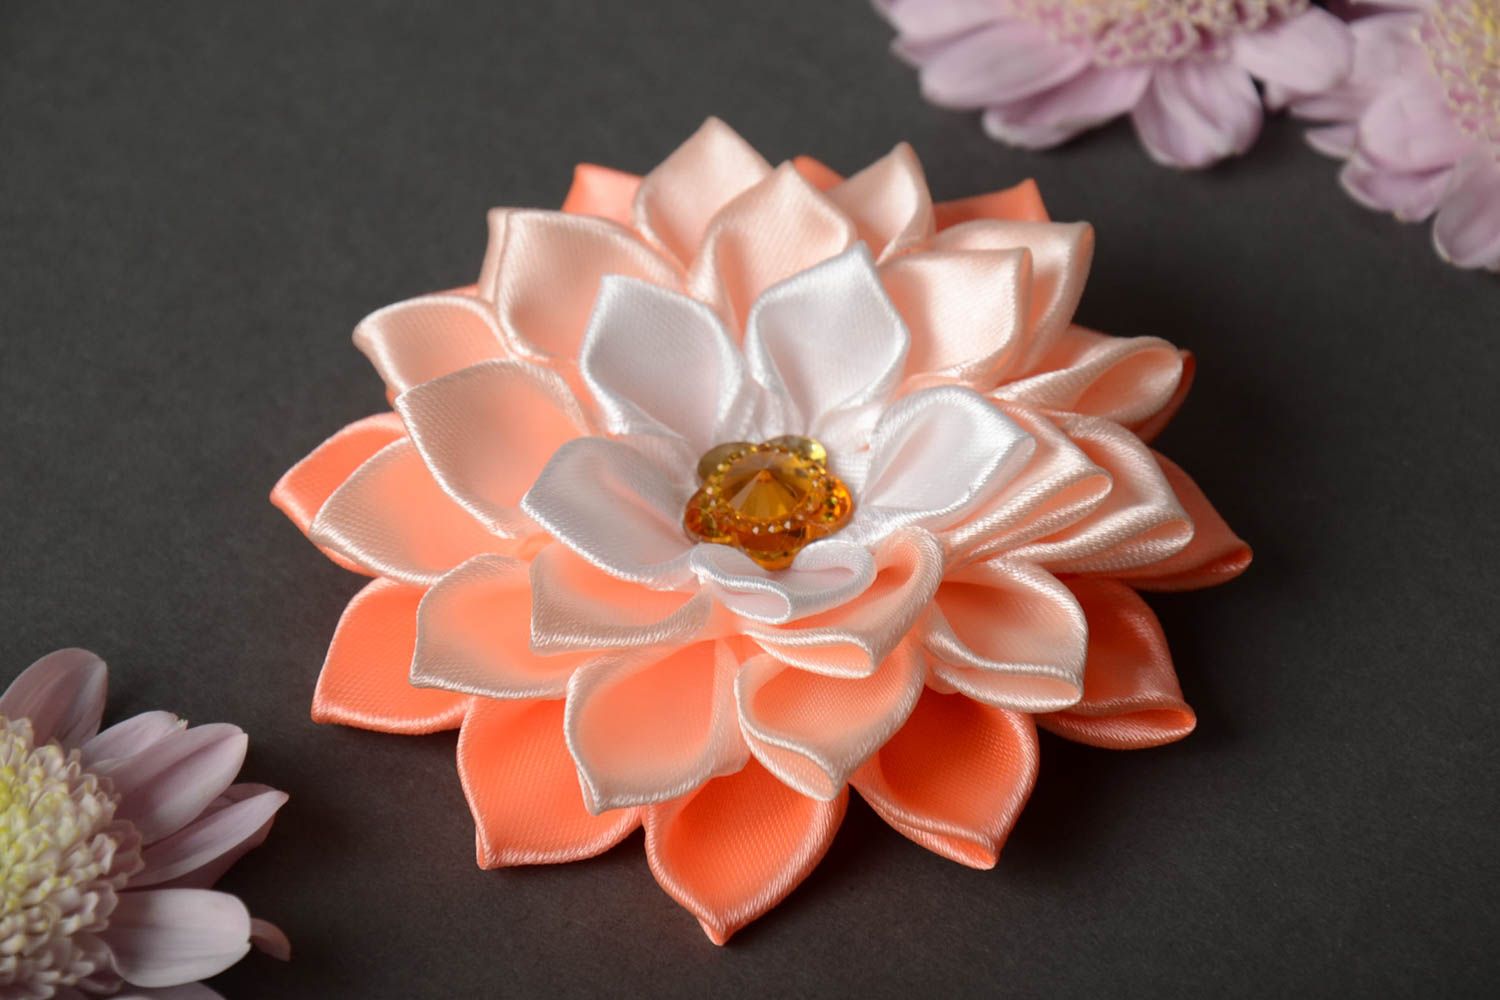
Basic methods of creating petals
The most important thing is to learn how to make kanzashi petals, from which the flower is then assembled. After all, this technique involves folding pieces of fabric in a special way. In traditional art, there are two types of kanzashi petals: narrow and round. But, thanks to the imagination of craftswomen, this technique is being improved, and several varieties have been invented that are used to create different elements.
Such types of petals as voluminous round, double or triple pointed, complex or special for roses allow you to create original beautiful decorations.
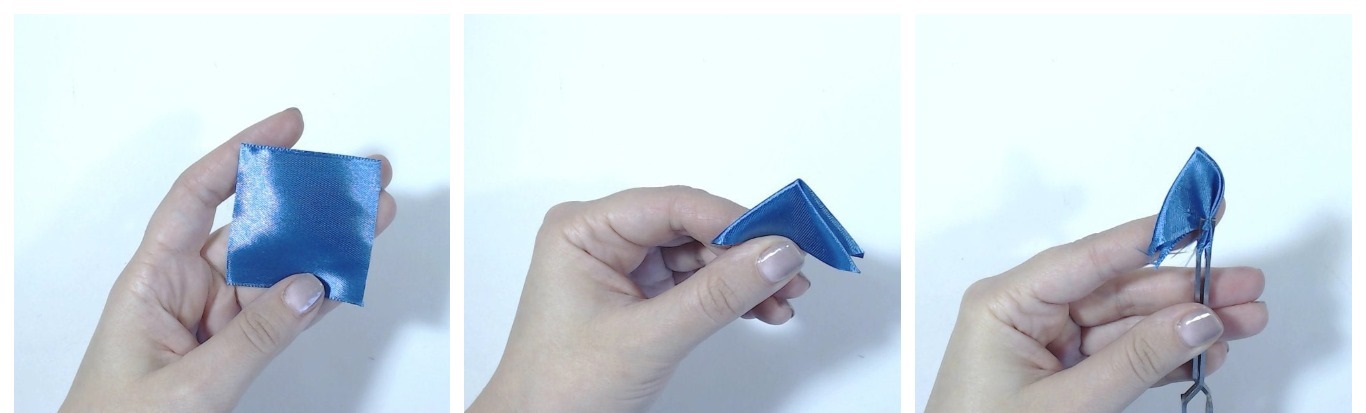
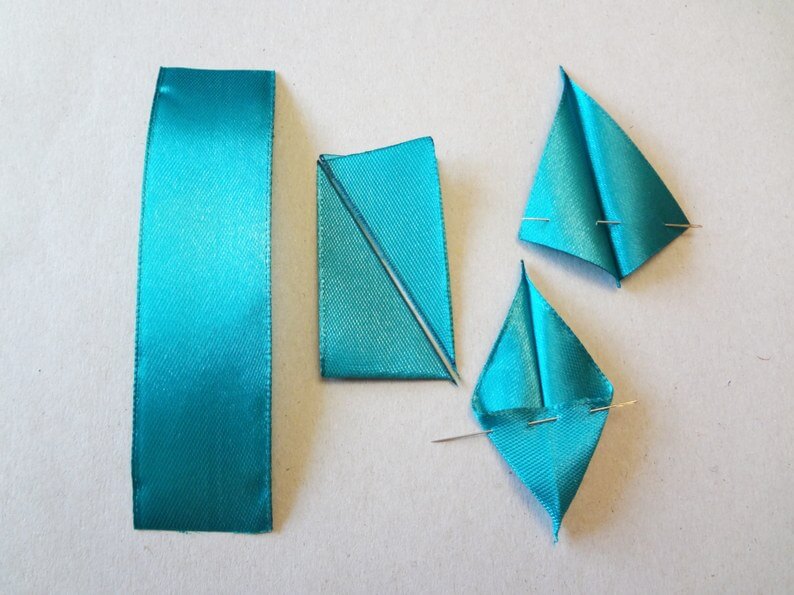
Spicy
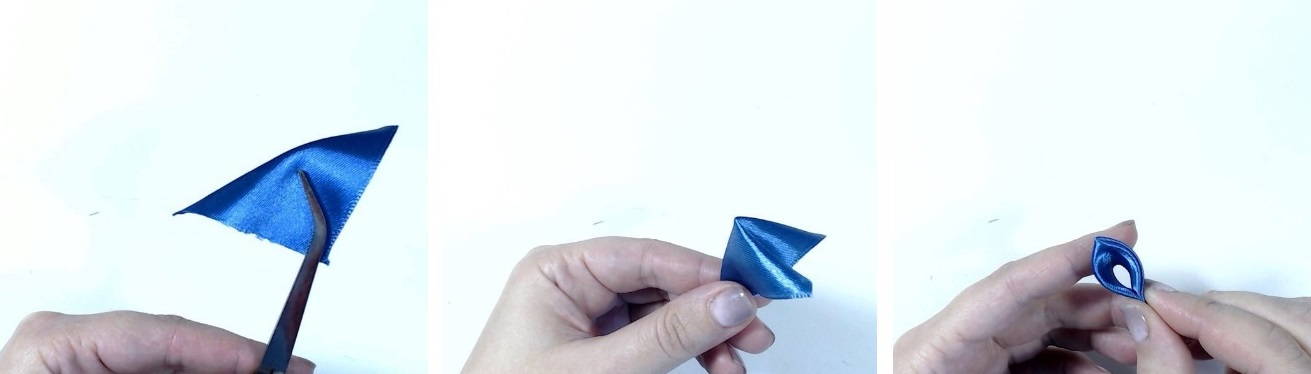
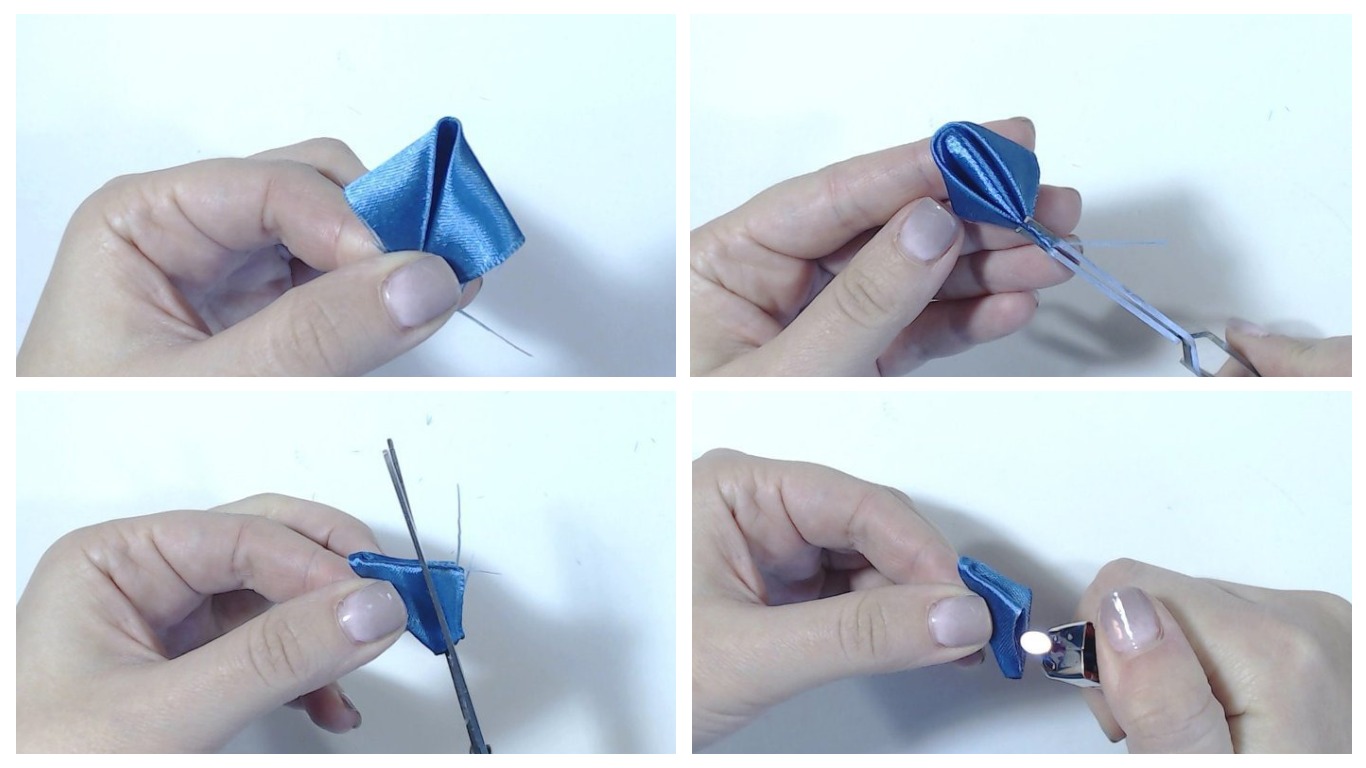
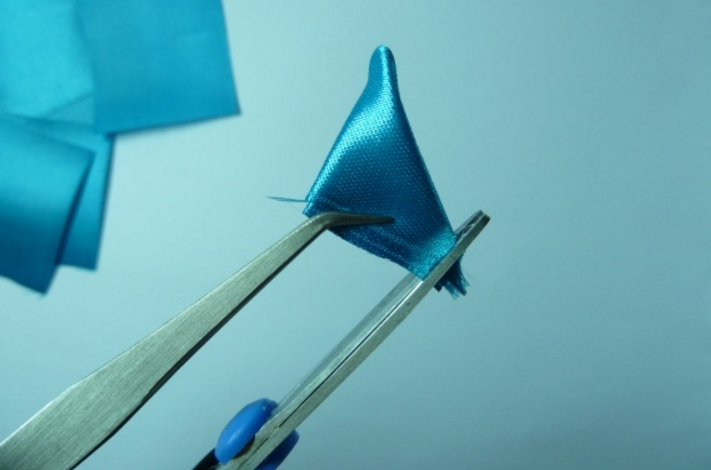
The easiest way to make a simple sharp petal in the kanzashi technique is to use a piece of tape measuring 5 x 5 cm with melted edges so that the threads do not spill out. It needs to be folded diagonally twice, holding it with tweezers. If you cut off the corner and the base of the resulting triangle, a petal will form, but you must singe the cut line.
In the same way, you can make a double or even triple petal. You just need to put two or three pieces together before cutting, use ribbons of different shades. To prevent the fabric from coming apart, you can fasten the pieces with a thread.

Volumetric rounded
The basic element of the technique are round petals. Most often they are made voluminous, these are the ones used for most flowers. This is the simplest technique, accessible to beginners. The master class on round kanzashi petals is easy to understand, so many beginners start with it.
First, you need to fold the ribbon squares diagonally, and then bend the corners. To prevent the resulting workpiece from spreading, hold it with tweezers. The bottom edge needs to be cut and singe. After that, bend the side corners back and secure. You will get a voluminous round petal.
Flat round
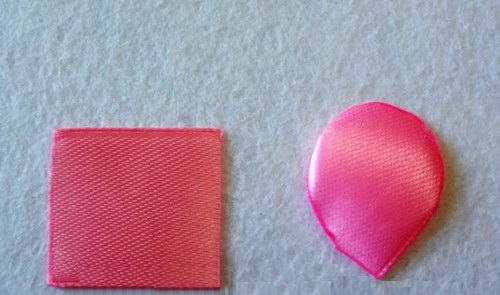
Sometimes flat petals are required, and the volume of the finished flower is achieved by their number. The easiest way to make it is to cut out the element of the desired shape and singe the edges. It is best to use a template.
Another option is to make flat round kanzashi petals also from a wide ribbon, from which squares are cut out. The workpiece is folded diagonally so that the right angle is at the bottom. Then the sharp corners are folded down, connected, and the petal is formed. The excess edges are cut off and singe with fire. Additionally, you need to give the petal the correct shape with your hands.
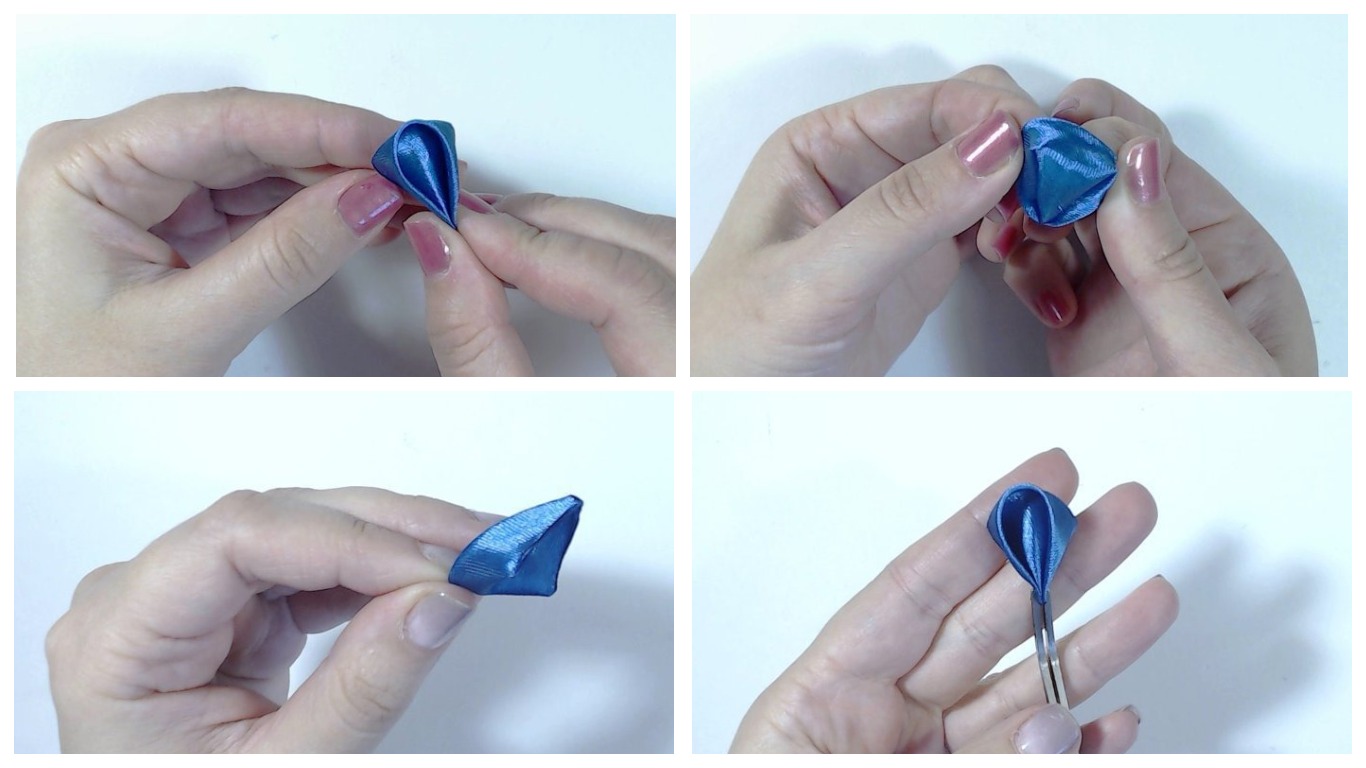
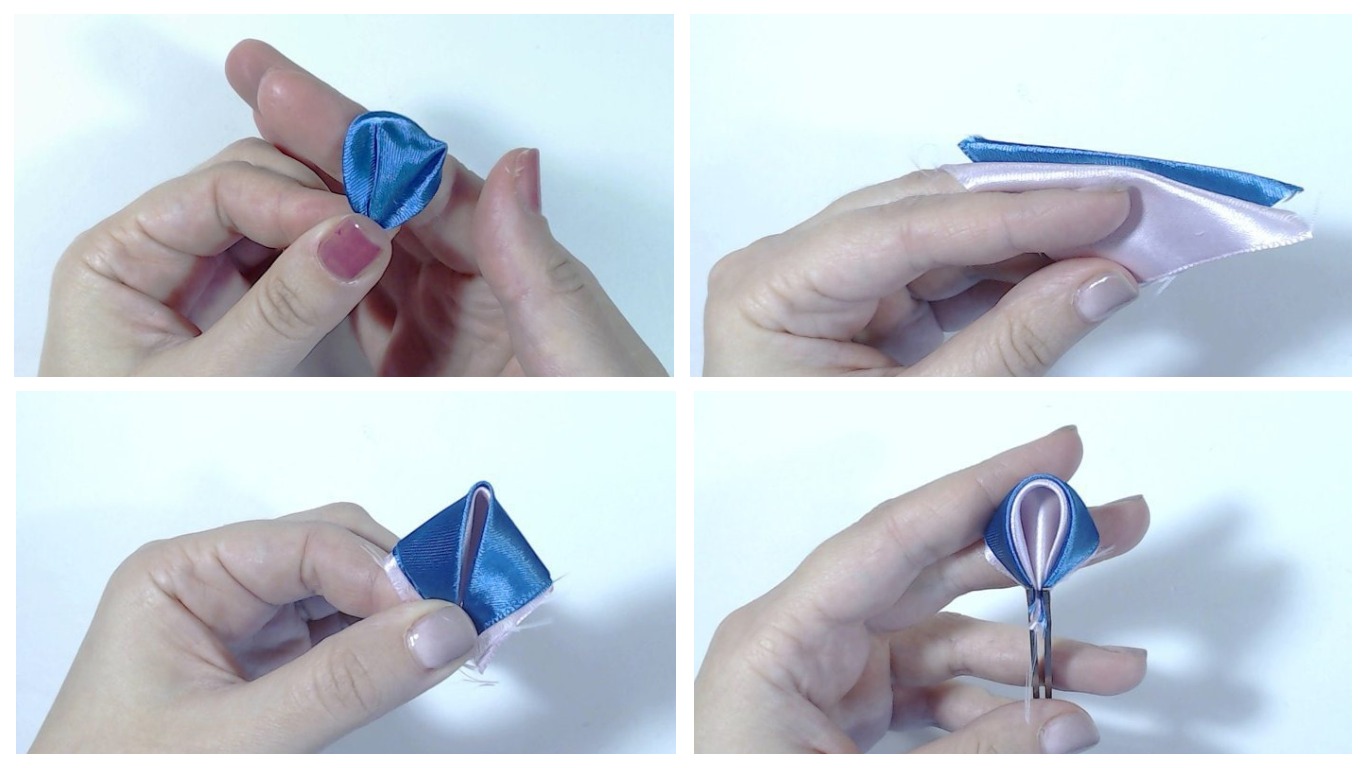
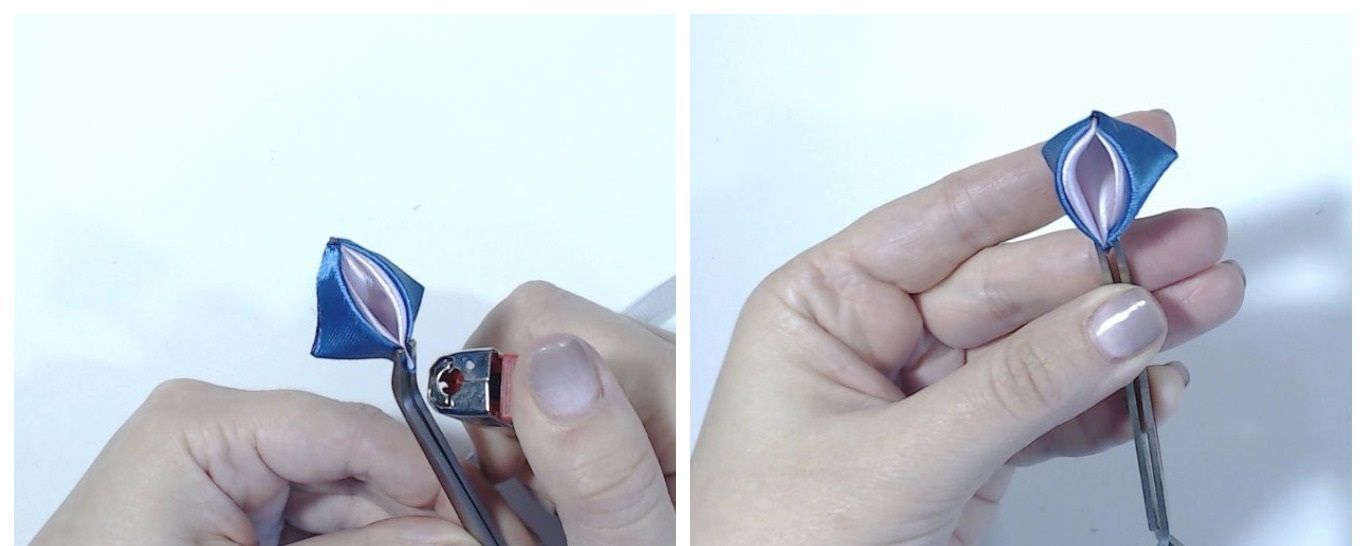
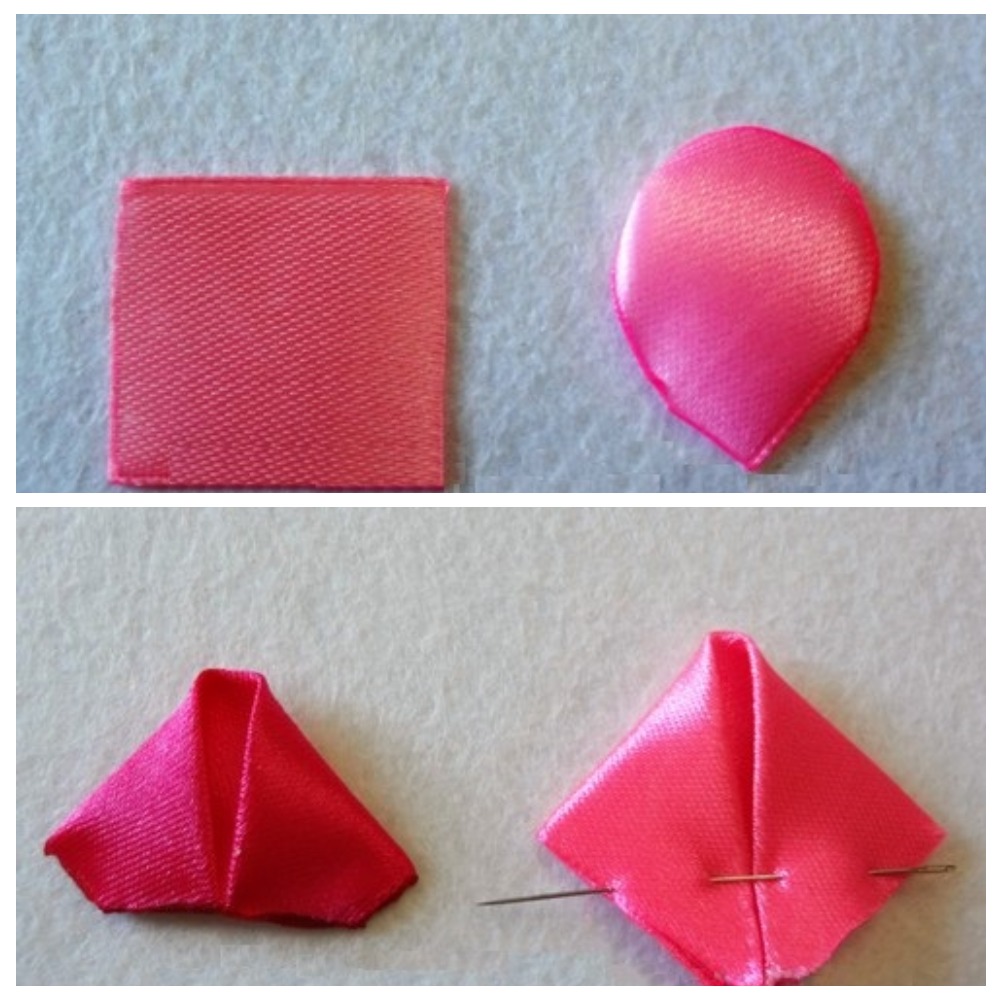
Complex with a fold
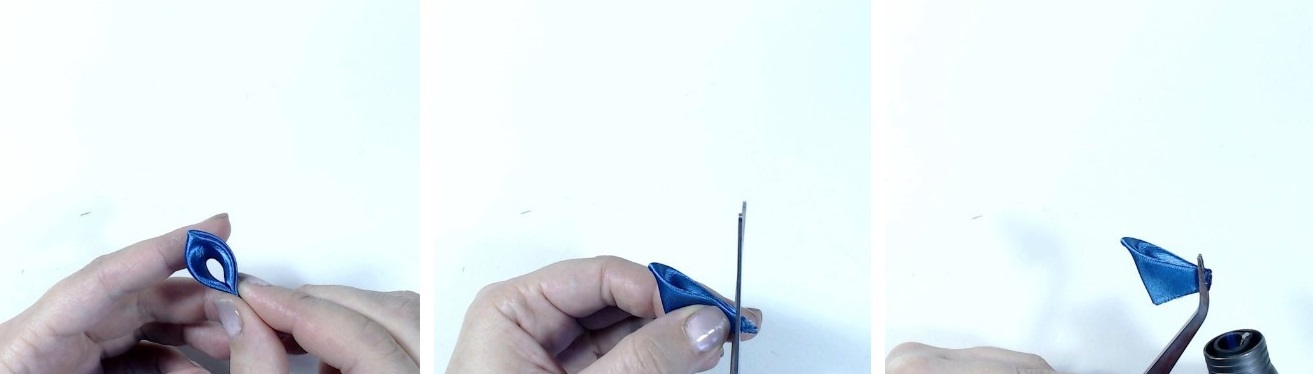
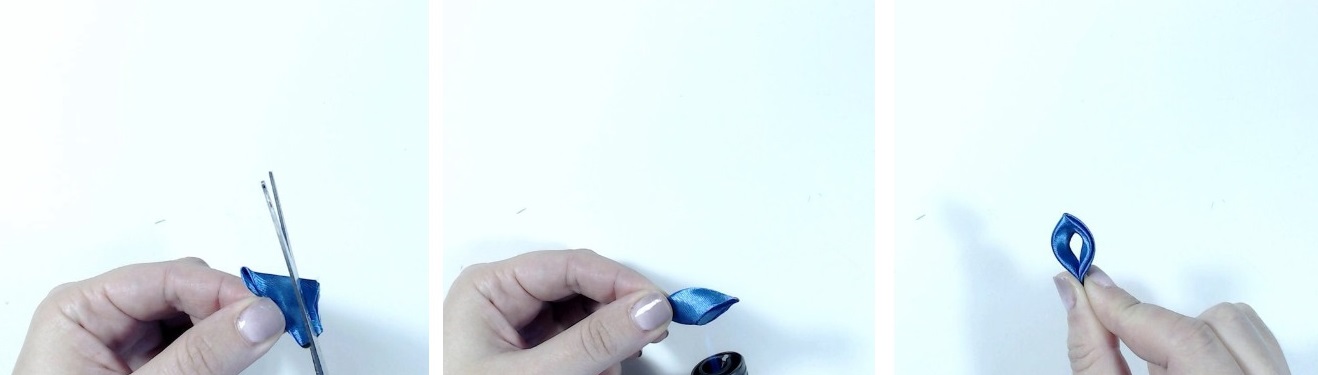
The shape of the petals can be complex, with a fold inside. To make them, you also need a square with a side of 5 cm. It should be bent diagonally and the corners should be folded. You will get a small square. Its lower part is cut off, and the remaining workpiece is compressed on the sides. This forms a petal with a fold in the middle. After this, the excess edges are cut off, singe and the semi-finished element is fastened with thread or fire.
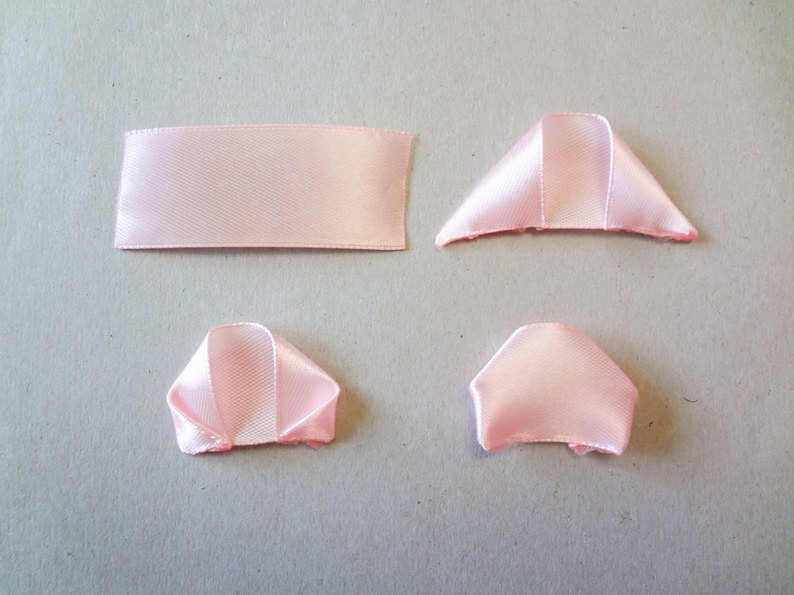
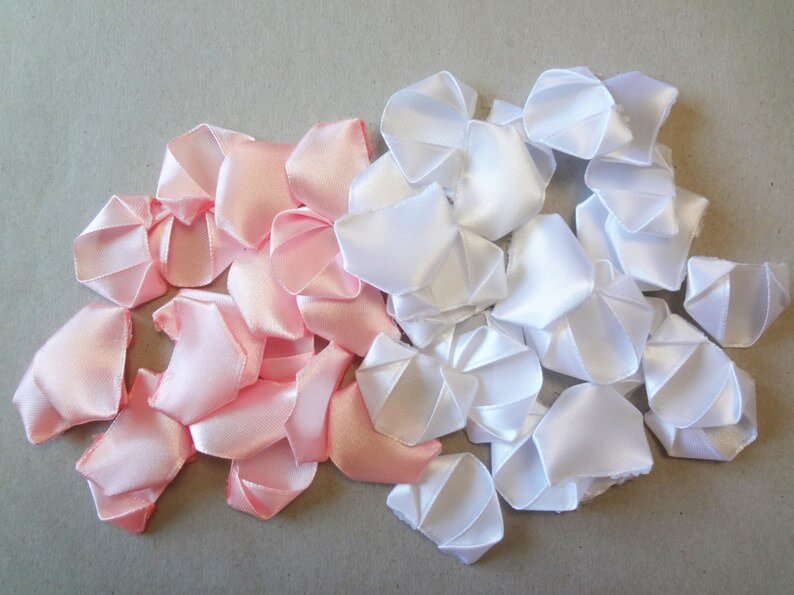
For the rose
You can also make a simple rose flower using this technique. You will need special petals for this. Master class on making:
- Take rectangular pieces of pink or white ribbon. Their length should be approximately twice their width.
- Turn the strip over to the wrong side, fold and secure the corners.
- On the front side you will get a workpiece with a rounded top edge. You need to bend the sharp corners on the sides inward, and then stitch with medium stitches.
- After this, pull the thread tight and tighten the edge. If everything is done correctly, there is no need to additionally singe the edges.
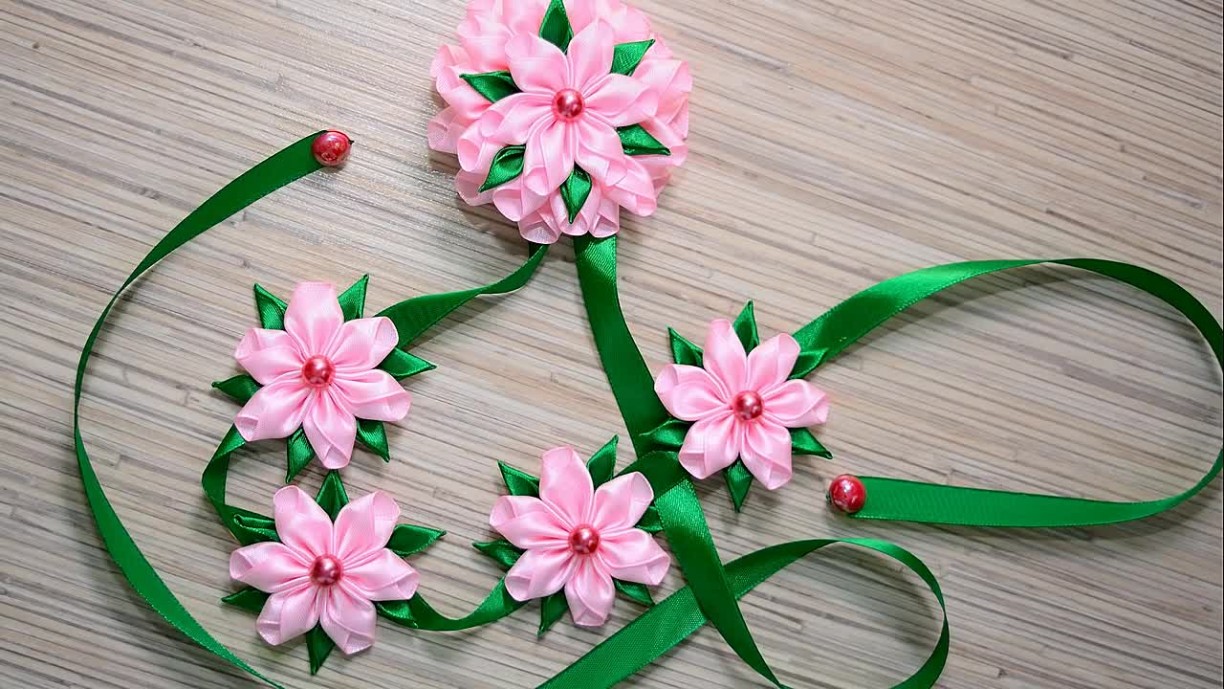
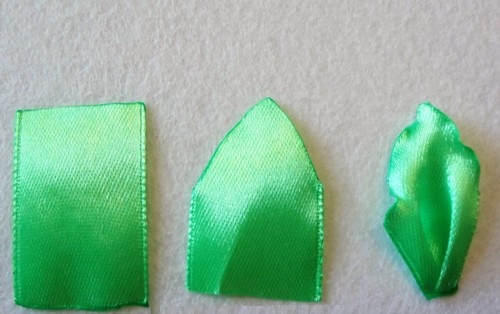
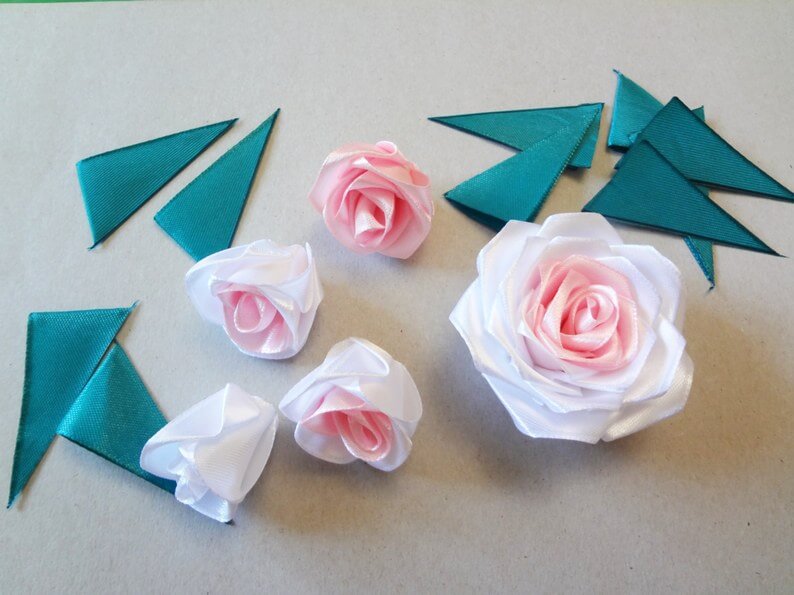
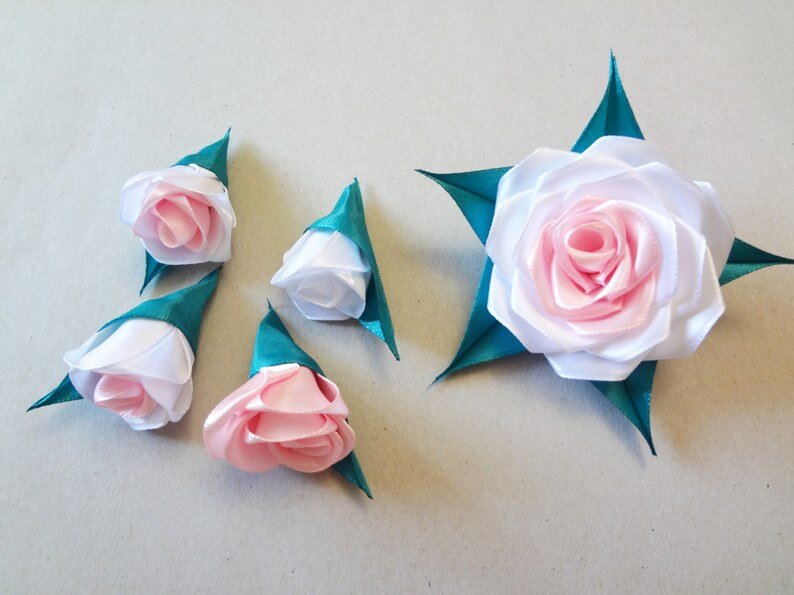
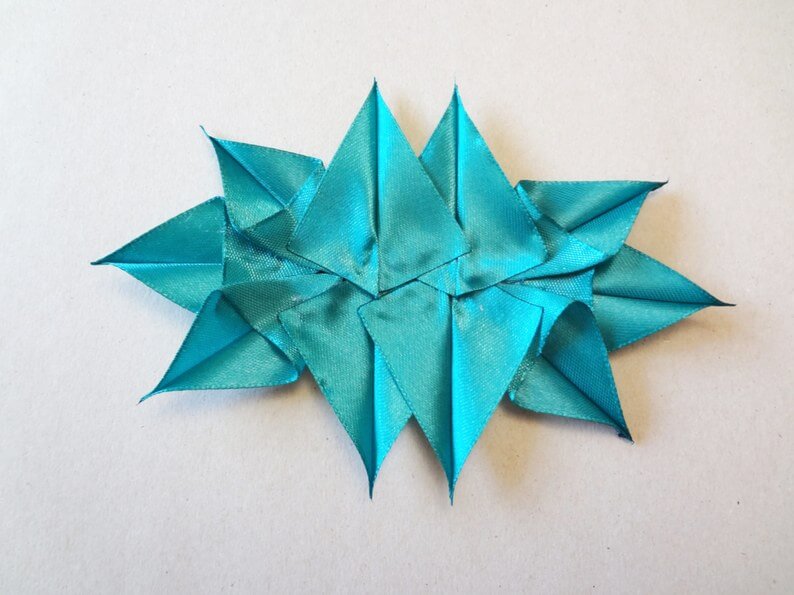
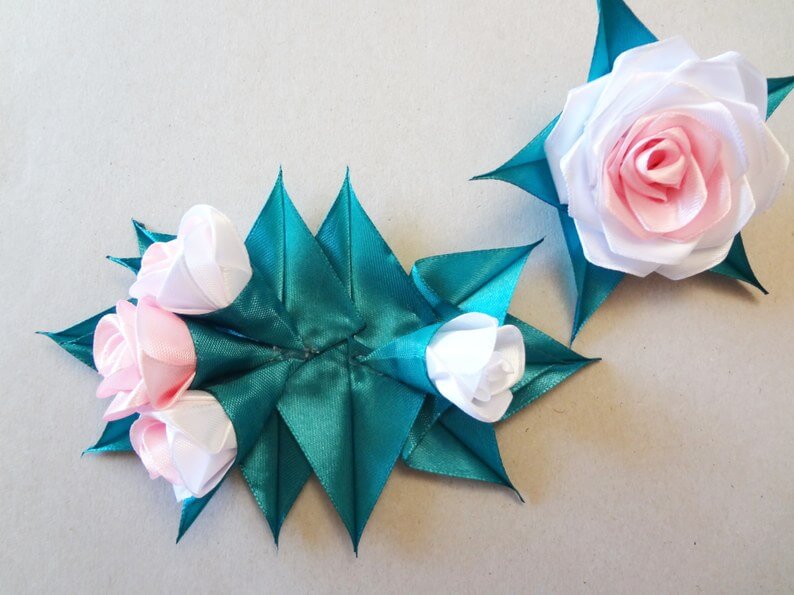
Making leaves and bows
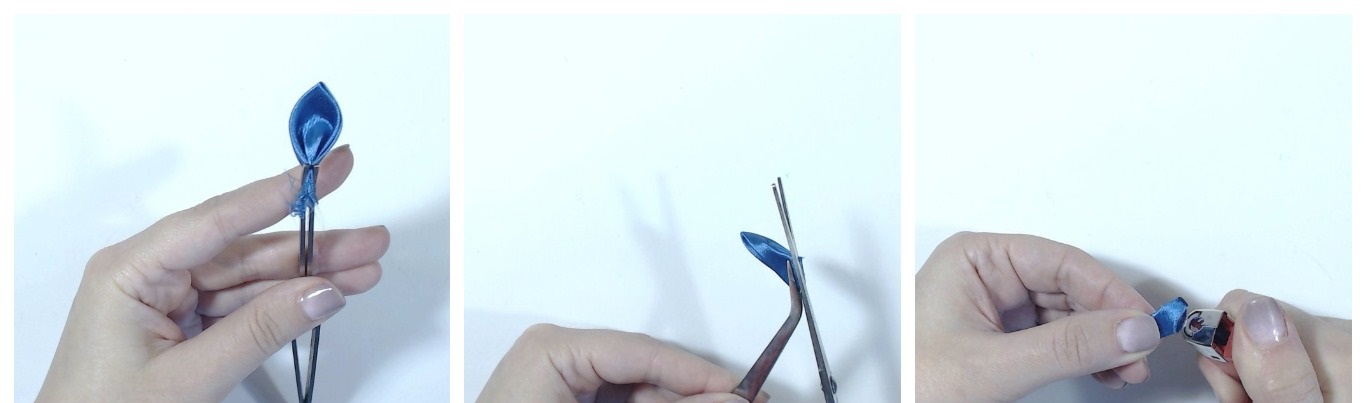
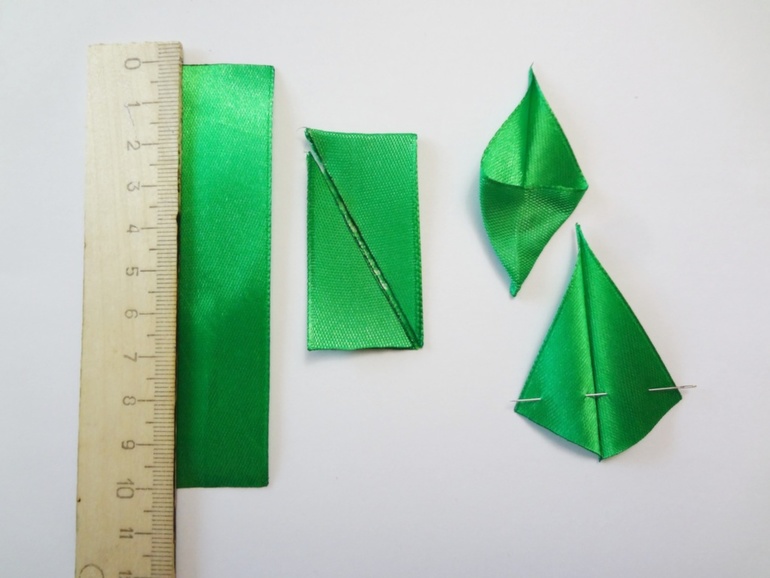
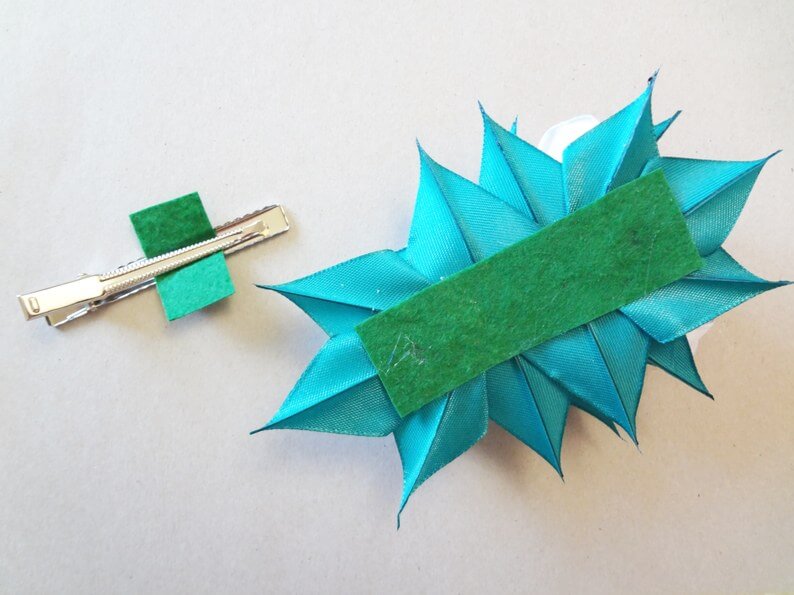
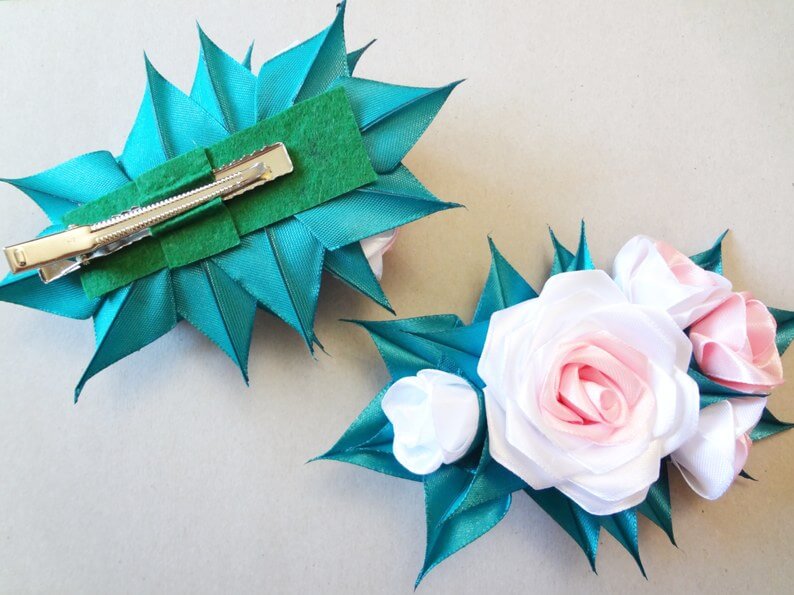
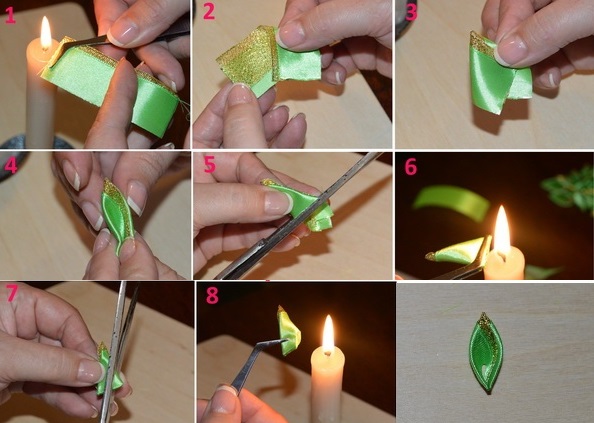
To create a beautiful decoration, you need to learn how to make kanzashi leaves from ribbon. They are usually made from green pieces. They are made from a ribbon 1 cm or 2.5 cm wide, strips of about 10 cm are cut from it. The resulting parts are folded in half and cut diagonally. It is better to do this with a soldering iron, it will immediately singe the edges. You will get two blanks, one of which looks like a cone and can be used as a leaf or for attaching buds.
The second rectangular blank is used to make rounded kanzashi leaves. They are cut at the top in the shape of a dome. Then the edges are singe, and then immediately stretched by hand to create a wavy shape. The lower part is gathered on a thread.
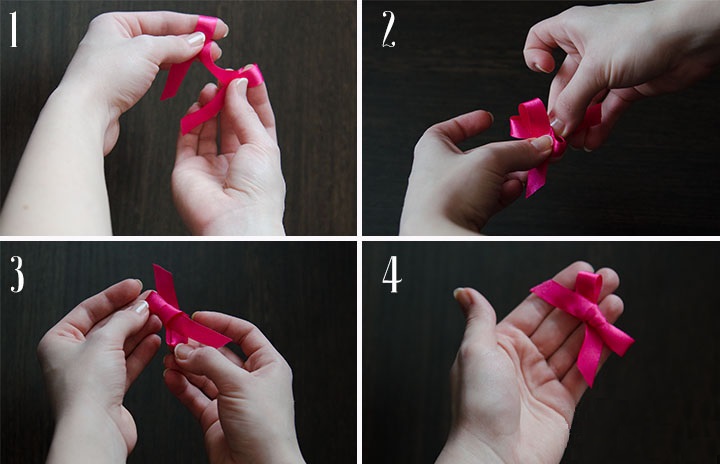
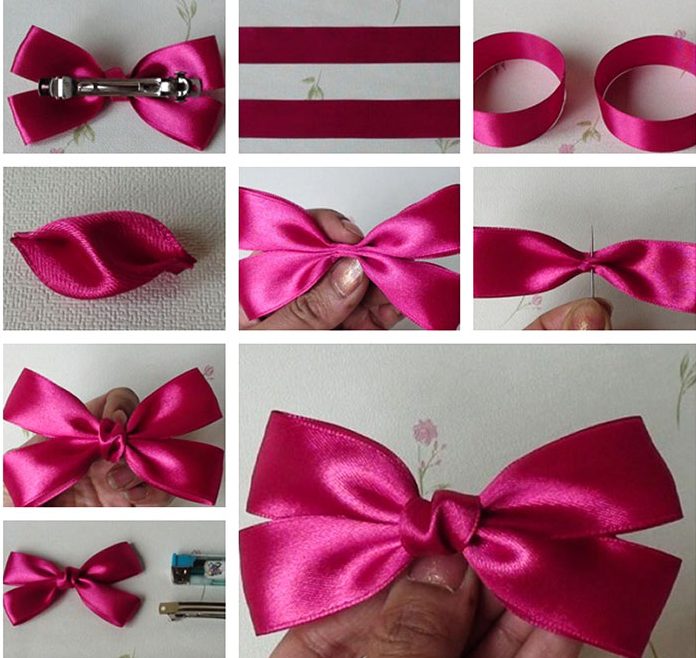
You can make beautiful bows from satin ribbons with your own hands. The simplest ones are recommended for decorating hair bands or brooches. They are made from satin ribbons of any width. You need to take a piece of the selected product with both hands, put it on your index fingers and tie a simple bow. To make a double one, you will need two identical ribbon rings. They are folded and sewn together in the middle. The place of fastening is covered with a piece of ribbon of the same color. When combining these methods, you get a beautiful lush bow, which can be used to decorate a hair clip, elastic band or headband.
How to assemble the product
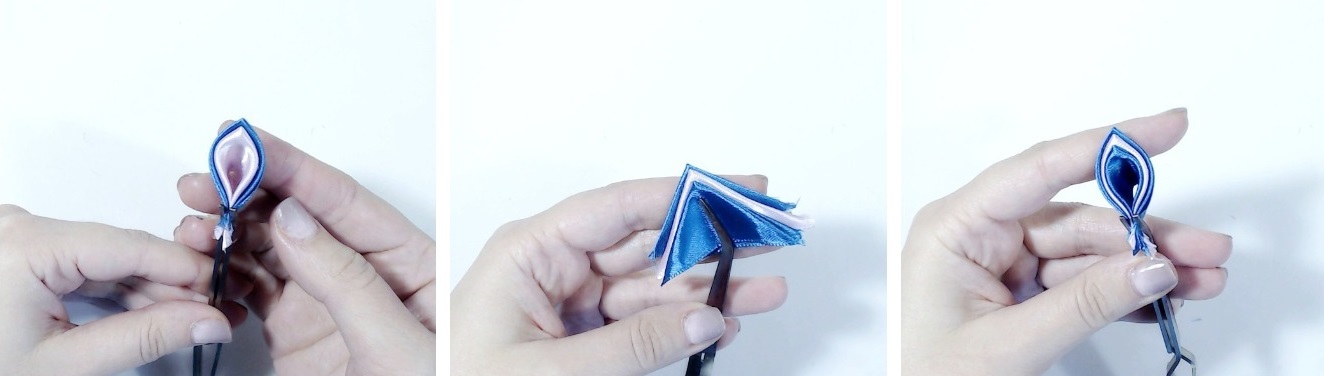
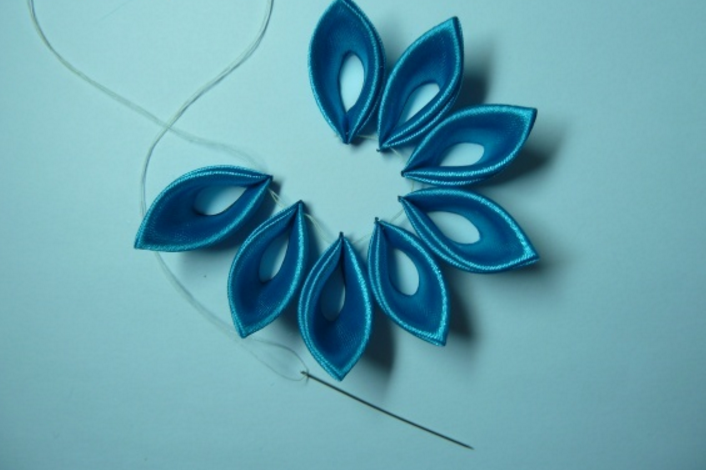
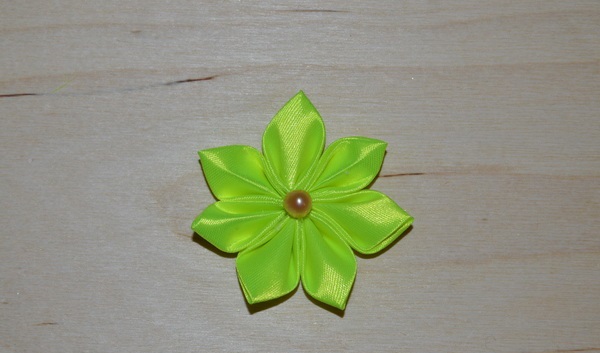
Flowers and a variety of compositions can be made from such blanks. The petals are connected in a circle using a thread or glue. They are decorated with green leaves, which can be combined to form a branch. A bead or a beautiful button is glued to the center of the flower.
The resulting bud is fixed to the base. This can be a cardboard circle covered with fabric of the same shade, a simple hairpin or headband. By combining different tones, the shape of the petals is obtained in different flowers from ribbons: daisies, chrysanthemums, roses. They can be connected.

Making flowers from satin ribbons is not difficult, but there are a few tricks that novice needlewomen do not know:
- It is best to process the edges with a soldering iron or a candle;
- you need to bring the petal to the fire not from above, but from the base, then there will be no black streaks;
- A hot glue gun is more suitable for gluing, it does not leave marks and does not damage the fabric;
- To prevent the pieces from falling apart when glued, you first need to secure them with a thread or pin them together.
If the finished flower does not hold its shape, you need to spray it with hairspray, but it is important to remember that this may cause the beads to become cloudy.
Step-by-step master class for beginners
First, you need to learn how experienced craftsmen make kanzashi. This technique only seems complicated, but once you understand it, you can make unique items yourself. To master the art of kanzashi for beginners, you need to try to create right away. You can watch master classes: they explain all the nuances and techniques of production, reveal all the subtleties of the work. Also, the video explains step by step what needs to be done to avoid mistakes. If you follow the instructions, then you will get beautiful flowers from ribbons.
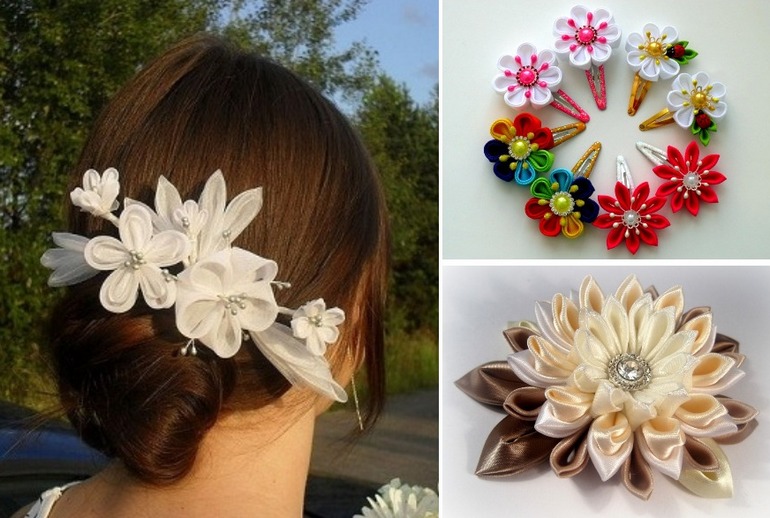
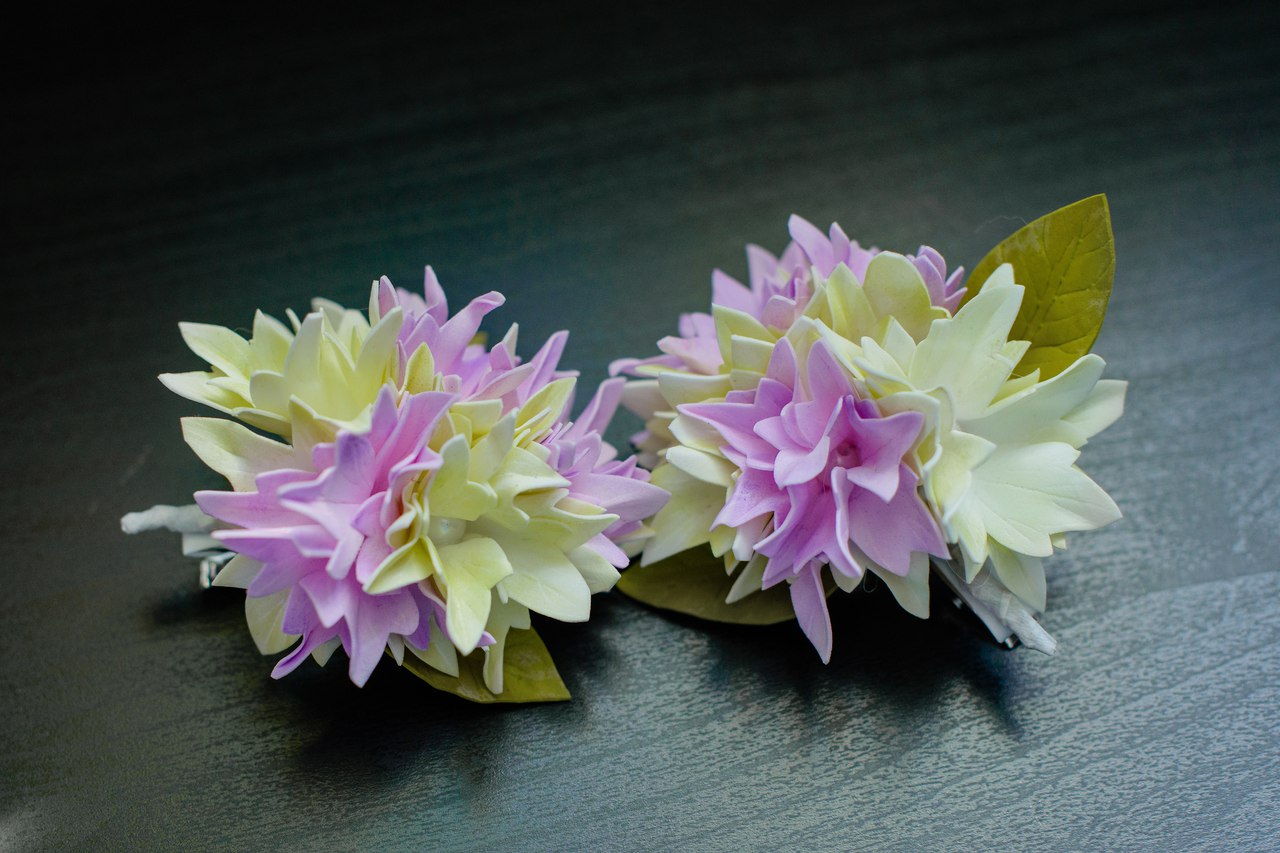
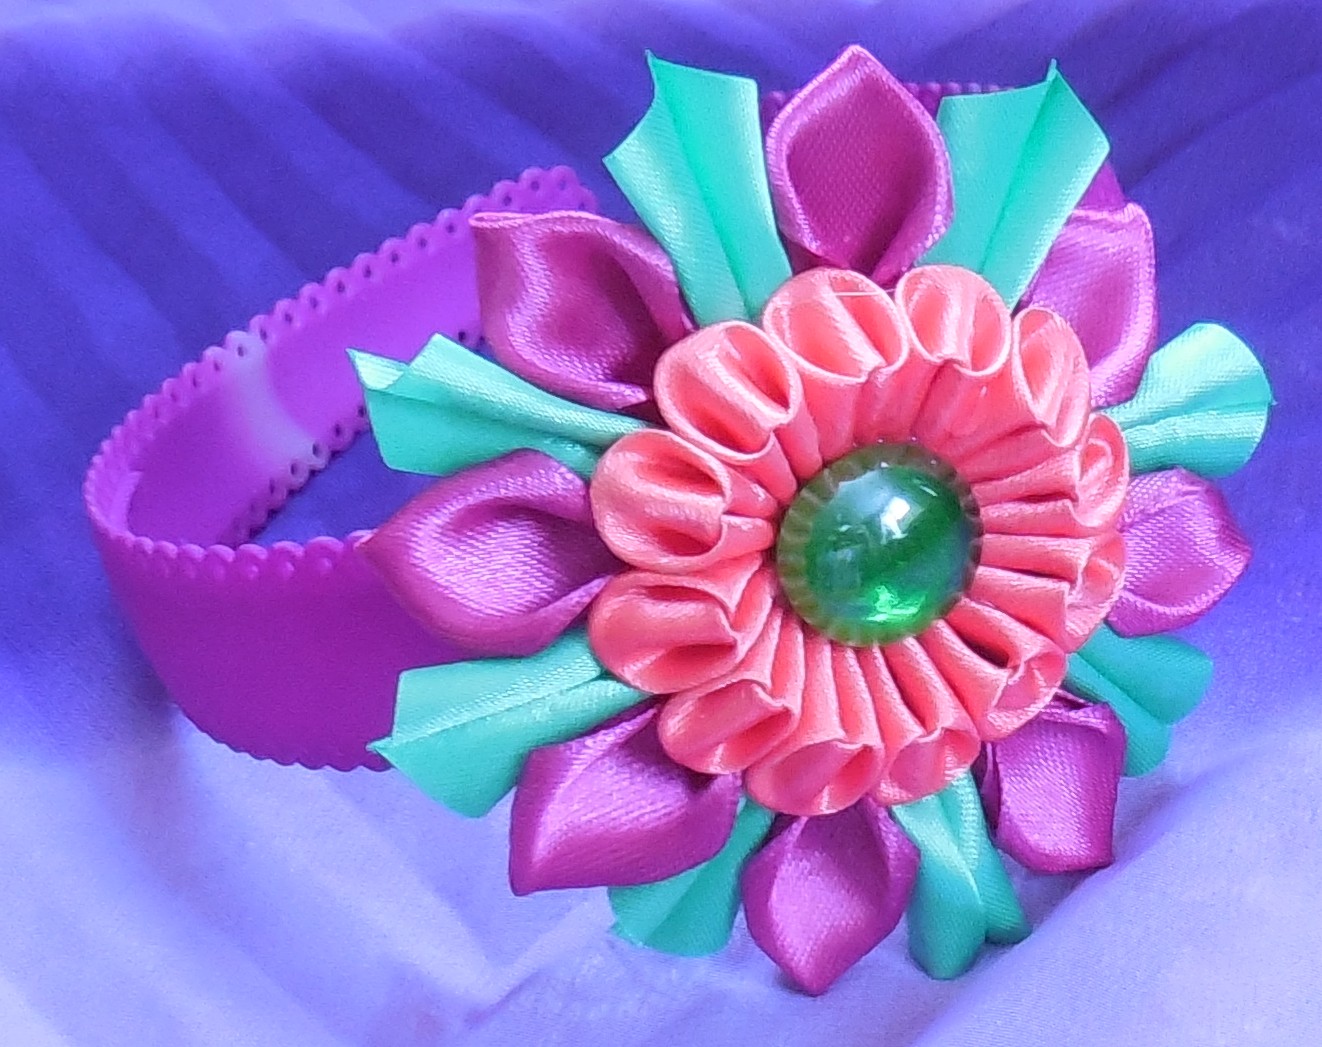
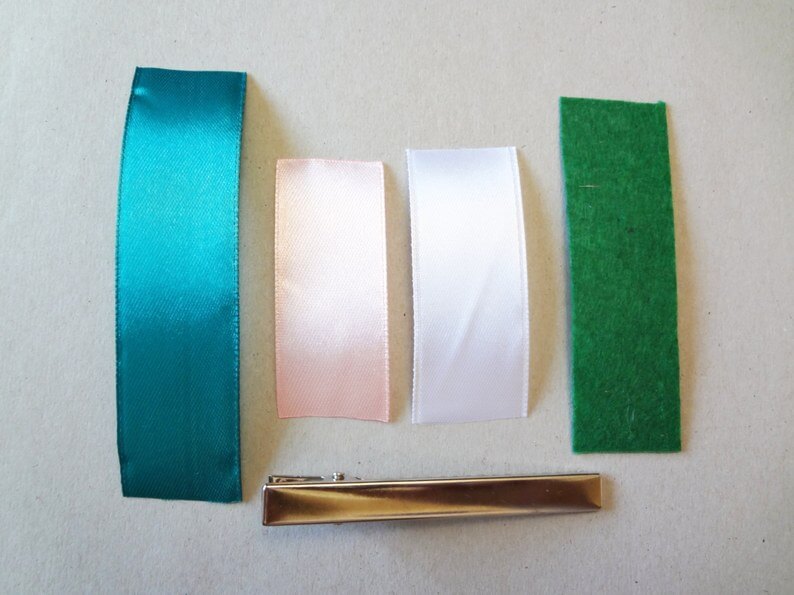
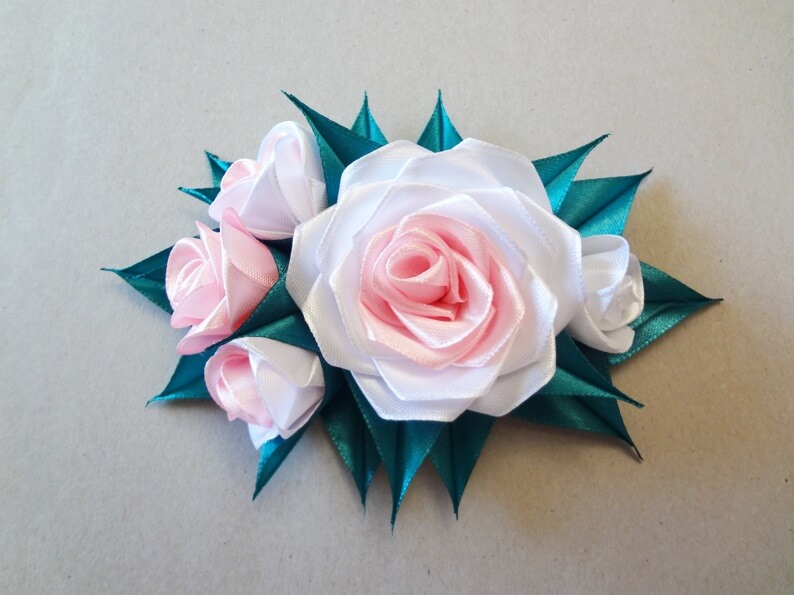
Hairpin with kanzashi roses
This technique is most often used to make hair decorations. Beautiful roses are made from ribbons, which can be used to decorate any hairpin. For this, you need a base, as well as a 2.5 cm wide ribbon in green, white and pink. The decoration is made like this:
- from pink and white pieces you need to make flower petals;
- make different leaves from green ribbon;
- roll one petal into a cone and glue the rest around it one by one, forming a rose;
- you can make the flower pure pink or finish it with white petals;
- you need one large rose and several small buds;
- attach the flower to a leaf base, glue the buds into the cone-shaped blanks;
- form a composition;
- glue a rectangular piece of thick fabric to the bottom, securing it with a hairpin.

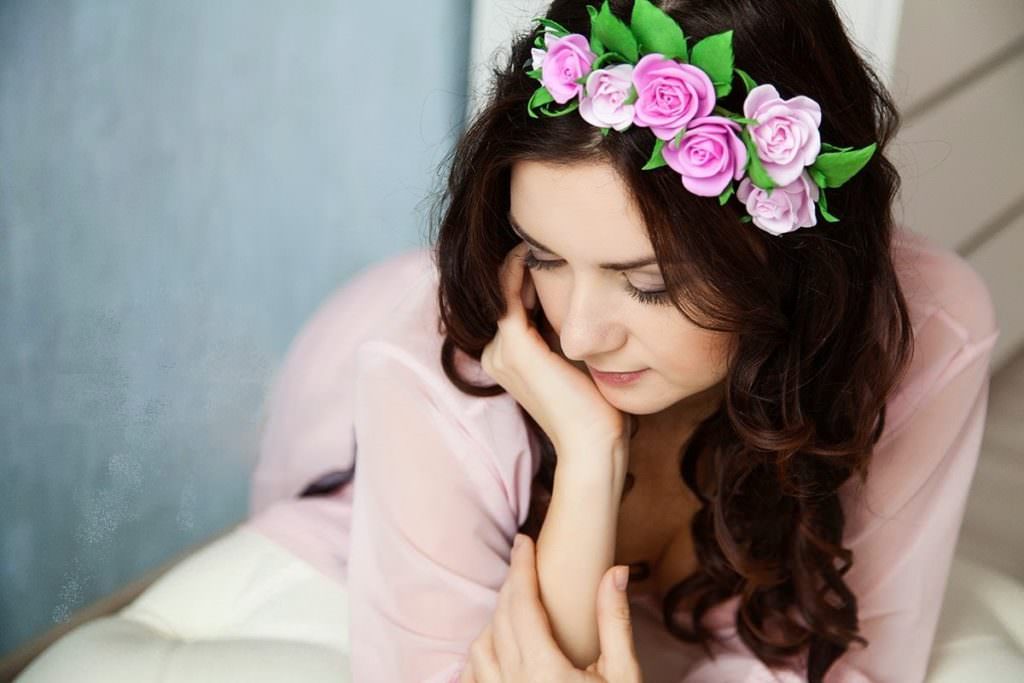
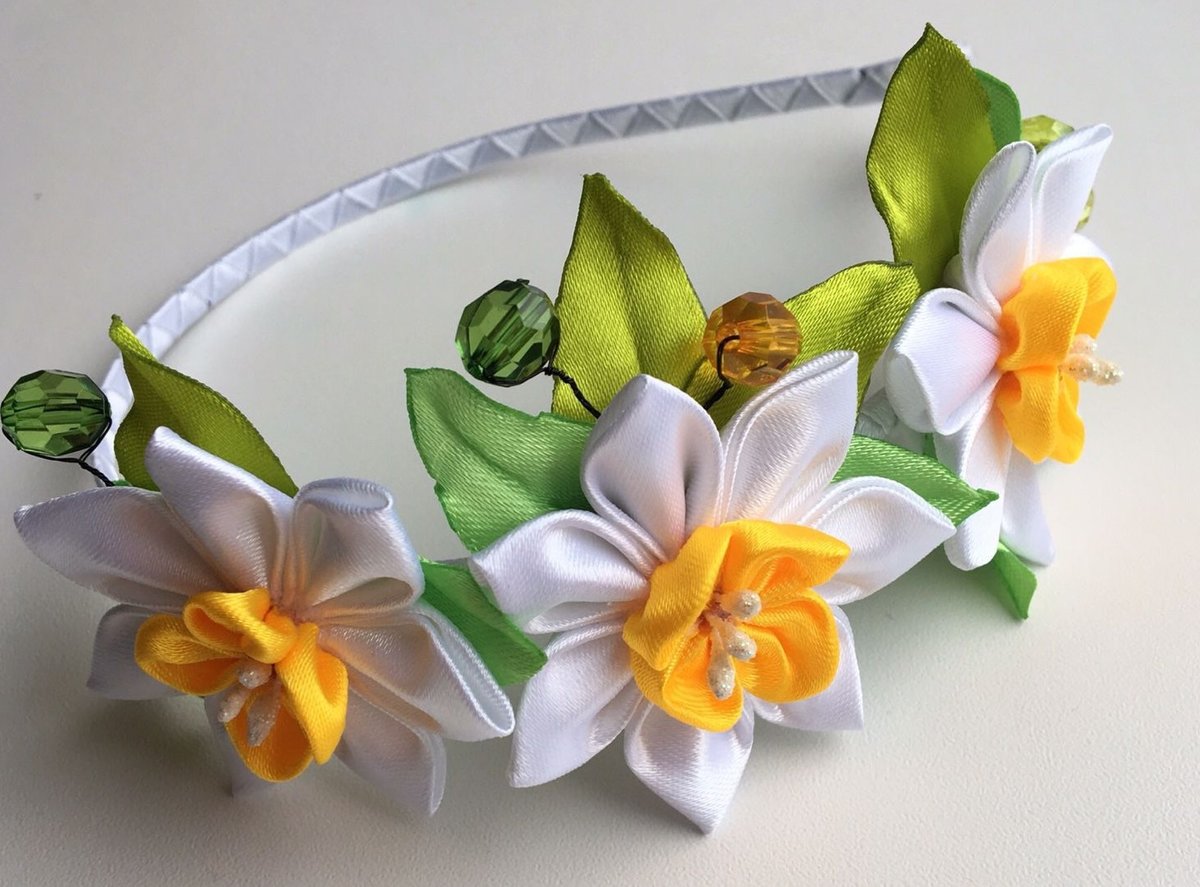
Headband for a girl
A simple and beautiful hair decoration can be made using a headband. Any girl will love this gift. You will need a simple headband, a cardboard circle and a satin ribbon of your favorite color. It is best to make kanzashi flowers from a 5 cm ribbon for this decoration. Stages of work:
- from 5 x 5 cm pieces make round petals and several long ones;
- connect round elements 5 pieces at a time and make flowers;
- attach a cardboard circle to the side of the rim;
- glue long petals around the base;
- attach three flowers to the side, if necessary, place one in the middle;
- glue the remaining flowers along the length of the headband;
- decorate the centers of the flowers with beads;
- Spray with hairspray to keep the composition in shape.

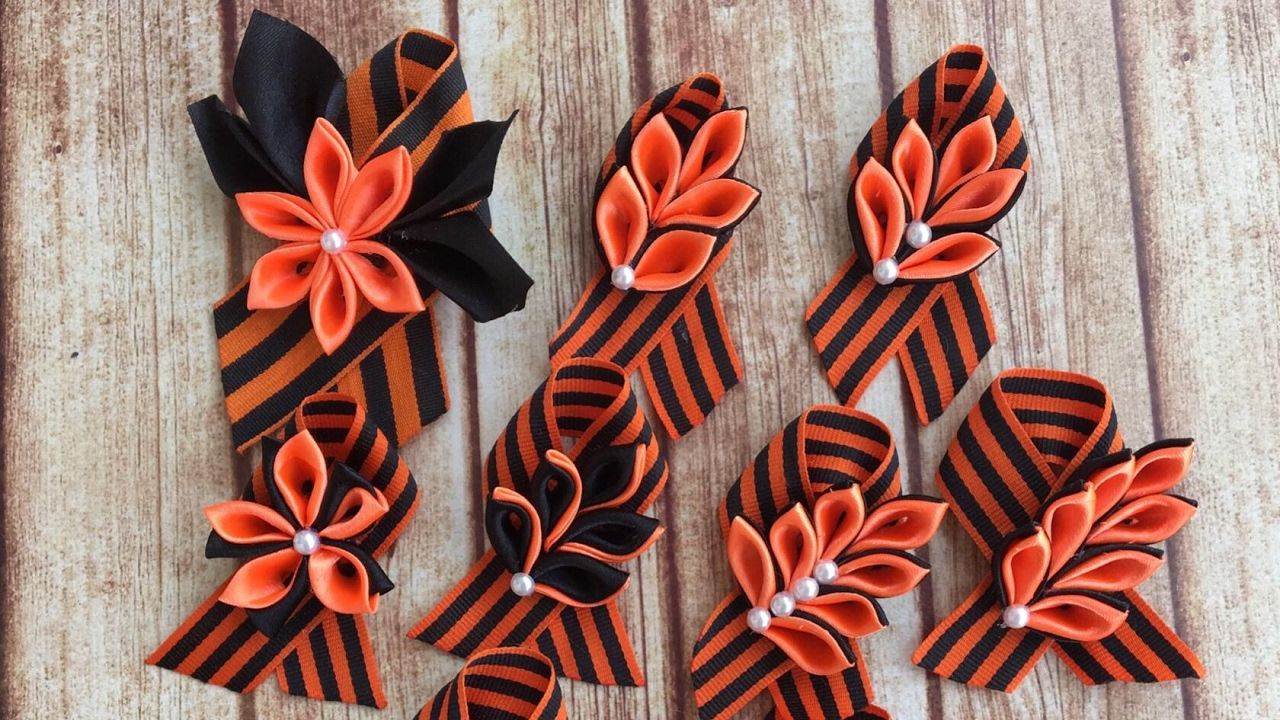
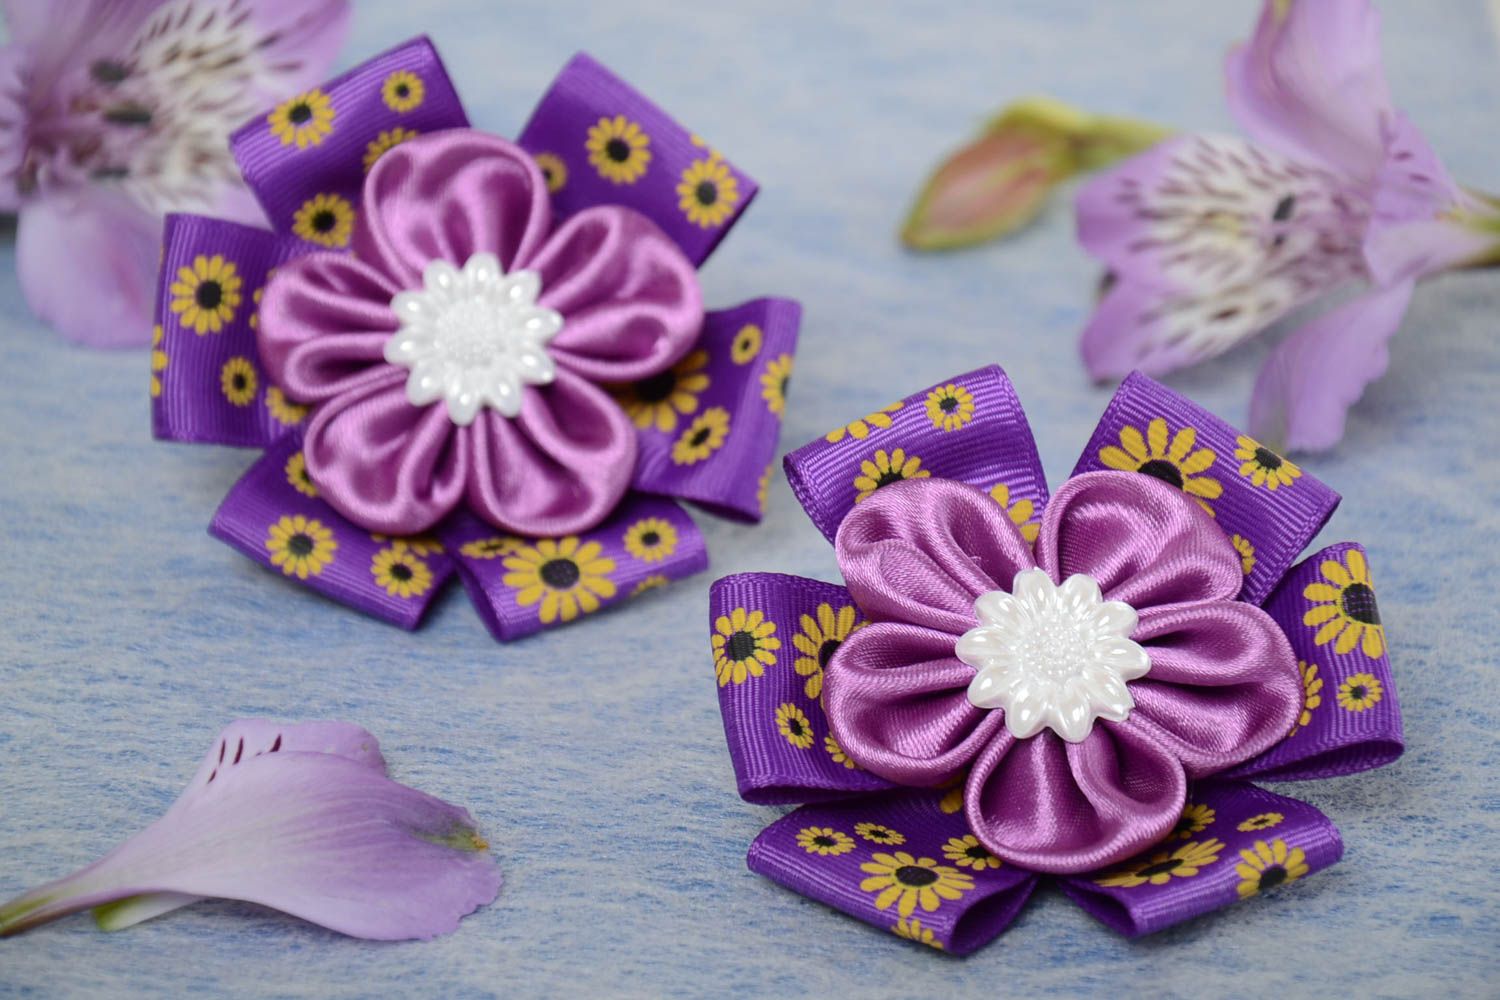
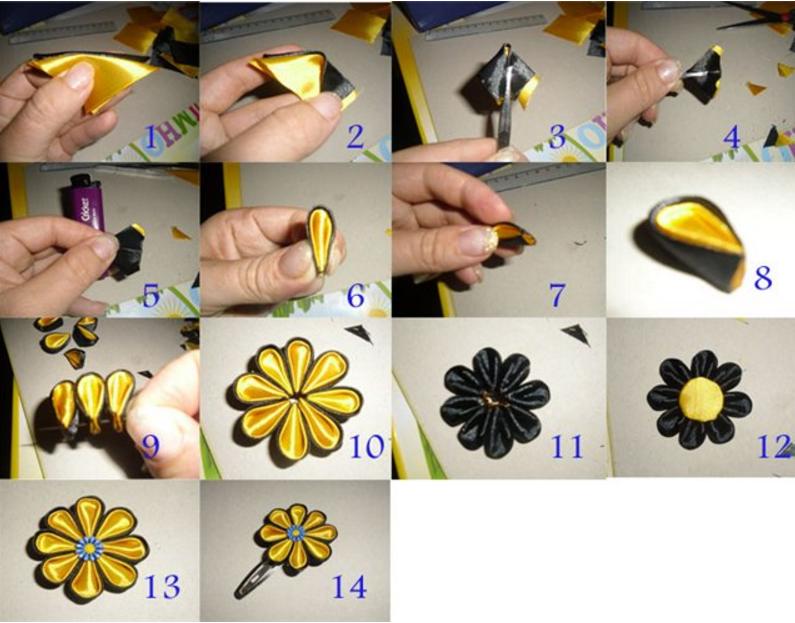
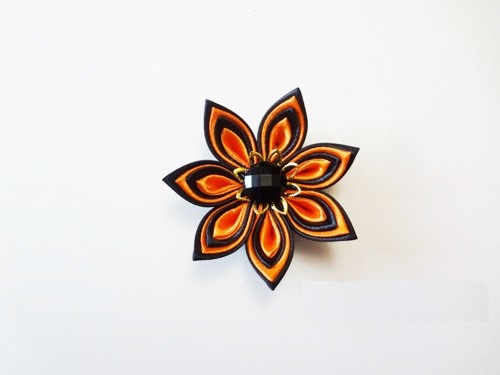
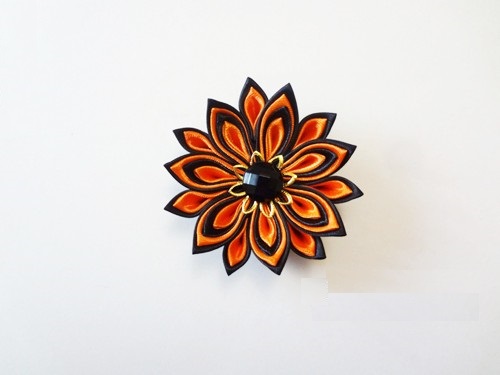
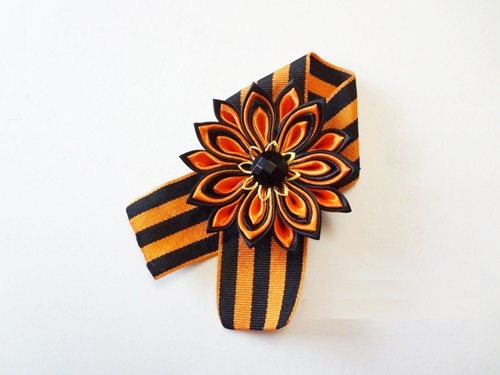
Brooch for May 9
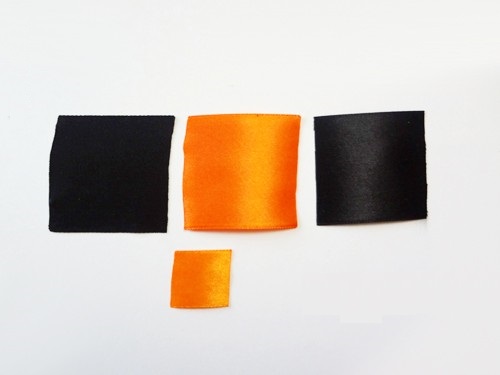
On this holiday, it is customary to attach a St. George ribbon to the chest. But it can be decorated with a beautiful flower using the kanzashi technique and glued to a brooch. This way, the commemorative sign will be easier to attach to clothes, and such decoration will look original. To make a brooch, you need:
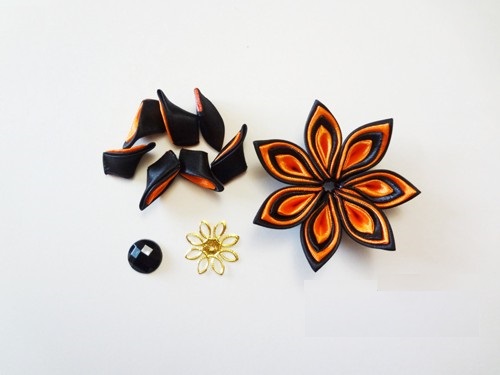
- cut squares from black and orange tape;
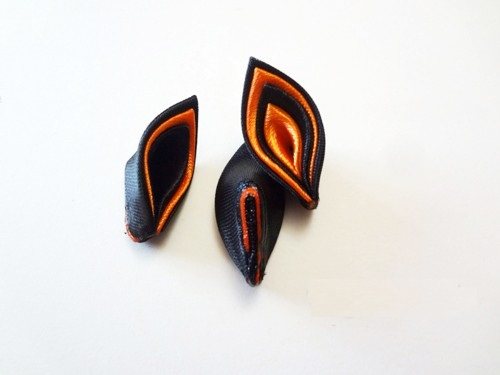
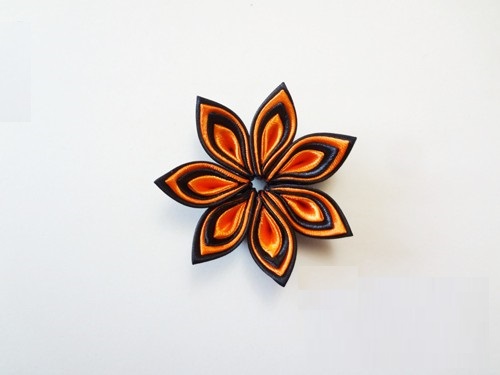
- make four-layered sharp petals, alternating black and orange;
- Fold 7 of these petals in a circle to form a flower and collect them on a thread;
- make the same petals, only from two parts;
- glue them between the main petals of the flower;
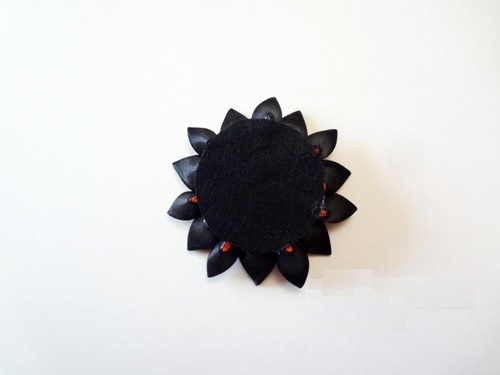
- attach everything to a round felt base;
- decorate the center with a black bead;
- The basis for the brooch can be a star made of red felt or a correctly folded St. George's ribbon.

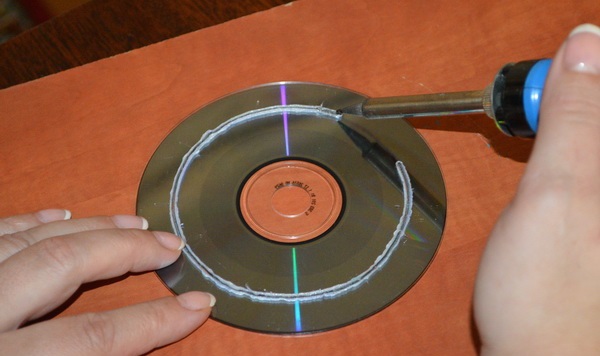
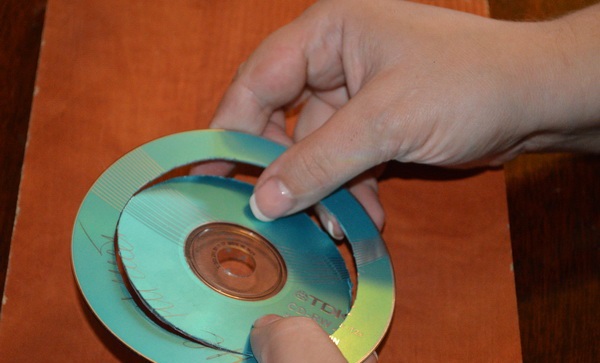
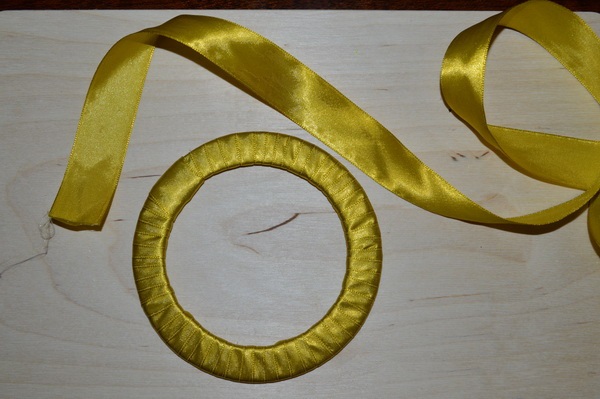
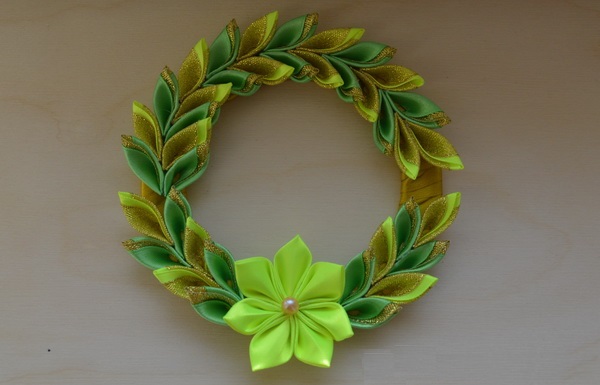
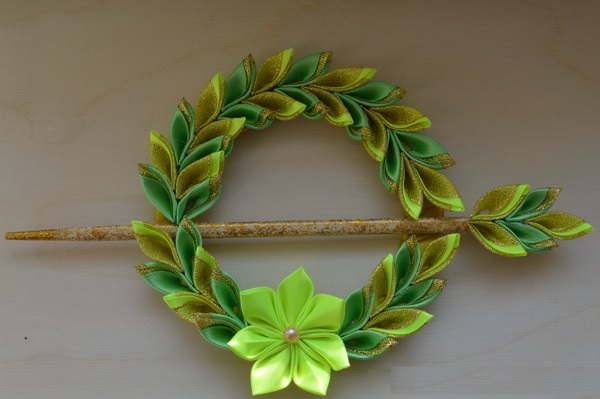
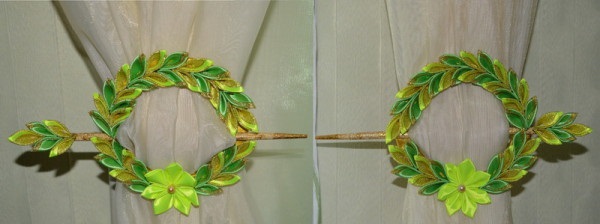
Curtain Tieback
Using the kanzashi technique, you can make original accessories to decorate your interior. Curtains and drapes are especially often decorated this way. To make a simple clip, you will need:
- make a base by cutting out a rim from a regular disk and covering it with fabric;
- Glue double sharp petals in pairs along the contour of the base to form a branch;
- decorate it in one place with a simple flower with round petals and a bead in the middle;
- Make a stick from a skewer to secure the tie-back, decorating it at the end with the same petals.
Having mastered the kanzashi technique, you can easily decorate your home or make original gifts. Such flowers can be used for hairpins, brooches, bracelets. Hand-made jewelry is always appreciated by everyone.
Video