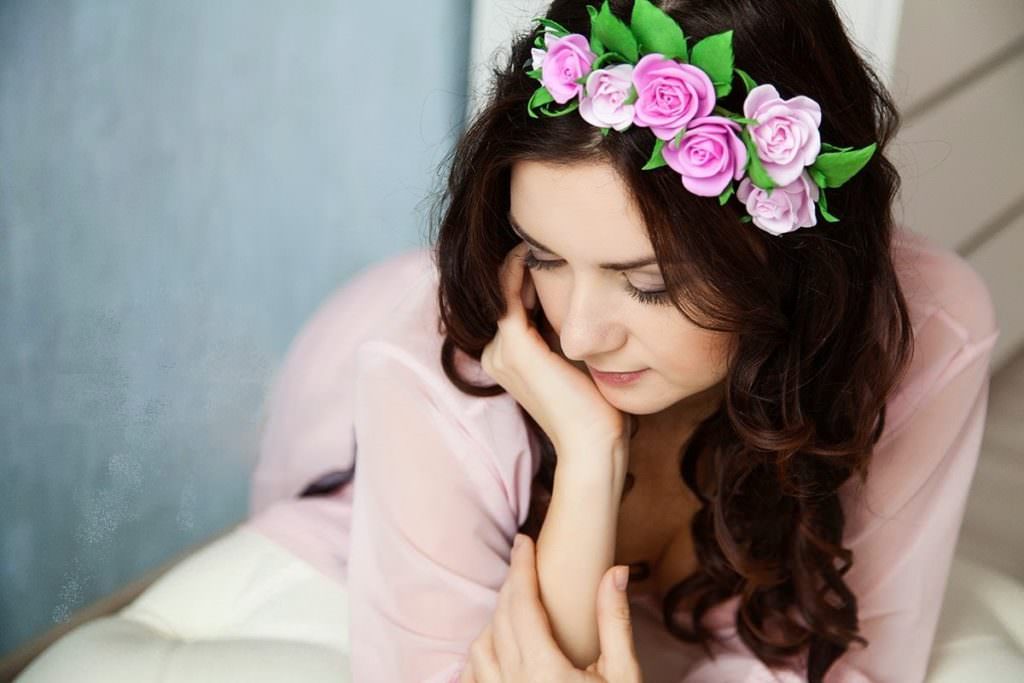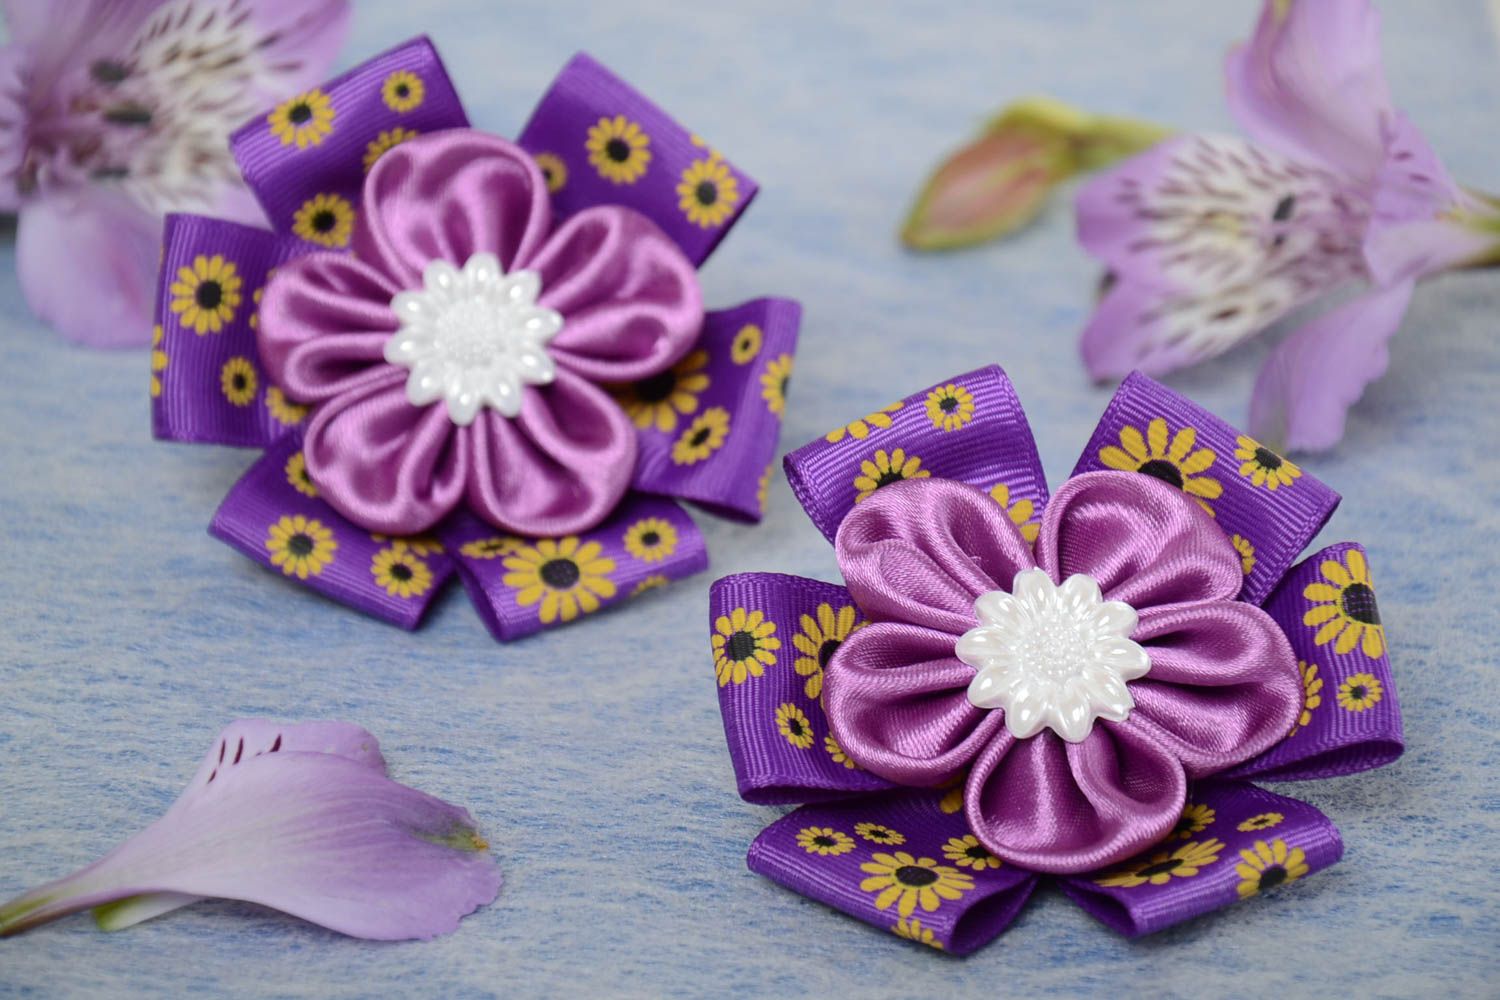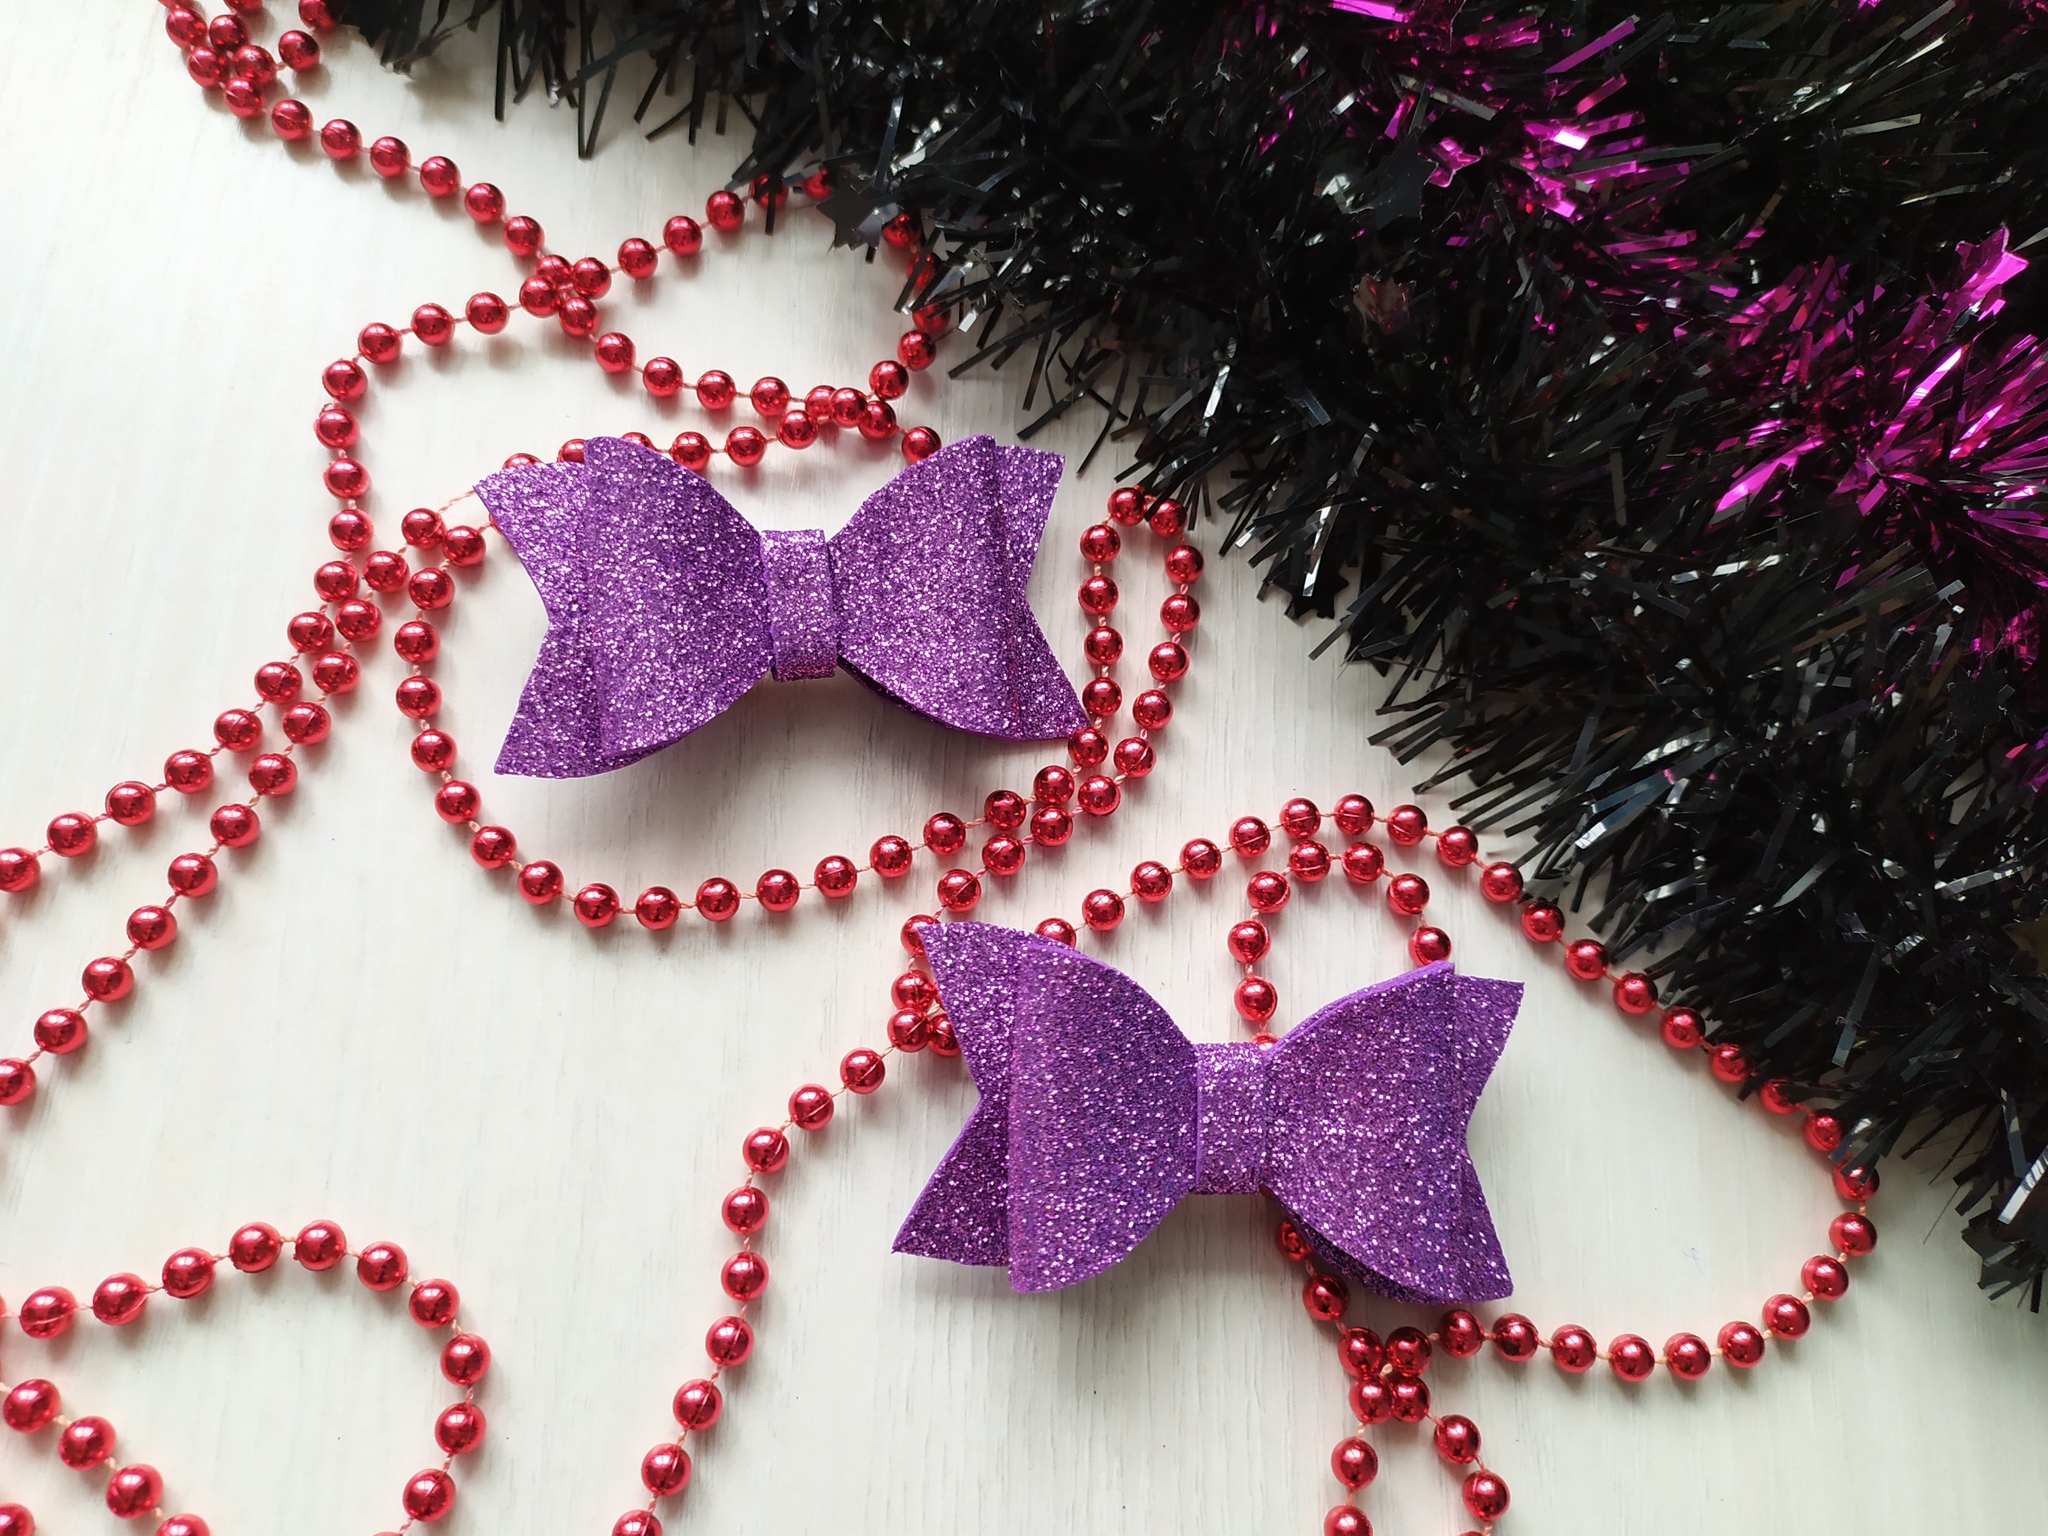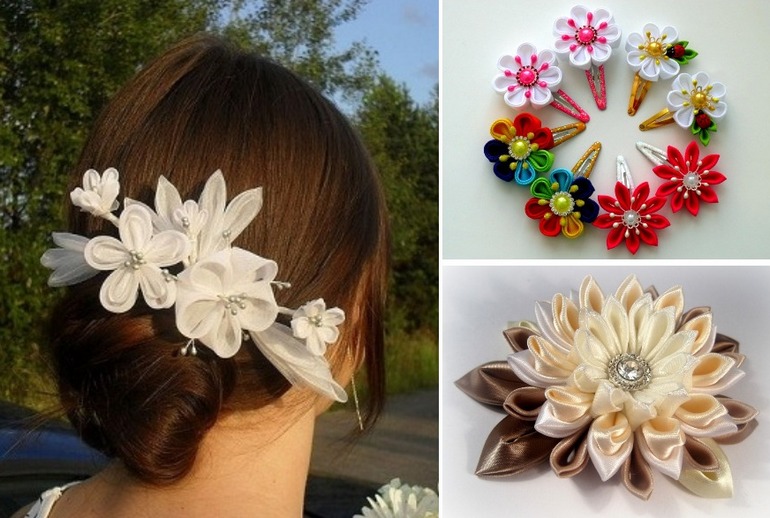
Handmade women's jewelry always looks exquisite, elegant, and can decorate an image and add mystery to it. Of particular interest are bows made in the Japanese kanzashi technique, which can be used for both hair and clothing. Amazing ornaments in this method are achieved through complex patterns. However, their diversity allows you to start learning the craft with simple options - even modest bows will look charming.
Features of the technique
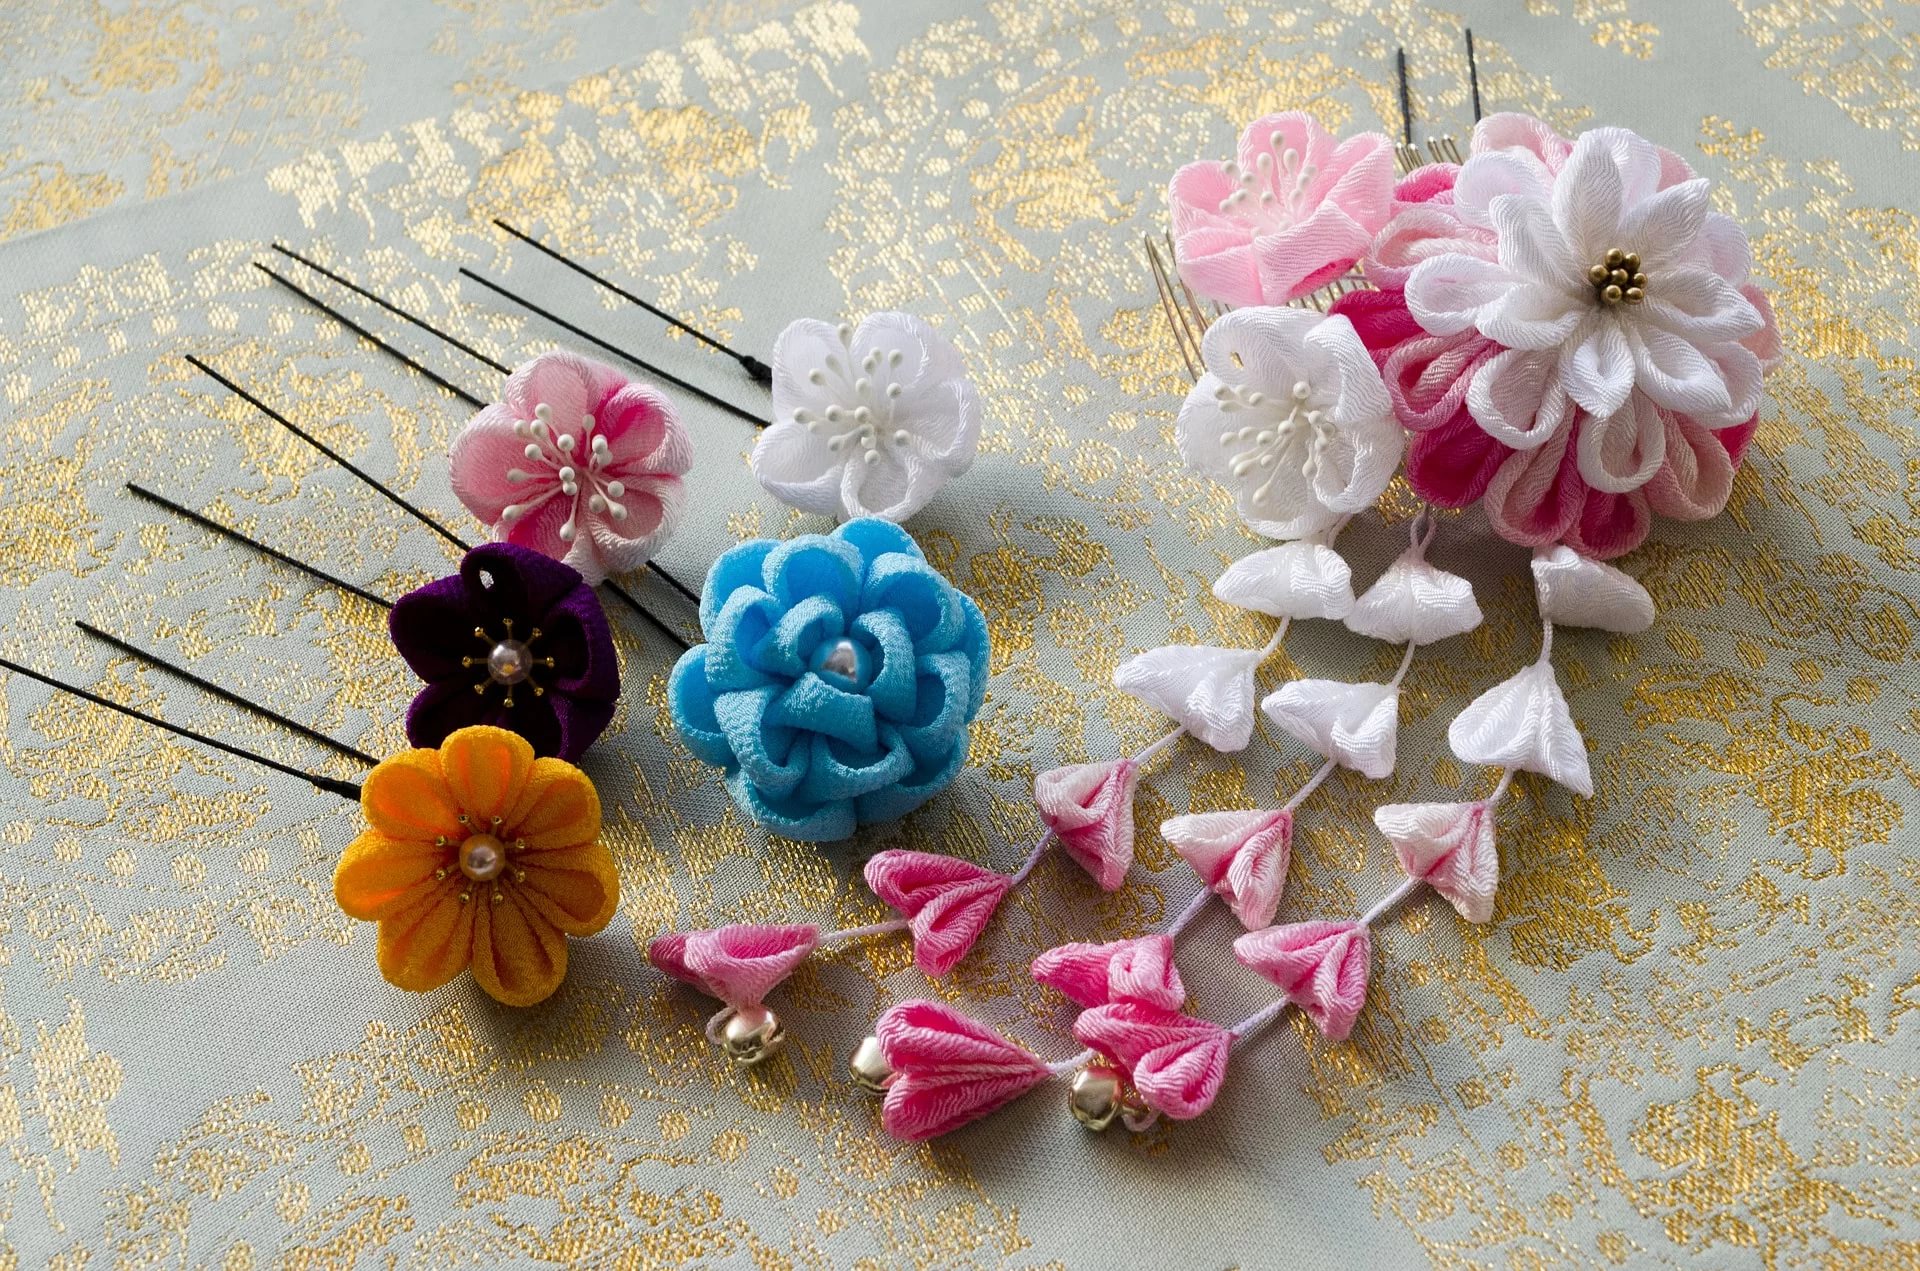
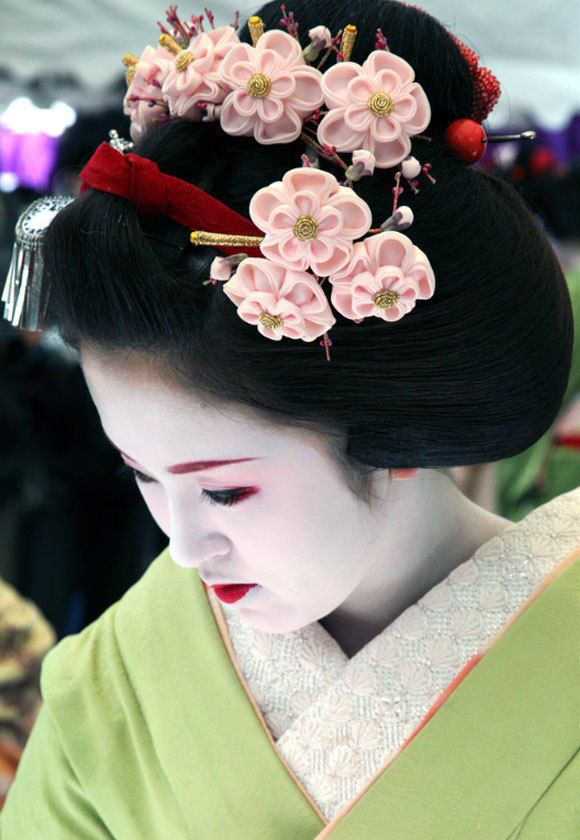
The history of kanzashi goes back to the Japanese culture of the early 16th century, when hairpins were the main attribute of a woman's image. Moreover, they were used not only as a decorative element. Then a division was created by splendor, color, and women wore only accessories permitted by age and status. By them, one could find out whether a Japanese woman had a husband and how many children she had.
The word "kanzashi" itself means "women's hair ornament" (pin, hair clip, comb, hairpin), which Japanese geishas used to secure their complex hairstyles. They were worn together with kimono and were created in the same style. National clothing for women did not allow the use of jewelry (necklaces, beads, bracelets), so the ladies compensated for this with exquisite hair decoration.
The kanzashi technique is based on the ancient Japanese art of origami. Only instead of paper, natural silk fabric was used as the material for the products. Wonderfully beautiful flowers were created from it and fixed to the hair with all sorts of hairpins. Briefly, the essence of the process can be described as follows: square elements of satin or silk are folded into petals in different ways, connected to each other, forming beautiful products in the form of a bud. It is the manufacturing technique that distinguishes such kanzashi bows from traditional ones, created using a certain algorithm for tying a ribbon.
Materials and tools for work
The basis of making Japanese bows is the virtuoso handling of the ribbon - folding it into a certain pattern is the main technique. The material can be any, but satin of different colors is most often used. It is beautiful, holds its shape well and is cheap. Rapeseed ribbon, lace, silk and organza are used as additional fabrics. By varying the width (from 0.5 to 5 cm or more), you can determine the size and volume of the future bow.
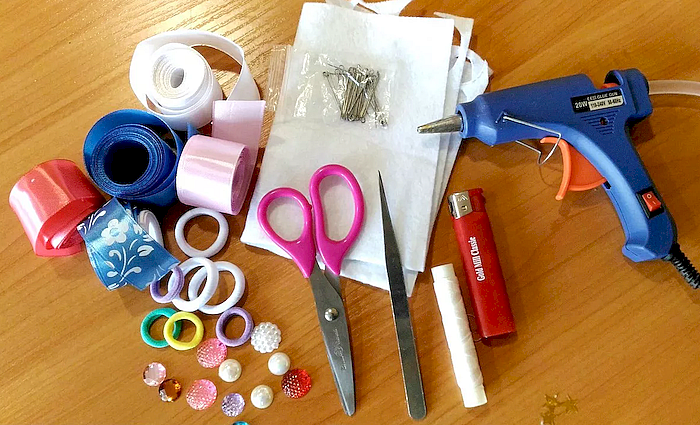
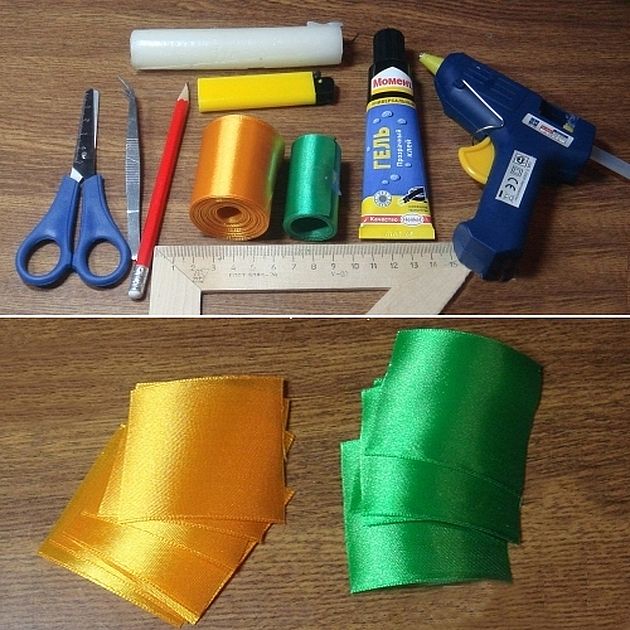
The decision to master this Japanese craft is associated with the need to stock up on certain tools. To make kanzashi from satin ribbons with your own hands, you will need the following tools:
- A ruler and scissors - for measuring the required pieces of fabric.
- Needle and thread - for assembling fragments into a single element.
- Lighter or soldering iron - to remove fringe from the ends of the tape.
- Glue gun - performs the same functions as a needle and thread.
- Tweezers - for working with small elements.
Additional materials for decoration include buttons, rhinestones, beads, and pearls. The latter, due to their large volume, are used in half form.
The listed elements should be used in moderation - a masterfully folded ribbon should remain the main decoration.
Manufacturing stages
The techniques for making decorations vary greatly: some can be made in an evening, while others will take much more time. The general scheme for creating kanzashi bows from ribbon consists of a simple algorithm:
- Cut the ribbons into squares, preferably using a soldering iron. If you use scissors, the ends of the fabric need to be singed.
- Using a needle, gather the squares onto a strong thread.
- Glue the element to the base: usually it is a circle of felt or cardboard. For a more aesthetic look, cover it with satin in the color of the flower itself.
- Sew a button or similar decorative element into the center.
- Attach the finished kanzashi to the base accessory with glue: this could be a clip, headband or elastic band.
- Wait until the glue is completely dry, straighten the petals if necessary.
The given algorithm refers to general recommendations. For creating beautiful kanzashi, a master class is the best solution. If you find suitable instructions, even a beginner will be able to make his first bow and immerse himself in a special atmosphere of creativity.
Elegant lush bow for September 1st
Bows for school are a traditional decoration for Knowledge Day, and a smart version in Japanese style will allow you to stand out from the general background of classic bows. To make it, you will need the following:
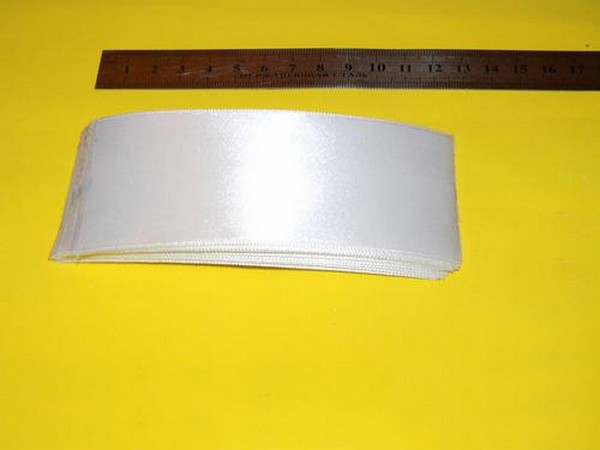
- white satin ribbon, 5 cm wide;
- soldering iron or lighter;
- ruler and scissors;
- glue;
- strong thread and needle;
- large bead;
- tweezers.
The first stage consists of preparing pieces of fabric measuring 12 x 5 cm - the more of them there are, the fluffier the bow will be. The optimal number is 17 pieces. Further actions are related to the creation of petals, so they are the same for each piece.
Beautiful bows are created like this:
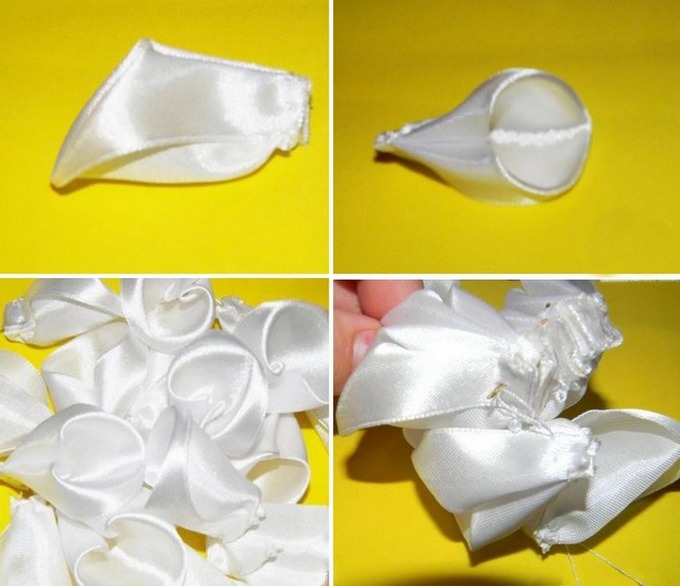
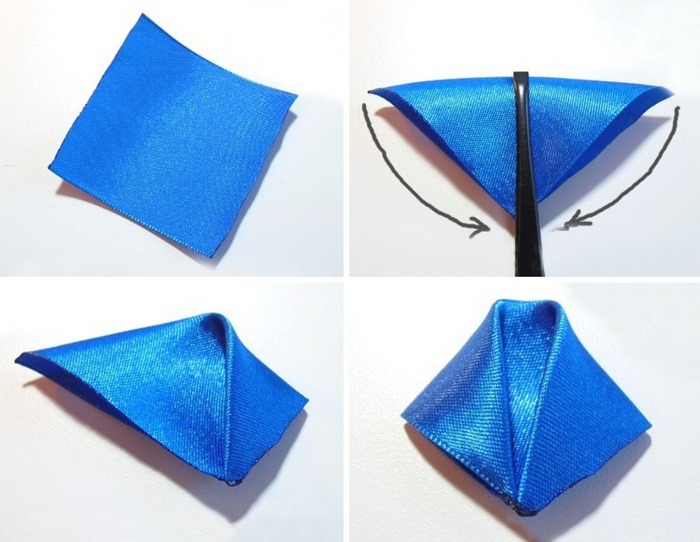
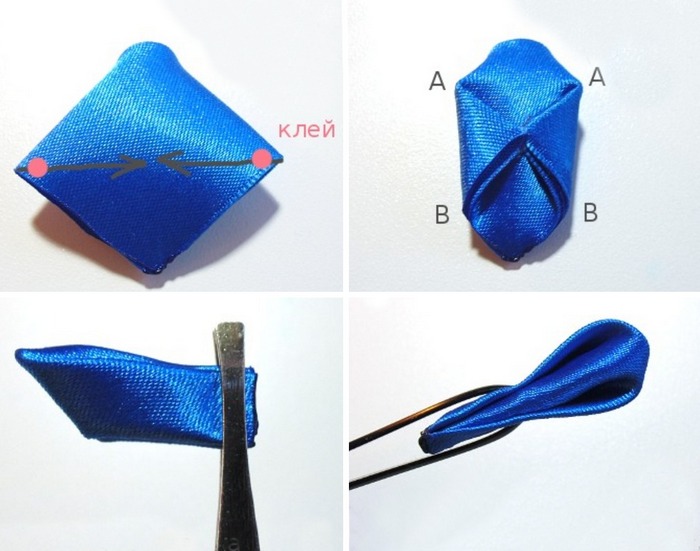
- Turn the piece of fabric over so that the front side is facing away from you, fold the upper right corner inward, and carefully secure it with a needle.
- Turn the flap and bend the lower left corner, hide the tip inside. Do the same actions symmetrically.
- Fold the flaps with the folded corners inward, stitch along the bottom edge, tighten the thread at the base of the petal. Unfold the title and open it up - you will get a three-dimensional element.
- Once all the pieces look like this, start assembling the entire composition.
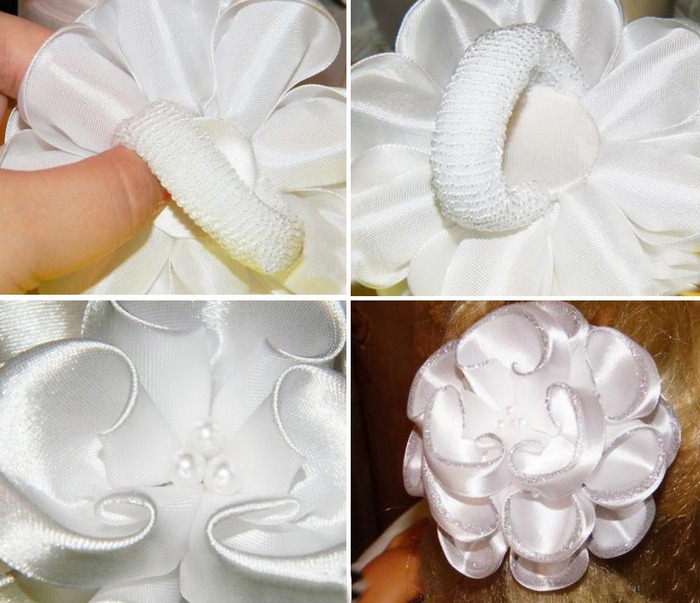
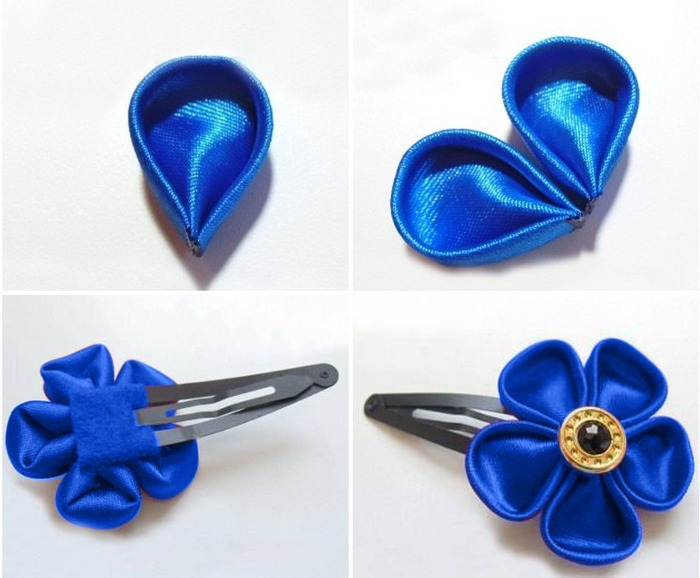
- On three separate threads string 8, 6 and 3 elements respectively for 3 levels. Turn the largest circle face down, attach the base in the form of a circle to the back.
- Turn it back over and create a full flower, securing tier after tier. After that, decorate the core with a bead and let the glue dry. School bows are ready.


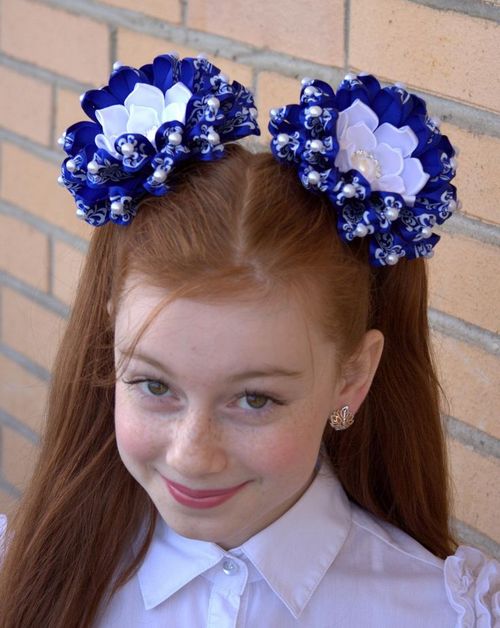
Strict for school
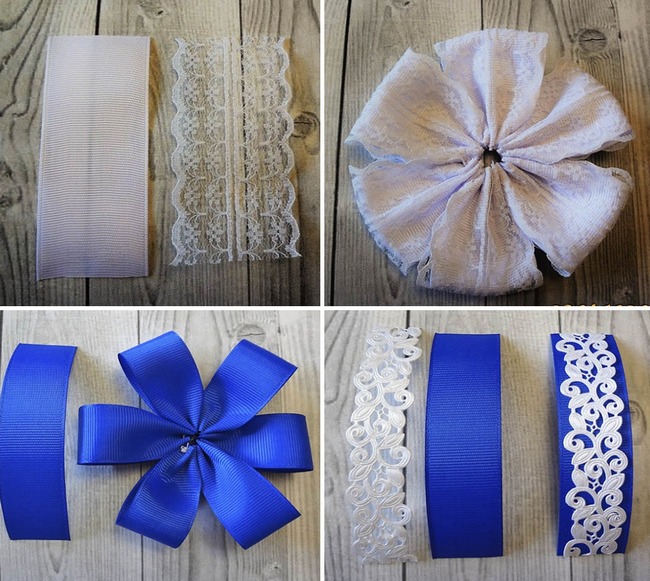
Bows for school can be delicate and elegant, as in the previous version, or strict. Neat beautiful accessories are suitable for school days, also, varying the color, it is easy to select and make decoration for a specific form. For this master class you will need:
- white grosgrain ribbon 4 x 10.5 cm - 6 pieces;
- light lace 4 x 10.5 cm - 6 pieces;
- blue grosgrain ribbon 2.5 x 10 cm - 12 pieces;
- white decorative ribbon 2.5 x 10 cm - 6 pieces;
- a felt circle, white or blue, 4 cm in diameter;
- a rectangle of white or blue felt 1 x 4 cm;
- white satin ribbon 5 x 5 cm - 1 piece;
- the same color satin ribbon 2.5 x 3 cm - 20 pieces;
- rubber.
You should also have traditional tools for creating kanzashi bows: from scissors to tweezers. In this master class, it is recommended to use a soldering iron.
The first stage is to create a bow, for which the lace pieces should be applied to the rep ribbon, soldering the ends. The resulting 6 elements are folded in half and gathered on one strong white thread. 6 pieces of blue rep ribbon are also folded in half and strung on a thread - this will make the second tier for the bow. The decorative layer consists of the remaining pieces and lace, with which a similar procedure is carried out.
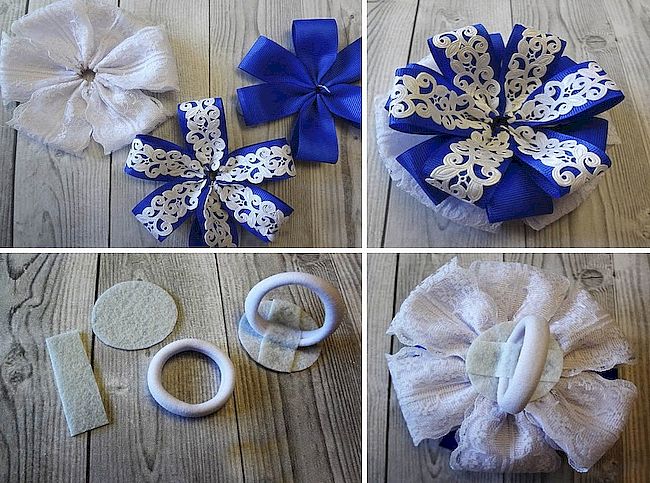
After preparing all the parts, you need to start assembling the flower. Apply hot glue to the completely white blank and attach the blue part to it. In this case, petals of different colors should not overlap. The third tier should be glued in a checkerboard pattern, creating a multi-layer proportional flower.
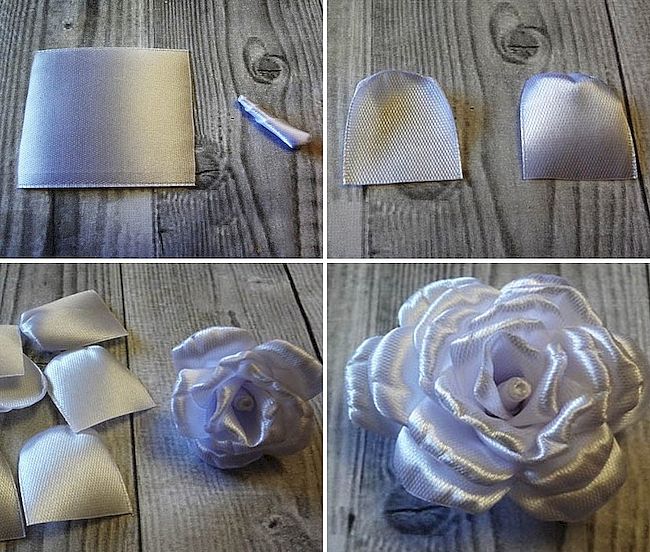
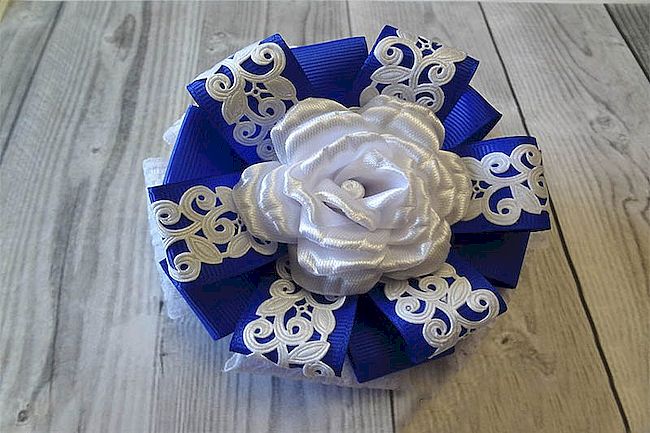
The basis for the kanzashi will be an elastic band, to which a circle will be glued. Then you need to connect the bow with the circle. To create a rose, you will need one piece of white satin ribbon, which should be folded almost in half, but with a slight violation of symmetry. After this, the flap should be twisted into a tube, smearing the gaps as needed. Trim the excess fabric from the bottom and scorch - the middle of the bud is ready.
20 pieces of satin ribbon are the future rose petals, so they need to be rounded at one end and just create a straight line at the other. You need to use a lighter for this purpose, as a candle can easily ruin the fabric. Assembling the flower consists of gradually gluing the petals to the tube, starting from the bottom and following the spiral. The formed rose needs to be attached to the middle - kanzashi bows for school are ready.
Unusual round
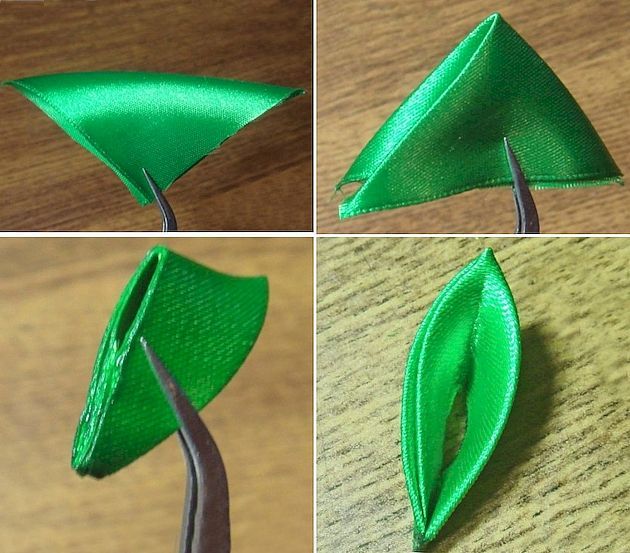
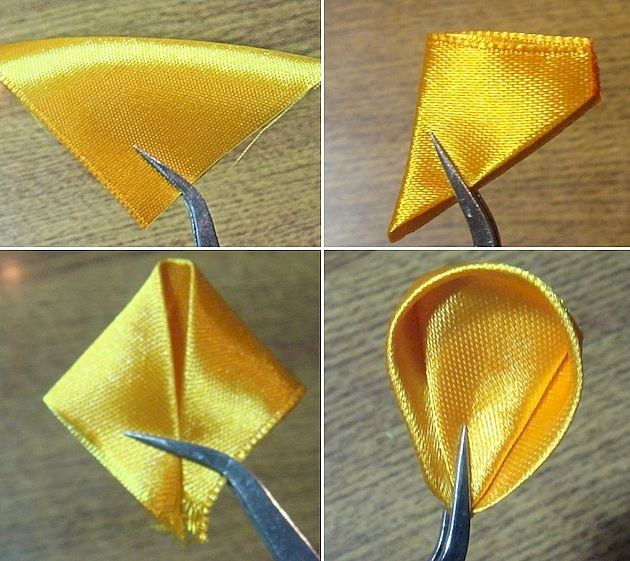
There are two types of kanzashi petals - round and pointed, the first are used in various techniques more often. To create them, beginners will need:
- scraps of satin fabric 5 x 5 cm;
- lighter;
- scissors;
- tweezers.
Sequence of actions:
- fold the fabric squares diagonally so that the corners match each other;
- fold two corners from one side to the third;
- unscrew the corners located on the left and right in the opposite direction and secure with tweezers;
- trim the bottom edge. The more fabric you remove, the thinner the petal will be;
- Fire the tip and secure with tweezers - the petal is ready.
- then assemble the finished elements according to the general scheme.
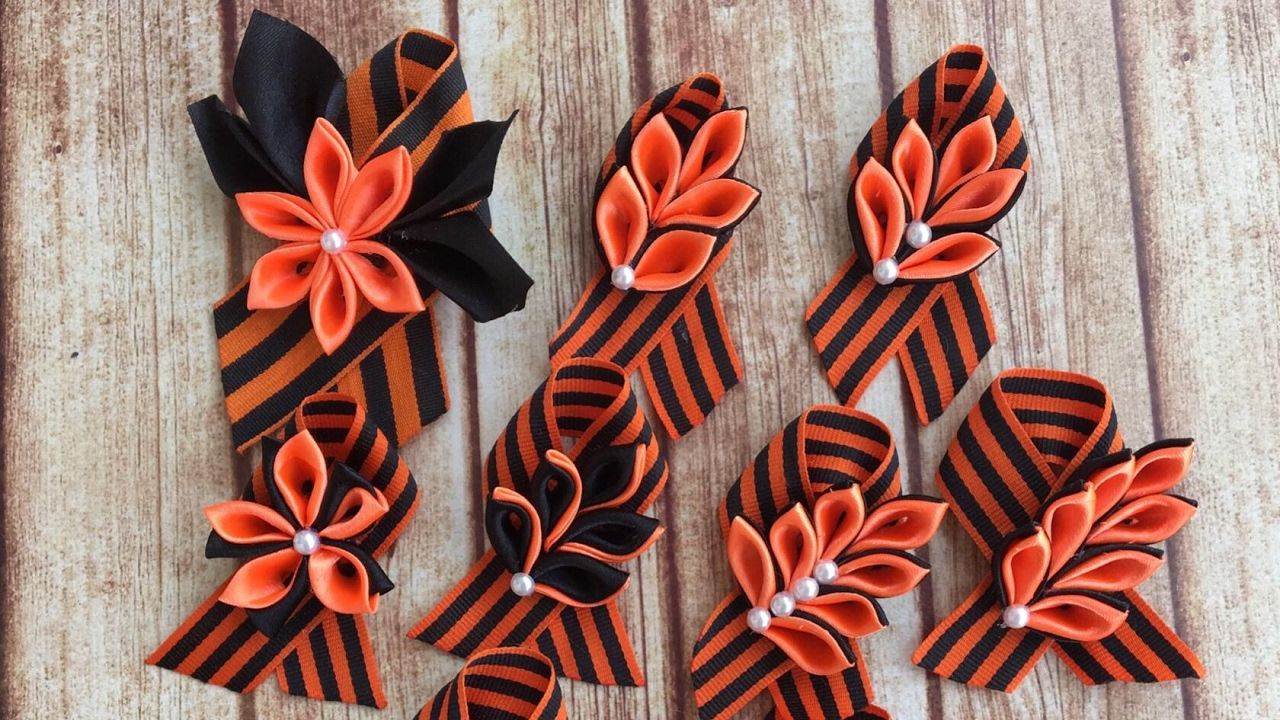
Miniature from thin ribbons
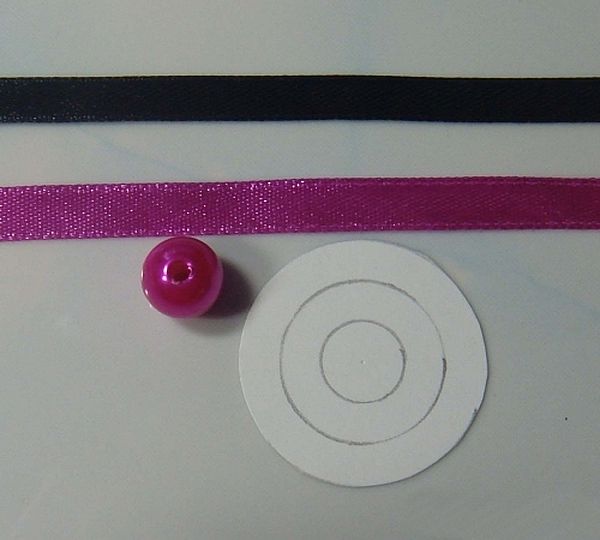
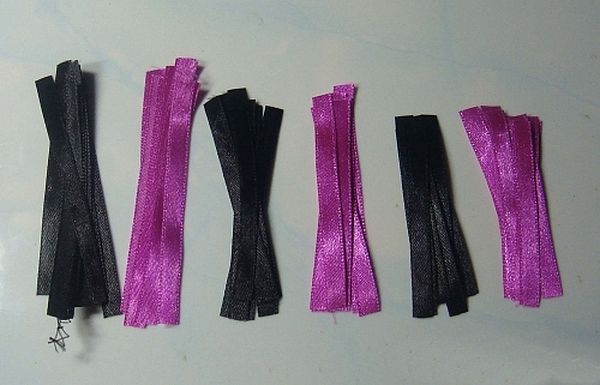
From round petals you can create simple but elegant flowers, for this you need to use a narrow ribbon 0.5 cm wide. From fabric of two matching colors - red and black, for example - you need to cut 3 types of strips:
- 8 cm long - 8 pieces;
- 7 cm long - 8 pieces;
- 6 cm long - 8 pieces.
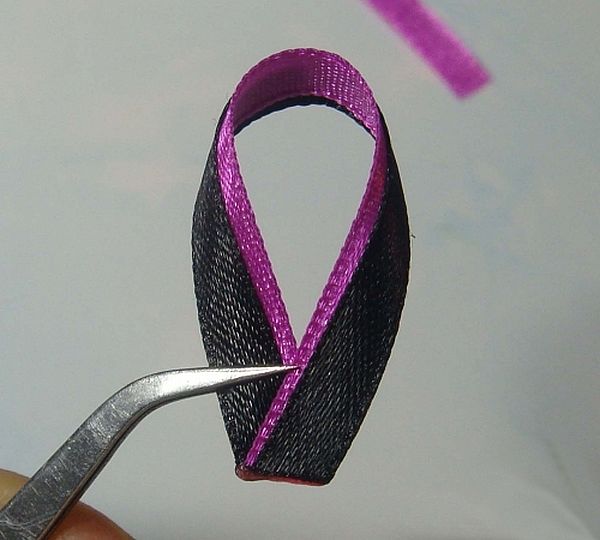
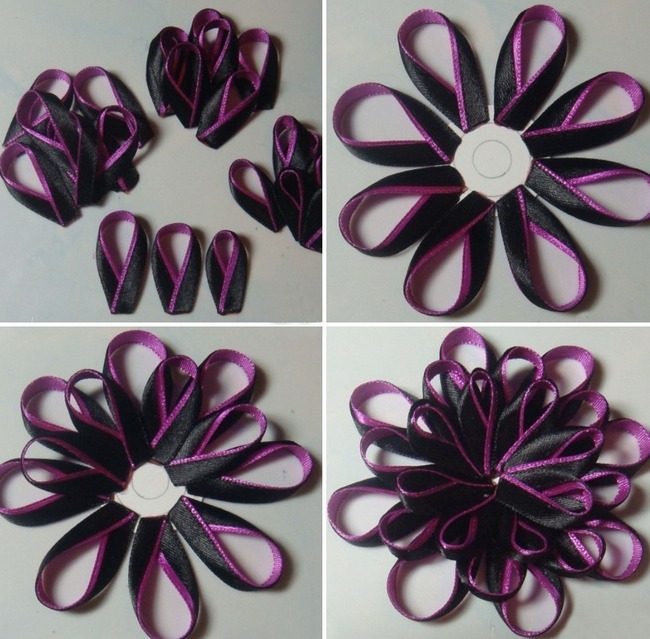
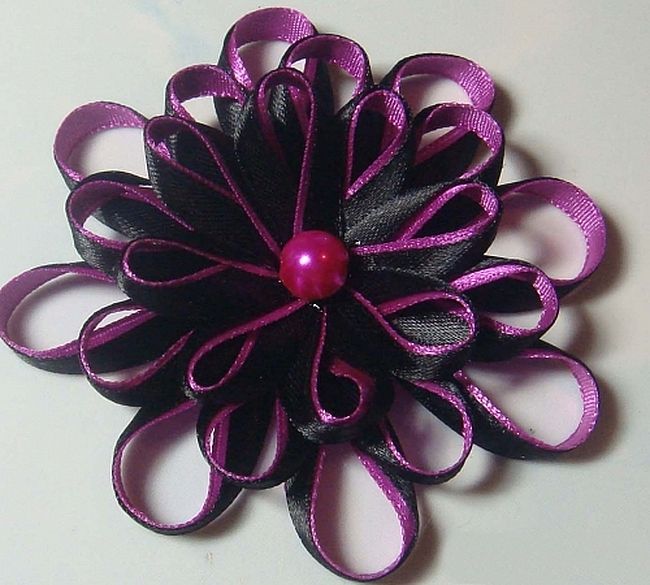
Next, you need to put the black ribbon on top of the red one, fold the ends and solder them. For convenience, you can use tweezers or a soldering iron. You need to do this with all the ribbons, without mixing them as you go. Glue the largest petals to the cardboard circle, and the medium ones to the spaces between them. The third row should create volume and fill the remaining voids. By gluing a bead to the center of the flower, you can make beautiful kanzashi.
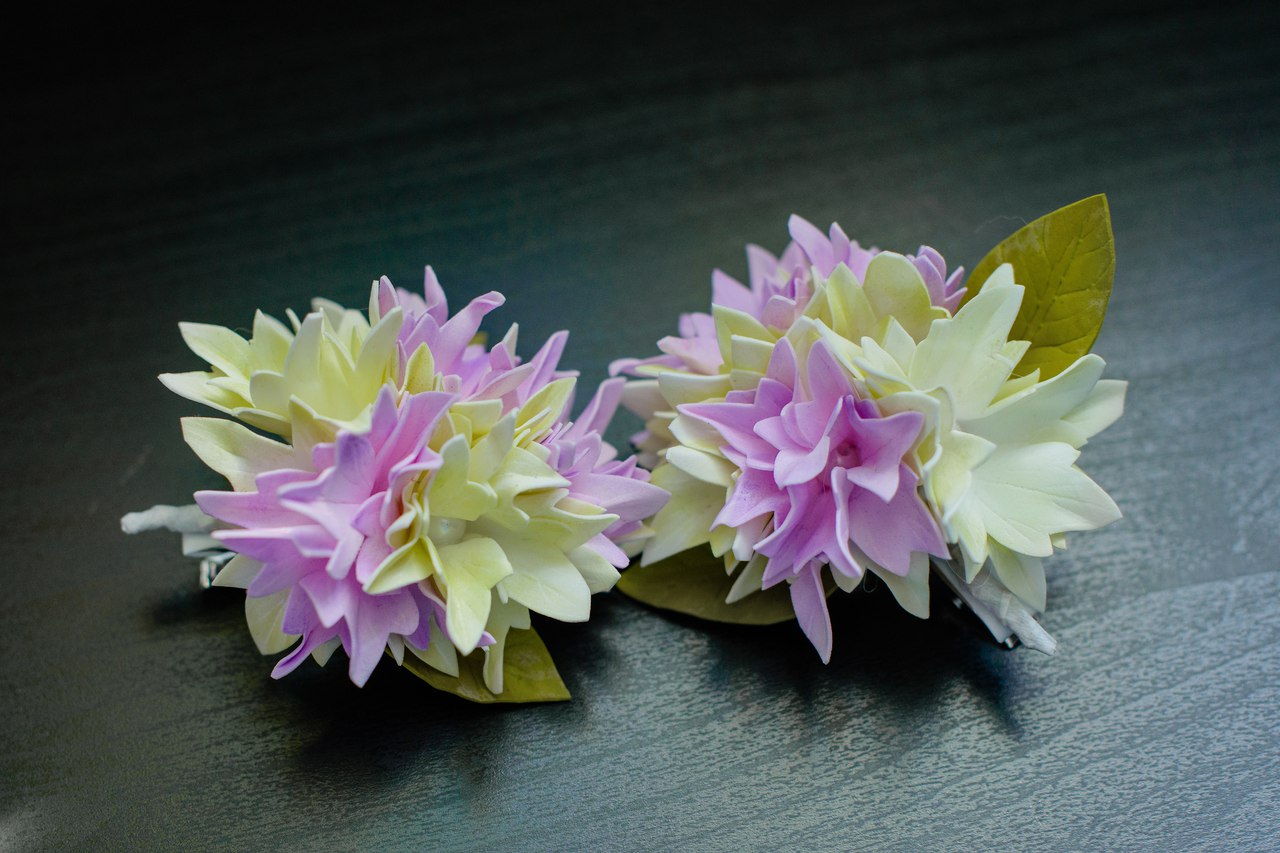
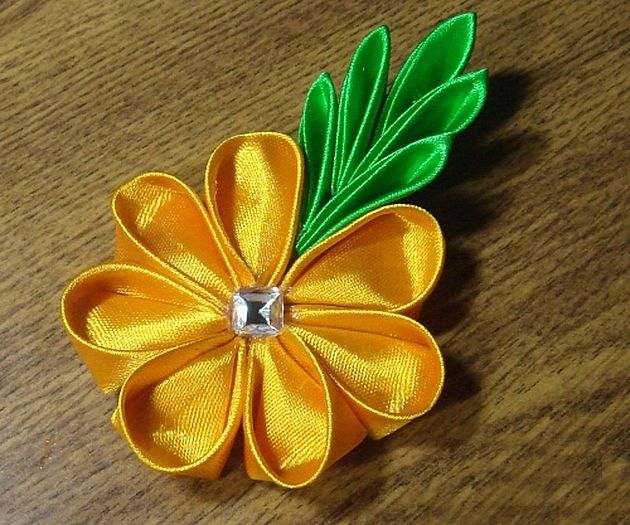
Easy for beginners
To create a charming rose using the Japanese technique you will need:
- satin ribbon 5 cm wide in green and other colors for future petals;
- glue;
- scissors;
- lighter.
The non-green ribbon is cut into 12 cm long strips, you will need 25 of them. To prepare the petals, you need to turn the strip over and lower the upper right corner to the bottom, forming a triangle. Using a needle and thread, baste along the bottom edge from the corner to the middle of the strip, and do the same on the left side. Pull the thread together, creating a petal, and secure it.
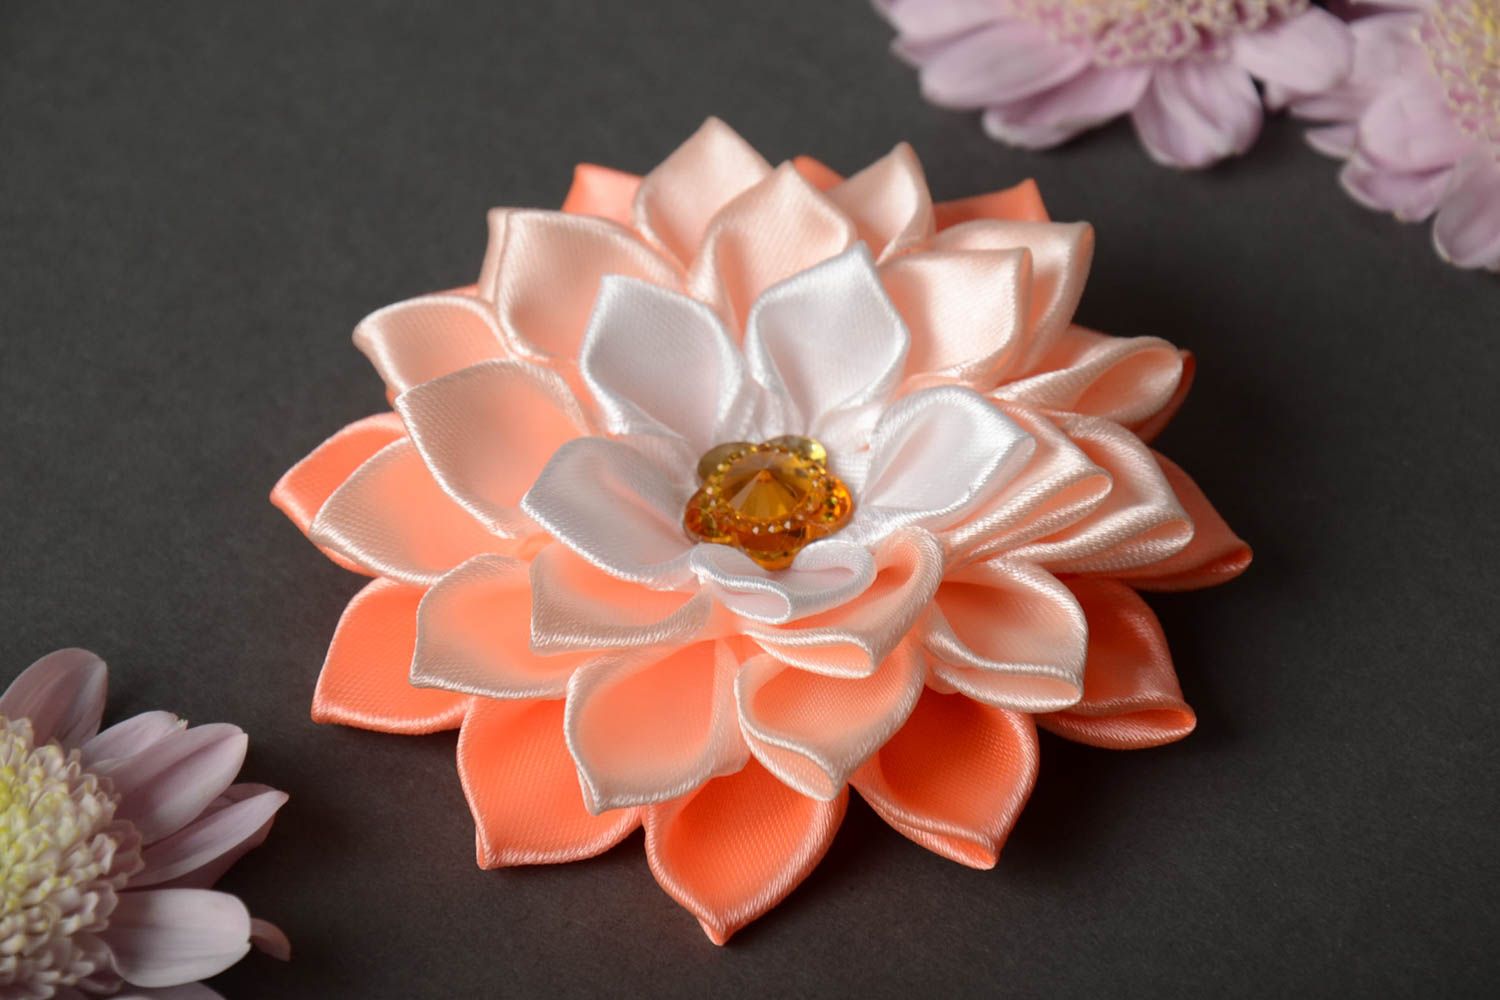
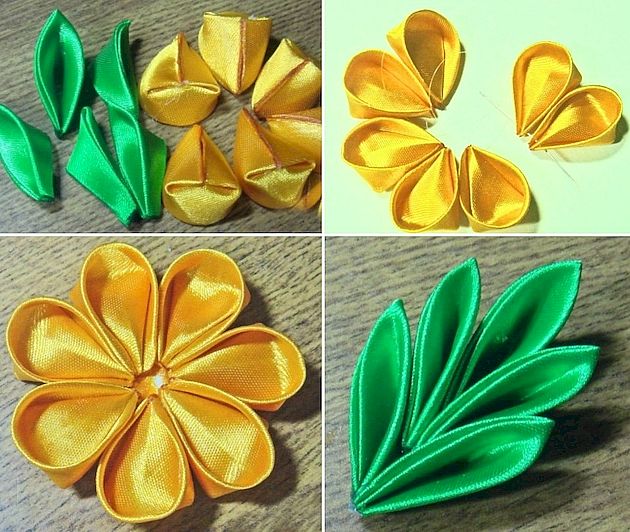
Once all the petals are ready, you can begin assembling. From the first element, you need to form the middle, wrapping it into a ball with glue. Then glue other petals in a circle, creating a bud. It is important to apply glue to the bottom edge. From green 10 cm long scraps, prepare round petals and attach them to the base of the rose.
How to properly attach to the base
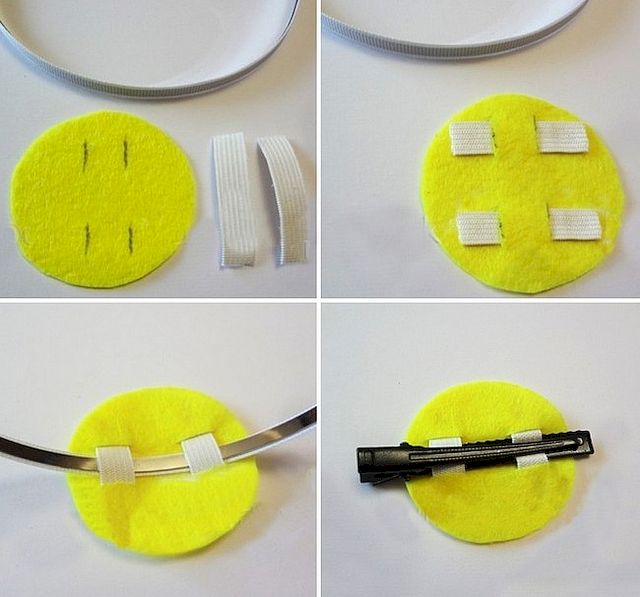
A kanzashi bow needs a base, which is usually made in the form of a felt circle - this material is quite durable, unlike cardboard. There is a universal method for attaching to a clip or hoop. It is enough to take a felt circle with a diameter of 4-5 cm and make 4 cuts: closer to the center, 2 at the top and bottom. Next, you need to thread 2 pieces of elastic through them and glue them. Then you should turn the circle over and thread the headband or clip - the decoration will look aesthetically pleasing.
There is another simple way to attach the base to the hairpin:
- open the clamp and pass it through the cuts made in the center of the felt circle;
- First, coat the central part of the hair clip with glue and secure the felt base;
- On the reverse side, also use glue to connect the side parts of the circle with the hair clip part.
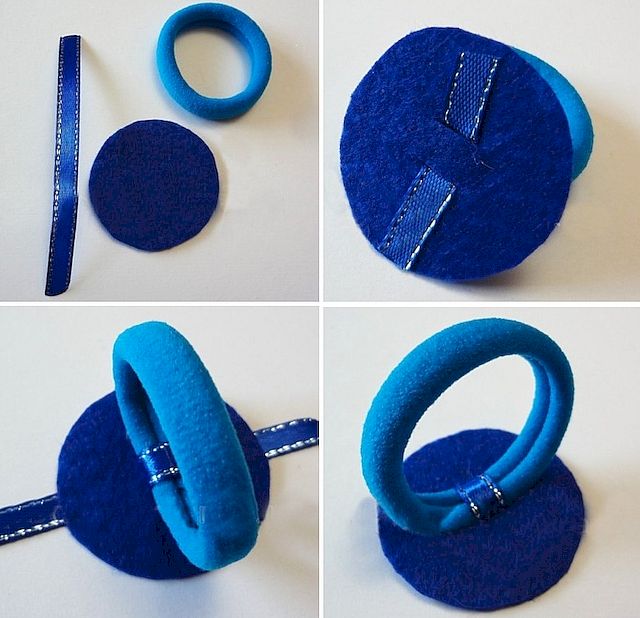
Option for attaching to a hair elastic:
- cut the felt circle in the center twice (each cut is 5–7 mm);
- secure the elastic band between the holes with glue;
- thread a narrow ribbon (grosgrain or satin) through the slits so that it covers the elastic;
- on the other side there are parts of the ribbon - they need to be glued to the circular base, and the long ends cut off. Now you just need to attach the bow.
You can also attach the base to the elastic using a rectangular felt element. To do this, drop some glue into the middle of the strip and connect it to the elastic. Next, the parts of the rectangle located on both sides of the element should be coated with glue, just before reaching the tips. After this, you should attach the resulting workpiece to the round felt base. The remaining ends should be trimmed, aligning them to the shape of the circle.
Craftswomen are constantly searching for new ideas and techniques; they are interested in a variety of patterns and beautiful results. Kanzashi is a worthy find for craftswomen who love to create charming jewelry. This art will especially appeal to young mothers who want to diversify their daughter’s image: Japanese bows will suit any occasion and setting.
Video