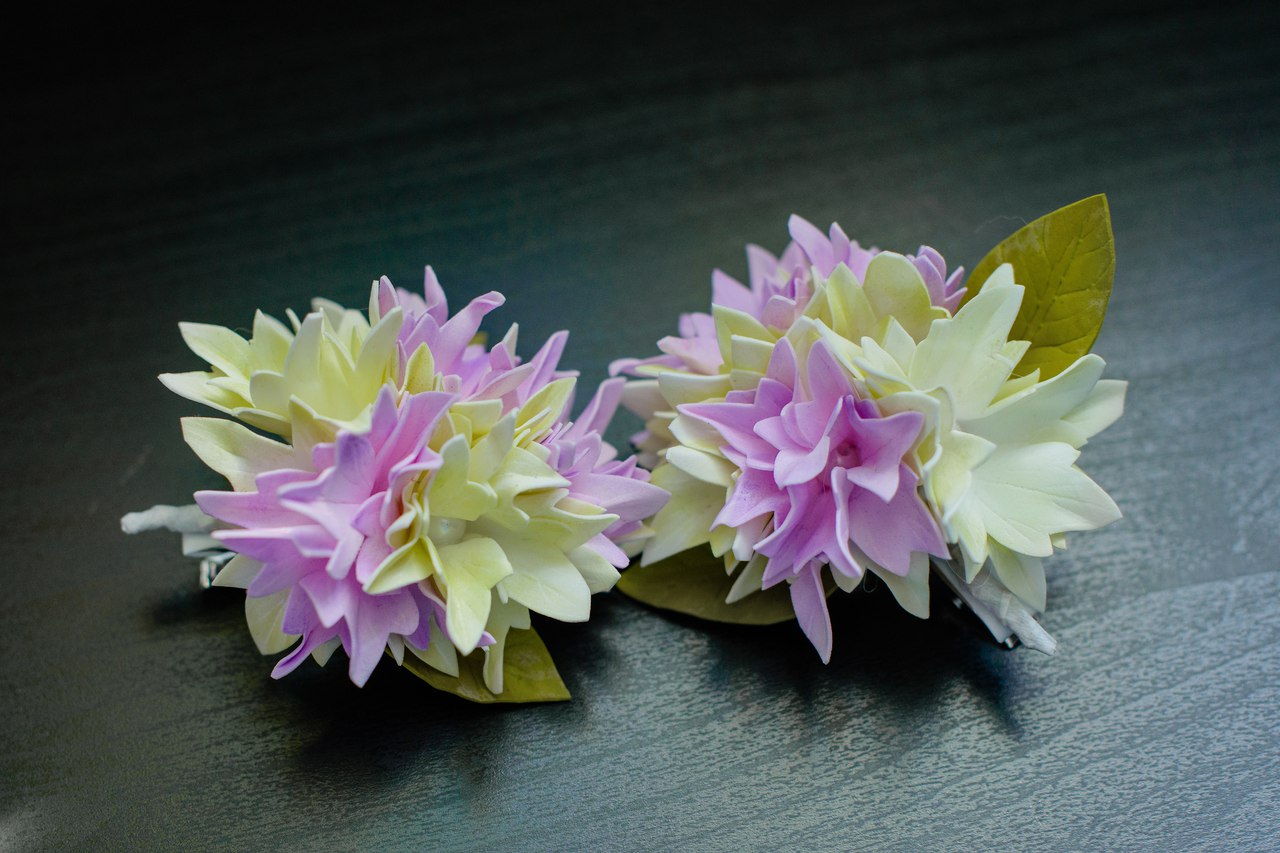
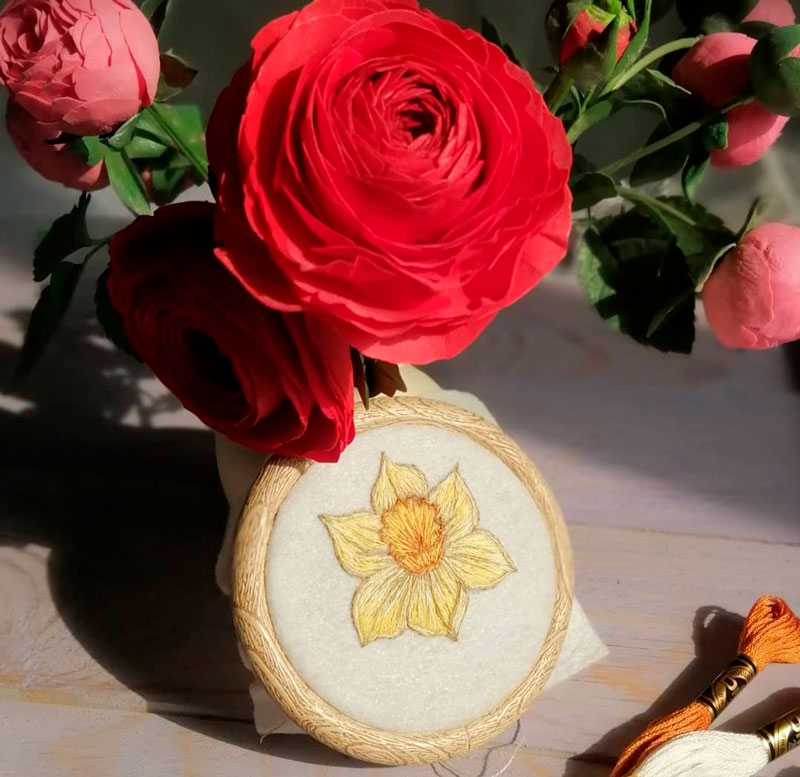
Handmade products have recently become increasingly popular, penetrating many areas of life. A striking example is decorative jewelry. Fashionistas are happy to use foamiran hairpins - original hair accessories that are famous for their irresistible beauty and uniqueness. A hairpin created with your own hands will be of special value to its owner.
Material Features
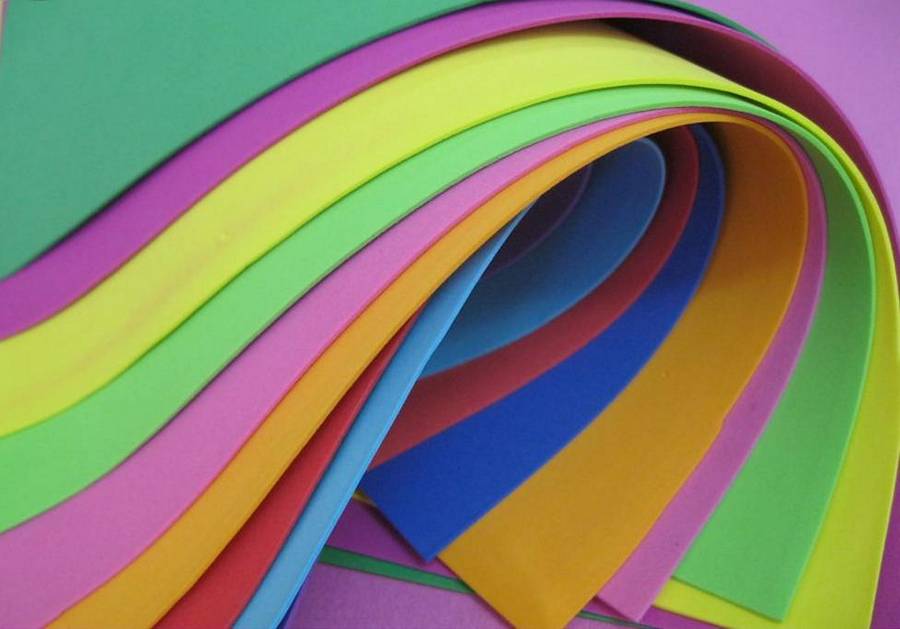
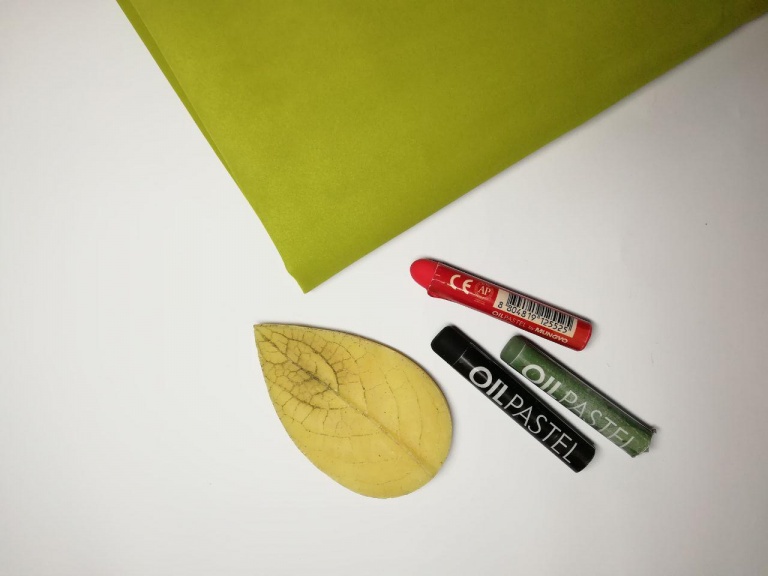
Foamiran (other names: foam, revelour, foam eva) is a foam material for decoration. It is produced in sheets, its distinctive characteristic is softness and pliability. Due to these properties, the material perfectly “remembers” the required shape and texture, preserves bends and veins. Foamiran is easy to cut and wash. It is non-toxic, harmless to humans and the environment.
The term "foamiran" comes from the name of the manufacturer Foamlran. The material was brought to Russia from Iran. Until now, this country has been the main supplier of foam to the handicraft market.
The color range of the material is presented by a huge variety of options. If you need to give the hairpins with flowers made of foamiran a unique tone or create a smooth transition from one shade to another, the material can be painted yourself. There is foam with prints (flowers, geometric shapes, pictures).
Another advantage is the variety of compositions that can be created from this plastic material. Hairpins, headbands, bows, garlands, flowers, unique decorative elements. It is recommended to watch several master classes on making hairpins from foamiran in advance. They will allow you to clearly understand the intricacies of the process.
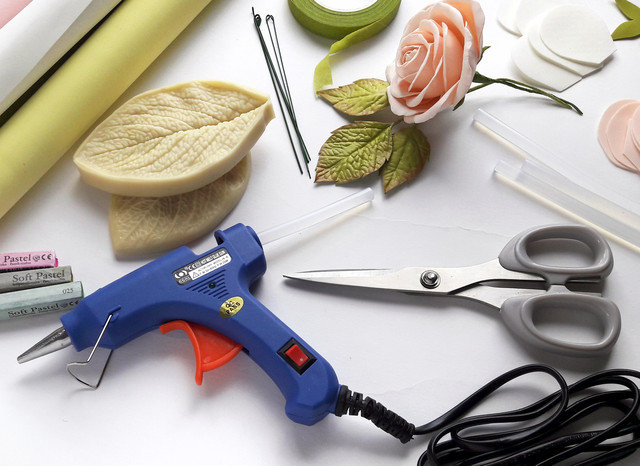
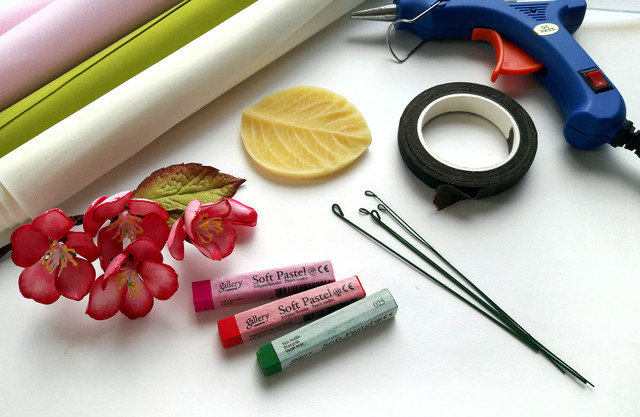
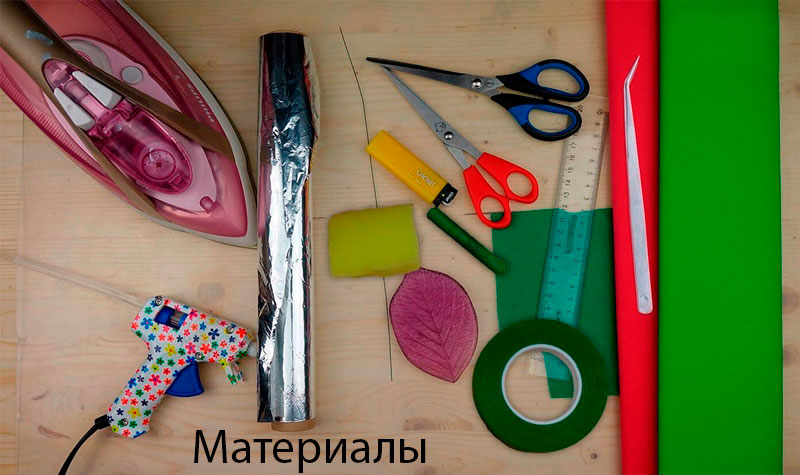
What you will need for work
Foamiran hairpins, like any handmade product, are created according to a certain technology. First, you should choose a model. Thematic portals publish a huge number of examples for every taste. You can draw your own sketch. Then you will get a one-of-a-kind product. After that, you should stock up on additional materials, tools, and decor. For work you will need:
- stationery knife or scissors;
- a simple pencil, with which the outlines will be drawn;
- toothpicks for outlining contours, creating veins and small holes;
- wire for the frame;
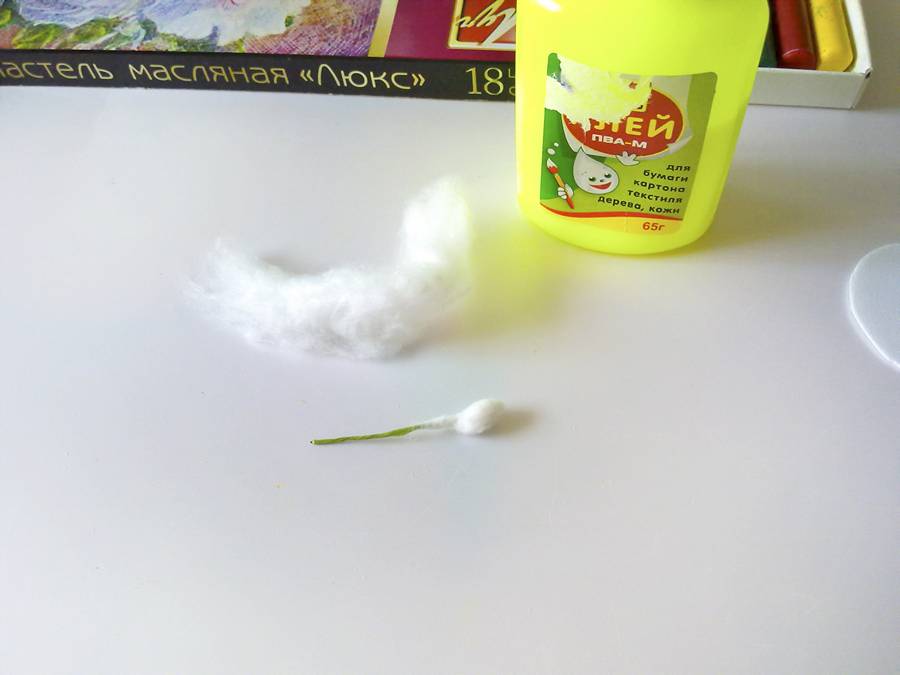
- stamens for flowers;
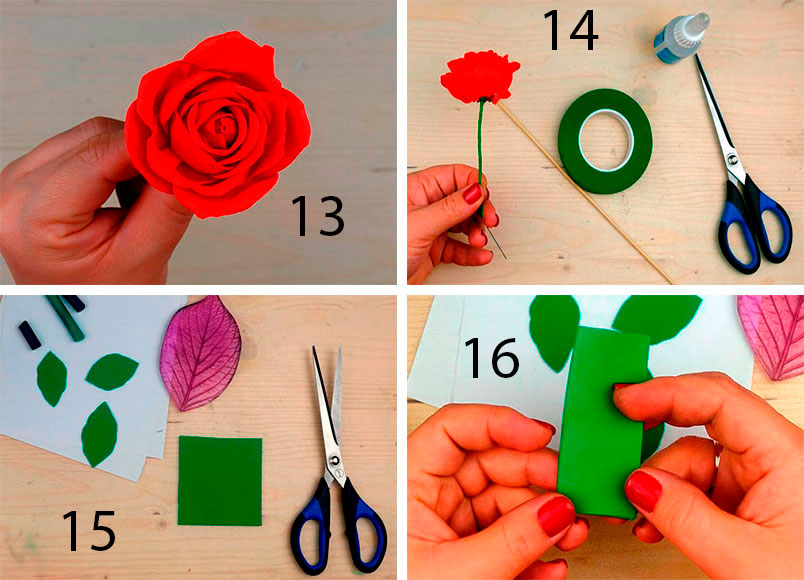
- tape to wrap the base;
- iron or lighter for heating.
Having all the items from the above list at hand, you can safely begin making the composition, which will remain to be attached to the base. For this, such types of hairpins as a comb, clamp, banana, click-clack are suitable. Elastic bands, hairpins, hoops are also used.
Basic techniques for creating flowers and leaves
A distinctive feature of foam is its ability to stretch a little. This is quite enough to give the material the necessary shape. The main thing in this matter is not to overdo it, otherwise it will tear.
Foamiran becomes pliable under the influence of heat. You can use a lighter, iron, candles. However, the temperature of human hands is quite enough to form the necessary detail of the future composition.
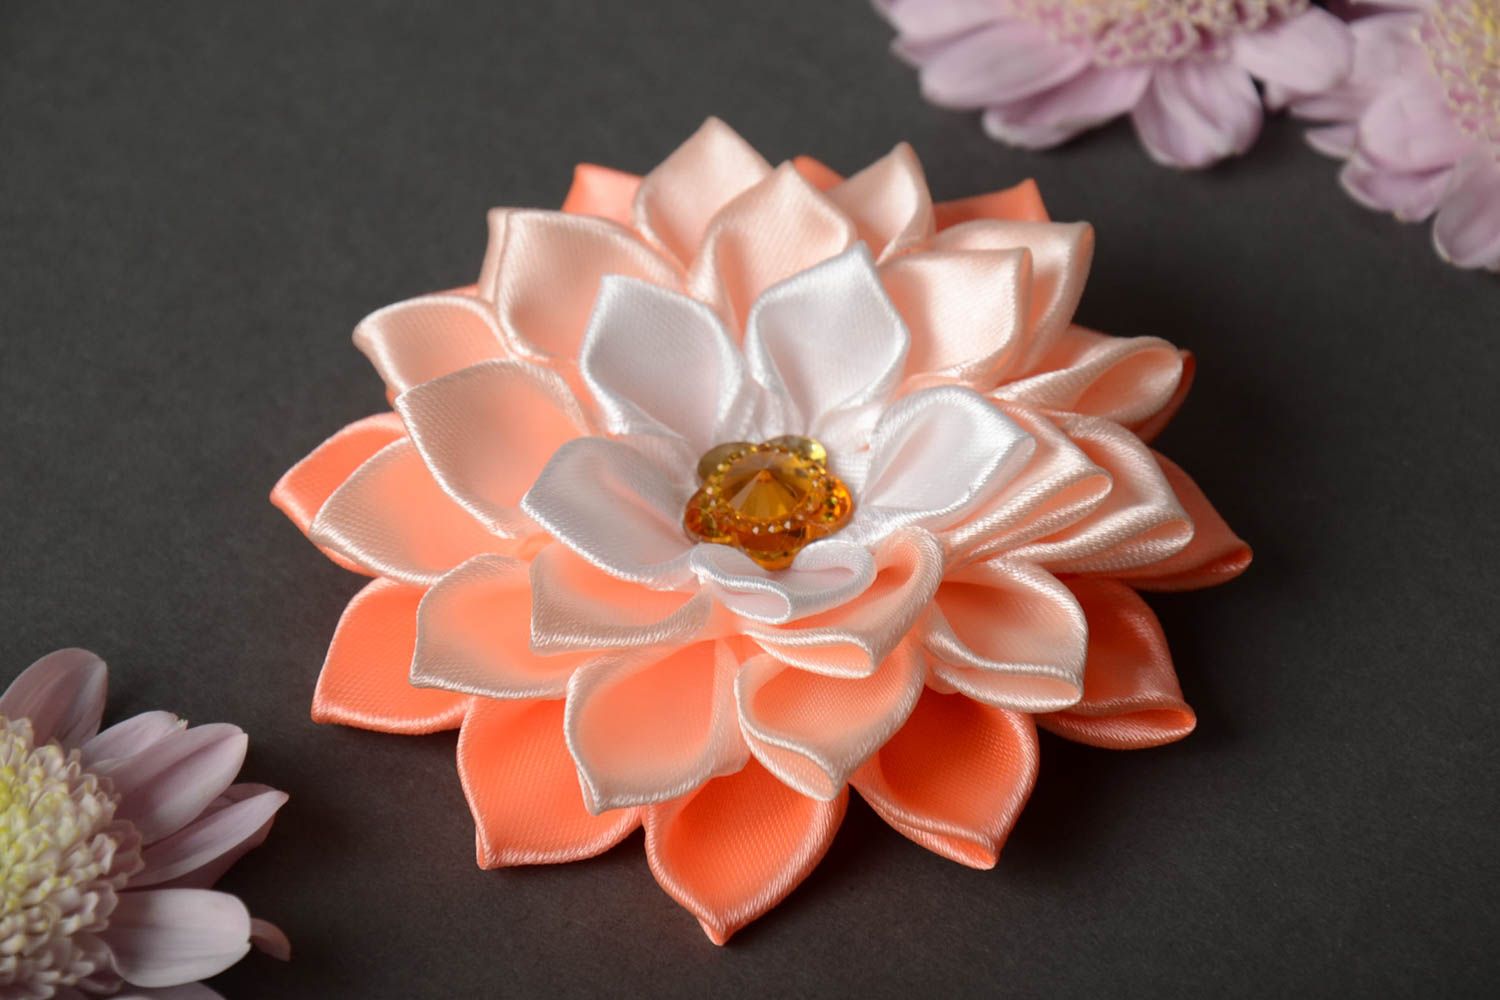
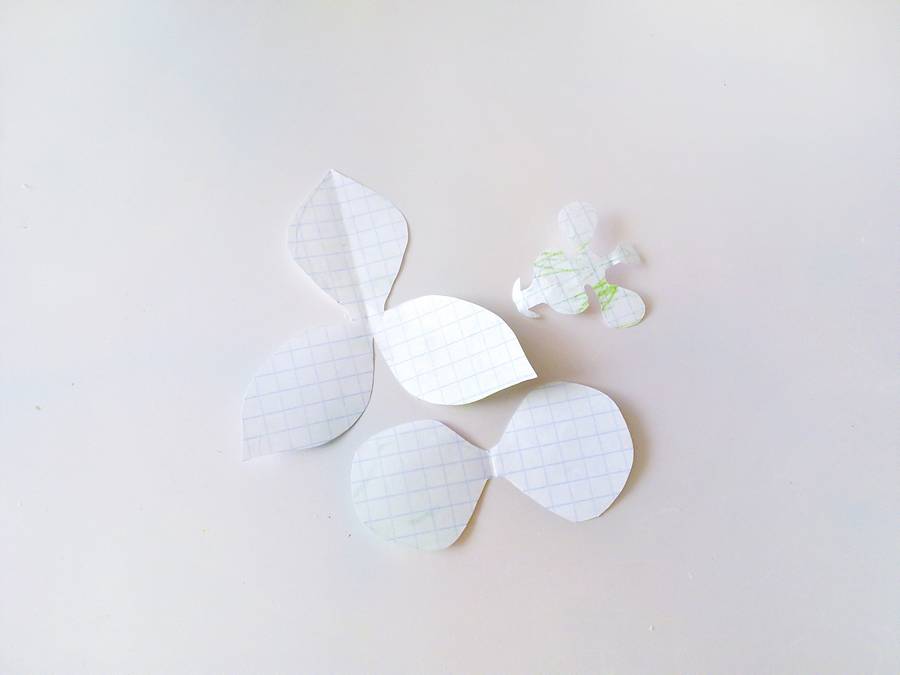
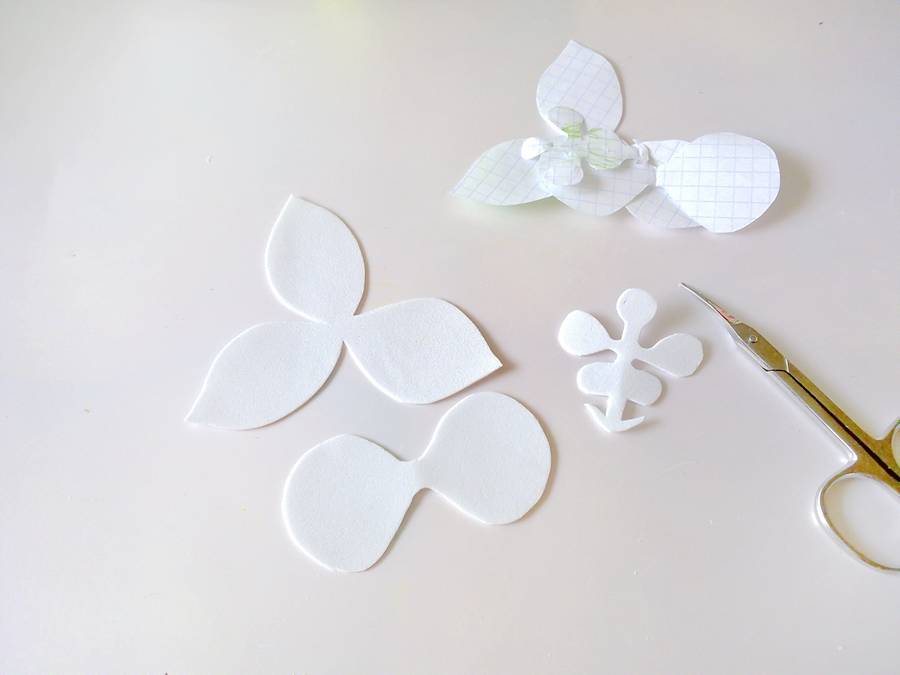
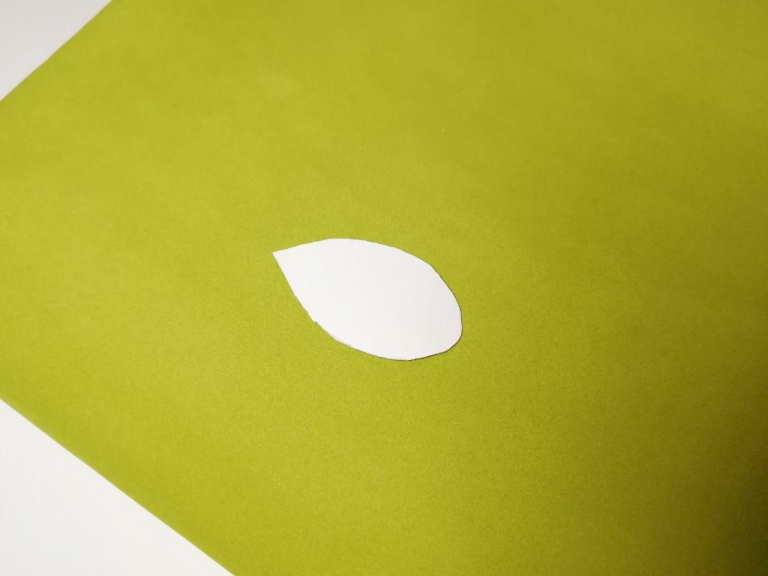
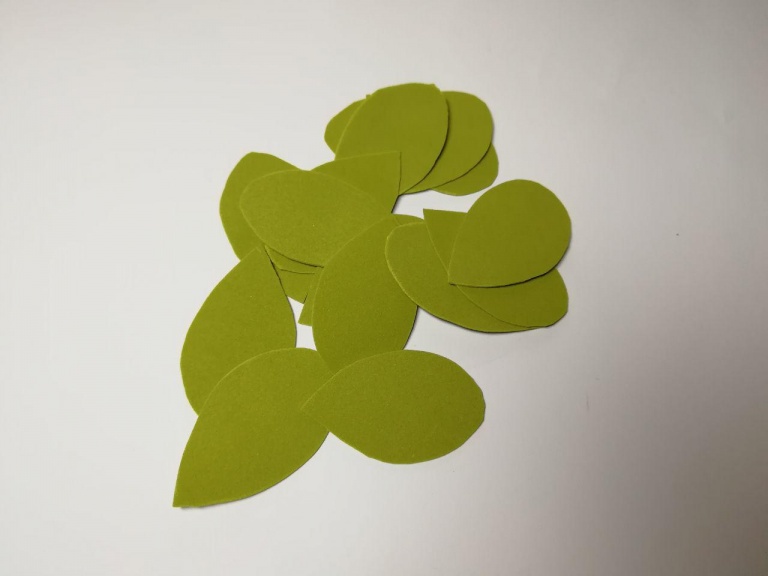
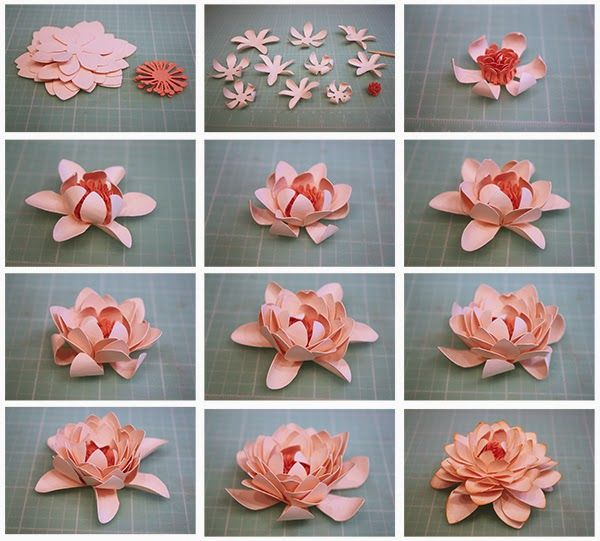
The most common foamiran product is flowers. First, a stencil is prepared taking into account all the sizes. The larger the flower is planned to be, the larger each individual petal should be. After that, a sheet of foam 1-1.5 mm thick is taken. The shape according to the pattern is transferred to it using a toothpick. Then the required number of elements is cut out. The product is formed according to the principle: cut off - heat - shape - glue.
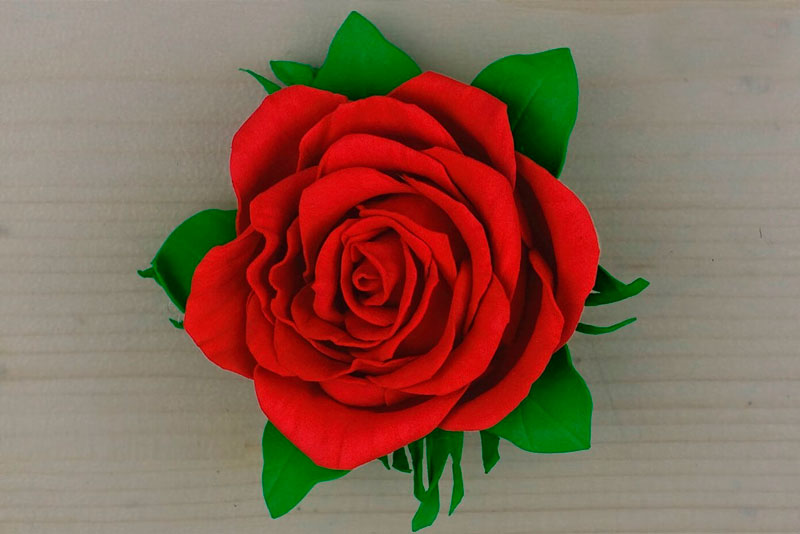
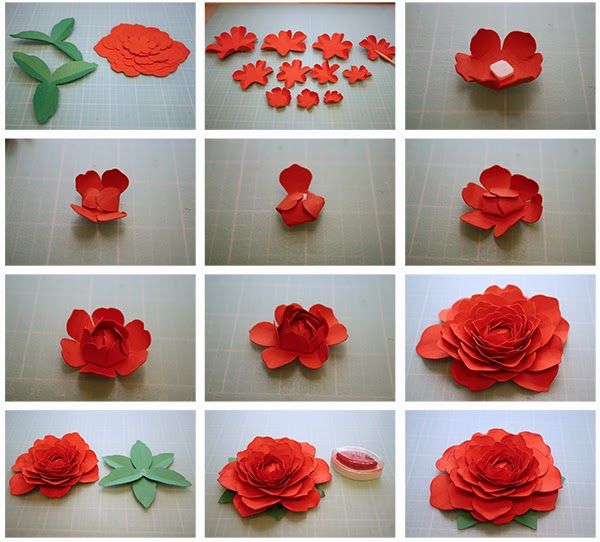
Rose
The rose is considered the easiest flower to make from foamiran. To make it, you just need to repeat the step-by-step algorithm:
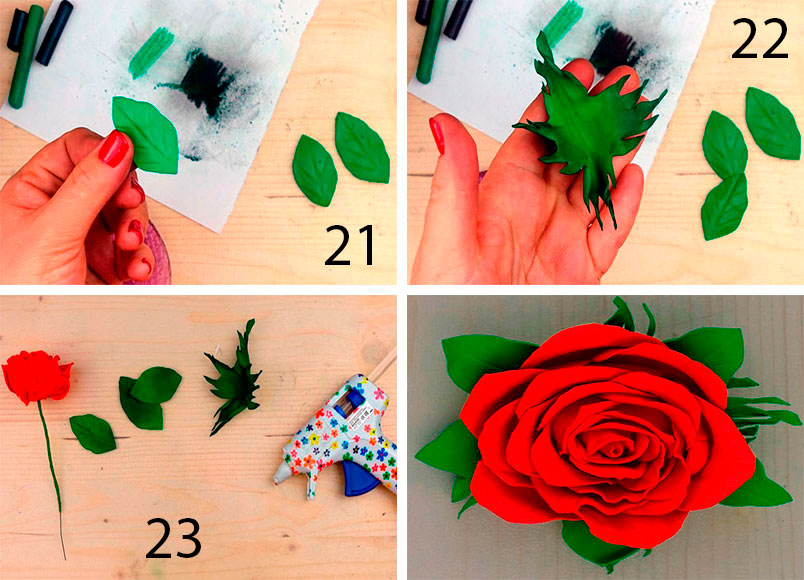
- Prepare the stencil.
- Using the template, cut out the green sepal and leaves, petals from a material of a suitable color. The volume of the finished product depends on the number of petals.
- Heat the leaves with an iron or a lighter, form them into an accordion, and twist them. Pull out the middle to create volume.
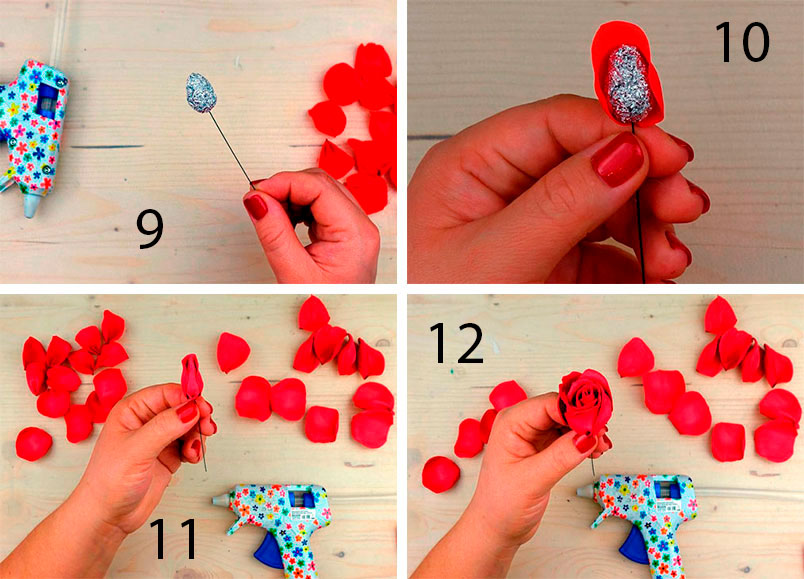
- From foil, make a drop of the required size for the bud.
- Attach the bead to a 15 cm long wire.
- Insert the glue-coated wire with the bead into the center of the foil drop.
- Glue 3 petals onto the drop to mask the foil element.
- One by one, attach all the petals to the finished bud.
- Cut the sepal along the perimeter.
- Treat the sepals and leaves with a heating device in the same way as the petals, and connect them to the flower using glue.
It is recommended to heat the foamiran petals with an iron. To form a wavy edge, use a lighter. The material is highly flammable, so contact with fire should not last more than a second. If the part catches fire, do not extinguish it with your fingers. In this case, it is better to always keep a container of water nearby.

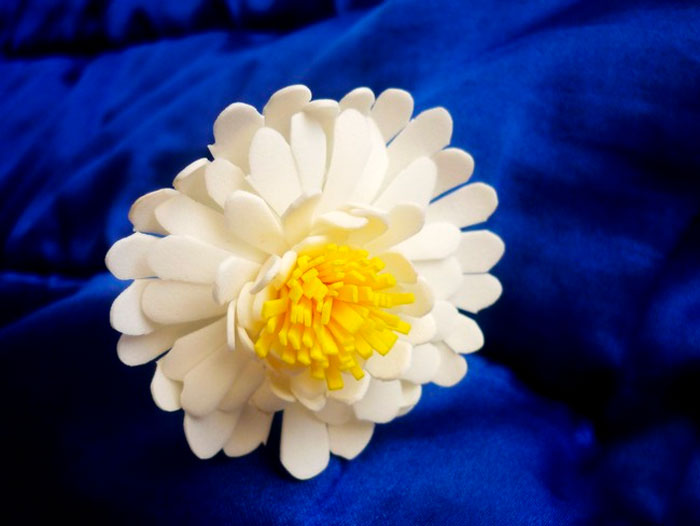
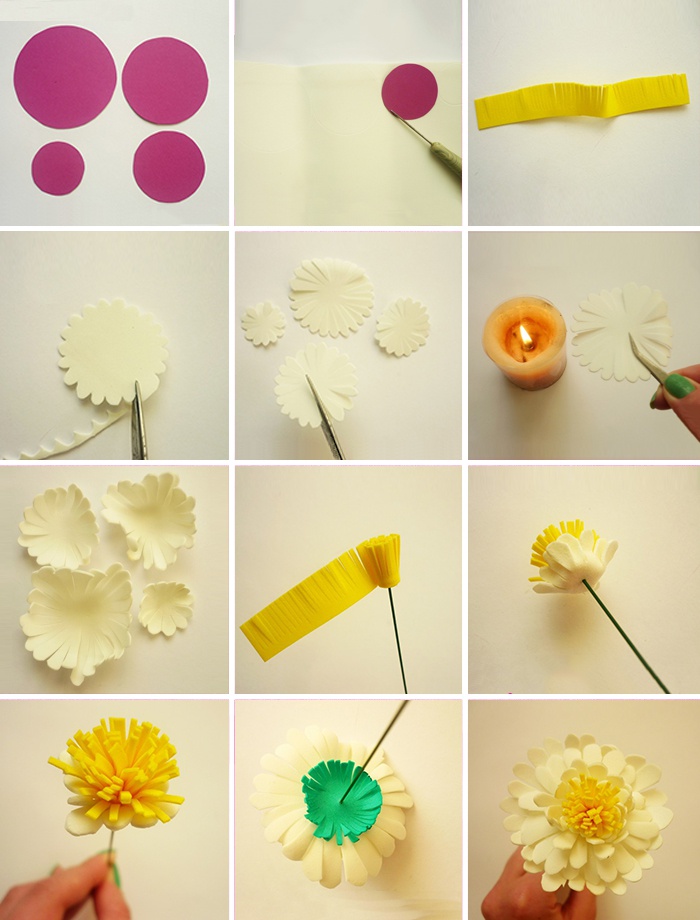
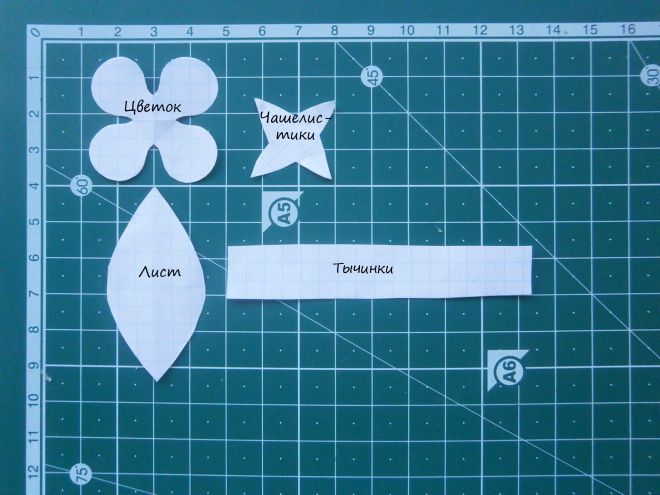
Chamomile
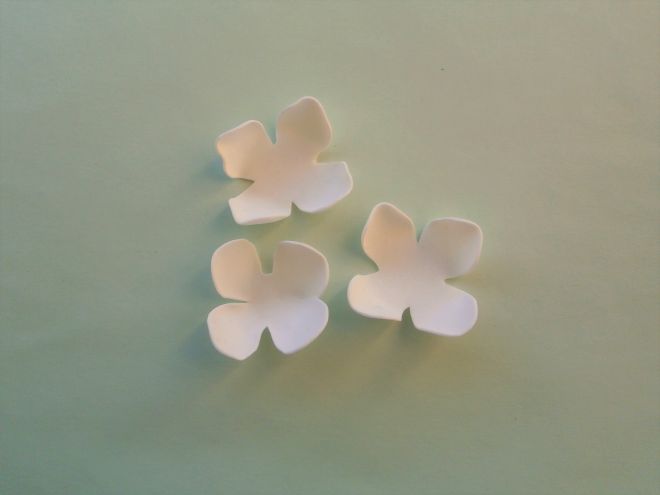
Despite the simplicity of appearance, many girls love daisies. To make this flower from foamiran, you need to follow the instructions:
- Four circles with a difference in diameter of 1 cm are cut out of white foam.
- The shape of the petals is cut along the entire perimeter, after which they are cut to a distance of 3 mm from the center.
- The edges of the petals are heated and given a characteristic shape.
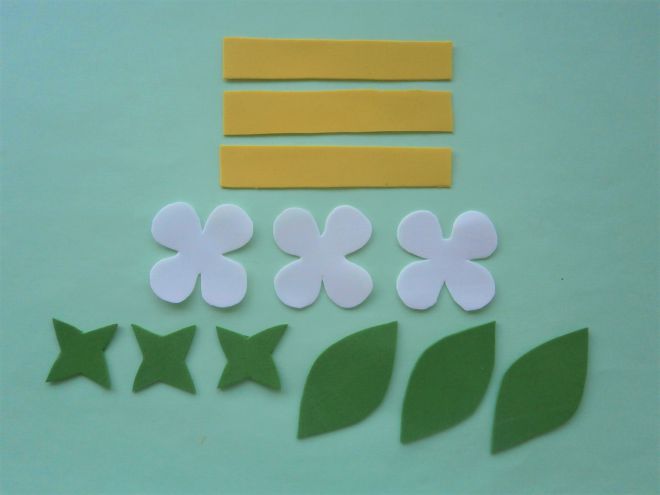
- A blank for the middle is cut out of yellow foam – a strip 27 x 2 cm.
- Cuts are made along the entire length to create a fringe effect.
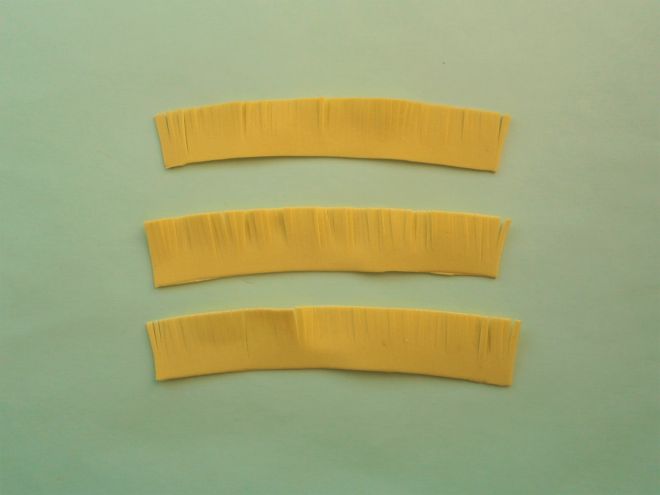
- The whole part is lubricated with glue using the drip method and twisted.
- The finished middle is attached to the wire.
- Prepared petals are strung onto the stem from the bottom, from smaller to larger.
- Each layer is fixed with glue.
- The final element is a green base in the form of a circle with cuts.
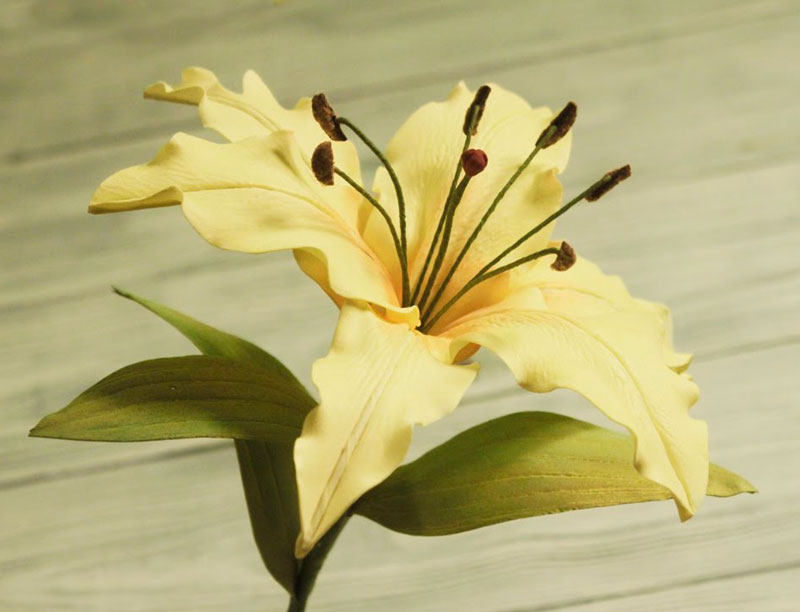
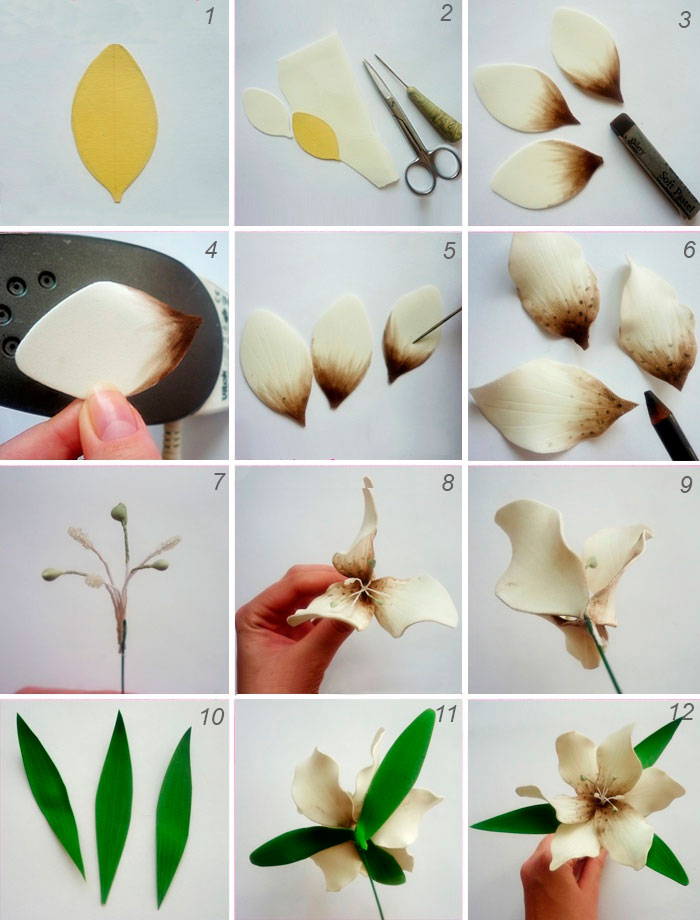
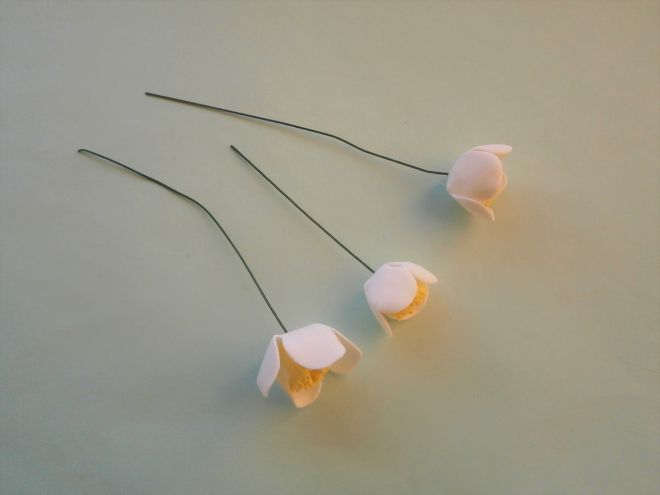
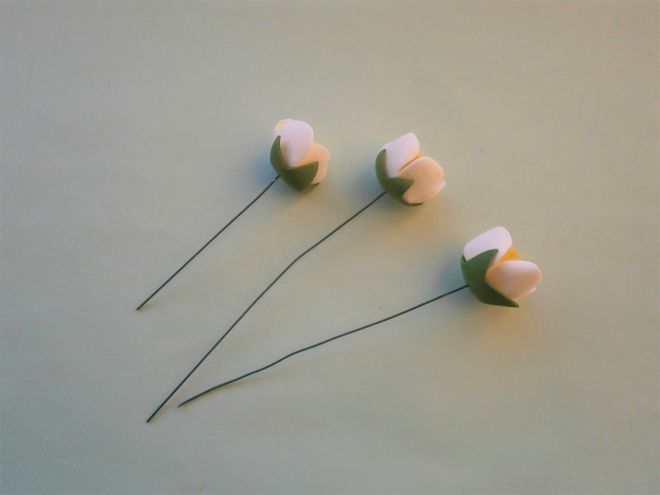
Lily
Even beginner craftswomen will not have any trouble creating a lily from foamiran. Manufacturing algorithm:
- A stencil is created in the form of a lily petal 6 cm long.
- 6 petals are cut out of white material using a stencil.
- On both sides the blanks are tinted in pale pink or pale lilac.
- The petals are heated.
- The veins are pressed through with a toothpick.
- Beautiful wavy curves are formed along the edges.
- Dots are applied to each piece, and the bottom of the petals is darkened with a brown felt-tip pen.
- The stamens are connected to the wire using glue.
- Three green oblong leaves are cut out of foam.
- After heating, the texture is created.
- Petals are attached to the stamens with glue in several rows, three elements in each.
- Leaves are glued to the flower.
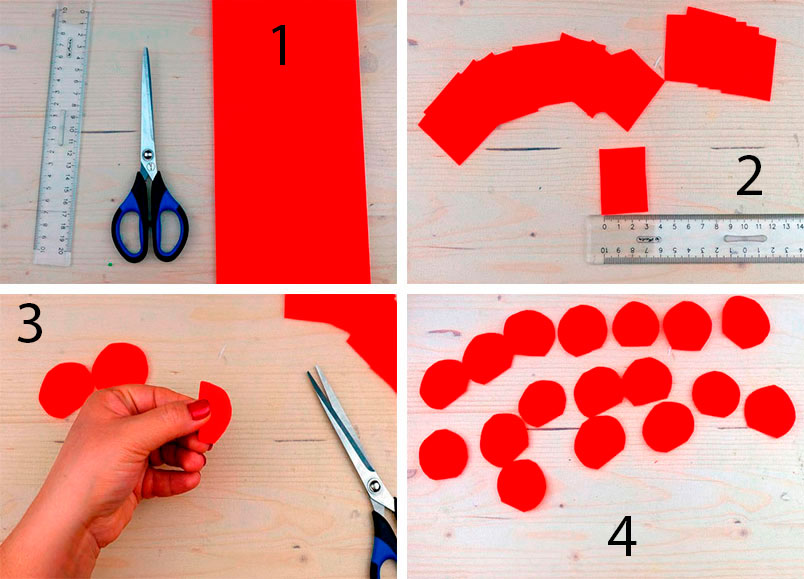
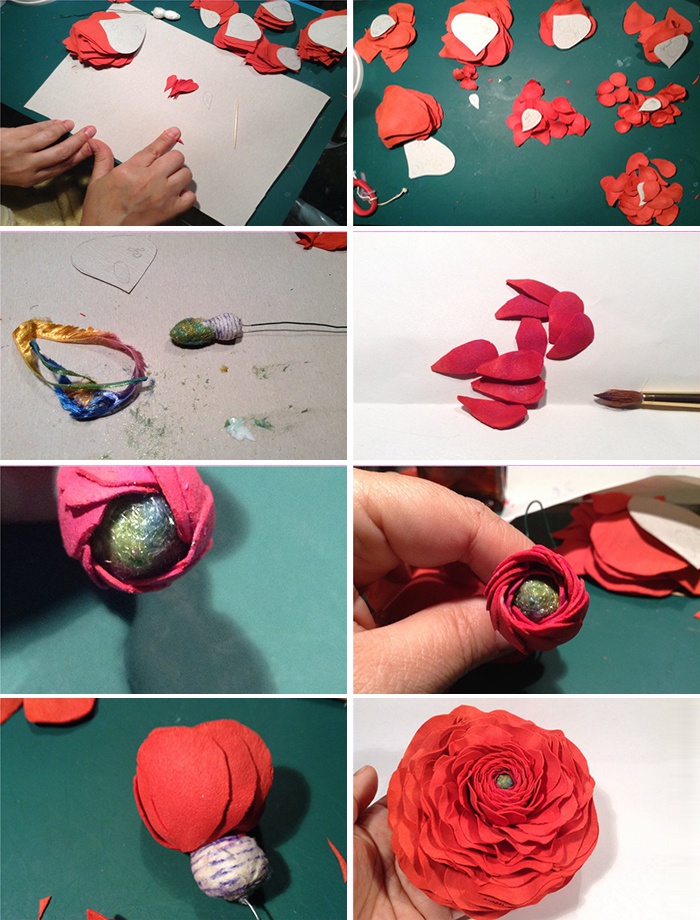
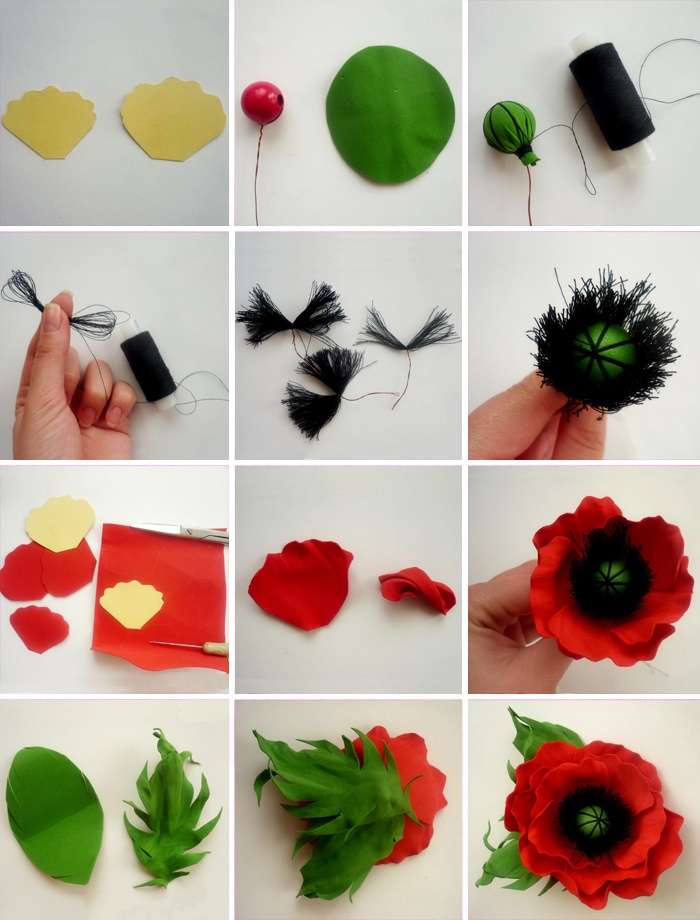
Ranunculus
Ranunculus is a fairly common flower throughout Russia. Only few people know it by this name, most know it as buttercup. Making it yourself is not difficult, for this:
- The stencil is being prepared.
- Petals of different sizes are cut out of red material. The more there are, the more luxuriant the flower will be.
- A small ball is rolled out of foil.
- The foil core is attached to the wire.
- The petals are heated and formed into waves.
- The petals are glued to the foil ball, overlapping each other, starting with the smallest ones.
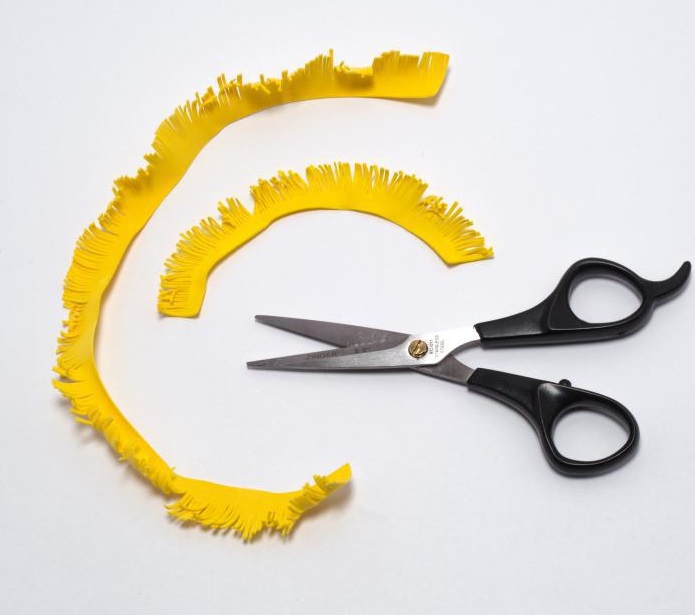
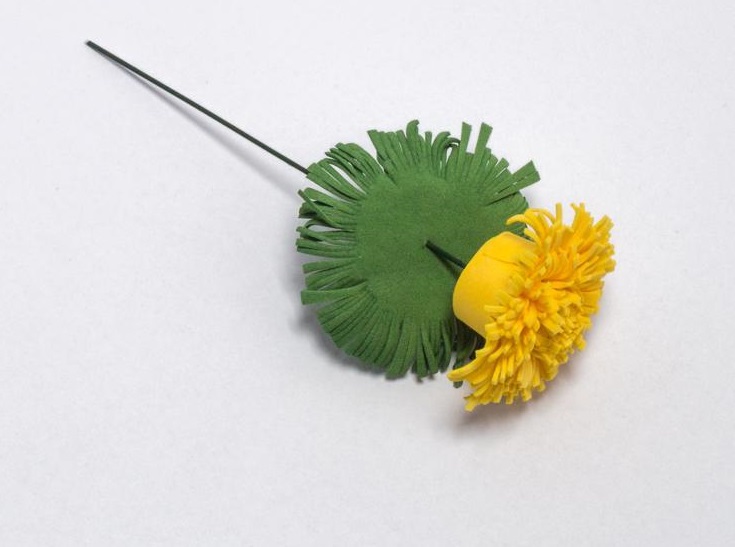
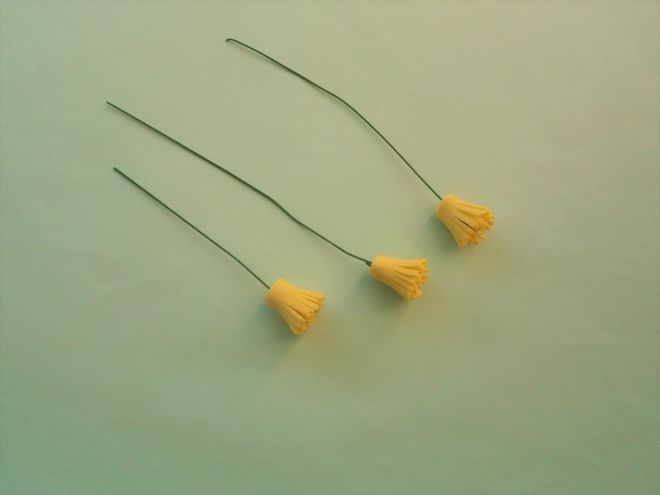
Dandelion
Dandelion is one of the most common flowers on the planet. You can make it from foamiran by following the recommendations:
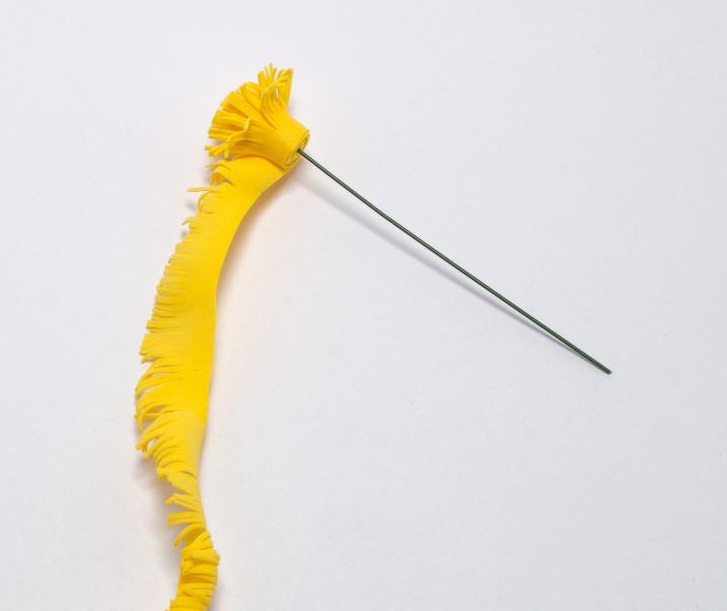
- A strip of 2 x 60 cm is cut out of yellow foam. If smaller sheets are available, then several strips must be prepared, giving a total of 60 cm.
- Cuts are made along the entire length, 5 mm short of the edge. This creates a fringe.
- A 10 cm long wire is wrapped with a 5 mm wide strip of green foam. Glue is used as a fastener.
- Once the stem is ready, fringe is wound around it, and each layer is secured with glue.
- The finished flower is heated and the petals are given the desired shape.
- Leaves are cut out of green foamiran, and veins are pressed into them after heating.
- Using glue, the leaves are attached to the stem under the flower.
Perhaps everyone wove a wreath of dandelions in childhood. You can feel like a child again by making one from foamiran. The product will give the same joy, but will not wither. You can wear such a wreath to folk festivals or a theme party.
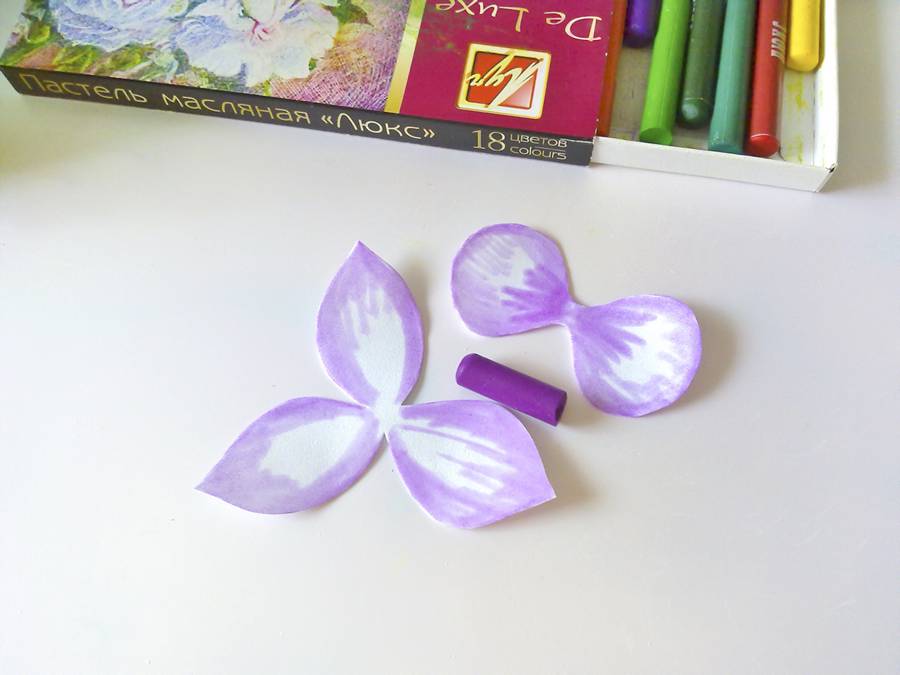
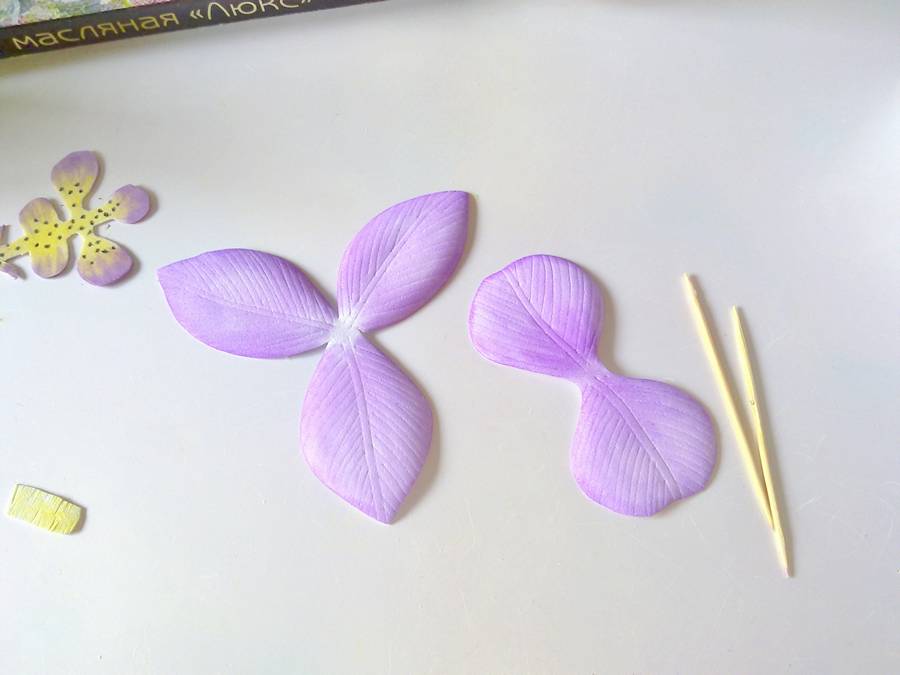
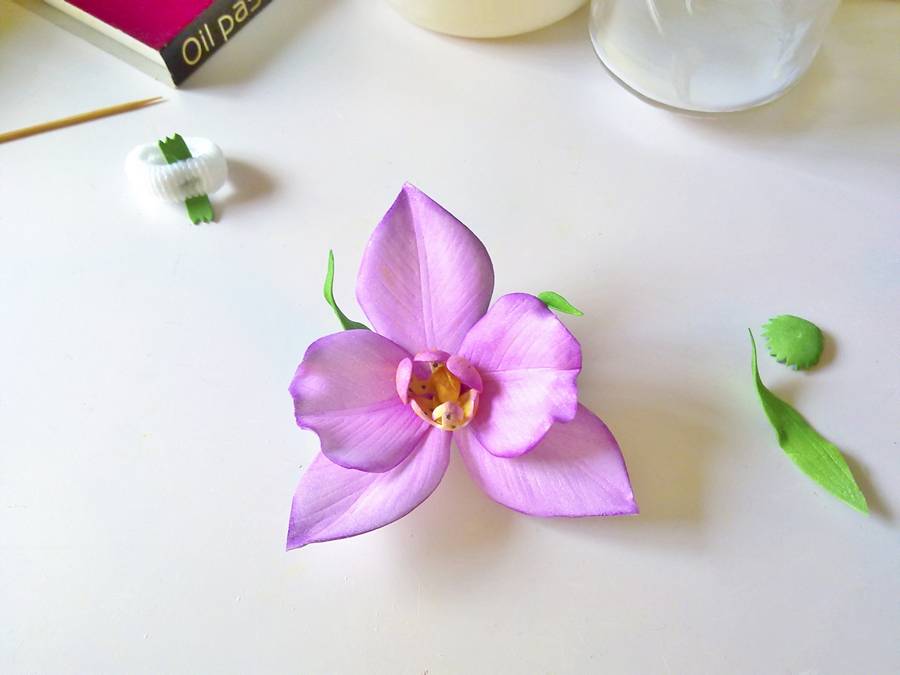
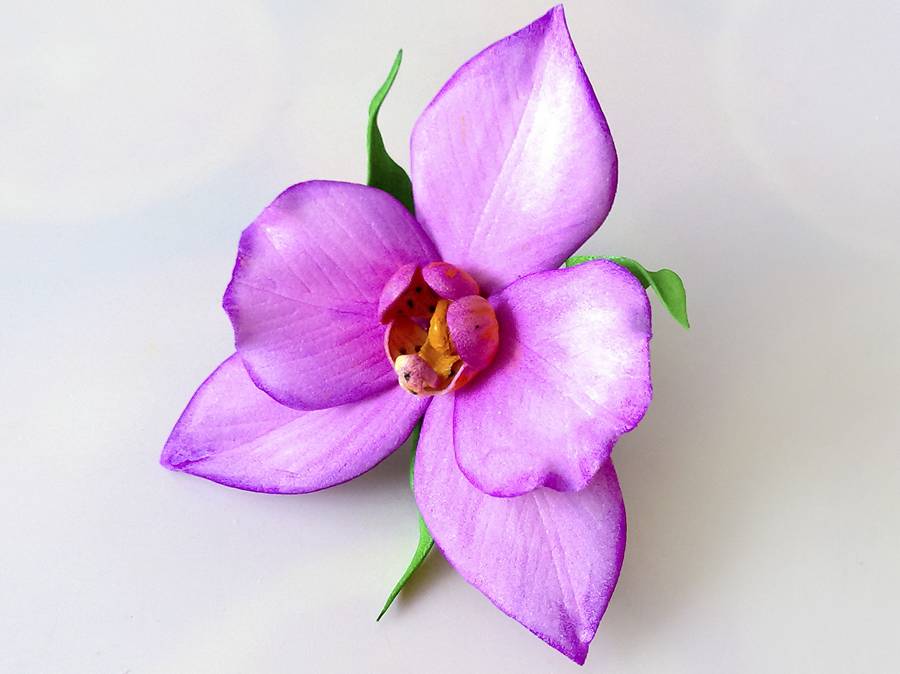
Orchid
Since ancient times, the orchid has been considered a symbol of wealth, love and beauty. Even a novice needlewoman can make this beautiful flower, just use the master class:
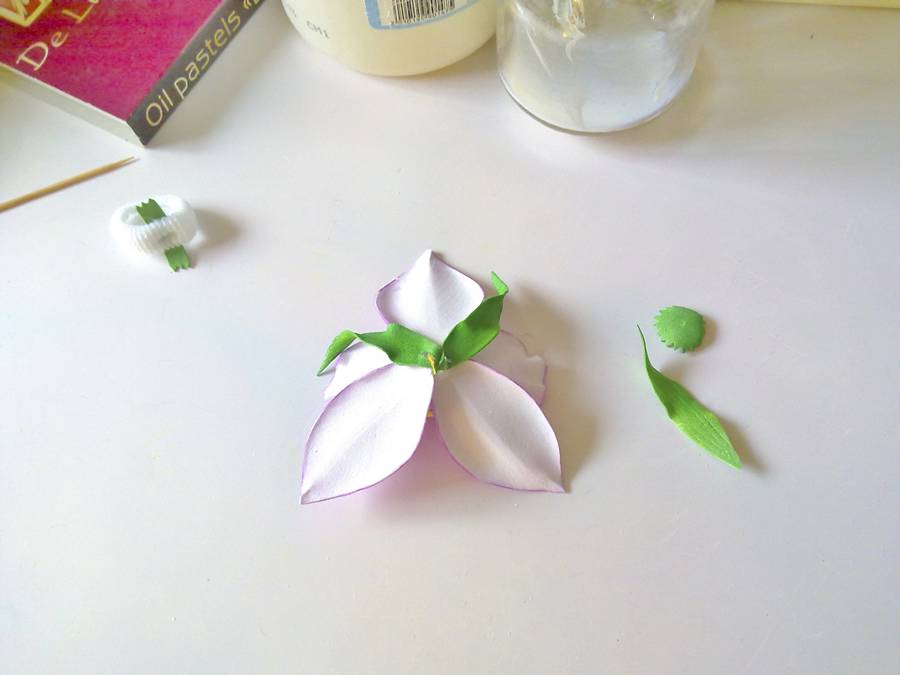
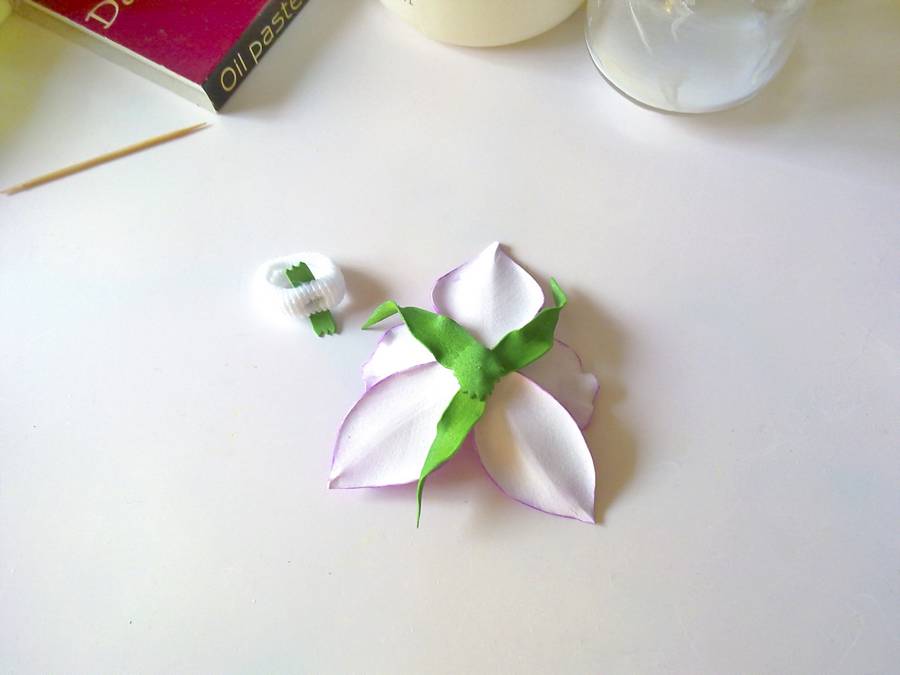
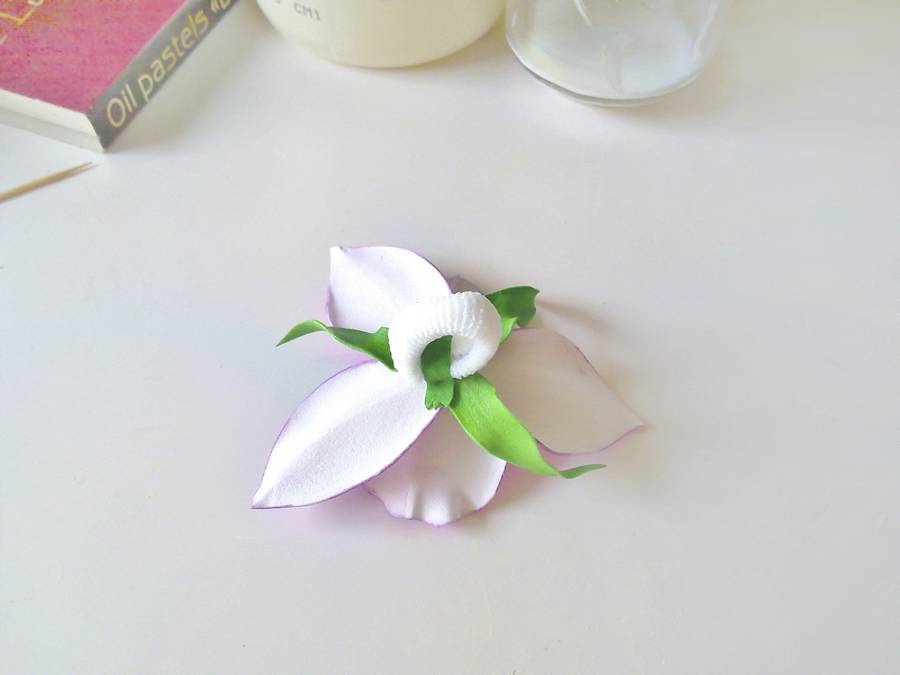
- First, a template is prepared.
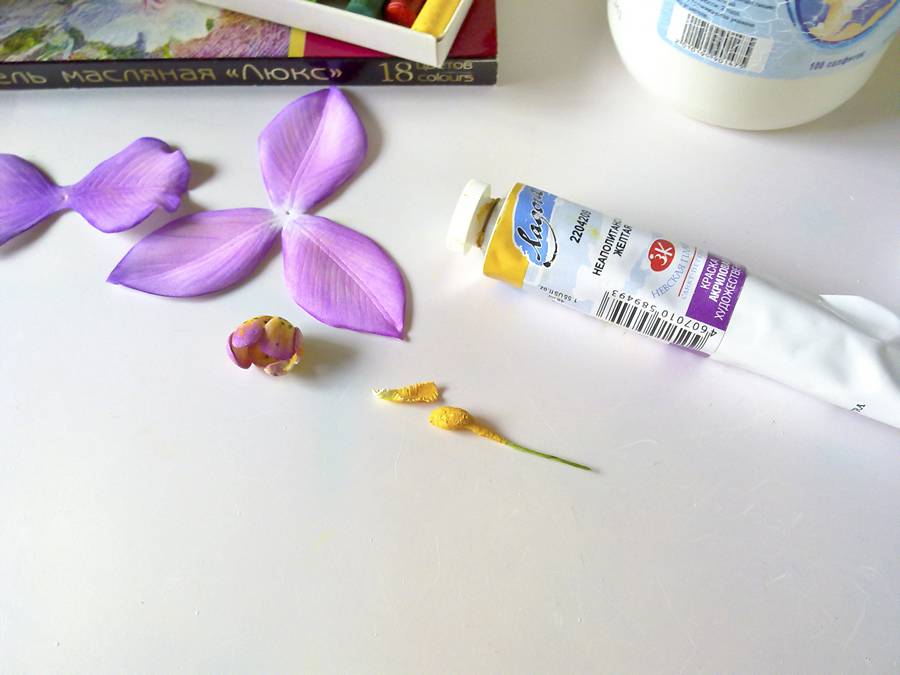
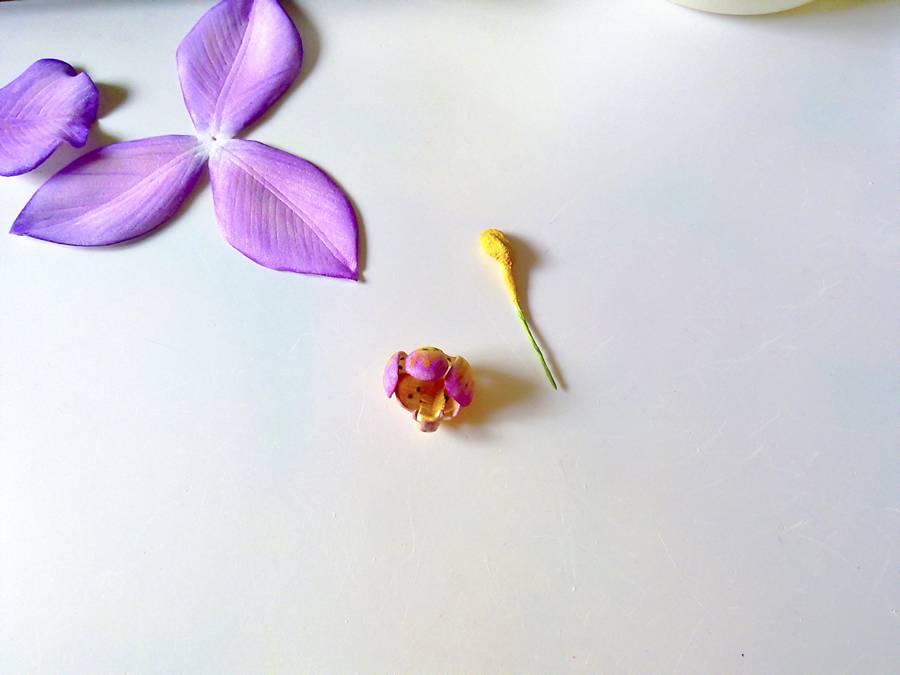
- White three-petal and two-petal blanks and a tongue are cut out.
- The petals are heated and pressed on a special mold, taking the required shape and texture.
- The tongue is tinted in three colors. The tail and wings are lilac, the head is yellow, and the middle is a red dot.
- Each side is treated with a heating device and twisted towards the central part.
- A two-petal blank is glued to the bottom of the center of the tongue, then a three-petal blank.
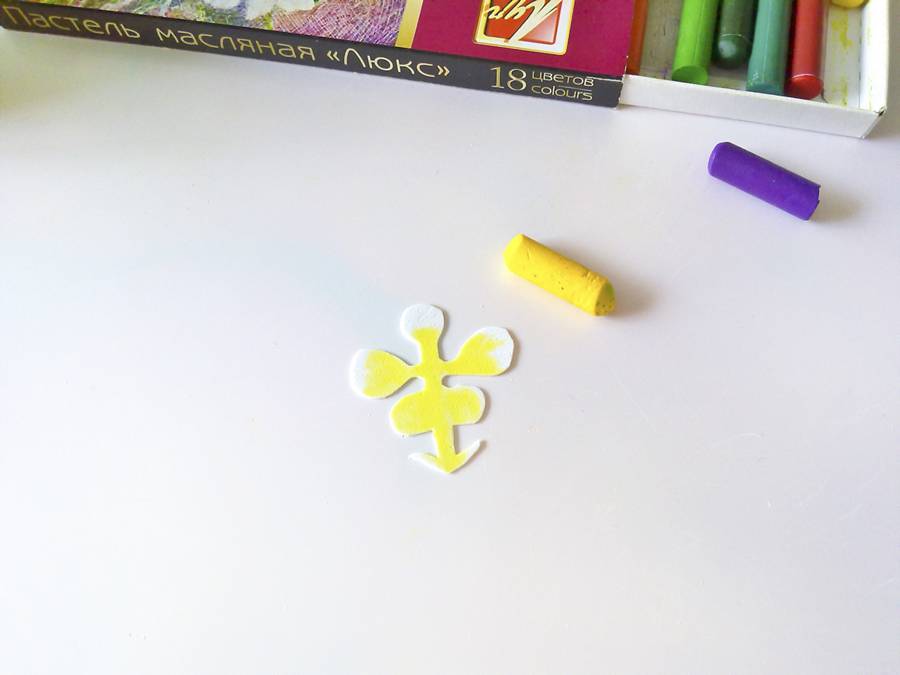
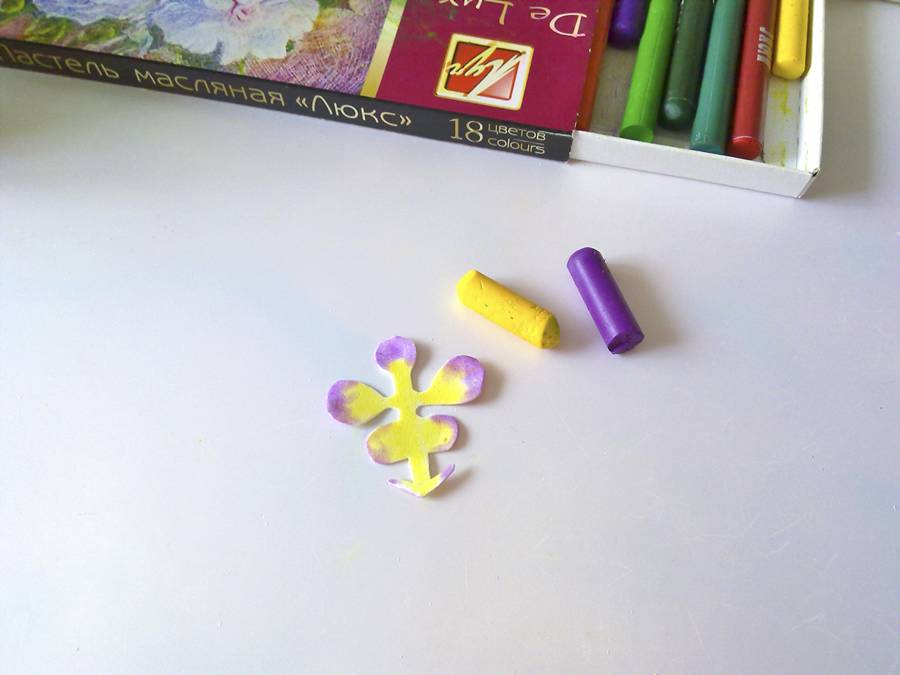
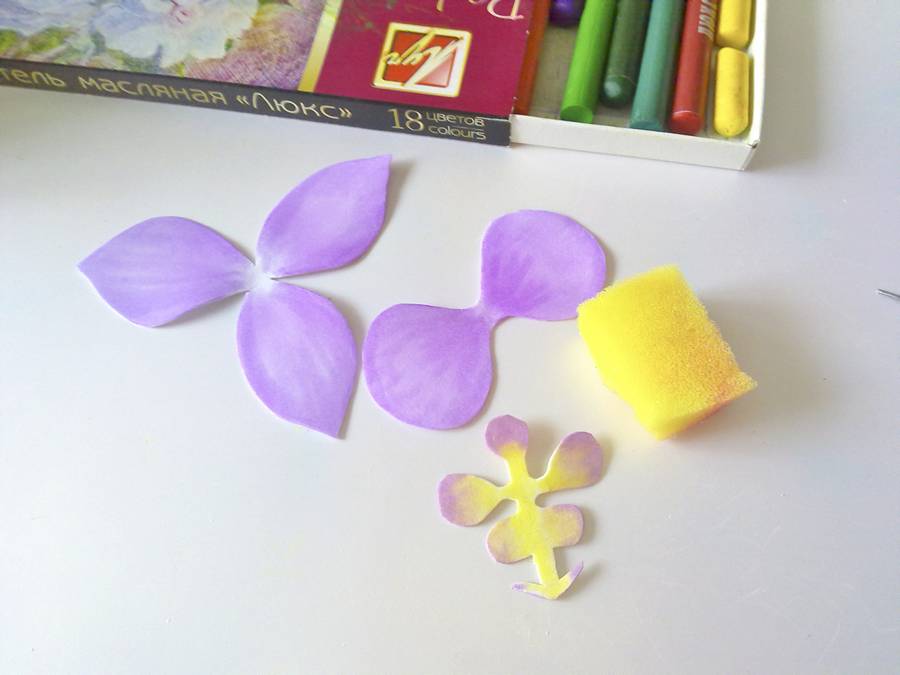


Jasmine
Jasmine attracts not only with its beauty, but also with its wonderful aroma. You can create a flower by following the step-by-step guide:
- The stencil is being prepared.
- The prepared form is transferred to the material and cut out. For one flower you will need 2 four-petal blanks, 1 sepal, stamens in the form of a white rectangle, 3 leaves.
- The petals are heated, a depression is formed, and the shape of a cup is given.
- The leaves are heated, the veins are drawn, and the shape of a boat is created.
- The white rectangle made of foamiran is cut, leaving 5 mm from the edge. This results in a thin fringe.
- The free edges of the stamens are colored yellow.
- The stem is formed from 7 cm long wire.
- The fringe of stamens is wound around the stem and everything is fixed with glue.
- From below the stamens, 2 rows of petals are strung on the wire in a checkerboard pattern and secured with glue.
- The sepal is glued on as the last layer.
- The leaves are attached to a separate wire.
- The composition is assembled by twisting the wires of the flower and leaves. The bare area is decorated with a satin ribbon.
A hairpin with jasmine made of foamiran, decorated with beads and rhinestones, will be a great gift.
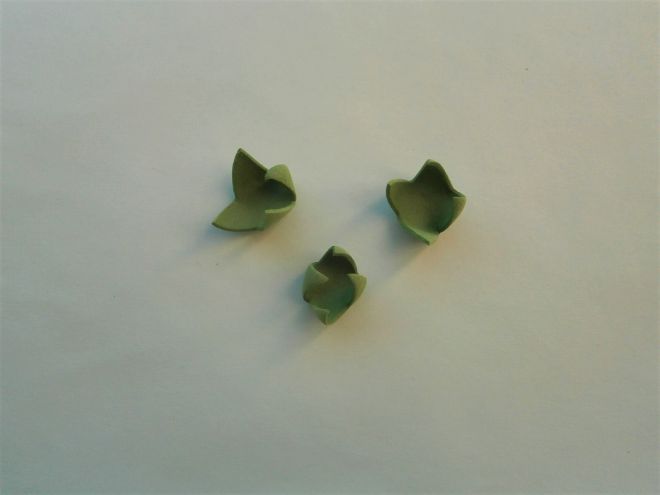
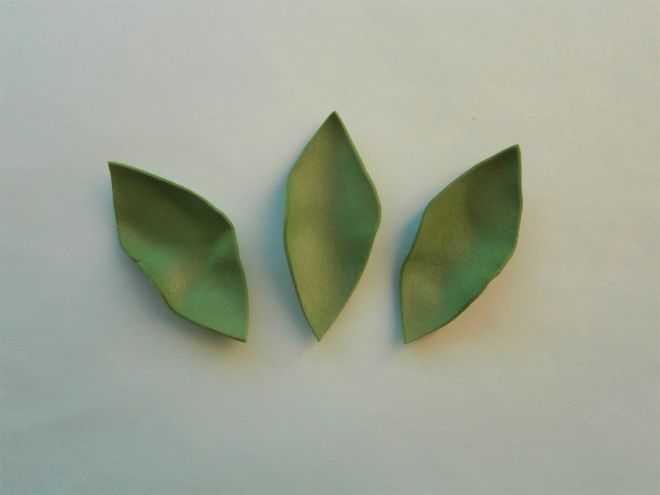
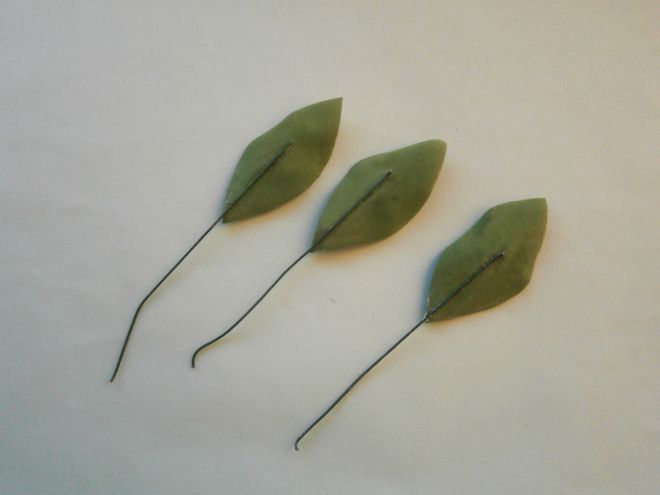
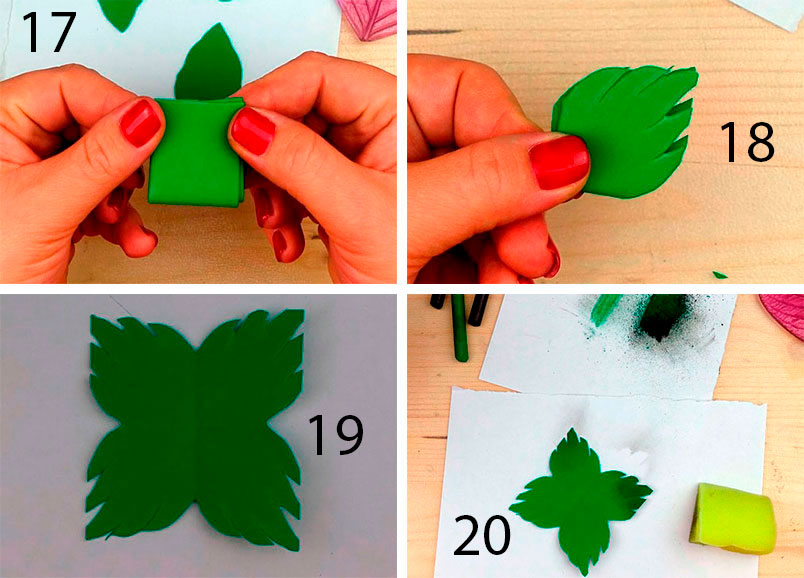
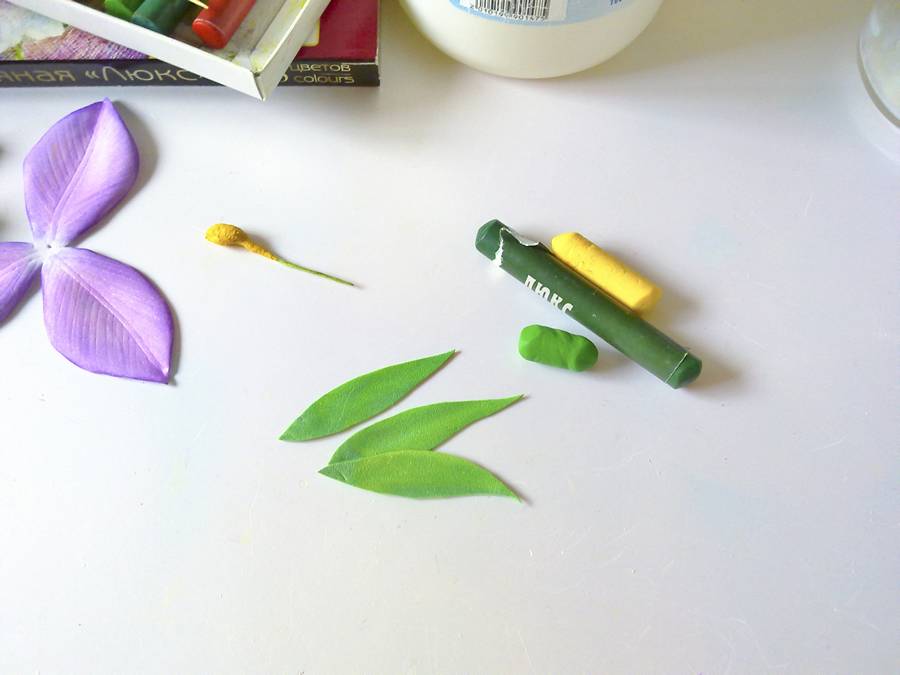
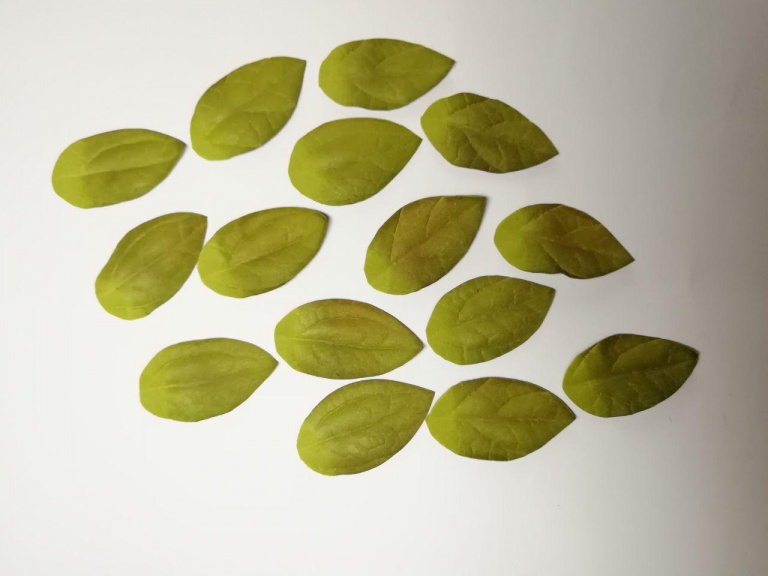
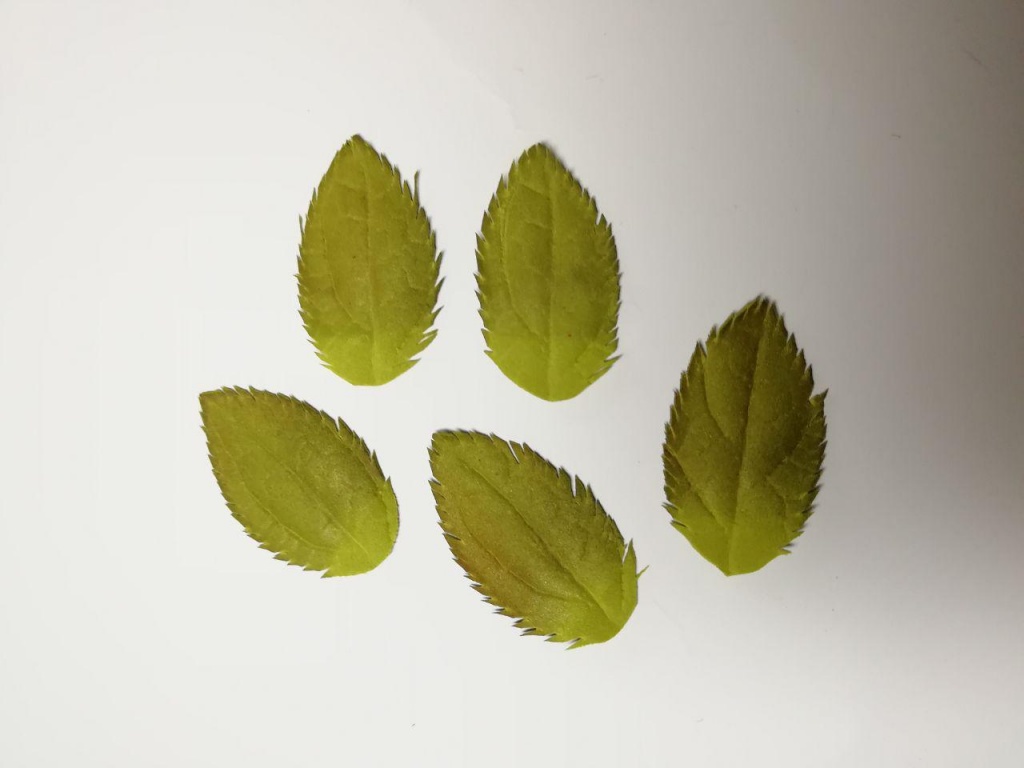
Leaves
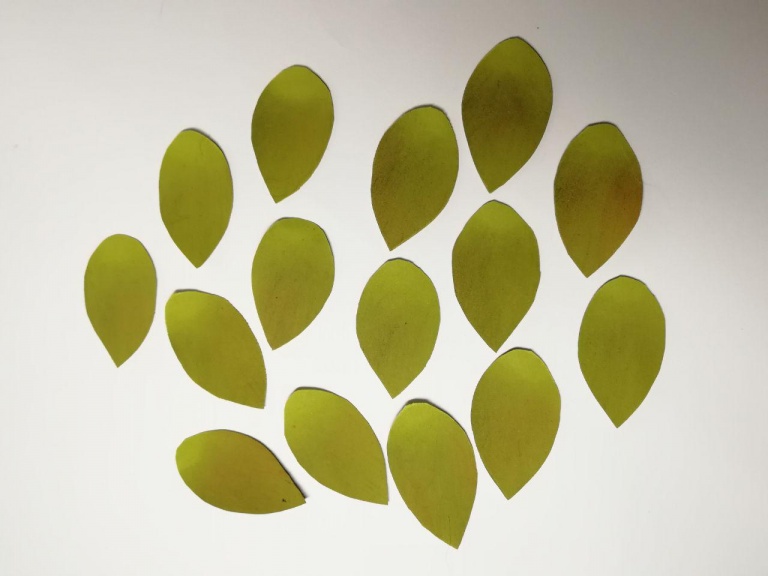
The production of almost any plant composition cannot be done without leaves. It is very easy to create this element from foamiran, especially if you have a special mold. The finished form saves a lot of time, you do not have to make veins by hand, the appearance is quite realistic.
The creation of leaves begins with the preparation of a paper stencil, which is applied to the foamiran canvas. Then the elements of the required size and color are cut out. The finished products are heated. Using a toothpick or mold, the veins are drawn, the desired shape and bend are given. If necessary, the leaves are additionally tinted.
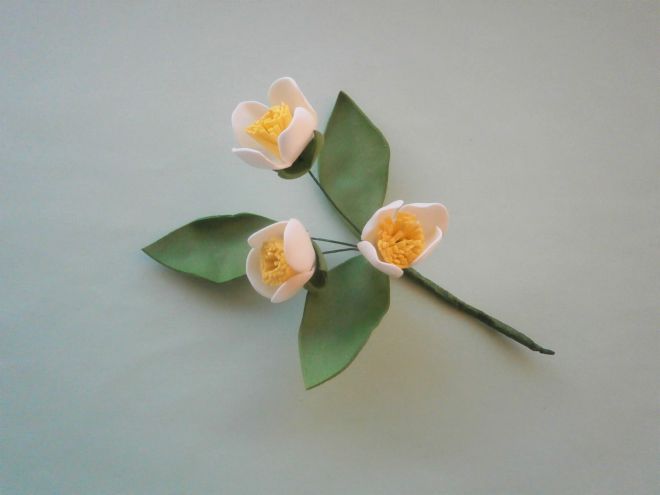
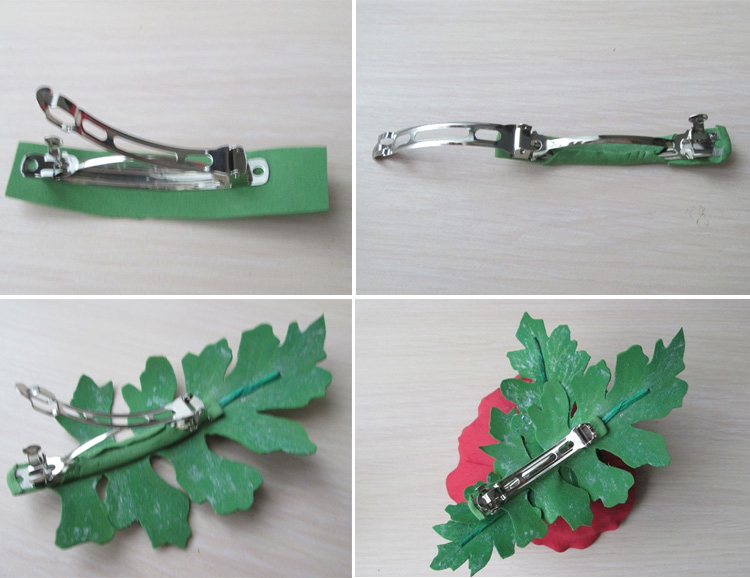
Assembling the accessory
Once the flowers are ready, they should be assembled into a composition that will make the foamiran hairpins more colorful. There are two simple options that are usually demonstrated in master classes. Everyone will be able to choose the most suitable one:
- The main material for assembling the composition is glue. Each individual element is cut so that the base is even, without additional material residues. After that, all items are placed in the composition. In the process, individual elements are recommended to be swapped to create the best option. Foamiran flowers, petals and additional decor are connected to each other with glue in places of greatest contact.
- The main material is wire. One end is lubricated with glue and stuck into the center of the flower. If you can’t pierce the foamiran, you can pre-make a hole with an awl. The wire is fixed to the leaf from below. After all the elements of the composition have acquired additional legs, the finished product is assembled by twisting the wire together. In the case when the fastening material stands out from the overall picture, it can be wrapped with a satin ribbon in the tone of the petals or leaves.
After creating the composition, it must be attached to the base hairpin. First, you should decide on the exact location. It is advisable to try on the unfixed version in front of the mirror beforehand. Then, using glue or wire, the flower composition and hairpin are connected.
When using glue to attach a large bouquet, you can insure yourself with a backing made of thick material, which is installed from the bottom of the hairpin and elastic band, capturing the edges of the composition. If wire is used, it is recommended to decorate its open sections with satin ribbon, and carefully cut off excess pieces. For comfortable contact with the head, especially when creating children's hairpins from foamiran, it is also recommended to use a backing.
Tips for Beginners
If you decide to make foamiran hairpins yourself, you should start with the simplest options. These include dandelion, chamomile, jasmine. It is recommended to watch at least one master class beforehand. Only after the first examples are ready, you can start creating more complex compositions.
In order to correctly determine the size of the flower, it is necessary to choose in advance the pin that it will be attached to. The larger the contact surface of the base with the flower, the larger the composition can be. If large flowers are attached to small pins, they will come off over time.
Beginners should not buy a large assortment of materials in advance. It is better to start with 2-3 sheets of the necessary shades to create a specific flower. Only in case of successful completion of the process of making hair accessories from foamiran can you safely go to the store to purchase additional material. For convenient work, it is enough to have basic colors on hand: white, yellow, green, red, pink, lilac. At any time, they can be given the desired shade using paints.
Video