Retro style is in fashion now. Many wardrobe items popular in the 60s of the last century are relevant again. One of them is a narrow tie, which is also called "skinny" or "herring", and is worn by both men and women. Knowing how to tie a thin tie in different ways, you can create stylish looks with this legendary accessory. Step-by-step master classes will help make the tying process easier.
Features of the herringbone tie
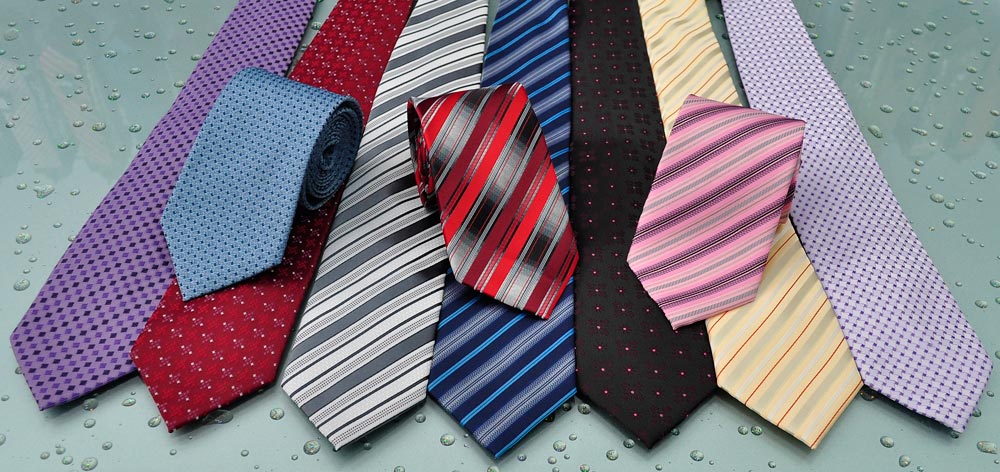
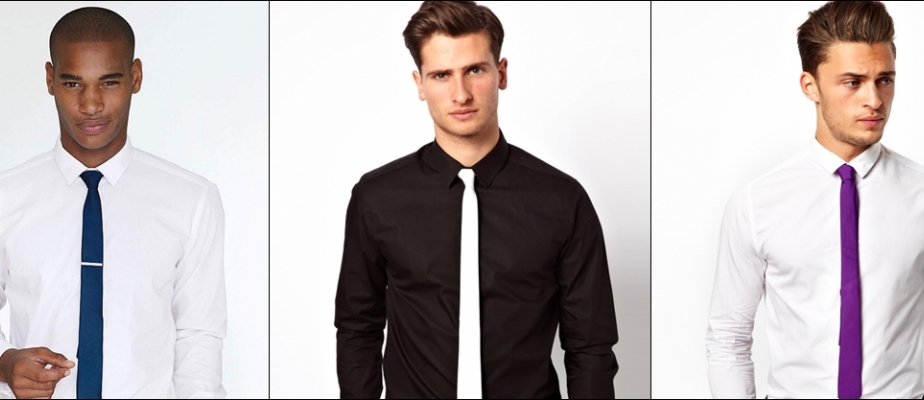
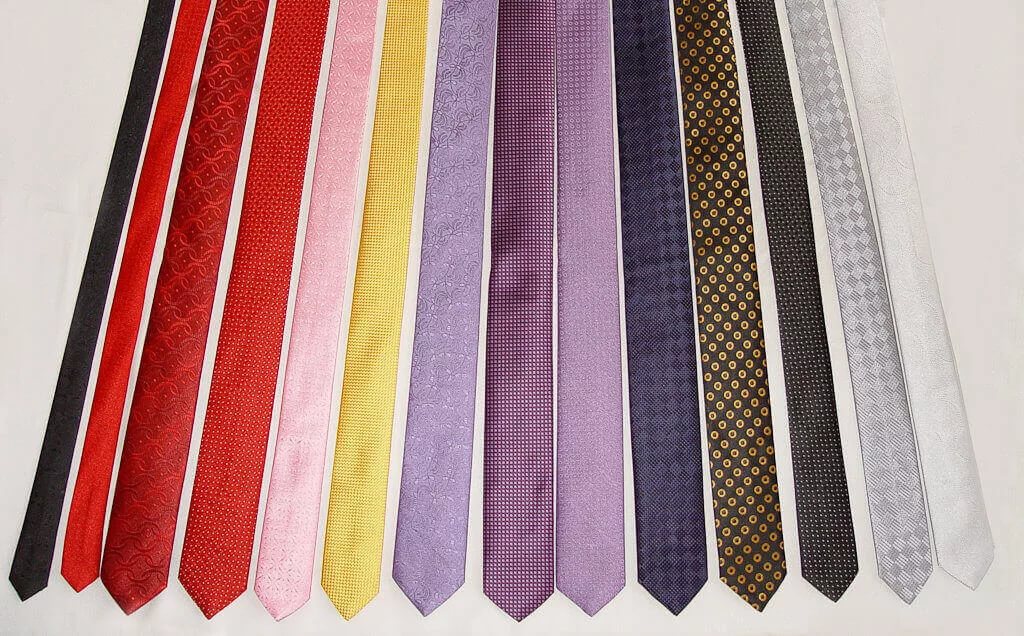
A herringbone tie is an accessory made of thin fabric with a width of 3 to 7 cm. Its original shape emphasizes individuality and allows you to create a stylish image. At the same time, a thin tie is universal and does not require a strict business style. It is the finishing touch, complements the wardrobe, but does not draw attention to itself.
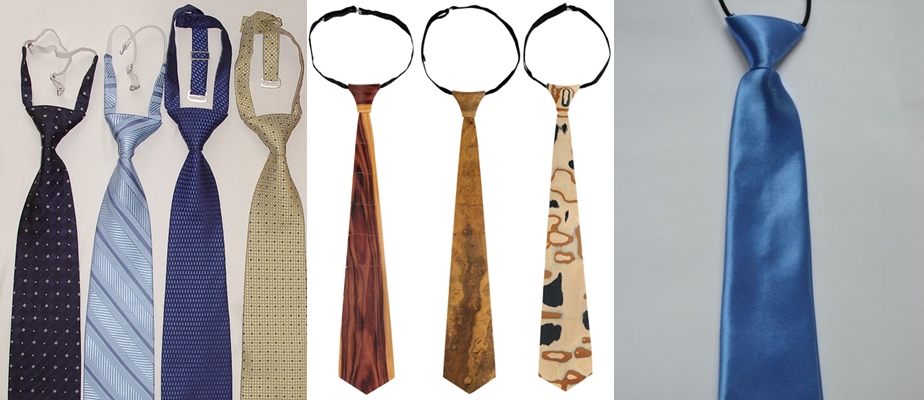
The skinny tie model, due to its features, is more suitable for young men of thin build and tall stature. It looks bad on plump or stocky men.
A beautifully tied accessory can be worn with almost any clothing, except for tracksuits and collarless T-shirts:
- It is worn over a shirt with long or short sleeves. The collar can be any.
- The "herring" pattern goes well with collared T-shirts and summer shirts.
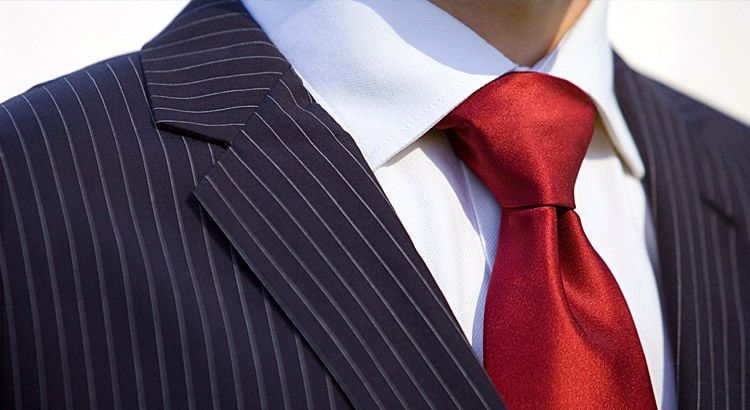
- You can complete the look with a blazer or a jumper. It is desirable that the tie be darker than them.
- When pairing an accessory with a jacket, you need to make sure that it matches the width of the lapels.
- Of the additional decorations that should be worn in tandem with a thin "herring", a belt is a must. If you choose a watch or cufflinks, then small ones. It is advisable to use a clip, since such an accessory is often made of thin fabric.
A narrow tie is democratic, it can be worn with a business or casual wardrobe. This accessory can be plain, with patterns or a design. If you combine it with clothes correctly, you can create an original fashionable image.


Suitable nodes
Not all men know how to tie a herringbone tie correctly, although this accessory has recently become very popular. It is more democratic, some carelessness or asymmetry of knots is allowed. There are many ways to tie a "herring" knot, which are chosen depending on the style of clothing. For example, in the casual style, knots can be done carelessly and not tightened very much.
The main advantage is that thin ties are easier to tie than classic ones. The knots should be small, corresponding to the width of the product. There are several most common ways to tie thin ties:
- Windsor.
- Half-Windsor.
- Quarter.
These methods are suitable for accessories made of different fabrics, and can be combined with any clothes. You can try more original and beautiful weaves, such as Pratt, Cavendish, Eldridge, Grantchester.
There is a basic rule to follow when tying a skinny tie. First, place it around your neck, with the wide end on the left. To get the right knot, the front part should overlap the narrow end by almost half.
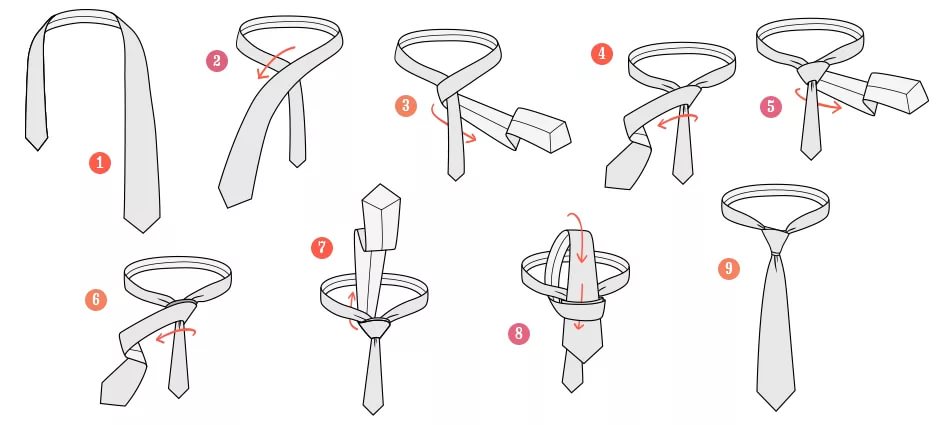
Half Windsor
This is a classic universal method that suits any collar. It has a triangle shape and is easy to make yourself. Before tying a thin tie, you should study the step-by-step algorithm of actions:
- Place the wide end over the narrow end.
- Bring it out on the left into the loop on the neck.
- Pass it through the resulting gap from above.
- Wrap the wider part again, bringing it up.
- Pass through the eye and tighten.
Tying a "herring" in this way does not take much time. And the accessory looks stylish and original, especially if you tighten it a little.

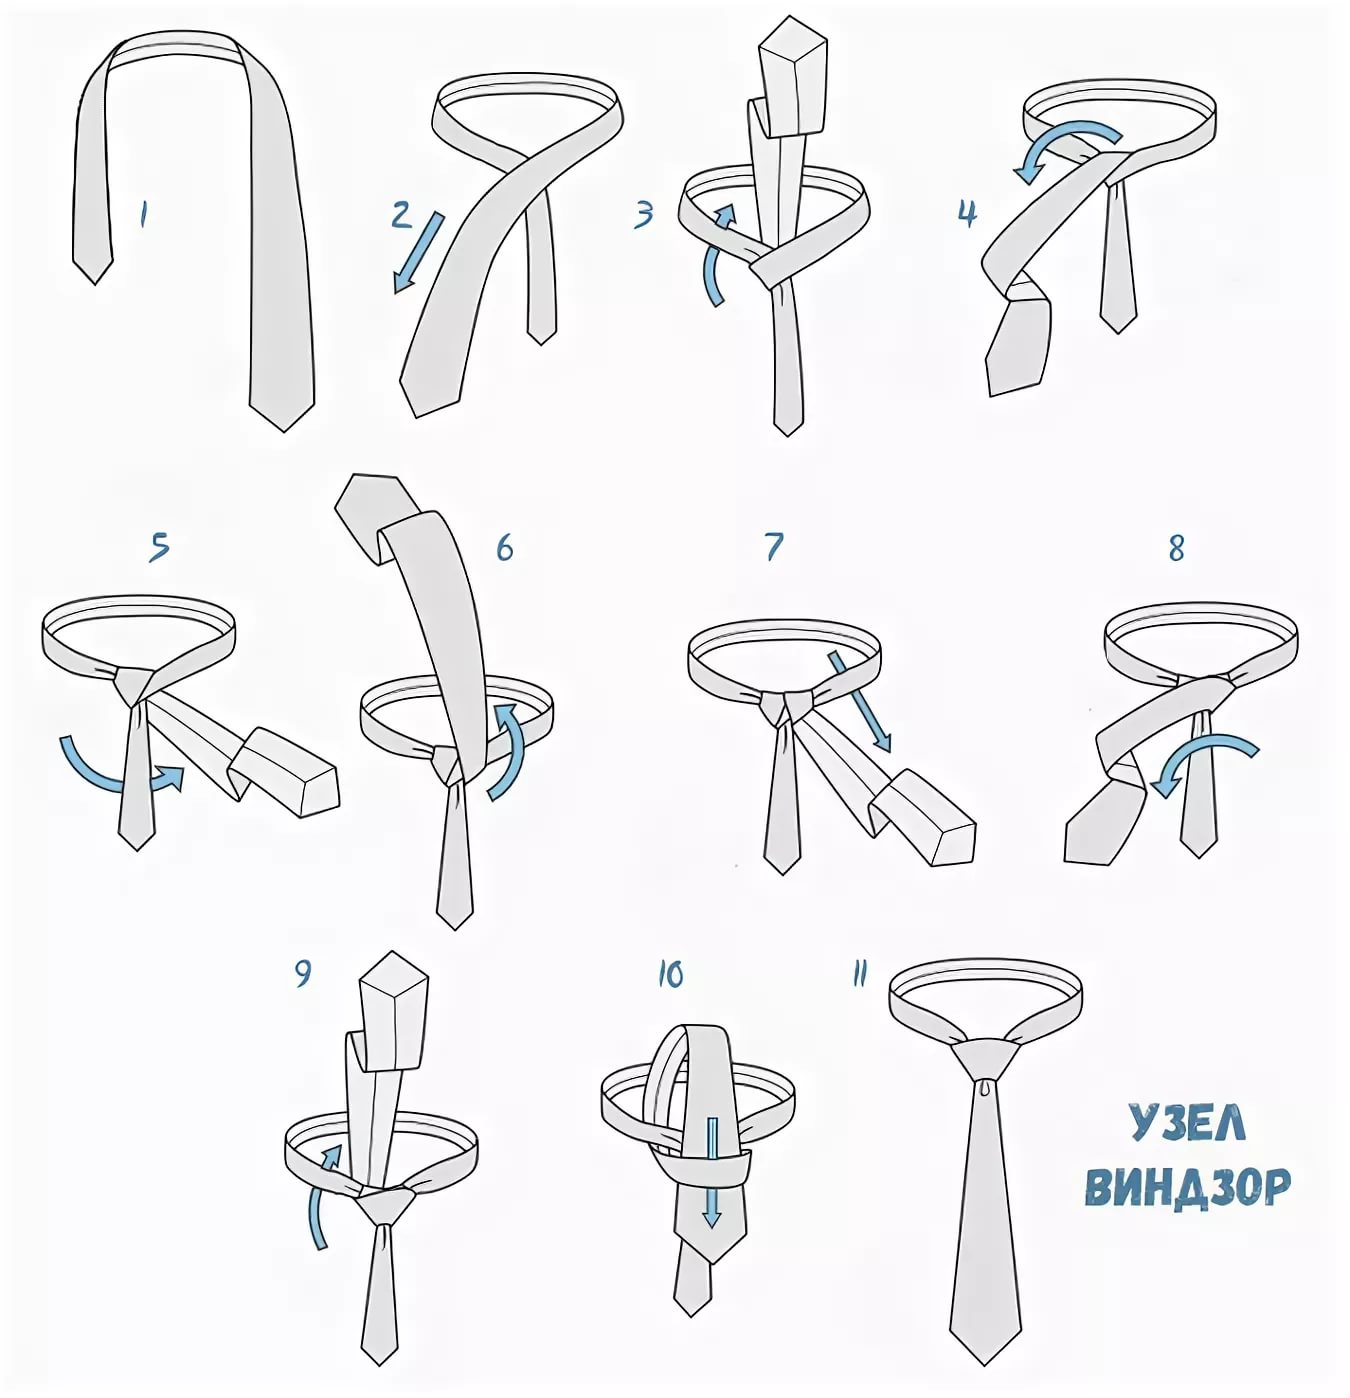
Windsor
This is a classic massive knot that forms a smart triangle. It is best suited to a wide collar. If you carefully study how to tie a Windsor knot correctly, you can quickly create a beautiful stylish look. Step-by-step instructions:
- First wrap the wide end around the narrow end and pass it through the resulting ring.
- Repeat the same thing, only pass it through the loop in front, and then place it on the right.
- Place the wide end of the resulting knot on top of the front and pass it through the neck loop again from the bottom up.
- A loop should form in the front, into which the wide part is threaded from above.
Windsor is voluminous, so it is advisable to tighten it as high as possible. Because of this feature, this method of tying is not suitable for men with a short neck, it will visually make it even shorter.
Prince Albert
This is a slightly asymmetrical knot of rectangular shape. To give the image a business look, it is better to tighten the tie well. Tying it is not difficult, the step-by-step process looks like this:
- throw the wide part over the narrow one (from right to left);
- return to the right, wrap around the narrow end to form a loop;
- right again;
- pass it through the loop in front and bring it up to the neck from the bottom;
- pass from above into the resulting double loop;
- pull down and tighten.
These knots are quite chunky, so they look better with medium or wide collars.
Pratt
This versatile elegant method of tying was invented in the USA, which is why it is also called American. The tying procedure is not complicated, especially if you follow the step-by-step algorithm:
- put the "herring" on your neck with the seams facing up;
- pass the wide part underneath the narrow one;
- bring it out from the front through the neck, lower it to the left;
- wrap around the narrow end in front;
- thread it through the neck again, only now from the right side from the inside;
- pass it down through the resulting loop and tighten.
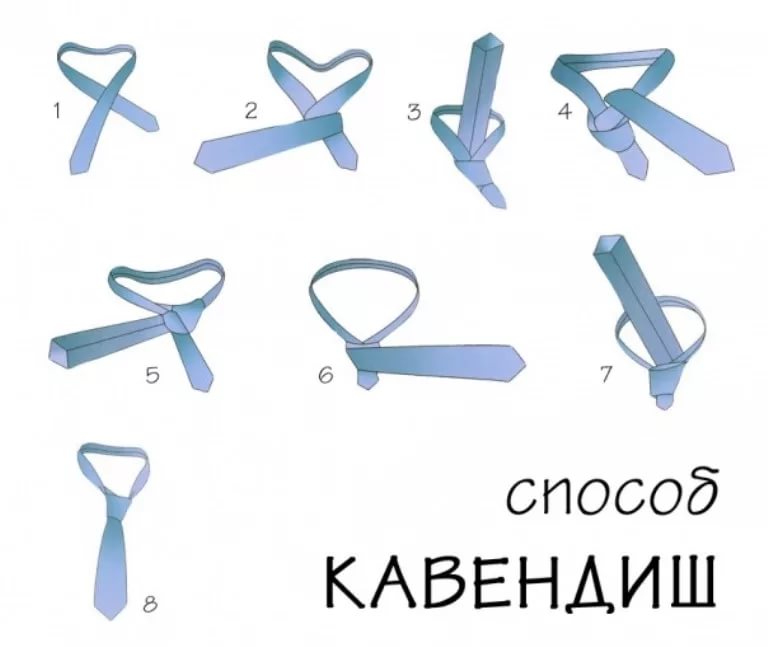
Cavendish
A bit like the classic Windsor. This knot is also voluminous, more suitable for wide collars. The tying process:
- Cross the ends (the wide one goes over the narrow one).
- Pass the top one under the narrow part, pointing to the left.
- Place it back in front over the narrow end and then thread it up through the neck ring on the right side.
- Lower it to the left and pass it under the other part again.
- Pass through the neck loop from bottom to top.
- Pass it through the loop from above, straighten it out and tighten it.
Eldridge
This is a rather complex voluminous knot. Its shape resembles an ear of corn. It looks original, suits any collar, business and casual look. Instructions:
- wrap the narrow end around the wide part, pull it out from the neck loop from top to bottom;
- repeat this step, only now the narrow end will be facing up;
- passing it under the wide part, thread it through the loop;
- pull to the left, tightening the knot;
- throw it under the neck loop from top to bottom;
- wrap, throw to the right;
- thread through the resulting loop, pull to the left;
- The remaining narrow end is not lowered down, but hidden under the shirt collar.
For Eldridge, it is best to choose smooth, solid-colored ties.

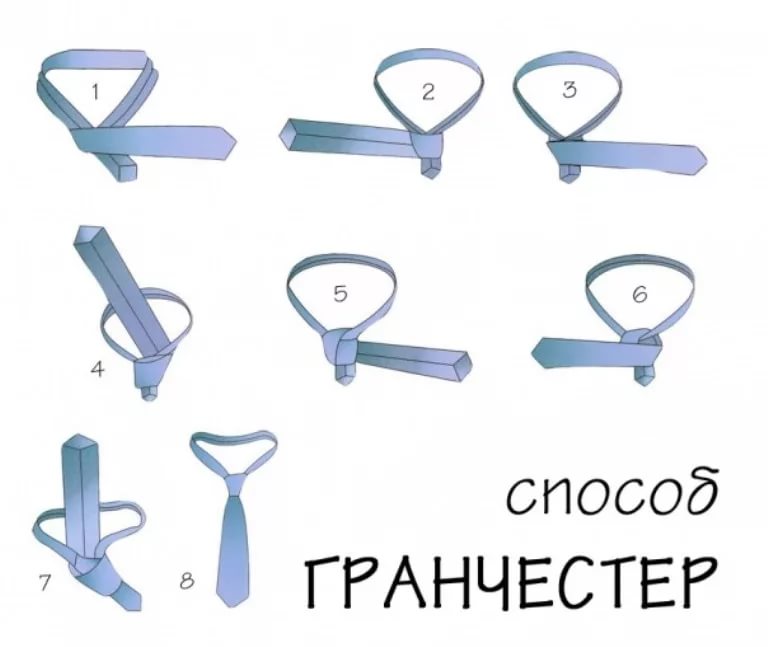
Grantchester
This is a beautiful unusual knot that gives a man a special charm. Tying a narrow tie this way is more difficult, but you can learn it too:
- wrap the wide part around the narrow part (twice) to form a loop, with the end facing to the right;
- pass it under the neck, wrap it underneath and bring it out to the right again, only now the wrong side will be on top;
- then wrap the knot in front, and put the wide end into the loop on the left;
- thread it through the resulting eyelet from above and tighten.
It is better to use a long accessory, but made of thin material, since the knot will be voluminous.
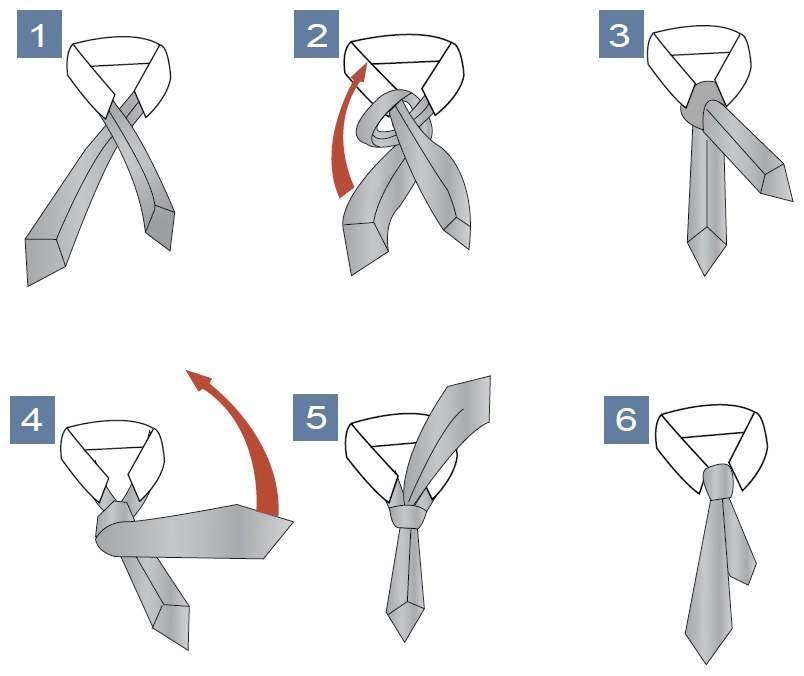
Easy way to tie
The easiest way to figure out how to tie a thin tie in four is to tie it beautifully. This is the simplest method that suits any look and does not require much time. The knot is slightly asymmetrical and elongated, has a triangular shape. Do not tighten it too much, carelessness allows you to create attractive folds in the recess.
Learning how to tie a quarter knot is not difficult, step-by-step instructions will help you do it right the first time. It is recommended to first do it in front of a mirror:
- Place the accessory around your neck, with the wide part on the left.
- Cross the ends, place the narrow one under the wide one.
- The top part needs to be wrapped around the bottom part, forming a loop.
- Pass it from the bottom up into the loop around the neck.
- Pass it through the small loop from above and tighten.
A thin tie looks great with clothes of different styles. Having studied various ways of tying, you can create fashionable images. With this accessory, a man will look original and stylish.
Video